Washington State Historic Plate
The state of Washington has a historic classification for license plates for older cars.
Actually there are two types, Collector Vehicle plates for cars older than 30 years and Horseless Carriage plates for those older than 40 years. For specific information, see the DOL webpage.
Either type can use a Restored Plate, an original Washington license plate that dates from the year of manufacture of the vehicle.
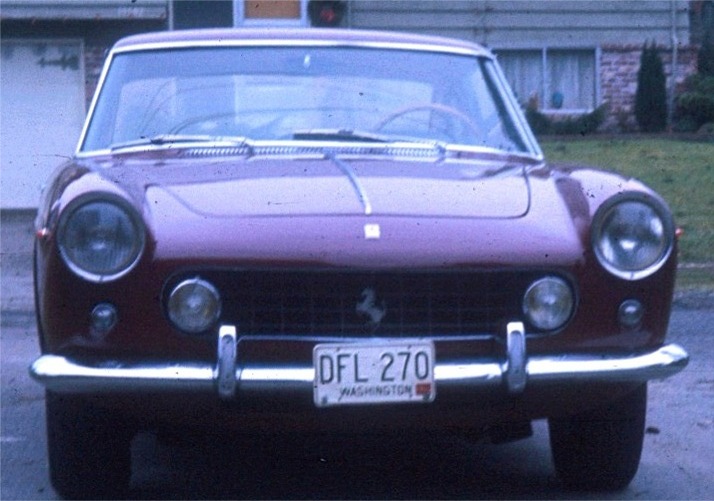
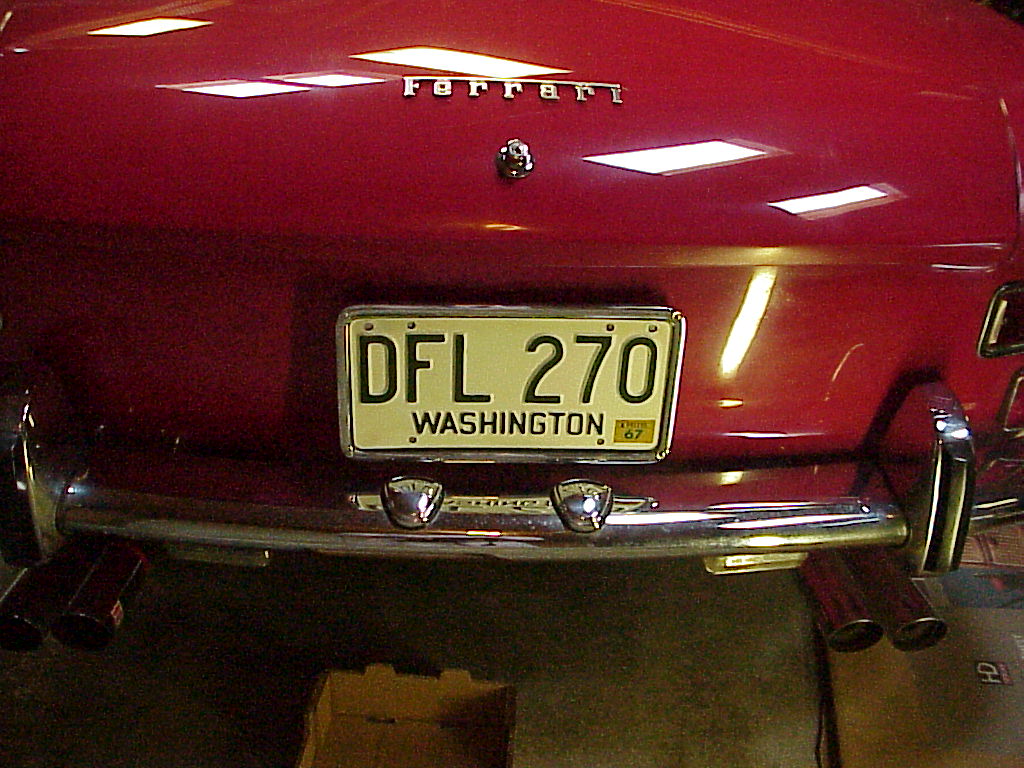
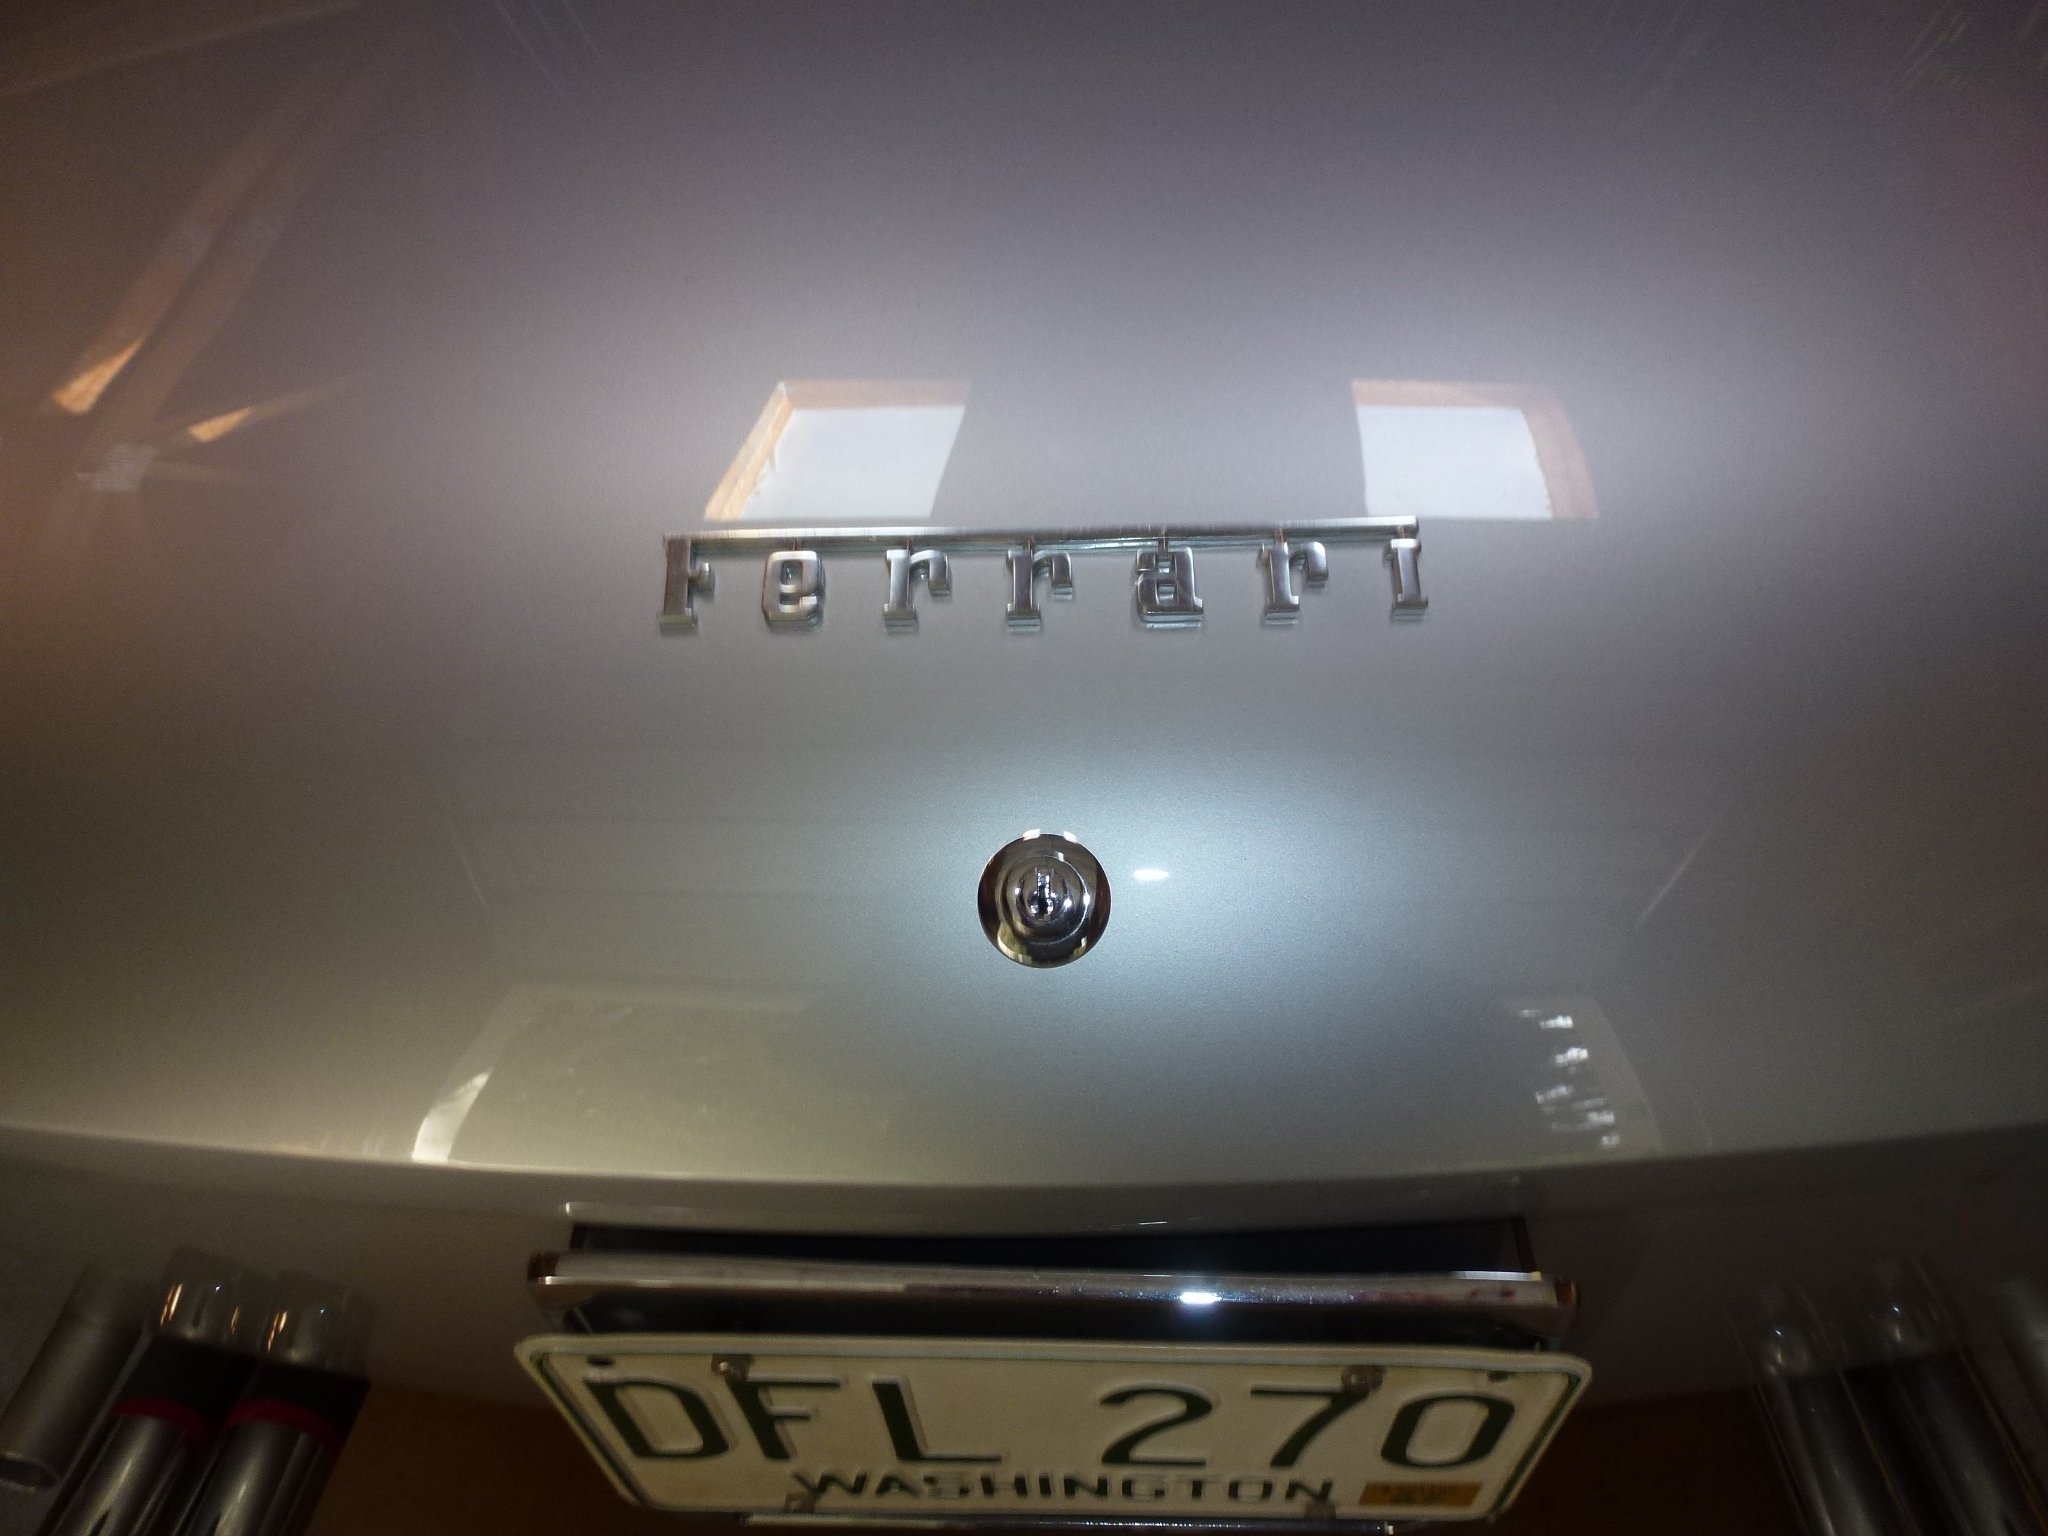
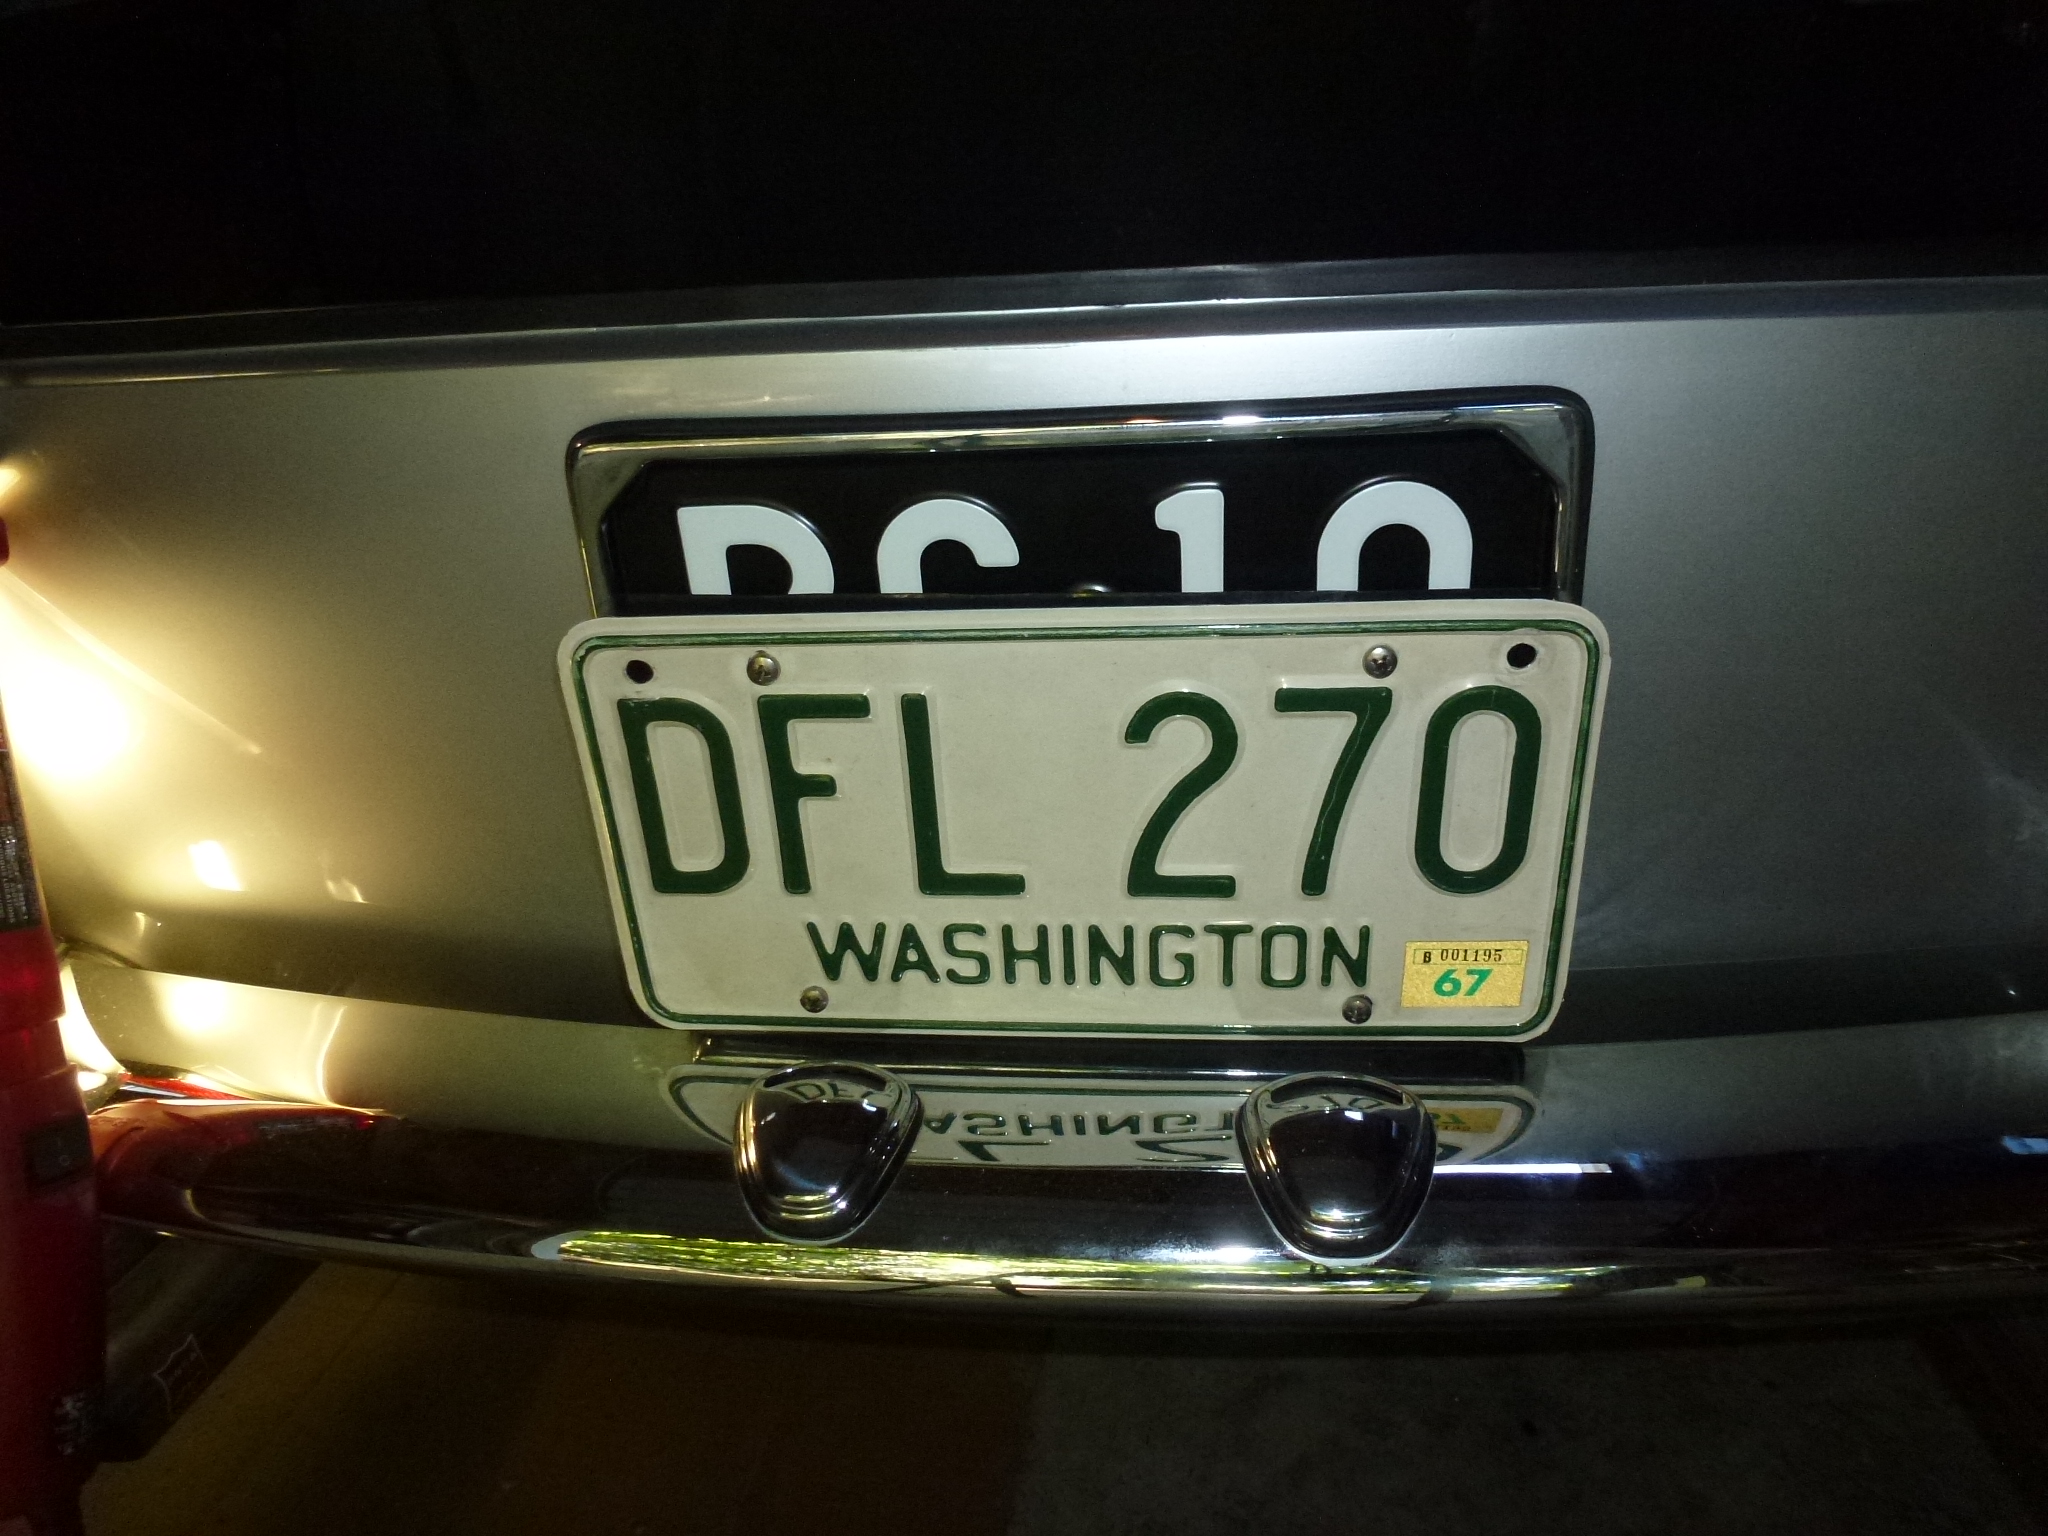
For my 330, the registration and title are dated in 1967 (even through the car was actually sold originally in Italy in 1966). I happened to have a pair old WA plates from 1967 one of which was in good condition. This plate was from a GT/E that I bought and sold a couple of years ago. It had about 15 years of annual stickers with the very bottom one being a 1967 one. I first tried soaking the stickers in lacquer thinner to see if they would come of nicely (on the not so good plate). That didn't work, so I ended up peeling the stickers off year by year in little tiny pieces that they break into. I finally got down to the first sticker of the good plate and used some rubber cement solvent to clean off the sticky residue. With historic plates, one only needs a rear plate, so having one good plate was just fine. Here's a picture of the GT/E with the DFL 270 plate on it.
I went through the process of getting that restored plate assigned to my car (which involves getting a new title issued). Once that is done, there is no annual renewal, but there are limitations on how one may use the vehicle.
Putting the rear plate on the car was quite simple.
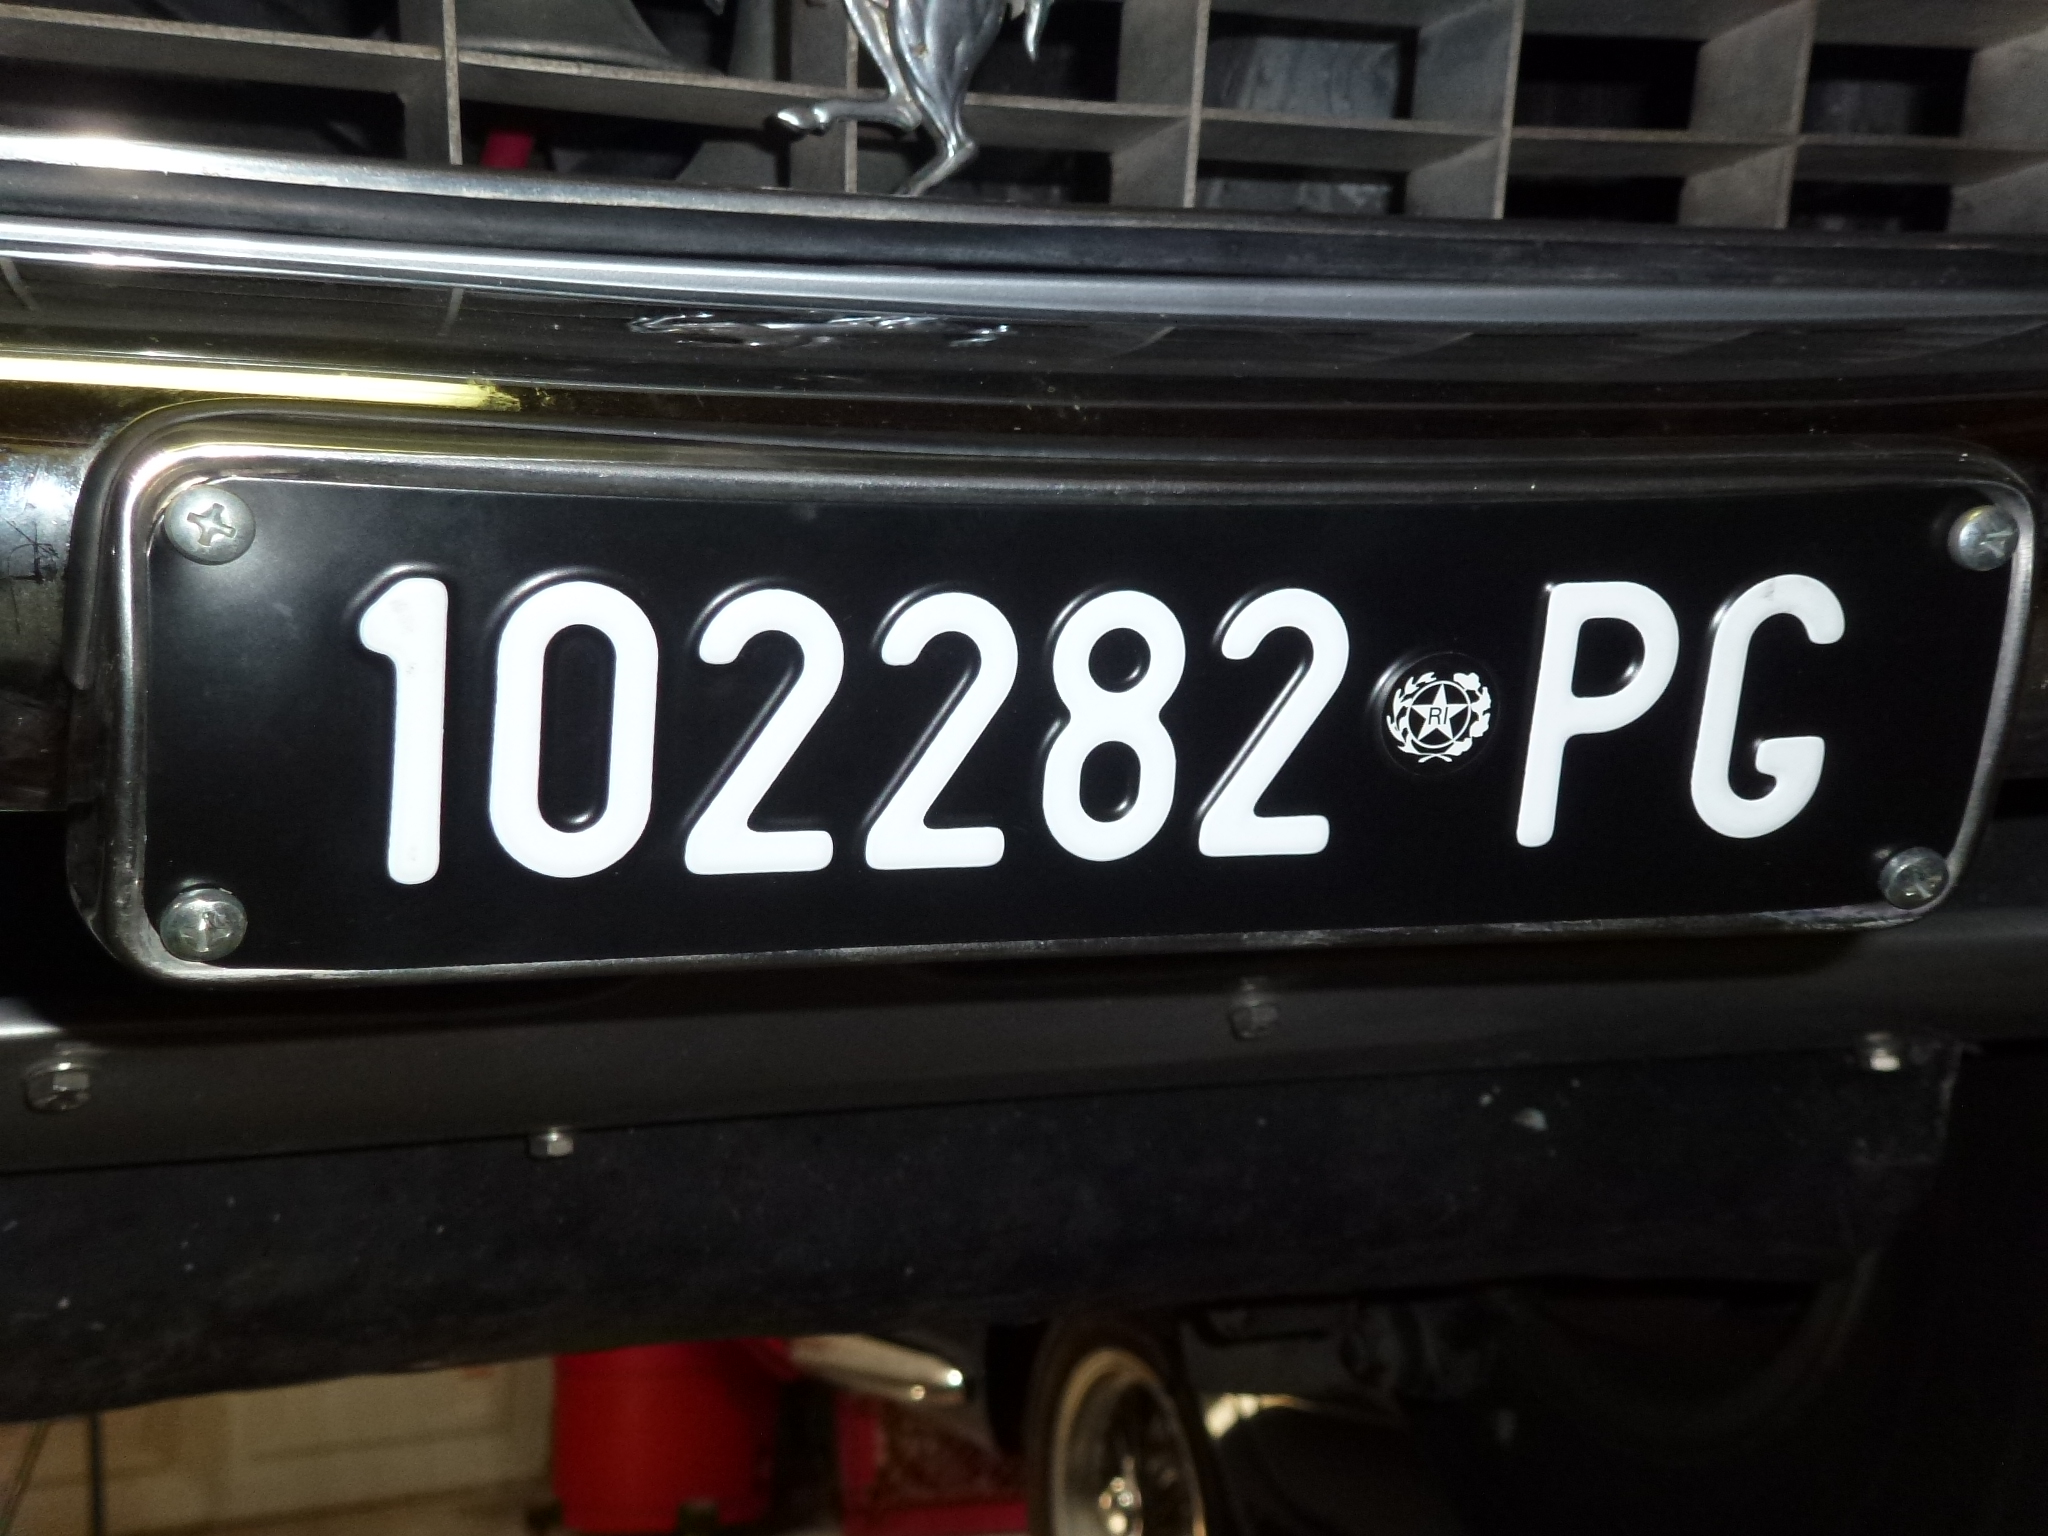
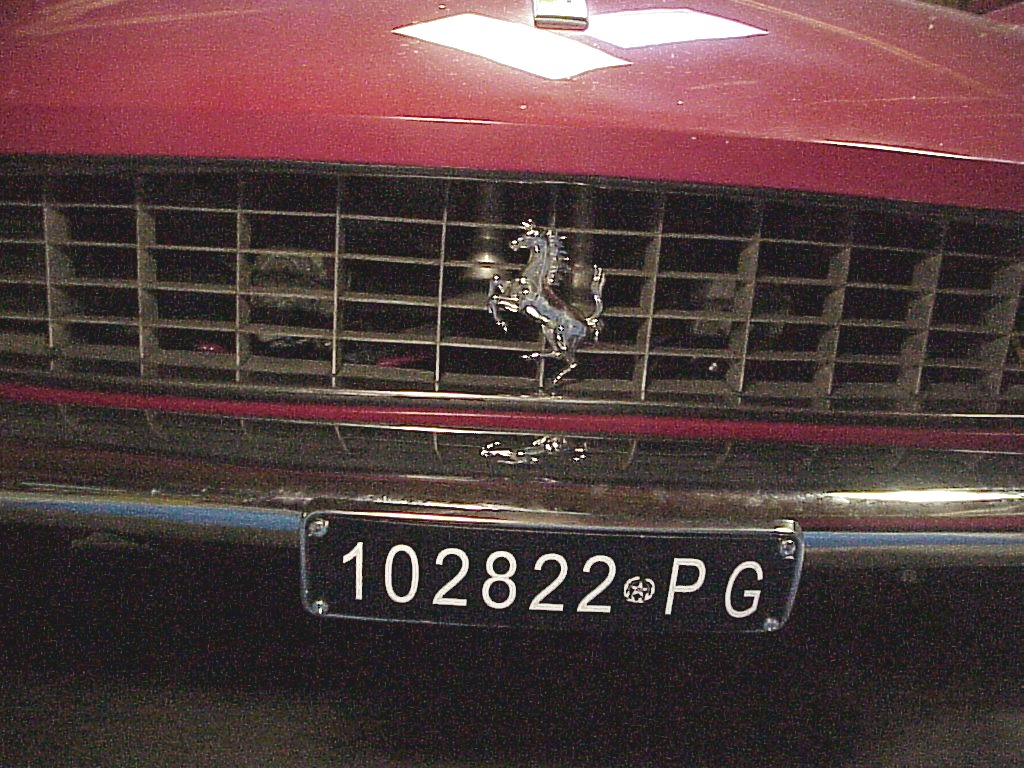
Since I no longer needed a front plate, I bought a European front license plate holder (thereby undoing all of the work I had done for a US front holder. I know the original Italian registration plate number courtesy of the Ferrari Historic department. My car had been serviced at the factory and just as a service department does today, the registration plate number gets written down on the paperwork. Now I needed a Italian front plate with the right number on it. Here's an example of one from the right province (Perugia).
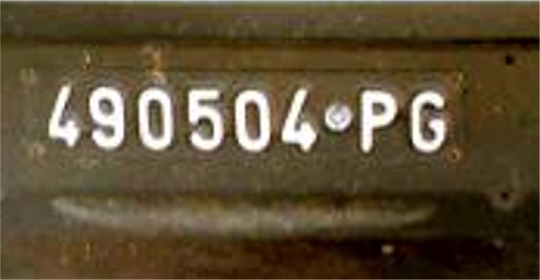
The Italian plates in the mid-60s were a thin plastic that was thermal formed with raised letters and seal. The raised portions where then painted in white. I had bought an Italian front plate just to get an idea of what I needed to do. Note the seal doesn't show since this picture was scanned.

I had previously inquired about a getting a plate made up in Italy, but found out that the price was over 300 Euros. I also looked around for a company who would do a thermoplastic one but nobody was interested in doing a one off even if I supplied the artwork.
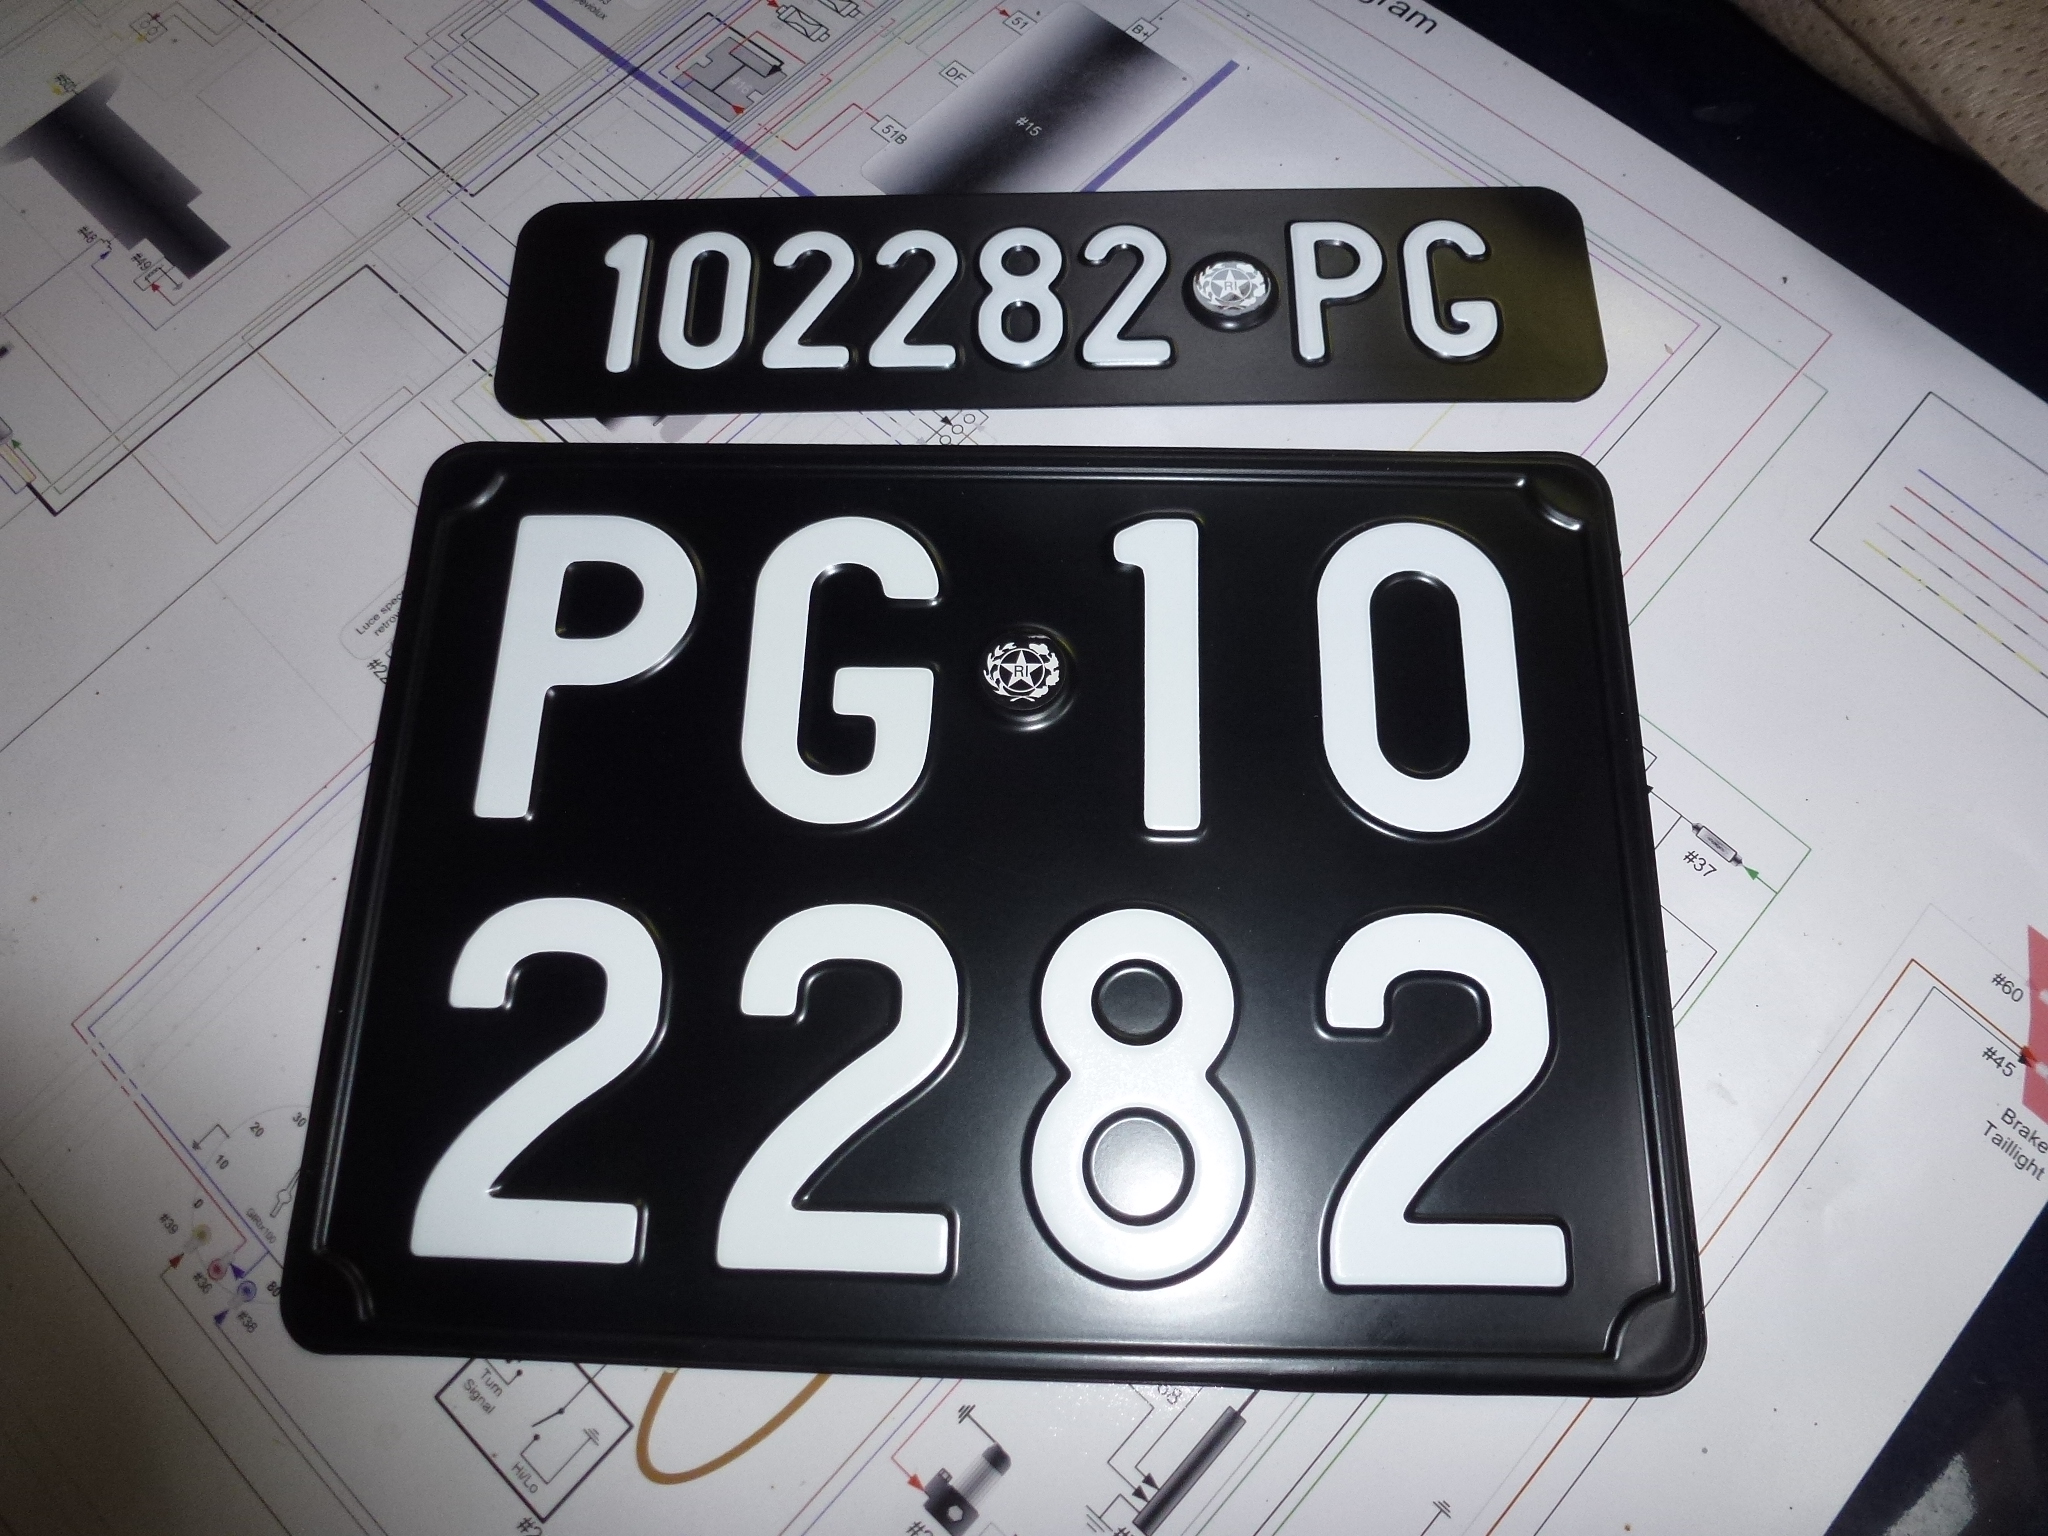
So for the interim, I bought some thin black acrylic plastic and some ink-jet waterproof vinyl white sheets. With the vinyl sheets, I can print the background of the plate black, leaving the letters and seal in white (one can't print white). With some playing on the computer, I found an appropriate font and sized the letters properly and came up with this artwork.

Printing it was interesting since the paper is letter (8.5x11") size and the plate length is 10.55". The printer requires about .6" on each end, leaving only 9.9" of printable area. I ended up taping the vinyl sheet to a legal (8.5x14") piece of paper, starting it .6" down from the top. This caused the printout to start at the edge and run almost the full length of the vinyl.
By cutting the acrylic plastic to the right size and covering it entirely with the vinyl artwork, it looks correct from a distance.
Maybe I'll try my hand at cutting out the letters in thicker acrylic and gluing them onto the thin backing sometime in the future. Then I would paint the raised letters. It still wouldn't be exactly like an original, but unless one looked at the back to see that the letters weren't thermal formed (hollow backs), one wouldn't know. But that's a project for another day.
I gave up on trying to do any thermal formed plates and ended up ordering some Italian plates. They are made of aluminum rather than plastic, but do have raised letters.
I had put a European rear frame on the car after painting. You can see that the WA plate is on spacers to fit over the frame.
I wanted the same effect, only with the Italian plate underneath. In addition, I wanted to be able to remove the US plate easily for shows. Another thing I wanted to do was to fit the Euro frame to the body correctly. This was sold to me as a 330 GT Euro frame, but the sides were straight so it never conformed to the body curve. I traced a line down each side and ground the back of the sides to fit the body. With the rubber edging, it fit nicely.

Once I had the Italian plate and Euro frame fitting right, I figured out how I wanted to hold the WA plate on and still have it removable. By attaching it to some stiff, but pliable plastic, I was able to have the plastic sides slip between the frame and Italian plate. Then sliding it down let the bottom slip behind the lower part of the frame. I used nylon fasteners on the plastic so they won't abrade the Italian plate.
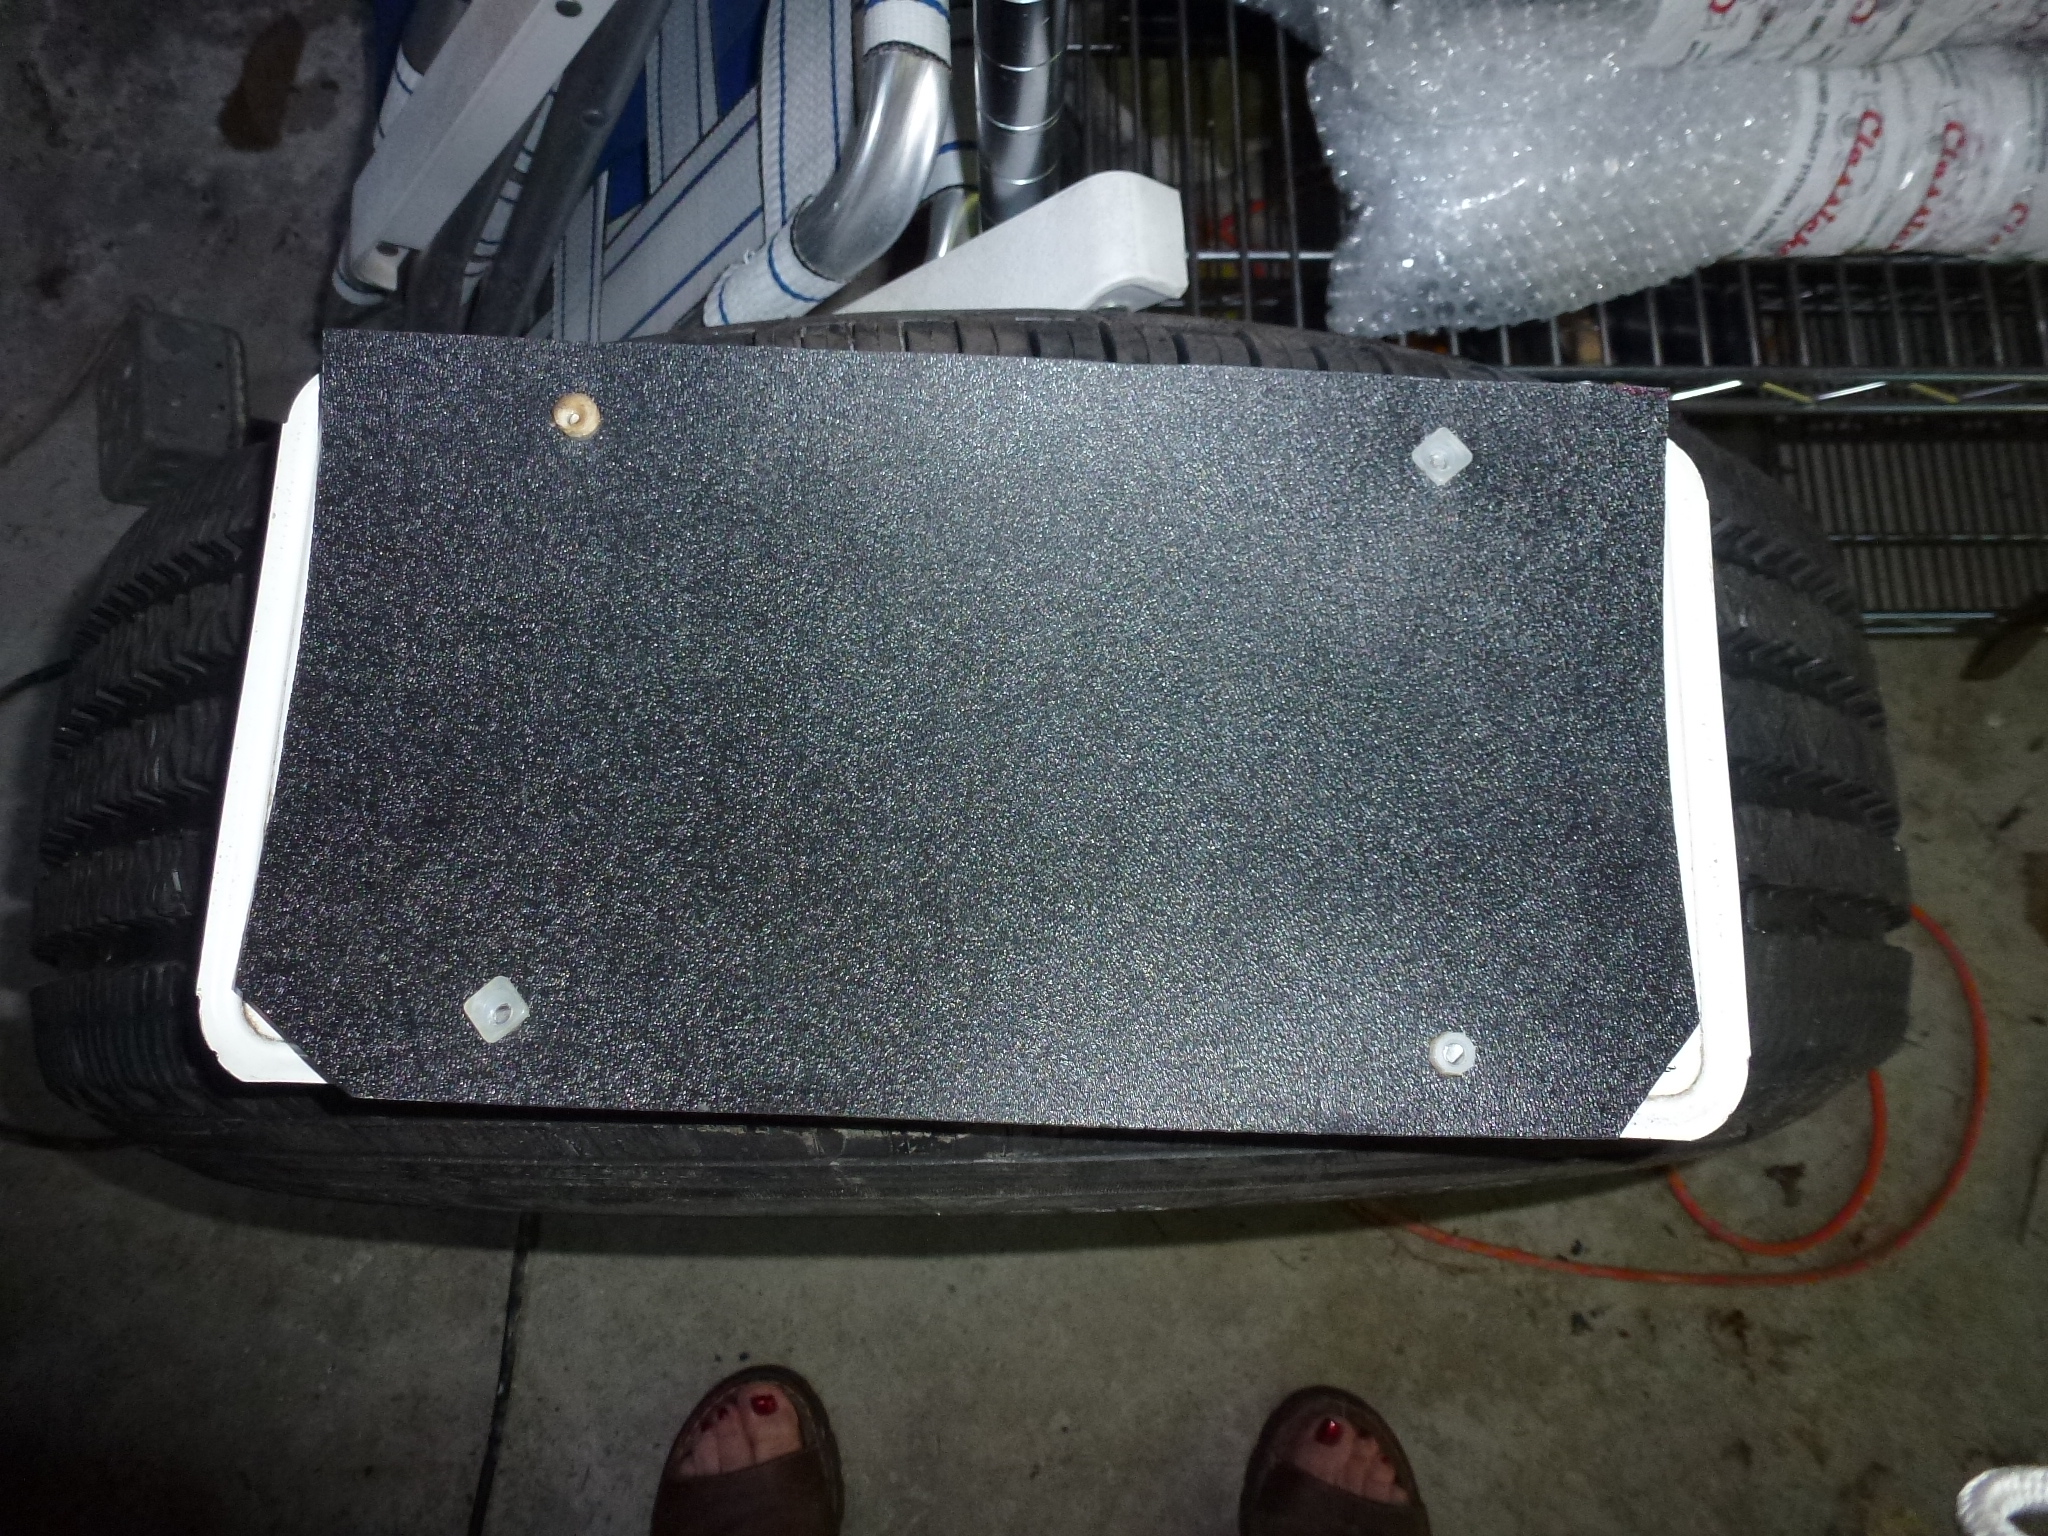
With that figured out, I mounted the Euro frame and trimmed the studs so they don't stick into the trunk. With the frame done and finished, I can continue on the trunk carpet as two pieces fit over where the studs come into the trunk.
I replaced the homemade plastic front plate with the reproduction I bought. It looks more realistic as the lettering is raised.