Clutch
You would think that the clutch wouldn't be much of a problem. However, another PF coupe owner, Chris, asked me to look at the bolts that attach the pressure plate to the flywheel.
When I went to research this, I realized that the clutch set that came with the car didn't fit. Further it was for an early 330 GT or 275 GTB engine. I ended up selling it to Yale to use in his 330. I was able to buy a NOS clutch and disk on eBay that was right for my car.
Once I had the right clutch, I started looking through the hardware for the right bolts. Of course, most of the bolts (and studs) on my car got lost over the years it was apart so I didn't have them. In particular, there are three pairs of bolts. When looking at the pressure plate, each mounting point has 2 holes, with the counter clockwise one being slightly larger and is made for a shouldered bolt to accurately locate the pressure plate. The other hole is normal size, though the matching tapped hole in the flywheel is relieved for the first couple of threads so the unthreaded part of the bolt won't bottom out. I got these pictures from another coupe owner that has his engine out, but not disassembled yet, so the right bolts were still there.
 Normal bolt, CW hole |
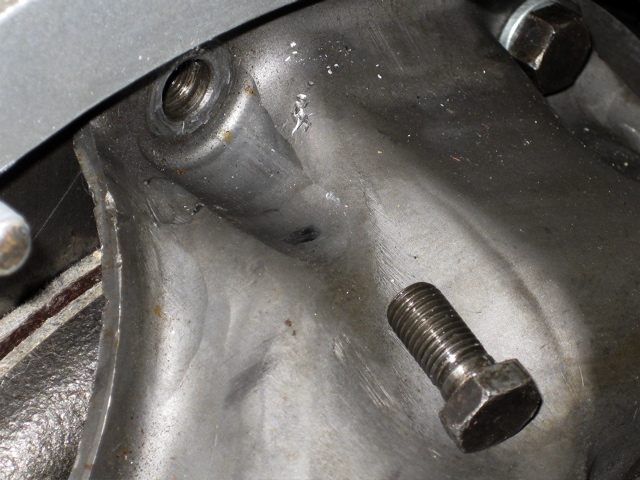 Shouldered bolt, CCW hole |
Chris had been looking for the correct shouldered bolts for a while. George, a local coupe owner, looked through his nuts and bolts and couldn't find the ones he took off his car nine years ago either. Then George took his engine to the machine shop that I used for my 330 to have it assembled and asked about the bolts. John at Autosport thought that these bolts also came on some German car as the clutch maker (Fichtel & Sachs) is a German company. I just got a call this morning that they located a source so I ordered a set each for the three of us. Not too cheap at ~$20 each, but much less that having them made or worse, having the clutch ruined after a few thousand miles because it wasn't aligned properly.
I'll try and find out what other make, model and year that these bolts fit for future reference.
The 'special' bolts came in, but the shoulder is too long and 1.25mm thread instead of 1.0mm. So back to the drawing board on that.
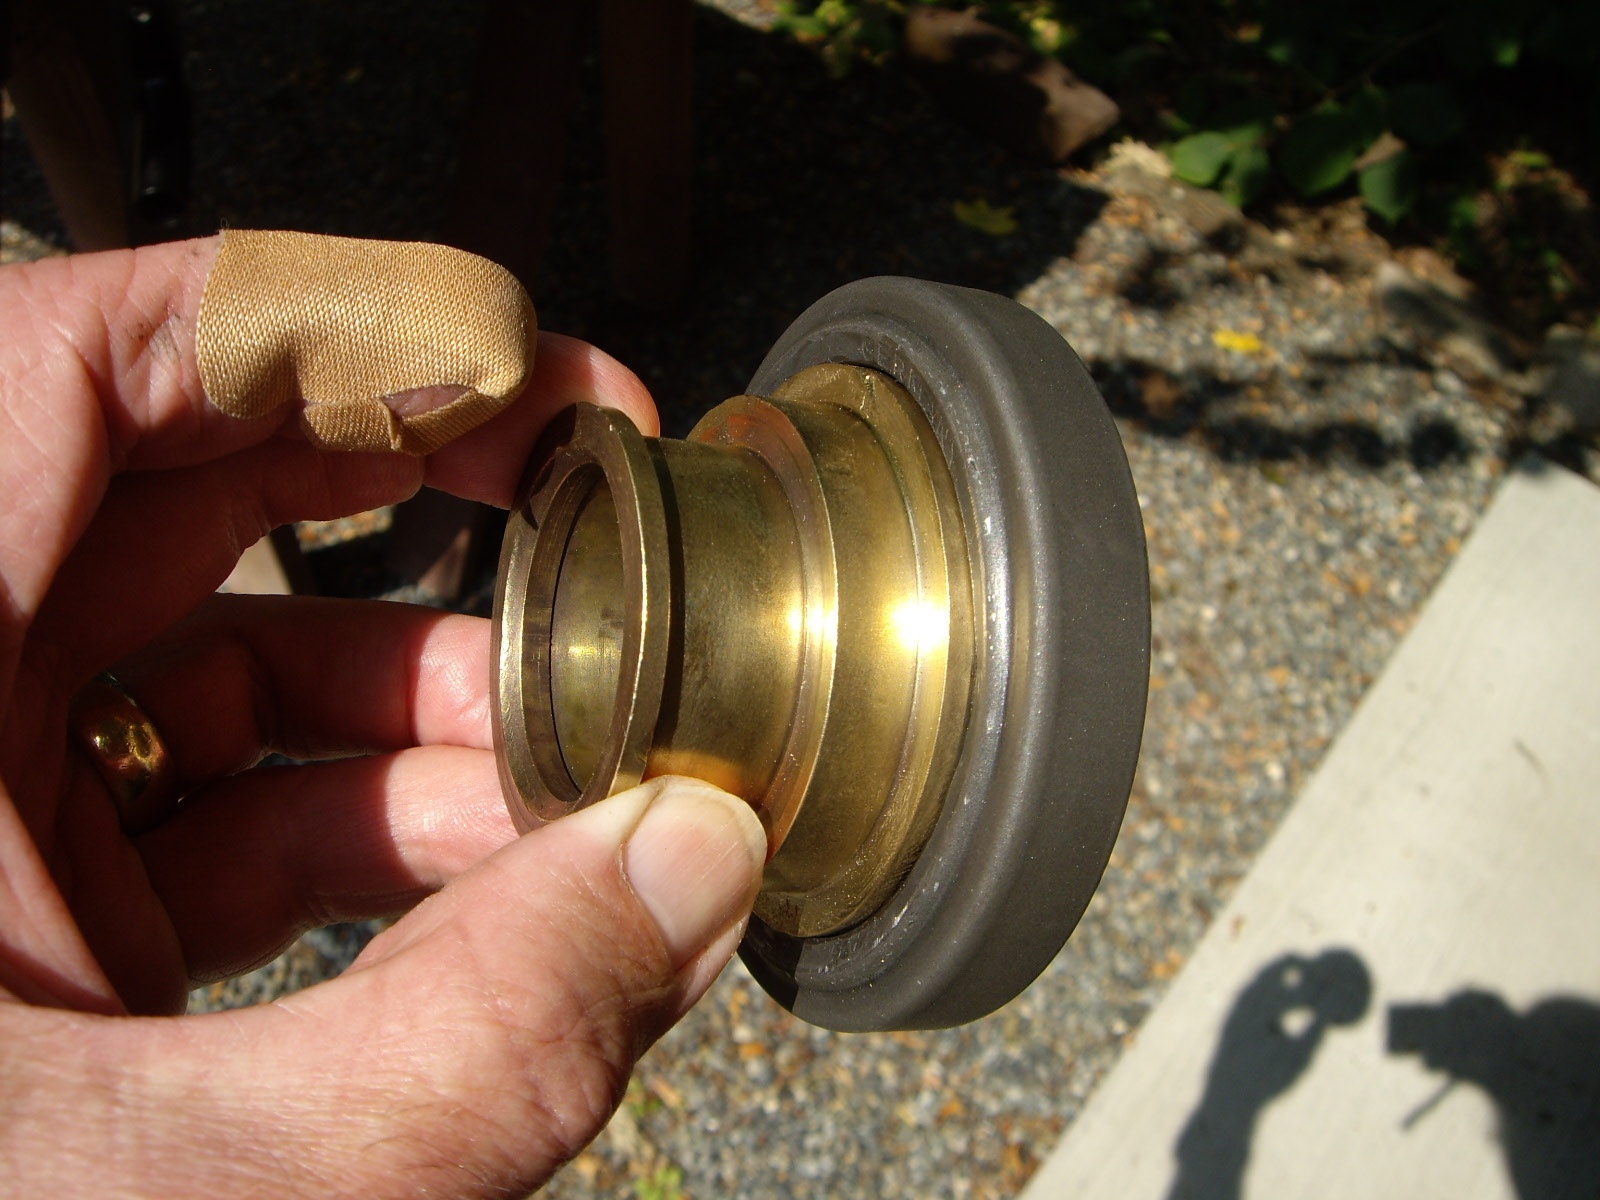
Since I had the clutch, etc. out of the box, I took the time to mount the
new throwout bearing. This looked like a piece of cake, just press off
the old one and press on the new one. However, when I pressed on the
new one, the thin metal cage for the bearings was slightly smaller in its
ID. So the shoulder on the brass mount squished it down, preventing
the bearing from working. I pressed it back off and looked at how to
solve the problem. If I had access to a lathe, I could have chucked
either the bearing or mount and make one larger or the other smaller.
Since I don't, I ended up using a Dremel to enlarge the bearing case.
Of course, this contaminated the bearing, so I made two 30 minute passes
through the ultrasonic cleaner, using fresh solvent the second time.
Then several rinses to flush out any remaining grit. To re-grease it,
I tried to see if my bearing greaser would work. This is two curved
pieces of metal (sections of a sphere) that screw together and have a Zerk
fitting on the screw. The bearing mounts between the two pieces with
the inner race of the bearing tight on one side and the outer race on the
other. Then grease is pumped in between and is forced through the
bearing from the inside to the outside. However, due the the same cage
that caused the original problem, the metal section wouldn't fit against the
inner race. The other solution is using a needle like attachment to a
grease gun which allow you to stick the needle into the bearing and pump the
grease right where it needs to be. Since I don't have one of these, I
ended up taking a caulking tube tip, making a fine tapered end and screwing
it onto the threads of the grease gun after the Zerk attachment was removed.
This worked well and the bearing now feels quite smooth as it is turned.
 |
 |