Locks and Keys
As usual with a Ferrari project car, the keys were missing for most of the locks. When I did the locks in the 330, my Dad was still alive and I had his locksmith shop available. Since that's no longer the case, I decided that I needed my own key machine. After bidding on a few on eBay, I get an inexpensive Belsaw one.
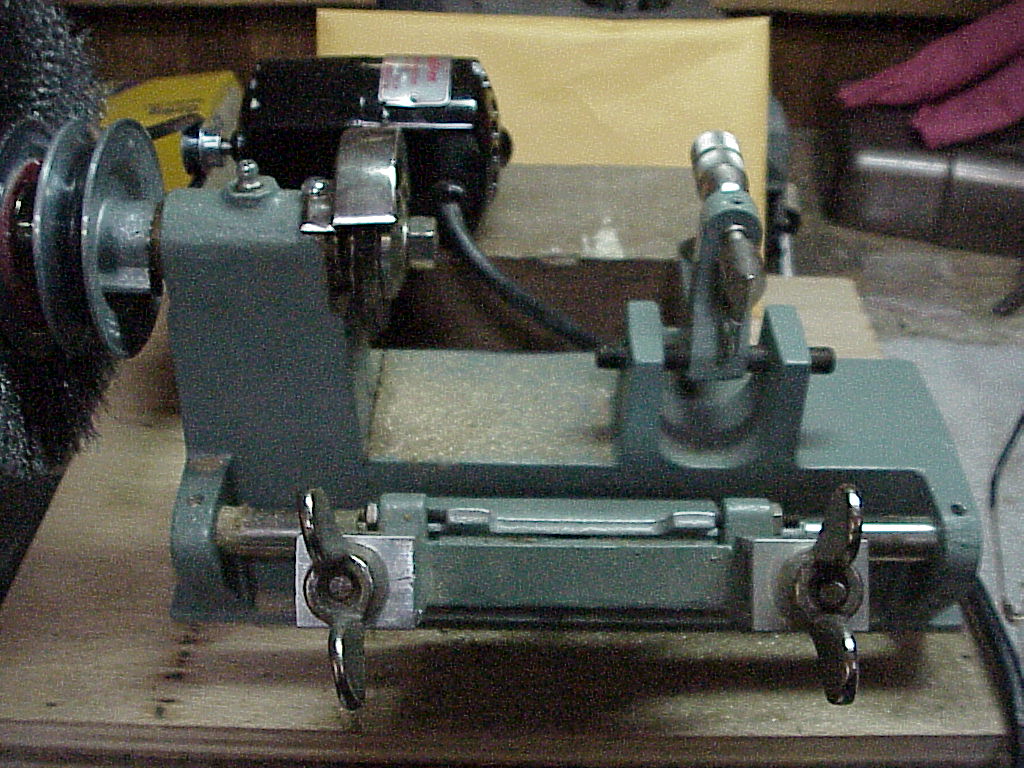
This does have one nice feature. There is a micrometer on the key gauge that is quite useful in cutting new keys to fit an existing lock.
The other thing I needed was a set of blanks. In addition to those for the coupe, I needed ones for the 308 which only came with 1 set of keys. Plus I had about used up the original blanks for 330s. I called the wholesale locksmith supplier that my Dad had always used. I explained who I was so they wouldn't think that I was some crook just trying to buy some blanks. They didn't have the old records, but believed me anyway. The main difference now is that the blanks cost a lot more. Several I needed were over $25 for the minimum order of 10 of a kind. Between buying the key machine and restocking with blanks, I'm probably about at the break even point if I had a locksmith do everything. But now, I can make any extra keys I need.
I had to make keys for four locks on the coupe. The ignition and gas cap used the same key and there was a key that turned the ignition that also fit in the gas cap lock though it wouldn't turn it. So I needed to make keys to fit the door lock, glove box lock and trunk lock. Here's the process using the door lock as an example.
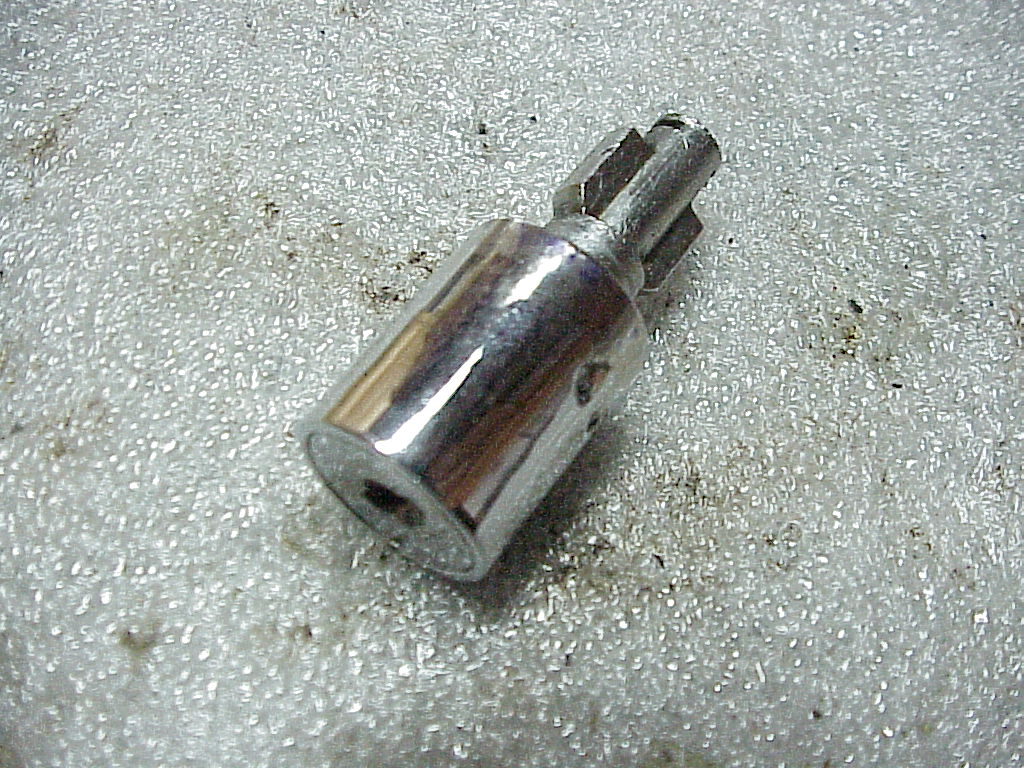
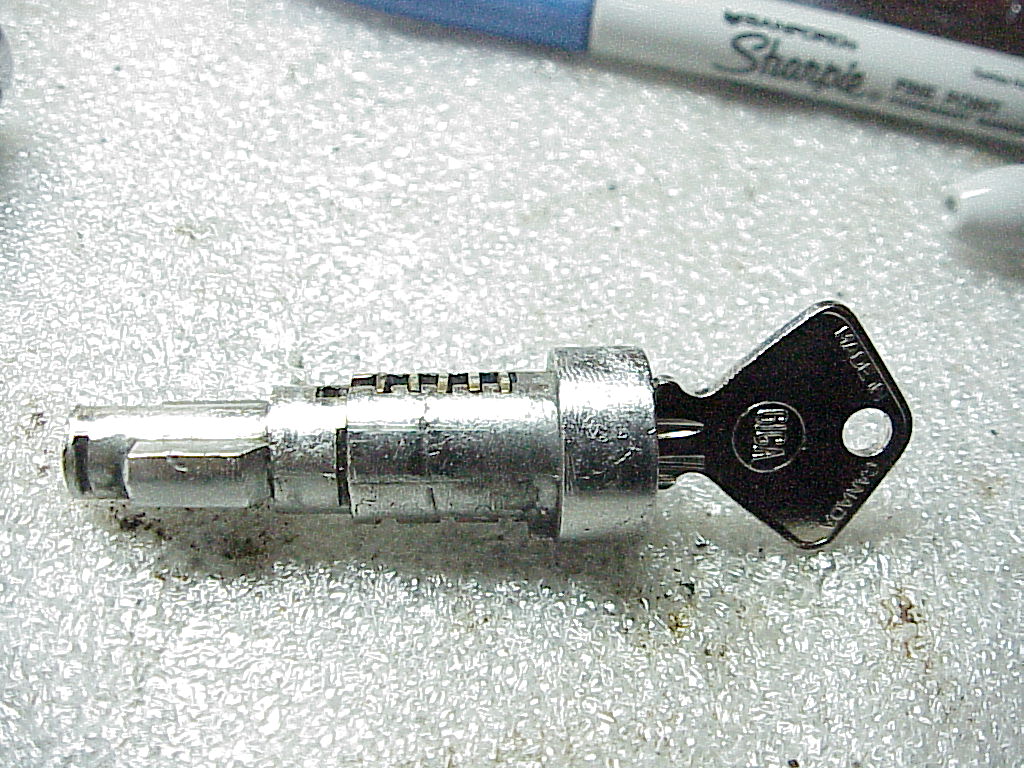
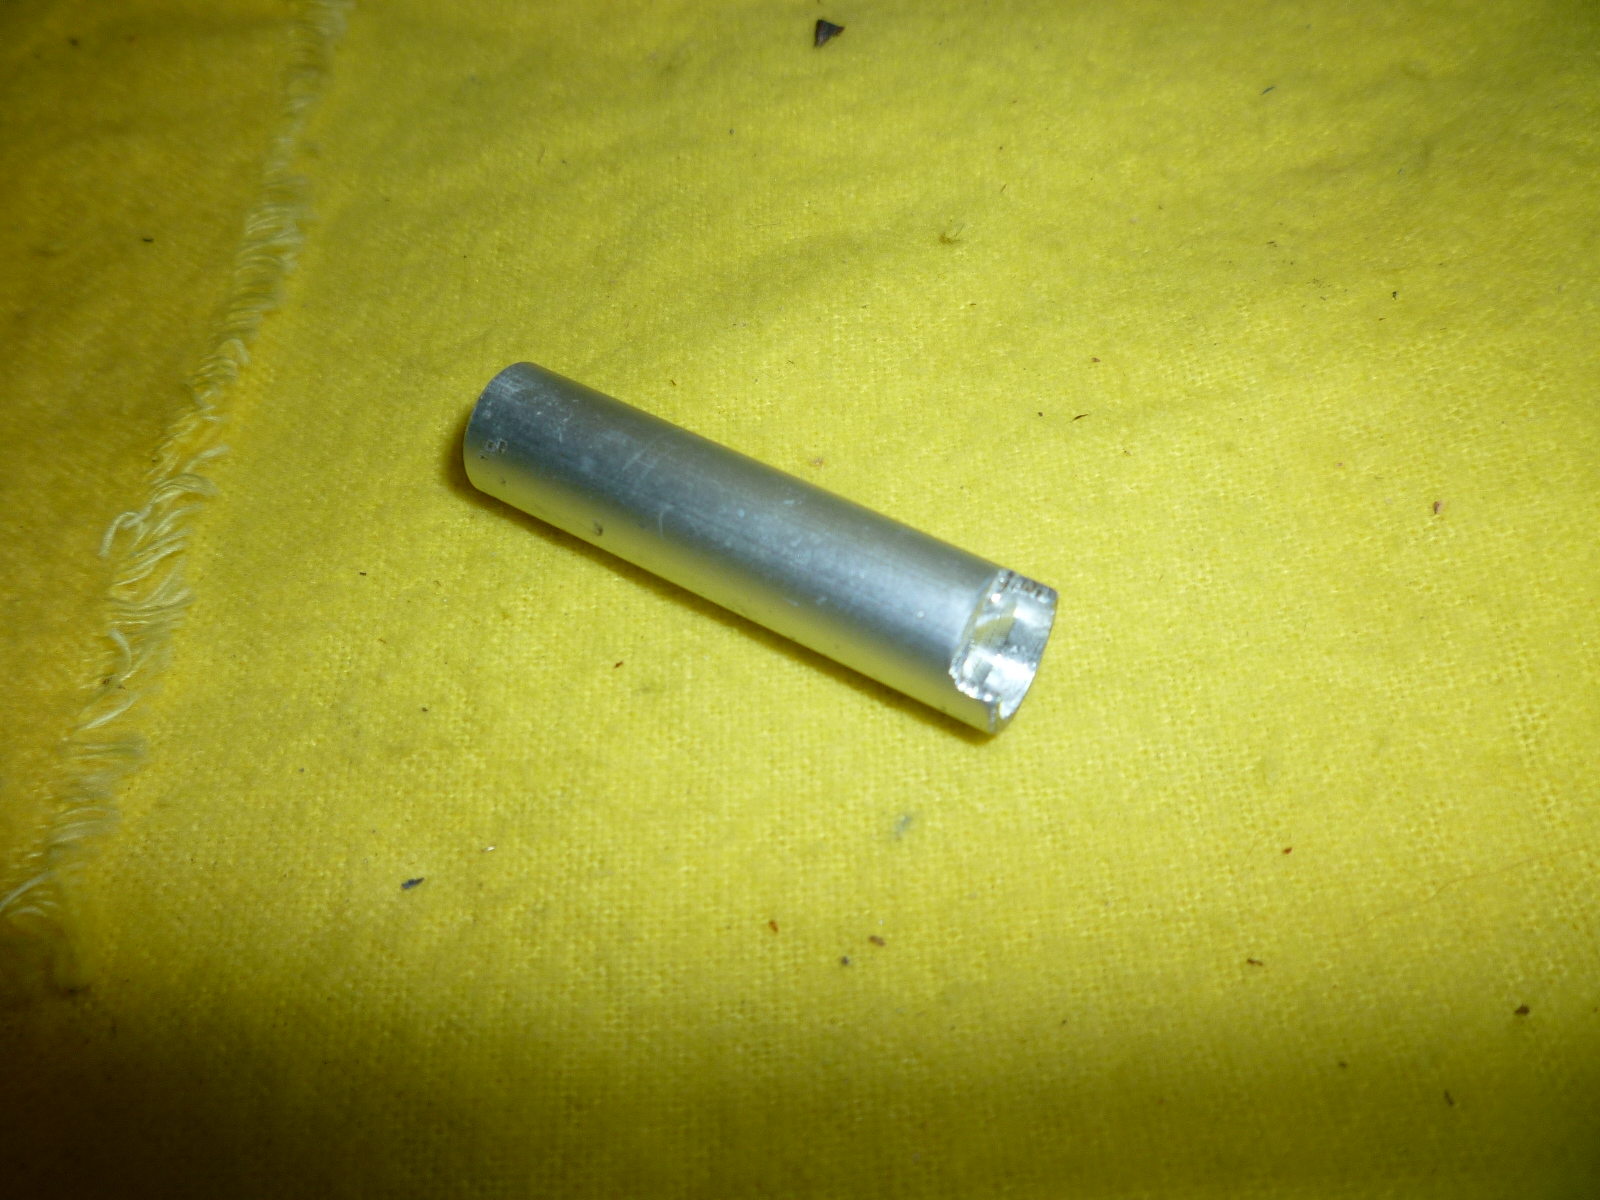
Most locks work on the same principle. There is a slot for the key with a specific pattern so only a certain blank will fit in. Inside, there are spring loaded pins or wafers that extend beyond the rotating portion (cylinder) into the body to lock the lock. When the proper key is fit in, each pin or wafer is lifted so the top is even with the outside of the cylinder, thus allowing it to rotate and unlock the lock. If the wrong key is used, some pins or wafers stick up too much and others not enough, thus not allowing it to unlock. Here's the barrel and cylinder of the door lock.
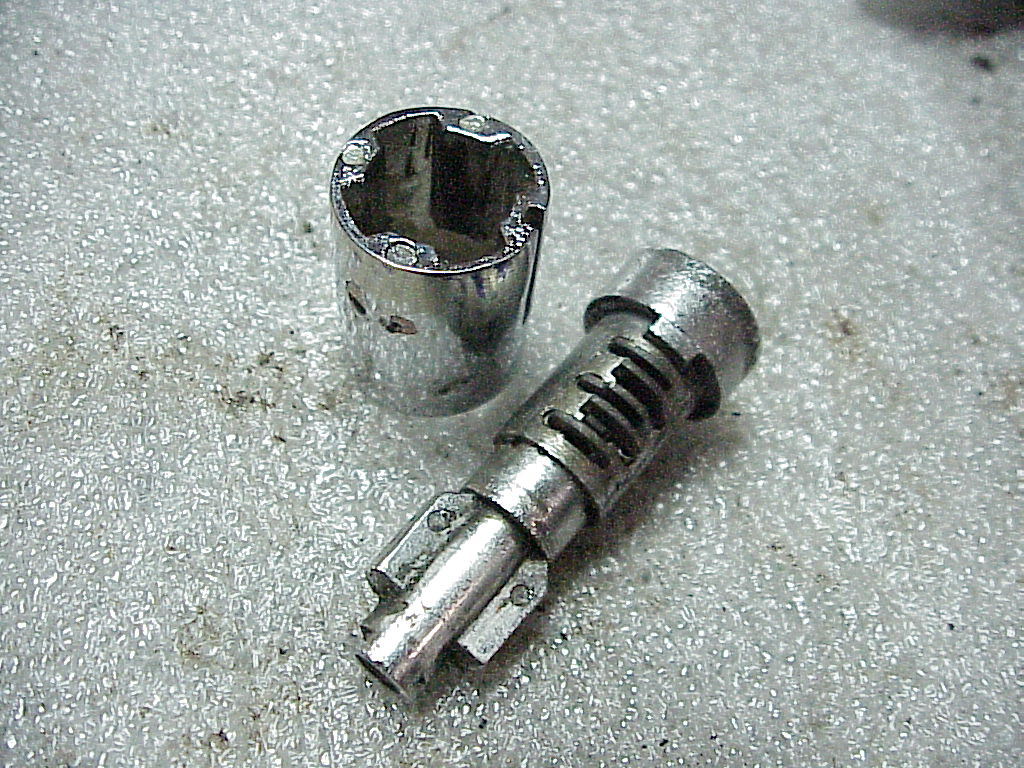
You can see the flanges at the rear. These fit though slots in the lock body when it is unlocked or don't fit when it is locked. Then you can't push in the button. Here's the barrel with the cylinder removed. You can see the wafers (five in all) sticking out of the top of the cylinder. These lock into the four slots you can see in the barrel.
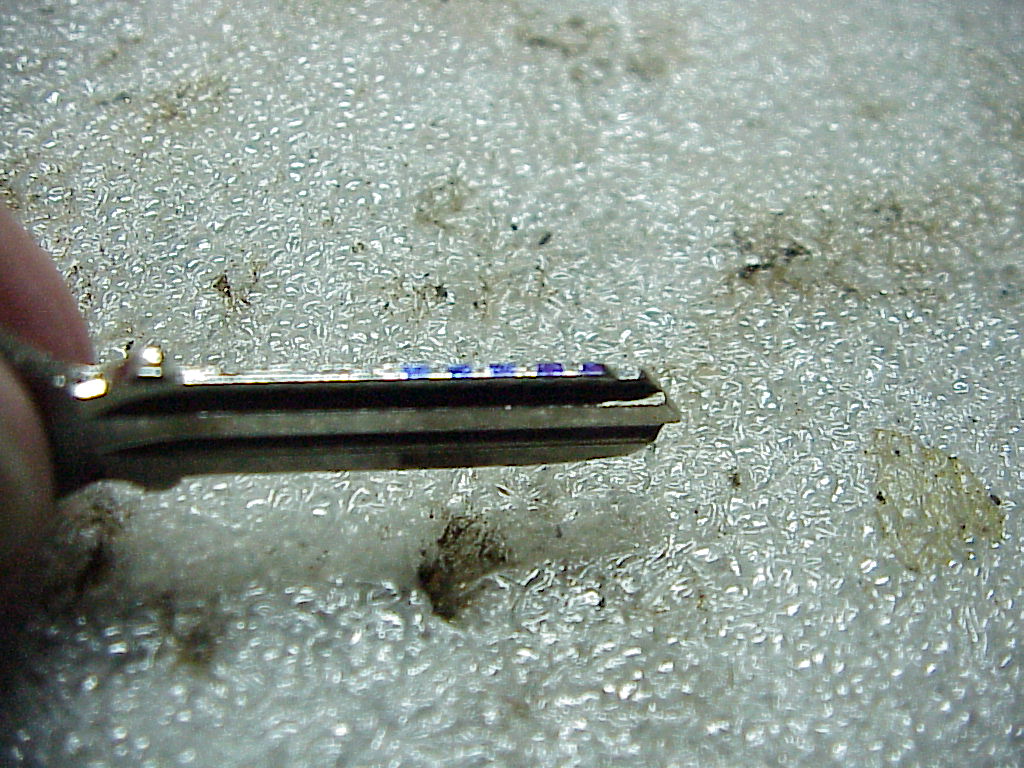
To start, one inserts a new key blank and measures how high each wafer (or pin) sticks up above the cylinder.
As you can see, wafers 1, 2, 4 and 5 (counting from the key end) stick up and 3 is correct as is. By measuring the diameter of the cylinder and the height of each pin including the cylinder, one can determine how much each location needs to be cut in order to have the wafers even with the cylinder when the key is inserted.
|
Barrel |
.500" |
Depth |
|
1 |
.565 |
.065 |
|
2 |
.532 |
.032 |
|
3 |
.500 |
0 |
|
4 |
.565 |
.065 |
|
5 |
.565 |
.065 |
So the depths of 1, 4 and 5 need to be .065", 4 needing .032" and 3 no cut at all. Next you need to determine where the cuts need to be. This was done removing the wafers and marking a blank at each wafer location. Here you can see the 5 locations marked in blue.
Then you mount the marked blank on the guide side of the key machine and a new blank on the cutter side. By adjusting the guide back the proper distance, the cutter will cut the proper depth. Once each location has been cut, the wafers should all align correctly.
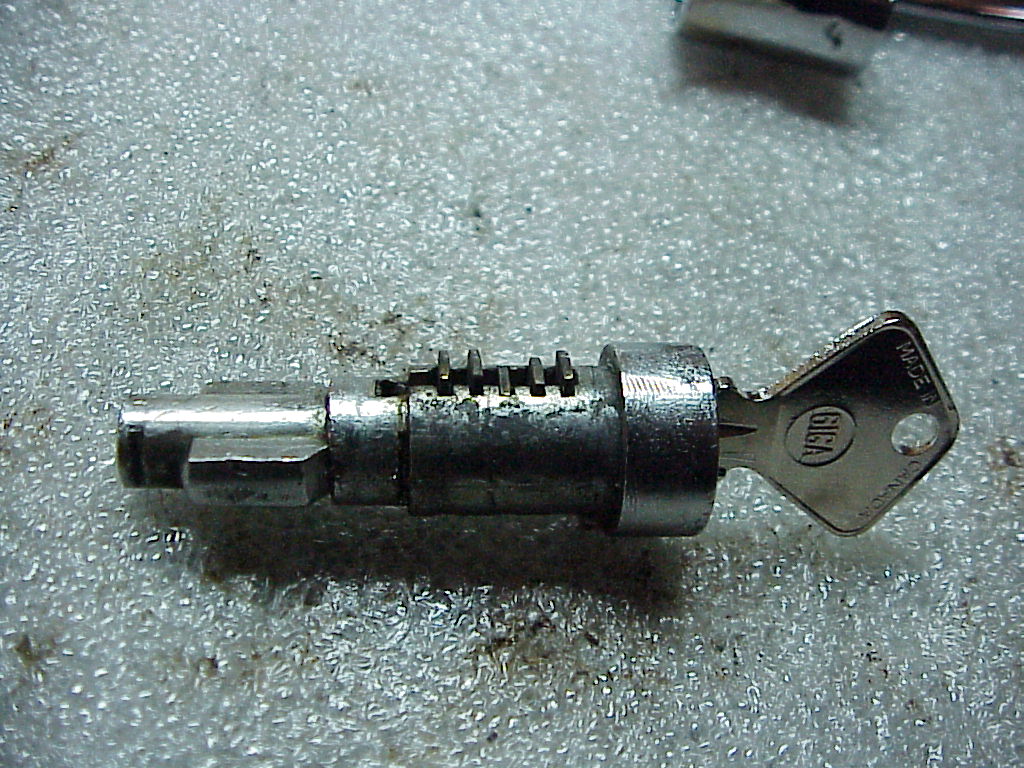
That's all there is to making a key to fit an existing wafer lock. The glove box lock used pins rather than wafers, but the concept is the same. I had to move wafers and leave one out to make the existing ignition key work in the gas cap lock. On a more modern lock, one could order a kit of wafers and just change them to fit, but with an old lock, you just make do with the wafers you have available. You can also get guide keys that already have the correct locations and depths. If these are available, you just put the guide key for the proper depth in and cut each location that needs that depth, etc. If I had several of these locks to do, I would have cut guide keys, but with only one lock to do, they would be a waste of time and blanks.
So now I have two sets of keys that fit the locks. My wife commented that it was important to be able to lock the car up even though there wasn't an engine in it nor any glass. She thinks I should be working on something more important, like the engine!
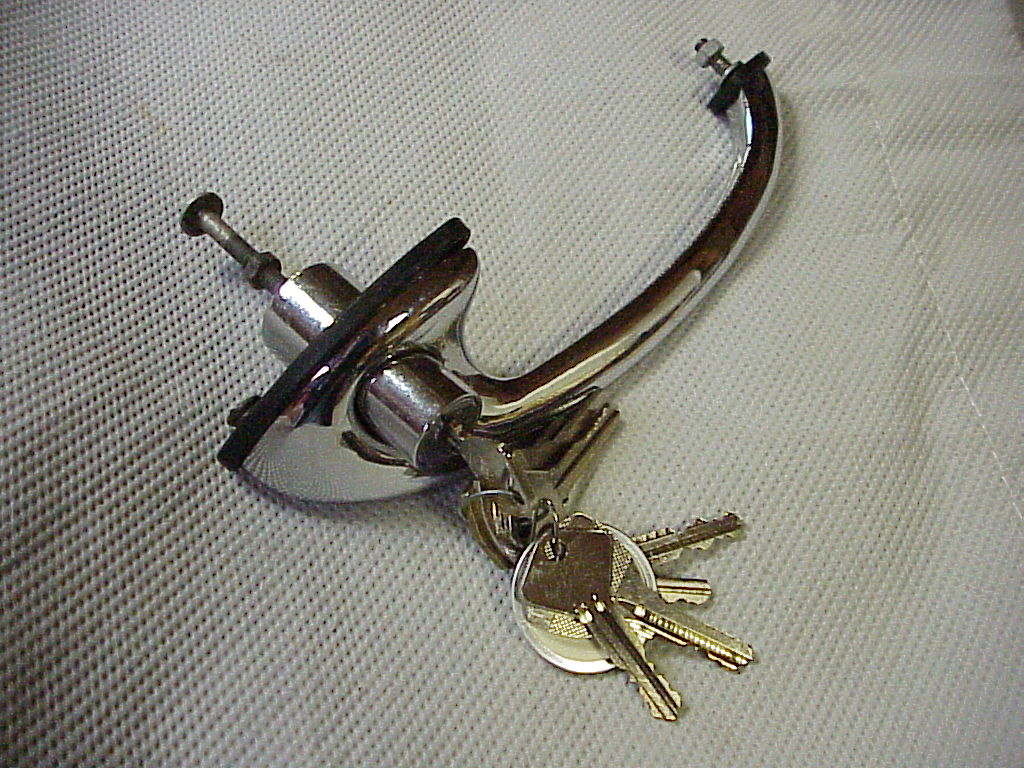
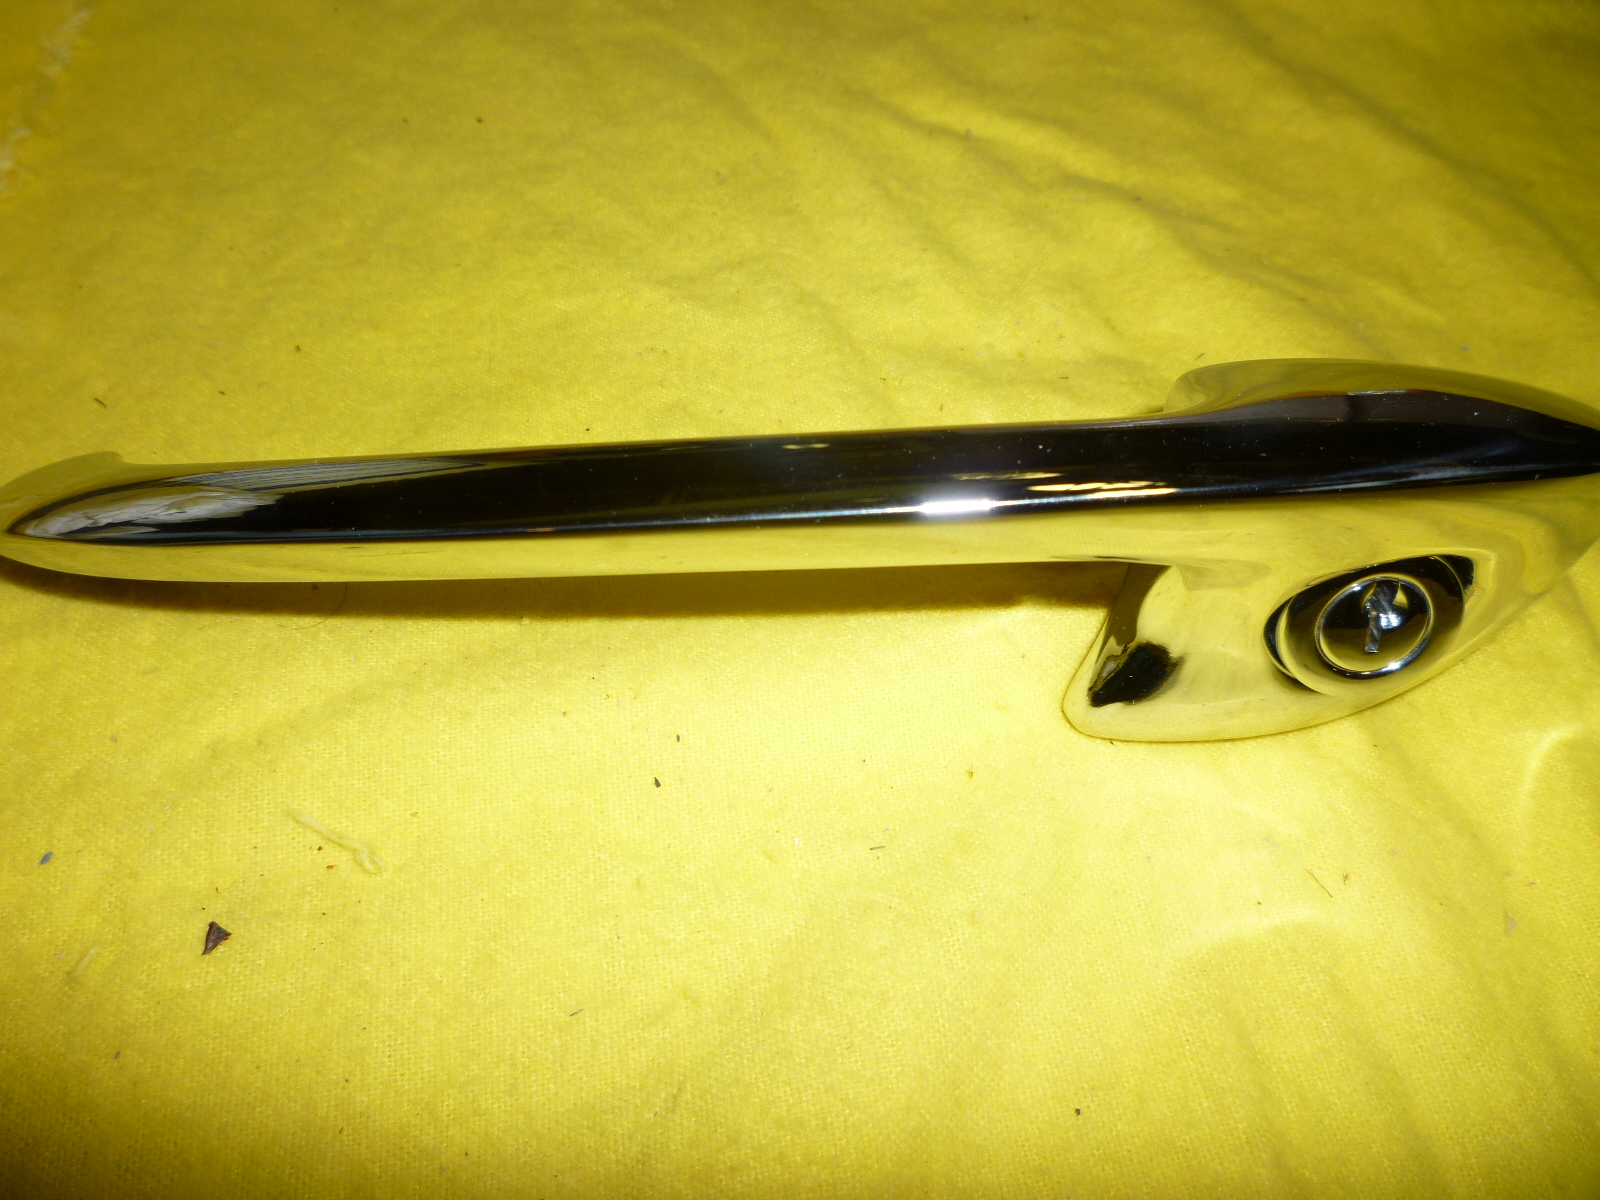
Though a lot of the chrome work on the car had been done by the previous owner, the door handles and lock were not part of that. To properly do the door lock, I had to disassemble the lock again, removing all of the pins, springs, etc. so I could have the cylinder (push button) and barrel chromed.
I dug out all of the parts to the lock for the driver's door today. I had looked at this a while ago and though that I had lost one of the lower pins. However, I forgot that there were only four pin locations in the barrel while the cylinder had five places for springs and top pins. This lock uses pins and springs rather than wafers. Wafers inherently provide a locked and unlocked position one half turn apart. To achieve the same thing with pins requires a second set of top pins and springs in holes on the opposite side. That way, when the key is pulled out at a half turn, the opposite top pins drop and lock up the barrel. Re-assembling a lock like this takes a lot of patience. Normally, one puts in a top spring and pin, depresses them and slides the follower forward, preventing the top pin from coming down again. Then repeat successively for each set of pins. Once done, you push the barrel (with the bottom pins in place) against the follower, pushing it out the back of the lock. Once the barrel is fully in place, rotate it to lock it up and assemble the back. Then the key will fit in and work the lock.
With this lock, there are two sets of upper springs and pins at each location. I had to make a special follower that had a hollow center with about one third of the side cut out. This left a long and short portion.
So to start, you fit one upper spring and pin in place, depress and capture them with the long part of the follower. This allows access to the opposite spring and pin location from the short part of the follower while the first upper spring and pin is still depressed. I also added lock shims on both sides of the follower just in case the follower slid back by accident. The shims would probably hold the upper springs and pins in place. After the follower has been slid forward capturing the matching spring and pin, you are ready to do the second set of upper springs and pins. Once all the upper springs and pins were installed, I tried to slide the barrel into the cylinder with the shims in place. Even when the follower was tight against the end of the barrel, there was still a little gap where an upper pin might catch, so I used the shims to prevent this. I had previously tried the barrel inside the cylinder to check that the extra chrome plating hadn't made the barrel too large. It fit alright by itself, but was really tight with the shims. I forced the barrel in, planning on removing the shims afterwards. However, it was so tight that the shims just pulled apart. In fact, I had to use the follower to drive the barrel back out. Then I chucked the barrel in a drill, and while it was spinning, used a Dremel with a sanding drum to take off the new chrome until I could see the original brass barrel. Once that was done, I was able to slide the barrel in with the shims in place. Then I removed the shims and tried to insert the key. It wouldn't go in. The first pin wouldn't push out of the way of the key. So I had to remove the barrel again, using the shims and follower to hold the upper springs and pins in place. Then I removed the first set of upper springs and pins to see why they wouldn't let that lower pin retract correctly. What I found was that one of the holes was filled with some cotton, probably a thread from the buffing wheel used to polish the chrome. There was also some of the buffing compound in both holes. About 10 minutes later, after using a dental pick to clean each hole, I was able to put the upper springs and pins back in place and have them work correctly. Finally, the key worked correctly when the barrel was put back in.
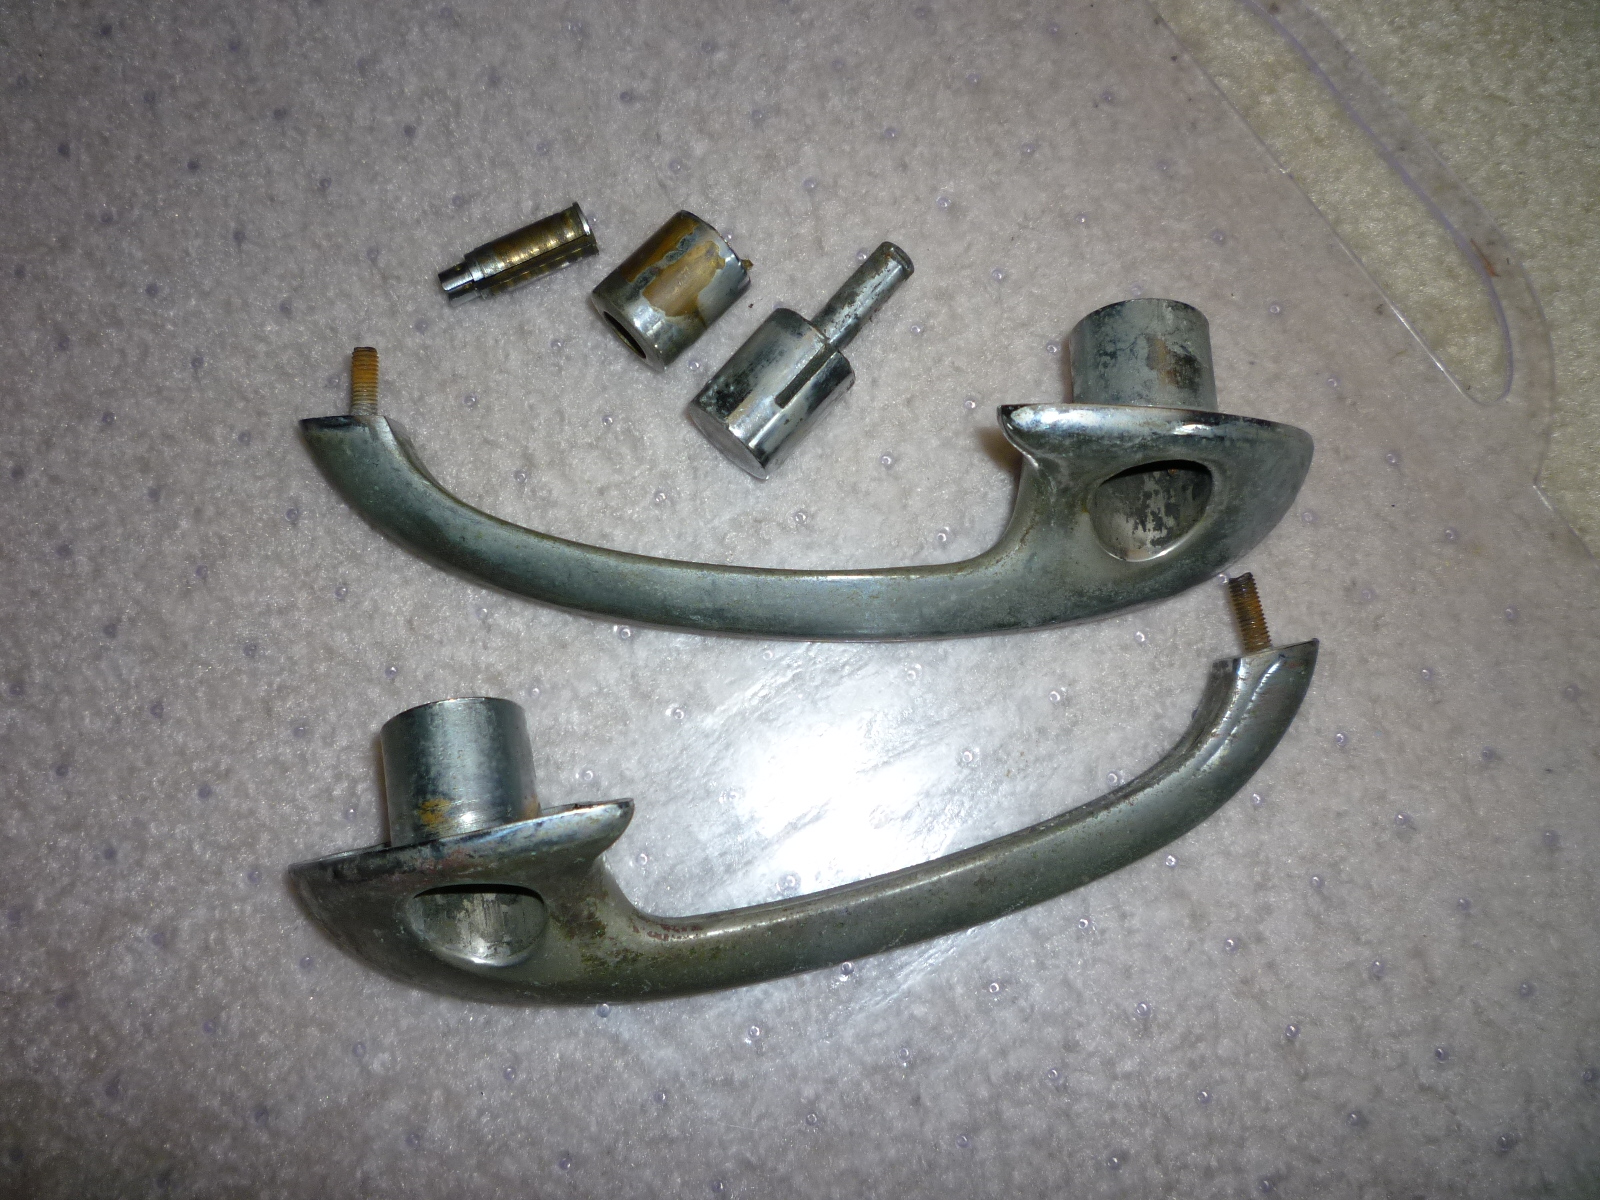
After three hours, here's the handle and lock all newly chromed ready to install.
I also had to redo the fuel filler lock as it was incorrect. Click here to read about that.