Monterey 2004 Test Drive
As a shake-down to my planned trip to Monterey for the Concorso Italiano, Pebble Beach and FCA National meet, we had planned on driving the 330 down to Vancouver, Washington a week ago. However, the weather turned out to be very hot (particularly for the Pacific NW), over 100° F (that's over 40 for you 'C' types), so we eschewed the 330 for the comfort of the van with its efficient A/C.
So this last weekend, we drove it to our ski place in Whistler, BC, Canada. That's a round trip of about 500 miles. I figured that if it made that trip OK, then it would be good to go to California.
The first thing that I noticed was that the brakes were acting funny. Every once in a while, the pedal would go almost to the floor, but usually they worked fine. The trip started with forgetting the passports and Nexus (fast border entry) cards. So it was back home after 15 miles or so. That necessitated a stop for gas as we would have had just enough to get near the border where we usually gas up. The cost of fuel in Canada is quite a bit more, but the round-trip to Whistler from the border is less than a full tank of gas so we always fill up on the US side.
As we neared the border, we tried to use the radio to get a road and border crossing report. But the radio couldn't seem to tune in anything. A later inspection showed that the coax wire at the antenna had broken. So we were driving blind so to speak as far as road and traffic conditions.
As we were on the upper levels highway in North Vancouver, we got stuck in a backup. At first I thought that it was the normal ferry line-up at Horseshoe Bay. So I kept in the left lane knowing that the ferry traffic would be shuttled off onto the shoulder to wait. However, both lanes were solid and moving very slow. We tried the radio again and got intermittent reception (when the wire was touching) and managed to hear that there was a blocking roll-over accident about 5 km ahead. It was about now that the gauges, including the water temperature one) stopped working. Little did I know that the fuse was corroded and that the fuse also supplied power to the radiator fans. We got into the right lane, planning on getting off on the next exit to work our way around the accident on side roads. Then I saw some steam coming up from under the car and decided it was time to get some air flowing through the radiator. So I got onto the shoulder and drop at about 30 km/h to the next exit. There I rotated the fuse and got the fans and gauges working again.
After some side roads, we got onto highway 99 which leads to Whistler. The gauges stopped working again, but since we were moving briskly I wasn't worried about overheating. Then I noticed that the ammeter was showing about -20 amps discharge. I stopped, figuring that I had done something to its fuse since it is next to the one for the fans. However it seemed to be fine and I fixed the other one again. We stopped a few miles further in Squamish at an auto/tire center. I figured that I could always buy what I needed if I could figure out what the problem was.
I thought that I might have not got the alternator connections put back right since I had it out trying to install an auxiliary radiator fan. But a double check of those and the ones at the voltage regulator didn't turn up any problems. So we motored on, only having about 45 minutes to go at that point. I knew that the battery would provide enough power for the ignition and once we got moving, the radiator fans would stop as the air flow through the radiator would keep it cool.
I was able to fix the alternator in Whistler with the help from a friend.
Now back to the rest of the test drive. Once we were in Whistler, I took out each fuse and cleaned the ends along with each of the terminal ends in the fuse box. That fixed the gauge/fan circuit problem. However, it didn't fix the passenger window not lowering that my wife was complaining about. From looking at the ammeter, I could see that the motor would try to raise it, so power was getting to the switch. With the problem either being the switch which requires some disassembly time or the wiring in the door, I decided to not address this problem until we got back home. Particularly since I'll be taking the door panel to install a side mirror on the passenger side before I left.
The brakes continued to get worse. A slow push was likely to go to the floor with little braking effect. A fast push always worked but led to some jerky braking as I didn't always know at what point they would grab. I decided that the master cylinder rubber cups were worn allowing fluid to pass by them on a slow braking action. When pushed fast, the cups would expand against the cylinder and push the fluid to the brakes as designed. I sent an email to White Post from Canada to get a rebuild set up. As soon as the engine cooled when we got home, I removed the master cylinder and sent it off overnight delivery. They promised a 1 day turn around and overnight back, so I should have plenty of time to get it installed and the brakes bled.
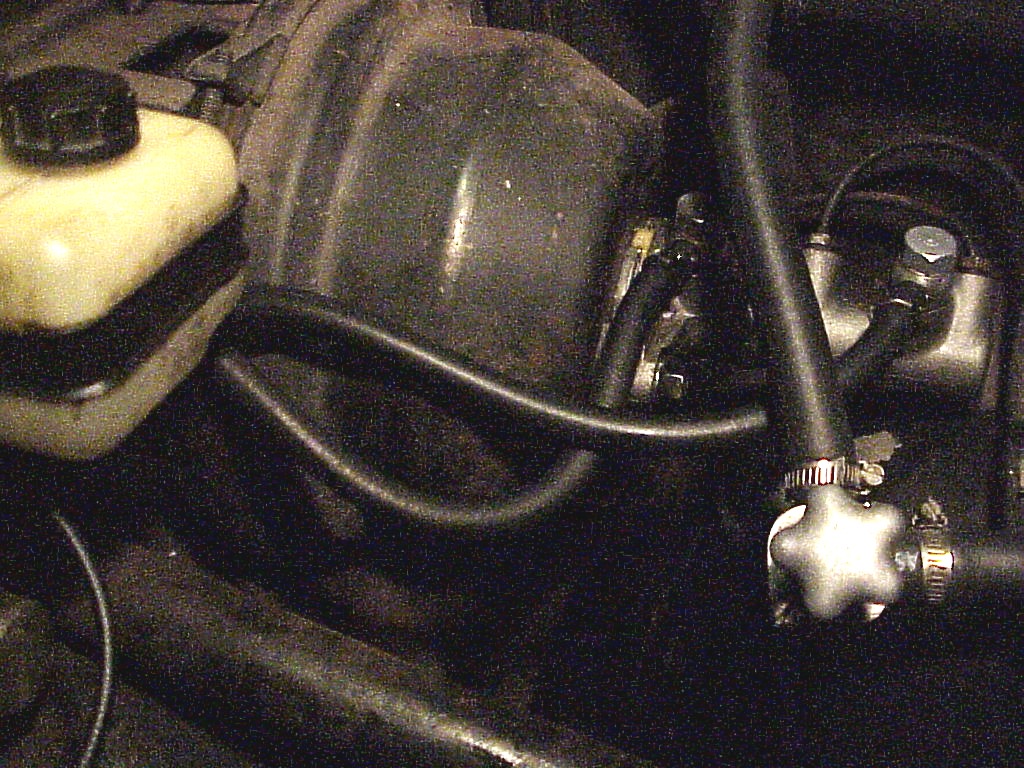
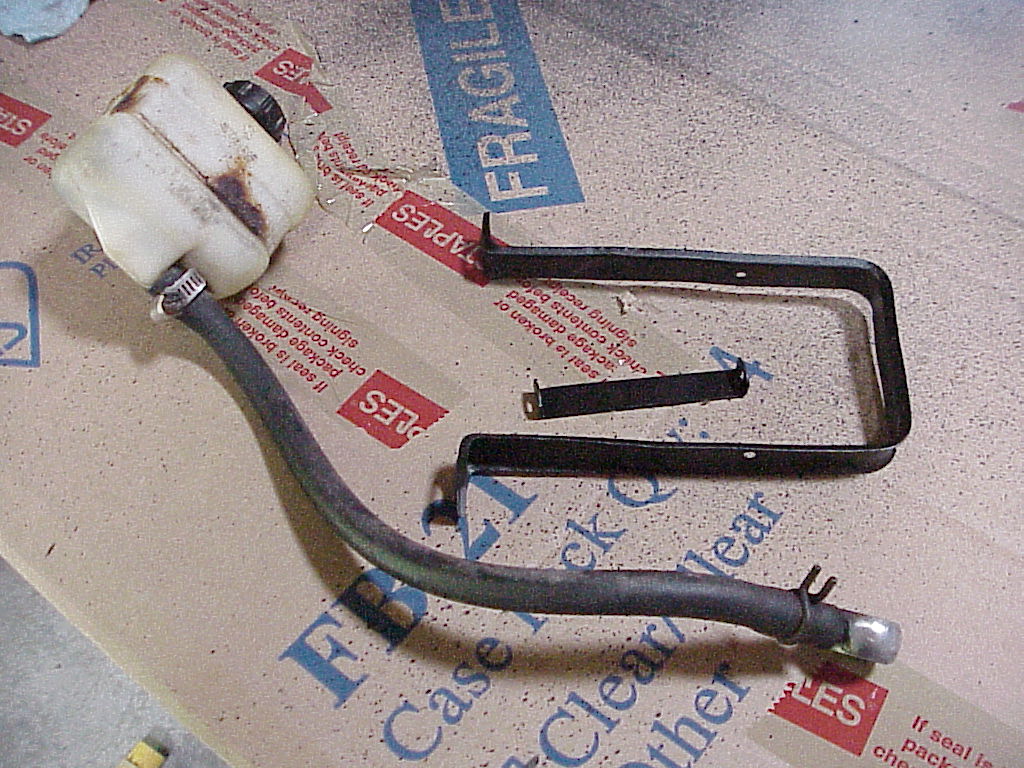
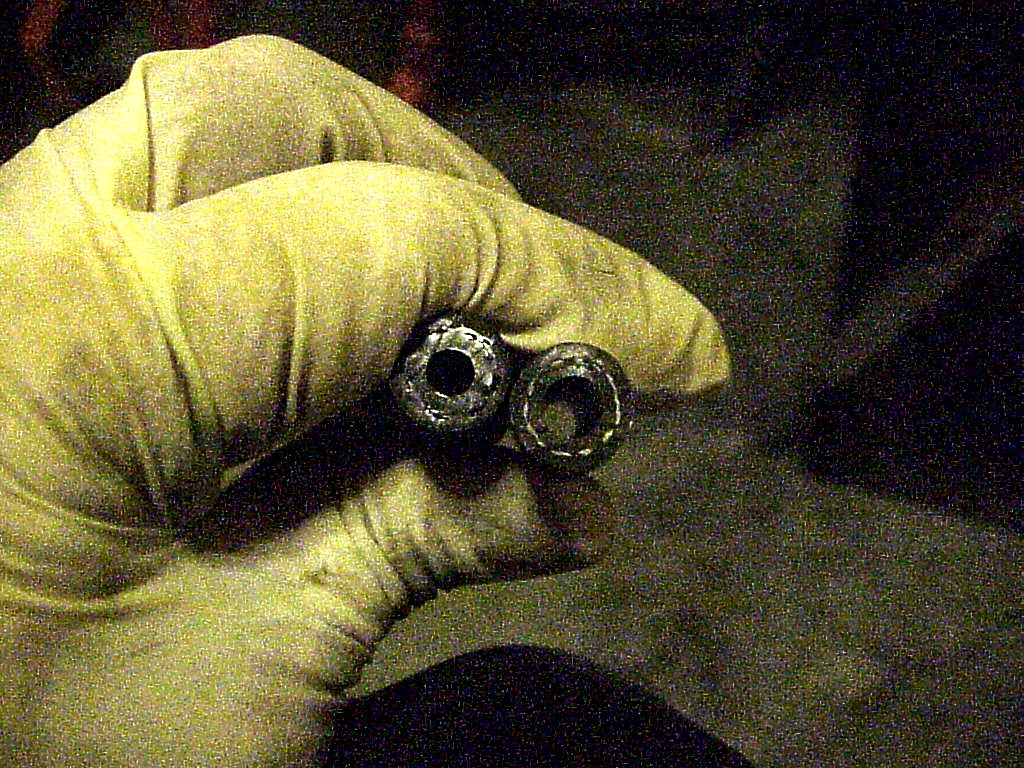
White Post came through with the master cylinder back the morning of the second day after I shipped them out. Of course, as I got ready to install it, I decided that the banjo fittings from the reservoirs would look better cleaned up. It was easier to take off the reservoirs and their bracket so I could take the banjo fittings to the wire wheel. Then I looked at the reservoir bracket and decided it could use a cleaning and painting. I did stop there, but considered refinishing the booster and its bracket. I'll probably regret that because I'll have to take the master cylinder off requiring another brake bleeding session when I do decide to clean up the booster. Here's one of the reservoirs along with the cleaned up and painted bracket and the final installation. You can see why I should have done the master cylinder, but with the date to leave for Monterey nearing, I needed to be finishing projects, not starting new ones.
 |
 |
So what started out to be a disastrous trip ended up not too bad. I'm just glad that these problems surfaced during this test drive and not on the way to Monterey.
I had some other long term tasks that I wanted to complete before leaving. Click here to continue the Monterey trip story.
As a side note, Lowell Brown is entering his 330 GT in the FCA concours in Monterey. When I was taking out my master brake cylinder, I was reminded that it had a tag on it. I asked Lowell if he had one on his car and after checking, he said that it was missing. So he came over a couple of days ago and replicated mine.
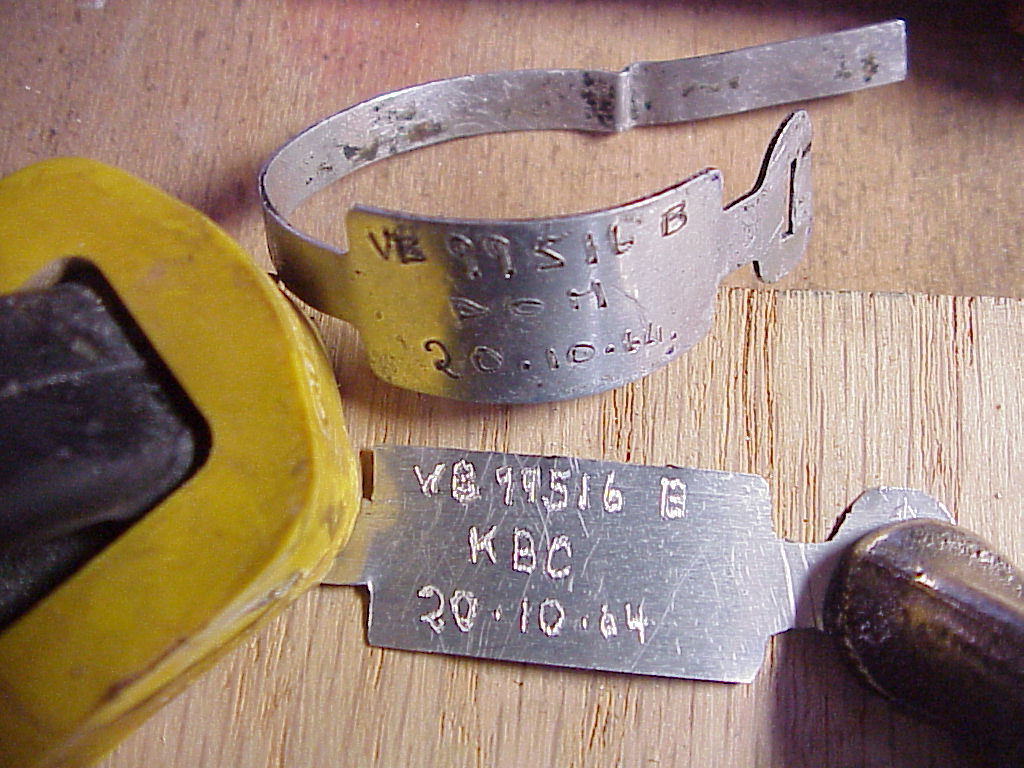
The engraving isn't quite up to par, but no one will ever notice it anyway. From reading the original, Lowell and I decided that the three letters (VOM) in the center were the initials of the person making the master brake cylinder (the ultimate quality assurance tag). Since I was doing the engraving, Lowell said to put my initials there, thus the KBC. We were going to pick a different date as his car was made three weeks later than mine, but there was no calendar handy to make sure we didn't pick a Sunday, so we kept the October 20, 1964 one.
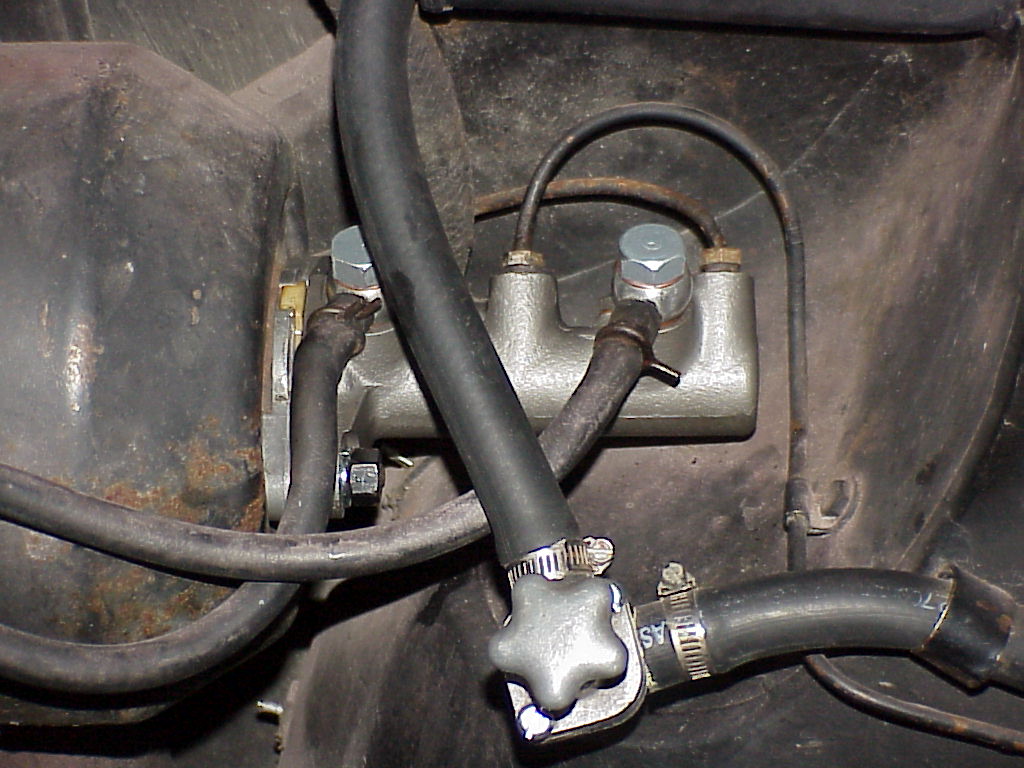
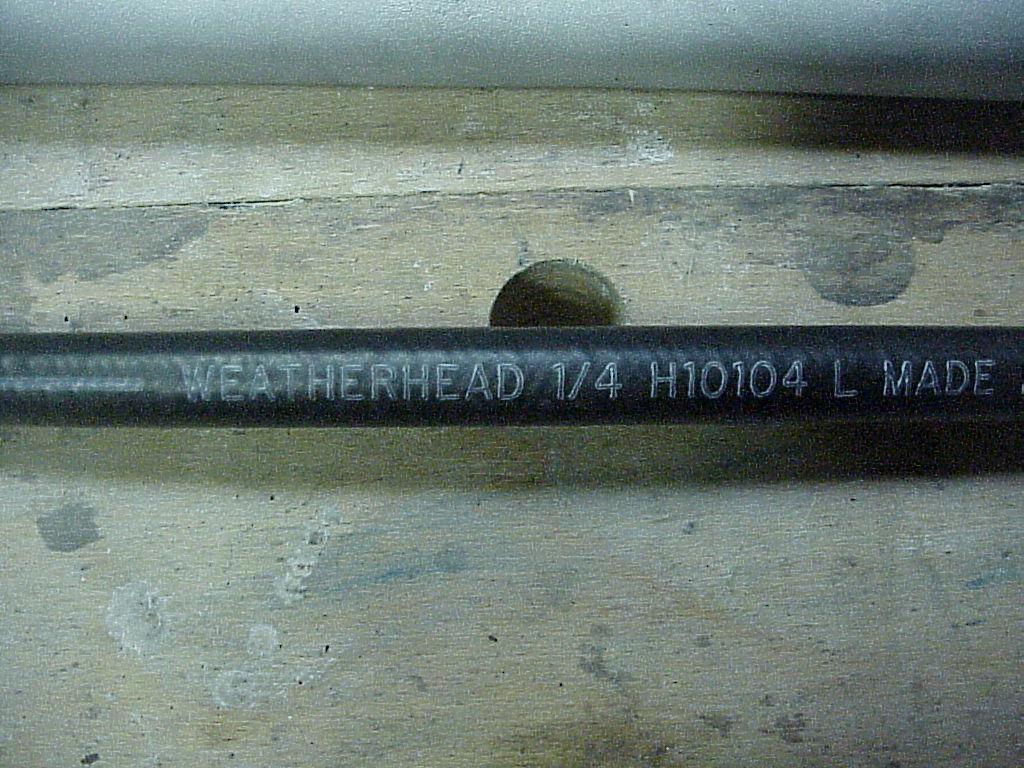
After I got home from Monterey, I noticed that one of the hoses from the brake reservoirs to the master cylinder was leaking. These looked like original hoses and I tried to be careful when I was replacing the master cylinder and cleaning up the reservoir holder, but evidently not careful enough. It wasn't leaking much as that reservoir was only 1/3 empty after 8 weeks, but it was enough to drip onto the exhaust and cause some white smoke every time I started the car. It was difficult to find some replacement hose. After trying a couple of places and talking to a person that had gotten some from a Ferrari parts supplier that weeped, the local Ferrari dealer thought that they might have the right hose at only $60/ft (it takes three feet). I kept looking. I ended up at NAPA, getting some 1/4" ID Weatherhead transmission oil cooler hose. The OD is only .010" larger. The ID is .025" larger but still fit tight on the fittings. Lowell Brown had gotten some from a Fiat/Alfa parts place. However, it was a little thicker and had a waffled surface rather than being smooth so I used the NAPA hose. I used lacquer thinner to remove the lettering from the outside of the hose after the picture below was taken.
|
|
|
|
Original on the left |
I also replaced three of the clamps with the proper wire spring ones. Here's the final result.