Package Shelf
When I got the car, the package shelf under the rear window had been replaced at some point. It was cardboard covered in leatherette with speakers that stuck up above the shelf. The original design was leather over hardboard with the speakers bolted under the shelf and a pattern of holes for the sound. In addition there was a welting around the outside which covered any space between the body and the edge of the shelf.
Here's a couple of pictures of an original from Lowell Brown's
Lowell's shelf had water damage on one end that had been improperly repaired. We ended up replacing the hardboard and remounting the leather and welting on the new piece. During that process I was able to measure all of the metal fittings used to hold the speakers and the shelf to the body. I also got photo copies of the speaker hole pattern along with the dimensions of the welting.
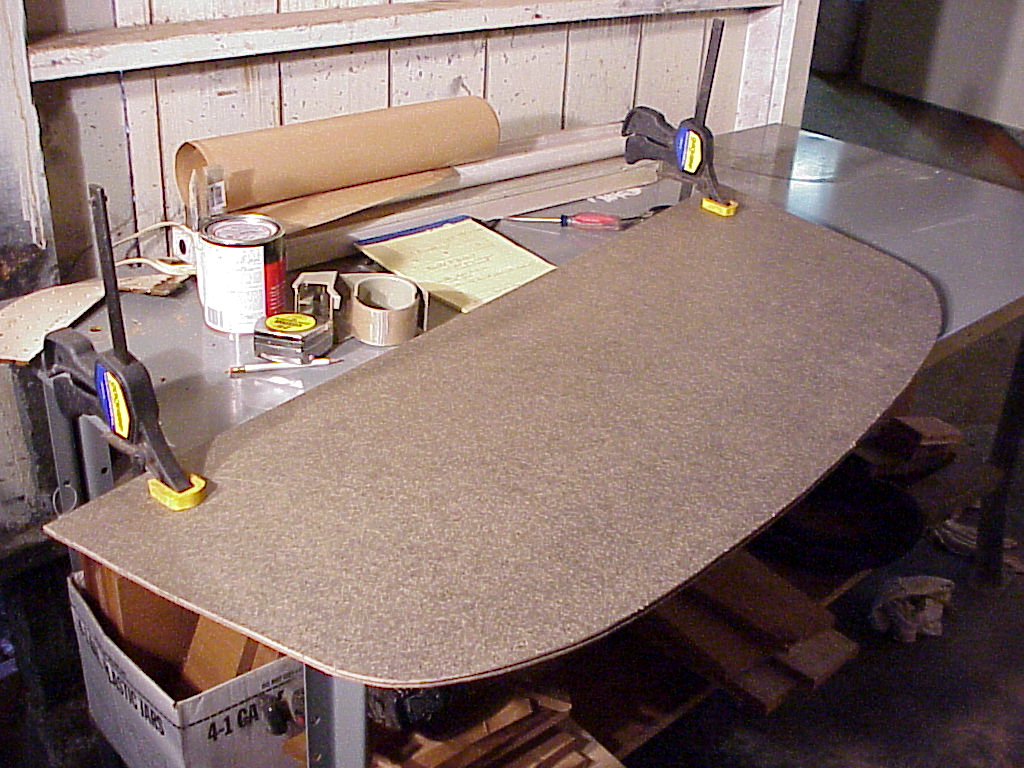
The first step was to cut a piece of hardboard. We actually cut two at one time since we were replacing his too.
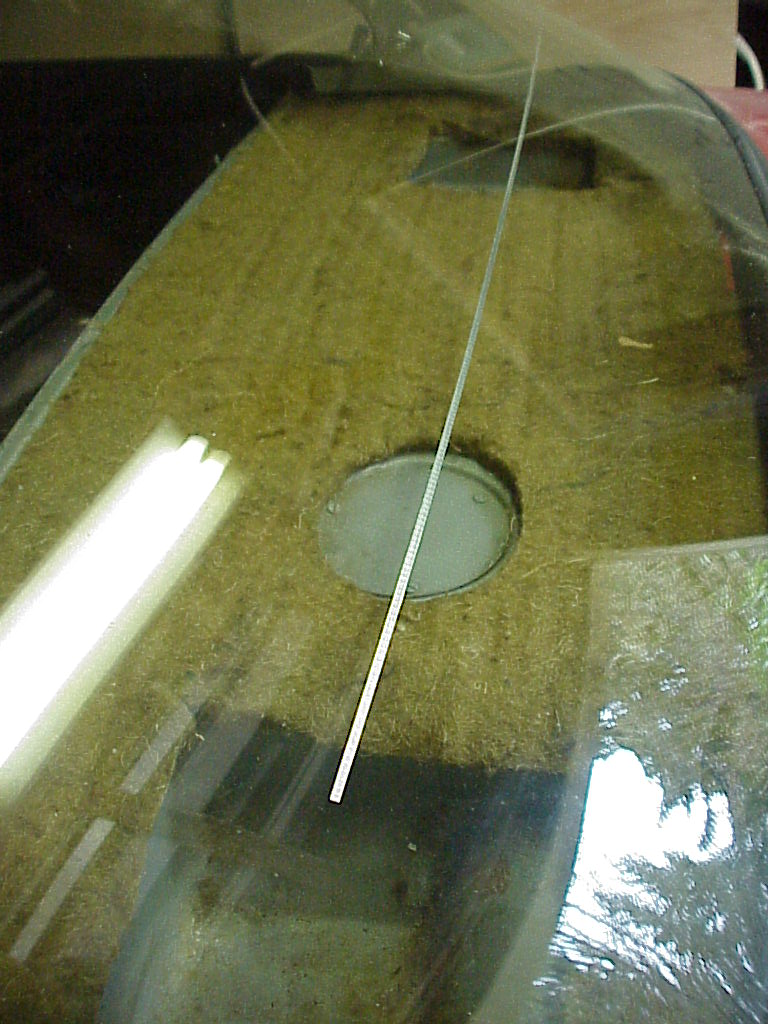
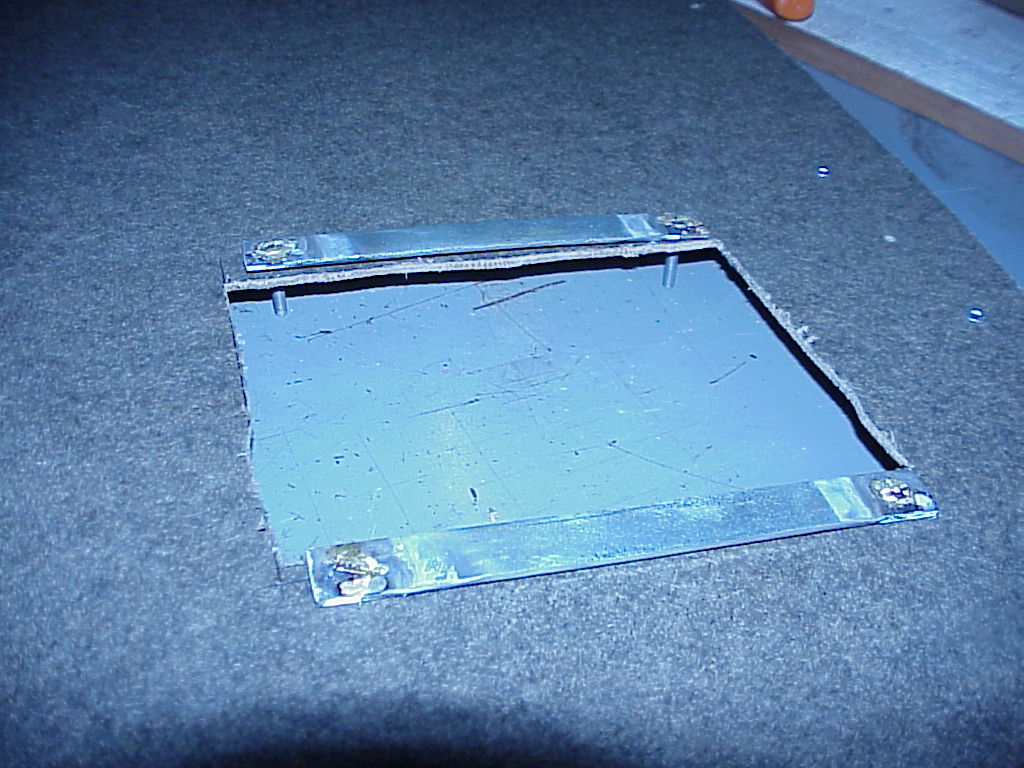
Putting Lowell's package shelf back together was rather interesting. The leather had rotted where the water damage had been. The exposed surface didn't show much damage, but the part stapled over the back was really bad. After unsuccessfully trying to stretch and staple it, we ended up gluing a wide leather strip onto the underside of the original leather around the whole end that was damaged. After that dried, we wet that whole end so that we could pull on the glued strip and stretch the leather back into its original position. We also replaced the foam padding under the leather and the jute padding that fits under the whole shelf. One thing that Lowell discovered was that there is a plate in the body over the fuel sender that can be removed. However, as the sender is quite long, I doubt that it could be removed from the tank without removing the rear window. I fixed my sender when I was working on the leaks in the tank, so I hope to never have to find out. Here you can see the plate through the rear window.
For my package shelf, I had to do everything from scratch. This included the panel, speaker brackets, hold down brackets, foam padding, leather with the hole pattern for the speakers and the welting around the outside.
I had to make the brackets for the speakers along with those that bolt through into the trunk that hold the shelf to the body in the rear. These were strips of sheet metal that have flat head machine screws soldered to them.
 |
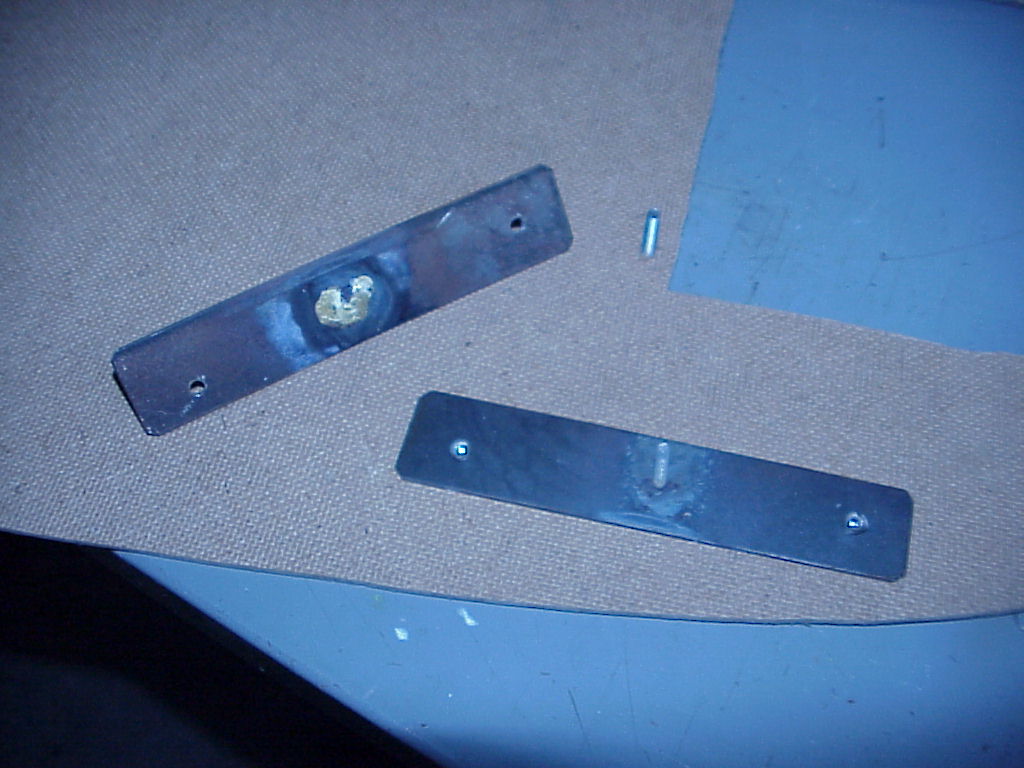 |
| Speaker Brackets Four of these, 3/4" x 7" x .080 sheet metal FH screws 5 x 30mm. |
Hold Down Brackets Three of these, 1 1/8" x 6 1/4" x .080 sheet metal FH screws 4 x 30mm. |
The speaker brackets just fit through holes in the hardboard and stay in place by the weight of the speakers. The mounting brackets are riveted to the hardboard.
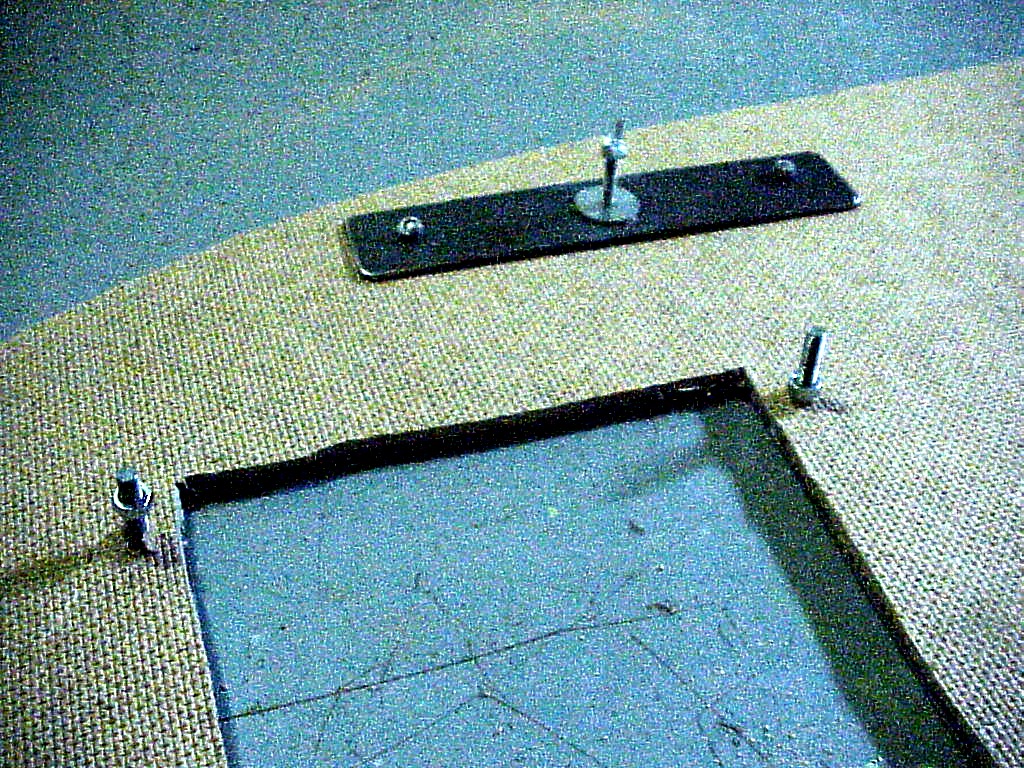
The hold down brackets are riveted to the underside of the panel with 3/16" pop rivets. The three studs stick through into the trunk where washers and wing nuts hold the panel in place. The speaker brackets stick through from the top and the speakers then supposed to be held to the panel with washers and nuts. Now since the brackets match Lowell's original, I'll probably have to make plates that screw onto the brackets that allow attaching the speakers to them.
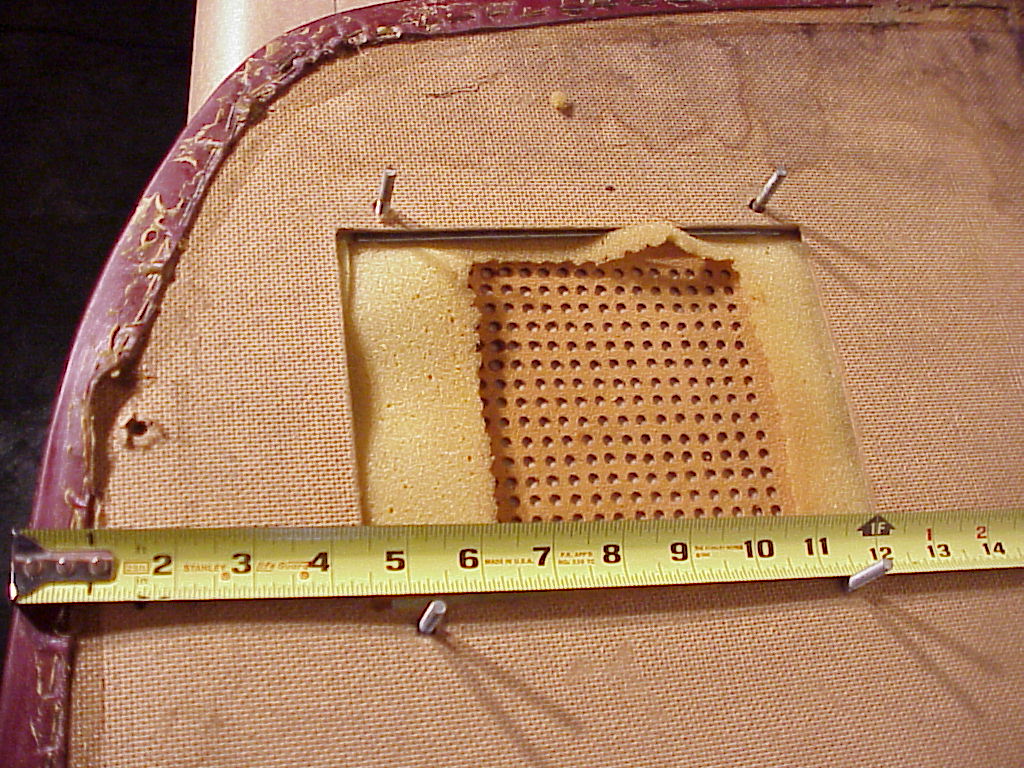
The 1/8" foam padding was spray tacked to the hardboard just to prevent it rolling or bunching up under the leather as I stretched and stapled it. Then it was time to punch the holes for the speakers. The pattern is 15 by 16, so there were 480 holes to punch through the leather, each exactly in the right place. I had photo copied Lowell's leather when it was out so I had the pattern. I also had measured the overall location from the end and side of the shelf.
 |
 |
| Hole Pattern Location | Photo Copy of the Hole Pattern |
After much thought on how to align and punch the holes, I ended up drilling a full pattern in 1/4" steel with the holes sized to fit the outside diameter of the 5/32" hollow punch. I used steel because the center to center distance for the holes was .300" and the drill used was .281". So there was only .019" left between each hole. Wood or aluminum would have fallen apart in the center. My neighbor has a milling table on his drill press, so it was easy to accurately index each hole and row .300" from the previous. However the time to spot drill, change to the drill bit, drill the hole, change back to the spotting bit and index to the new location for 240 holes wasn't trivial. It took several hours.
 |
 |
| Partially Drilled Hole Pattern | Ready for Punching |
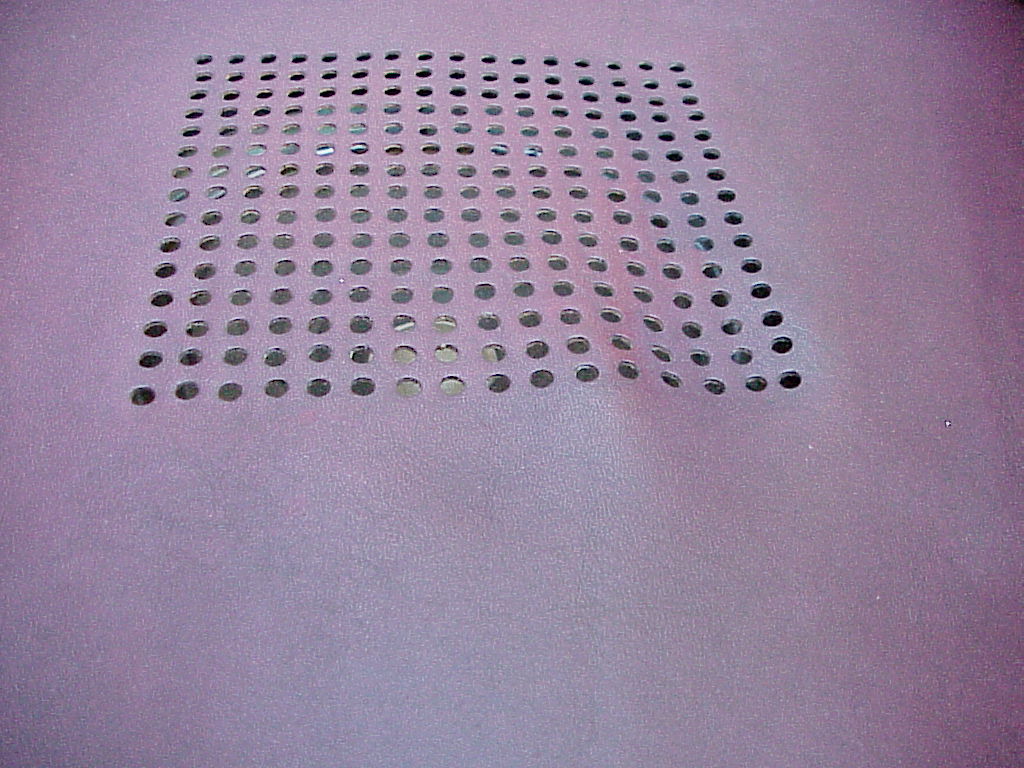
Then it was just a matter of using the hollow punch, through each hole for one speaker and then the other. I decided to punch the holes after the leather was mounted and stapled to the panel. That way they would be in the right place and not get skewed when the leather was stretched. 480 holes later, here is the result.
 |
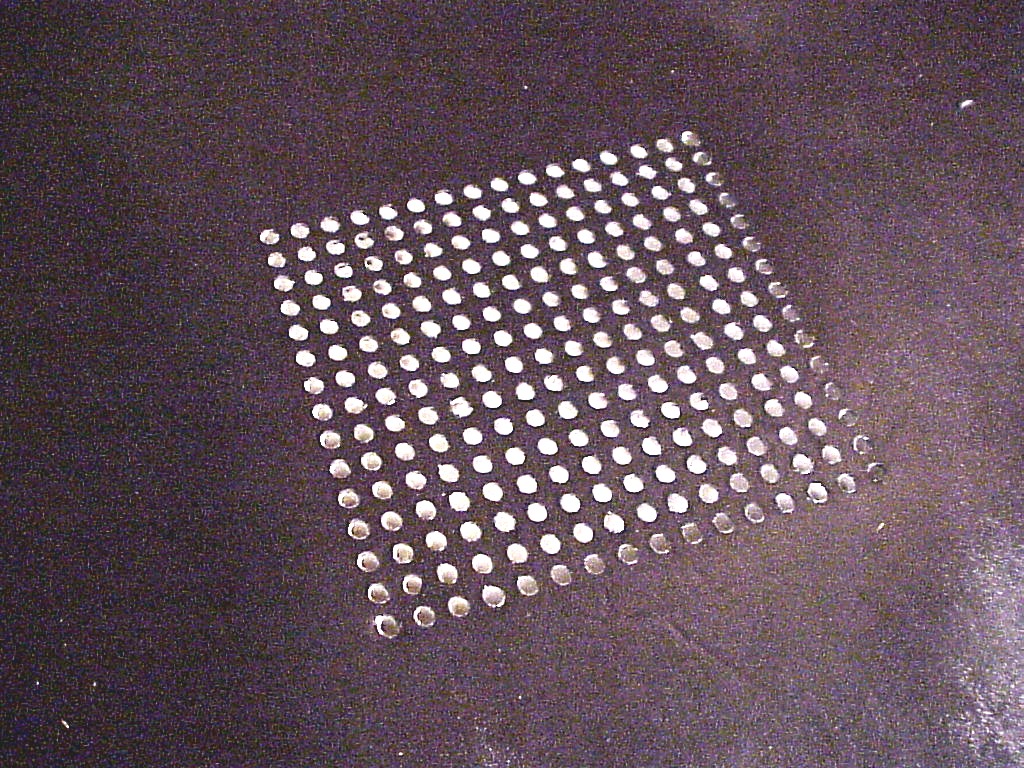 |
| Punched Out Holes with Pattern in Place | Finished Pattern |
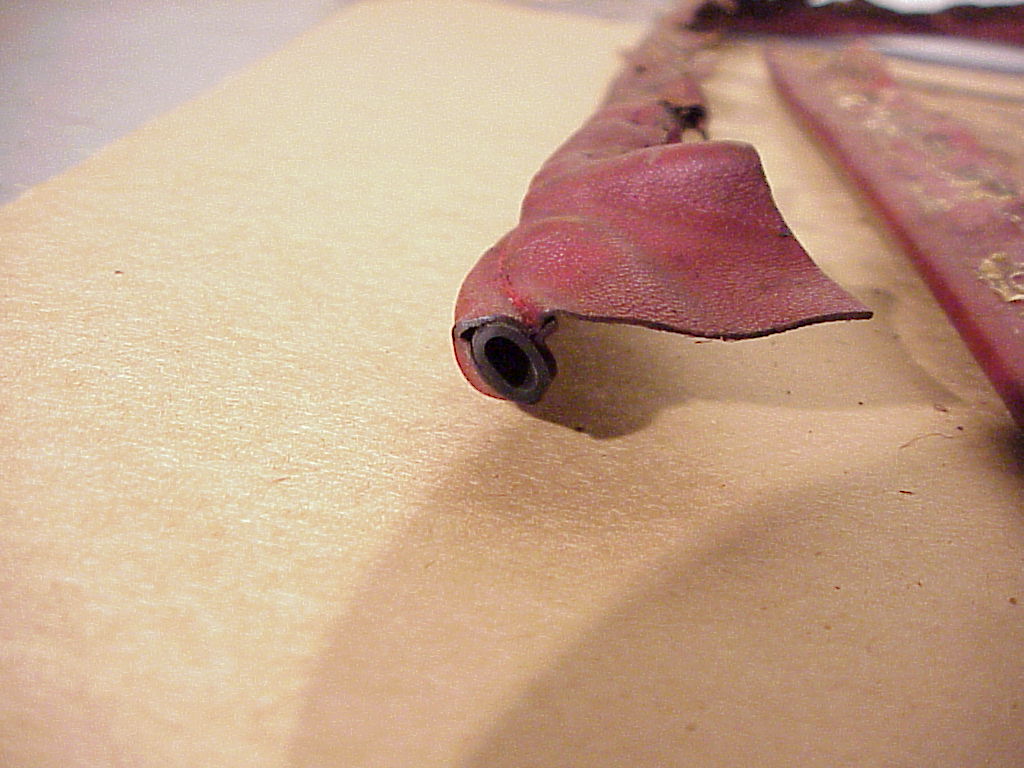
I also had to make the welting (actually my wife did all of the sewing). The original was a soft rubber hose about 1/4" OD that was sewn inside a long strip of leather. I ended up using soft nylon rope which had about the same consistency. The welting ends up being 79" long as it is one piece from the front edge by the back seat around the back and then forward to the back seat on the other side.
 |
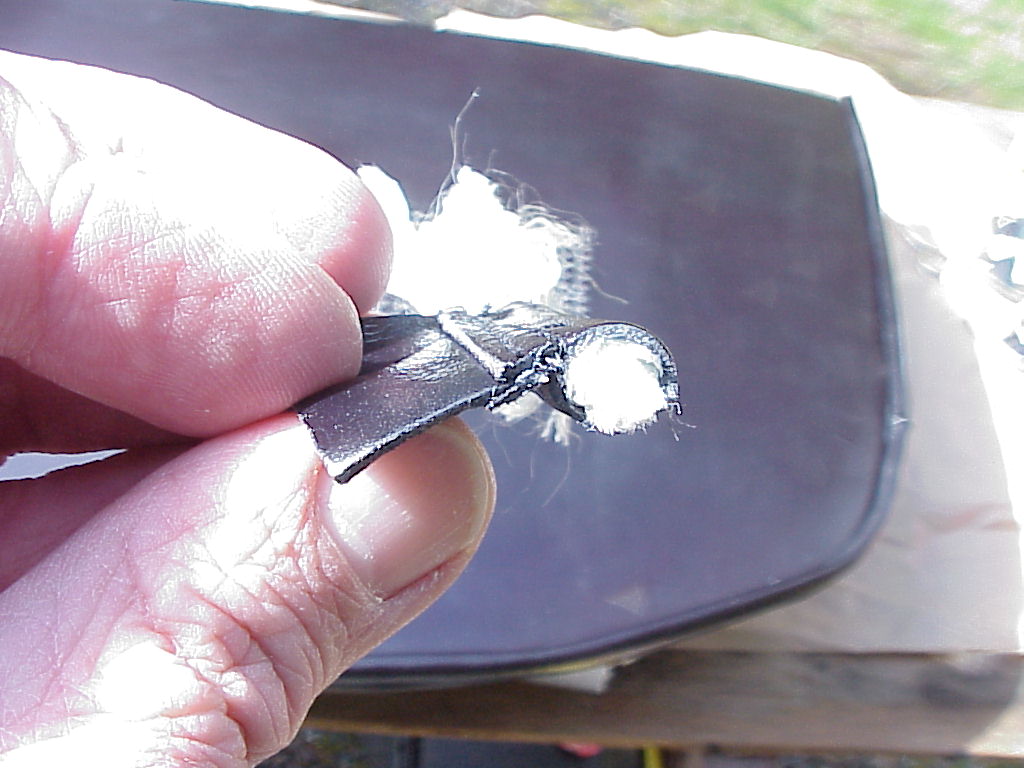 |
| Original Welting | My Reproduction |
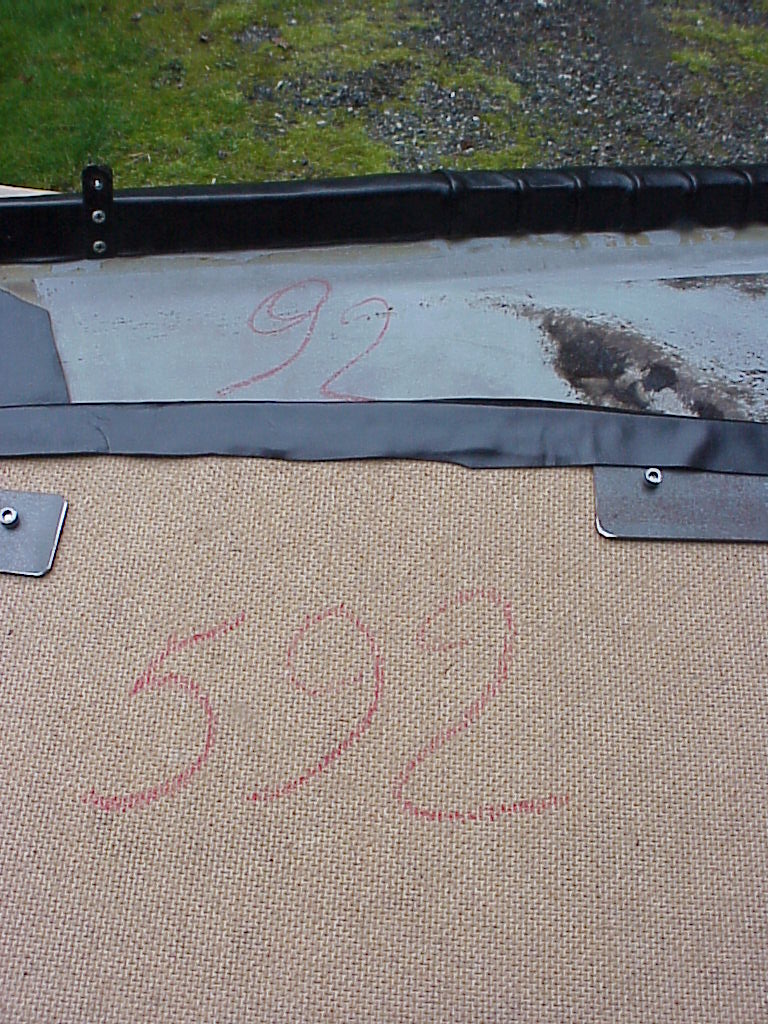
The welting was then glued onto the package shelf. The old package shelf had 6x9 inch speakers mounted with the grille being above the shelf surface. Since the new shelf has the speakers mounting entirely underneath, these speakers wouldn't fit into the cavities in the body. So a trip to Radio Shack got me a pair of 6½" round speakers that did fit. Of course, I had to make mounting plates to fit these to the stock brackets. Mounting the speakers completed the package shelf and it was ready for installation. The one final thing was using a red crayon to mark the underside with the body number like the original would have been. I used the example on the under side of one of the seats.
 |
 |
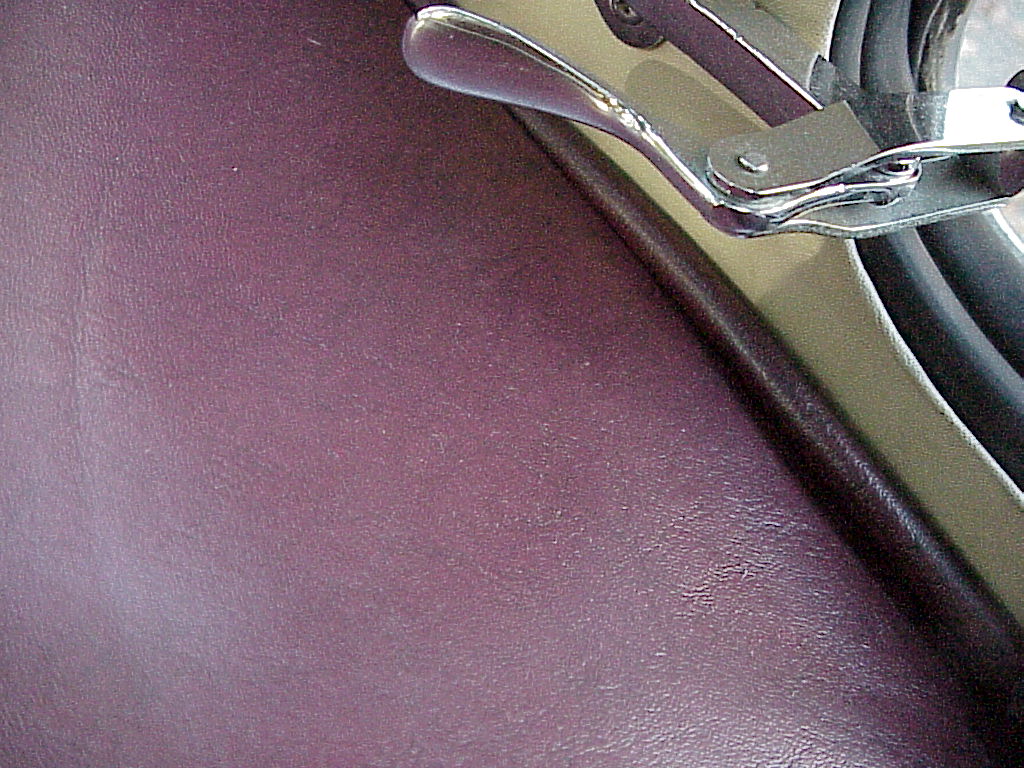
Since the front edge is captured by the lip of the rear seat back, one has to remove both of the seat cushions and the seat back before the old shelf could be removed and the new one installed. It's easy enough to do assuming that the carpet isn't glued over the cushion tabs. The only trick is on the seat back. It clips in at the top so after removing the four screws, pull the bottom out slightly and then push the whole cushion up to release it from the clips. All three cushions have metal tabs that stick out ready to do damage to the interior of the car, so one has to be careful how you handle them.
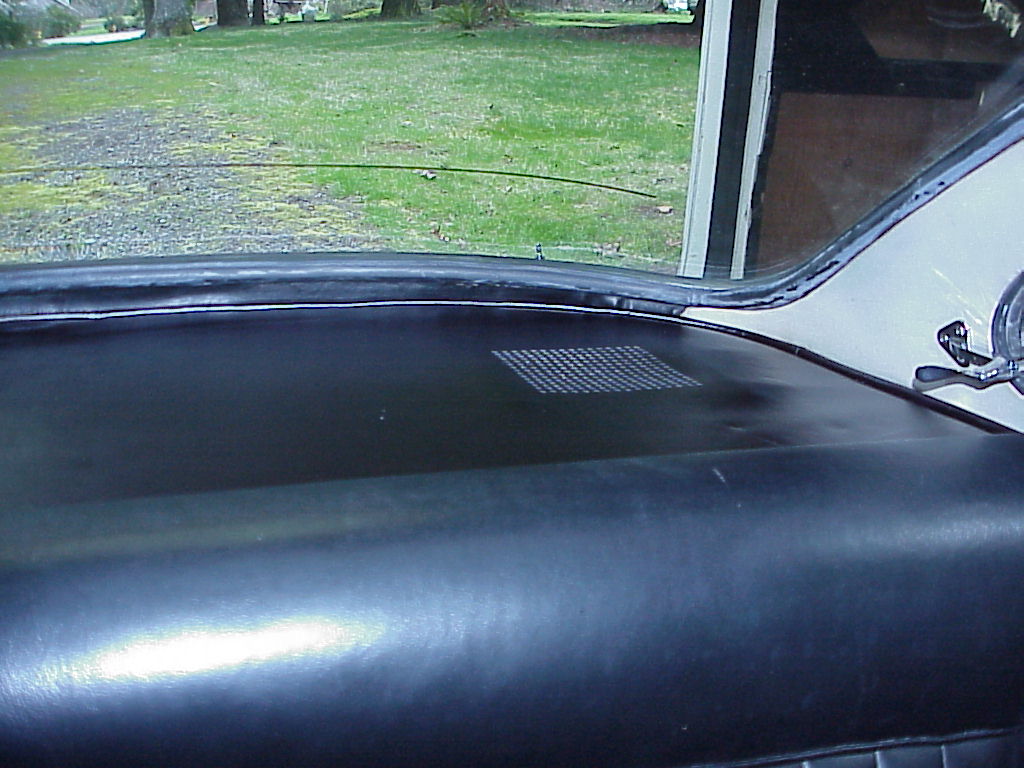
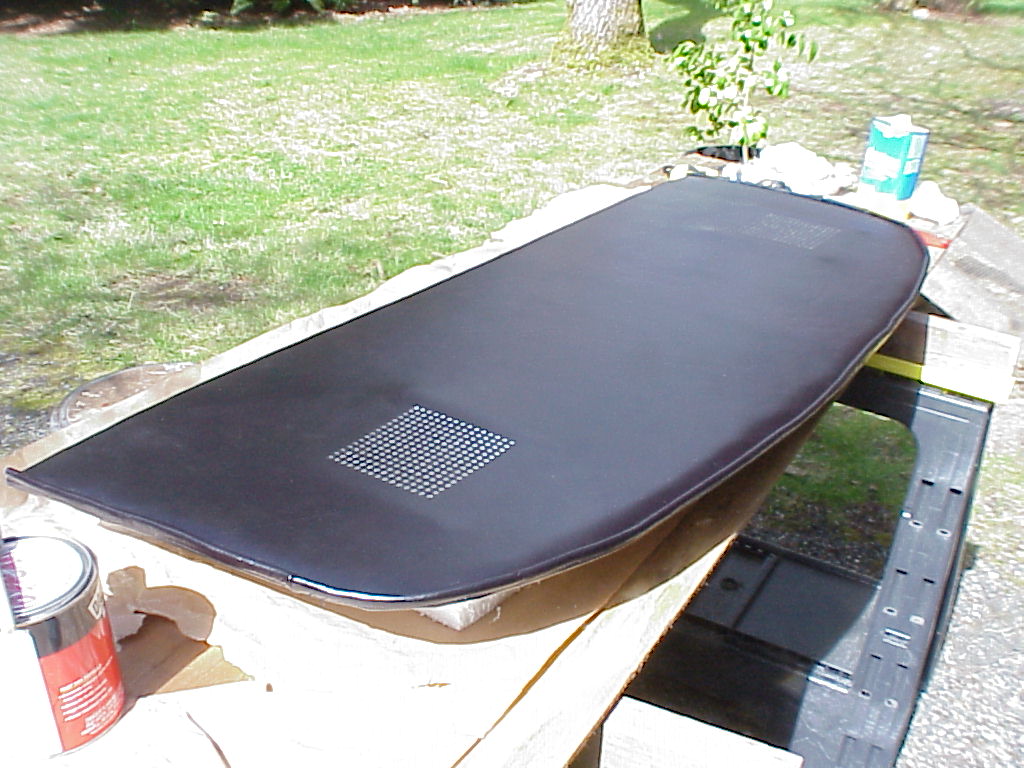
Completed installation
Of course I made full-sized drawings of all the parts so someone else needing to make a package shelf won't need to find and disassemble an original like I did.
Package Shelf R&R
Removal of the package shelf is not a simple pop it out. The front edge is under the lip of the rear seat back. So you have to remove the rear seat bottoms, the bolster between the seats and then the back of the seat. Now the front edge of the package self is now free. In the trunk, you will find three studs with washers and wing nuts sticking down from the package shelf. Once those are free, push up on the studs to free up the shelf. Then you should be able to lift the front and reaching toward the back free up the studs so the package shelf can be removed. Replacement is the reverse, starting with getting the studs through into the trunk.