There's always a problem
A couple of years ago, I was down at Tom Shaughnessy's getting some parts. I had bought a set of new front shocks from Algar, but I couldn't find any rear ones. The ones on the car weren't Konis and I wanted to put the original type in.
Tom has lots and lots of used shocks. However, if you've ever been to his place, organization is not one of Tom's strong points. All of the shocks were in one place, in the lower floor of one warehouse. This floor is more like a crawl space with only about 5' of clearance. Further the lighting is marginal. So we proceeded to start looking through boxes and boxes of shocks, with the majority being for a 308. In the very last box (of course), we did find a set for the rear of a 330 GT, springs (very important as you will find out) and all. As I didn't need the springs, I removed these and returned them to Tom.
I sent these off to Koni a while ago to have them rebuilt. No problems with that. I also got the rubber boots from Mike Dunn and the rubber pads from Dennis McCann as the existing shocks didn't have them.
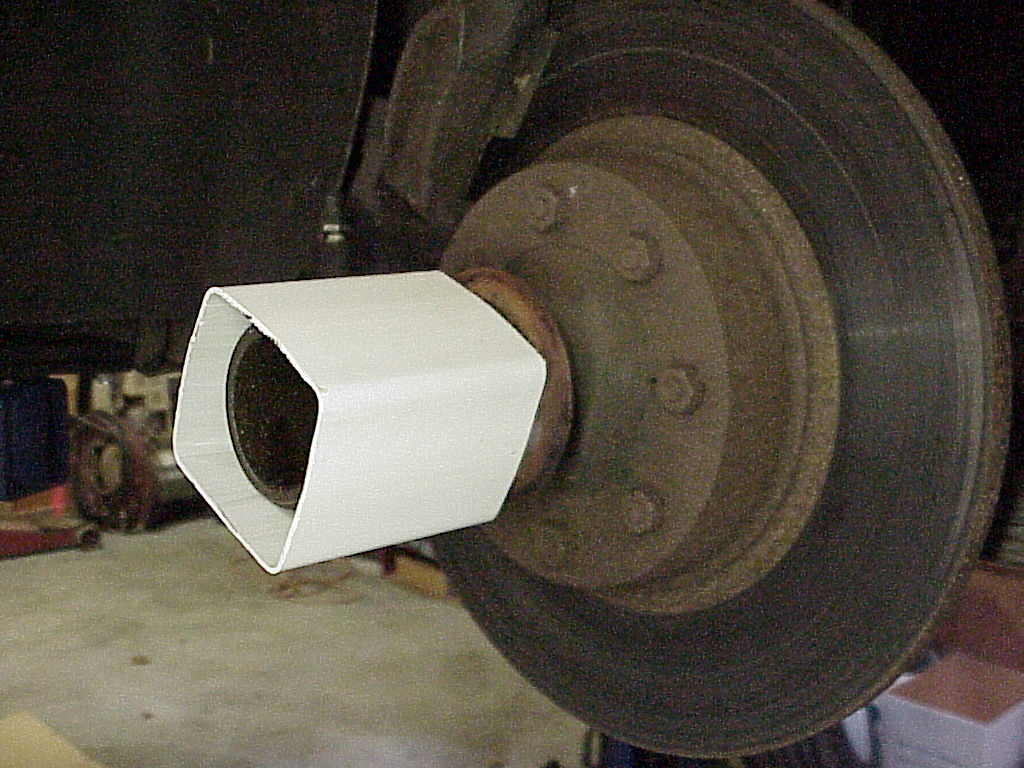
Forward to yesterday. It seemed like a good day to pull the old shocks, move the springs, put everything together and install the new ones. The first thing I did was to make some covers for the axle shafts. I have several sets of t-shirts and sweat shirts that have circular grease marks from leaning on the end of an axle shaft. I measured the diameter and they are about 2 1/2". Then I looked around for some tubing about that size. I found some plastic down spout that was just about right. I cut four of them 4" in length so I now have enough when all four wheels are removed.
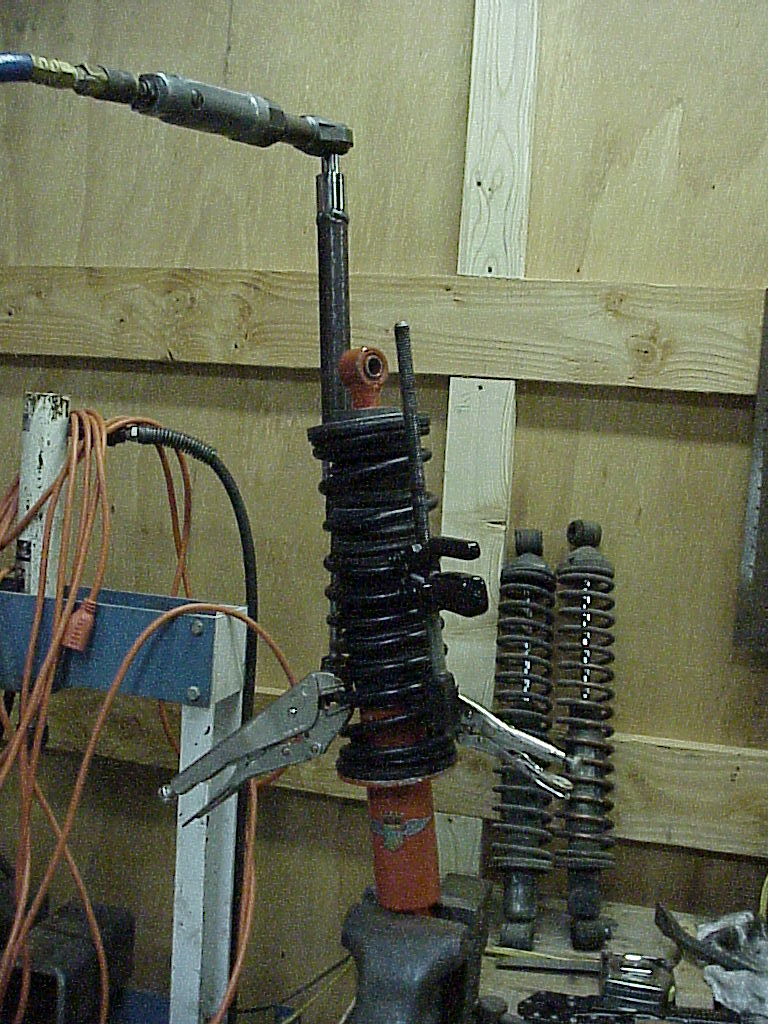
The first hint of trouble on the shocks was after I removed one and compared the old and new shocks side by side:
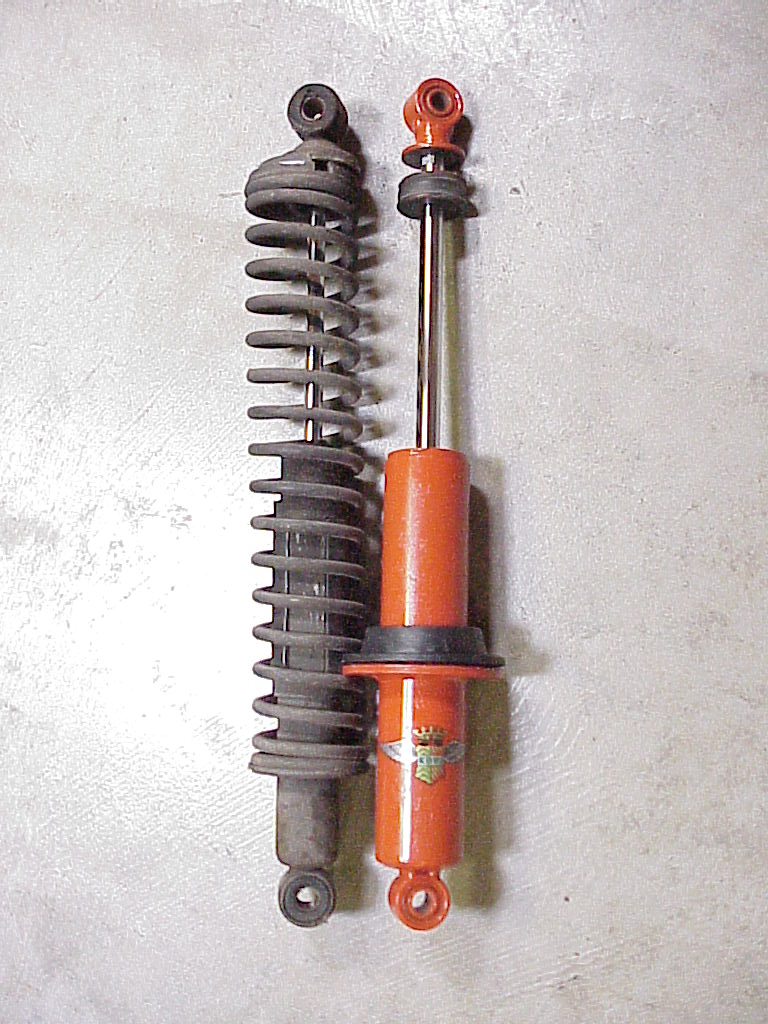
As you can see, the lower bases for the springs are at different points. This means that the spring would be more compressed when installed on the new shock and the car would probably sit higher.
After removing the old spring and comparing the diameter to what was required for the new boot and rubber pads, it was clear that this wasn't an original spring for the car. I called Tom and asked about the pair I had returned to him. It's been two years and Tom has moved around a lot of stuff. However, he had just run across a pair of springs that weren't marked and weren't where he normally keeps springs. He counted the number of coils, measured the outside diameter, height and wire diameter. I compared these to the dimensions of a rear spring on Lowell Brown's 330 GT and they were almost identical. So an email back to Tom has them shipping on Monday.
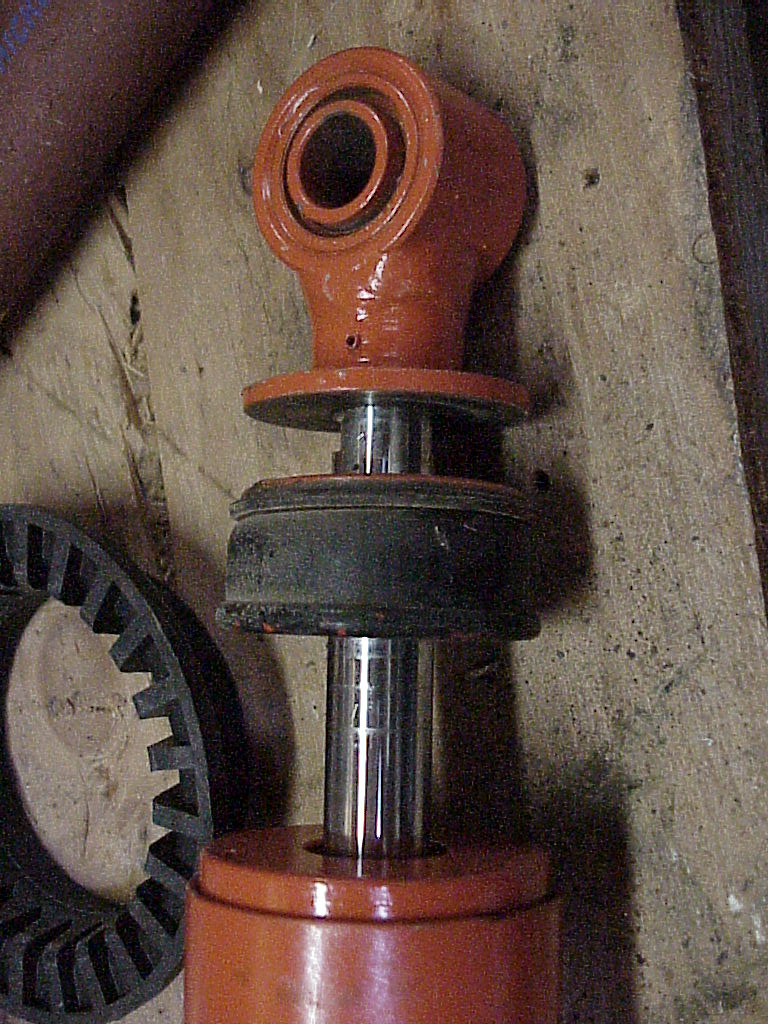
In the meantime, I assembled the new shocks as far as I could. In order to install the rubber boot, you have to remove the fitting at the top of the piston rod. This is screwed on and then pinned with a thin roll pin. You can see the pin just above the collar at the top of the rod.
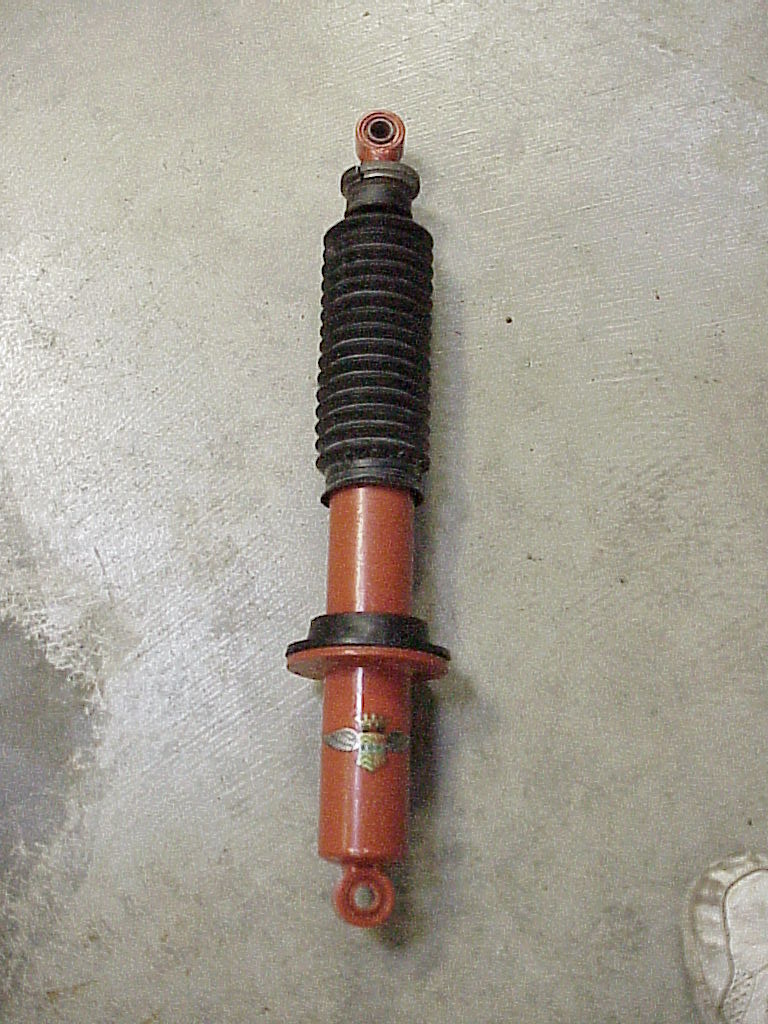
After removing the pin, the top unscrews and you can put on the stop collar and boot on the piston rod. One has to put on the lower rubber pad first as the boot is a little larger than the hole in the pad. I found that I could tighten the stop collar with the boot installed, so I put on the metal fittings that go above the rubber rebound pad, pushed everything tight against the top and tightened the stop collar.
 |
 |
| Boot, Rebound Pad and Spring Fittings | Ready for the Spring |
So I'm stuck until the springs get here. Maybe I'll start working on the bushings and pins in the front suspension. As long as I can't drive the car, I might as well have both ends taken apart.
To be continued.
The springs arrived yesterday and after some cleaning and painting, I put the springs on. These springs are a lot stronger than the old ones, so they made the spring compressors work extra hard.
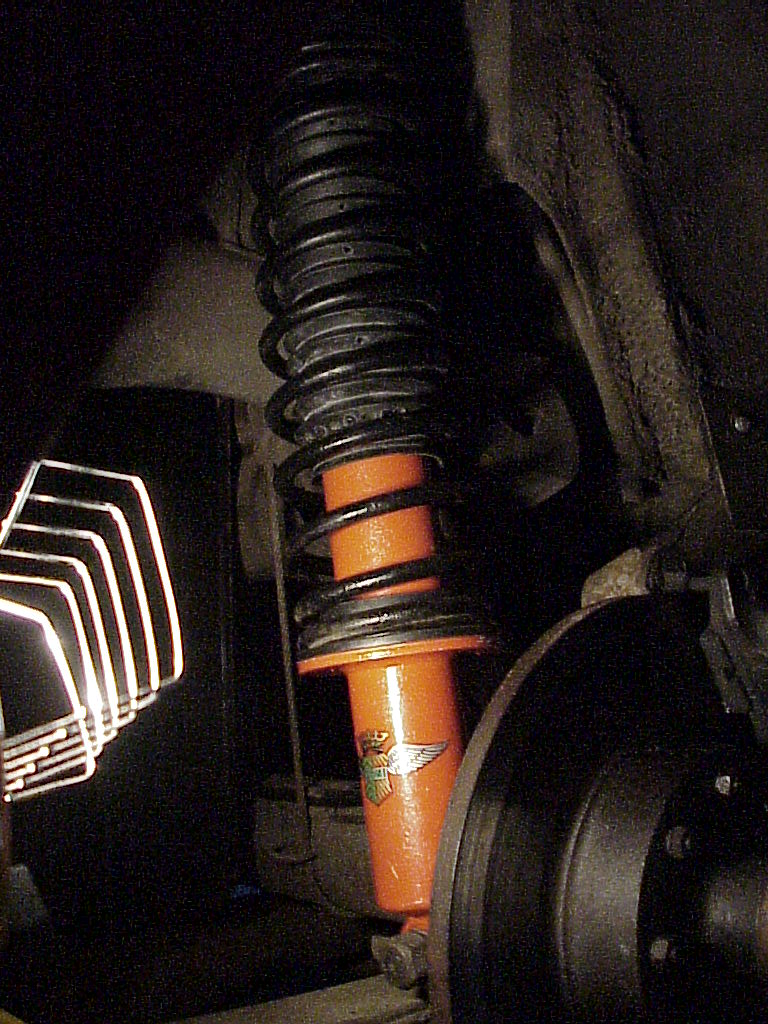
The vise grip pliers are locked onto the spring on the 'downhill' side of each hook. My compressors are so old that they don't have locks built into the hooks that prevent the compressor from sliding down around the spring when there is high tension. I had made a very long socket for these compressors so I can use an air socket wrench to easily tighten or loosen the nuts. I just took a long socket of the right size, cut it in two and welded a piece of pipe in between. You can see it sticking up with the air ratchet on top. The top of the rubber boot is hard plastic and just a little smaller than the inside of the spring. On the first try, I had the upper hooks of the compressors on the same coil of the spring. Once the spring was compressed, I couldn't get the boot worked above the hooks. I ended up having to start again with the hooks on different coils. That way I could move the boot to the side and above the lower hook and then to the other side and above the other hook. Here's the final installation.
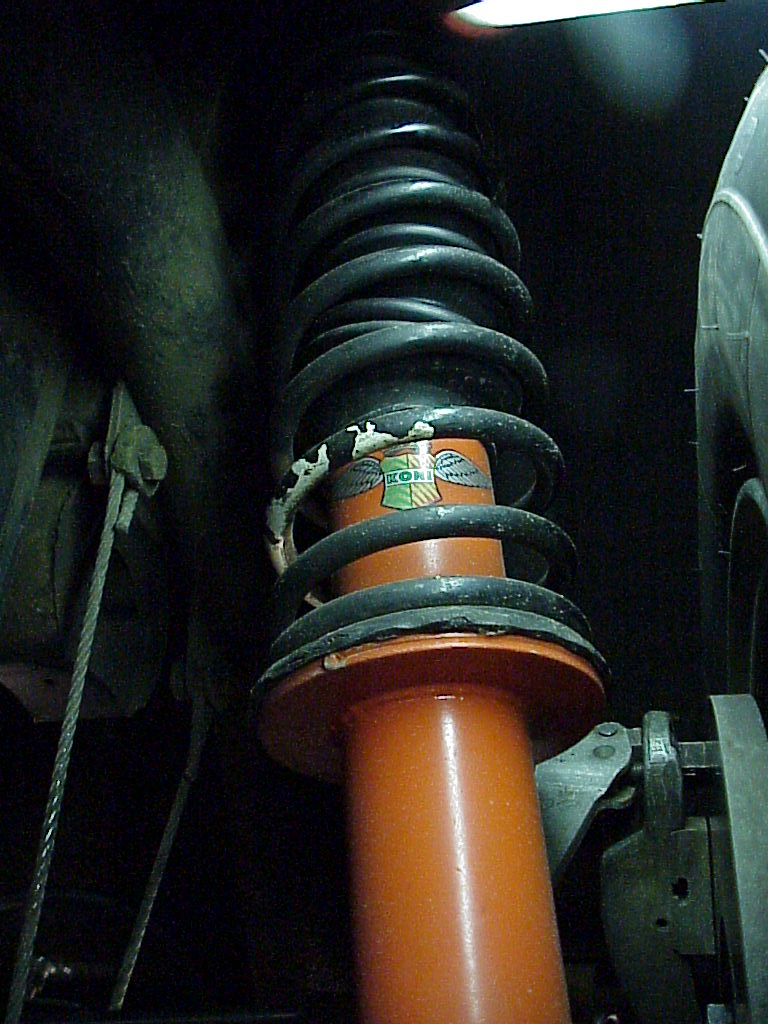
The only thing left to do now is to paint the 'spring rate' color back on the springs. When they were made, each spring was tested for its strength. These were sorted into various categories and a unique color was painted on the springs in each category. During the cleaning, I saw some yellow paint on the 4th coil of each spring. Lowell is coming over today to put acorn nuts on the sump studs on his 330 and he's bringing the paint as I don't have any yellow handy. Carlos Durante (Alfa of Tacoma) told Lowell and I about this when Carlos was working on Lowell's 330 a couple of years ago. Lowell's springs are marked with white paint. One wants both springs to have about the same compression rate or the car would lean to one side at rest or lean more on turns to one direction than the other.
 |
 |
| My yellow markings | Lowell's white markings |
It's also interesting to note the position of the Koni stickers. Both Lowell's and my shocks were rebuilt by Koni in New York within the last 2 years. I guess they are just like Ferrari, it gets done in whatever way the mechanic wants to do it.