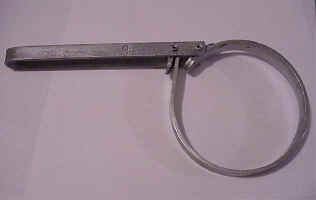
Making Reproduction Oil Filter Wrenches
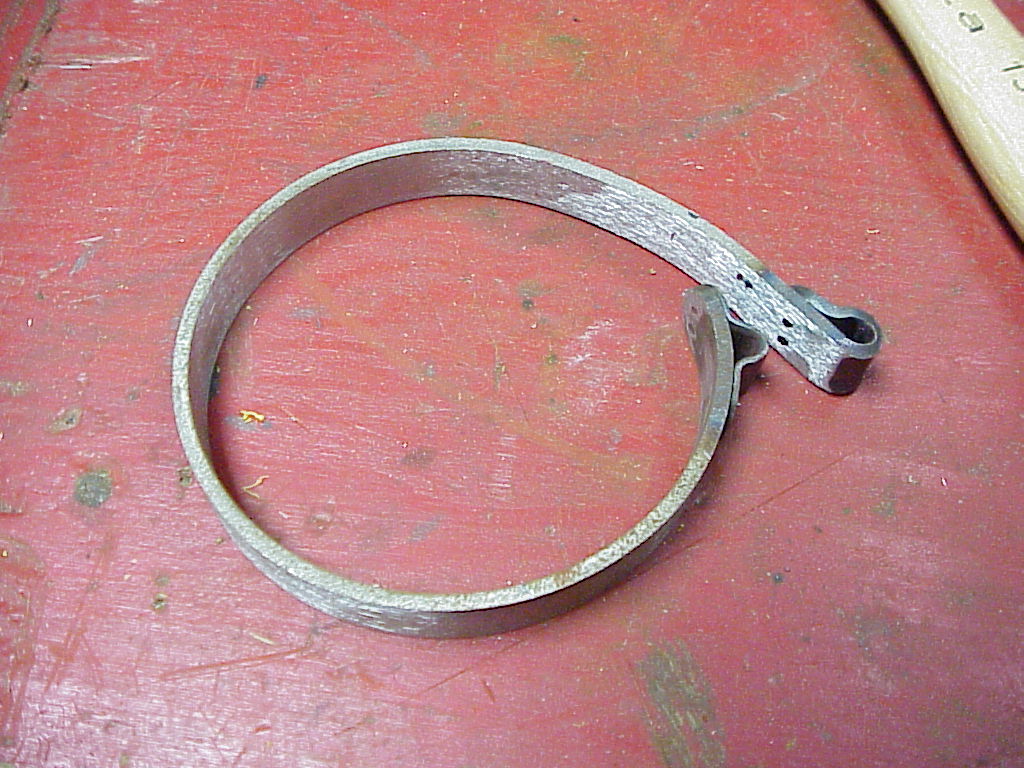
In the process of searching for various tools to fill in my toolkit, I realized that making the oil filter wrench wasn't too difficult. It's really only three pieces of metal riveted and welded together. I was able to take dimensions from an original (courtesy of Lowell Brown) so I had the metal thicknesses, rivet lengths and everything else needed to accurately make a reproduction.
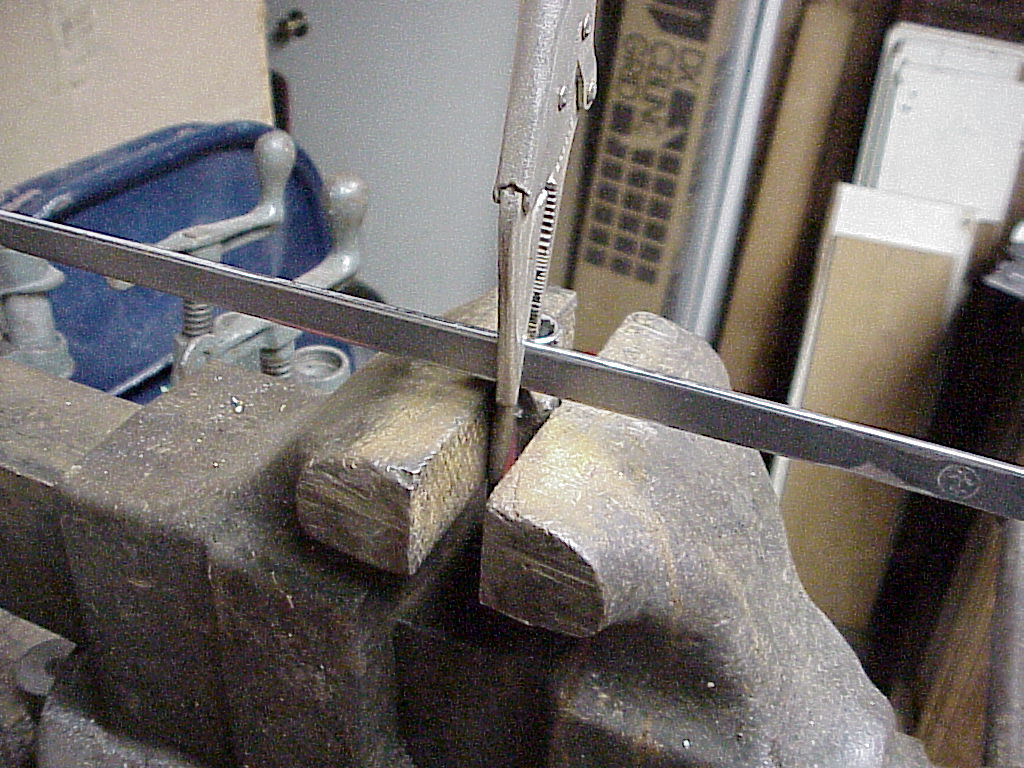
The strap is one piece with one end bent and looped back on itself with space for a rivet. The first pass at making the straps didn't work out. I had the metal sheared to the proper width, but didn't realize that the original had square edges. The shear leaves a rolled edge on one surface and a sharp edge on the other. By the time I would have surfaced the edges to make them square, they would have been too narrow. It also would have been very hard to get the edges square and straight. So I got some more material and located a company that specializes in water jet cutting. They cut the straps to the exact width and the edges are all straight and square. The next issue was how to bend the strap to form the loop at one end. After a couple of experiments, I made a jig with a pin that I could bend the end around. This bent the end 180º and by reversing it in the jig, I could use the vise next to the pin to clamp the end tight back against the rest of the strap. Of course the end had to be rounded on the grinder before doing this.
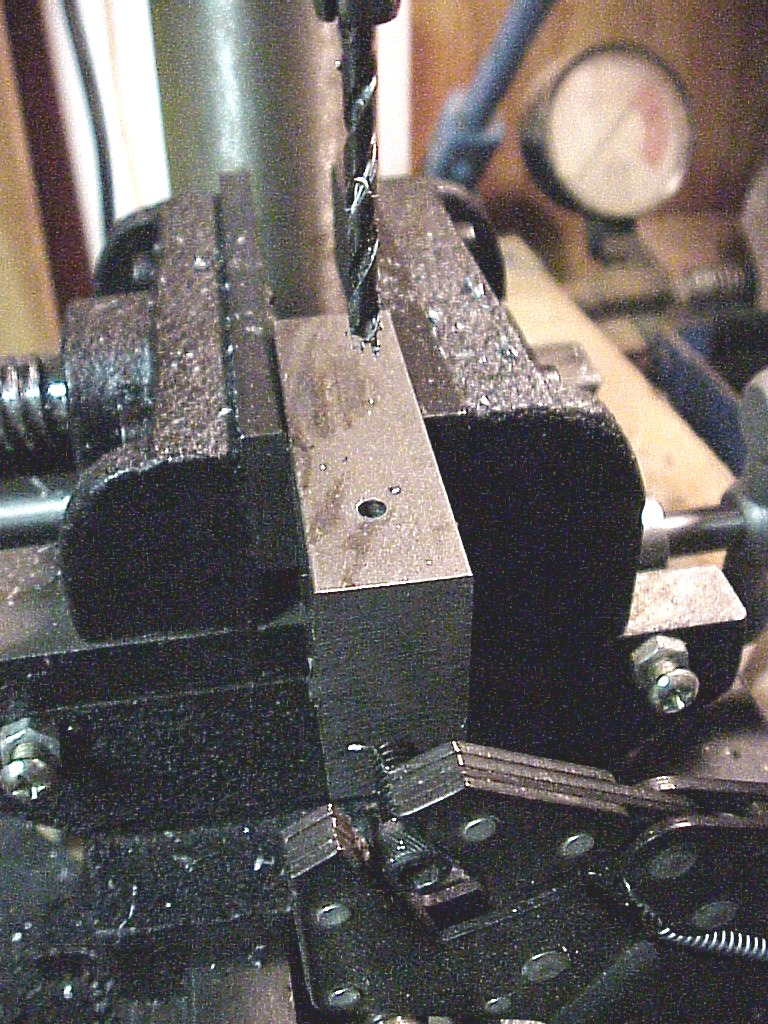
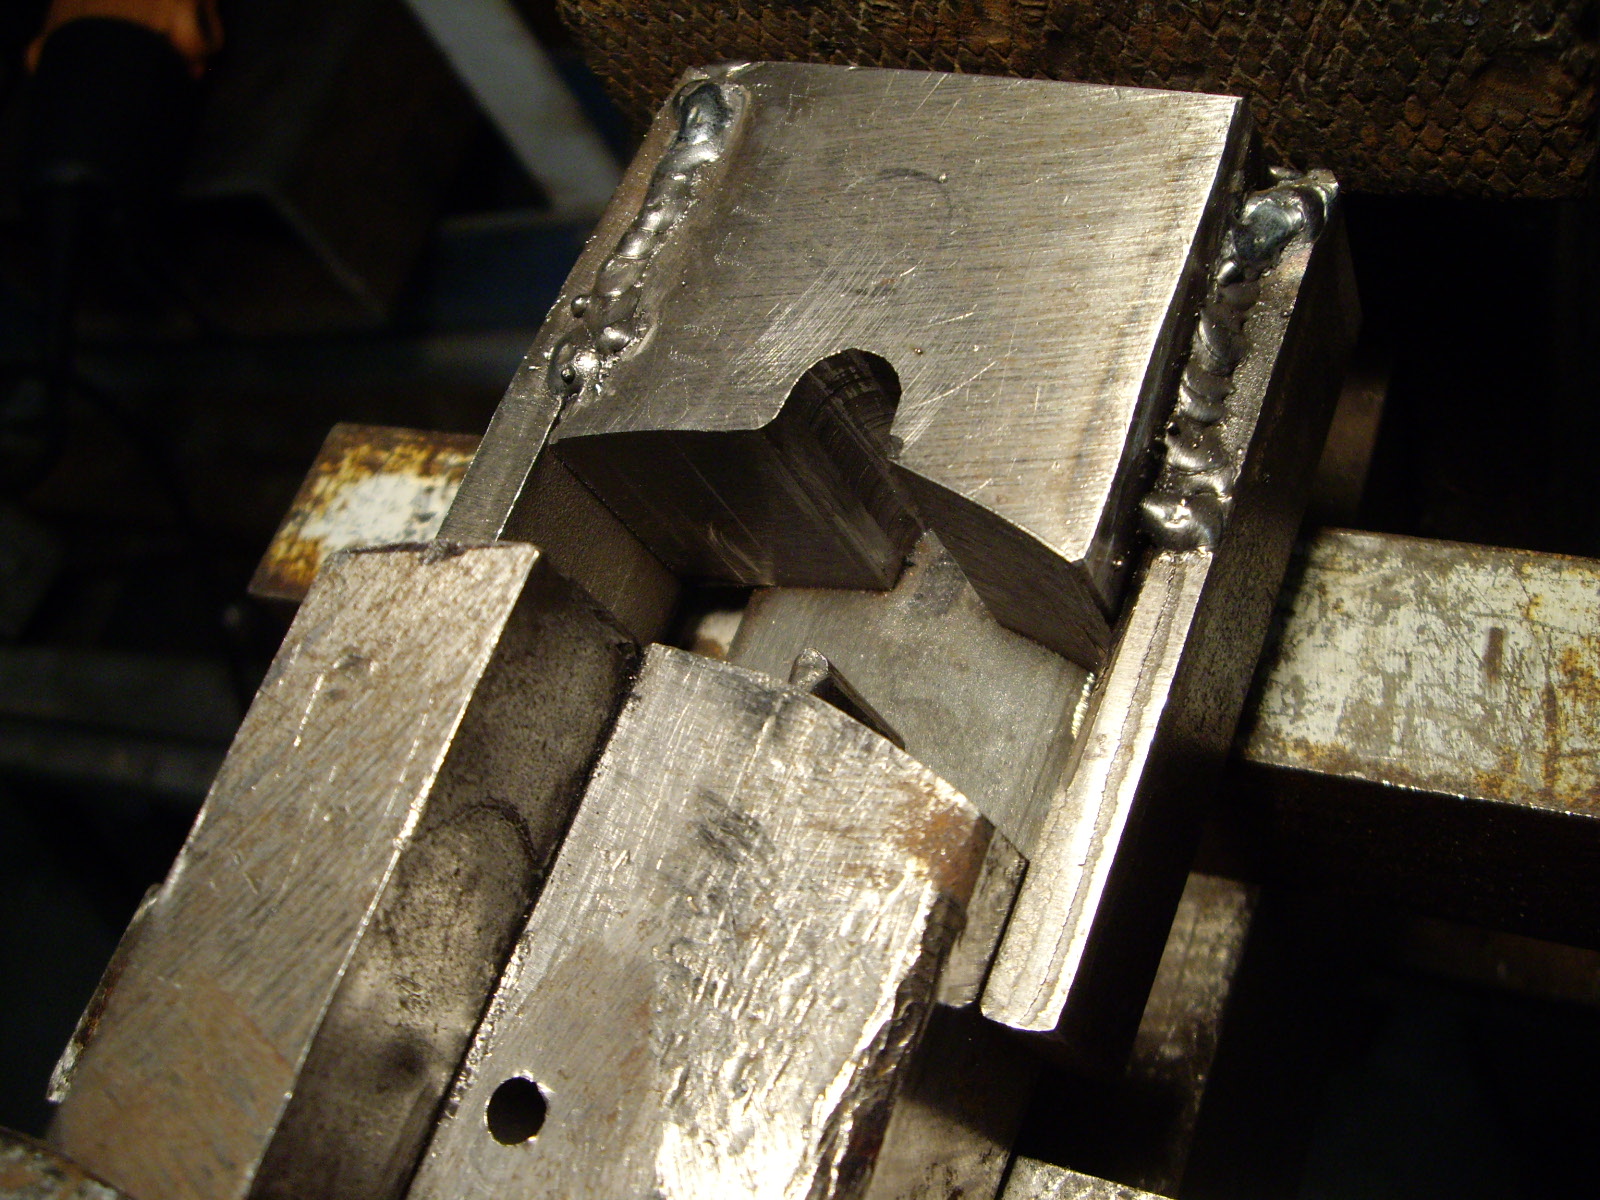
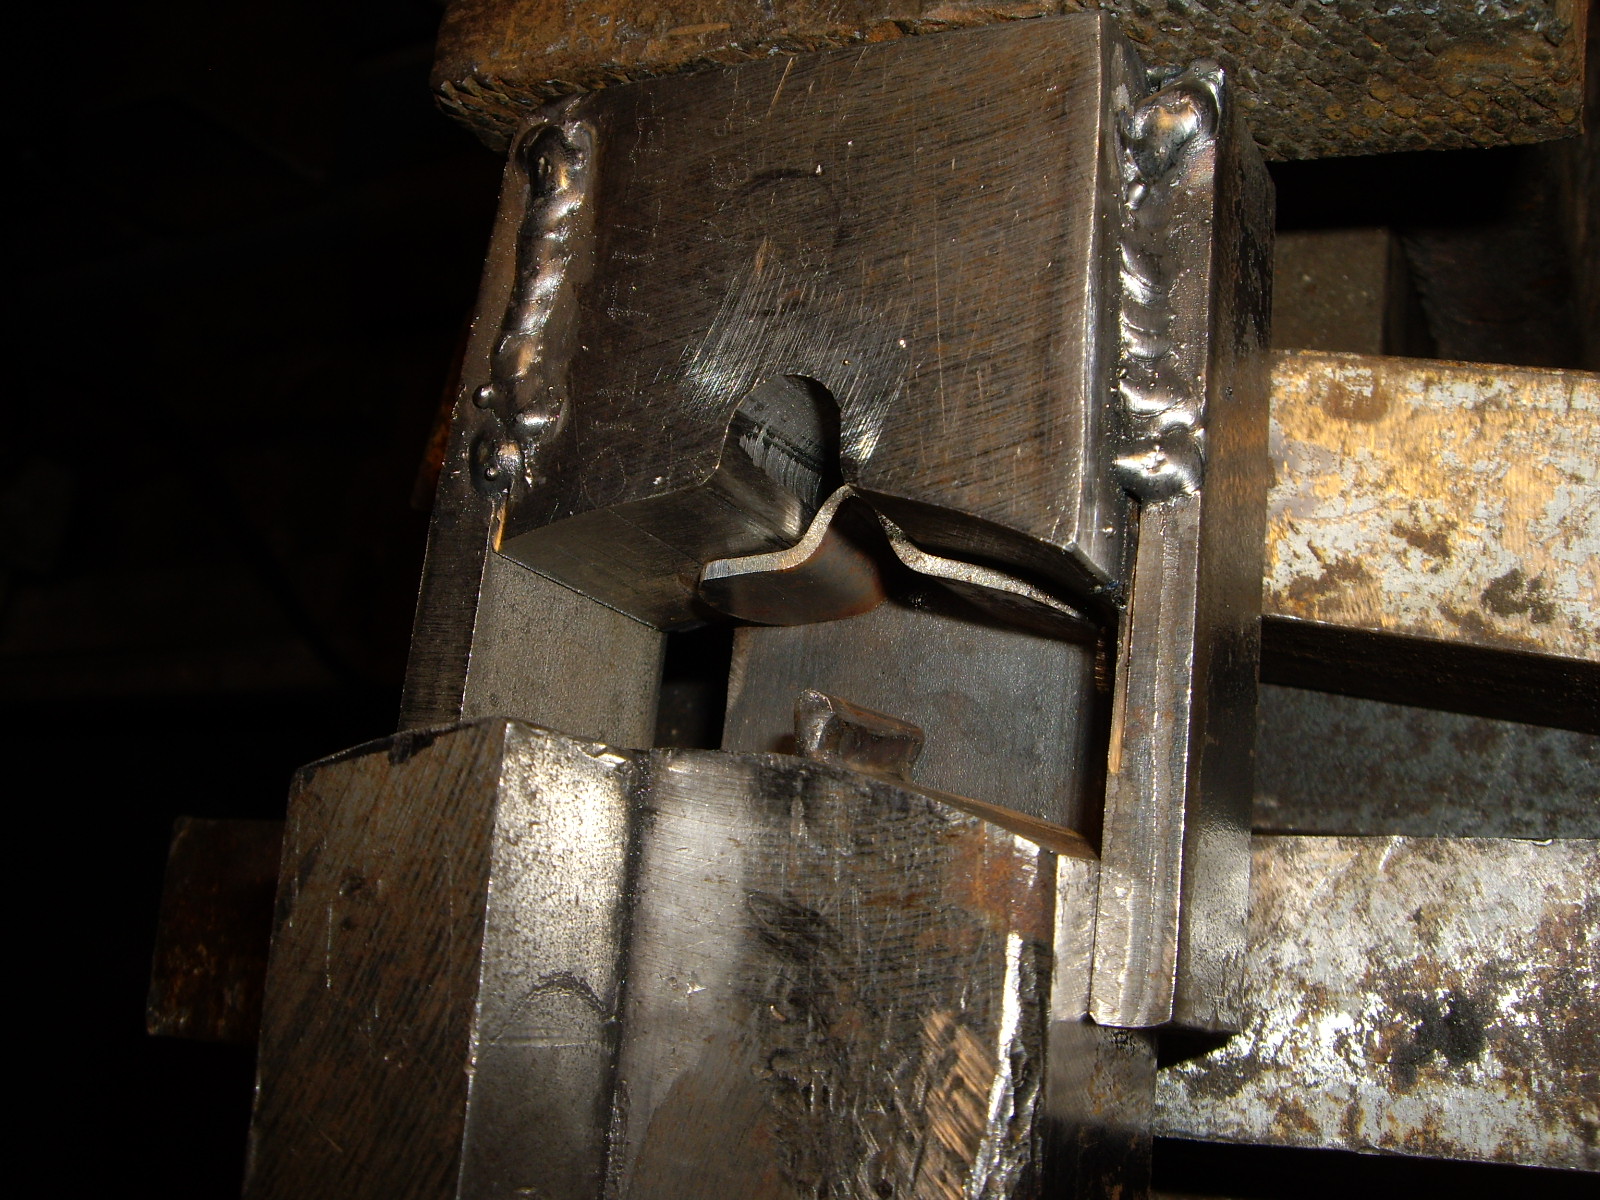
The other end of the strap has a metal bracket spot welded to provide the place for the rivet to fit. Another jig was made that would press a piece of metal into the U-shaped bracket necessary. Then the bracket had to be bent and one end had to be rounded before it was spot welded onto the strap.
Both ends of the strap had to be spot welded, but the end with the bracket had to be bent before the welding as it wouldn't bend evenly once the bracket was welded on. So I made a small bend using the outside of a 1 5/8" socket and sent all of the straps and brackets out for welding. I couldn't make the complete bend at that time as it would interfere with welding of the bracket. After the welding was complete, I rounded the end with the strap on the grinder.
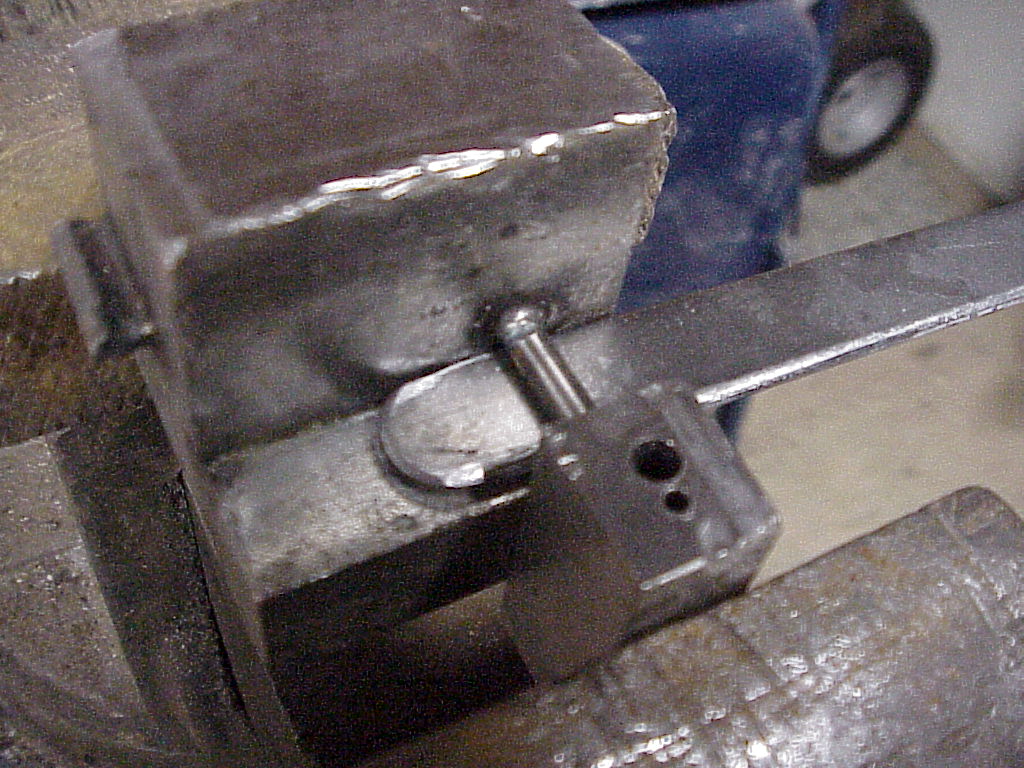
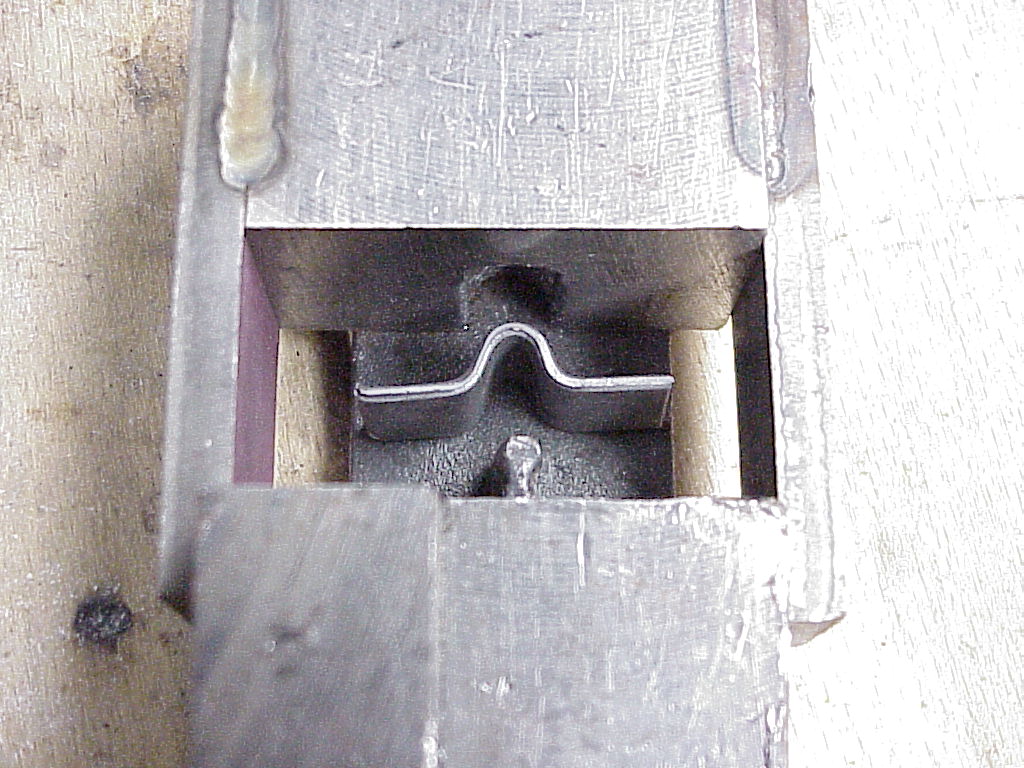
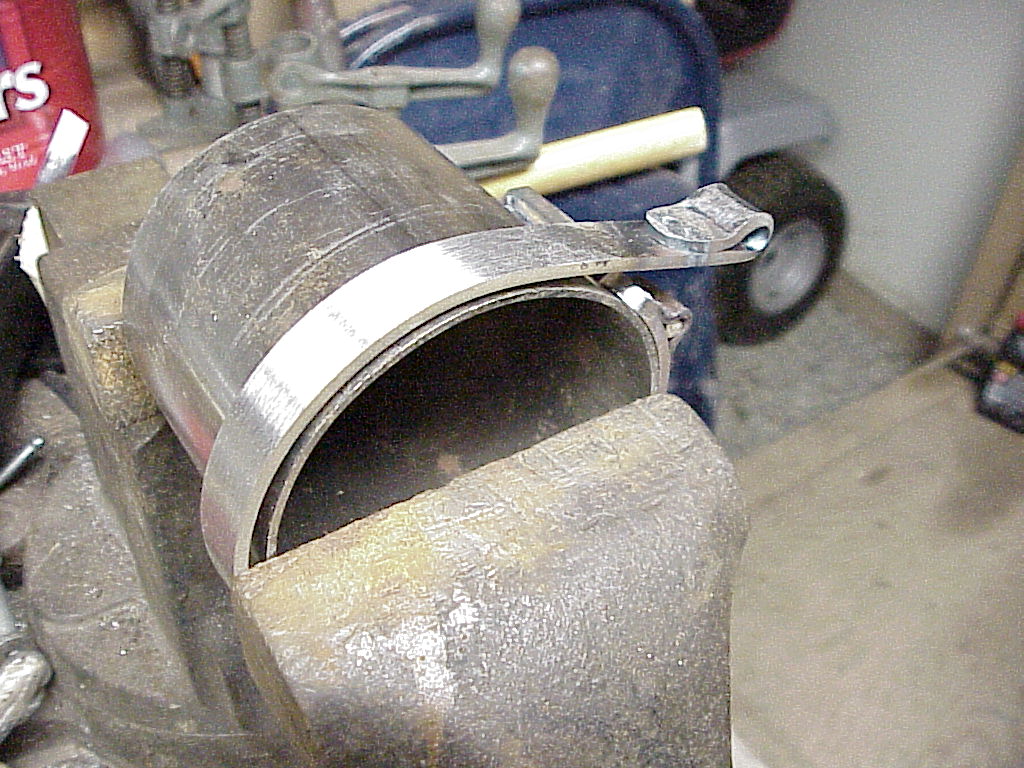
Making the final bend was done over a metal cylinder that had a short pin punch welded to the side. The cylinder was slightly smaller than the required diameter of the strap as the metal will spring out a little after bending.
The punch was the same size as the rivet and positioned so the pin would fit into the bracket welded onto the strap. You can also see the small bend that was done before the bracket was welded on.
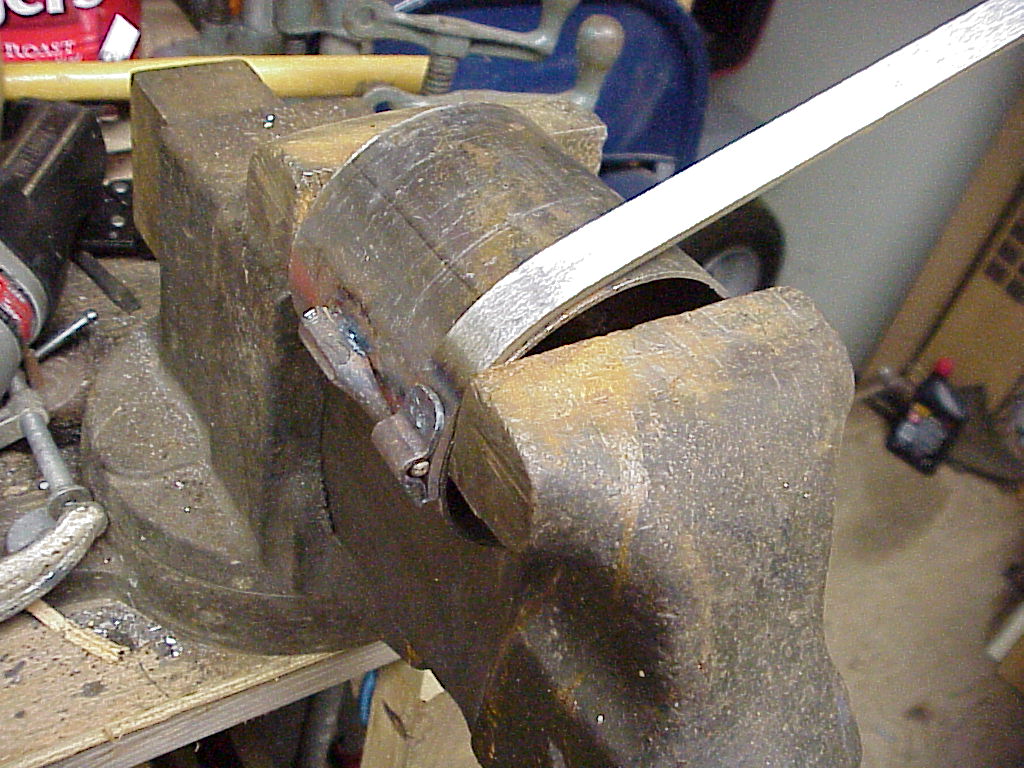
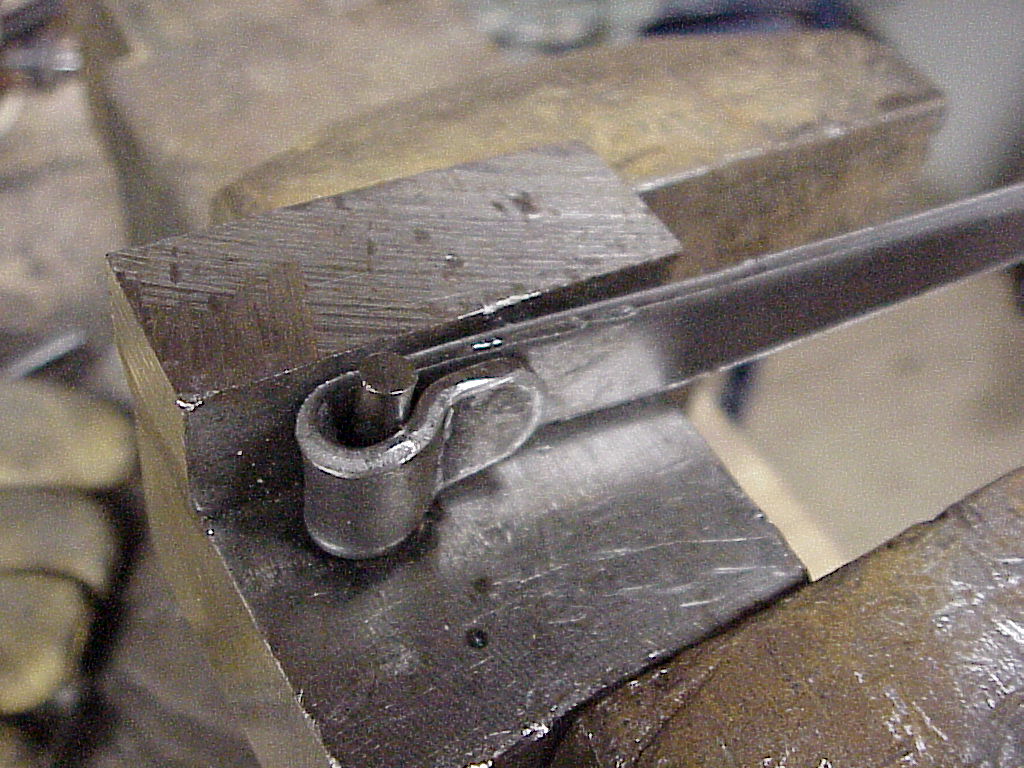
Then it was a matter of bending the strap around the cylinder all the way around and over the bracket end.
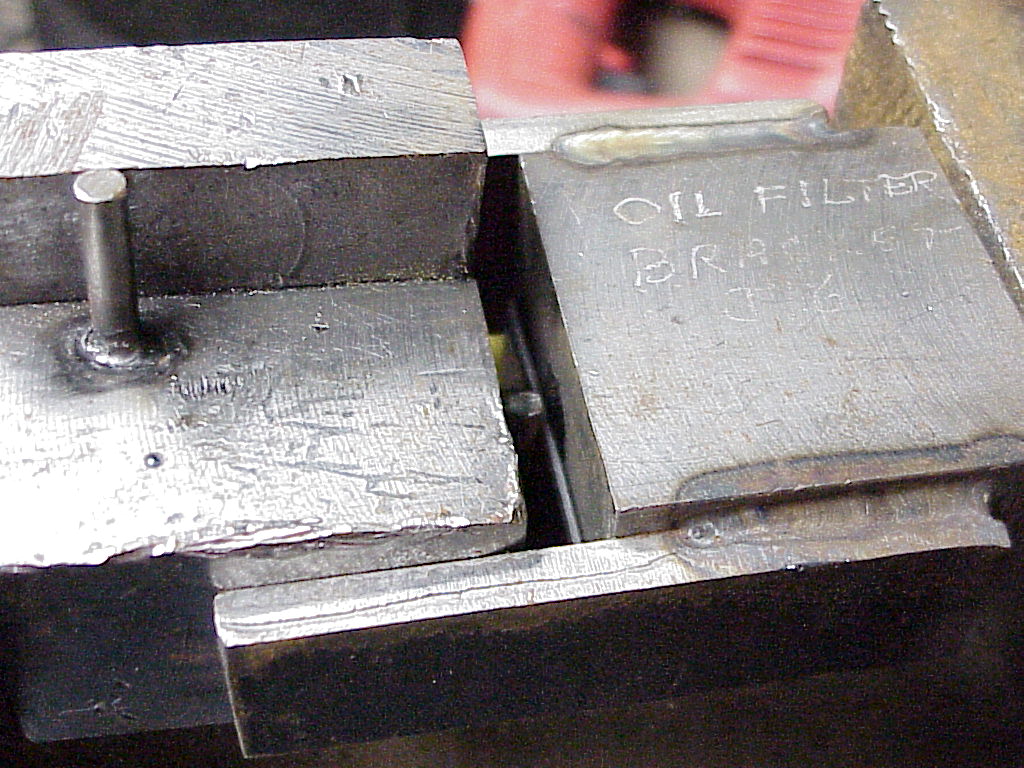
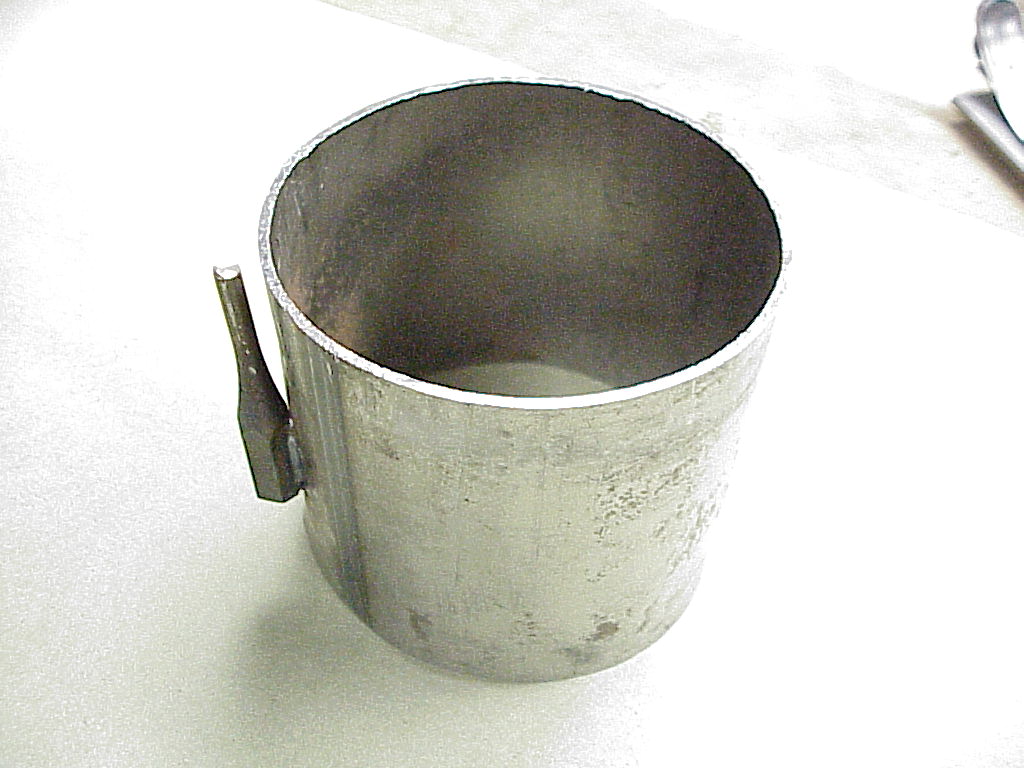
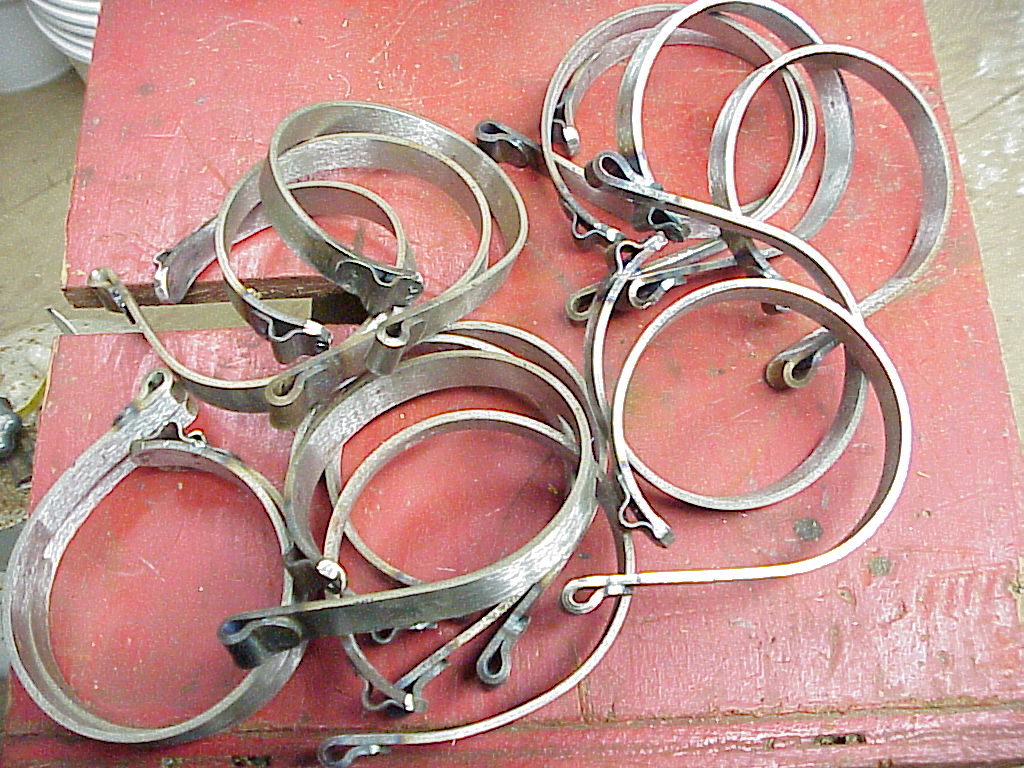
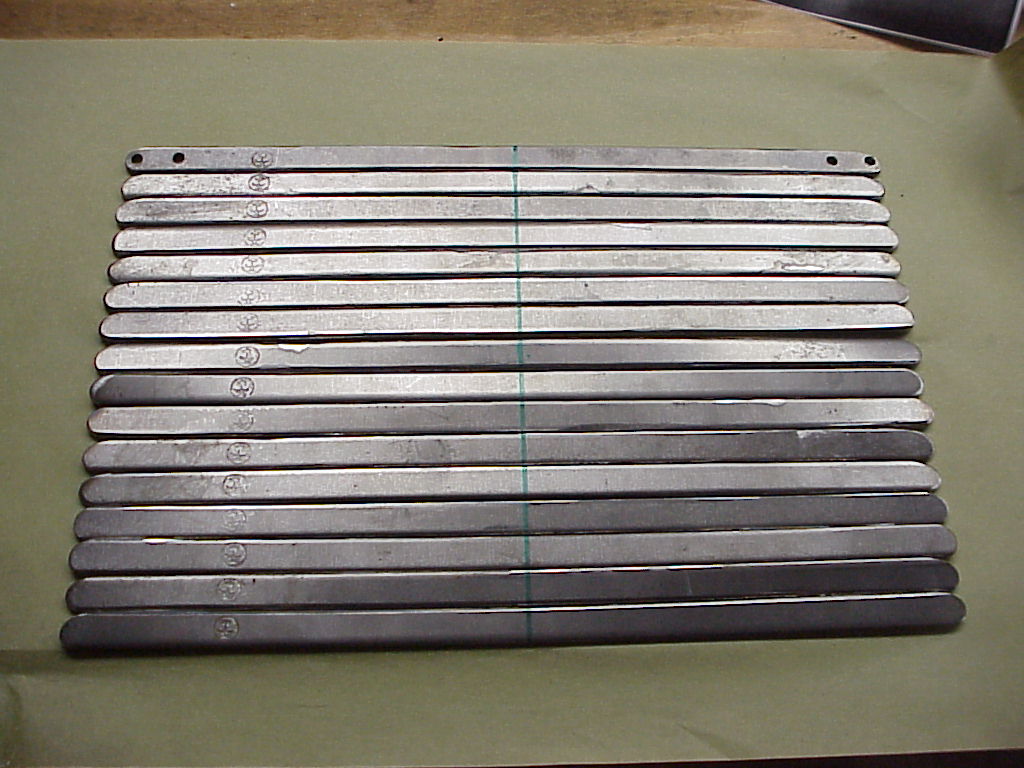
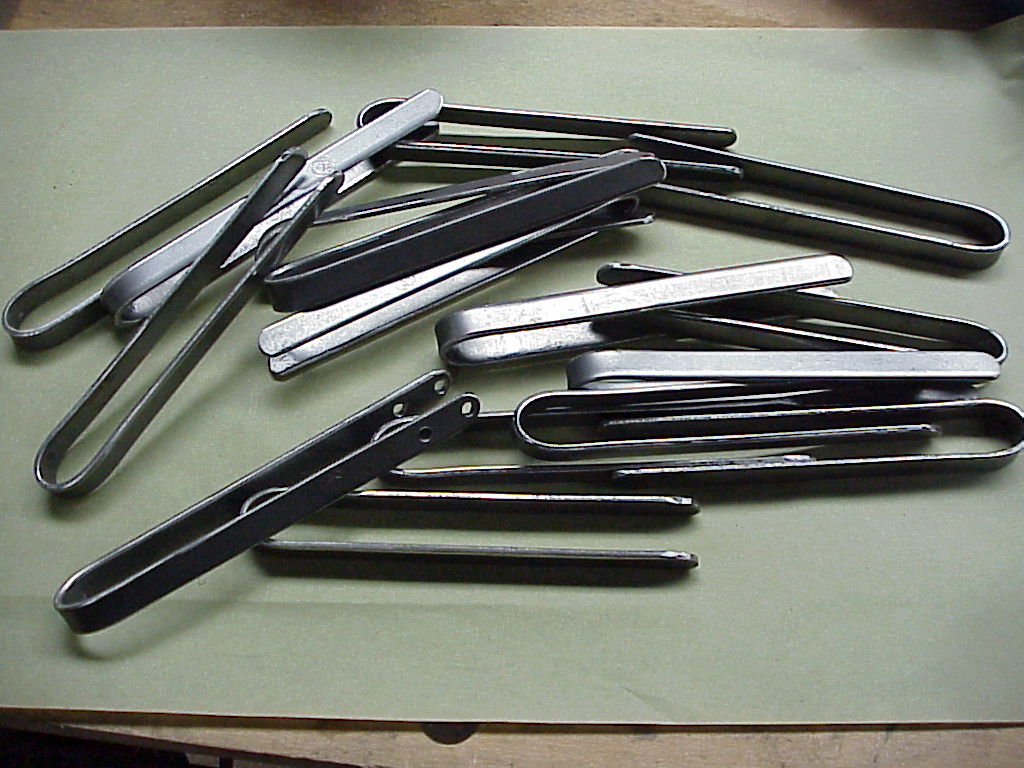
Here are the completed straps.
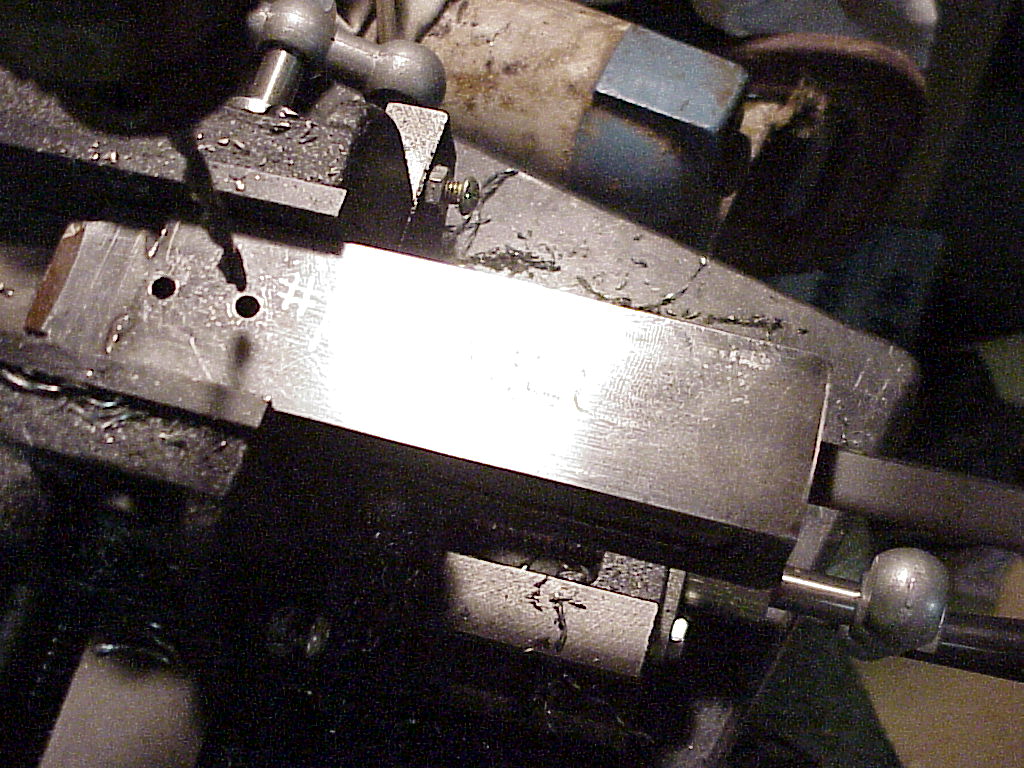
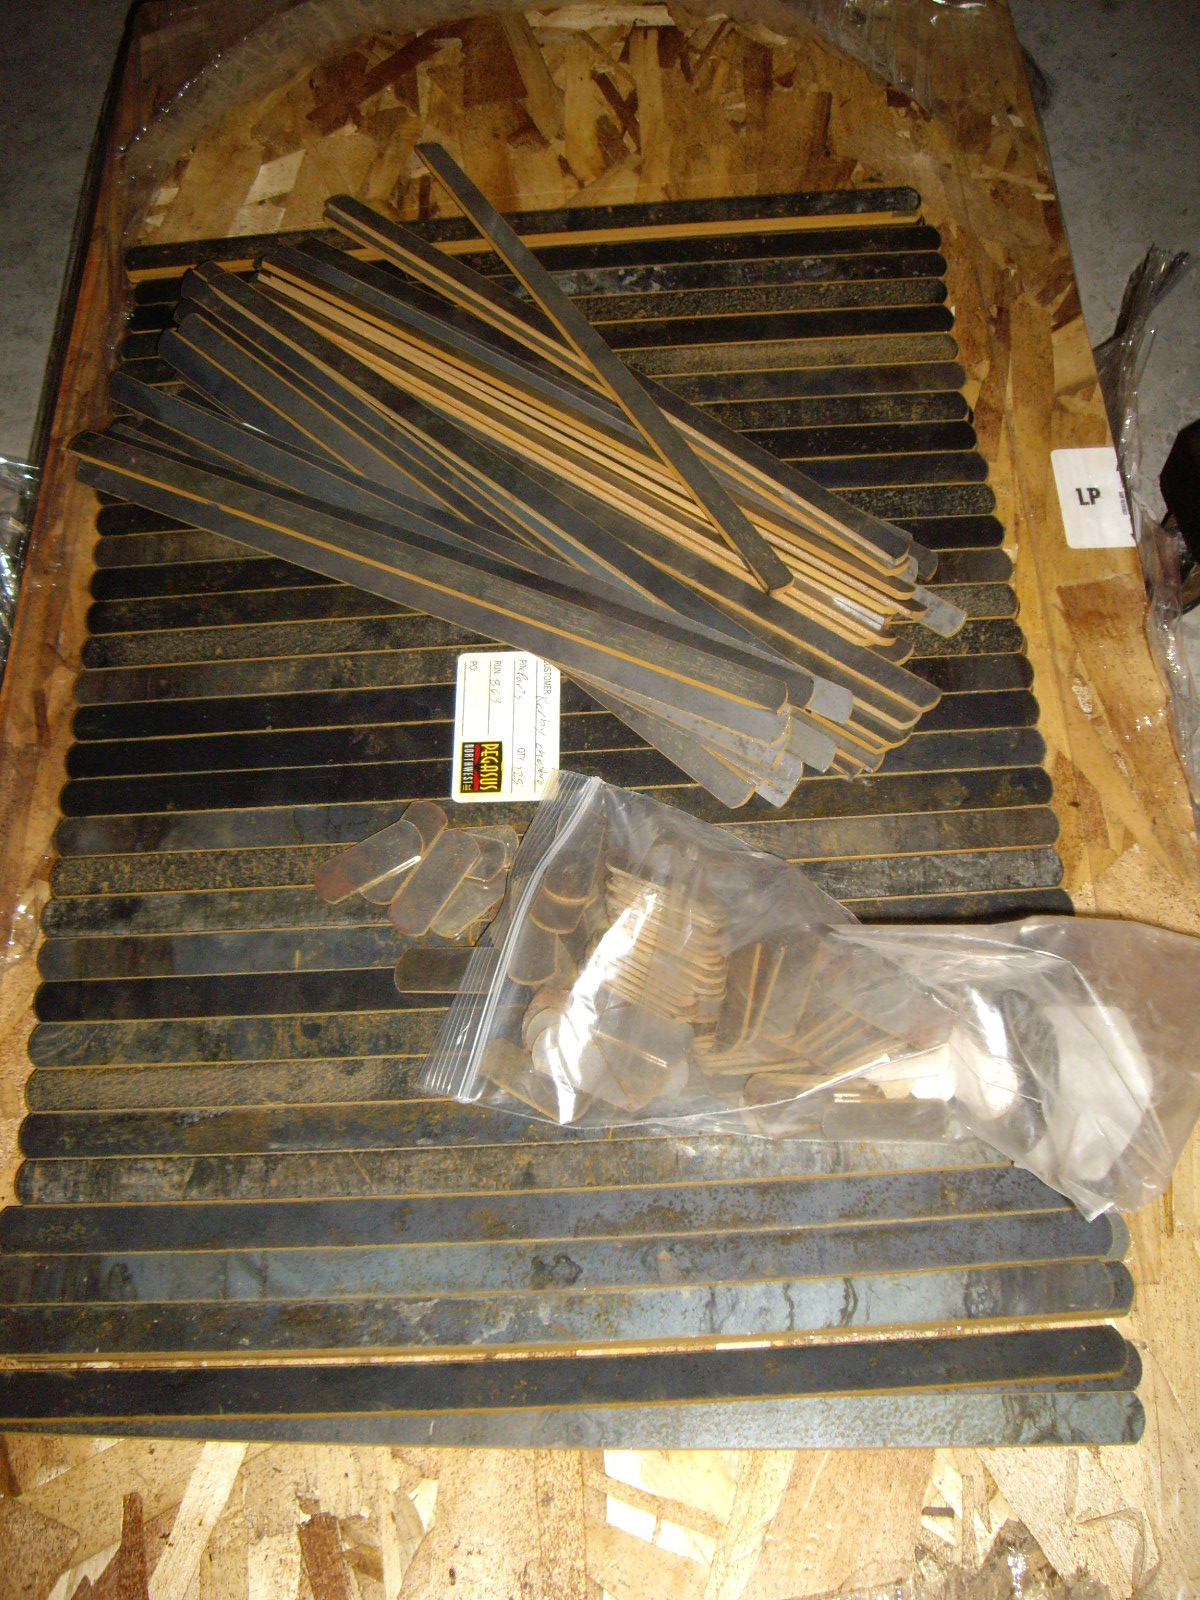
The handle is just U-shaped piece of metal with holes for the rivets. Since it would have hands gripping it, the edges needed to be rounded from the ones left by the shear. A session on the 48" belt sander left all of the sides nice and smooth. The shear also twists the metal, so I had to straighten each piece before working on the edges. They also had to be cut to length using the cold saw.
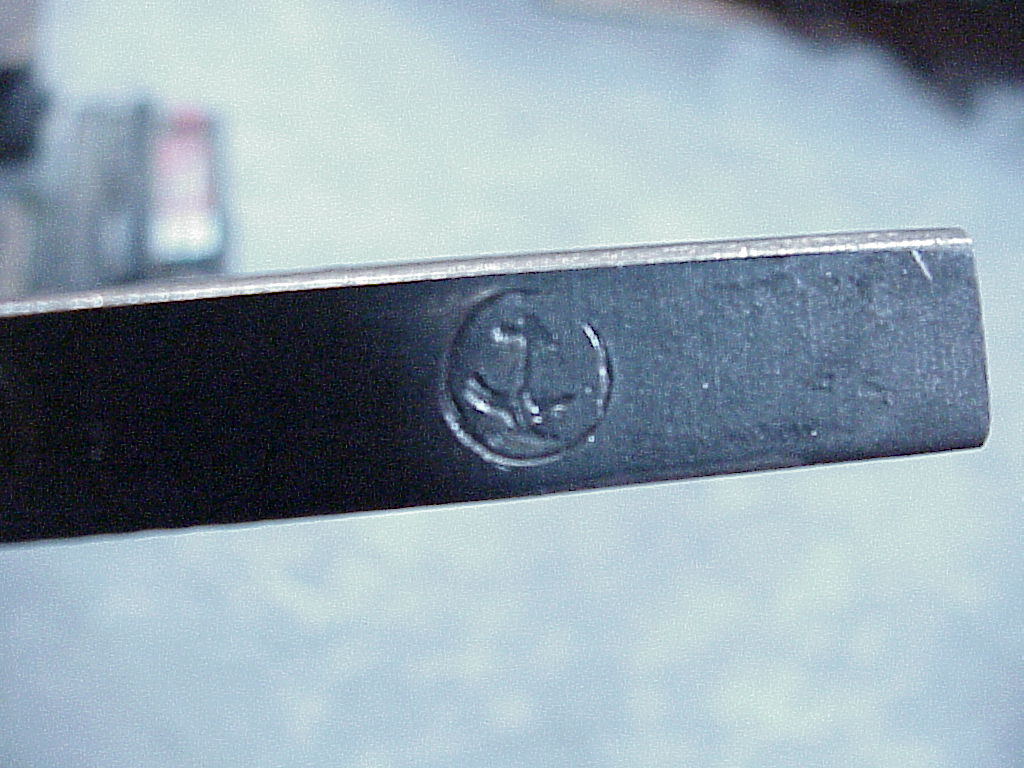
The next thing that the handles needed was the Carello symbol stamped into each one.
| The old way | The new way |
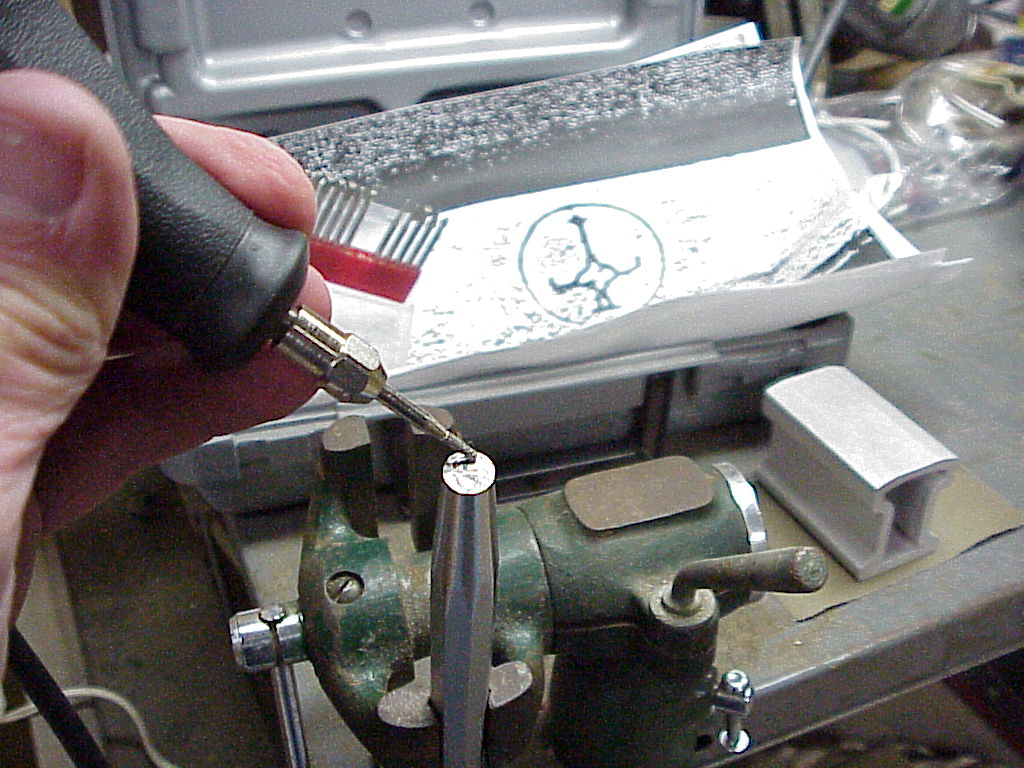
| Making the
stamp was interesting. I cut the end off a center punch where it was
3/8" in diameter as that was the size of the stamp needed. Then I
spent many hours using a Dremel with fine carbide bits to cut the stamp into the
end of the punch.
You can see the 8x picture of what I was trying to engrave in the background. It was really easy to make a mistake and grind off a portion that needed to be there. When that happened, one simply puts the punch on the disk sander, grinds everything off and starts over. It was also difficult to figure out where you were at any point. By using a marker to color the whole end and then sanding lightly with some super fine wet/dry sandpaper on a metal sanding block, the highest portions of the pattern would be left shiny and the rest colored. I never was happy with the completed stamp. It wasn't that clear and further, it dulled after 20 or so uses.
|
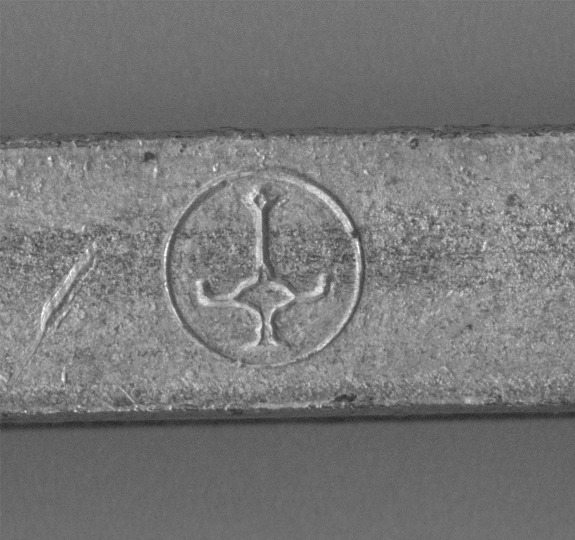
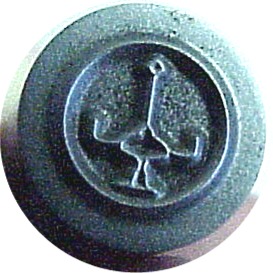
For the latest batch of wrenches, I decided that I wanted a
better Carello stamp. After talking to local machinists to see if they
could make one, one suggested I look for a company that makes steel stamps.
I found Sossner Steel Stamps in
Tennessee using Google. After couple of email interchanges, I mailed them
a CAD drawing and they produced a beautiful stamp at a reasonable price.
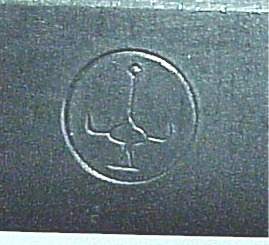
Here you can see the stamp and its impression.
Since I now had a stamp that makes a beautiful impression, it made sense to do something so it was in the correct place each time. I already had a jig that held the handle correctly for drilling the rivet holes (see below), so it was easy to drill a 1/2" hole in the correct place for the stamp. Then a scribe line on the stamp and the jig for the right orientation leaves little chance for an error. The jig is thick enough and the stamp fits the hole tightly, so one doesn't have to hold the stamp as you whack it with a hand sledge (that also saves my thumb). This also means that the impression is uniform rather than being susceptible to being deeper on one side depending on how vertical the stamp was.
|
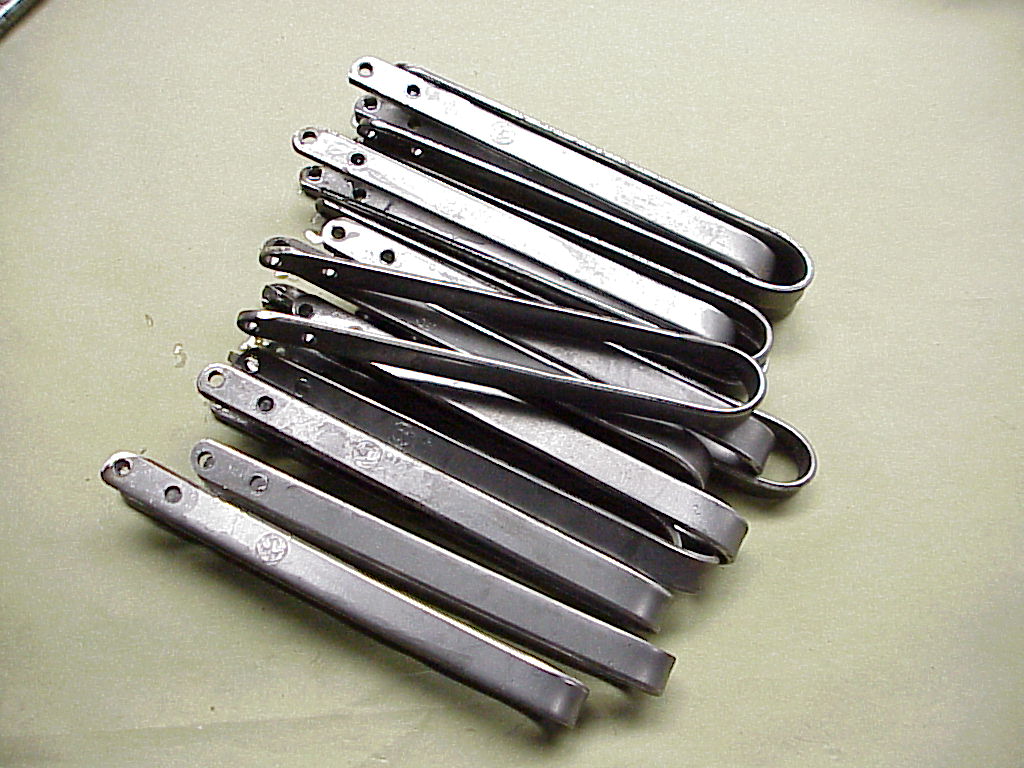
Here you can see all of the stamps toward the left ends of the handles.
The ends have been rounded and the line in the center is marking the location to make the U-shaped bend.
| The old way | The new way |
| The bend was done around a 9mm socket by hand. Then bend
was finished by flattening each side over a section of steel with the same
thickness as the space between the two parts of the handle. It turns out
that I should have made the bends first and then cut and rounded the ends. As it
was, each side didn't end up exactly the same length since I was bending by
hand. So I had to true them up on the belt sander.
|
When I started making these wrenches, it was almost a one-off.
I made 15 or so in the first batch. The second batch was about 20 and that
finished up the steel stock that I had initially ordered. This latest
batch is over 60, so I decided that I needed a better way to bend the handles.
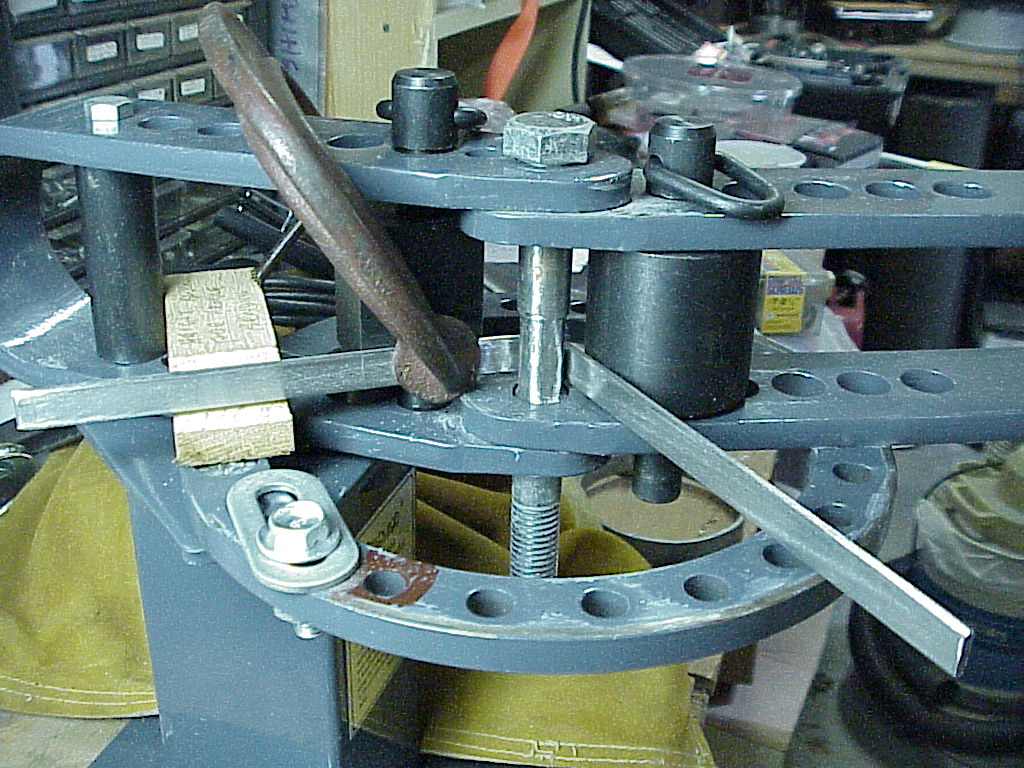
I got a bending tool from Harbor Freight when it was on a half price sale.
The bending mandrels don't go small enough for the handle (5/8" diameter bend).
However, the pin to hold the mandrels is 5/8". I tried using that, but
after the metal relaxed, it was still a little too large. So I ended up
stopping by the hardware store and buying a long 5/8" bolt. Then I ground
down the portion where the handle would ride to 1/2". That gave just the
right bend.
It turns out better to complete the rounding of the ends after the bend is done. First, both ends get done at once. Second, they come out identical and the each side is automatically the same length.
|
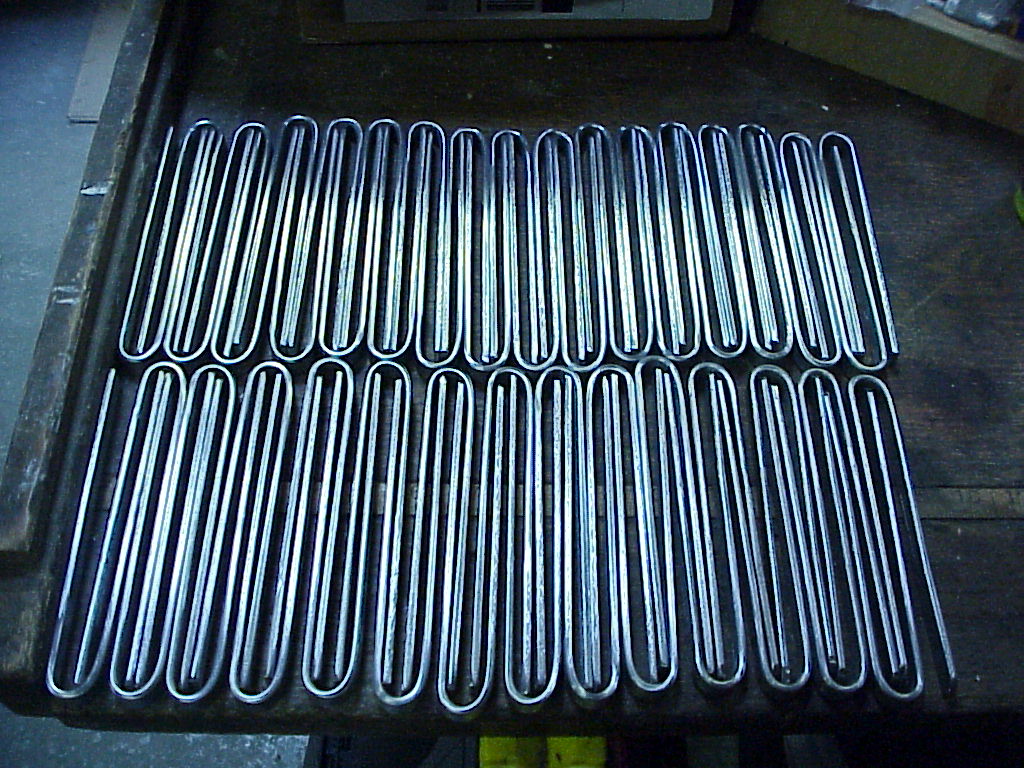
Here a bunch of handles after bending
After that, I was ready to drill the holes for the rivets. Getting them in the correct place through both sides of the handle was a problem. So another jig was needed. This one positioned a handle end correctly under pre-drilled holes in the jig. Then it was simply a matter of aligning the jig in the drill press, sliding in each handle end and drilling the first hole. You can see the handle protruding out the right side of the jig. After all of those holes were drilled, the jig was moved to align the second hole with the drill bit. Another pass on each handle end left all of the holes drilled in just the right place.
Next came the rivet process.
| The old way | The new way |
|
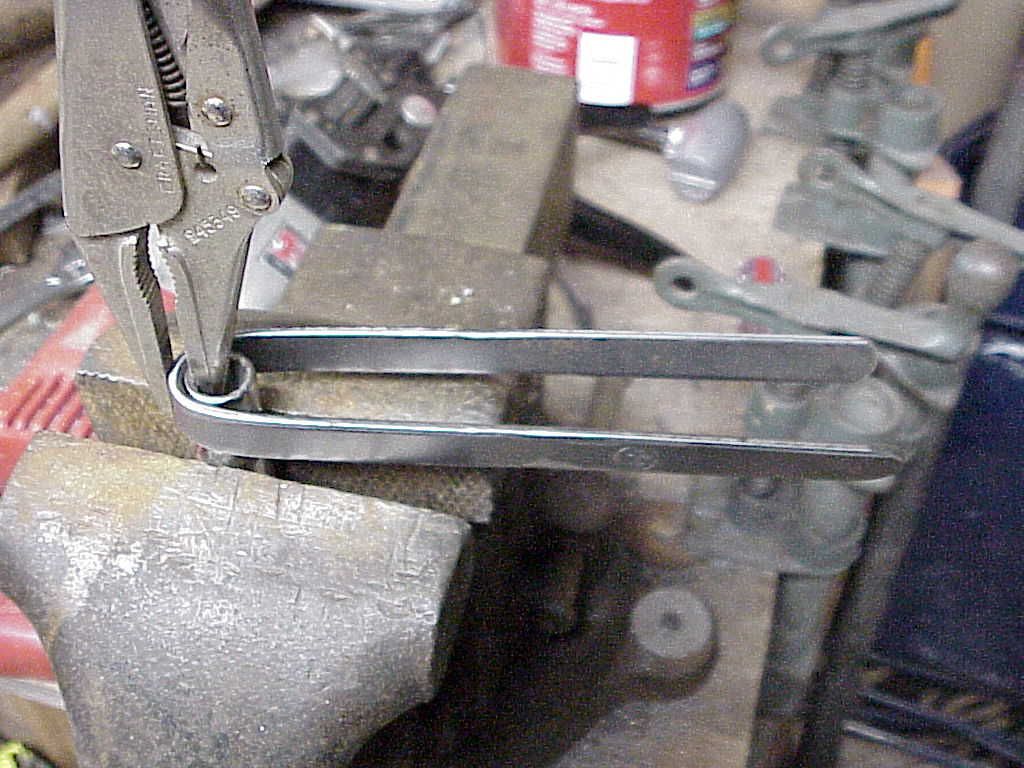
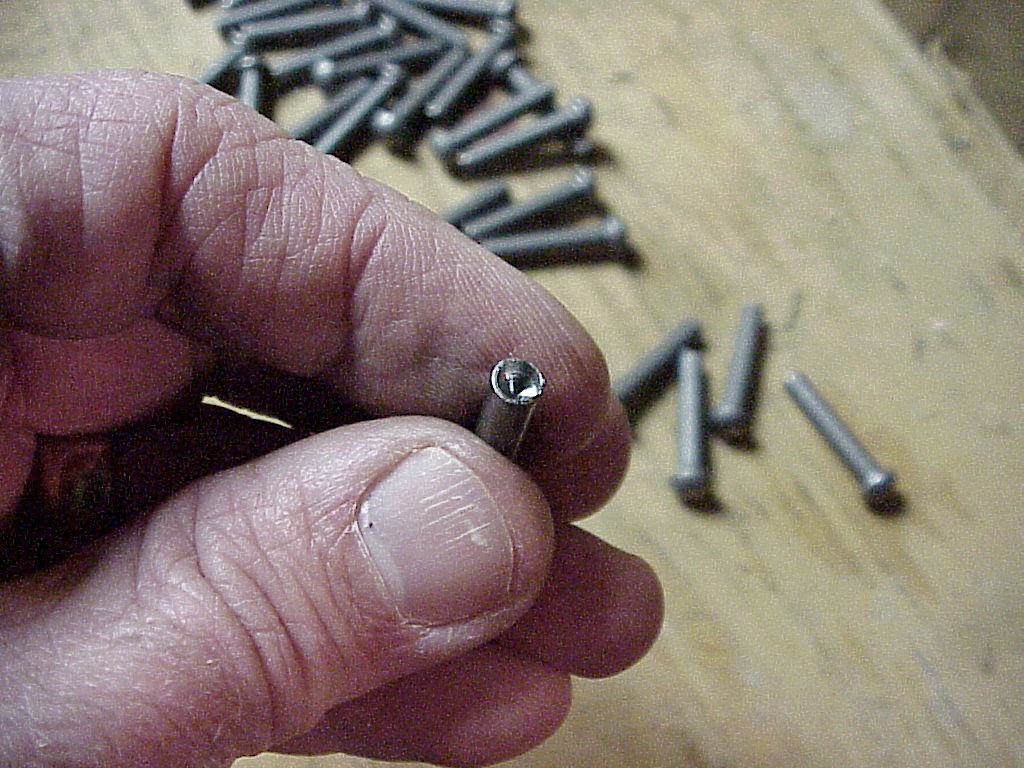
The rivets also presented a problem. The closest I was able to come to the originals was a 3/16" diameter by 1" long solid rivet. In order to properly set the rivet, they needed a 9/64" hole drilled in the end about 3/16" deep. Trying to accurately center punch the end of the rivet and then position and drill it in the drill press left me with a couple of good rivets and many failures. Then I had a simple solution. By drilling a 9/64" hole completely through a 1 1/4" piece of steel and then drilling a 3/16" hole part way through left a hole where the rivet fit through from one side and the drill bit could come from the other. This left the drill perfectly aligned in the center of the rivet and nothing could move. Adding a tapped hole from the side allowed a screw to hold the rivet in place so it couldn't slide out as it was being drilled. The depth was controlled by setting the depth stop on the drill press. You can see the rivet head protruding at the bottom and the lock screw at the side.
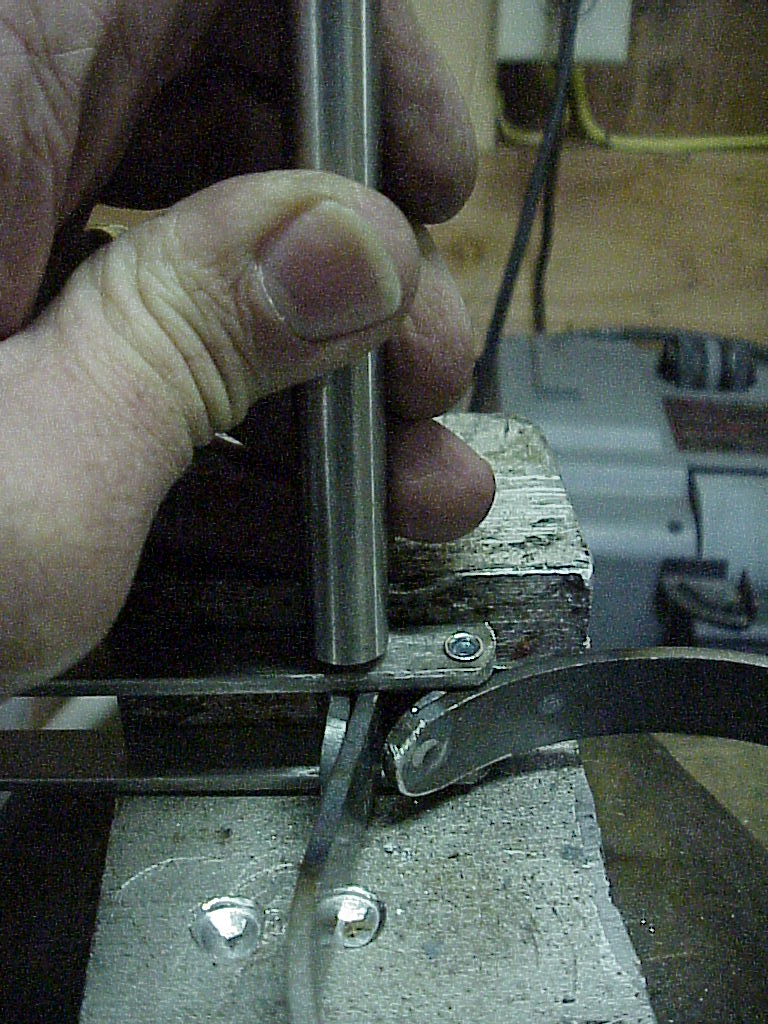
Here's the jig in the vise. The rivet is pushed up from the bottom and locked in place by tightening the screw with the pliers. The drill goes down the pilot hole and drills the end of the rivet to the correct depth.
The final product. A perfectly drilled hole in the end of a rivet. Of course if I had wanted thousands of rivets I could have ordered semi-tubular rivets made to the exact dimensions. But when you need just a hundred, you take what is available in small quantities and make do.
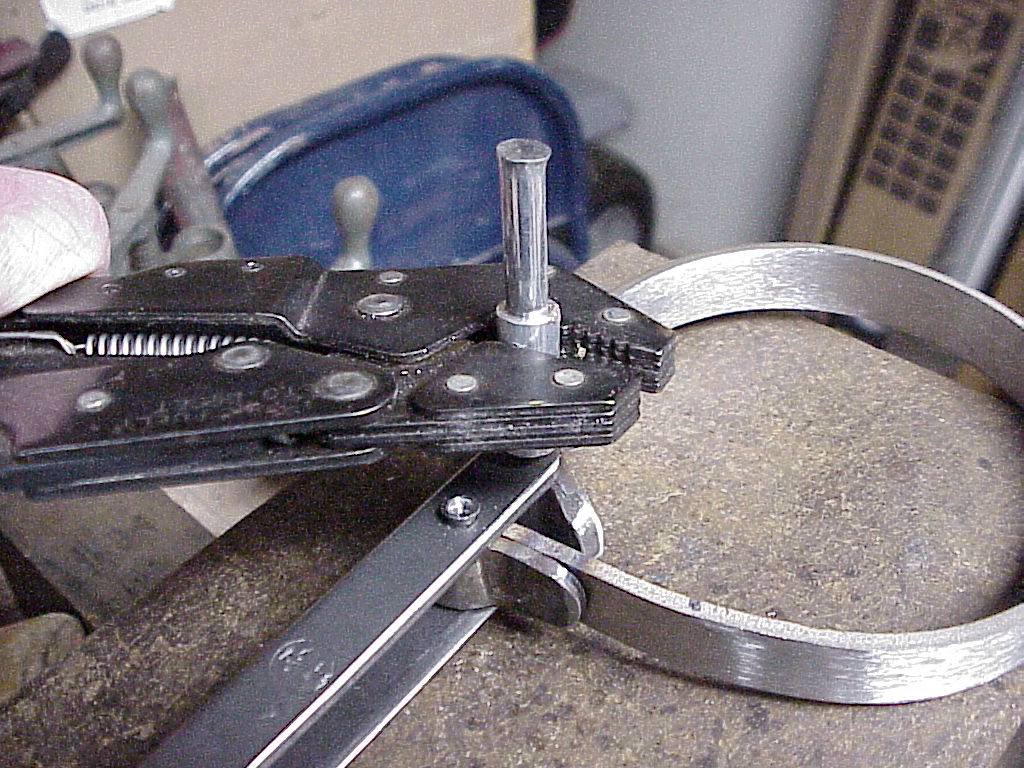
The last part is riveting all of the parts together. To properly round over the drilled part of the rivet requires a special tool that is hammered on the rivet end.
|
Now that's it's a couple of years later and with more companies having web sites, I found a source for semi-tubular rivets for the latest batch of wrenches. These already have the hole in the end for the cinch in addition to having a head that is very close to what the original rivets had. I also got the proper cinching tool to match.
I drilled a couple of shallow holes in an aluminum block. These are positioned to just hold the rivet heads so the handle sits flush with the surface. That makes setting the rivets easier and less error prone.
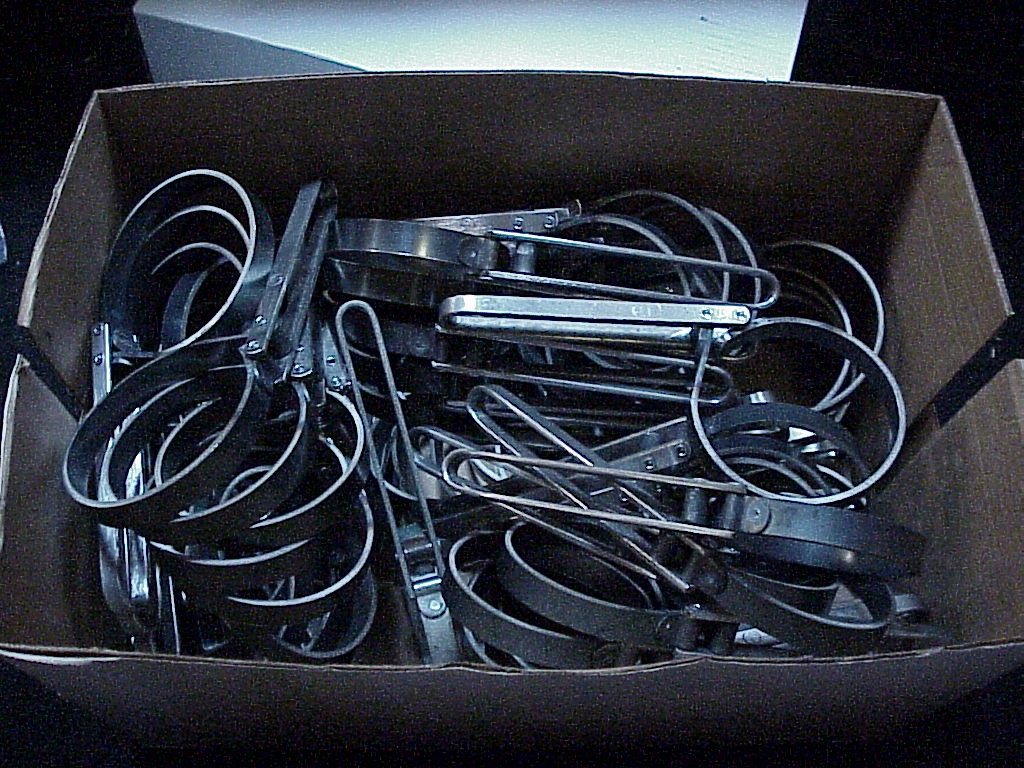
Completed wrenches ready to be plated.
|


Then it's time to send the completed wrenches out to be cadmium plated. Here are the final results.

I want to thank my neighbor, Mike Steiner for all of his help on making the jigs and the use of his 48" belt sander, large drill press and 36" disc sander for rounding and cleaning up of the parts.
I just delivered my last three oil filter wrenches in Monterey. So I started the process for another batch, doubling the 60 I made last time. This time, I had enough lead time to have the water jet people cut everything exactly, including the curves at each end. This saves lots of grinding time and everything will be more uniform, but it doubled the water jet cost. Here are the pieces as they came back.
The
next thing I wanted to do was eliminate more steps, so I re-worked the jig used
to bend the bracket so it would also put the curve to fit the strap in at the
same time the bend for the rivet was being made. I also made a couple of
semi-circular cuts with an end mill to align the bracket in the jig.
|
|
 |
 |
Between these last two changes, it will cut the time for making each wrench down by 5-10 minutes or about 20 hours for this batch. Well worth the time I spent doing the engineering drawing for the pieces and cutting and grinding the jig.
I finally completed this batch of wrenches and just got them back from being cadmium plated. Here they are ready for storage and eventual delivery.

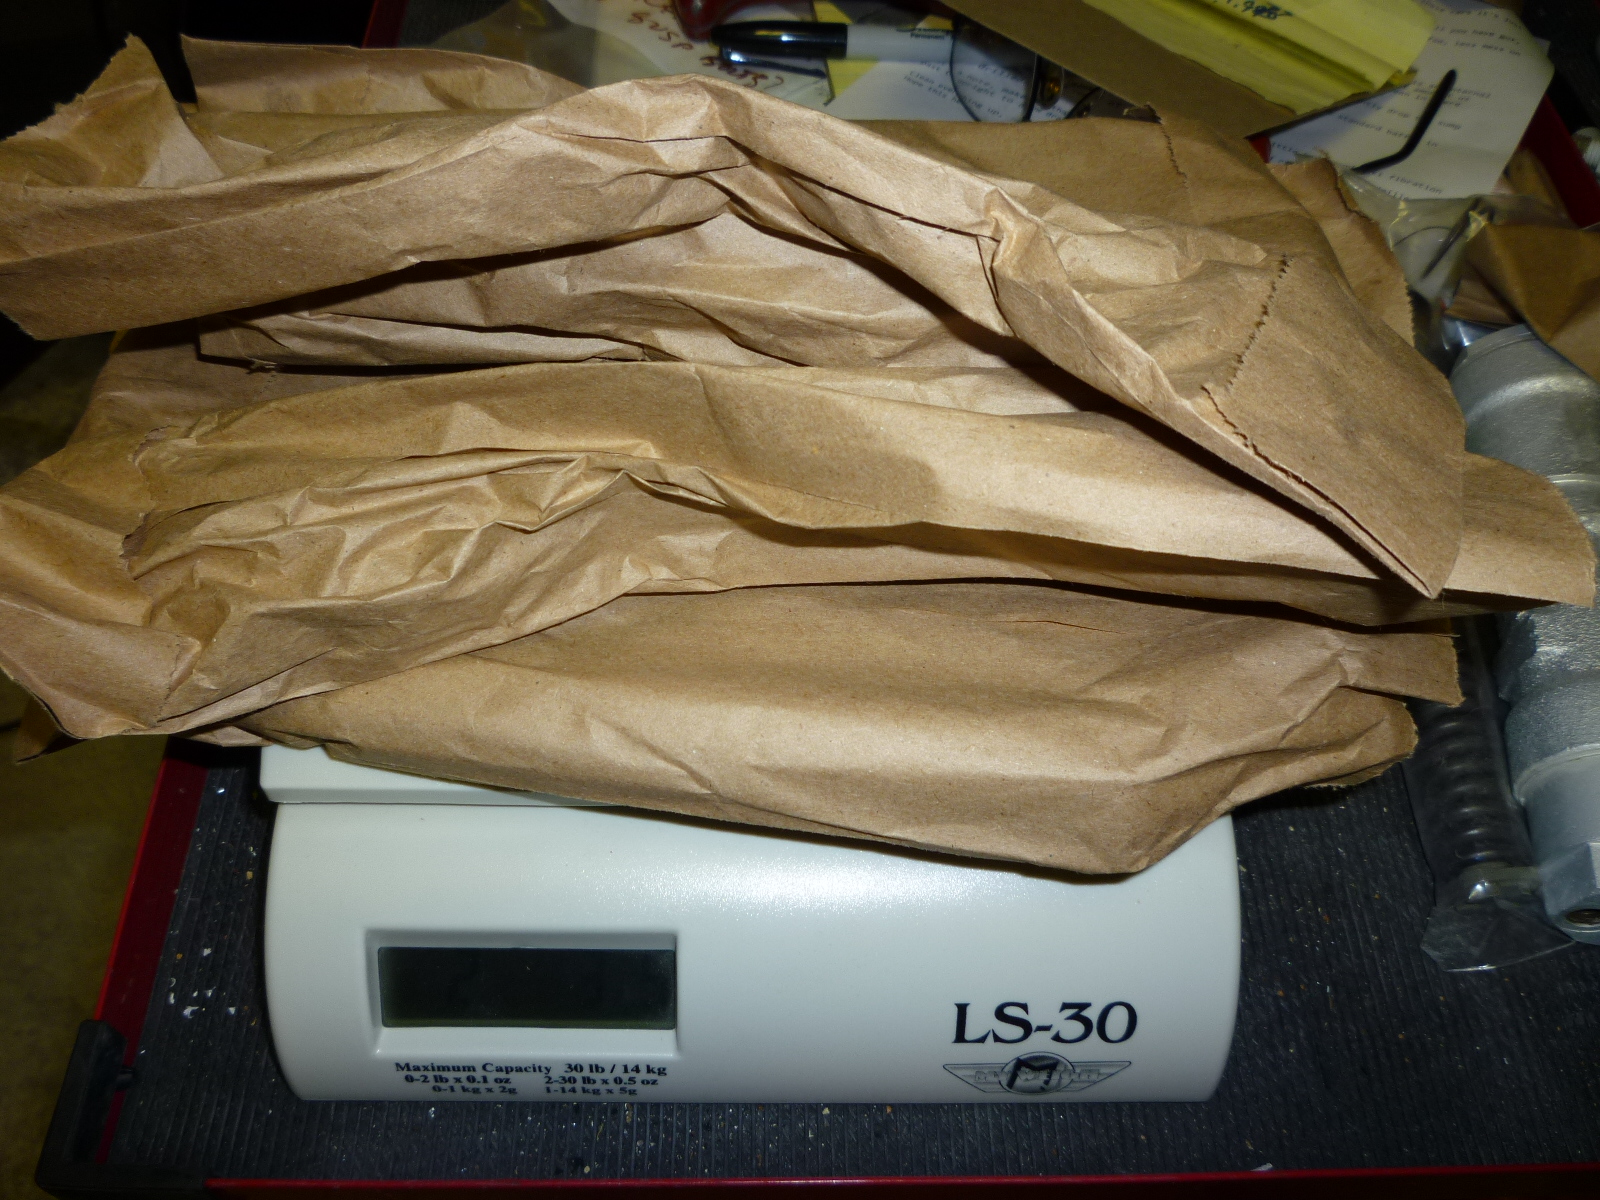
After I had put them all away in the tub, I realized that there was one original wrench in there. I bought it on eBay with some issues, but I was able to straighten everything out and put in new rivets in place of the screws that someone had used. So I had added it with the others so the plating would be fresh. As you can see, each wrench is individually wrapped in a sack. I really didn't want to have to look into each bag, so I brought the digital postage scale out to the shop. Originally, I hoped to weigh about 10 at a time, but 4 was the limit for easy stacking. I found the 'light' set of 4 after about 20 or so wrenches. Since I had 120 to possibly weigh, I was lucky to find it so quickly.
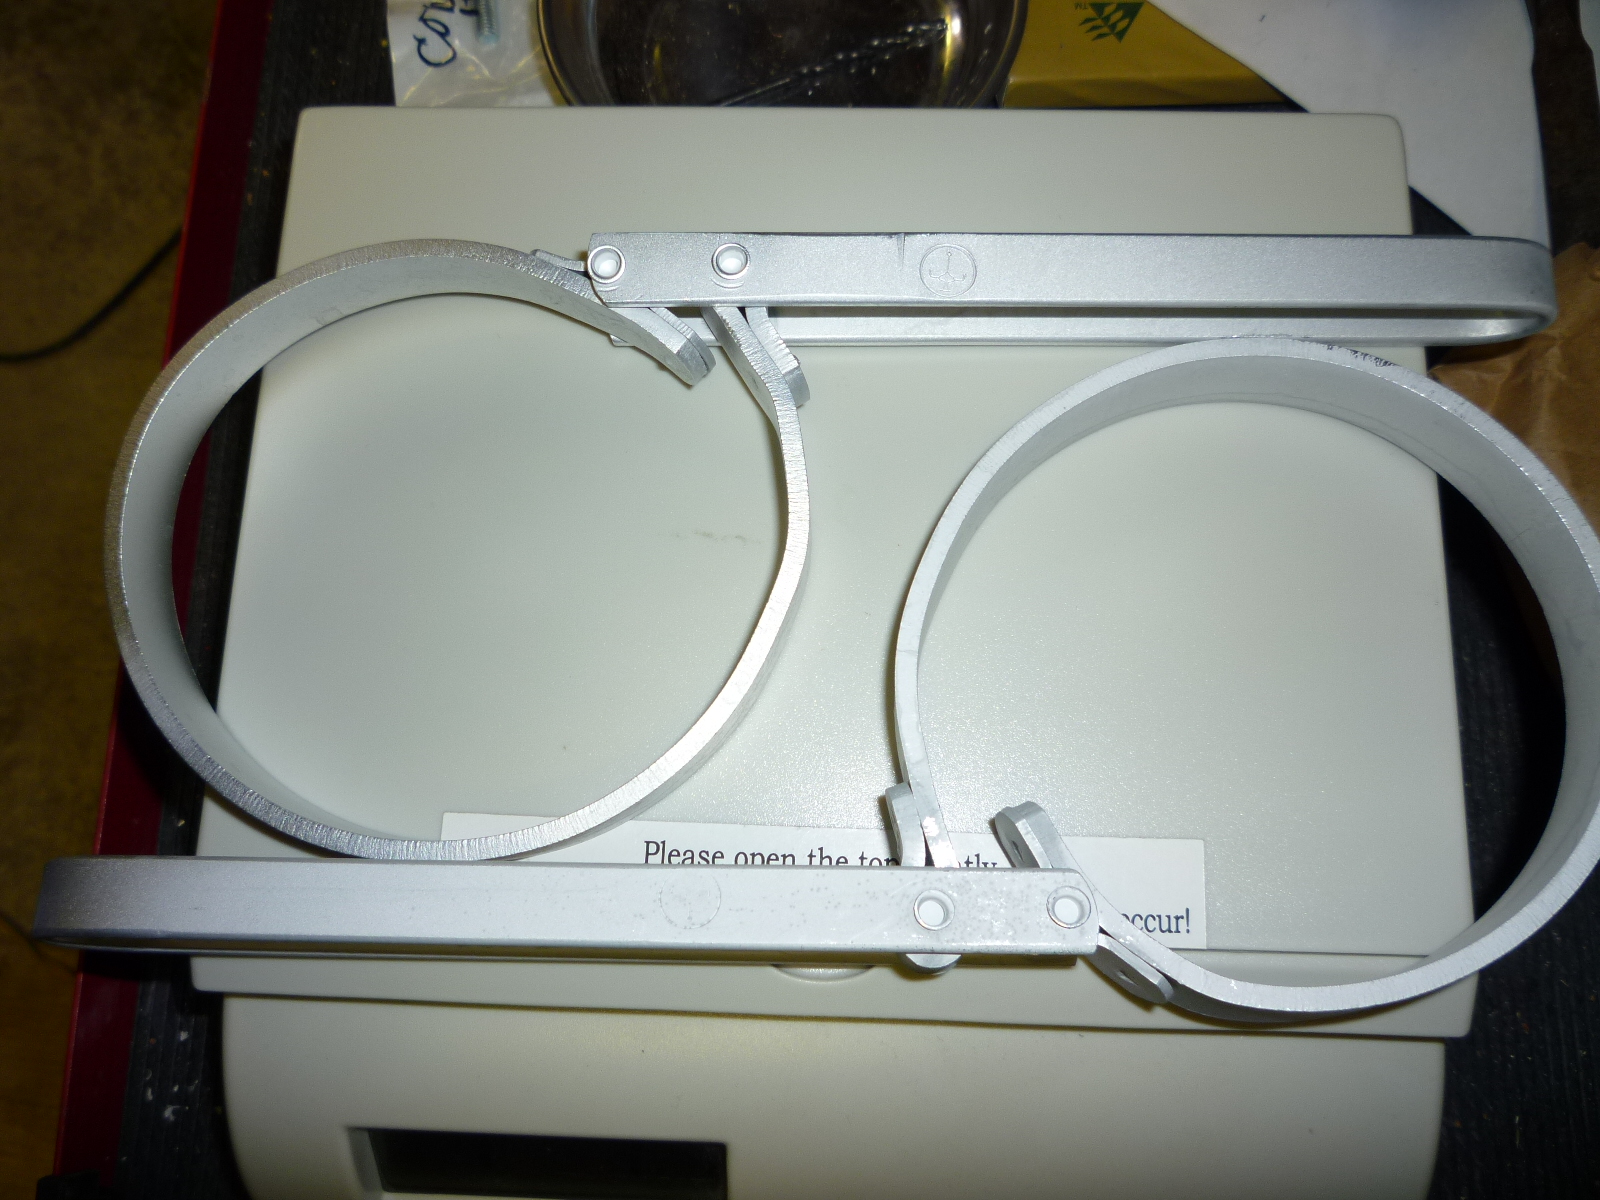
You may not be able to tell, but the original is the top wrench and one of my reproductions is the bottom one.