Electrical Issues
As most people know, the fuse blocks on the 308 series of cars is problematic. In general, I haven't had a problem until a couple of weeks ago. I went to a local FCA event on a day that threatened rain. I don't like to drive the 308 in the rain (or any other car if I can help it), but I recently got new tires and the rain was supposed to hold off until after I would be home.
That was not the case as it started raining at the event. When I went to leave, the wipers wouldn't work. I fiddled with that fuse and they would work for a few cycles and then stop. I squeezed the connectors together and replaced the fuse to no avail. At least we were on the top floor of a hotel parking garage so I was able to move the car under cover. I ended up swapping the wiring and fuse to the next location and got the wipers working.
On the was home, I realized that the turn signals didn't work. This circuit and the brake light circuit was ones that moved the the original failing location.Since then, I've moved things back and worked on the issue, but could never get the wiper and alternator fuse to work consistently.
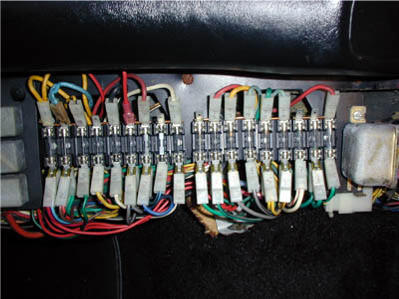
Many people have replaced their fuse blocks with those made by Birdman. These are better made than the original and use standard AGC glass fuses that clip in place instead of the original ones held by spring clips. However, the original covers don't fit and no replacement covers are available.
So I never considered replacing mine.
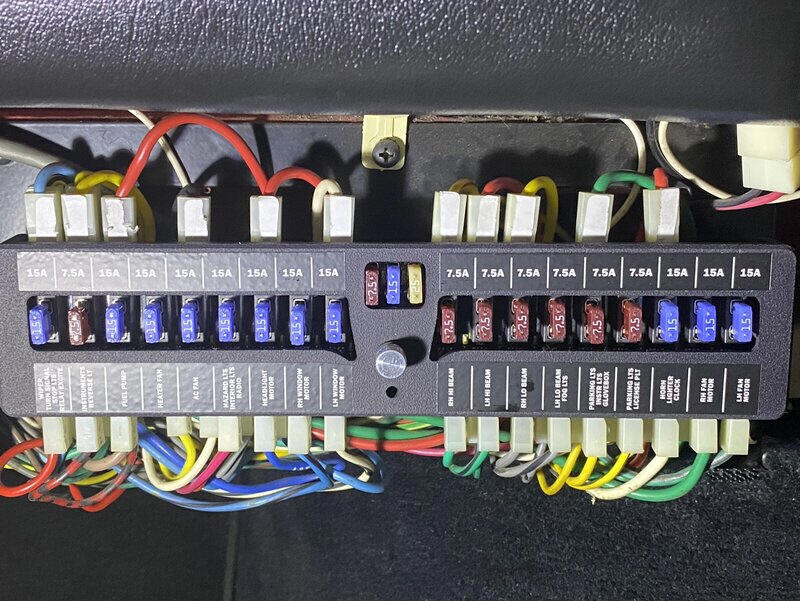
Now, there is a new replacement that uses the newer blade fuses and though doesn't use the original covers, has a nice cover available with the appropriate labeling. These are from TurtleFarmer on Ferrari Chat.
The Ferrari Chat thread about these blocks is long, starting at the initial concept through production and addition of a cover. So I decided to stop chasing my problem and order the replacement.
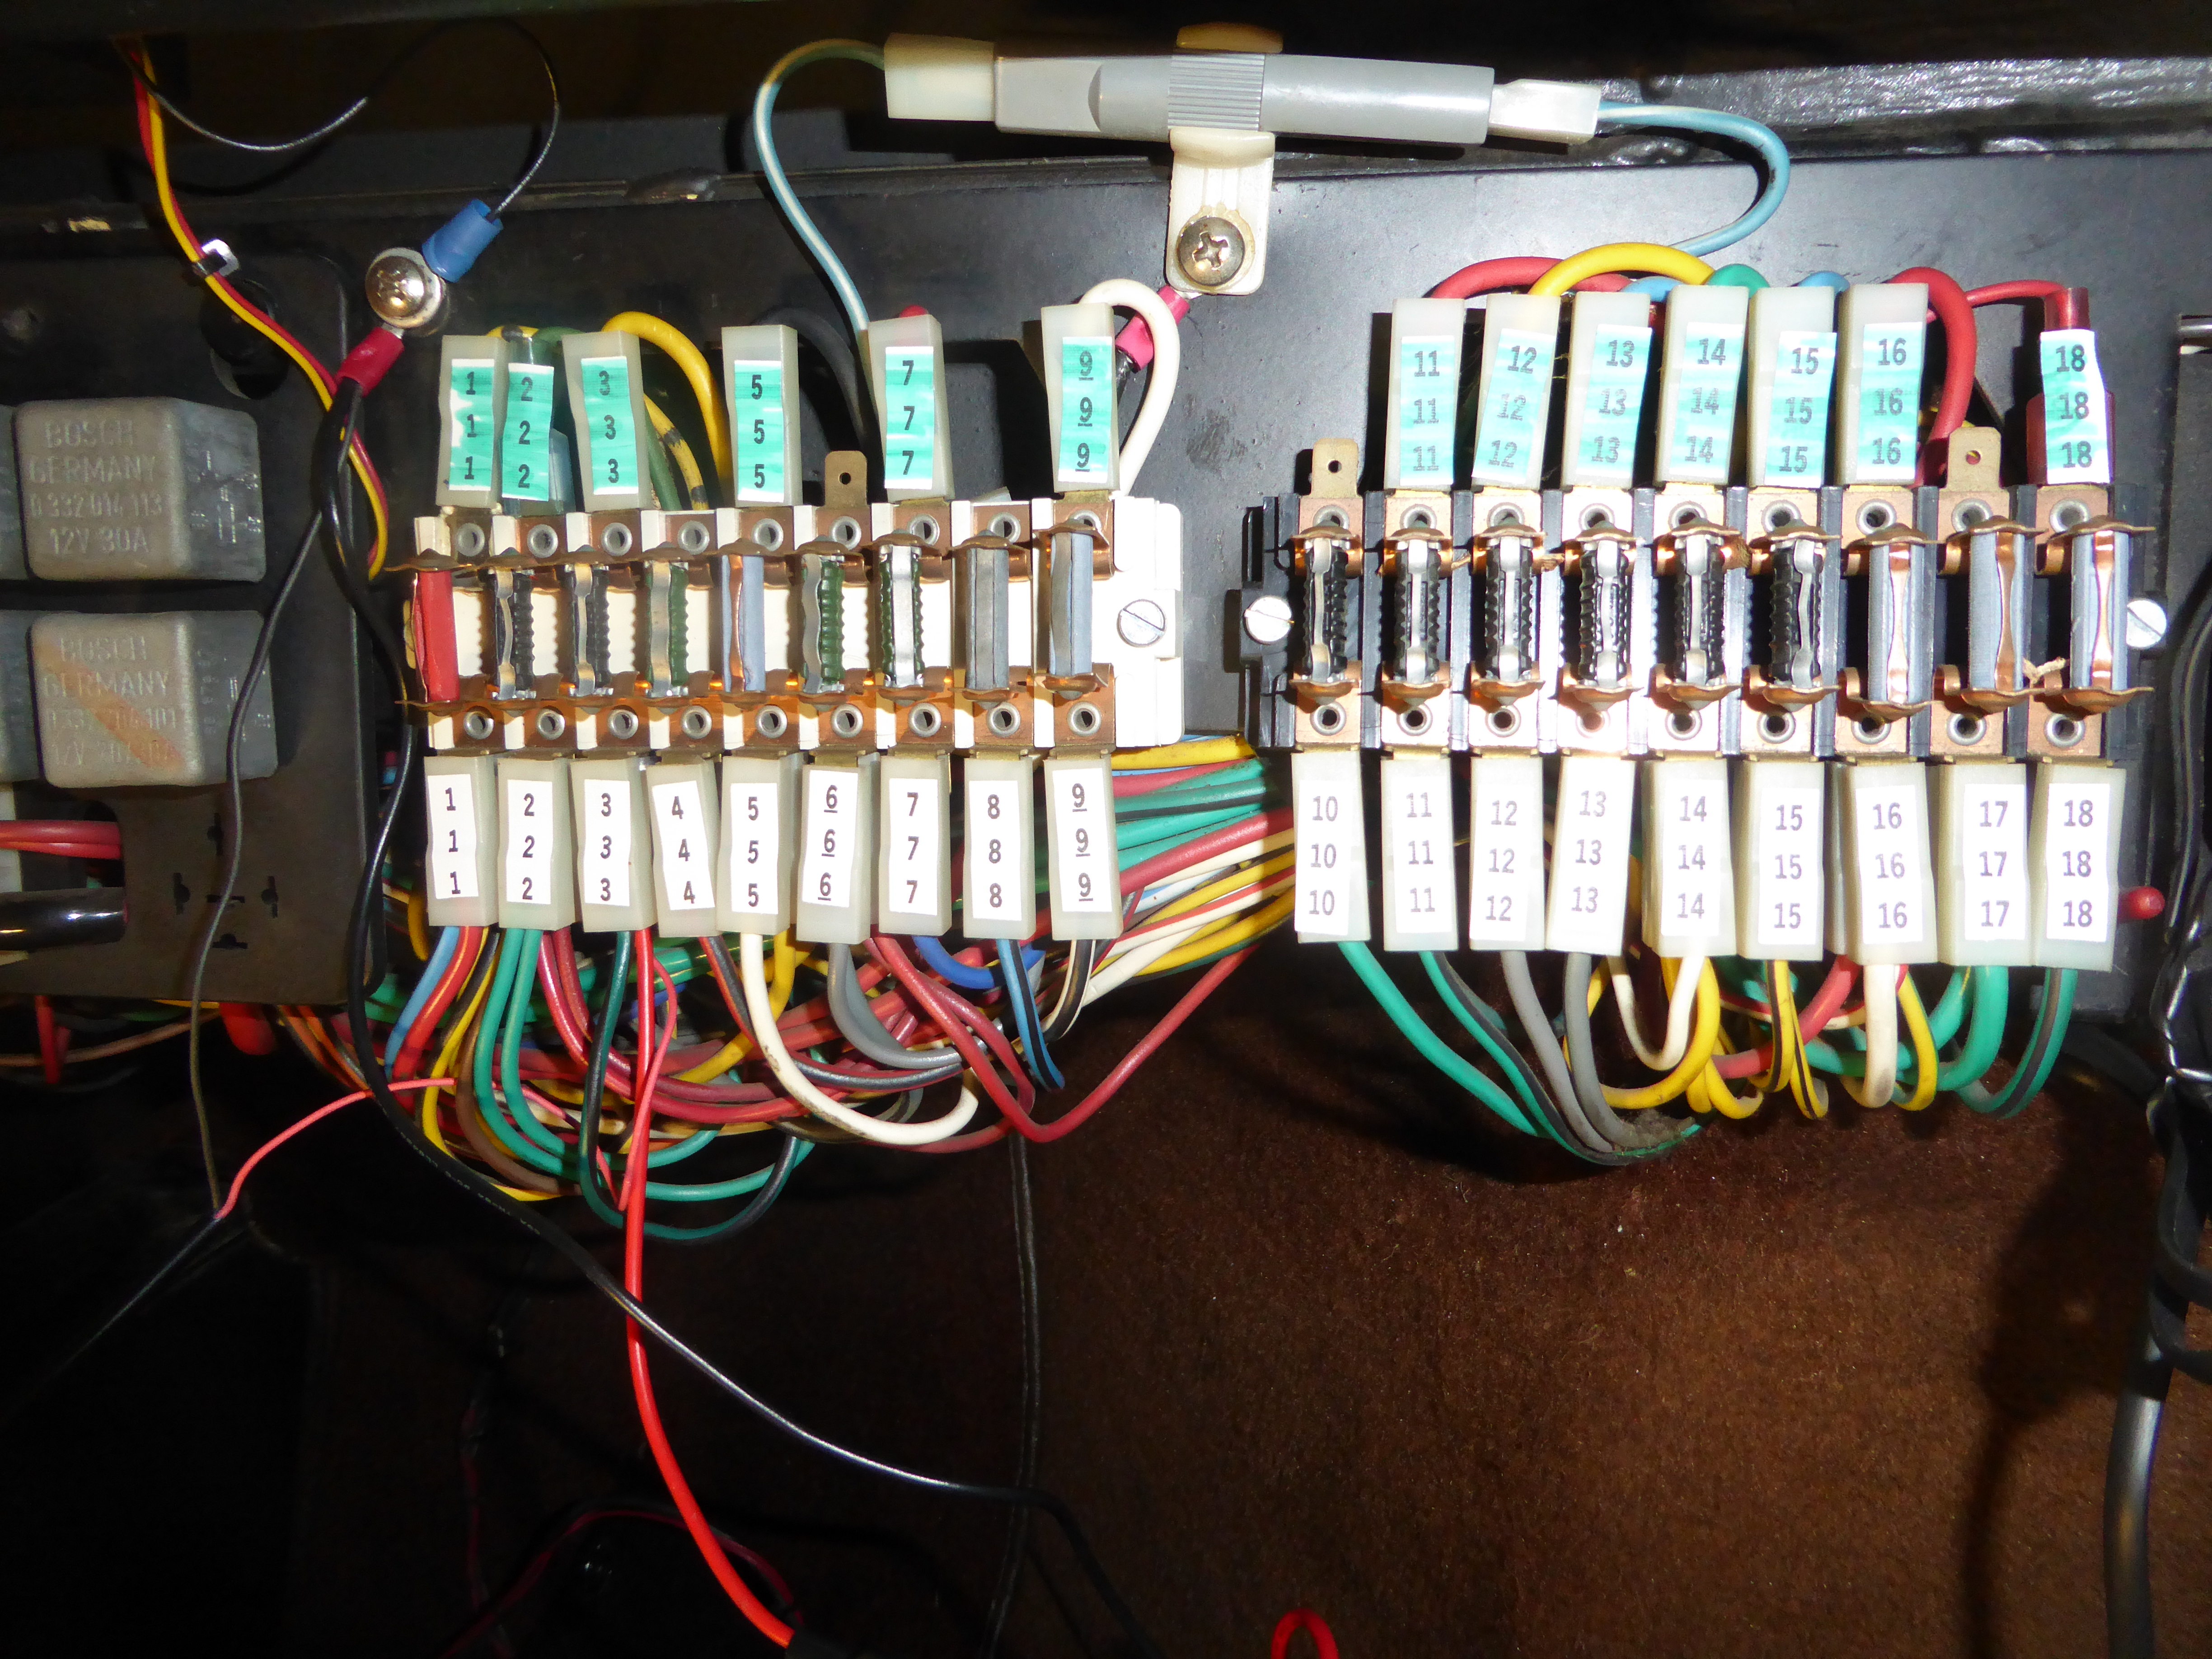
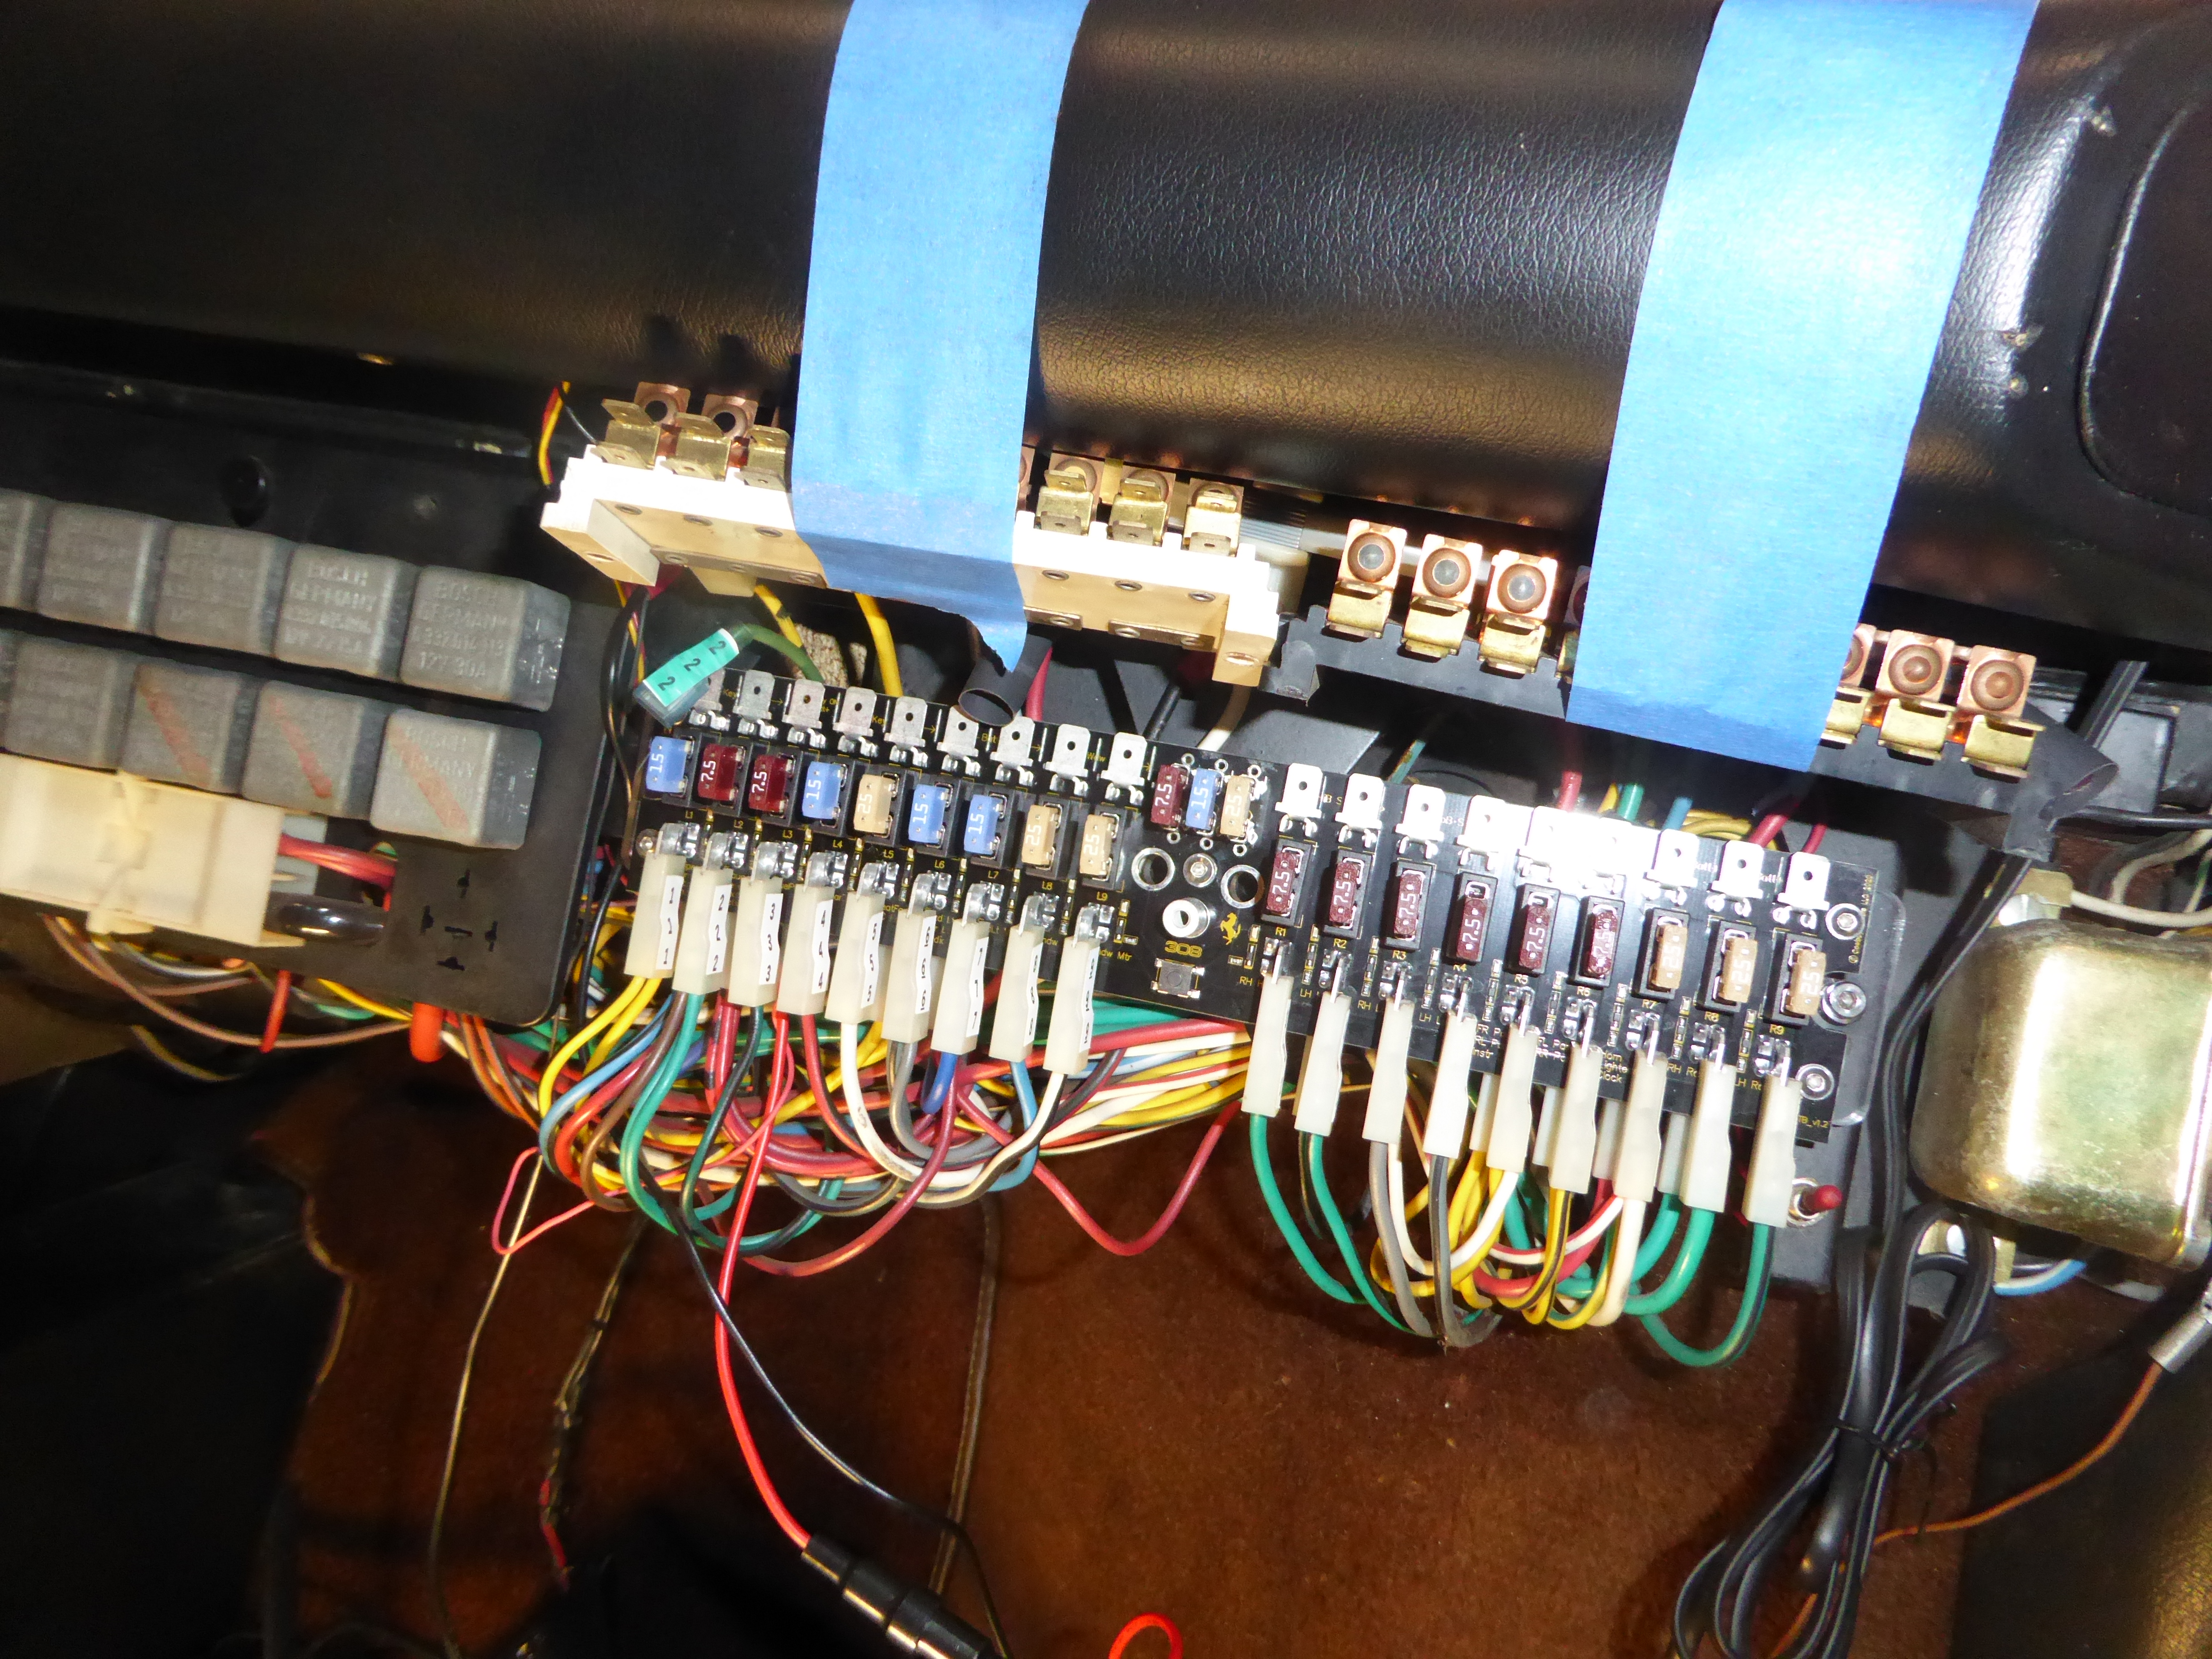
I ordered the fuse block and cover which took a couple of days to get here. In the meantime, I put wire numbers on all of the connectors.
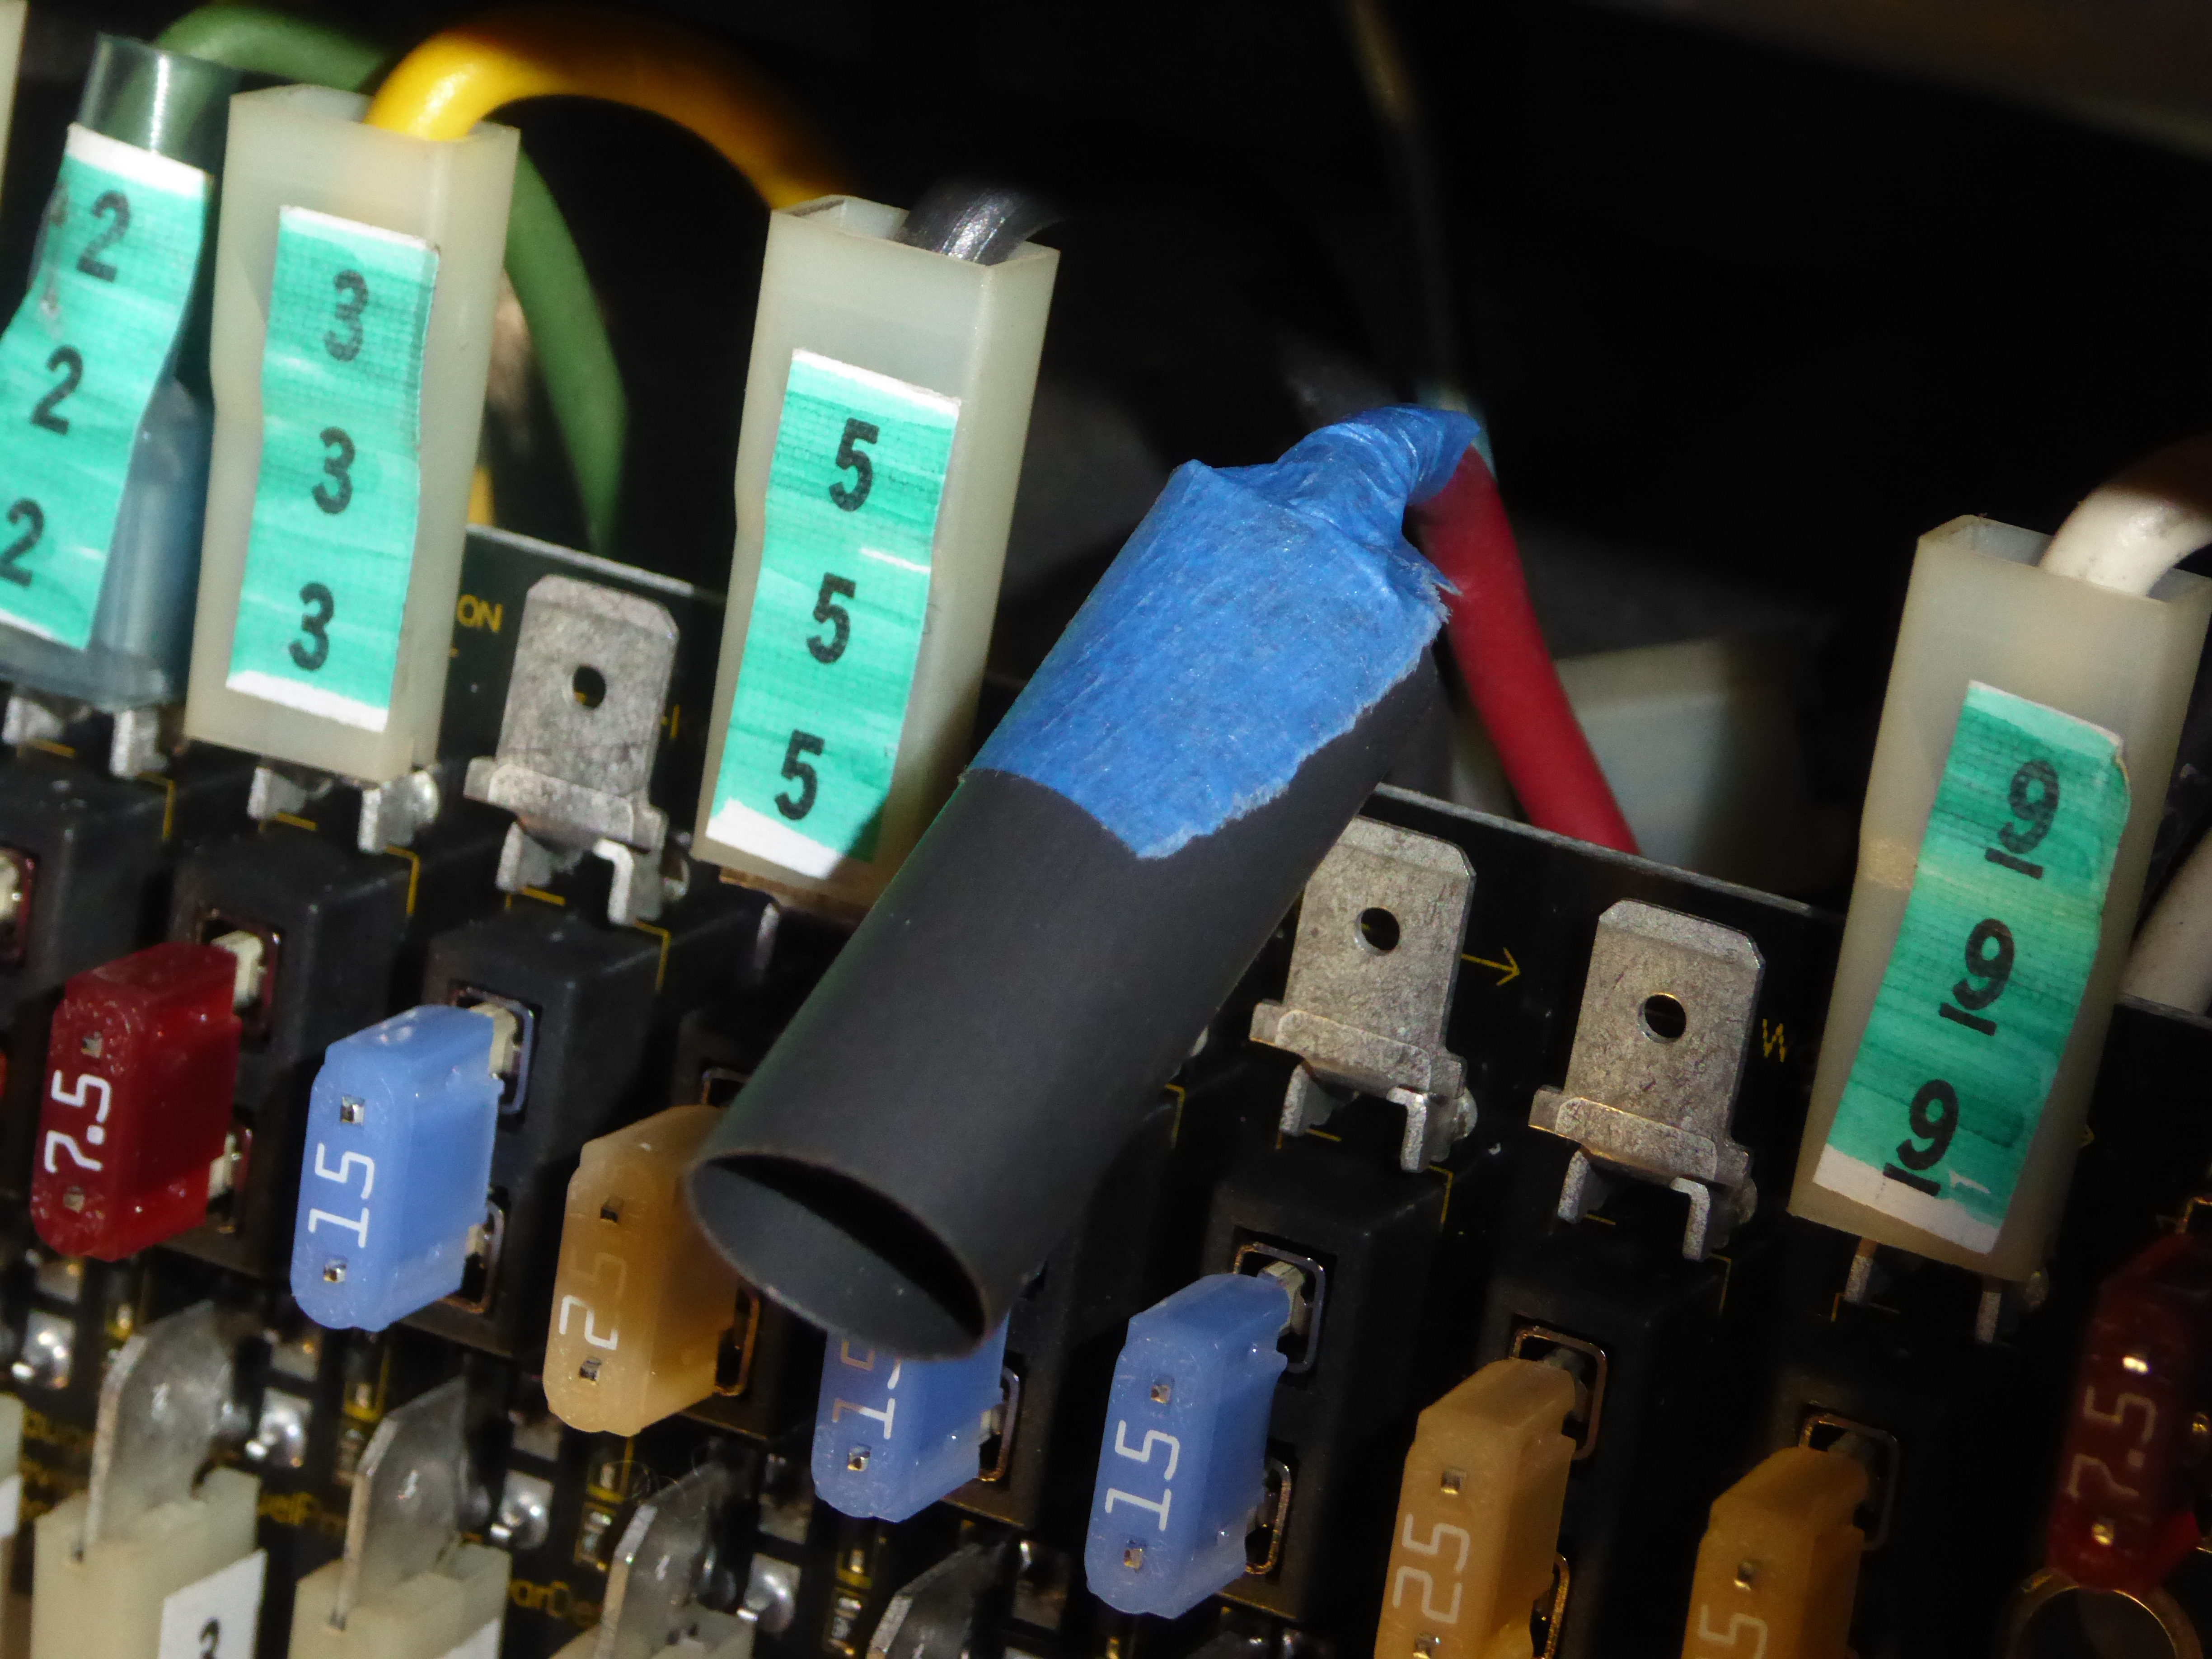
The problems I've been having are from the leftmost fuse (red). Upon further inspection, I noticed that the surface of the connector is different, probably from excessive heat.
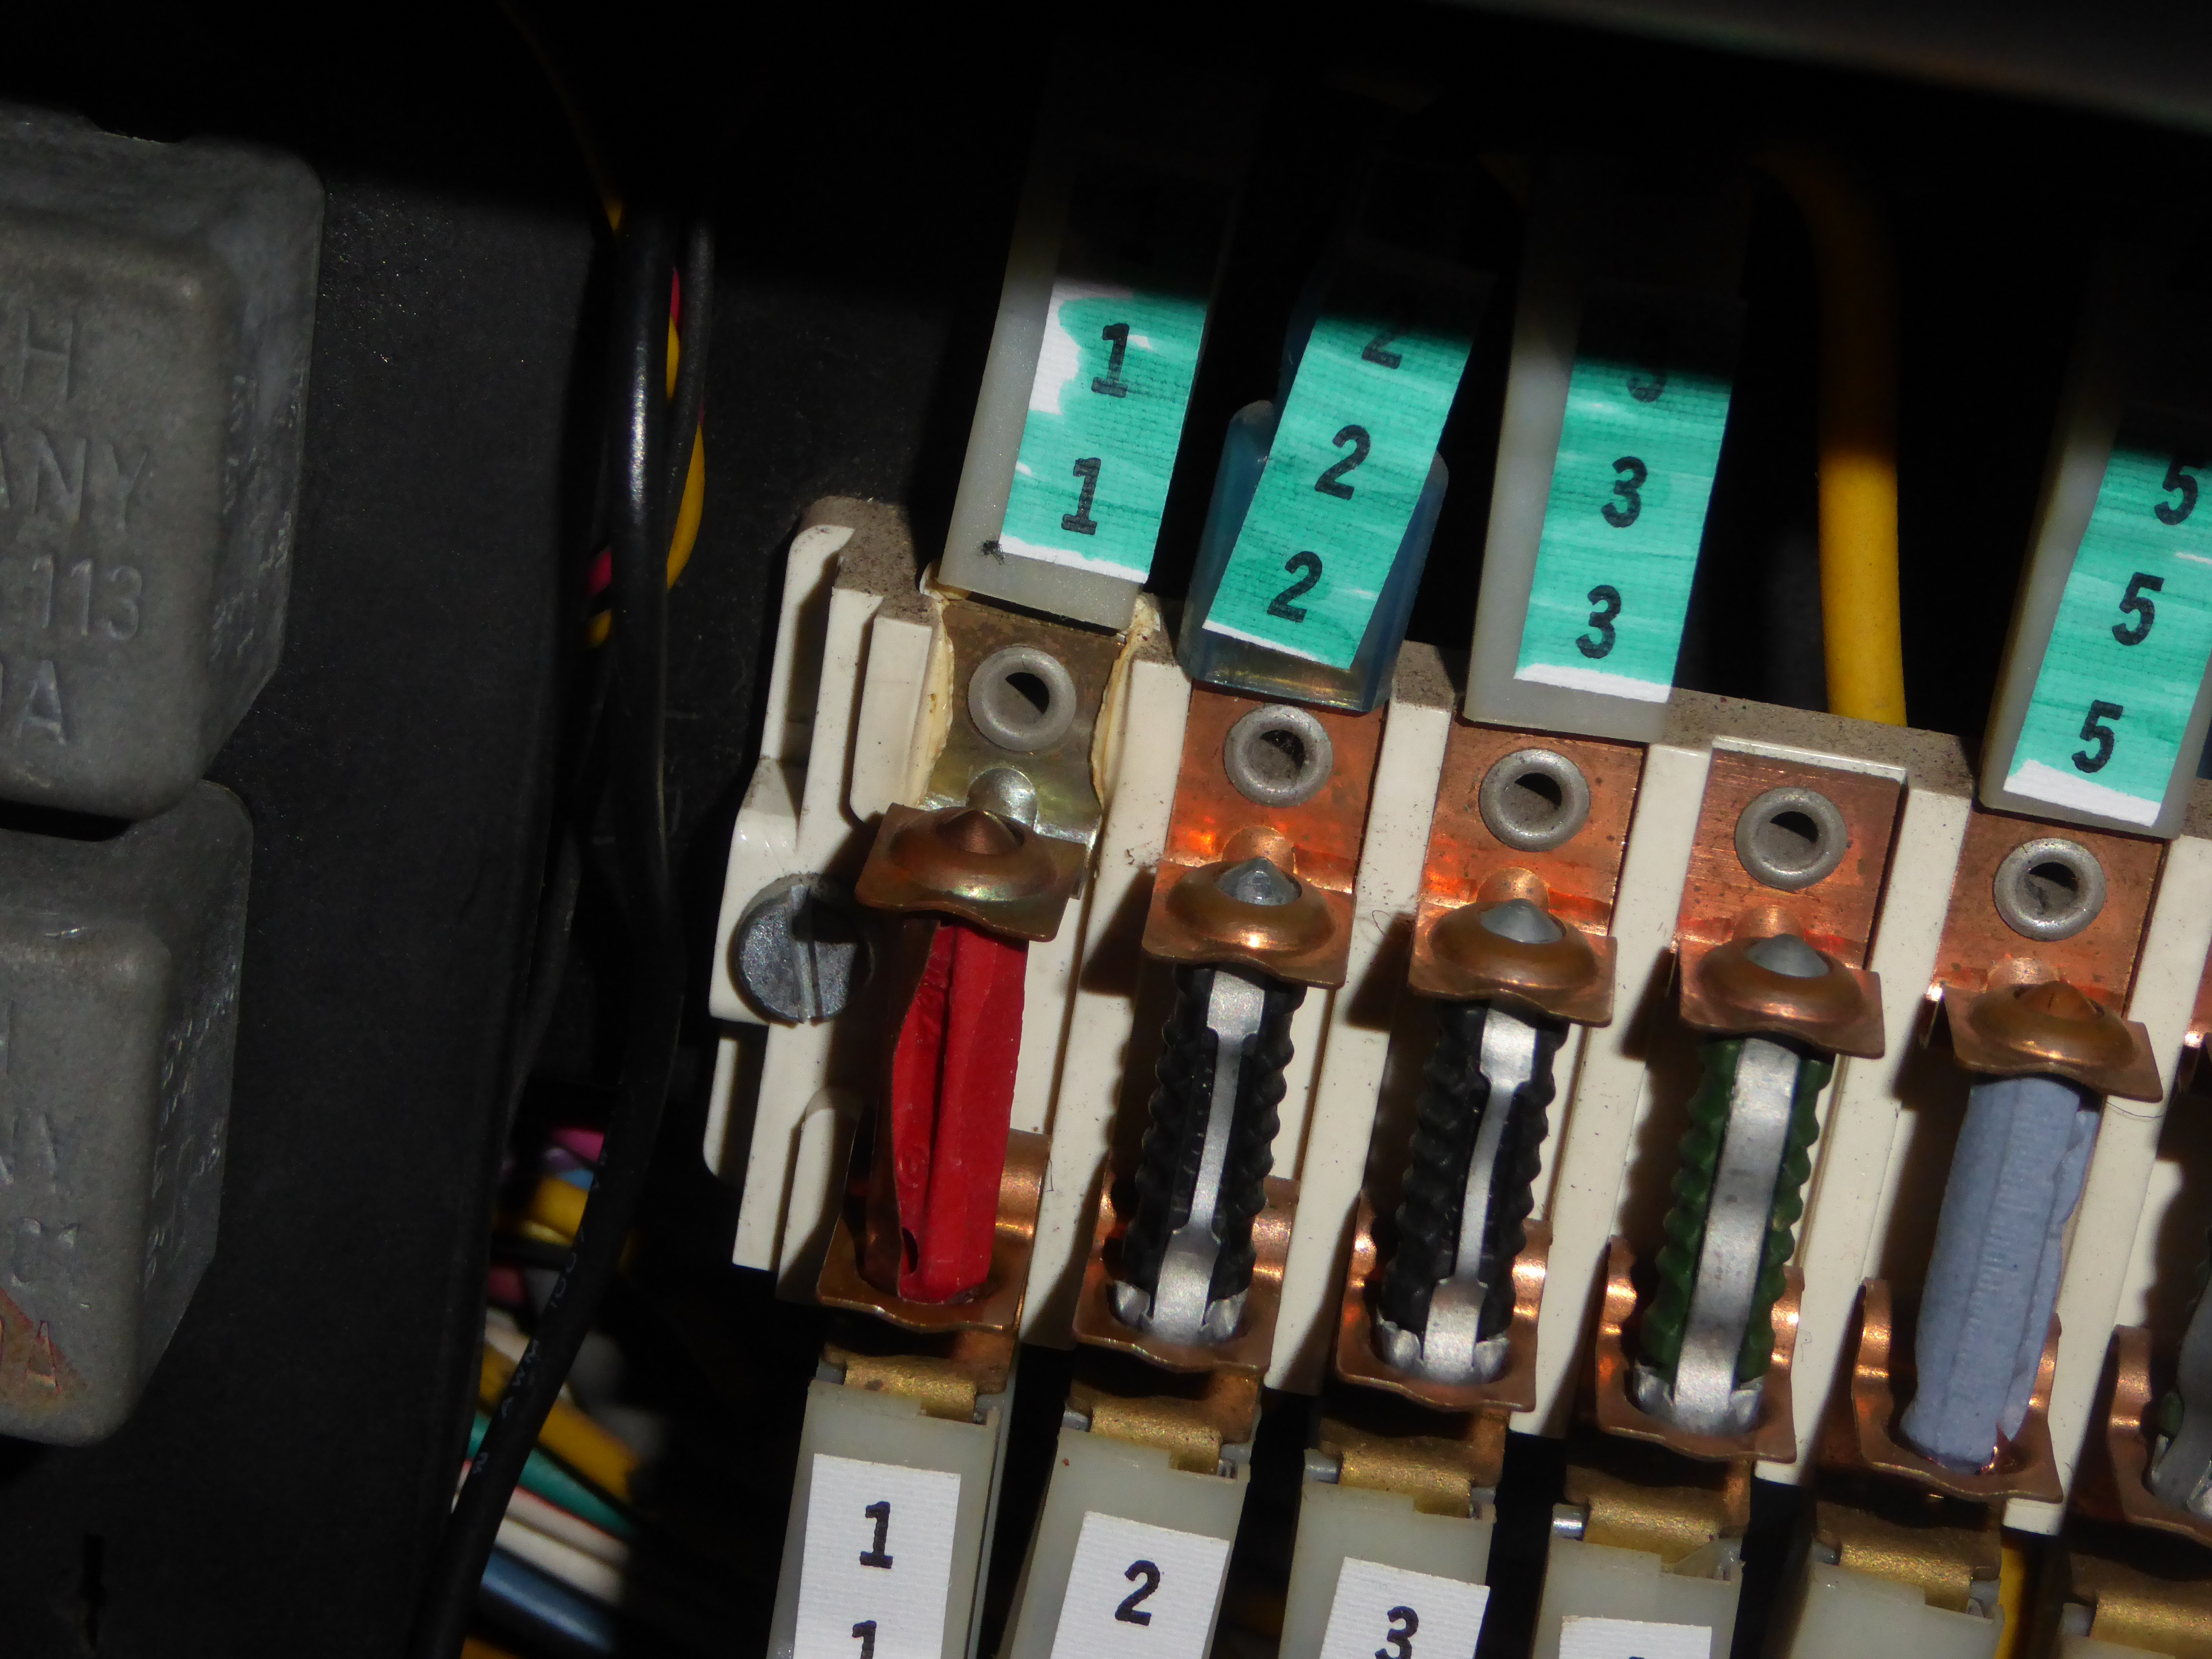
The three leftmost fuses are fed from one hot lead and there is a buss bar connecting the three of them. The other two wires on the top feed other non-fused circuits, including the alternator dash warning light. This was also on when I was having problems with the wipers. It is an interesting circuit. The wire from the fuse panel feeds one side of the bulb while the other side of the bulb is fed directly from the output of one bank of diodes in the alternator. If the alternator is working properly, both sides of the bulb are +12V and the bulb is dark. If the alternator is not putting out enough voltage, the bulb lights relative to the alternator voltage, brighter at low (or no) volts and dimmer at close to battery voltage.

The wires at the bottom of fuse 1 power the wipers, washer motor, turn signals and brake lights. Hence the lack of working wipers. The new fuse panel will clear up all of these problems.
There have been a couple of electrical problems that I've been ignoring. The windshield washer pump would blow its fuse whenever I tried to activate it. I thought that probably there was a bit of grit stuck in the motor preventing it from turning thus pulling too much power. These little pumps are simply two plastic gears that push water through between them as they spin. It takes just a little piece of grit to jam them. Well, I disconnected the wire and hose from the tank and removed it. This is easily done since it has to be removed to remove the spare tire. When I looked at the connector, it was a bit twisted up, probably from removing the tank and setting it aside to access the spare tire or battery underneath over the years. As I was unwinding the wires, they were stuck together and shorting at the connector block, thus causing the fuse to blow. I separated then with some shrink wrap and electrical tape. I had to split the shrink wrap lengthwise as there was no way to slide it over the wires, but it was able to be slid down into the connector and then taped in place. I also bench tested the pump and it worked fine.
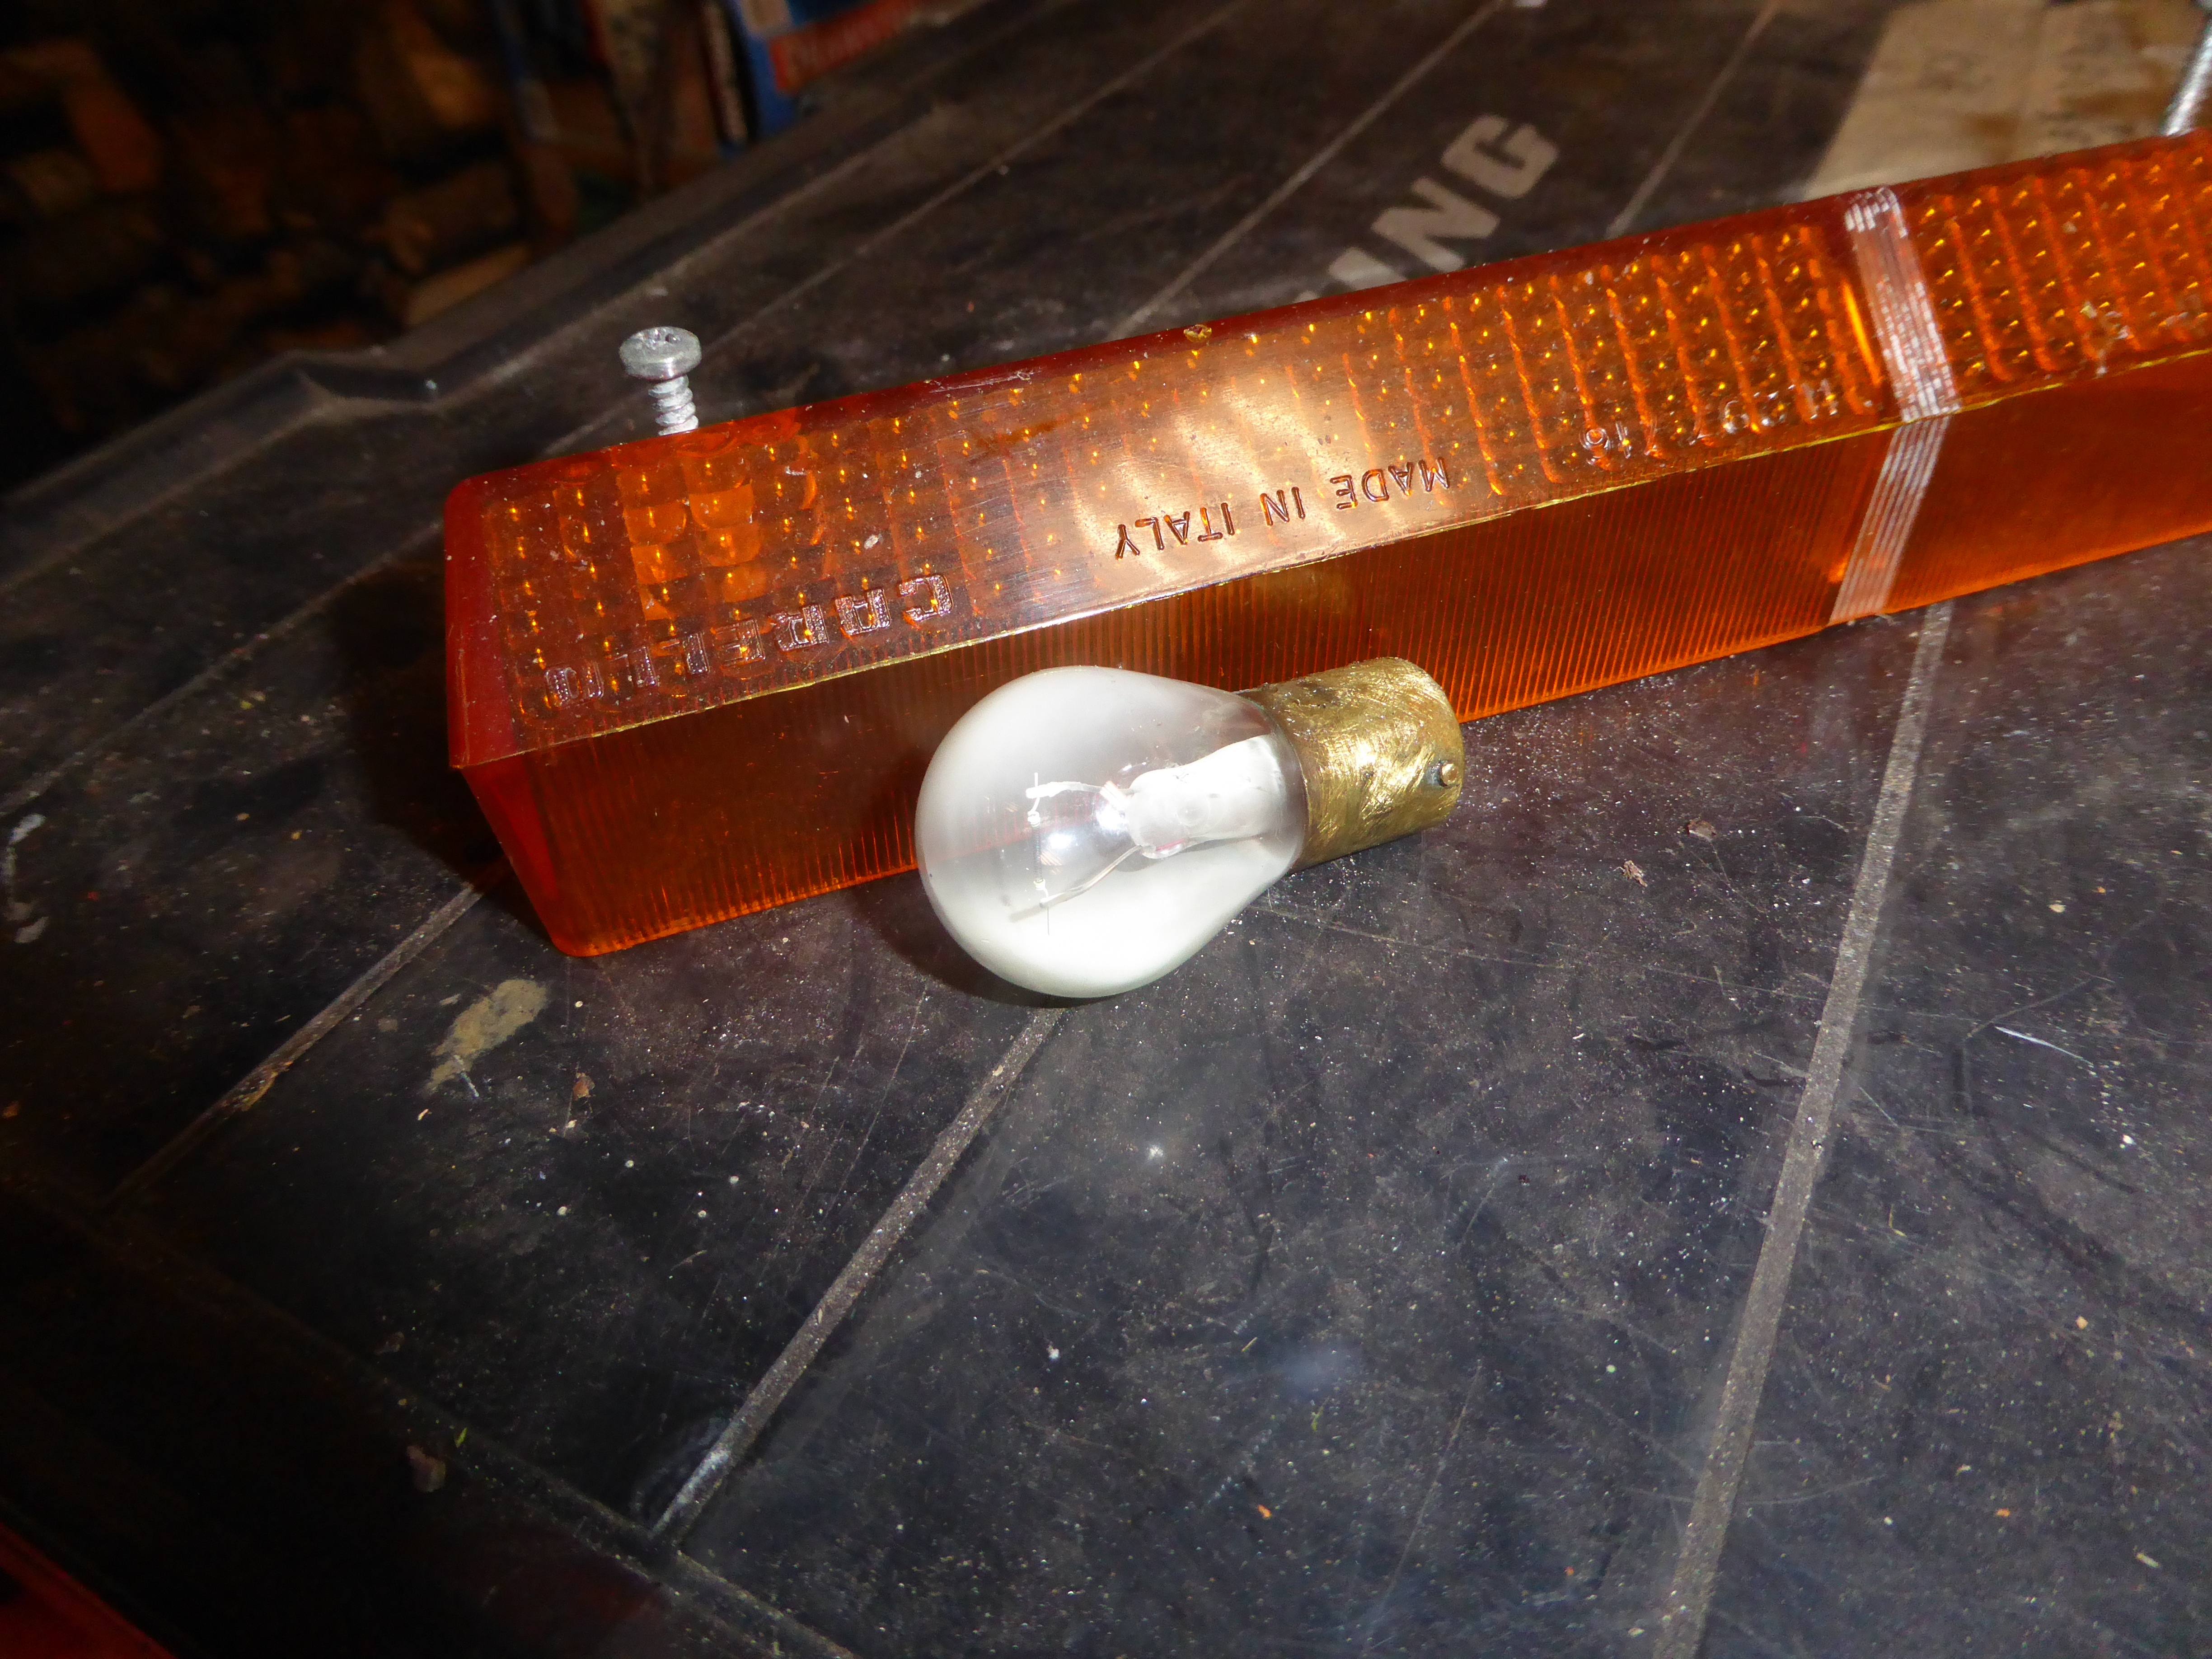
The left front turn signal has always been a problem. I've had to fix its ground a few times since I've owned the car. So I just assumed that it was the same problem again, though the last time, I cleaned everything and used dielectric grease to prevent corrosion. When I took the cover off, the bulb looked pretty flaky and wasn't working. Of course, I have many different spare bulbs around, but no 1073 ones, so I'll have to stop at an auto parts store and get some. I also noticed that the tapped extensions that the cover screws go into are splitting. The housing is just pot metal and I wasn't surprised that this was happening. I don't know if housings are available, nor do I want to think of what the price might be if they are. So instead, I put some JB Weld epoxy in the cracks and then used some shrink wrap to stabilize each extension.

I did make a jumper with an inline fuse to test the circuits by bypassing fuse 1. Everything worked including the turn signals, wiper and washer. I also checked that all of the exterior bulbs including the brake lights all worked.
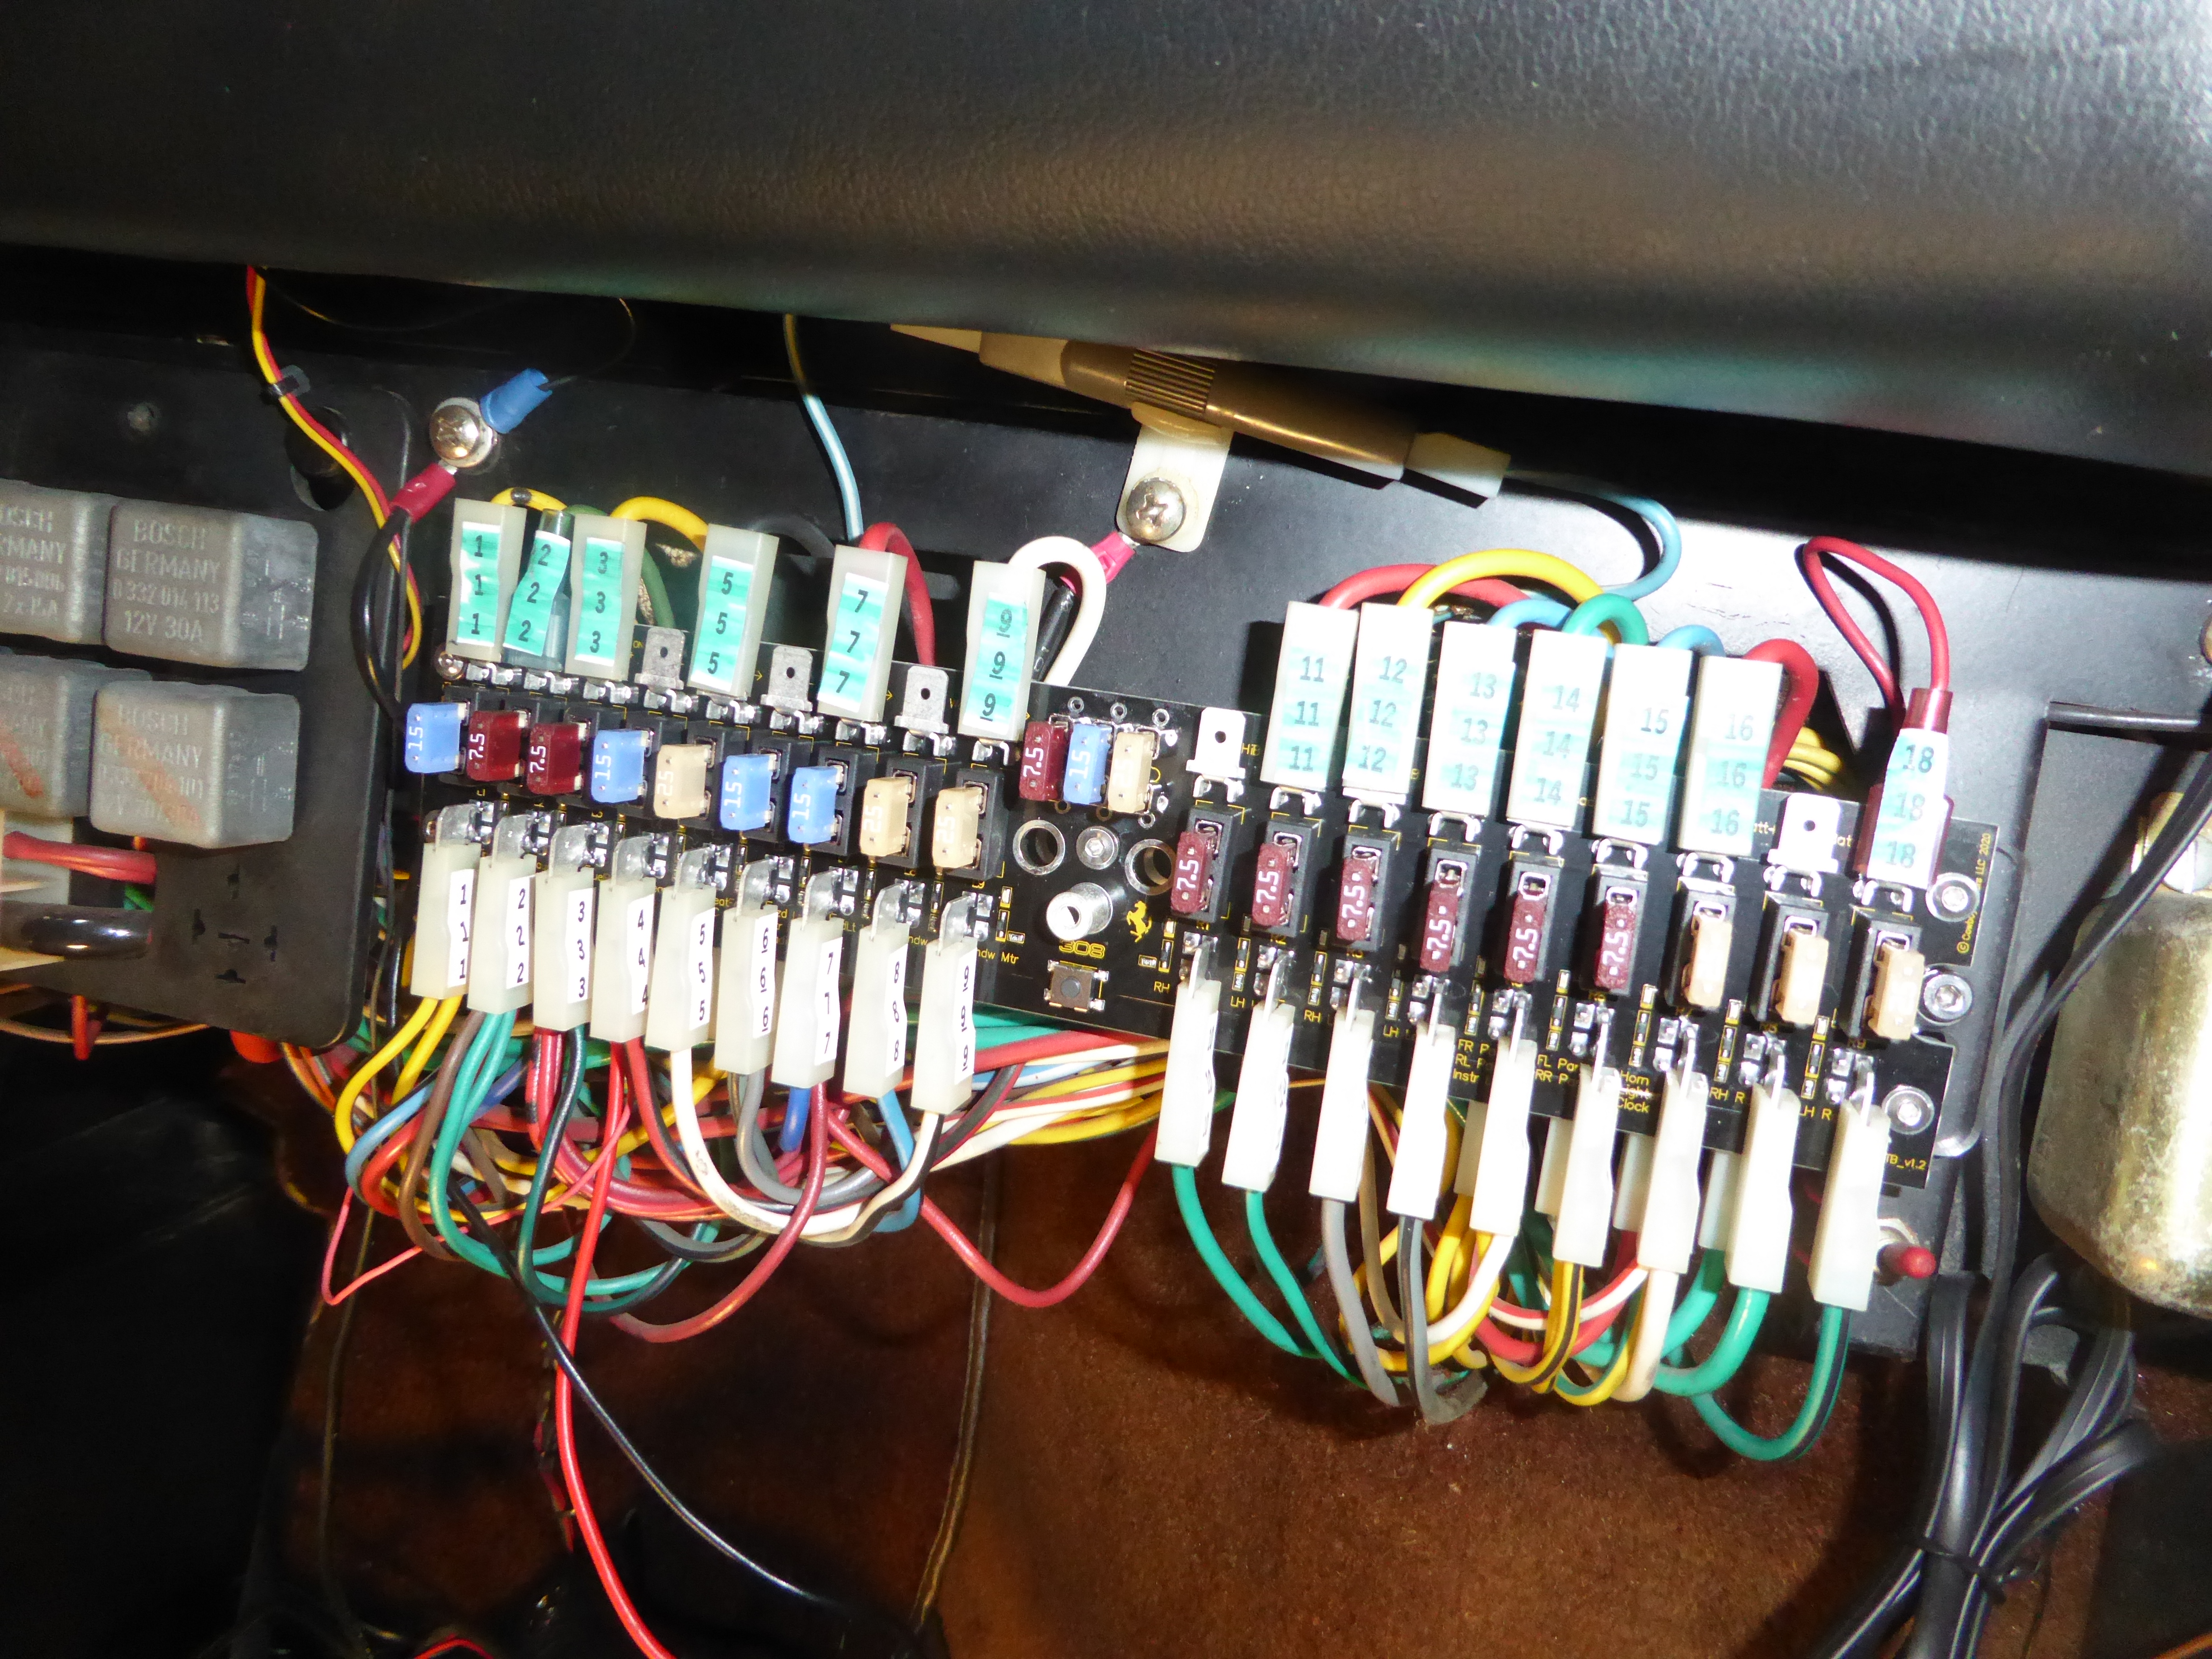
The new fuse panel came in a day early. I was getting ready to visit Dennison's to check on the PF coupe engine and progress on the 330 when I heard the package being dropped off. Kudos to the post office for a quick delivery. Mailed in MT and delivered in WA in about 40 hours. The panel and cover looked exactly as I was expecting. The instruction were clear with pictures or illustrations as needed. Several warnings to make sure that prior work on the existing fuse panel would be noticed and allowed for during the installation. Basically the installation is removing the wires from the old panels and moving them to the identical place on the new one. First I raised the car on the lift to make access a standing situation and not have to be kneeling or trying to sit on the door sill.
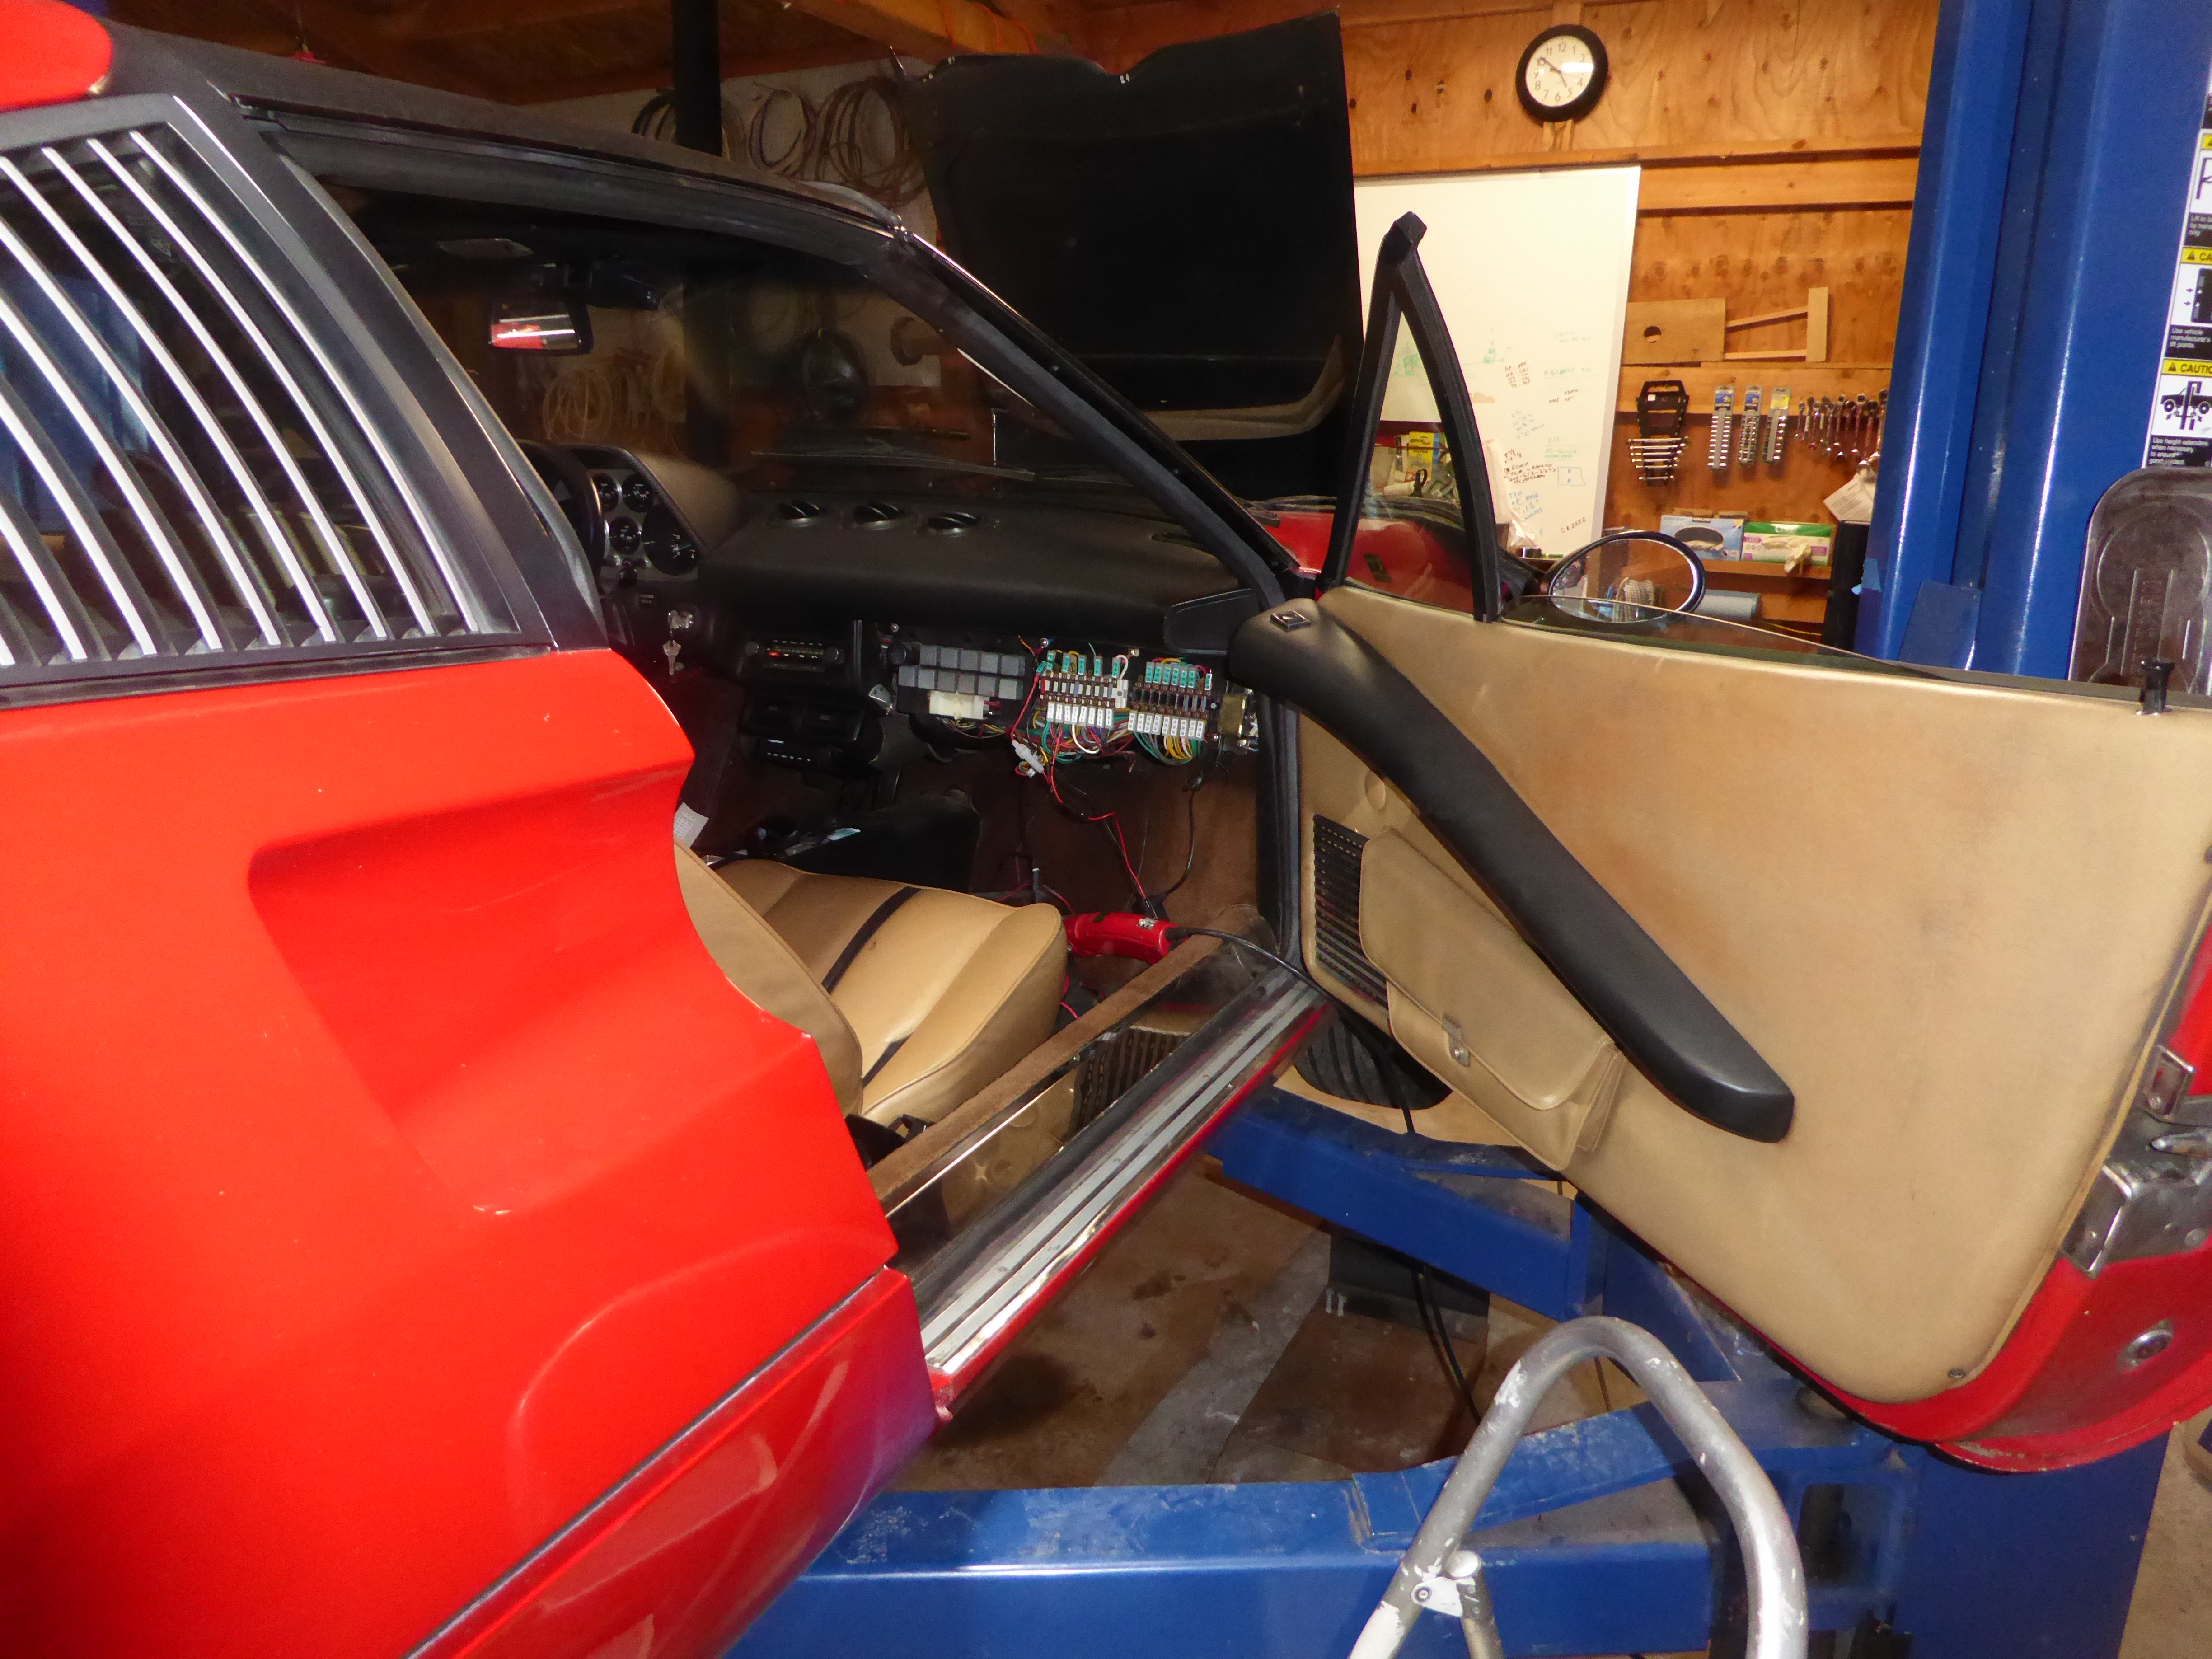
I had already labeled the wires with the top row (unfused power) with highlighted markers. One of the cautions was to disconnect the battery. That's a good idea, but in the 308, you have to remove the washer fluid container, the spare tire and open the battery access panel. Then you are bending over the fenders to the center of the car trying to reach down and free up the ground connector. Instead, I isolated the three always hot leads going to the fuse panel. I removed them and taped on a length of shrink wrap so there was no possibility of them accidently grounding.
Then I started by removing the bottom sets of wires and moving them to the new panel. Once that was done, I removed the screws for the existing fuse blocks and taped them up out of the way while I screwed the new panel in place.
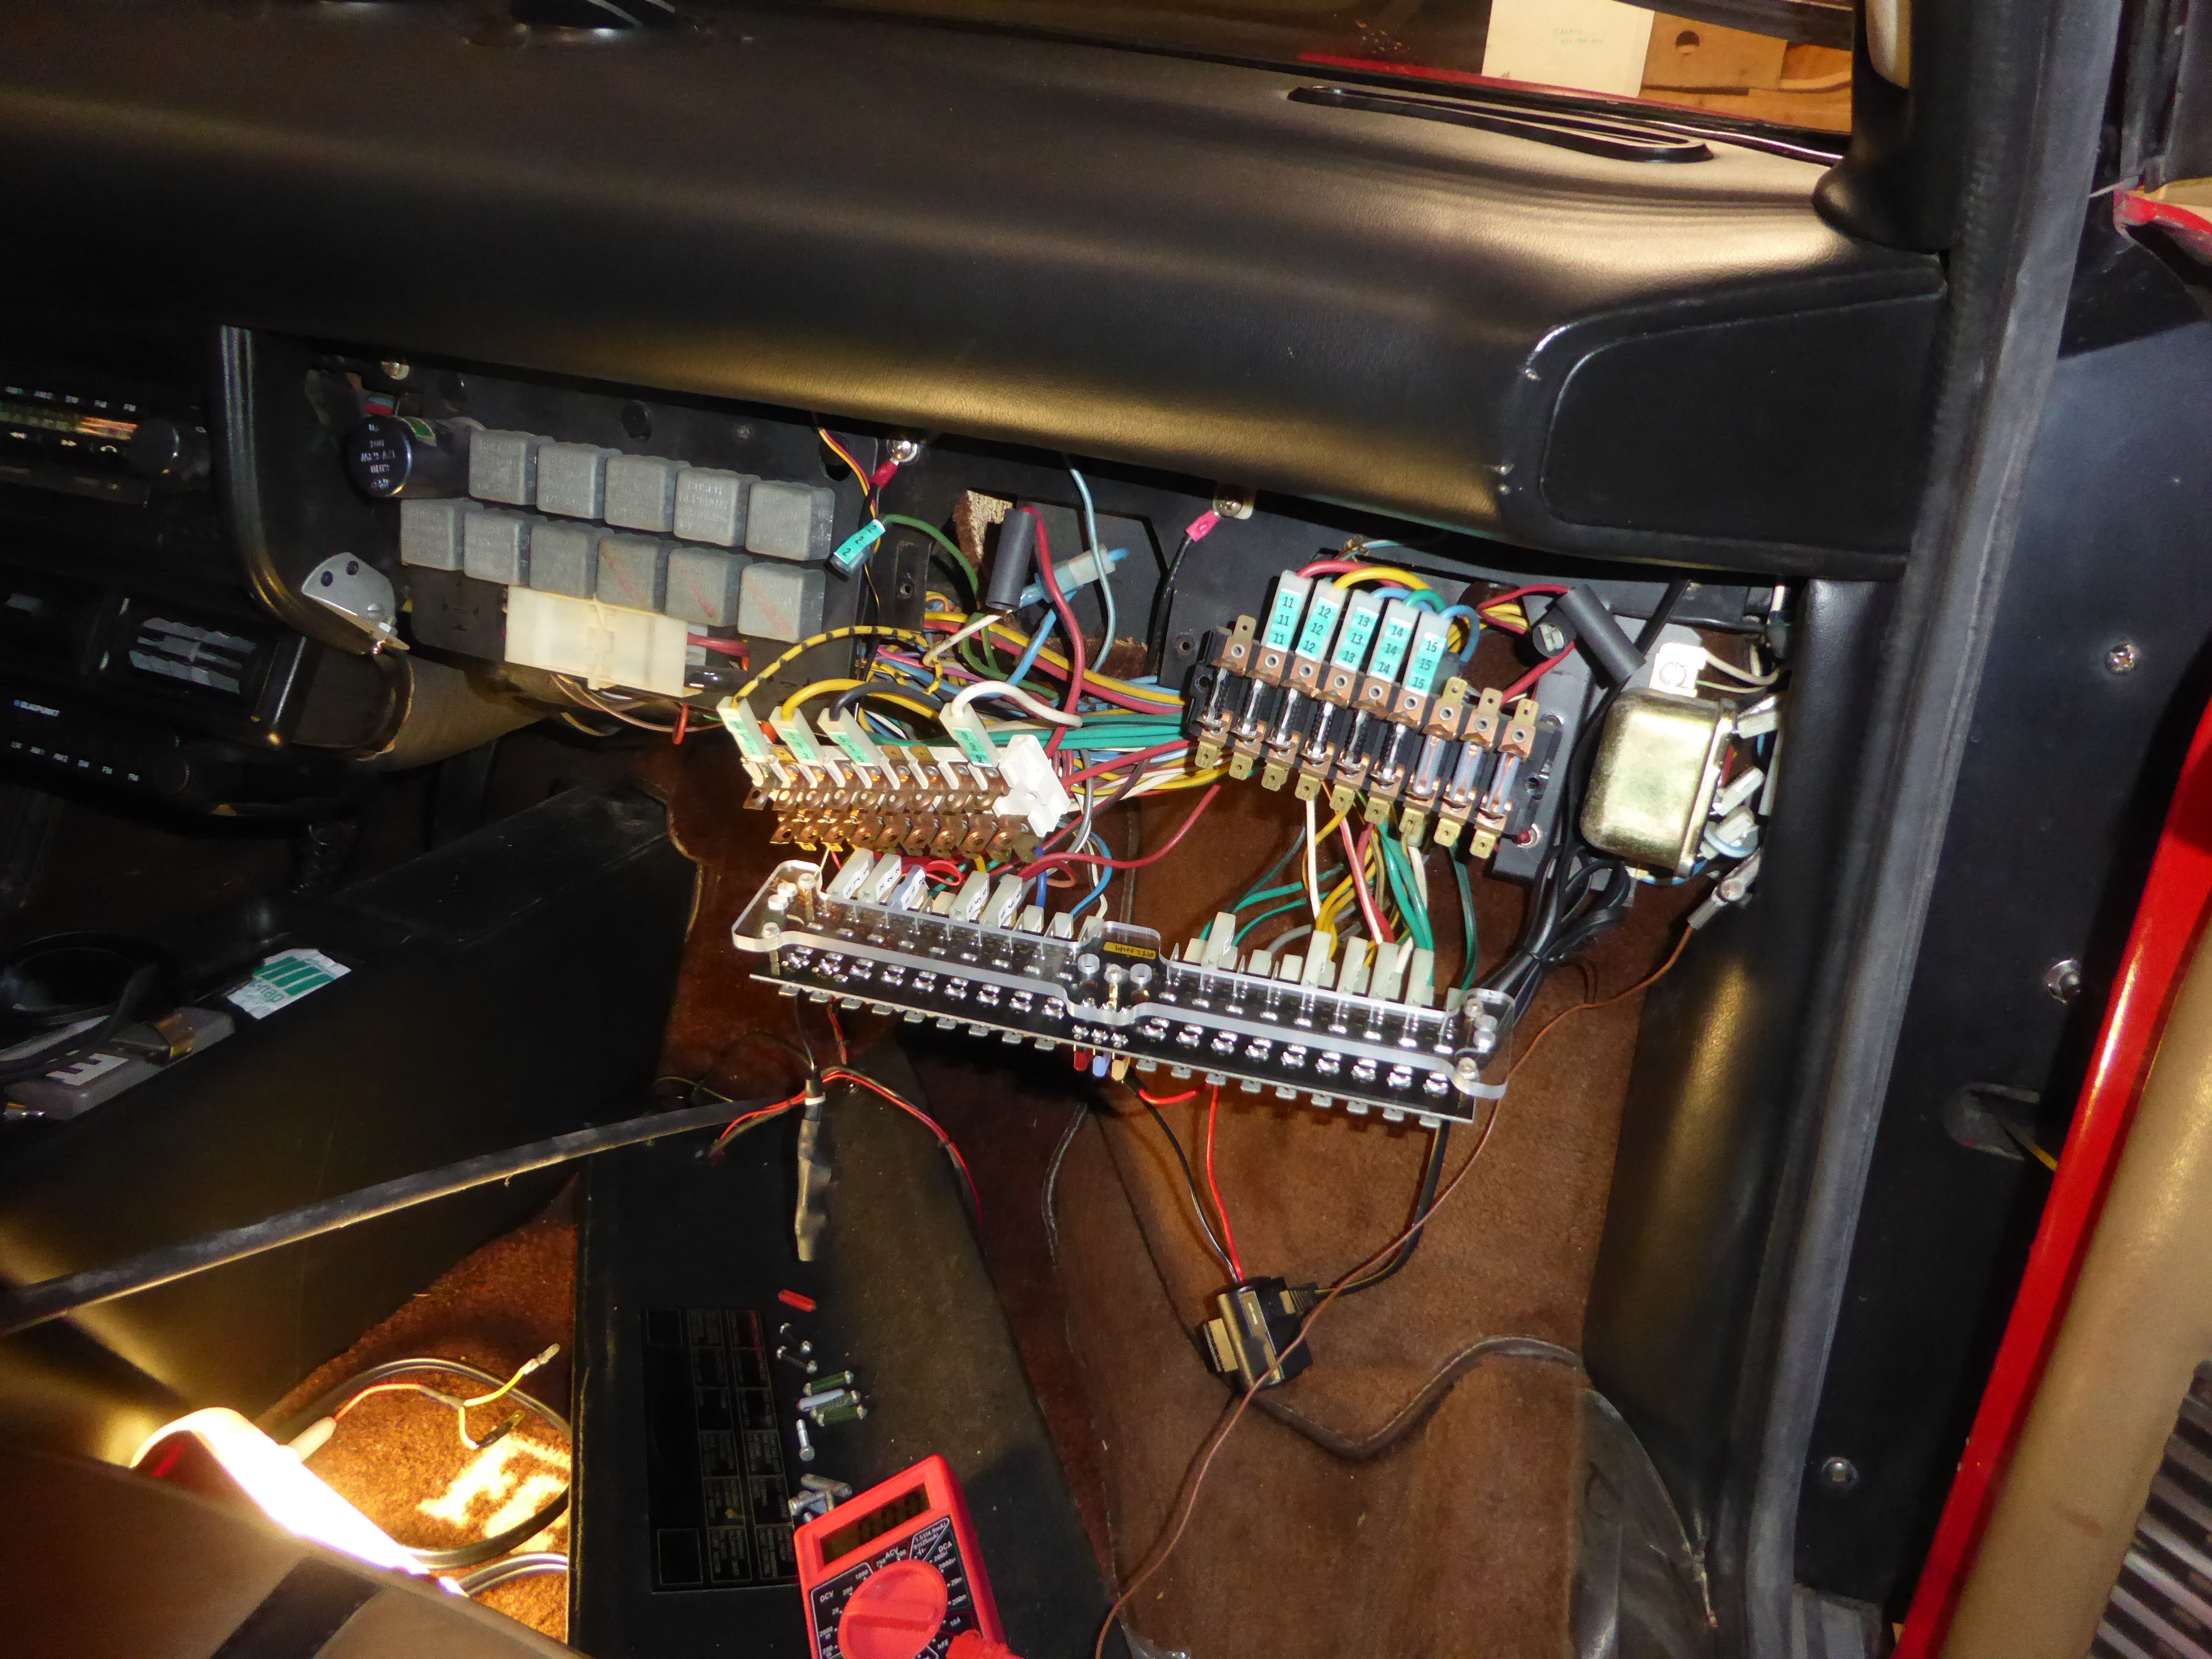
Then I moved the upper wires from the old blocks to the new panel, un-taping the hot ones at the end. I was now about an hour into the project having done the labeling the other day.
Then it was time for testing. My car has a aftermarket alarm for which I have no instructions except what the owner told me. That was how to set, disarm and put it into a hold mode rather than automatically set when the doors are closed. I've always kept in hold mode, but whenever power is lost, the alarm always sets itself when power is back on. I noticed a tiny toggle switch at the bottom right of the fuse area. I had set the alarm off earlier and as usual, had to pull out the owner's wallet, find the code and reset it. Hmm, I thought that this switch might permanently turn off the alarm so I wouldn't have to worry about it, so I flipped it down. The light on the alarm turned off and I thought I had successfully disabled the alarm.

Then when I started testing, any circuits that work in run mode (key when engine is running) didn't work. Further, there was no incoming power to those circuits. At first, I though that perhaps I had frayed or broken the two wires as I was moving them to the new panel. But the connectors looked and felt fine. After looking at the wiring diagram again, I thought about the switch I changed, so I flipped it back up. That caused the alarm to turn back on, but I was able to reset it before it went off. Then suddenly all of those circuits were working. So that switch is actually an immobilizer, turning off everything when the key is in run mode. I would really like to remove the whole alarm system, but I think I would need to remove the dash to follow all of the wiring and get everything working again. Well, at least I know how to completely kill the car if I need to. It took another half hour to suss out the alarm switch and get it back in the right position. If the previous owner had told me about the switch (and I remembered from 18 years ago), the testing would have been a snap.
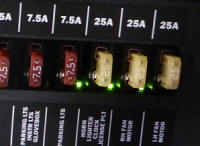
One nice feature of this panel are LEDs that light up if the fuse is good when a test button is pushed. You can see the three lit ones that are always powered. The others like the headlight circuits to the left would only show up if the corresponding circuit was turned on.
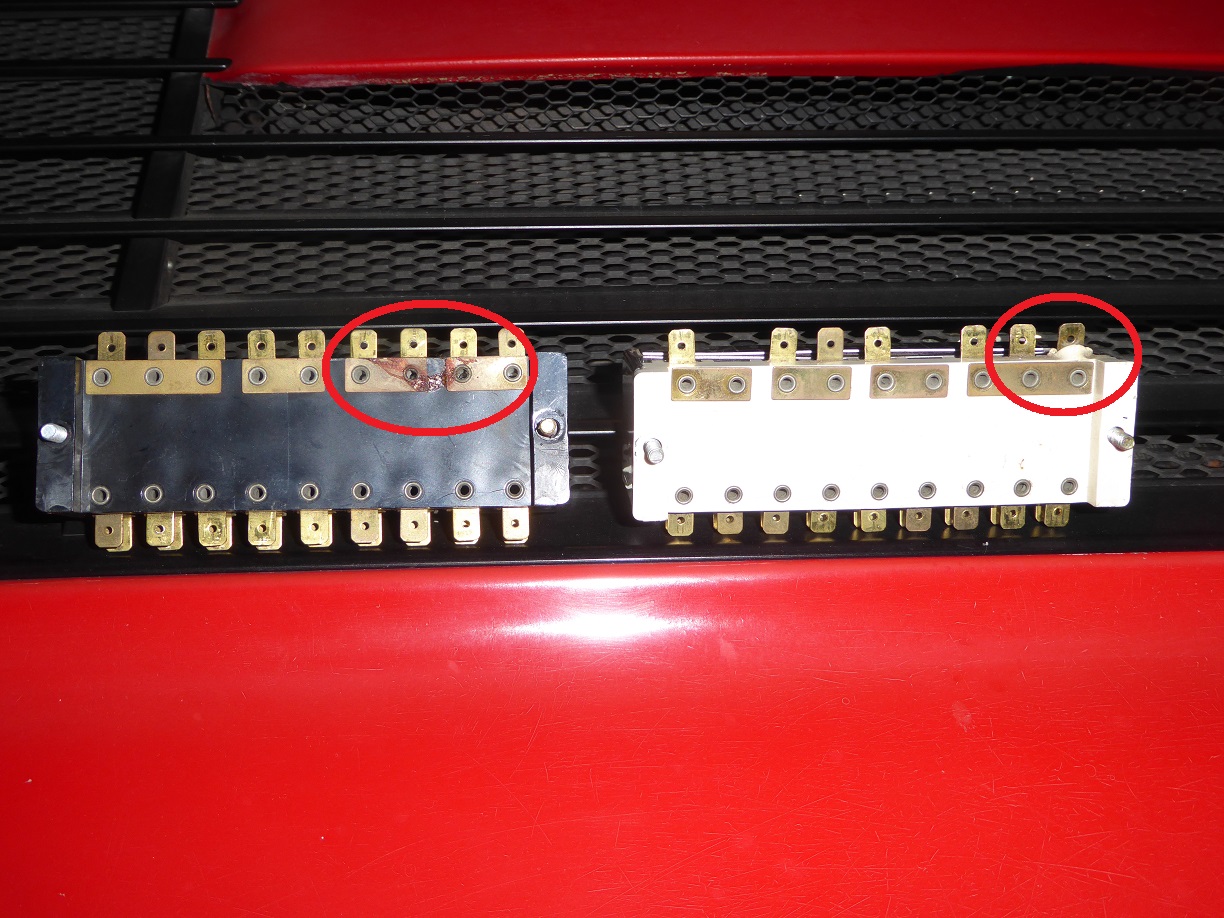
In looking at the old fuse blocks, you can see where the buss bar leading to the fuse I was having a problem with has gotten hot and melted some of the plastic. The other block had some corrosion going on it too. So I'm glad to have these problem fuse blocks gone from my car.
As a side note, the electric windows work a little faster since there is less voltage drop across the fuses. Every little bit helps with 308 windows.