Air Conditioning Ducts
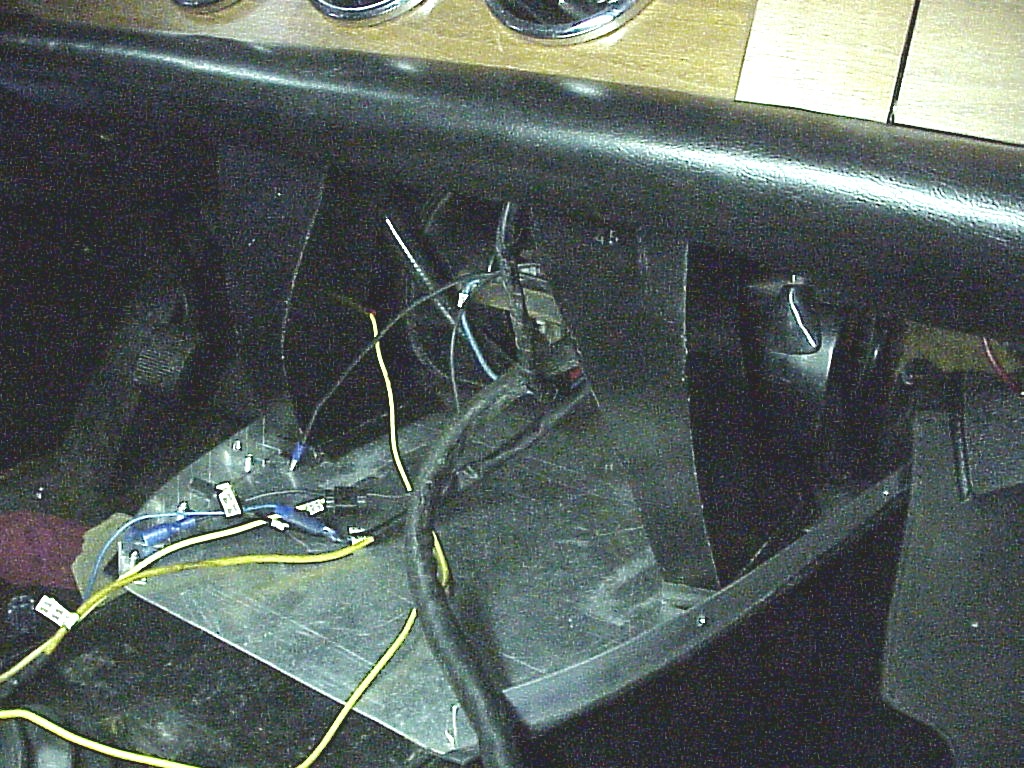
I had noticed that the console was missing a panel that supports the two 'wings' that fit under the dash. I had seen another car that had that panel not long after I bought my car. I also noticed that the panel had a couple of rectangular cutouts that didn't make any sense to me. It turns out that they were for the A/C ducts that were also missing on my car. I had made a simple panel that worked until now.
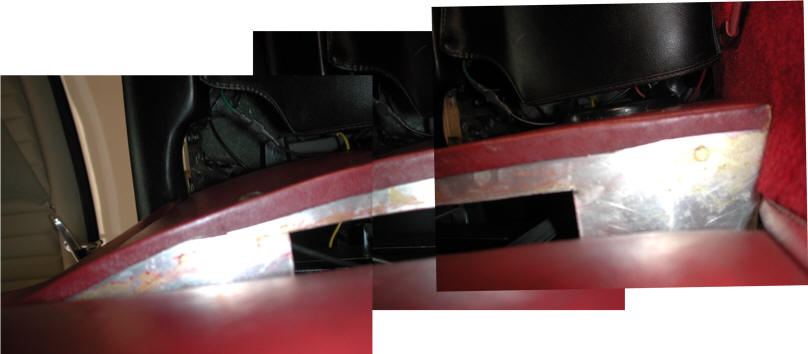
I asked Lowell Brown to take some pictures of the bottom of his console and some measurements so I could make a new panel and get everything correct. I put the pictures together so I could get an idea of the overall shape.
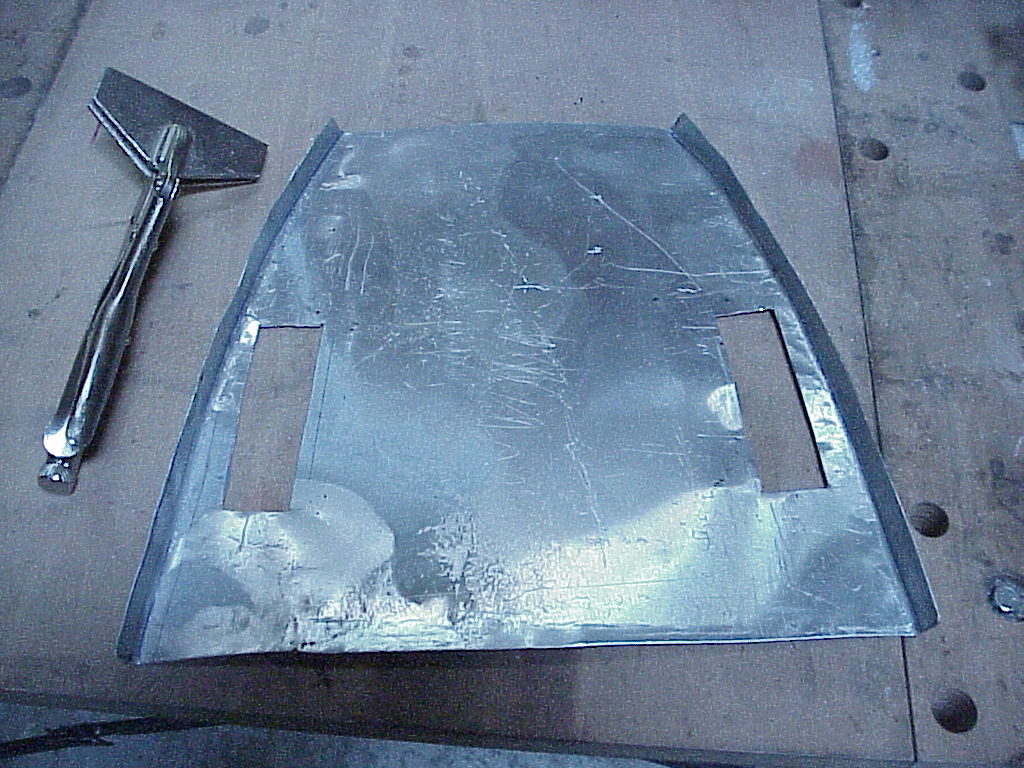
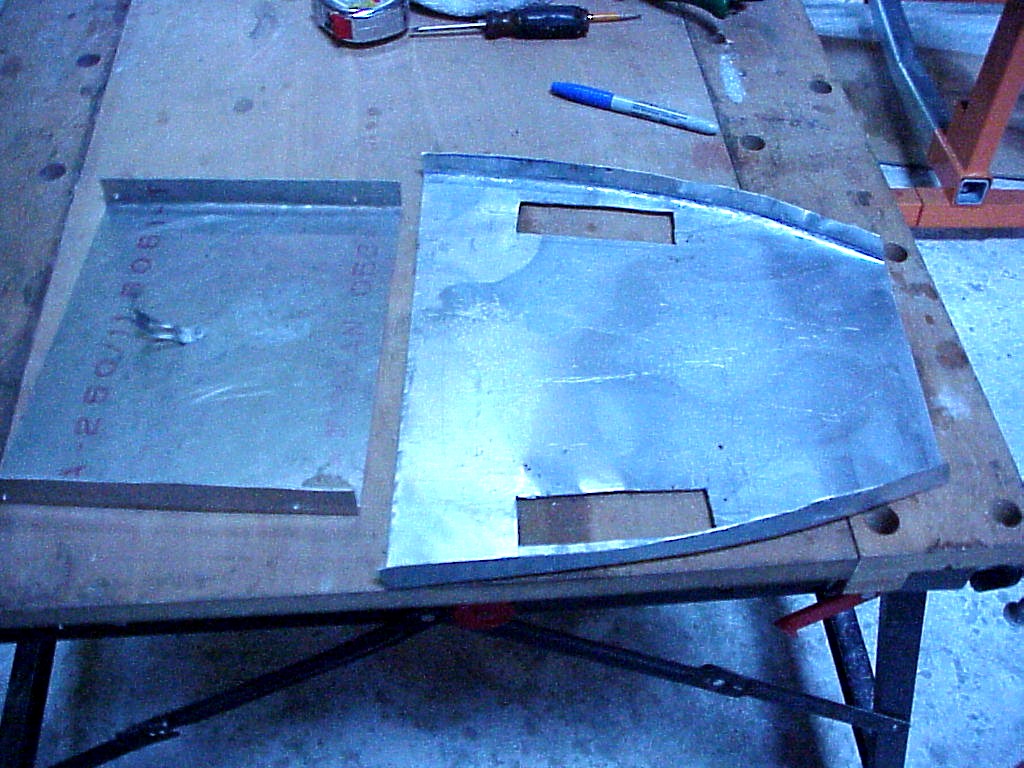
Then given the dimensions, I made a paper pattern by tracing using my console and moving the wings to the right places. I transferred the pattern to some aluminum, allowing about 3/4" at the two edges to allow them to be turned up so they can be screwed to the console.

Here is the finished panel.
 |
 |
You'll notice the clamping pliers with the wide nose. These pliers are designed for welding to clamp two panels together, but I also find them useful in bending parts where I want a wide grip.
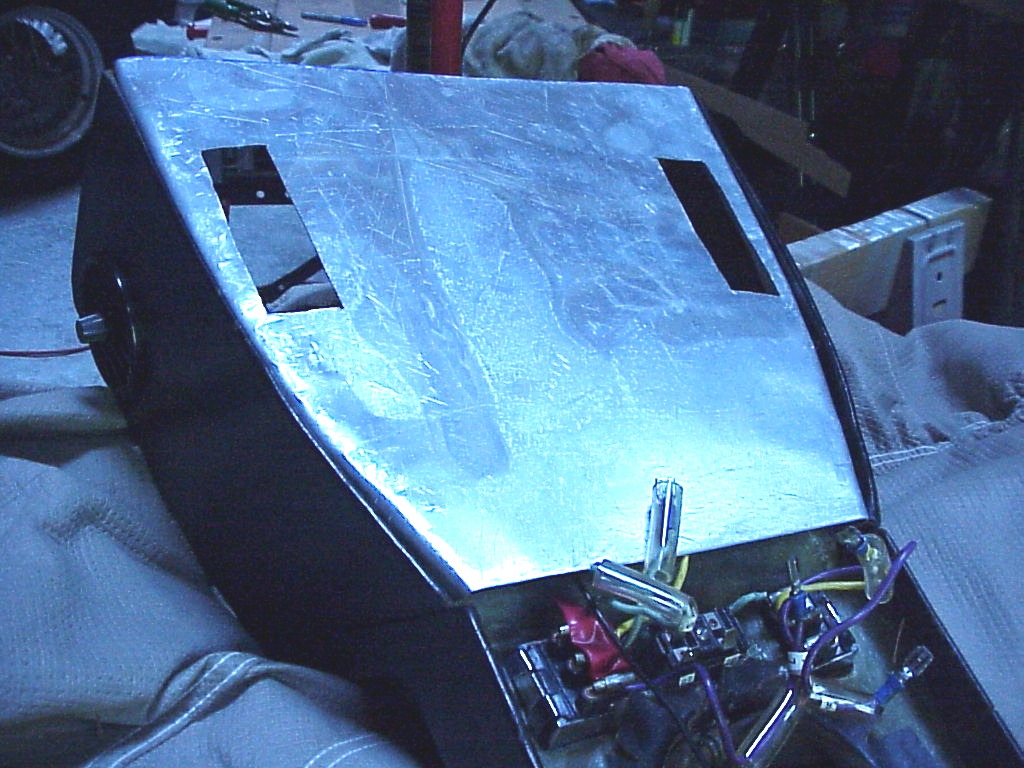
Quite a difference from the original one (on the left) that I made a long time ago.
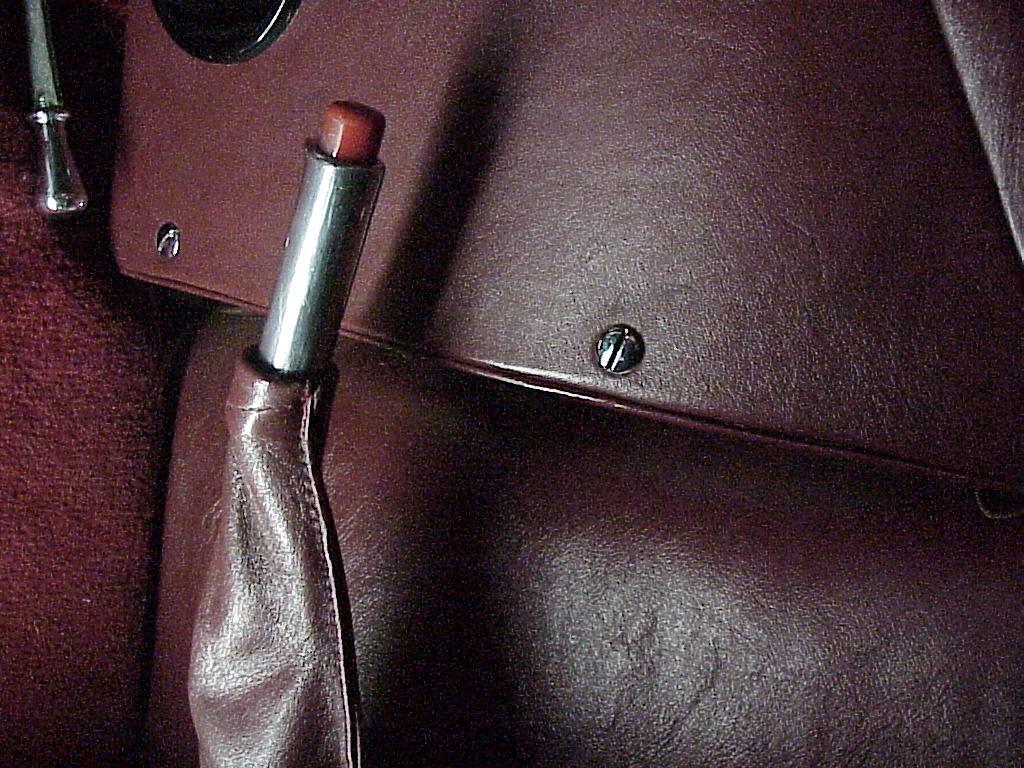
I'll also need to find four appropriate round headed screws to hold the panel to the console. After reviewing the pictures from Lowell's car, the way I made my panel isn't like the original. You can see some flat rivet heads along the edge of the leather in the composite picture above. Then you can see the leather covered edge in the picture below. Lowell had mentioned that the wings of the console had some sort of bar fastened to them. So I think that the panel has leather covering the edge with some angle aluminum riveted to it. The bolts screw into the angle material to hold the panel to the console.
The next thing to work on is the duct work. The ducts are part 7 below.

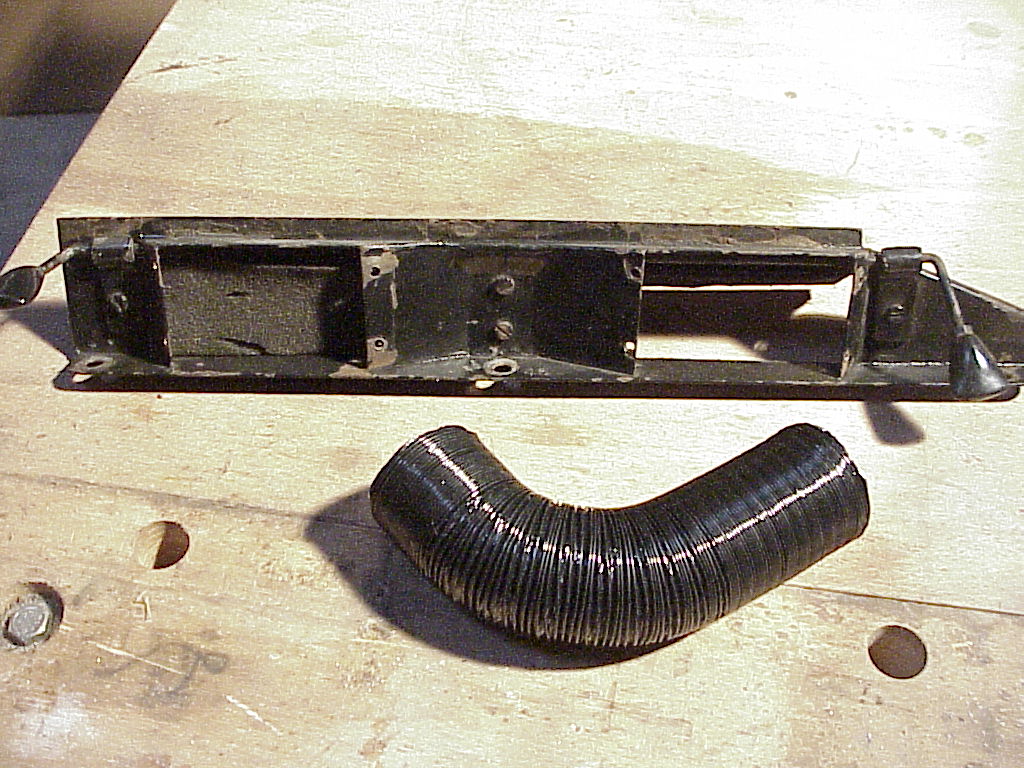
They are pretty complicated so I'm going to try another solution. You can buy carburetor tubing that is designed to prevent icing by bring heat off the exhaust into the air cleaner. This tubing is a plastic and aluminum corrugated product that expands and can be bent as necessary. If I can find it in 2.5" size, I hope to make two fittings, one to fit the rectangle in the new panel and the other to fit the door flap area of the evaporator box. That size has about the same area as the two openings. The tubing can be squished to make it into an oval, so I can get it to approximately fit the openings. You can see the door flaps (one open) and some similar 1.5" tubing that I had on the shelf.
Stay tuned as I continue this project later.
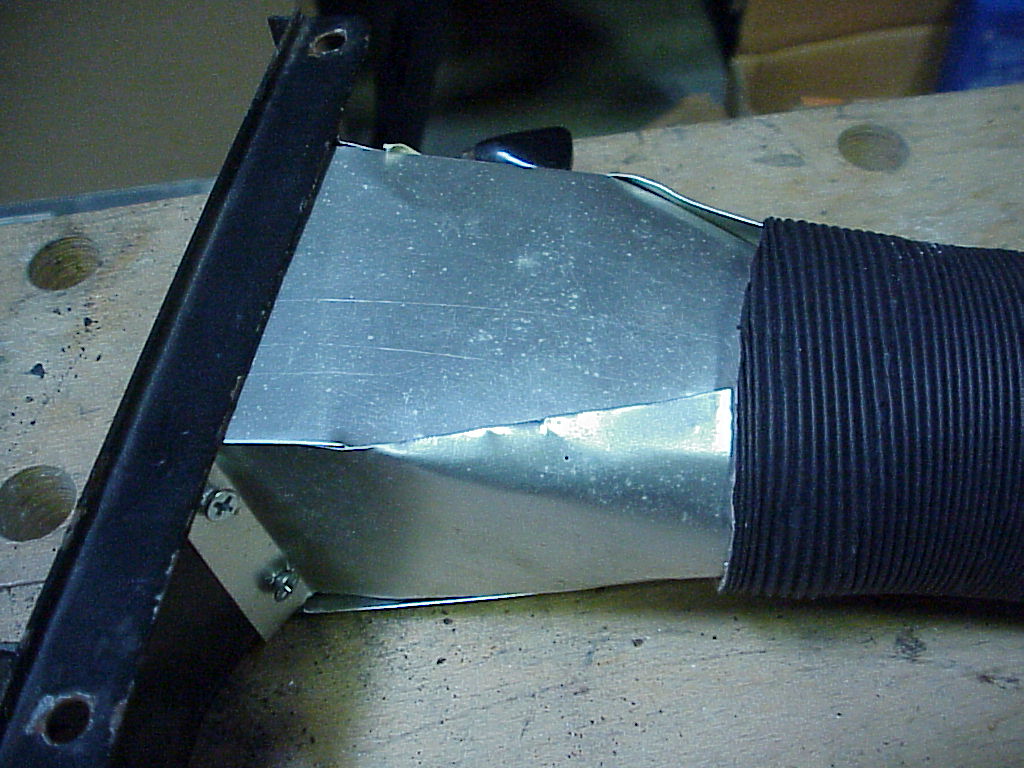
I tried to mock up something that would use some tubing, but it turns out that the length necessary to turn the rectangle into an oval is too long. The duct would hit the top of the radio.
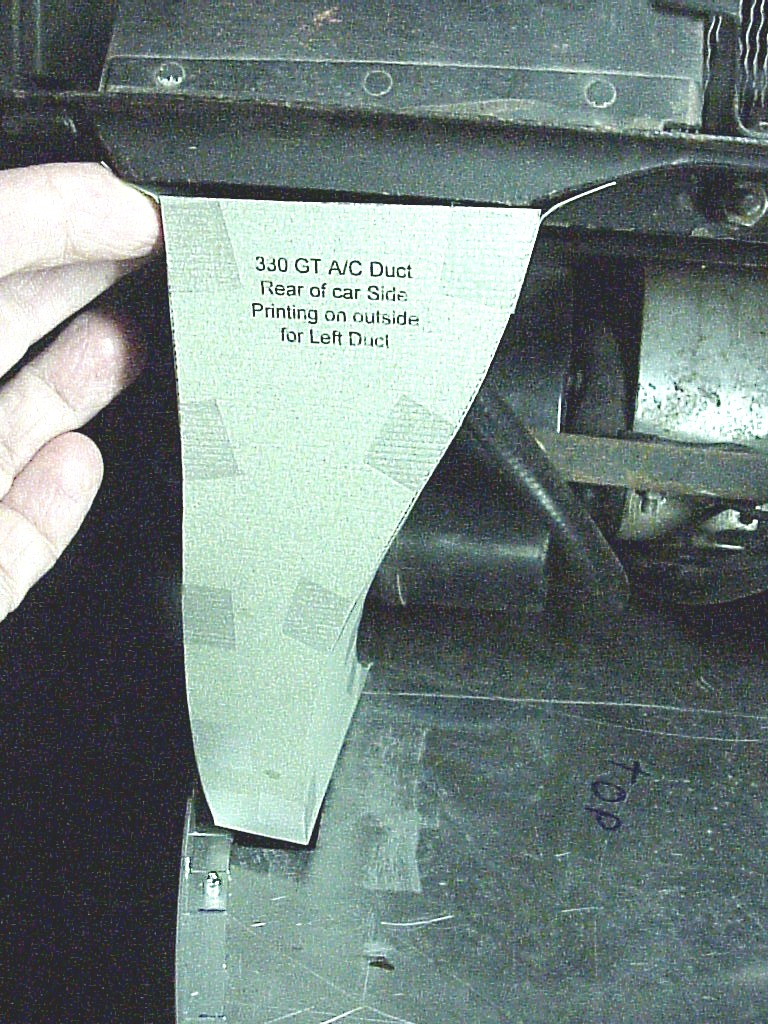
So I went back to the Ferrari solution, a swooping four sided duct. I spent some time in a CAD program designing the pieces given the dimensions I could approximate. Since the evaporator is at the A/C shop, I don't know exactly where the door flap area is relative to the holes in the bottom panel. I printed out the four sides on some heavy paper and then taped them up so see how it might look.
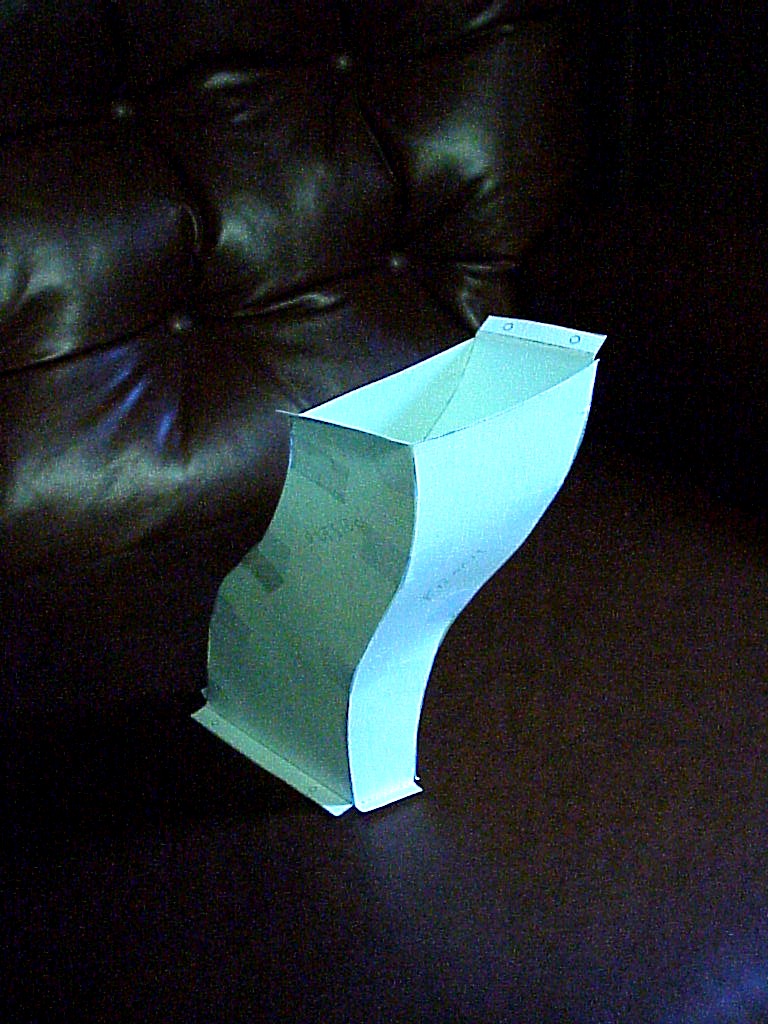
I can't go any farther until I have exact measurements, but at least the concept works. Compared to the drawing above, I may need to have the sides swoop down thinner in order to clear the fans. Eventually, I'll make them in aluminum and have my neighbor TIG everything together.
After some thought, I decided to go back and make the bottom panel like an original. Since the leather covered edge is visible on the original, my design with the upturned sides would look different. I bought a section of aluminum angle (½"x¾") and cut a bunch of slots in the ½" side. This allowed me to bend it to conform to the curve of the console. Then I pop-riveted the angle to the panel with enough inset for the console thickness. You can see the leather strips that are used to cover the edges ready to be glued on.
I also made another pass on the duct work after asking Buddy Obara to stick his finger up inside of his. He confirmed that his was made in a similar fashion to the drawing. He also mentioned that there is some foam rubber glued to the bottom of the ducts that help seal them to the bottom plate. The ducts are screwed to the evaporator box at the top and the console just gets slid under them.
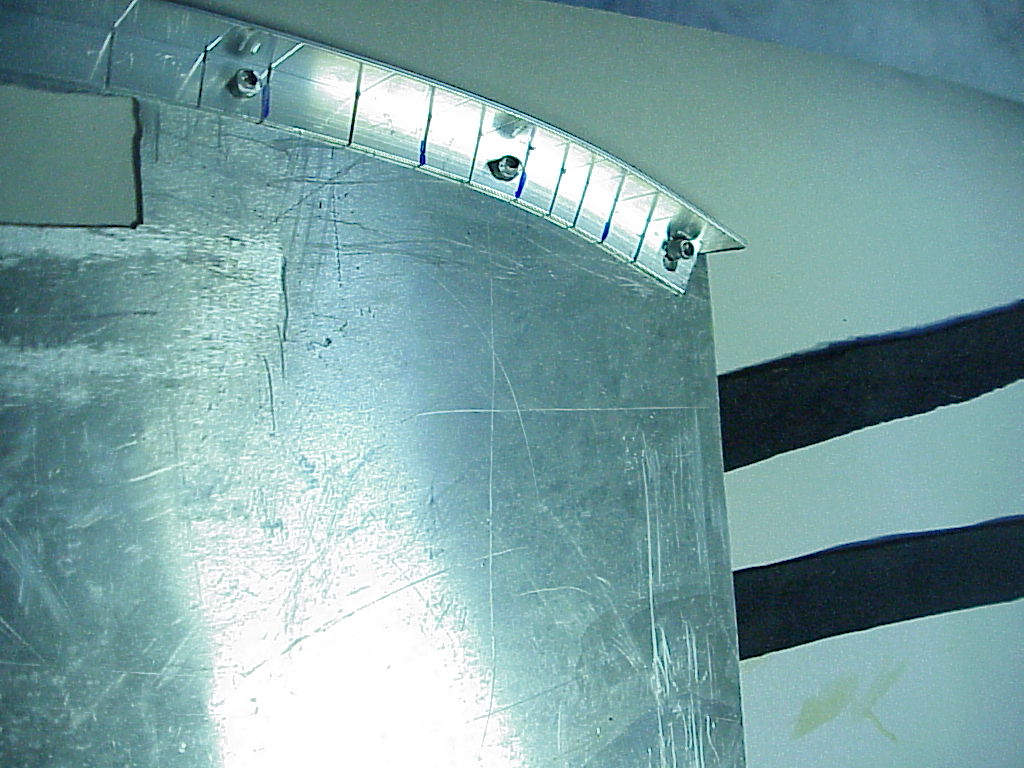
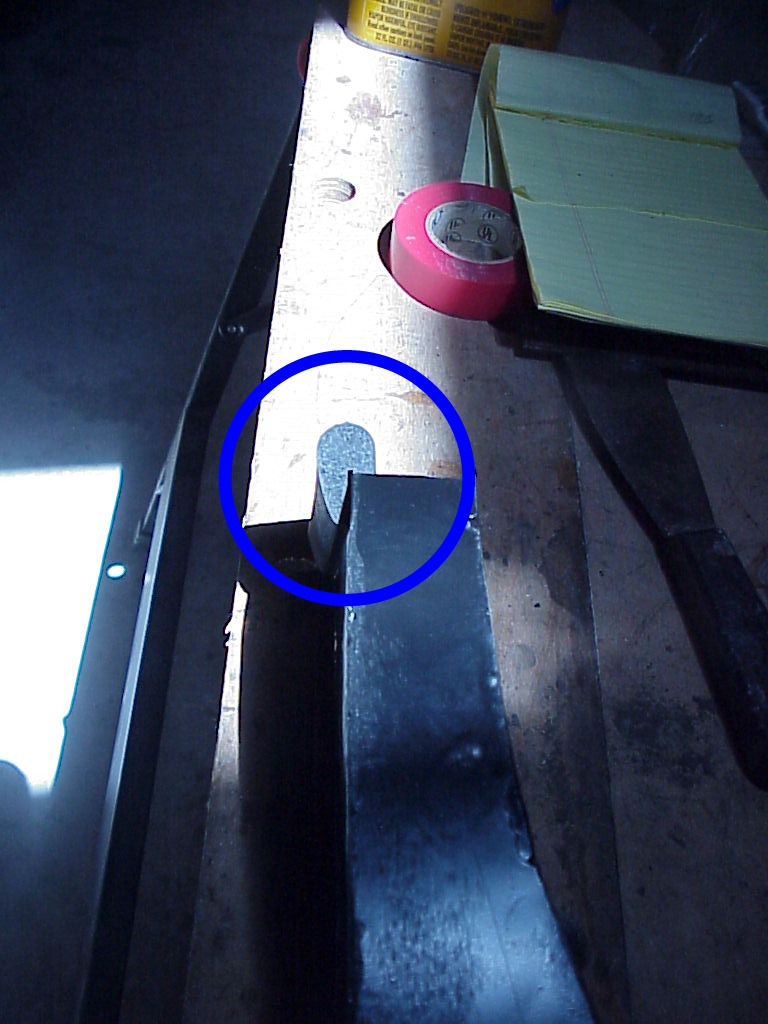
Here's the panel all done. Now I need to find some large slotted pan head screws like the one circled in the picture on the right to attach it to the console. They are available from Metric and Multistandard Components, but they are about a dollar per screw, minimum order of 25 and I only need four. So I'll check with a local metric screw and bolt place to see if they have something similar. Since I'll be tapping the aluminum angle to accept the screw thread, I could also use an American threaded screw.
 |
|
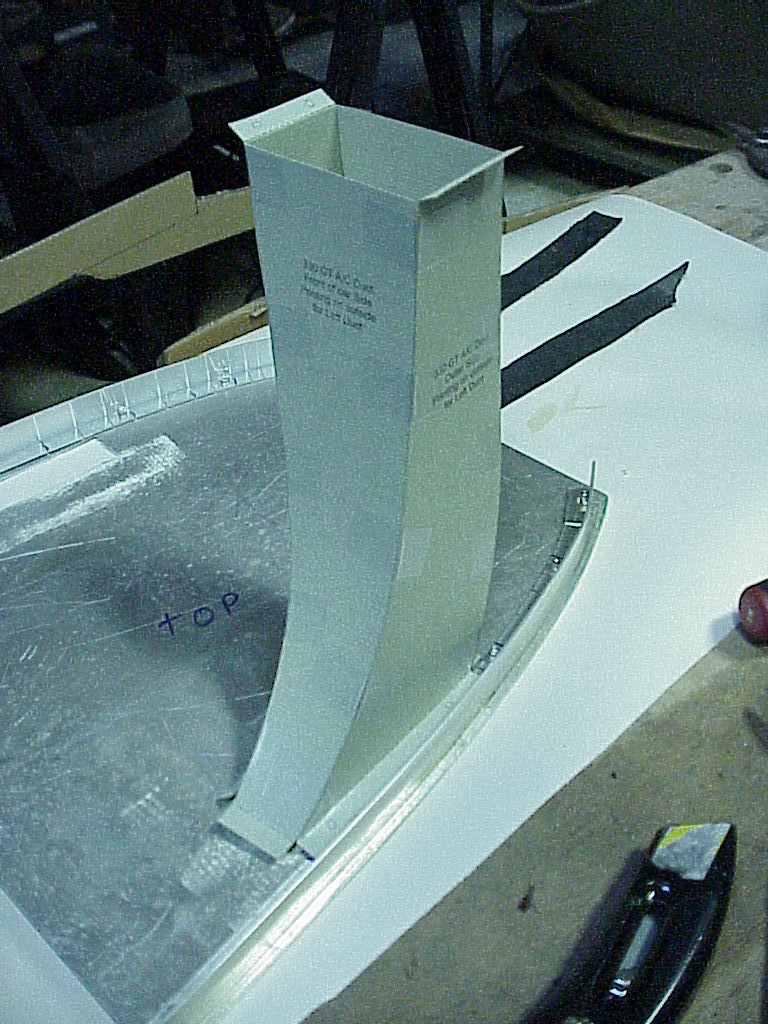
Now that the evaporator is back from the shop, I remounted it in the car and fit the console in place. Then I marked where the panel rested on the tunnel cover. I removed the panel from the console so I could lay it on the tunnel and make the necessary measurements between the door flaps and the cutouts in the panel. One thing I hadn't realized was that the door flap section isn't parallel to the panel, but is at a 10° angle upward towards the rear of the car. I made some revisions to my drawings, cut and taped up a paper model and tried it.
.JPG)
A couple of passes later, I have one that fits correctly.
 Inside the car, note the gap at the bottom for the rubber seal. |
.JPG) Inside the console, checking for the fit beside the radio. |
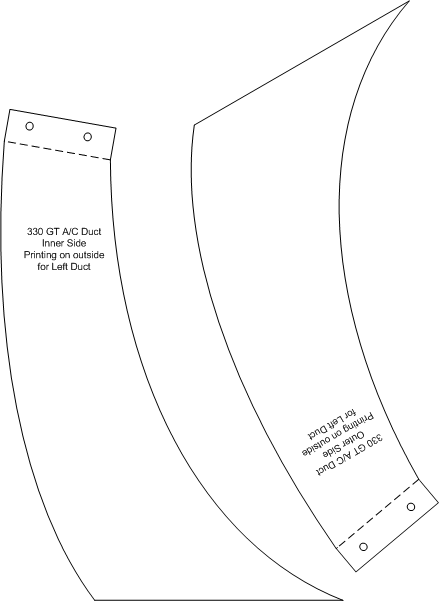
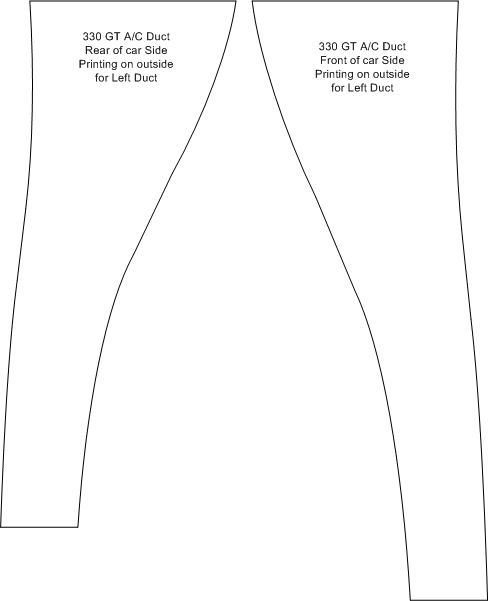
Here are the final drawings.
 |
 |
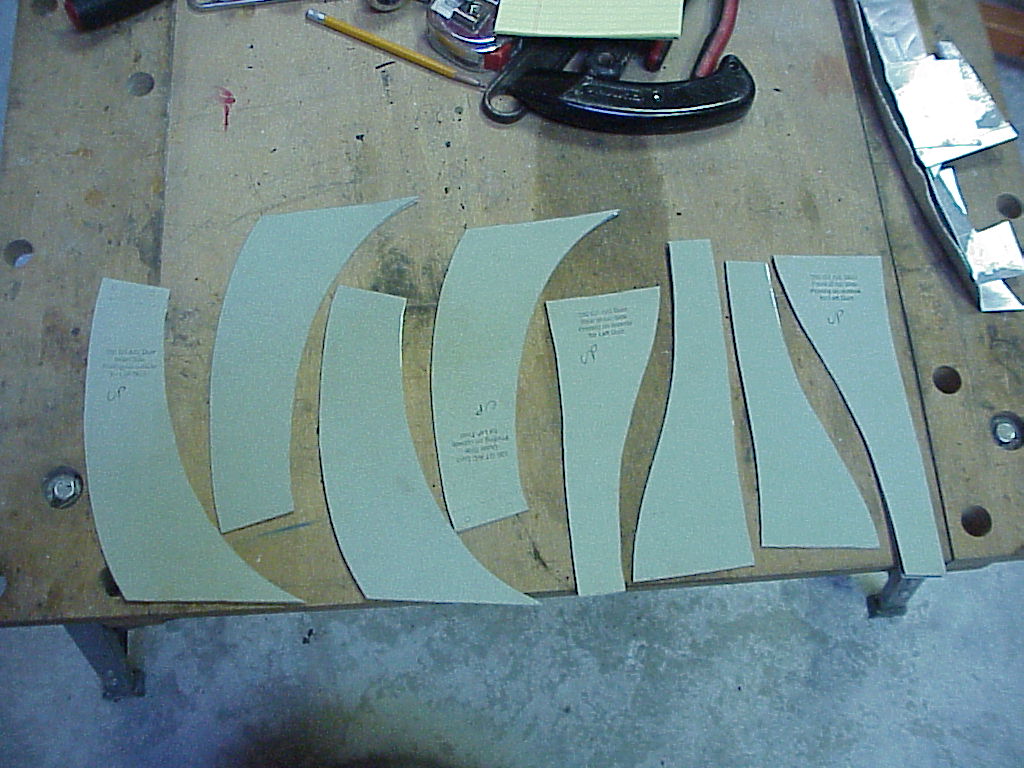
Now its just a matter of transcribing these onto some aluminum, cutting out the 8 sides and having my neighbor weld them together.
Since the ducts are mirror images of each other, I used the same patterns, only put them face down for the right side. I used some tack spray to temporarily stick the patterns on the aluminum in order to cut them out on a band saw. Here's the cut-out panels and the final ducts all welded and cleaned up.
 |
.JPG) |
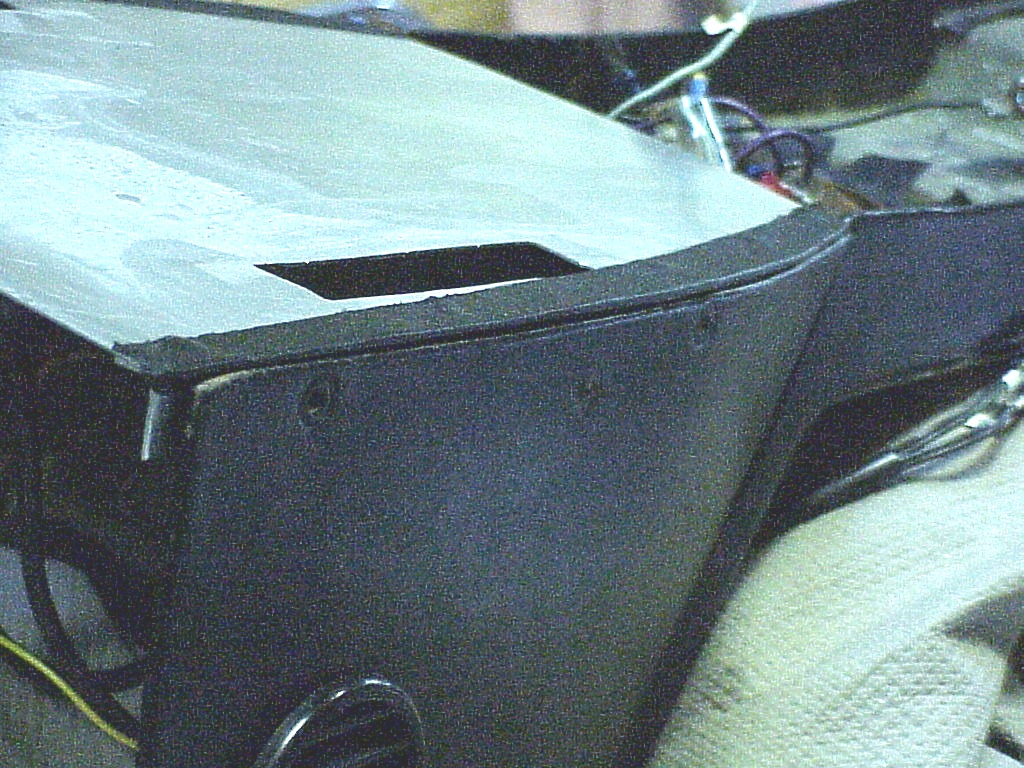
There is rubber that seals the evaporator box to the dash (#3 in the parts picture above). It's in good enough shape to re-use. I am going to replace the thin foam rubber on the door flaps with some new as the old was falling apart. From Buddy Obara's description of the rubber at the bottom of the ducts, it is the same profile as on the evaporator. I happen to have some I bought for the PF coupe, so hopefully the two feet that I'll use will leave enough.
Now I have everything done to start putting the car back together.
When I tried to fit that rubber on the bottom of the duct, I found out that it would reduce the duct size by almost half due to the thickness of the rubber. I had some inner fender rubber that I also tried, but it was too thick too.
 |
.JPG) |
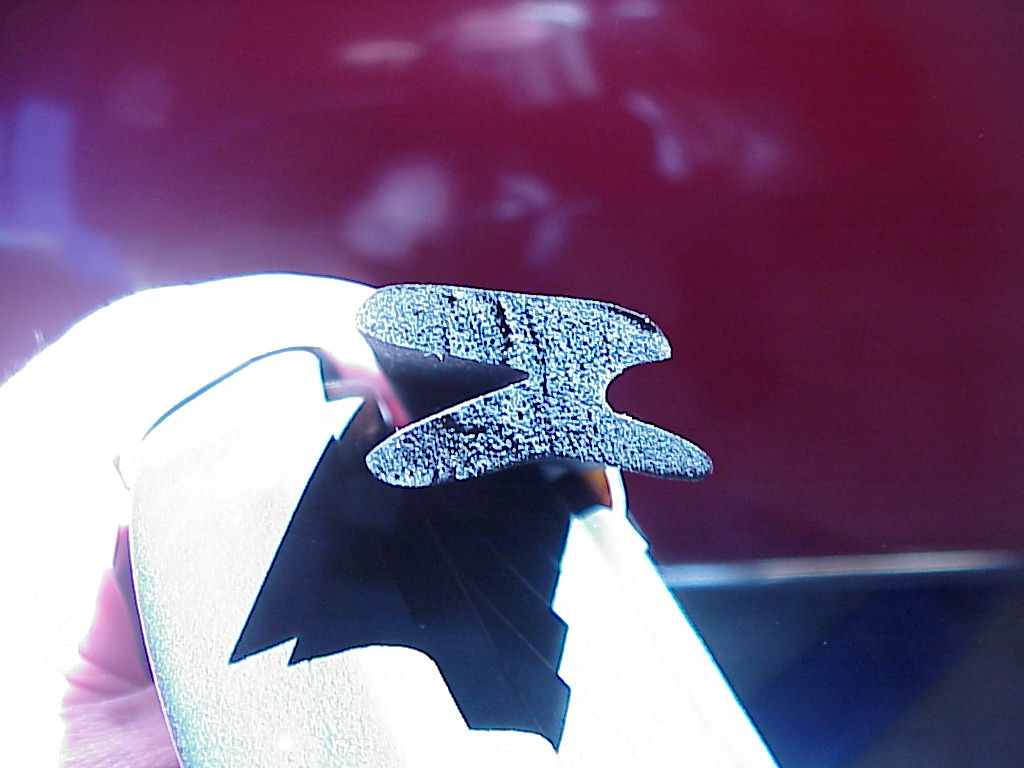
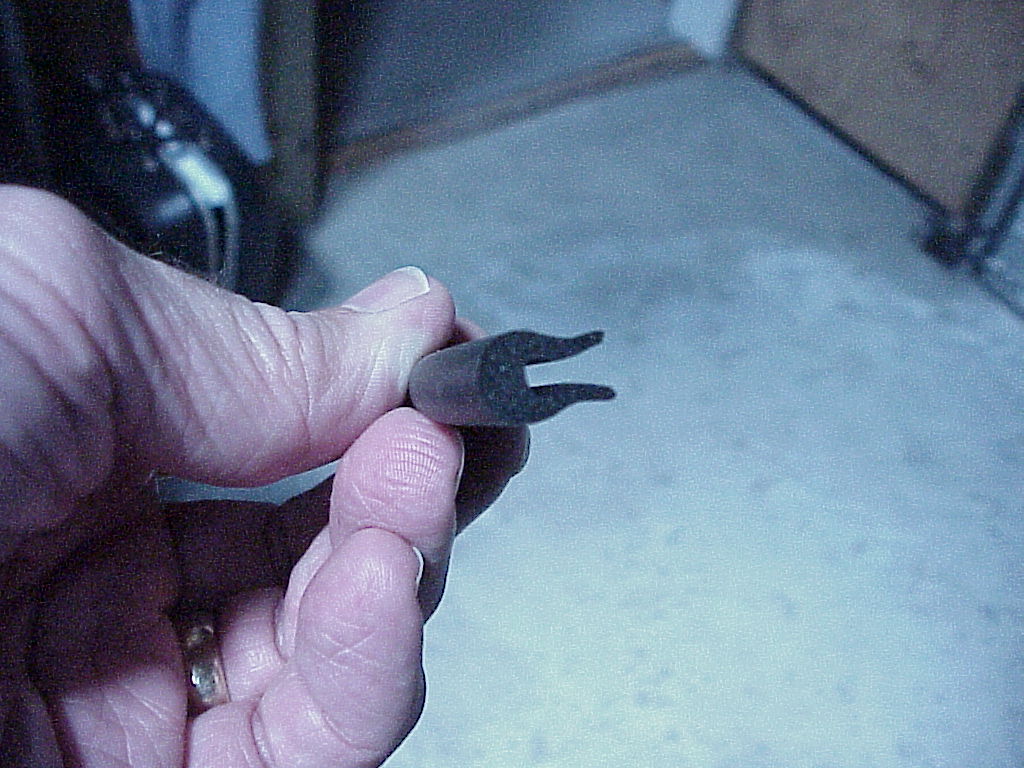
I went looking in the various catalogs I have and found that SoffSeal has a foam rubber profile that looked about right, so I sent an email asking for a sample. In a few day, a package came with a number of their foam rubber samples, E798 among them. The sample looked fine on the bottom of the duct, so I ordered enough to finish the job.
|
|
|
.JPG)
The other rubber part that I needed was the thin foam rubber for sealing the door flaps. I had some 1/4", but that was just too thick to work. I spent some time at craft stores and fabric stores, but the thinnest foam rubber they had was also 1/4". One store tried to slice off some thin pieces, but the thickness was too inconsistent. So I posted a note on TomY's message board and got a response that Virginia foam insulation tape K-501 was the thing to look for. I found that Grainger Supply carried it, but the local warehouse didn't have it in stock. Once I understood what I was looking for, I found that McMaster-Carr had a similar product, 1/8" thick self-sticking foam insulation. It comes by the foot, 54" wide, so I have plenty.
.JPG)
The foam from SoffSeal came in so I was able to finish the duct installation. So all that is left is to re-install the console.