Vents and Trim
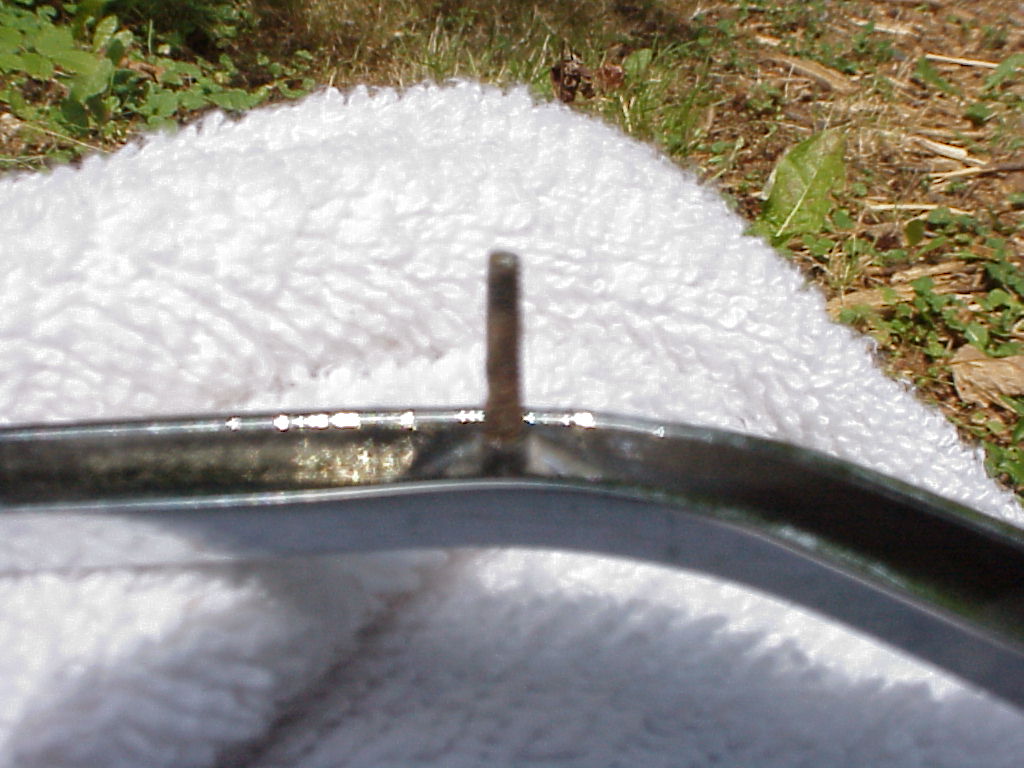
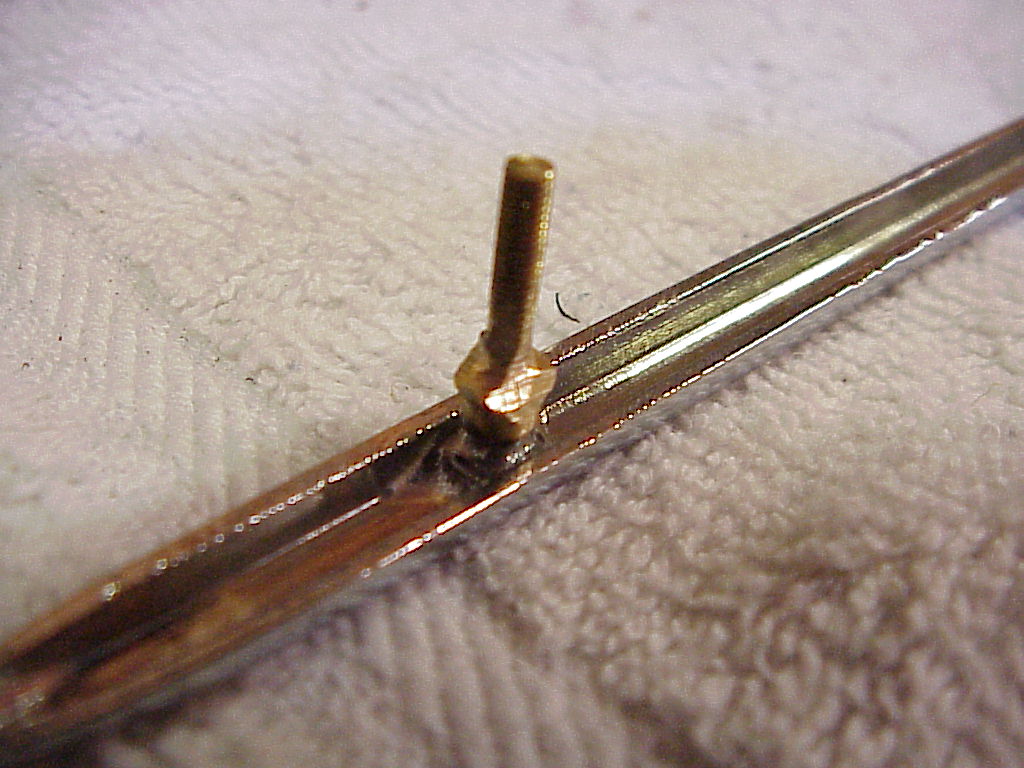
The side vents on the front fenders were a problem. I had the chrome trim plated and this made the studs on the back that are used to hold the trim and vents on too small for the 3 mm nuts that were supposed to be used. Here you can see the taper on the stud. (Sorry for the focus, but by the time I realized it, I had already cut all of the studs off so I couldn't take another picture)
A quick trip to the local hardware store yielded some nylon speed nuts that would more or less go on. There are eight studs per trim piece and some are in impossible places even if you could use the right nuts. I finally got speed nuts on all the studs but I wasn't sure that they would hold. After the Whistler trip I put some duct tape on the backs of the vent pieces so if one got loose, it couldn't vibrate out. When I removed the trim to work on this final solution, one side was down to four speed nuts.
I've done a lot of thinking of how to solve this problem. The studs do have enough thread near the chrome, but not enough where the nuts need to be due to the thickness of the fender inset. From the looks, the studs are actually round headed screws that are brazed in the V of the trim. I could remove these and braze or silver solder in new ones, but that would destroy the chroming due to the heat. Then I would be back in the same situation except that I could warn the chrome shop to take special care.
I thought of just cutting off the existing stud and silver soldering on a new stud, but I was afraid the the solder joint would fail and the new stud would just fall off. Eventually enough would fail and the vents would fall out and get destroyed.
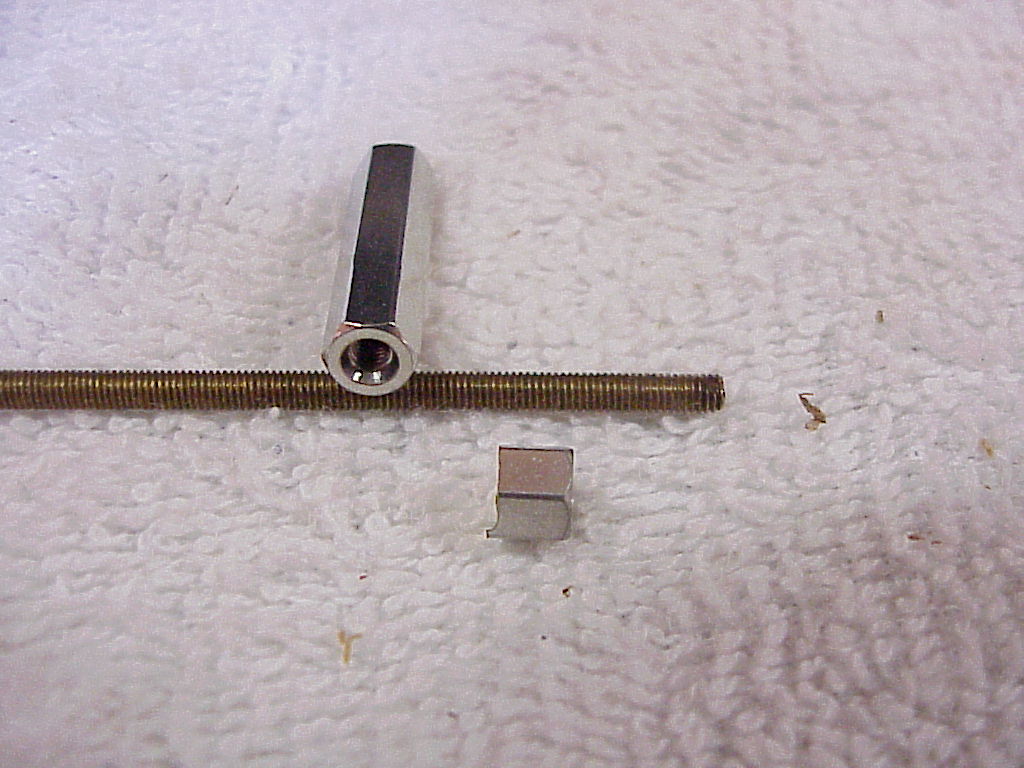
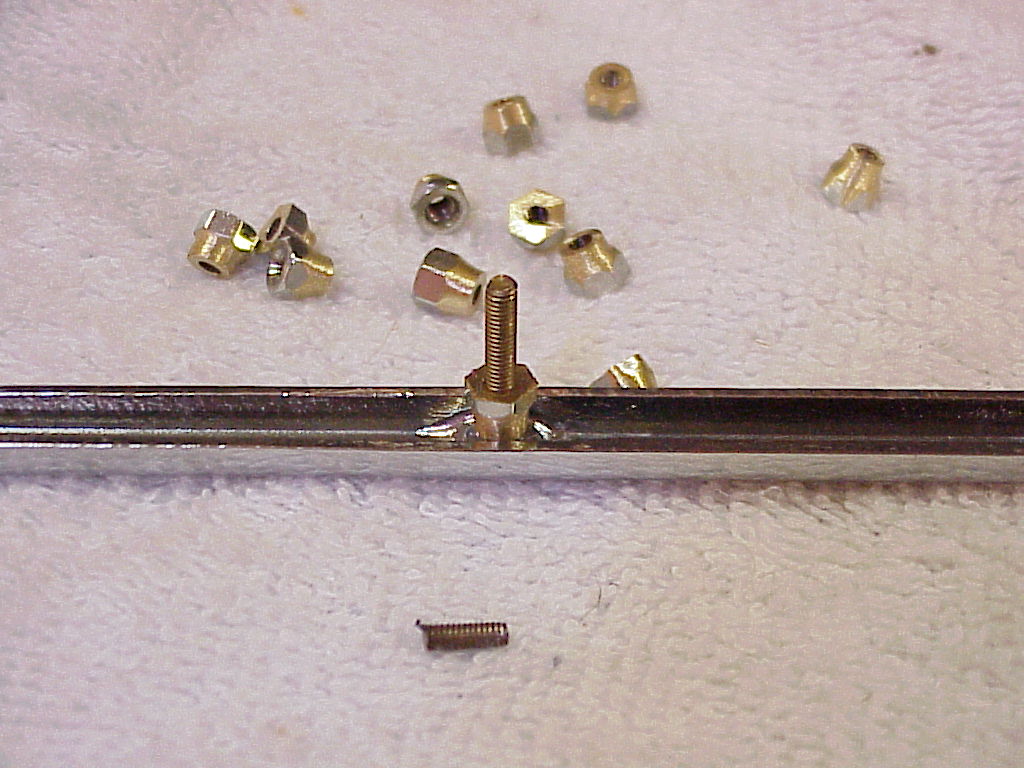
The last idea I had was to cut off most of the existing stud leaving about 3/32", screw something like a long nut on the remaining portion and then screw a brass stud into the other end of the long nut. There are actually threaded standoffs that combine the long nut and stud, but I couldn't find any in 3mm size that had a long enough stud. They are designed to hold something (like a printed circuit board) above some other surface, so the nut section was in several lengths, but the stud part was always the same short length. I did find some regular standoffs in 3mm size and also got a meter of 3mm threaded brass rod to make the studs. Here you can see the threaded rod, a standoff and a piece that I cut off that is the length I needed.
As the trim is narrow where the old stud is mounted, I needed to taper the short standoff pieces so they could screw down on the good threads as far as possible. Here you can see the tapered standoff pieces, a old stud cut from the trim (bottom) and one new set installed into the trim piece. There's a clear difference between the diameters of the old and new stud.
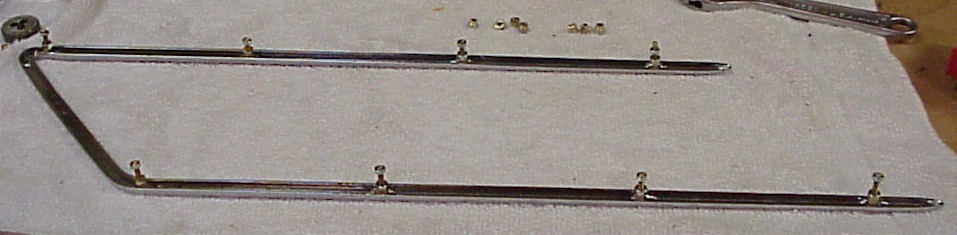
It took a several hours to cut off the old studs, cut and taper the standoffs and cut and clean up the threads on the new studs. Here's a full trim piece with all eight studs fixed up waiting to be epoxied on. There isn't a lot of thread left on the old studs and a couple didn't have enough thread to hold the standoff. So I decided to epoxy everything together as an added precaution.
I also had to trim the sides of some of the standoffs to fit into the fender opening.
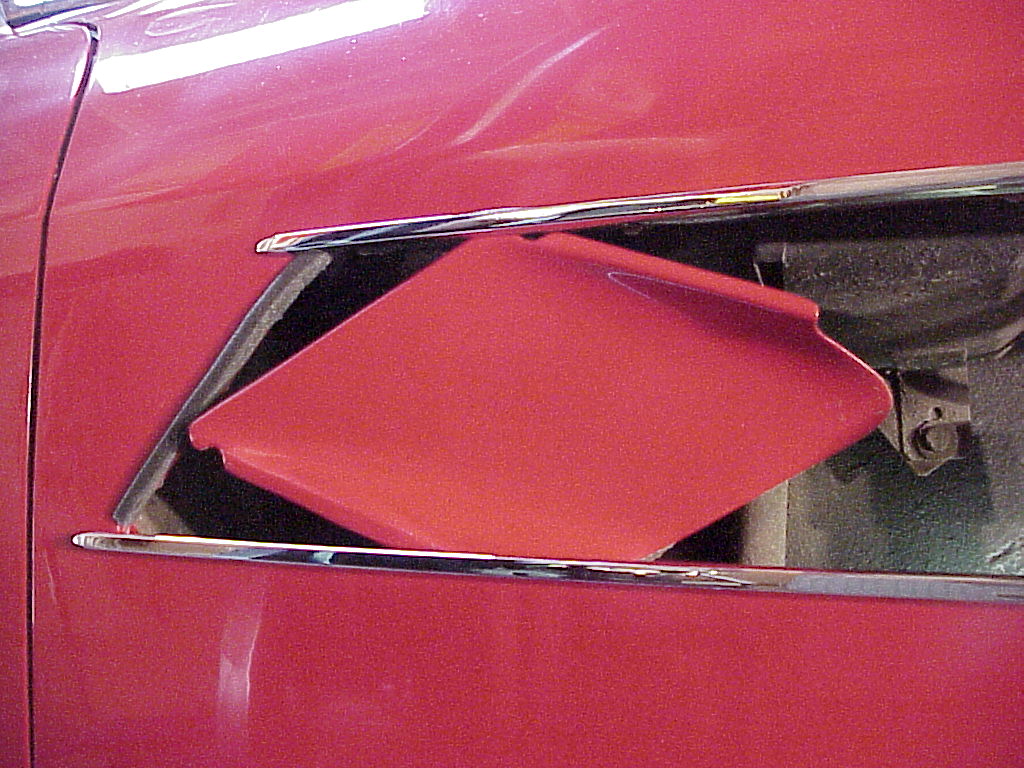
The first couple of times I put the vents into the fender, I held them in place (all three) and fit the chrome trim over them. This required help and it was quite difficult to start and tighten the nuts on the studs, particularly the two upper ones at the rear. They are near the heater boxes and are very difficult to reach. Since then I figured out that the vents can be inserted into the chrome after it has been installed. I started by sticking some foam strips onto the inset edges of the fender. This foam holds the vent flush to the outside against the trim. You can see one of the strips on the left edge in the pictures below. Then I mounted the trim and loosely put on the washers and nuts. Next the rearmost vent is installed by tucking the lower corner into the trim at the bottom and rotating the top corner and edge into position. The right picture shows the starting position. Once the rearmost vent is in position, I tightened the nuts at the rear while they were still accessible. Then the middle section is installed the same way, tightening the nuts as you go. The front section with the block off plate goes on from inside the fender rotating it in the same way. Once it's in place, the final four nuts are tightened and you are done.
 |
 |
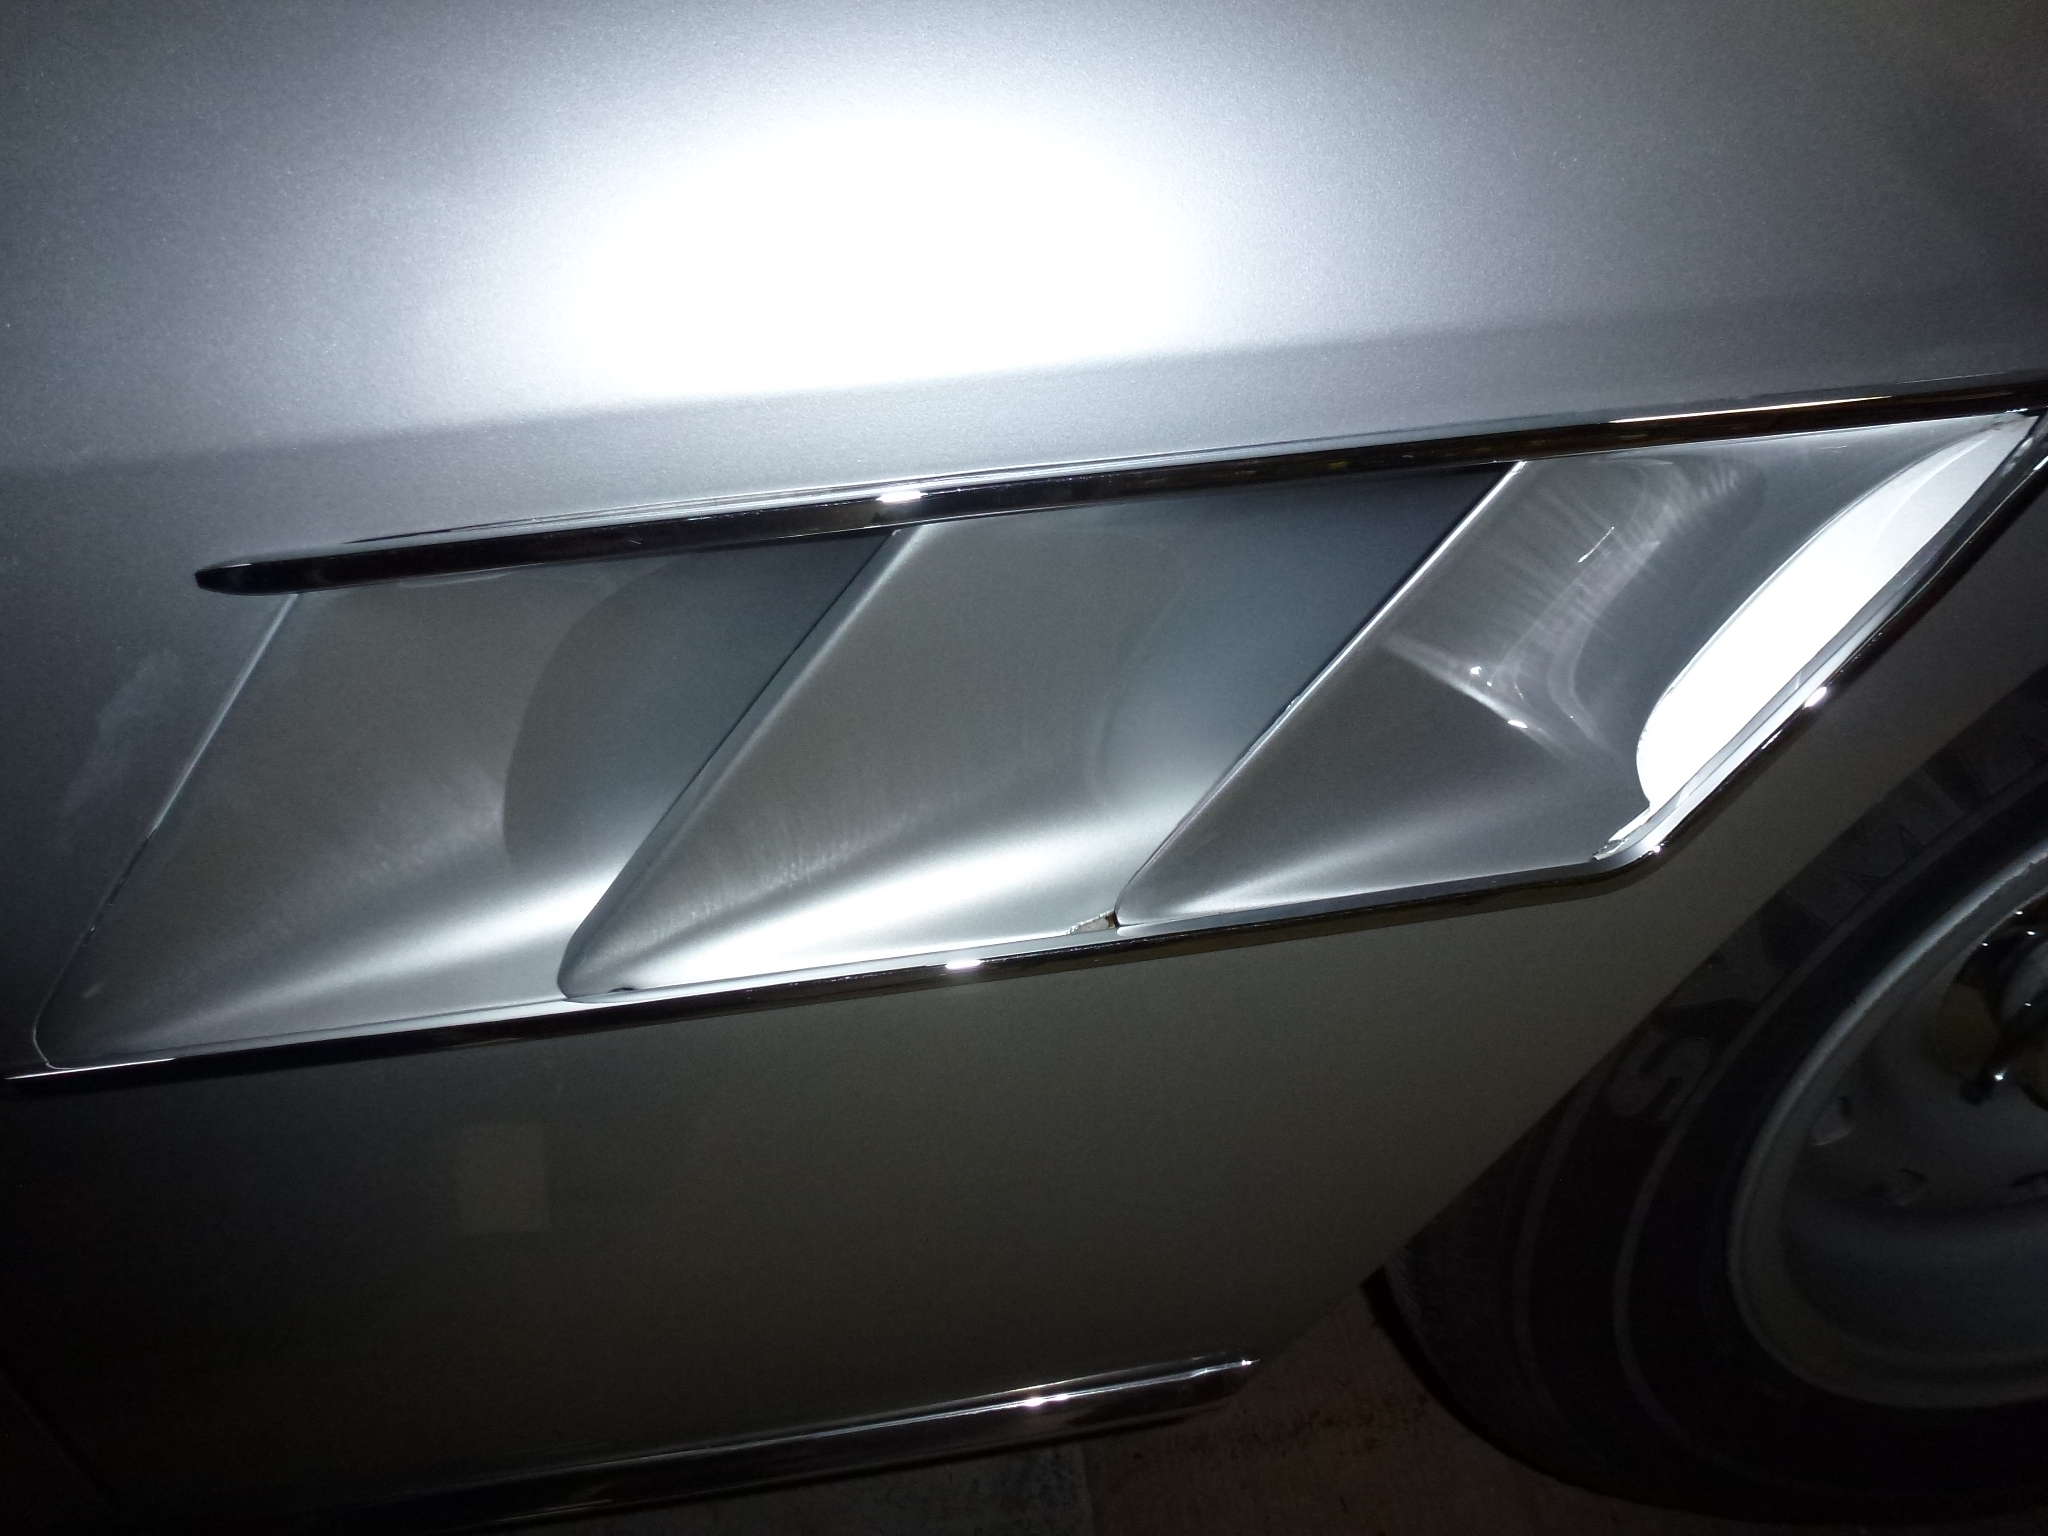
Here's the final result.
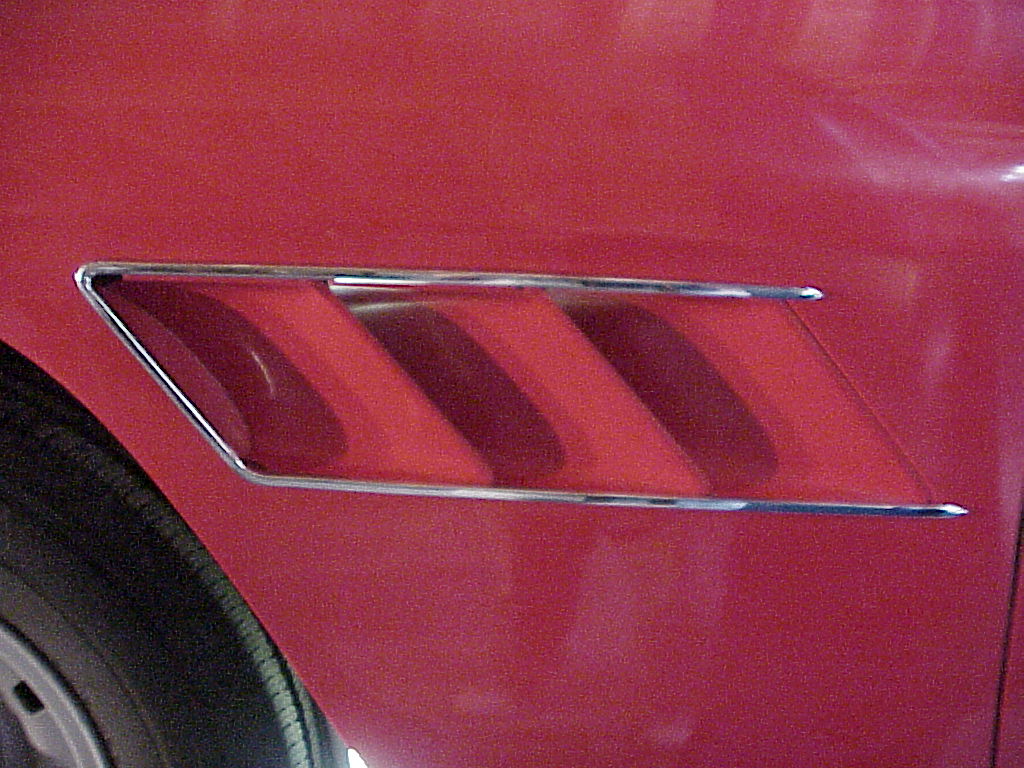
Now I don't have to worry about the vent pieces falling out.
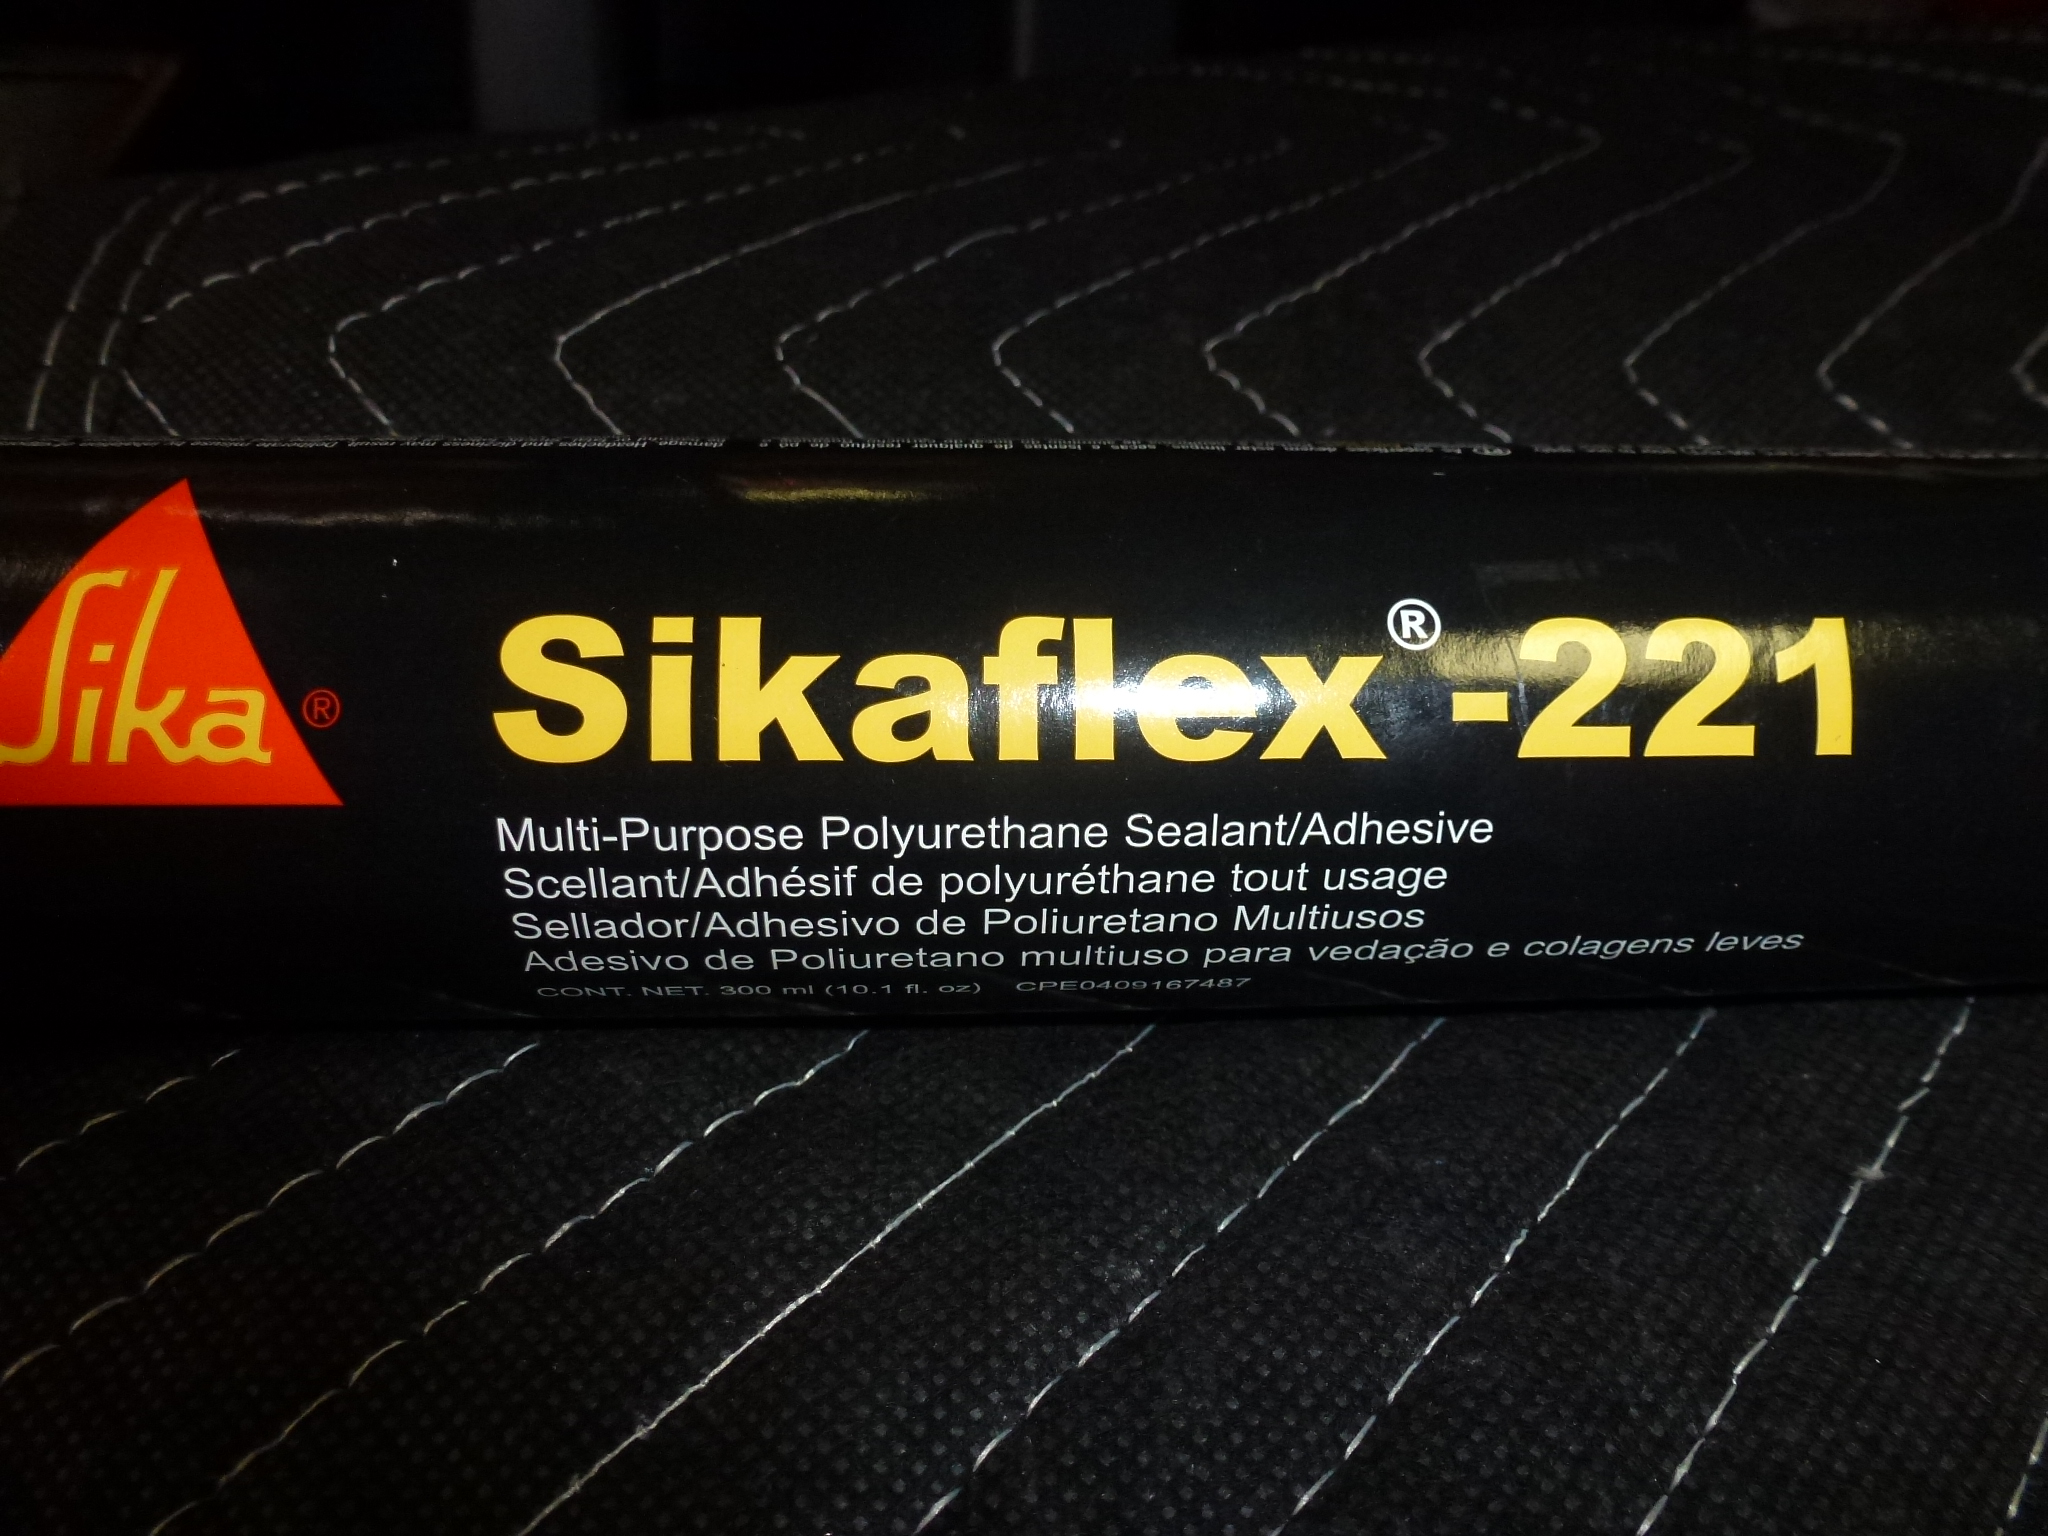
Fast forward a decade or so, with new paint. These vents would not stay straight for any length of time. I've tried different types of foam rubber, double stick tape, etc., all which have failed. When I got the car painted, I talked to the body shop owner about how to keep these in place. He said that they use a marine adhesive, Sikaflex with lots of success. So I bought a tube, twisted out the center vent and then gooped up the front and rear ones, using wedges and clamps to hold them in place while the adhesive set. Time will tell if this works, but I hope that I don't have to push the vents into place every time I finish a drive.