Polishing Stainless Steel Trim
We spent last week at our ski place in Canada. During the summer, we aren't quite as busy with just some hiking and bike rides to fill in the time. So I took the stainless steel moldings from the front and rear windows up there along with 4 grits of wet/dry sandpaper.
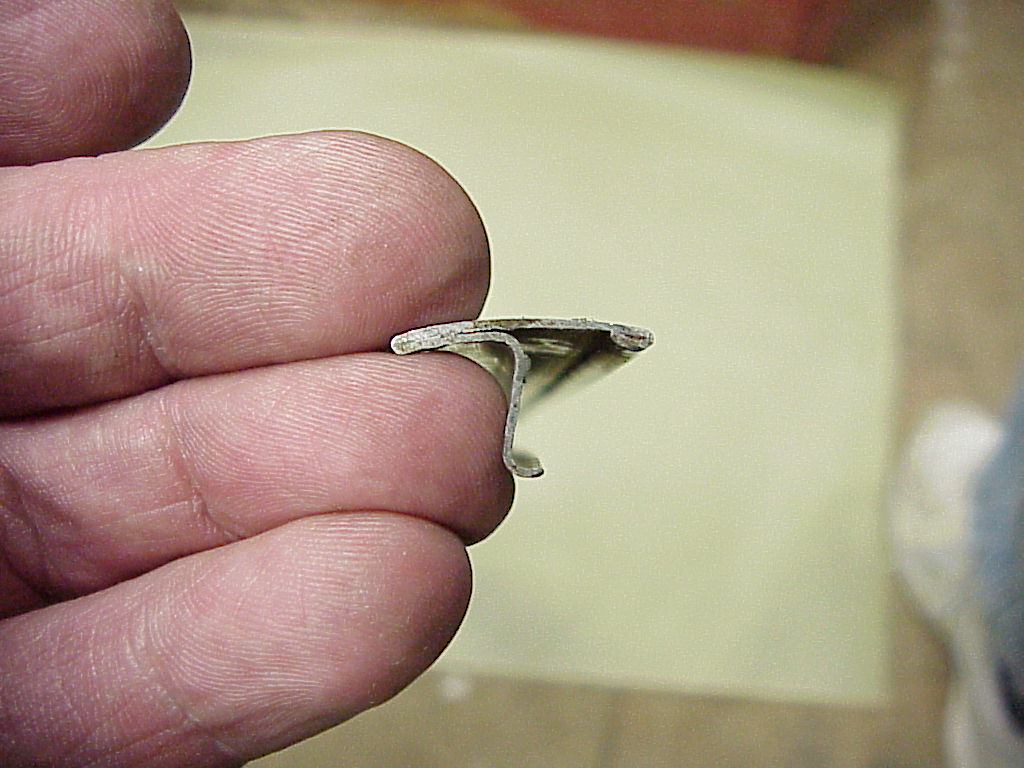
The moldings have a number of scratches, nicks and blemishes that have accumulated over the years. In addition there were a couple of dings I added when I took them off. It turns out that there's a trick to removal without damaging them. The molding is one piece and the inside edge consists of two layers. Of course, one naturally starts by prying up on the outside edge. If you start on the inside edge, the extra layer prevents any pry marks from showing through to the finished side. You can see the double thickness of the trim on the portion between my fingers. The trim is held in place by the J shaped portion at the bottom of the picture. This fits into a slot in the rubber trim. By prying up on the double layer, the J shaped portion is lifted and naturally wants to slide out of the rubber.
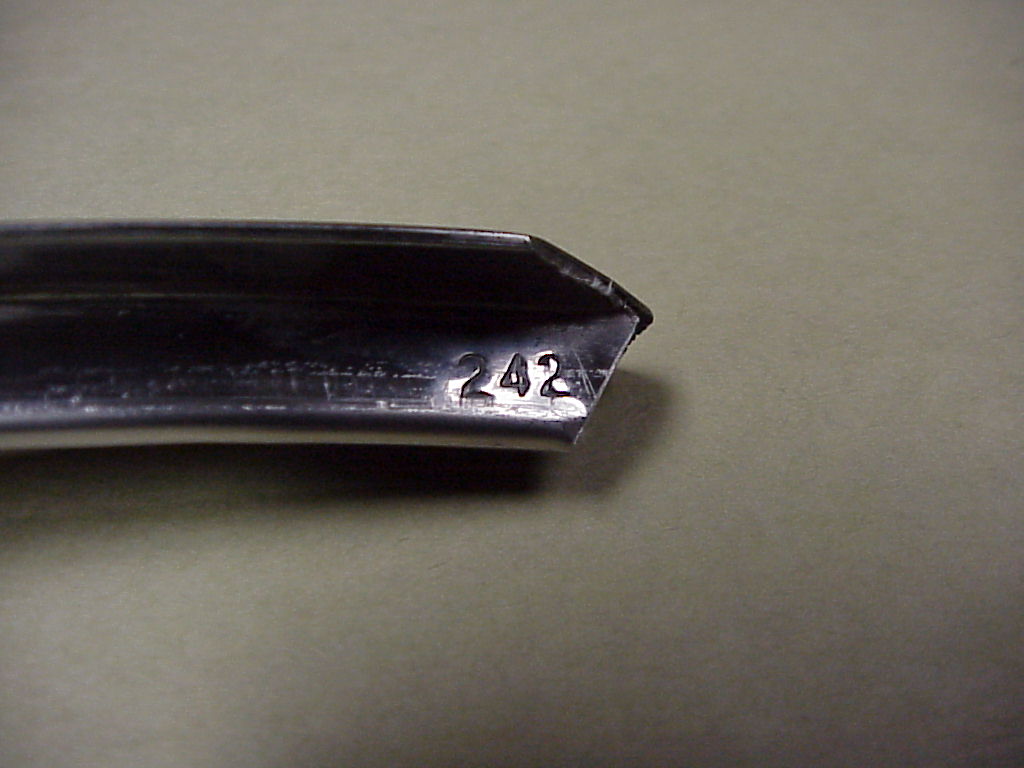
It's interesting that each piece has the first three digits of the Pininfarina part number. All of the unique body parts for a 330 GT start with 242.
The process of removing all of the marks and polishing the trim is time consuming. First you have to fix up any high or low places (such as those put in by incorrect removal). This is done by careful use of a small hammer and anvil. Once those areas are just slightly higher than the surrounding metal, a fine file (ignition file works fine) is used to clean up the high spots and make everything smooth. Well, relatively smooth. The file leaves scratches about as deep as any of the other ones.
Next you start with the wet sanding using an appropriate grit depending on the severity of the marks you need to remove. I started with 220 grit for the scratches, followed by 320 grit. Other areas can be started with 400 grit. You can just use 400 grit for everything, but it takes forever on a deep scratch. The final sanding is done with 600 grit. You should sand using a different direction for each grit. That way you can see if you've removed all of the scratches from the coarser grit. If you sand in the same direction each time, coarser scratches will be hidden and not become visible until the polishing phase. So I sat out on the deck with my bucket of water spending several hours wet sanding the trim pieces (there are seven). It takes an hour or two to do each piece depending on its length .
After everything has been sanded smooth using 600 grit sandpaper, it's time to start buffing. For stainless steel, there are three buffing wheels and three grades of compound used. The coarsest will remove the fine sanding scratches. The medium grade really starts the polishing with the fine grade bringing out the color of the trim.
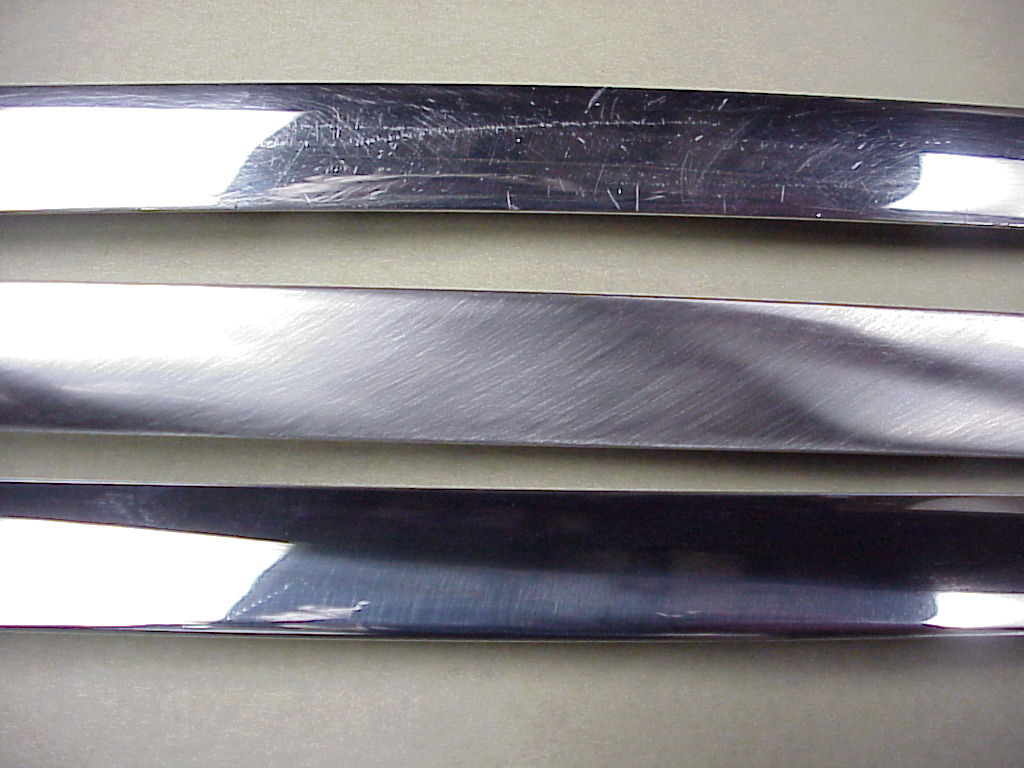
The picture shows a trim piece before any work has been done. The middle piece is after the wet sanding ready for buffing. The bottom piece has been buffed with the coarse and medium grades and just needs the final color compound to finish it off.
When buffing these long and narrow pieces, you have to be careful to not let the wheel catch the edge. These are pretty sturdy, so it's difficult to bend them up, but you can put new scratches in if the piece hits something as it's thrown by the wheel. When buffing, you used the same technique of different directions so you can tell when you've polished the scratches from the previous work. As it's easiest and safest to buff down the long length of the trim, I had the last sanding marks run diagonally. That way, the first and third compounds are buffed in the long direction with only the medium buffing having to be done sideways where it's easy to have an edge catch.
For the installation of the trim, please click here.