FISPA Electric Fuel Pump
The FISPA electric fuel pump on my 330 had stopped working several years ago and I fixed it. So when my friend George mentioned that he had replaced his a number of years ago, but kept the old pump, I offered to take a look at it and see if I could get it working.
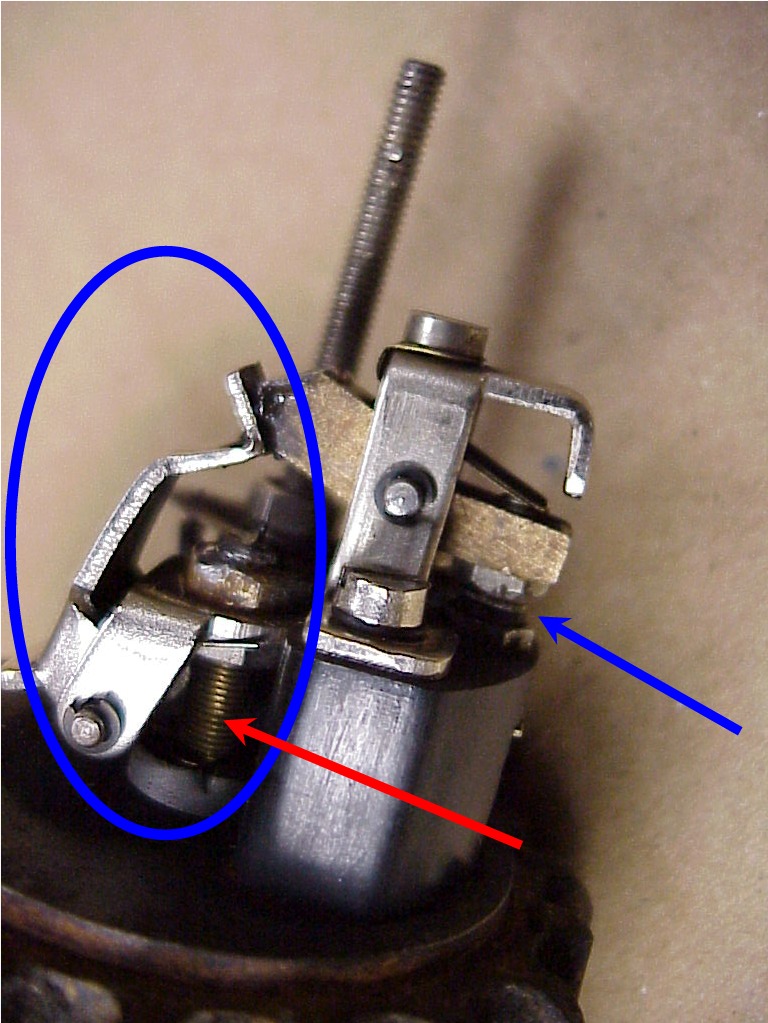
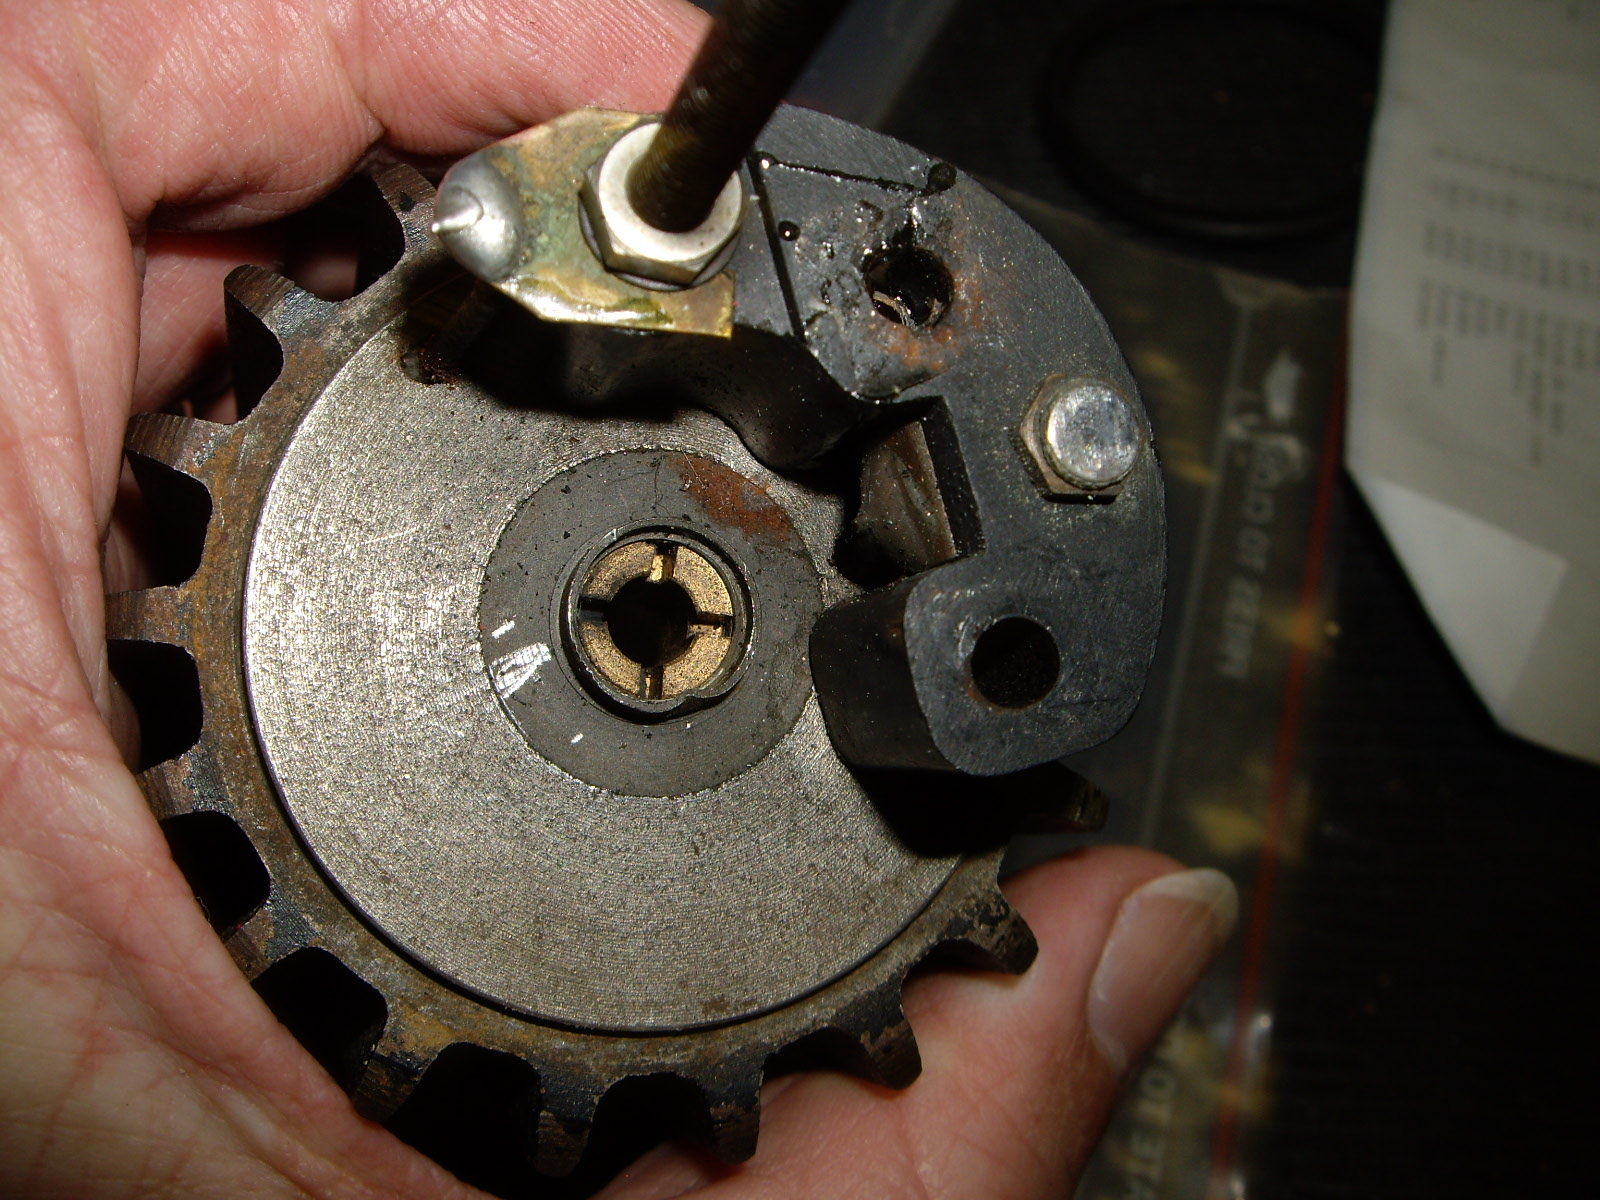
First, I just took off the top and cleaned the contacts. When I tried it, the solenoid would just move a little, not enough to flip the contact that would break the circuit. The blue arrow points to the contacts. The red arrow points to the stud attached to the solenoid. When the solenoid is energized, it moved the actuator mechanism circled in blue upwards. The top angled piece goes over center on the lever, causing it to move down and thus opening the points on the far side. This cuts the power to the solenoid and it retracts due to a spring. The angled piece drops below the lever, closing the points and re-energizing the solenoid. This repeats the process giving the distinctive clicking sound heard when priming the carbs before starting an older Ferrari.
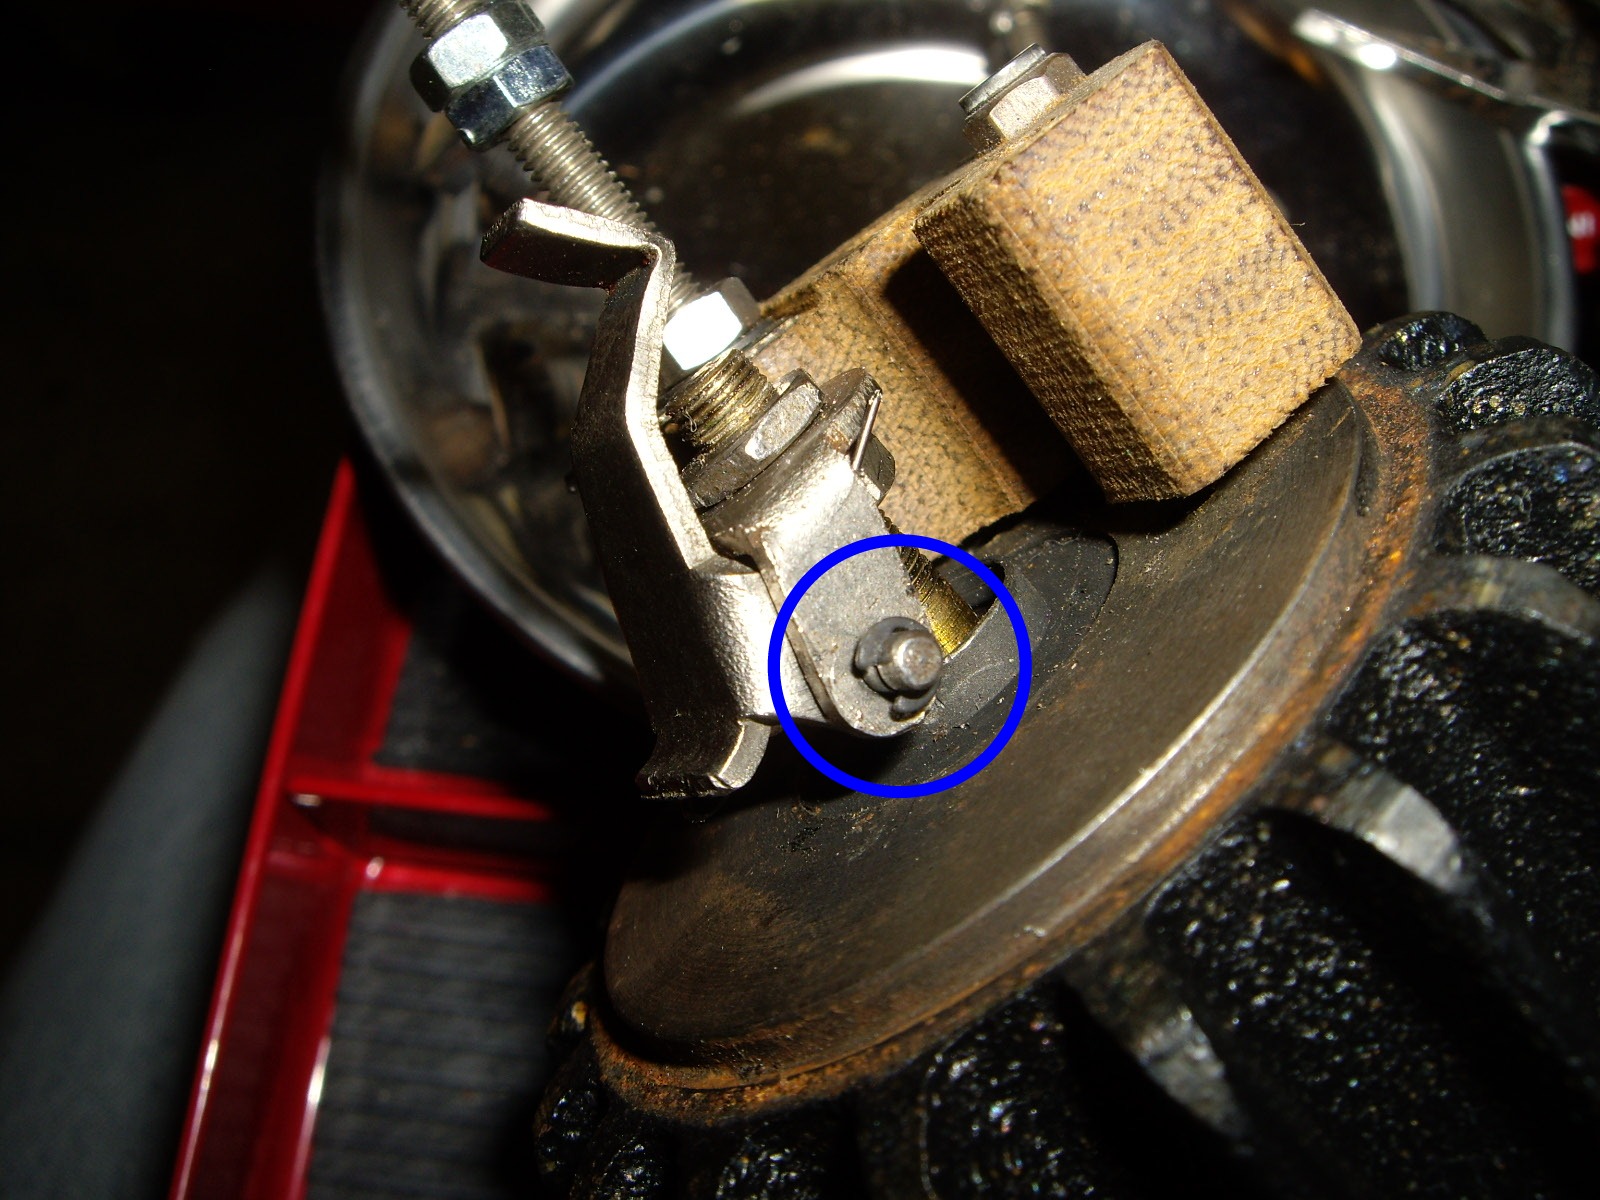
The actuator wasn't moving up enough to go over-center on the lever and it was adjusted at the top of the stud. It wasn't obvious what was wrong, so I took another pump off the PF coupe and took the top off of it. When I ran it, I could see exactly how the mechanism was supposed to work. One thing that I did notice was that the spring holding the actuator against the lever was weak on mine. So I took that portion apart, re-bent the spring and put it back together. There is the smallest C washer (circled) I've ever seen on the end of the pin that holds the actuator. One sneeze and it would be gone forever. After I re-installed the pump, I got it working through the dash switch. I plan on testing each electrical component as I install it. It will be much easier to track down a problem with the dash and engine out than later when everything is back together. In the case of this pump, I would have had to drain the fuel in order to remove and work on it.
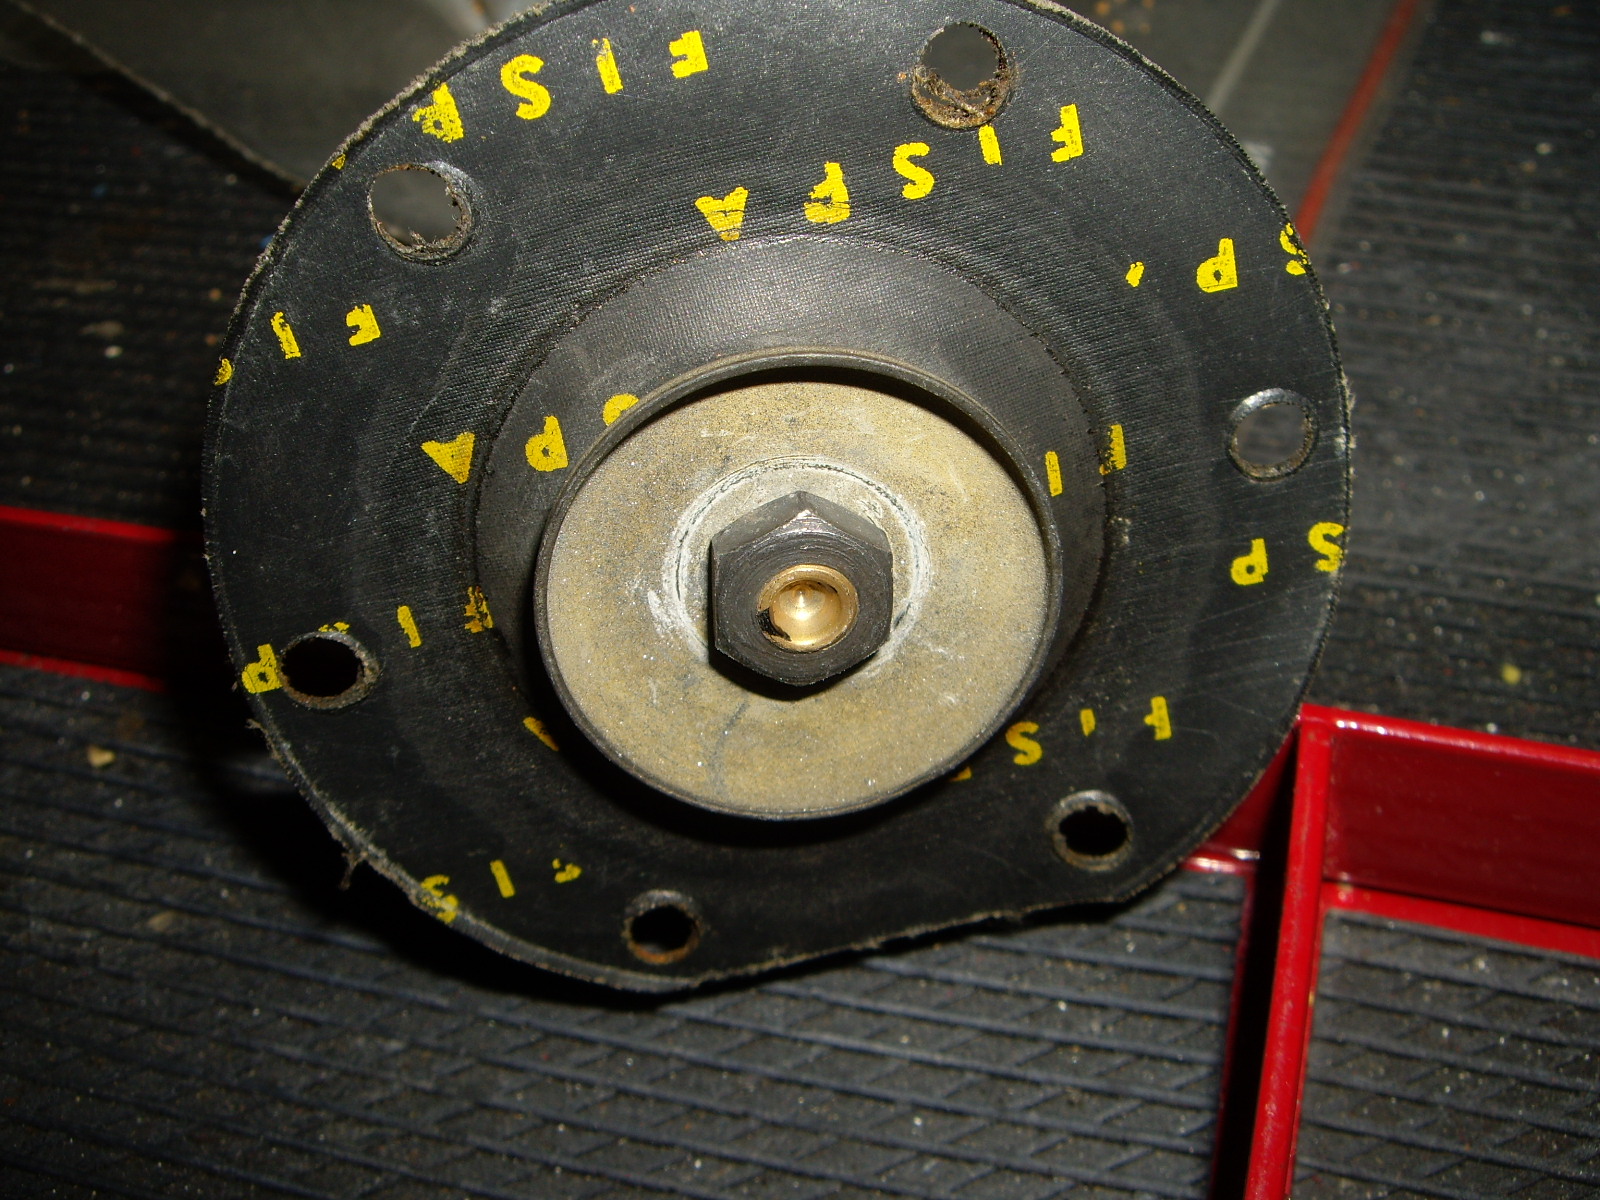
Since the top mechanism of George's seemed to be in good order, I took the bottom part of the pump apart. This was new territory for me as I managed to fix my 330 pump by just cleaning the points. The bottom consists of the finned body containing the solenoid, the diaphragm, chamber section and inlet/outlet base.
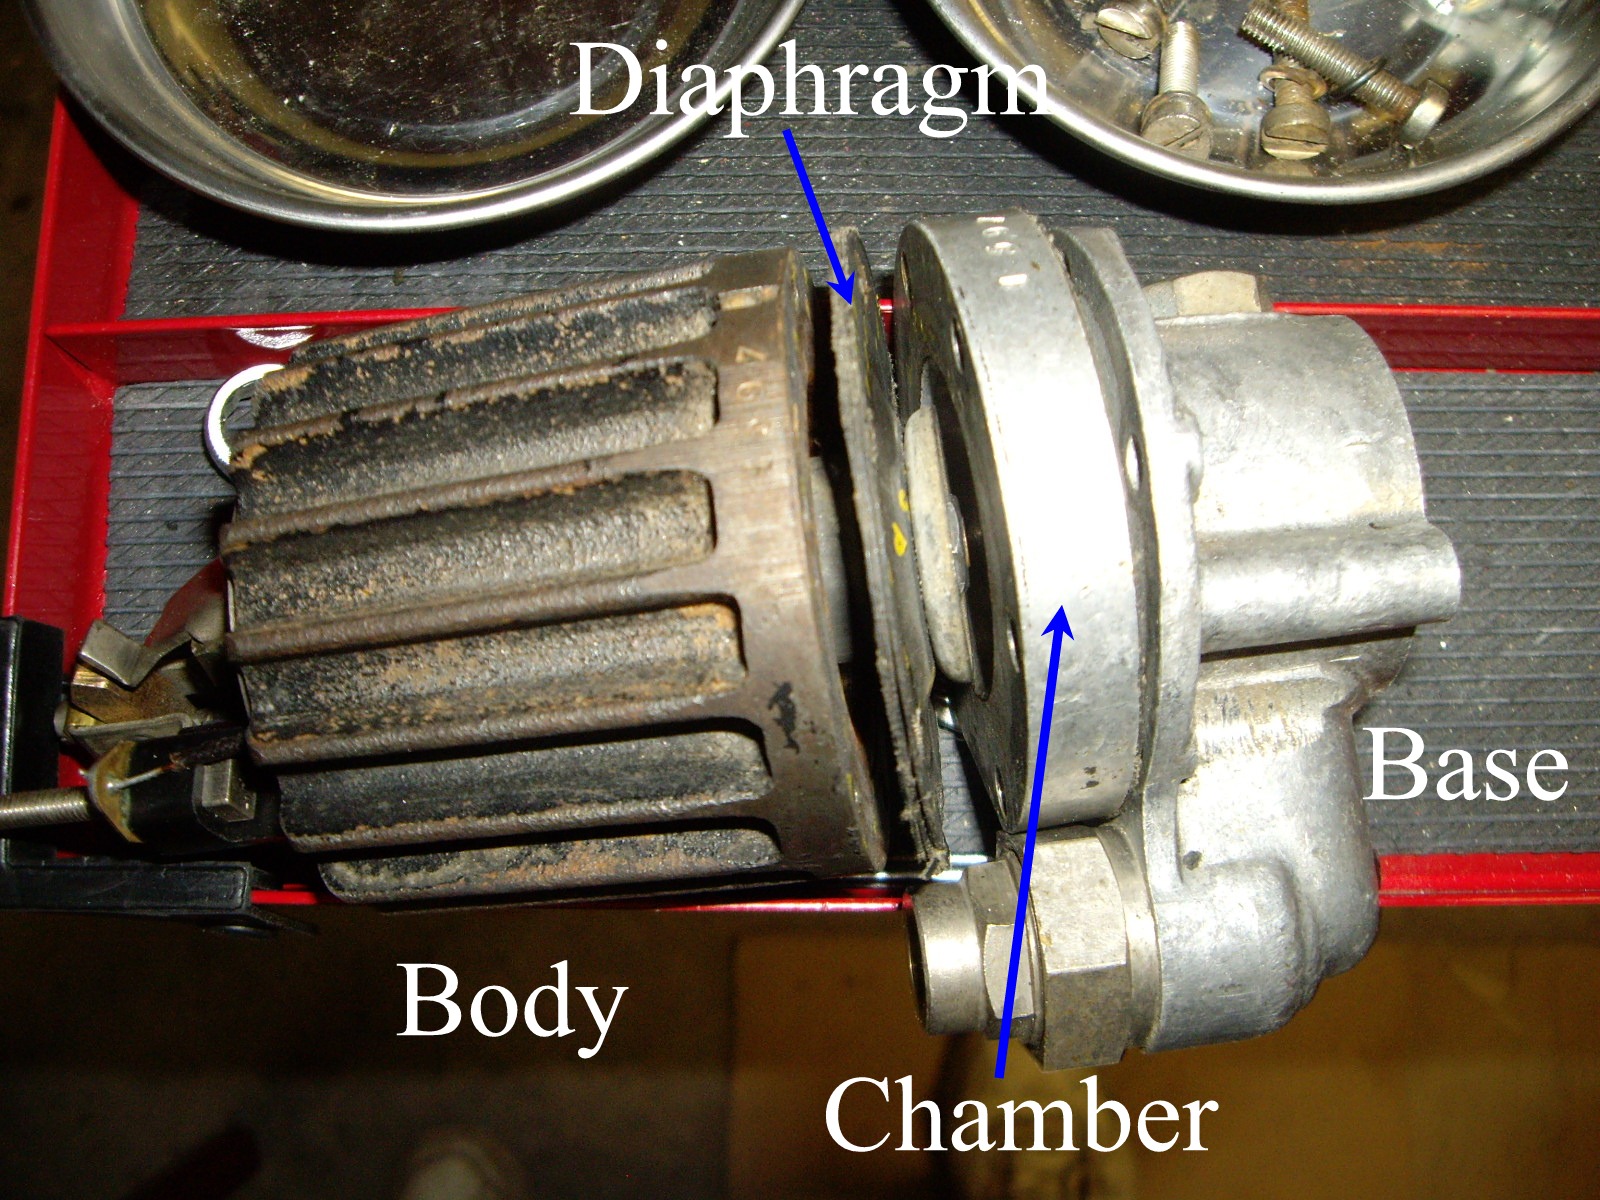
The base came off fairly easy, but the chamber section was firmly attached to the body with what looked to be a gasket between them. It turns out that the gasket is actually the edge of the diaphragm. After consulting with George, I used a sharp chisel to separate the chamber section. Once it separated a little, I carefully peeled the diaphragm away from the chamber since it's attached to the solenoid. Once the diaphragm was free, the solenoid had a greater range and the pump would work properly. But if I held the chamber section on tight, trapping the diaphragm edges, the pump would stop again. The diaphragm was very stiff when flexing it manually, so I think that the problem is just old age. George is going to get a new diaphragm which hopefully will get this pump back in good working order and he can retire his $20 parts store special that he put in many years ago.
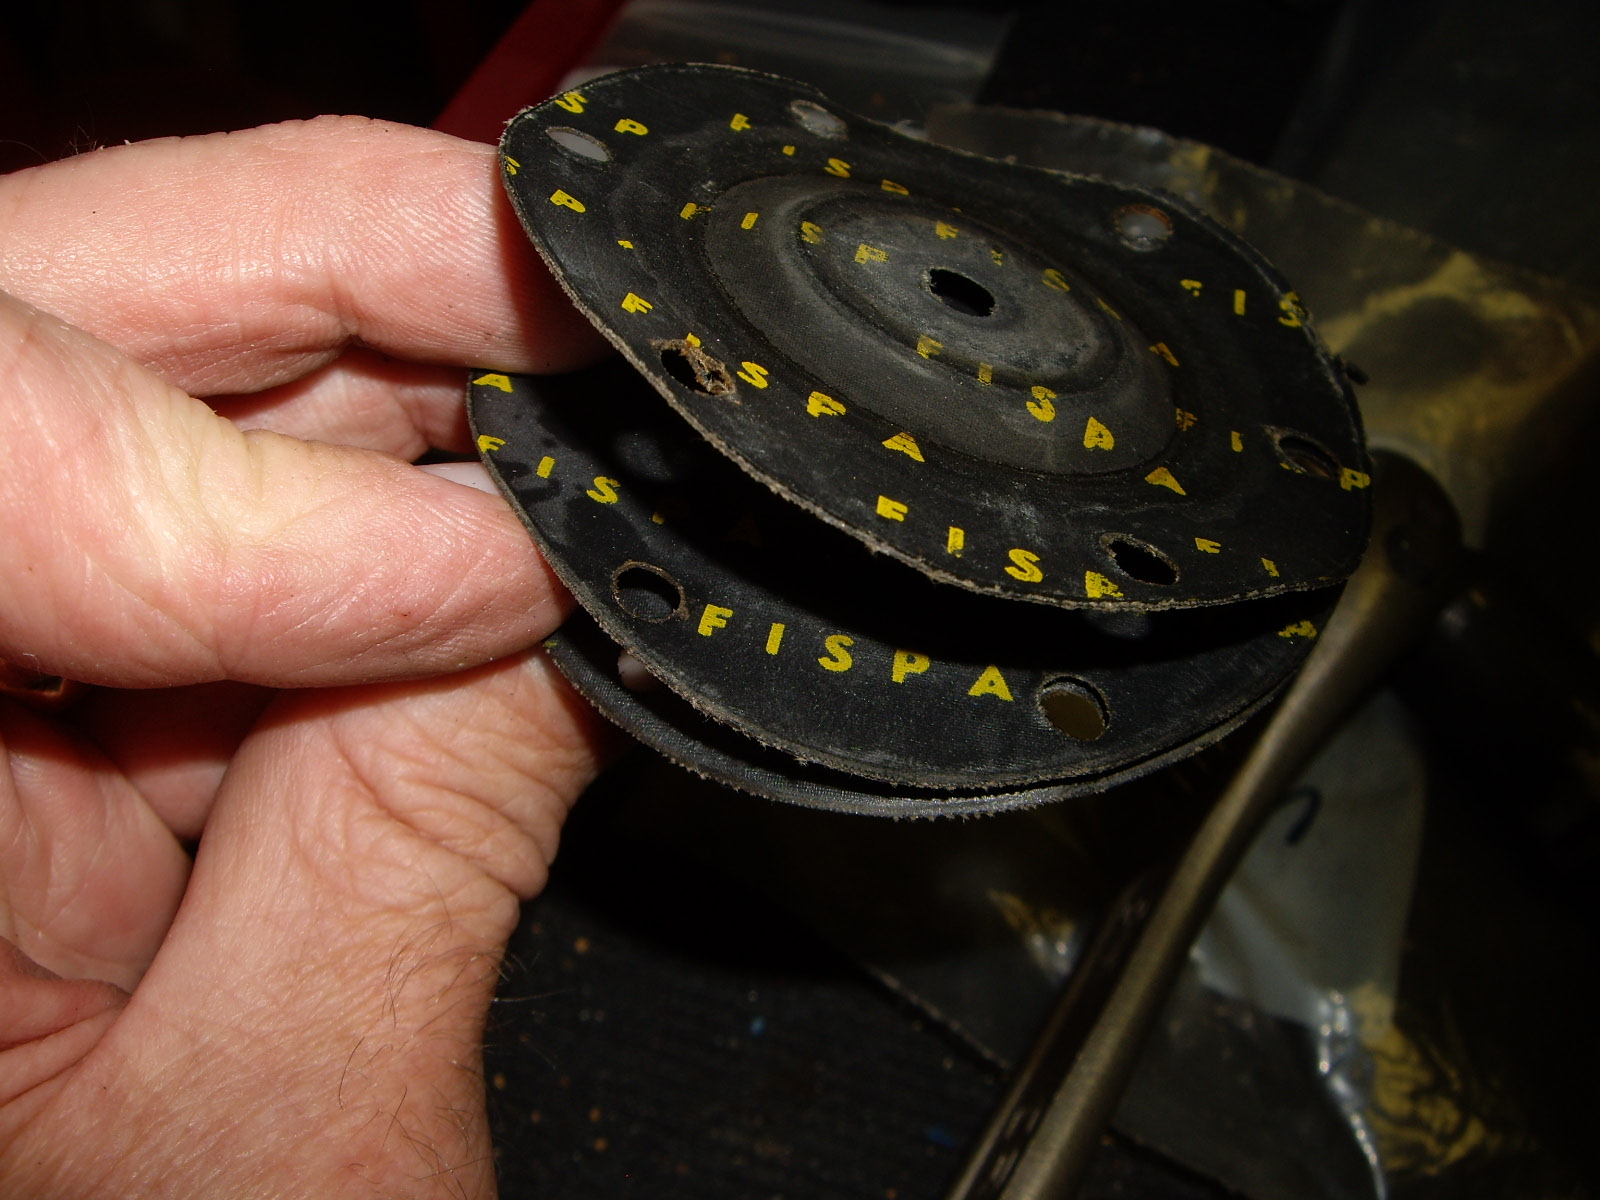
The diaphragm kit came the other day and George dropped it by. The first thing I noticed is that the new diaphragm is single ply while the old diaphragm was three layers thick.
The first issue I faced was that the diaphragm is held between two washers with a nut. However, the brass shaft that the nut was threaded onto had the top curled over the nut. At first I wasn't sure about this, but after trying to unscrew the nut, I became convinced. I eventually used a small cutting wheel on a Dremel to grind away the lip.
 |
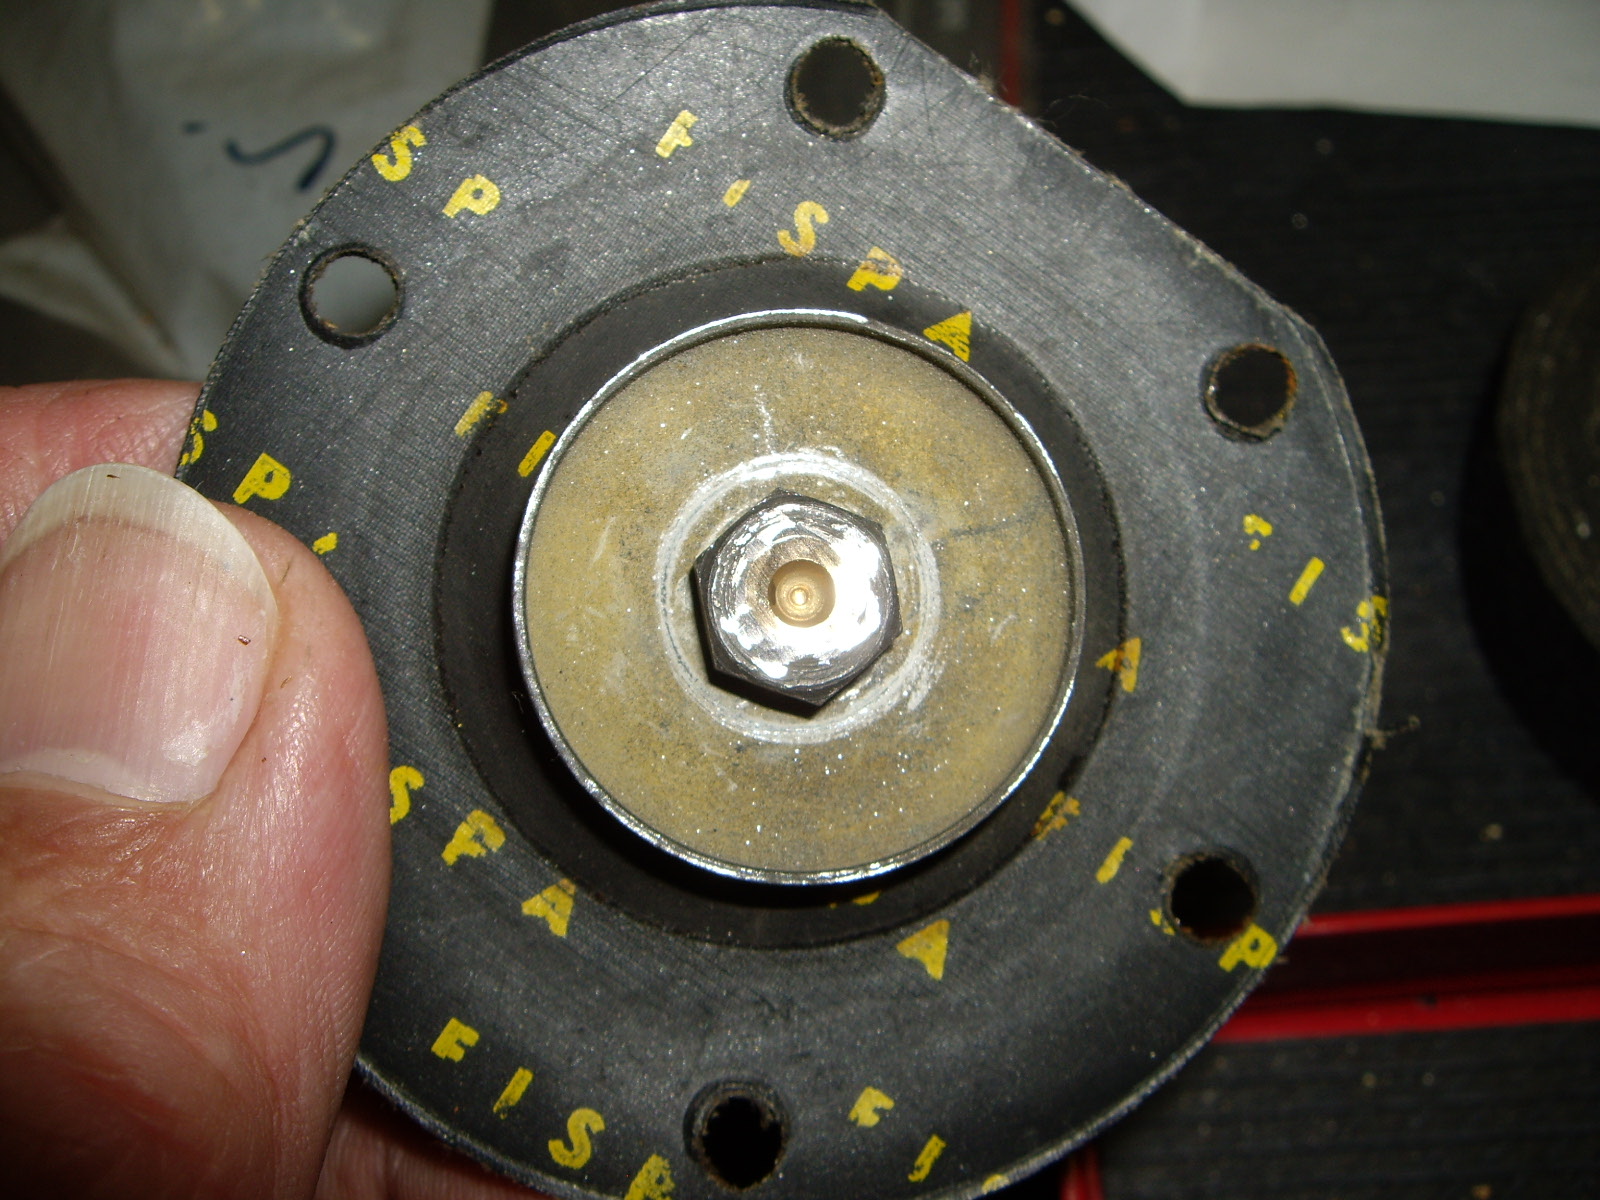 |
Then the nut unscrewed and I was able to replace the diaphragm. At first I was thinking that I would put on a brass nut and solder it to the threaded shaft. However, because the new single ply diaphragm was much thinner that the old three ply one, enough of the thread stuck up to be able to flatten it over the nut to lock it in place. The other thing that I did the other day was to epoxy the phenolic mounting block back together. It is quite common for these to crack and Mike Dunn makes replacements.
The last thing to do was to put everything back together and adjust the height of the actuator. Once that was done, a quick test proved that everything was working correctly. One final item that I do is to thread an extra nut on the 12V connection stud and adjust it so the bakelite cap just rests on it. That way, over-tightening the electrical connection can't break the cap (which are available from Parker Hall).
In the process of looking at George's, I took mine apart to see how a good one works. During that process, I realized that the spring wasn't holding the actuator in tightly enough. It would work for a couple of minutes and then stop. I tried to just re-stress the spring by bending it, but the tension wouldn't stay and the pump would again stop, though taking several minutes. I eventually took the spring off and forced an extra turn into it. Then the pump ran for a 40 minute test session.