Dash Removal
In order to fix the A/C evaporator, I had to remove the dash.
This is something I have never had to do on the 330 before, but as I told Lowell Brown one time, that's never stopped me before. I did talk to another 330 owner who had taken his dash out, so I had a some knowledge. The main item he mentioned was that there were four studs with wing nuts that had to be removed.
The first task was disconnecting the battery. There are two leads to the ammeter that are always hot, unfused and are big wires. If you were to short one of these to ground, the results would be spectacular and possibly start a fire.
I started by removing the glove box. This is necessary in order to access the right back side of the gauge cluster in the center. There are 2 wires for the light and the 4 screws on the sides that have to be removed. After that, it's just a matter of maneuvering the box out. First, right side gets pushed back to clear the frame. Then the front bottom needs to go back so it is below the frame of the dash in that area. Then some some more rotating and it becomes free. The A-pillar trim was removed. A caution is in order here. The glove box door does not need to be removed. However, you spend quite a bit of time with your arms, tools or a light stuck through the opening with the door open. If you put too much stress on the door, it could break at the hinges. It is pretty sturdy and I haven't broken mine, but removal is the safe way to go.
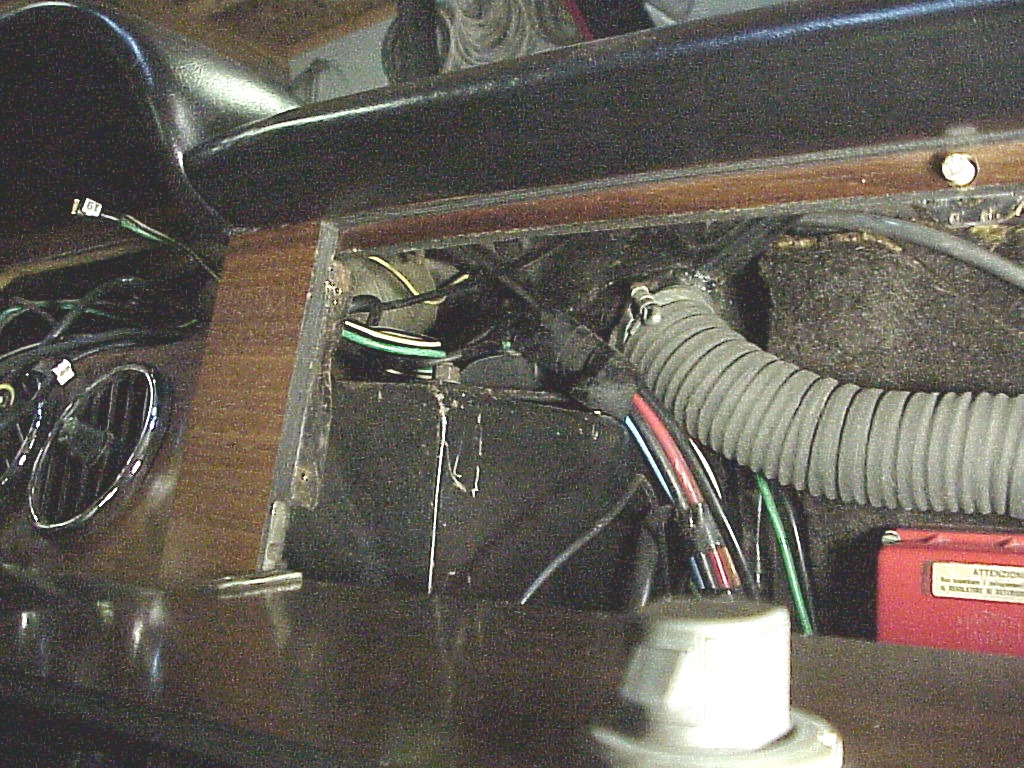
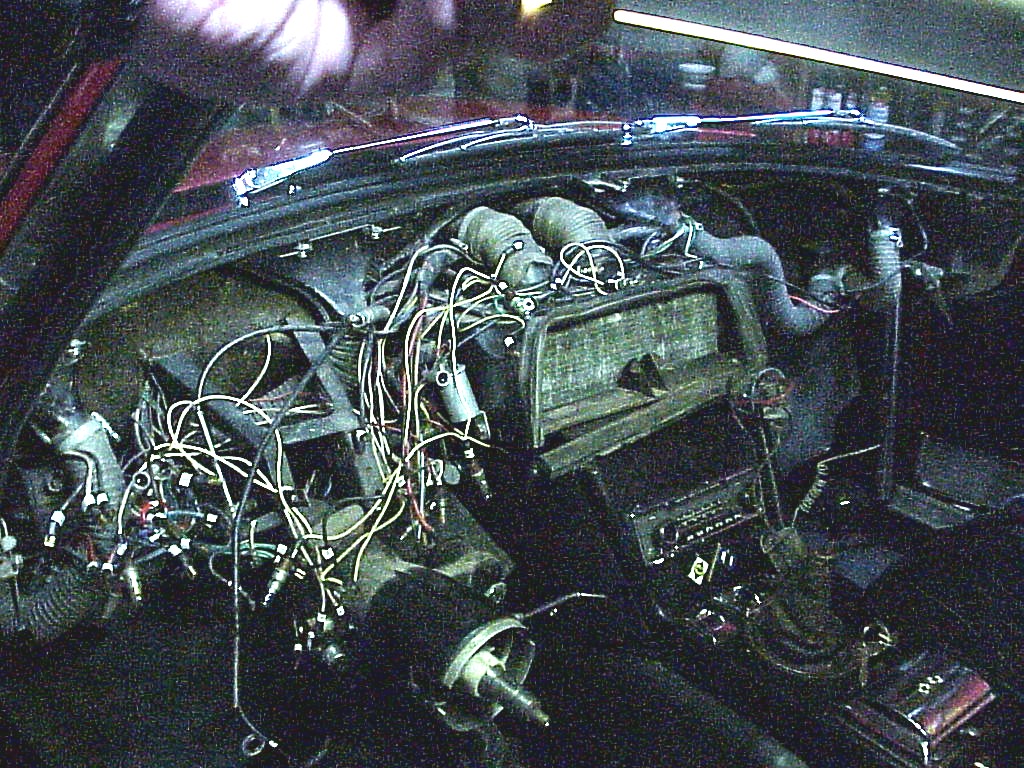
Next I started removing the gauges. These are held in place by J or U shaped clips over studs, tightened down by serrated nuts.
 |
 |
I removed the clip from the right side of the four gauge cluster through the open door of the glove box. For the other clip, the tach needs to be removed, so I moved to the driver's side. I removed the tach and speedometer. That gives access to remove the oil gauge cluster and the left clip on the four gauge cluster. As I had already removed these gauges before, all of the wires were marked with matching numbers. You can see the 7 and 8 on the tach picture above. Using duplicate numbers on the wires and where they go makes for quick removal and error free re-assembly.
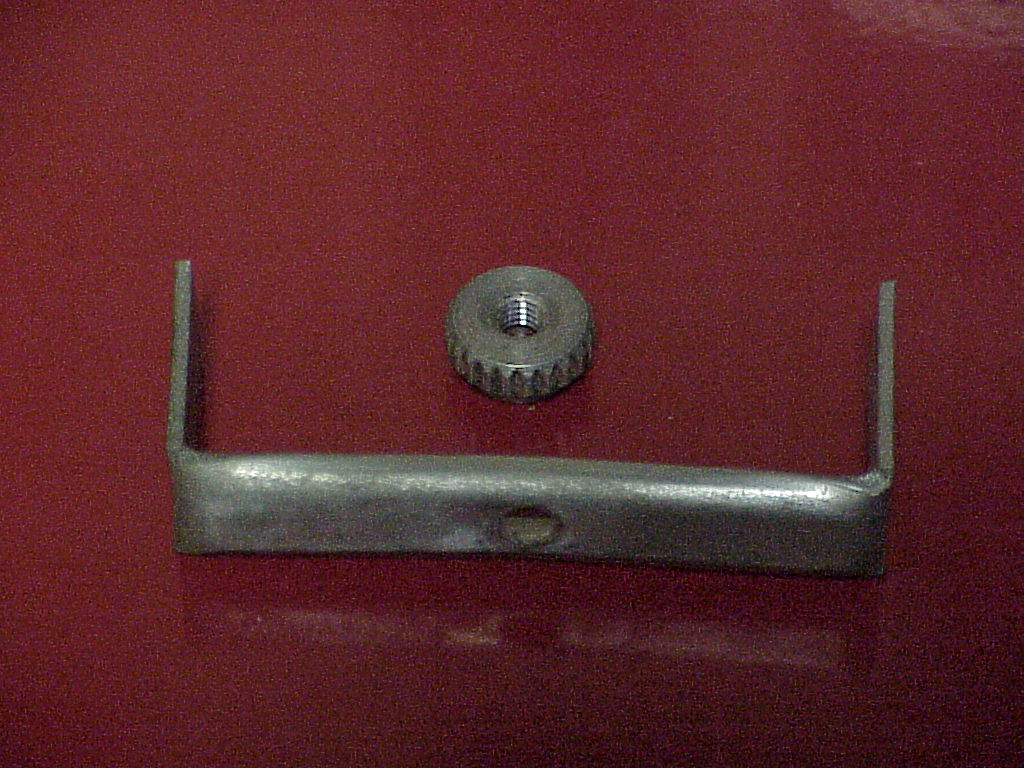
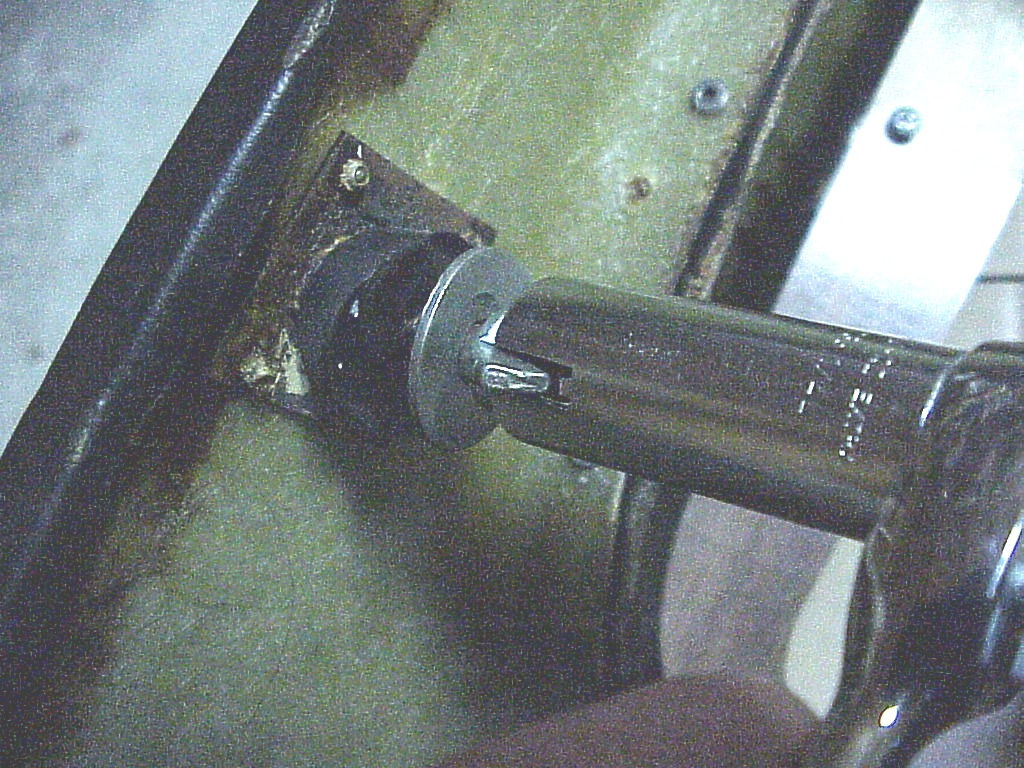
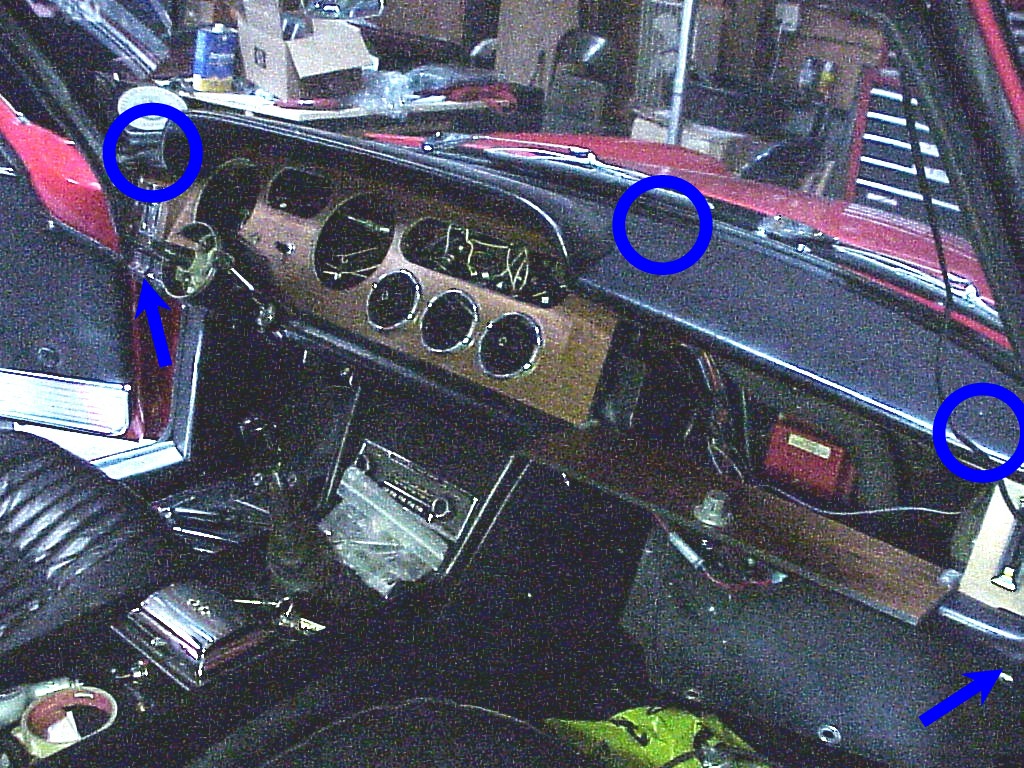
Then I went looking for the studs and wing nuts. I ended up only finding three. Those plus two bolts at the bottom left and right sides is all that holds the dash in place. Sounds easy, right! But not so. The wing nuts didn't want to move and the access was limited. I ended up cutting a couple of slots in a long socket. The slots fit over the ears of the wing nut and allowed much better leverage to remove them. It turns out that you don't have to remove them entirely, just run back them off about 1/4" but more on that later. Here you can see the wing nut socket tool and approximately where the stud and wing nuts (circles) and bolts (arrows) are.
 |
 |
After removing the bolts and wing nuts, the dash started to come free. Next was to remove the attachments to the three heater controls. The heat/defrost ones are a bent rod that slides through the lever and a clip that then pops down over the rod to hold it in place. The heater control is the typical coiled wire sheath around a sliding center wire. I had had problems with this before and noticed that the sheath was again sliding instead of the center wire moving. So another task to get done. Maybe I can get it fixed for good since I have much better access now. With those controls loose, I tried to get the dash to move up. First I noticed another brace on the right side of the switch panel. After that was free, the dash still wouldn't move up because the areas where the bolts held it on was underneath the frame. After some playing around, I figured out that the dash was designed to slide out to the rear of the car. That's why the wing nuts don't need to be taken off as the studs just slide out of the brackets. Next the dash started hitting on the steering column. I had previously removed the steering wheel to fix the headlight switch (yet again) so it was already out of the way. I'm not sure that you would have to remove it just to get the dash out though. The steering column is held in place by two screws and a long bolt. Removing those let it drop down out of the way as there is a universal joint on this side of the firewall.
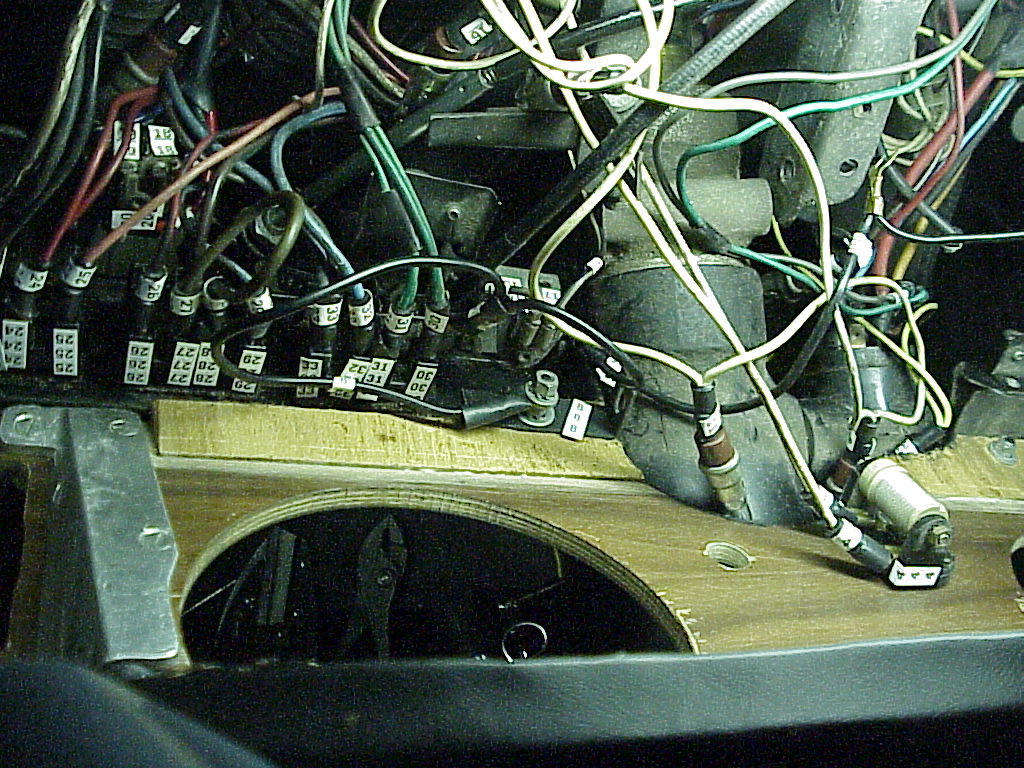
Now that everything was out of the way, I tried to slide the dash back, but it kept stopping. I kept looking for the elusive fourth wing nut that I had been told about. It turns out that there is a lip on the front edge of the dash by the windshield. So you have to raise it a little while sliding it back. Now that it was free, I had to remove all of the wires to the switch panel. Since I had never taken those off, matching numbers were put on the wires and connection points. I use cards of matching numbers. You can use two cards, but I usually just cut across each card so each number is ½ length which is long enough to wrap around a wire or connector.

In addition, there were two wires to the accessory socket and in the case of my car, wires to a switch that selects either a city or air horn. I also had to remove the two A/C controls that are part of the air outlets in the center. Finally everything was free and the dash came out.
 |
 |
As you can see, there's quite a rats nest of wires left. The dash itself doesn't have much left on it by now. Next was to remove the A/C evaporator, but that wasn't real obvious so I left it for another day. I had thought that it would take about five hours to remove the dash, but it ended up only taking about 3½ hours.
One thing I did throughout this process was to use plenty of zip baggies to hold the parts and associated screws and bolts for each item. This makes putting things back together much less of a mental challenge trying to remember exactly with screws where used where.
Installation of the dash is more straightforward than the removal. Mainly because you know exactly what has to be put back together and in what order. The first thing was to reconnect all of the wires to the switch block. As you can see, that was just a matter of plugging the right numbered wire into the matching location.
The A/C controls also had to be mounted first since the wiring fits between the dash and evaporator. I also re-attached the hot water control and wire. Once that was done, the dash was ready to be fit back in place. I had the wing nuts and washers on the studs, but quite loose. That way they just needed to be tightened once the dash was in place.
.JPG)
Once the dash was in place, the two heat controls were re-attached and the choke put on its bracket. The steering column was raised back up and bolted in place. One thing I forgot about was that the connection to the horn is made by a spring loaded piece of carbon that rubs on the side of the steering column. Since it's spring loaded, it sticks out as soon as you lower the steering column. I just shoved the column back in place and broke off the carbon tip. It's still available for a reasonable price (if you consider $16 reasonable for something that looks like a ½" long piece of pencil lead). I just removed the holder until I can get the part. That way the spring wouldn't arc if I tried to use the horn.
The last thing to do was put in all of the gauges, starting with the oil cluster. Then the 4 gauge cluster is installed with the tach and speedometer being the last ones. One thing I do is to screw the ground wire down to each gauge. Originally the ground wire is just slipped under one of the knurled nuts. However, having them already tight is just one less thing to deal with when reaching in behind trying to put the clip, washer and knurled nut all together using one hand. The last item to get done is putting the glove box back in.
As I connected the ground on the battery, the starter turned over Along the way, a couple of the wires on the ignition switch had come loose due to the steering column being dropped down. I thought I got them back in the right place, but obviously not. A little time with a volt meter let me figure out that mistake. At least I could have the battery connected afterwards..
The next test was the headlights. They worked fine except that the FARI (high beam) indicator light was on when the low beams were on. I checked that the indicator wire was plugged into the right fuse in the fuse box. I pulled apart the plug going to the steering column headlight switches and testing with the Ohm meter showed each wire to be connected at the right switch position. I went back to the fuse box and figured out that the low beam fuses had +12v when the headlight switch was in the high beam position and vice versa. Well, that explained the FARI light but since everything is color coded with red being the high beam circuit and yellow being the low beam one, I was at a loss. I went back to the connector under the dash and finally noticed that someone had switched two wires in the connector. This left the red connected to the yellow and yellow to red. So I took the wires out of the connector and put the in the correct positions. Now the FARI light was working correctly, but the high beams were on when the lows should have been. I had to switch the wires at the headlights to make everything work properly. I don't drive the car much at night and with the headlight switch problems I've had, this must have been wrong for quite a while and I never noticed.
The next test was the next switch, the AUTOFLUX (electric fuel pump). It didn't work. At this point I was tired of chasing problems, so I went ahead and tested most everything else. The rear window defroster also didn't work. It turns out that they are on the same fuse, so I checked it and it was blown. I thought an easy solution until I put a new one in and it immediately blew as soon as I turned on the electric fuel pump switch. So I had a short somewhere. Since the AUTOFLUX circuit has wires going to both the fuel pump and the associated indicator light, I reached up under the dash to remove the indicator light. I found that I had mounted the turn signal flasher and then pushed it out of the way. It just touched the 1/16" of bare wire where it goes into the connector to the indicator bulb. I moved the flasher unit so it was out of the way and put a new fuse in. That solved that problem.
All the other circuits worked fine, thankfully. I installed the console and checked out the window switches, radio, cigarette lighter, etc. Finally everything was back together and I could take the car off the lift and drive it. This took two months from when I started to fix the A/C, but several other things got fixed at the same time.
After I was all done and clipping the leatherette panel under the dash back in place, I realized that I had broken the carbon brush that lets the horn work. Click here for that fix.