Door
The doors are the most complicated of the body parts. Many pieces, some of which have to be taken apart in order.
Disassembly of the door:
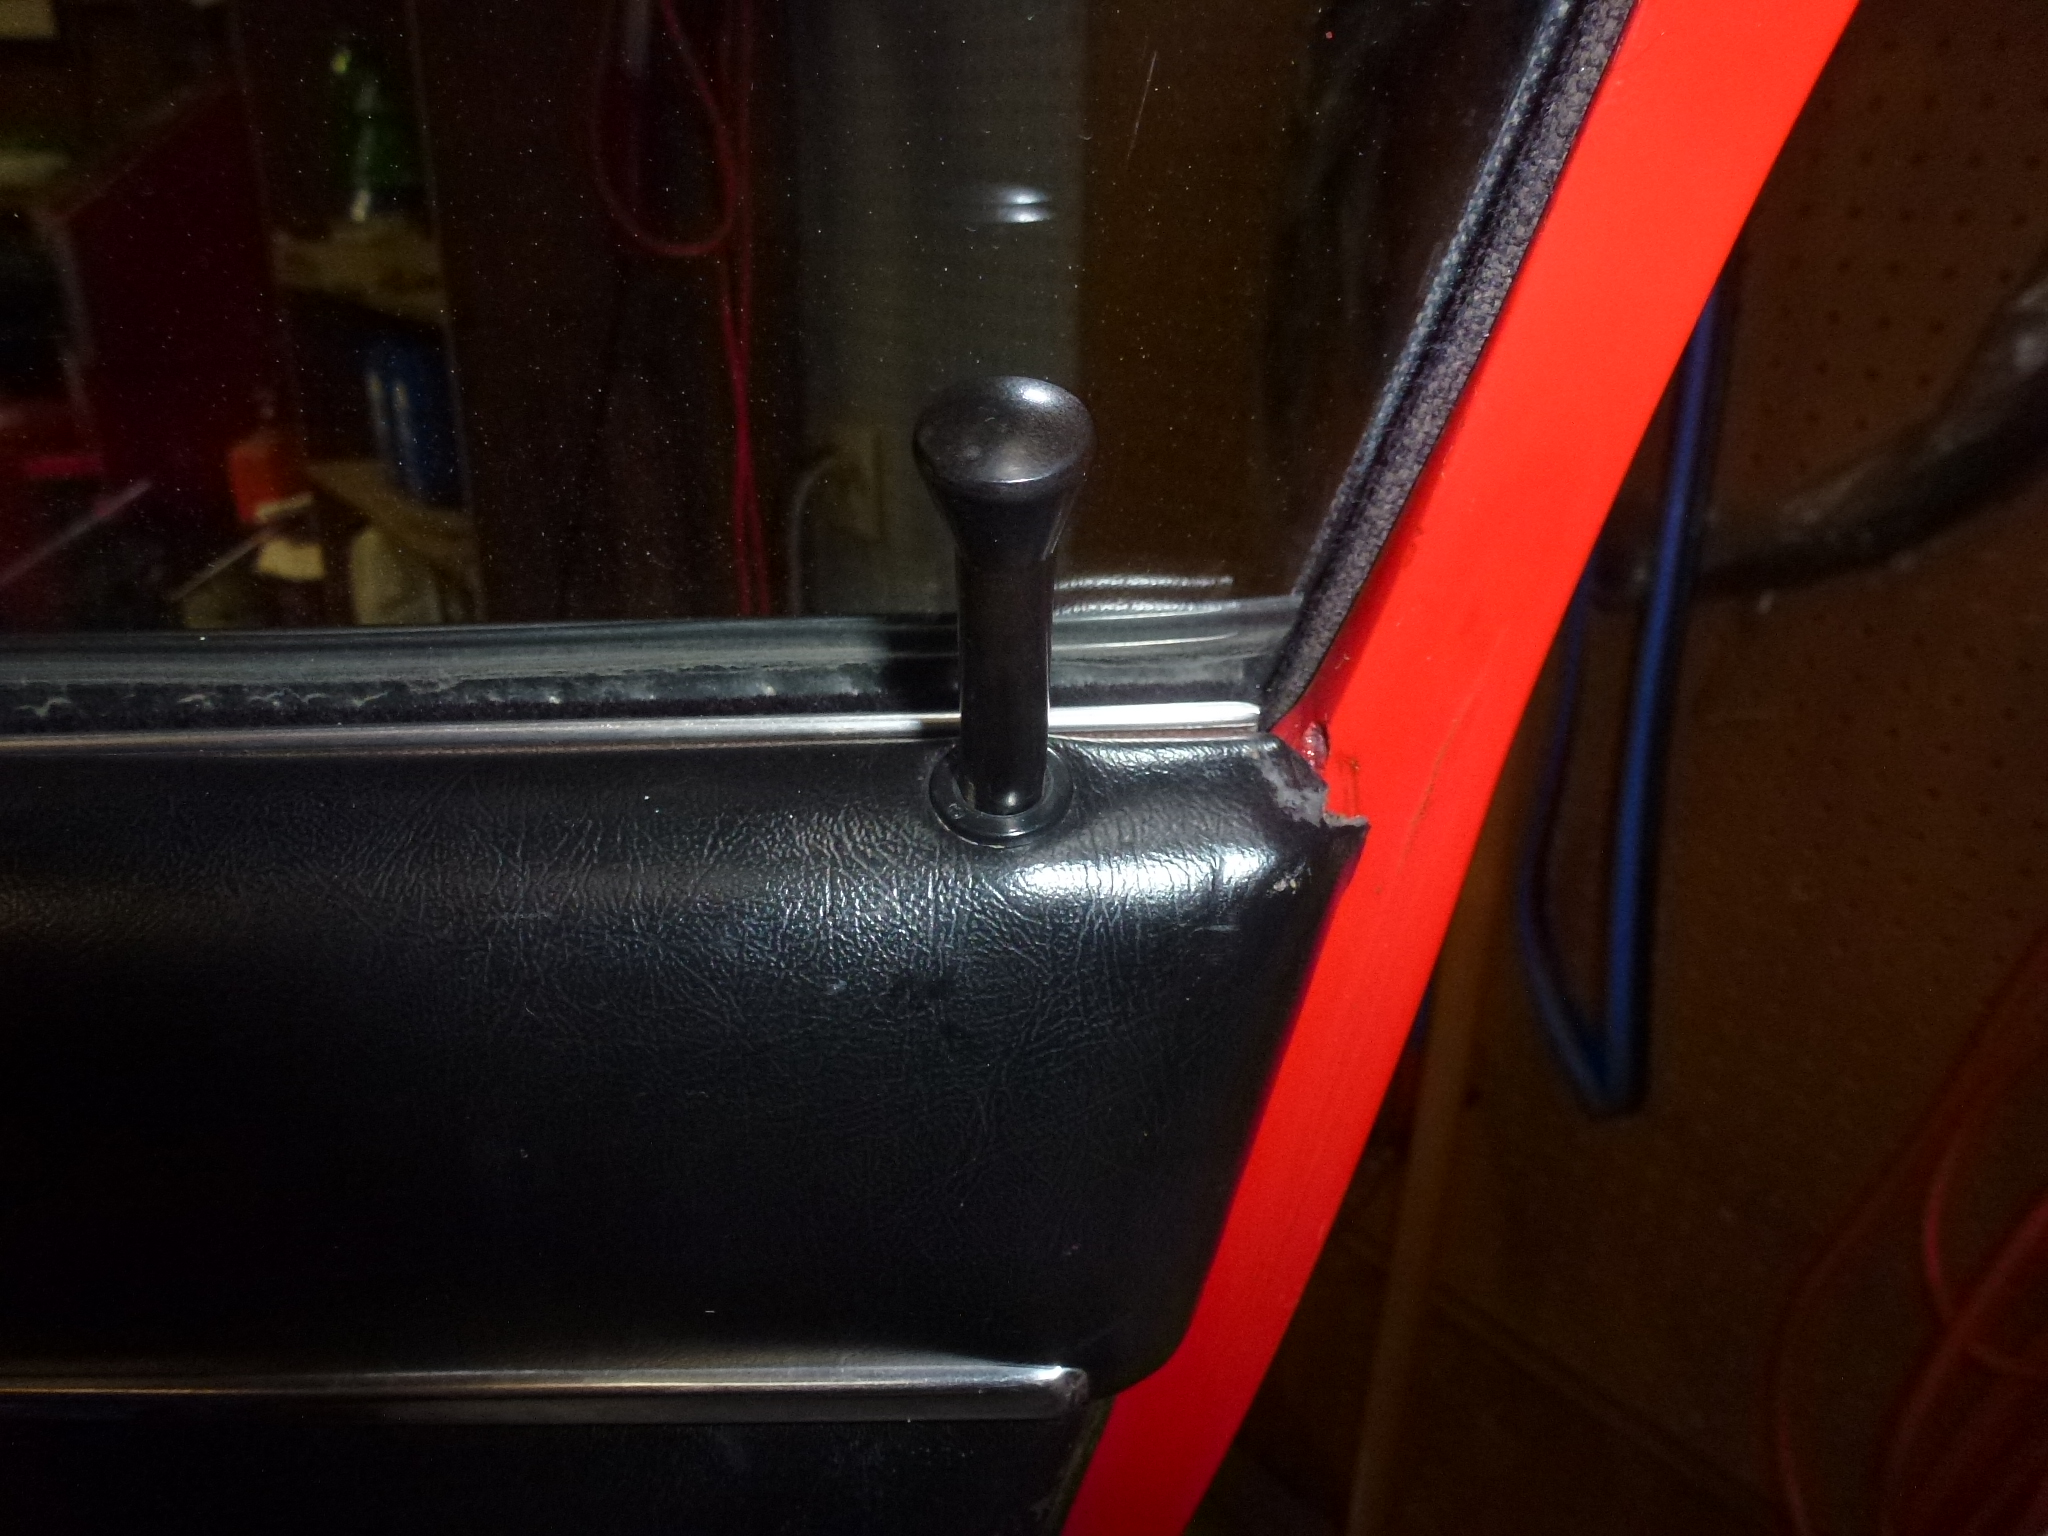
- Remove the lock knob. This just unscrews.
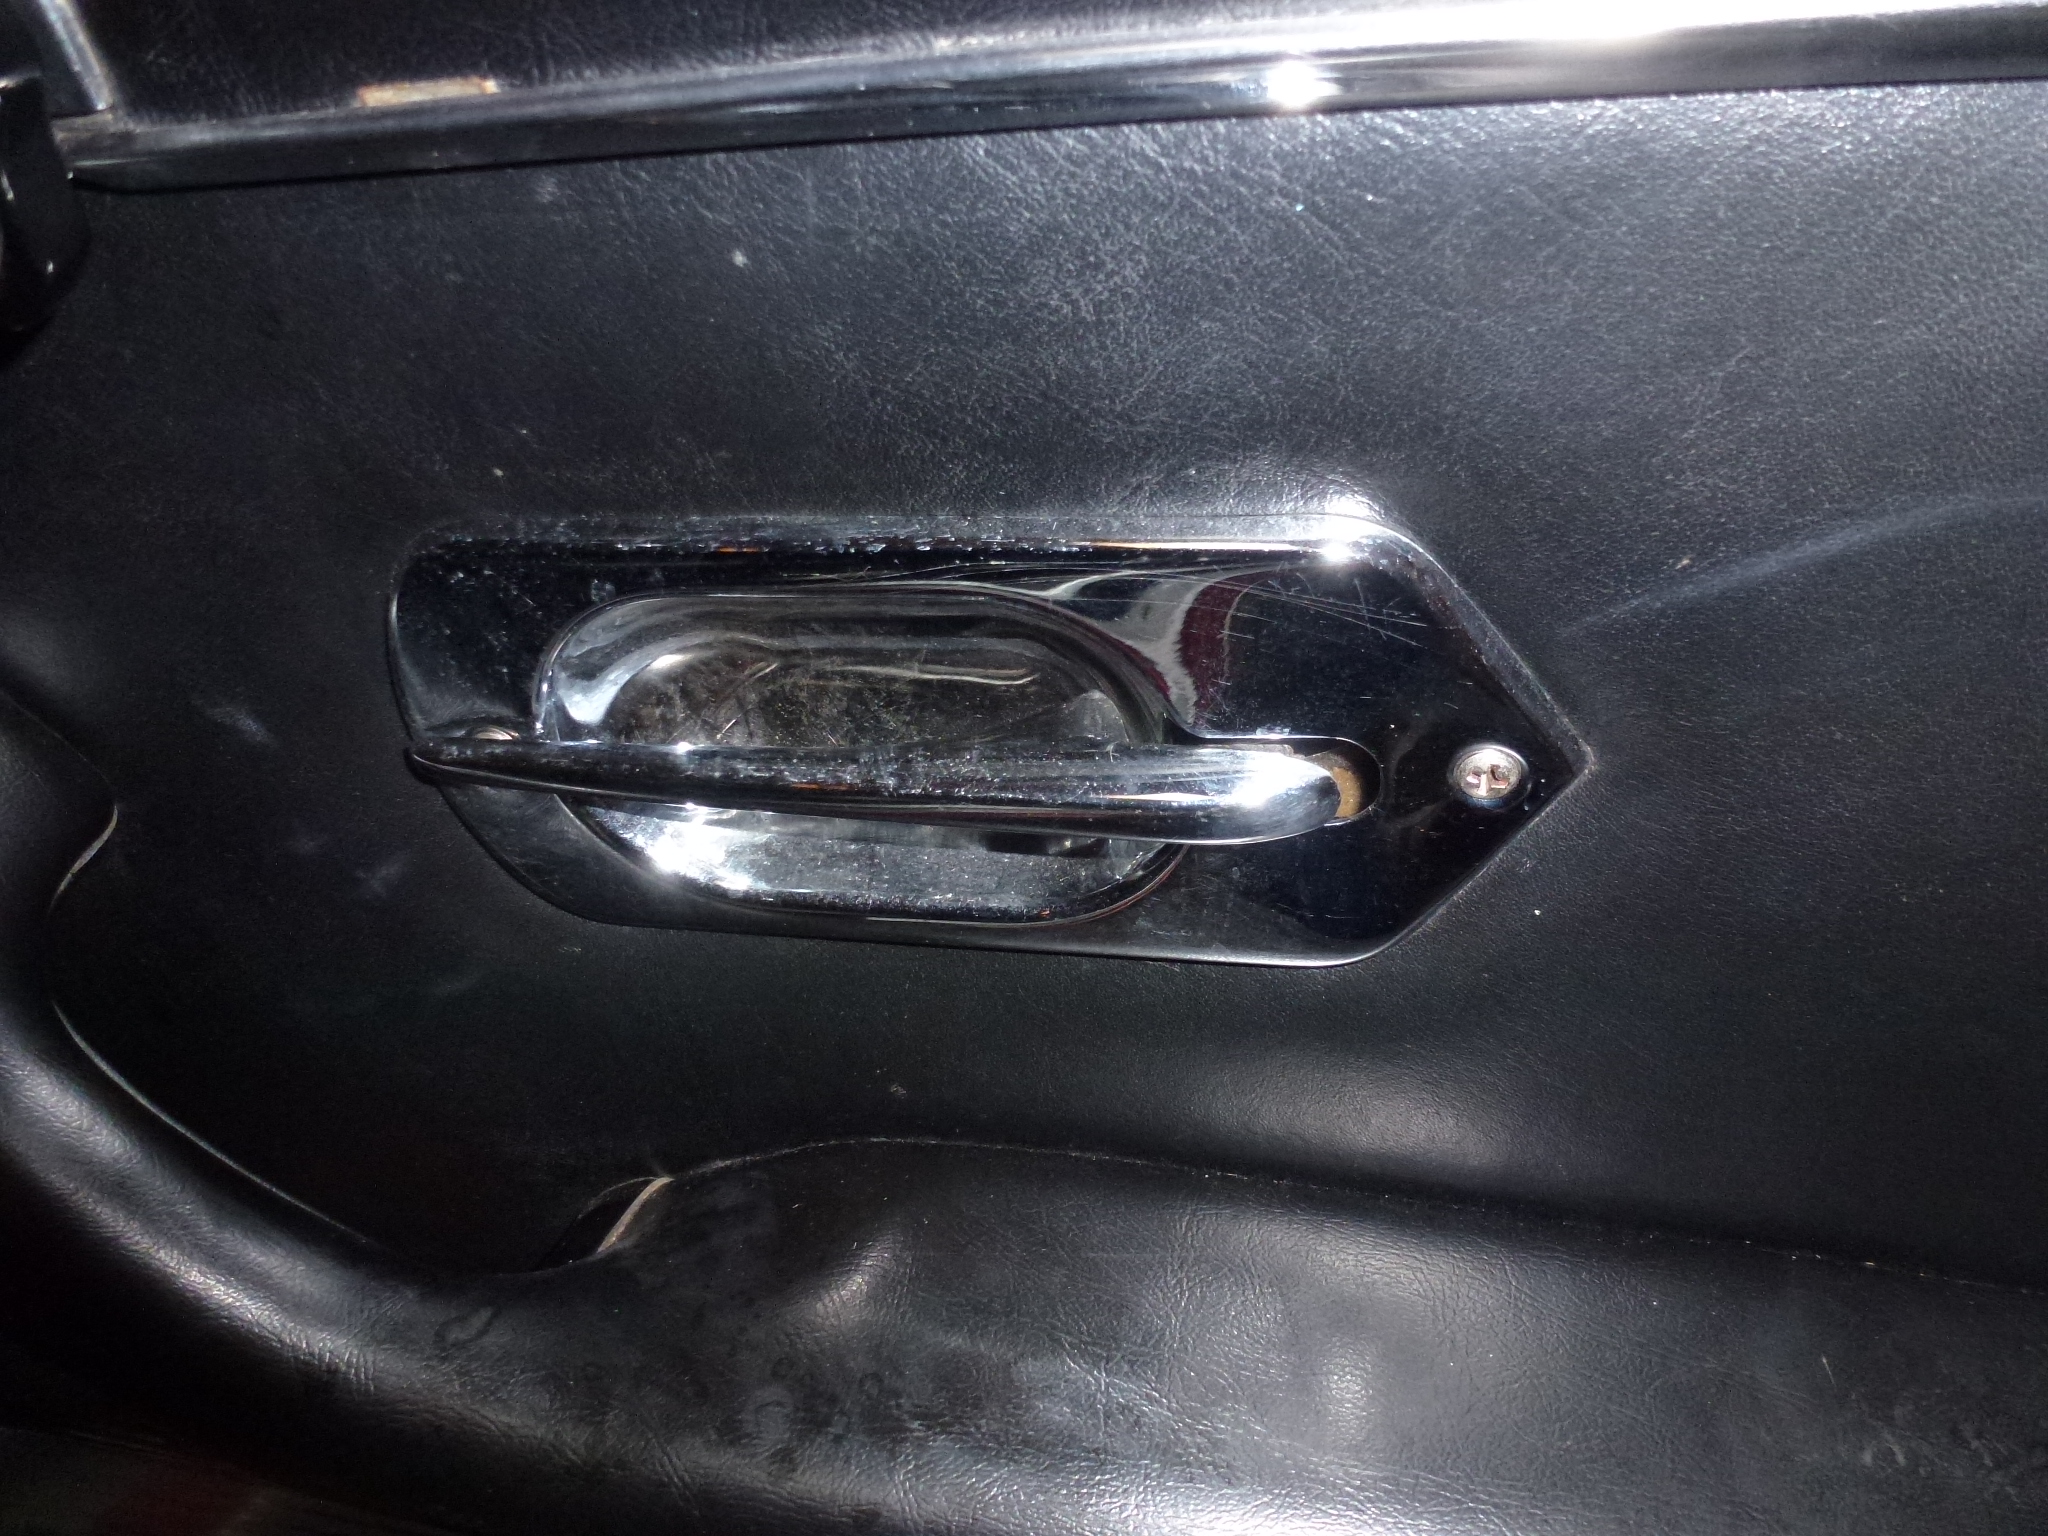
- Remove the latch handle escutcheon. Two screws.
-
Remove the arm rest handle. One screw and then lift up as it rests on clips.

-
Remove the door panel. Several screws, but the ones in the lower trim just need to be loosened. Then starting at one bottom corner, pull the panel out of the clip holders. Once free, the panel slides down from under the panel above.
-
Peel off the plastic weather proofing. If you are lucky, it will be original.
-
Remove the panel under the window. Three screws to be removed and then lift up.
-
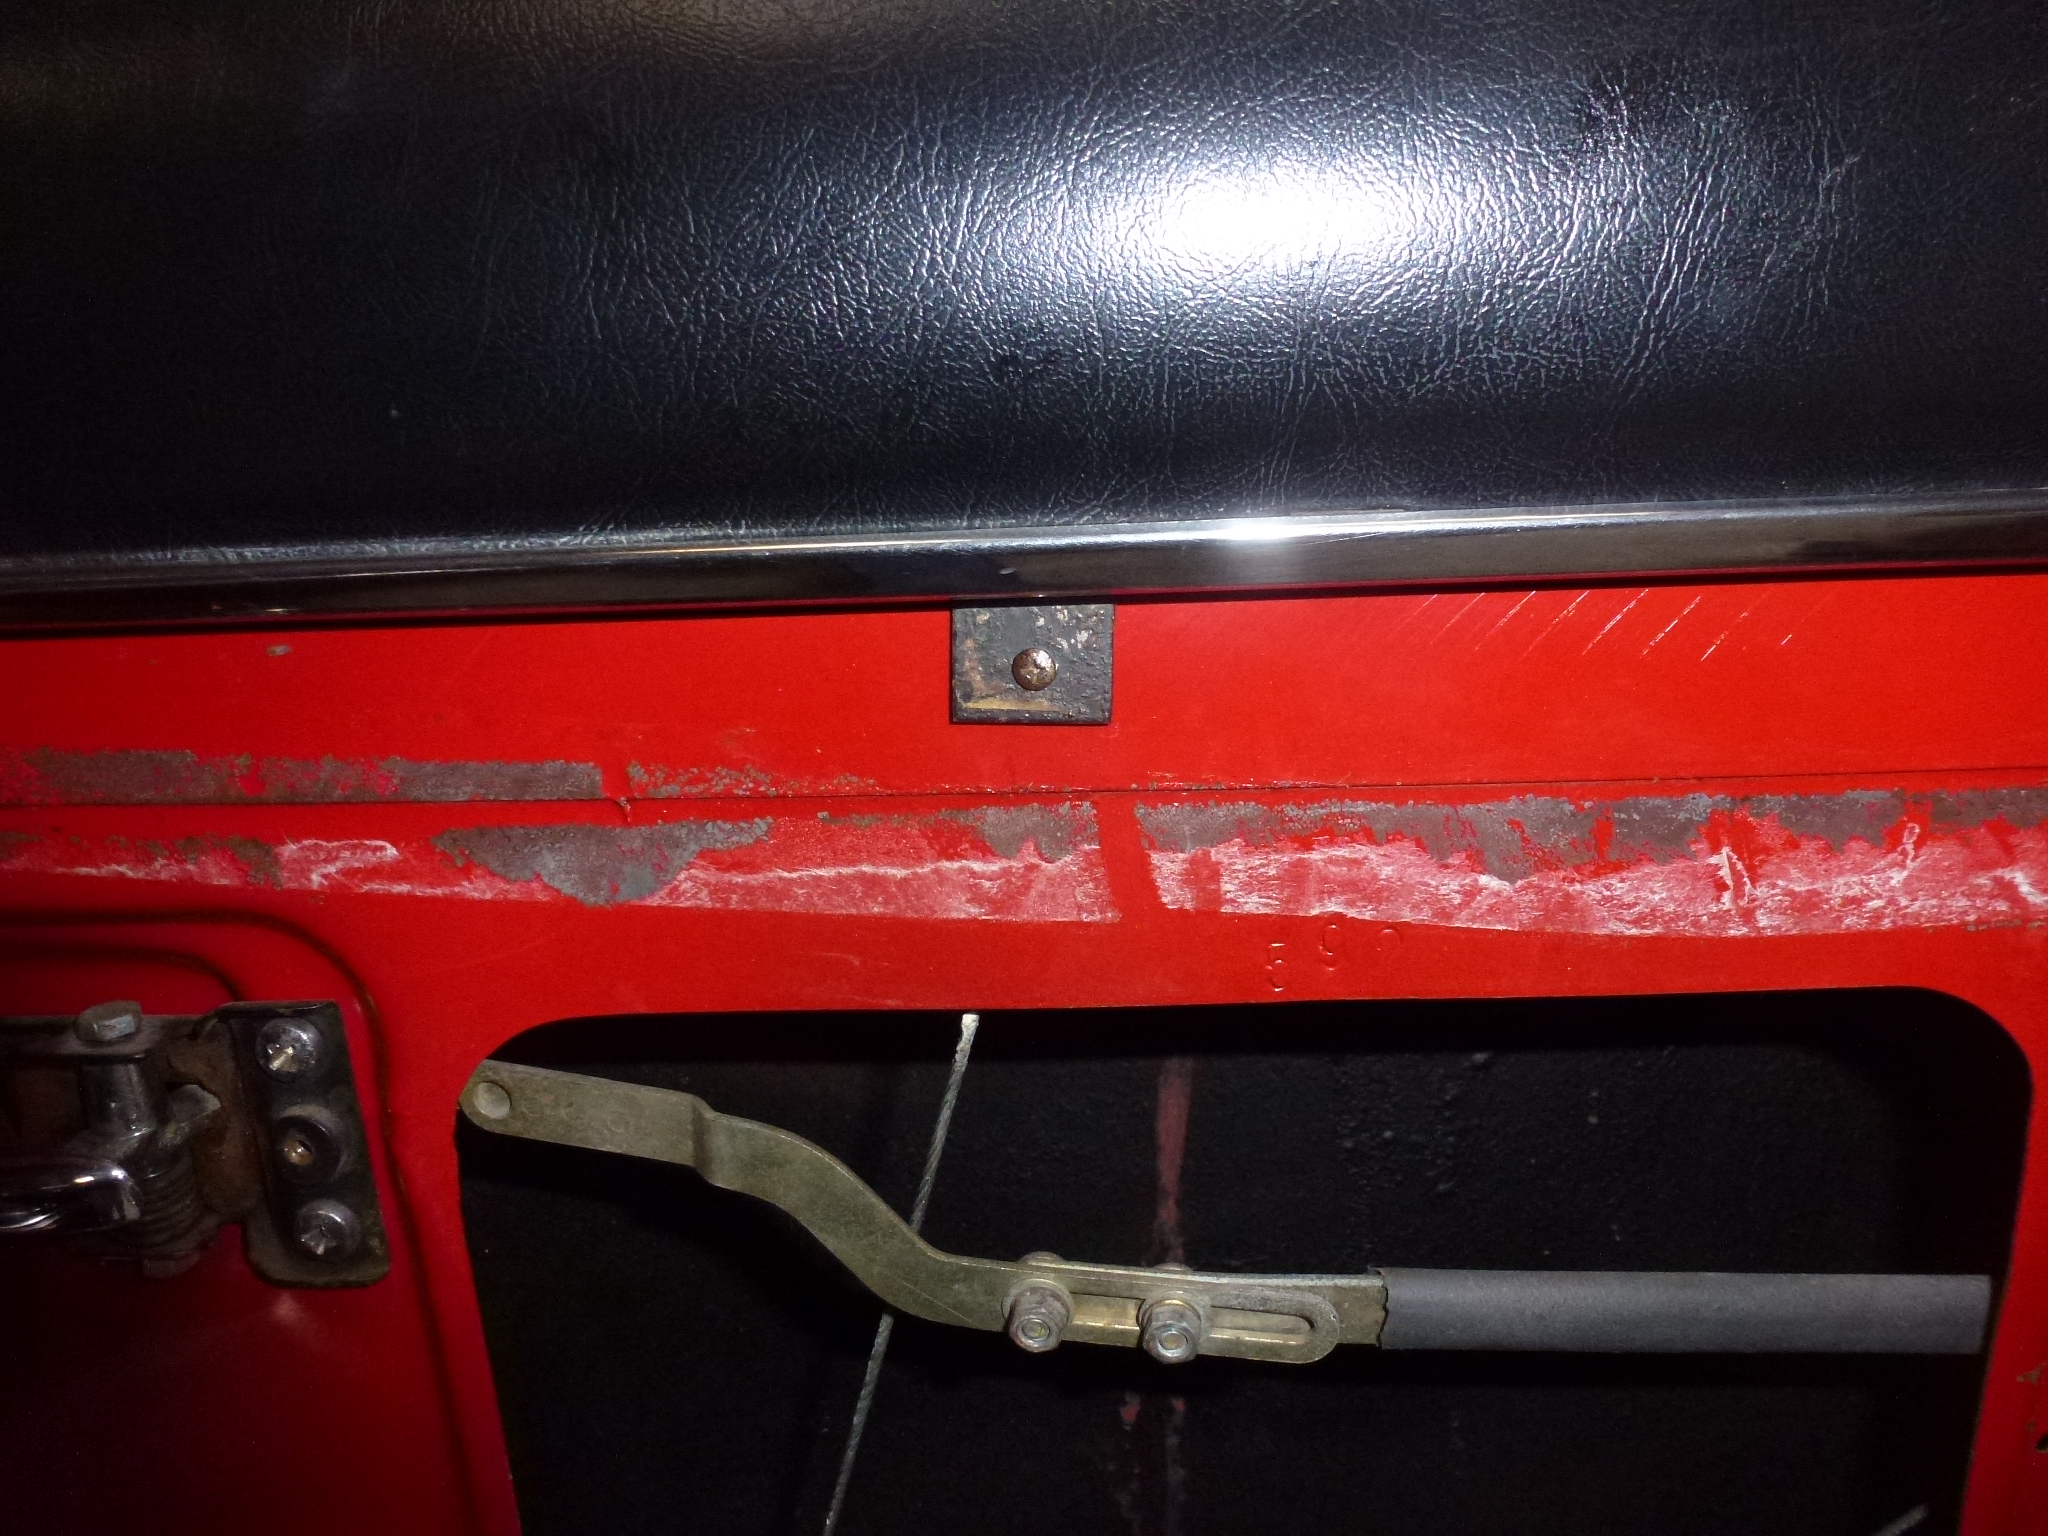
Remove the bracket holding up the connector arm from the latch to the inside handle.
-
Undo the connector arm from the inside latch handle from the latch mechanism.
-
Remove the inside latch handle. Three screws. The window must be up.
-
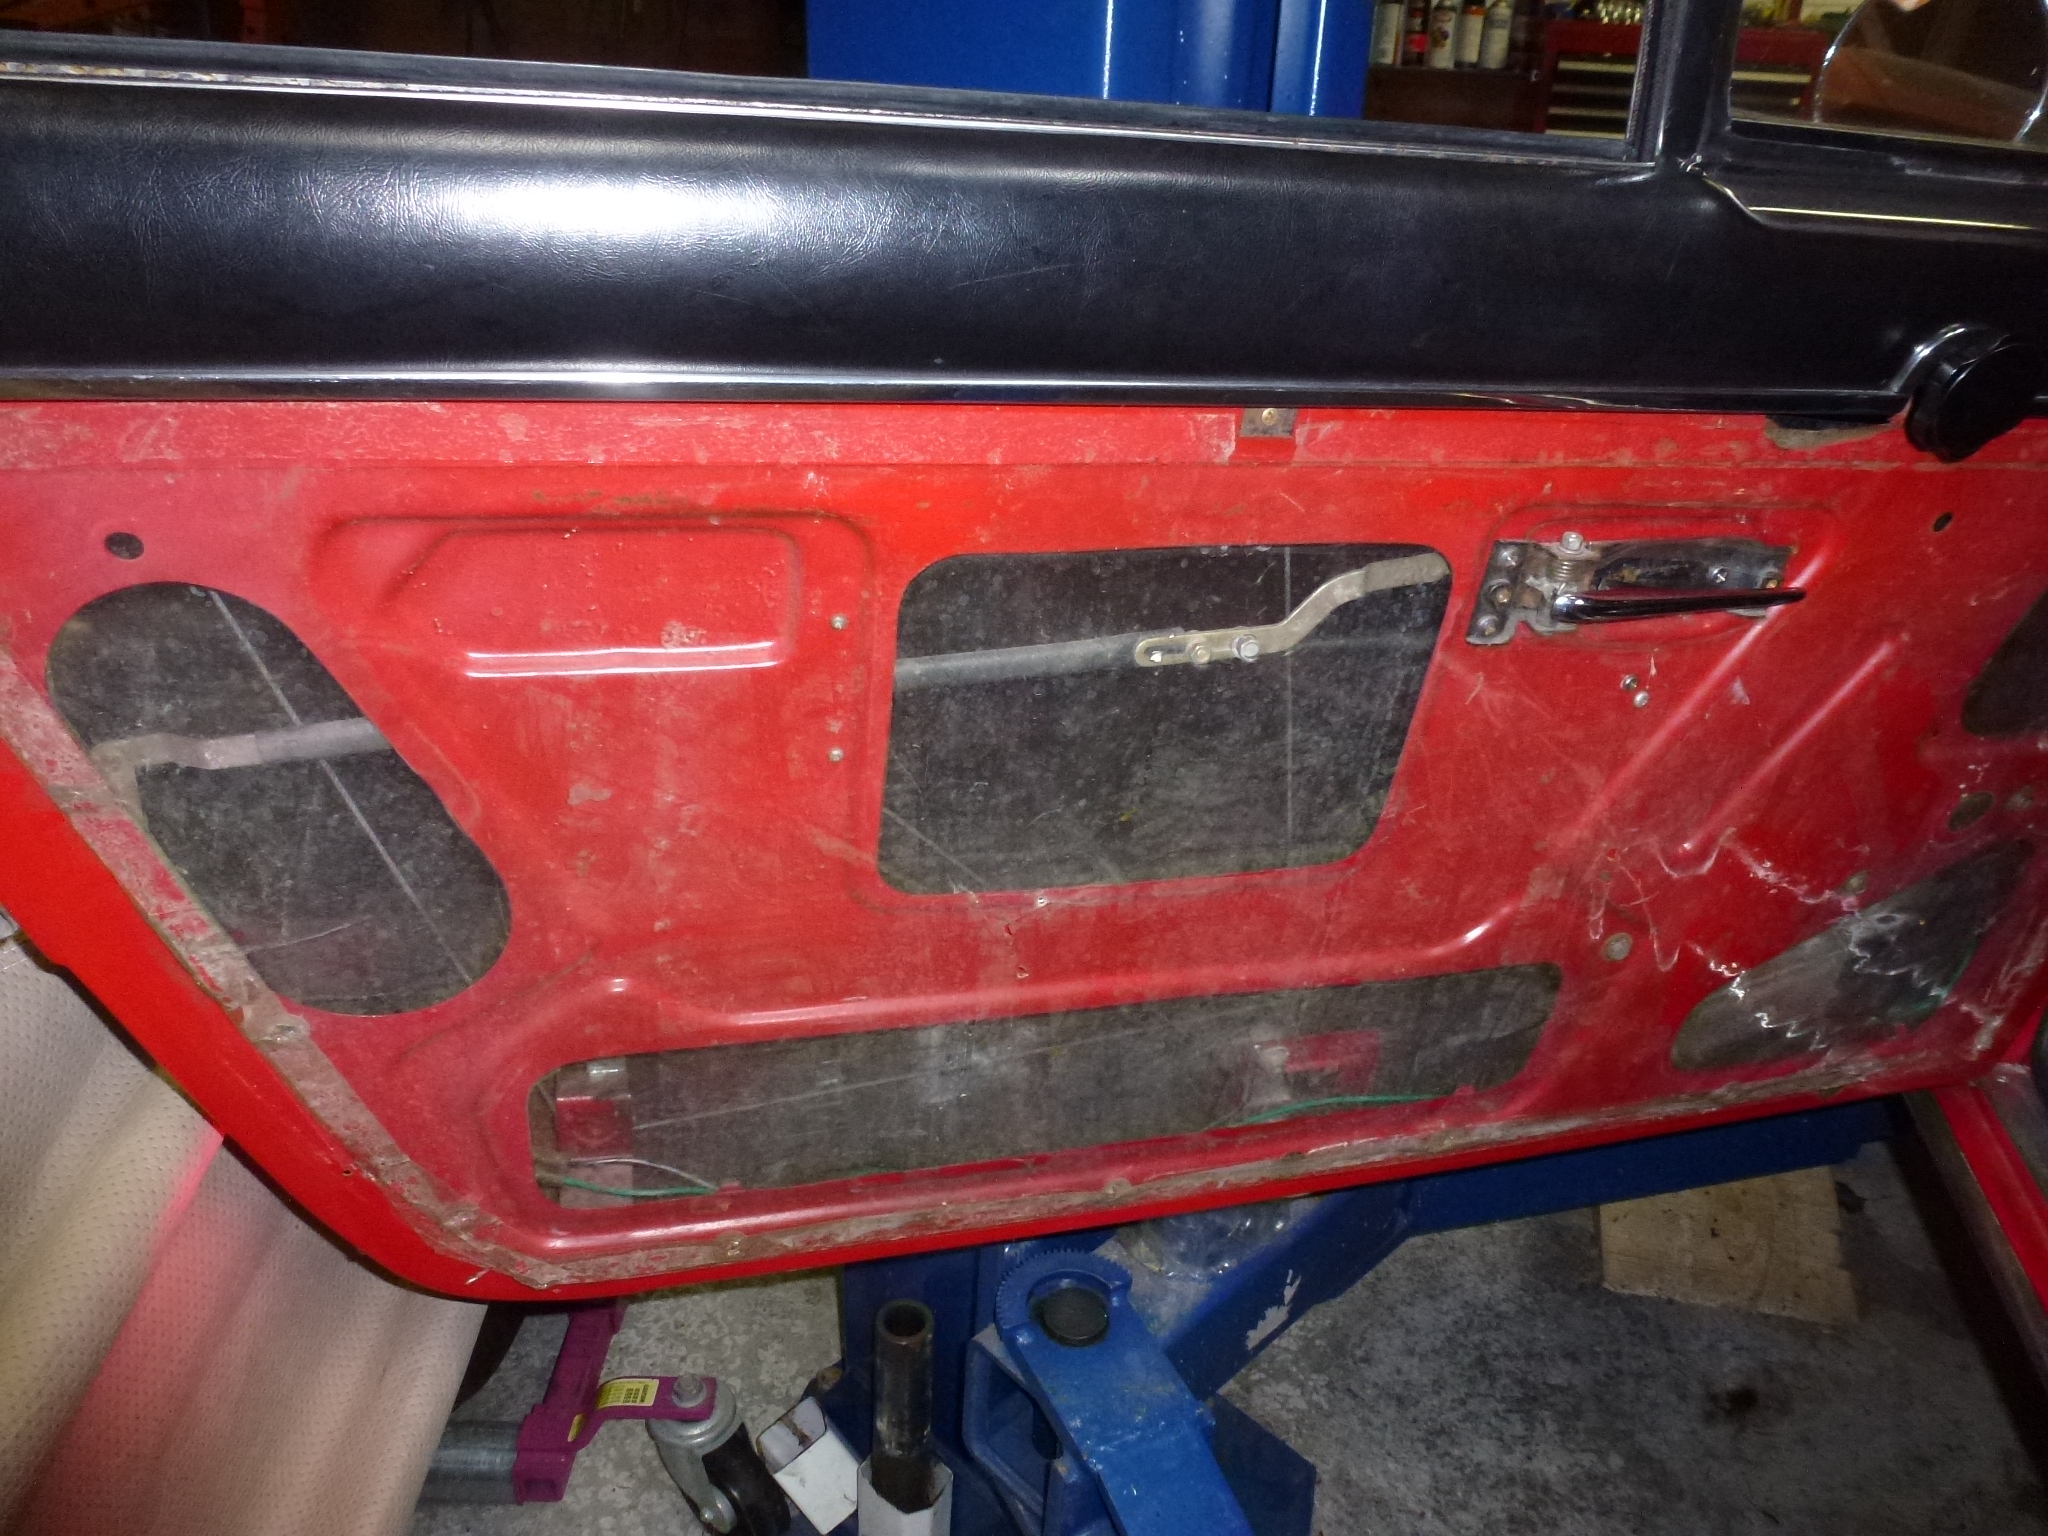
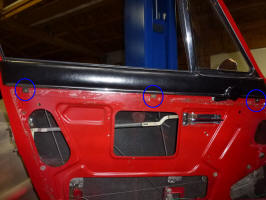
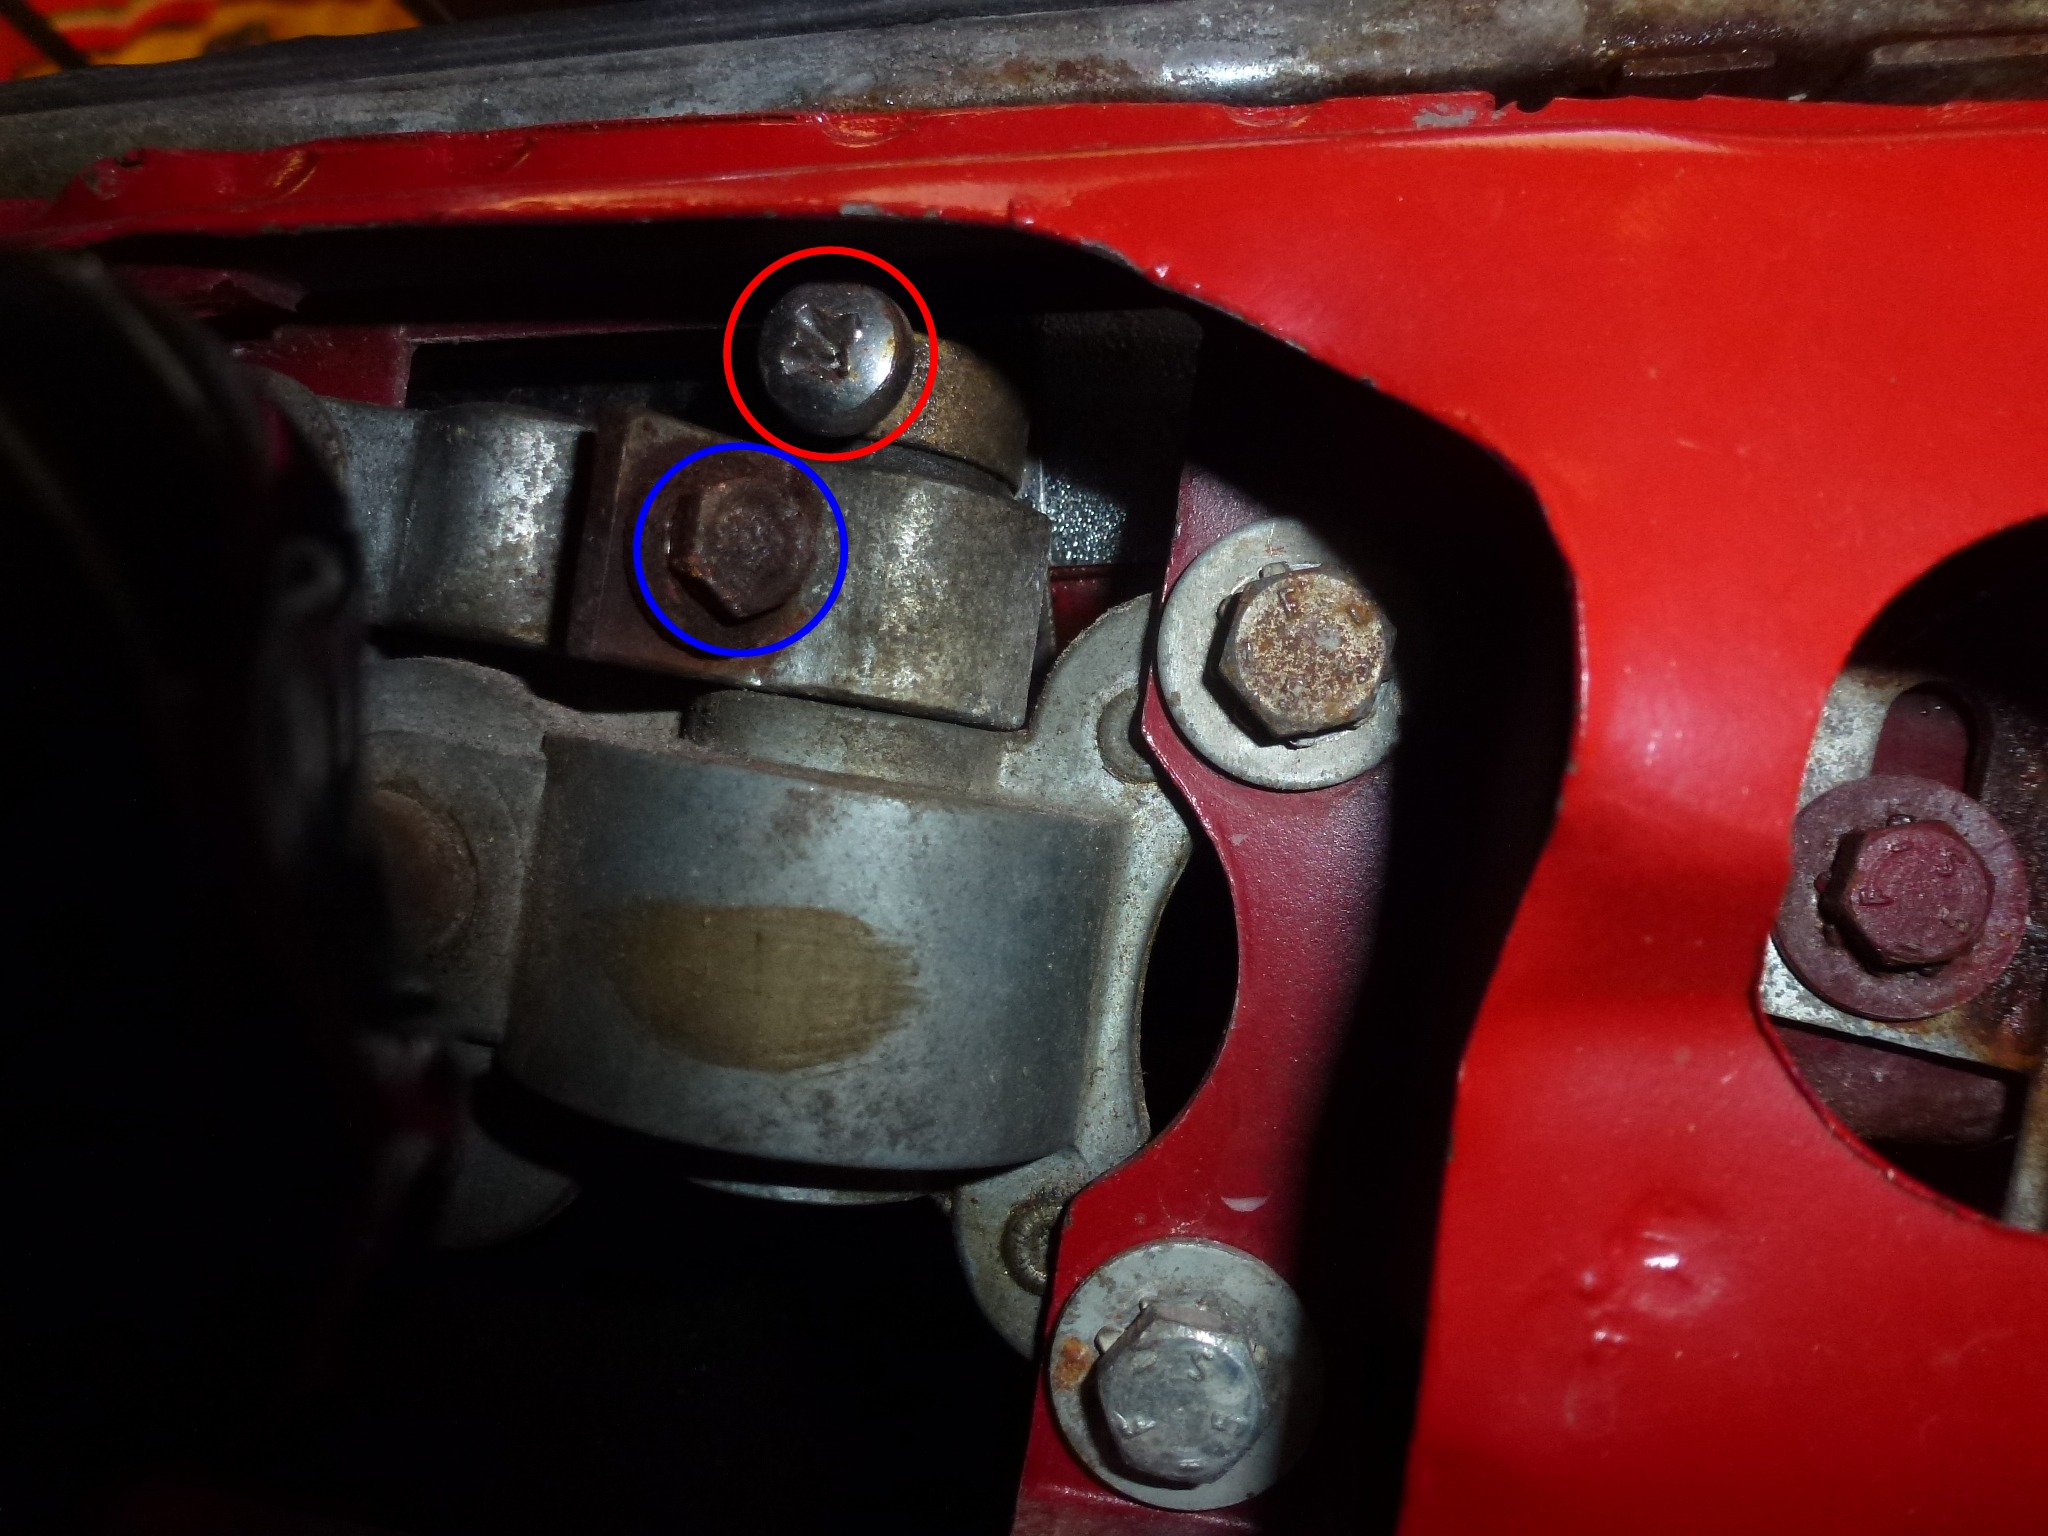
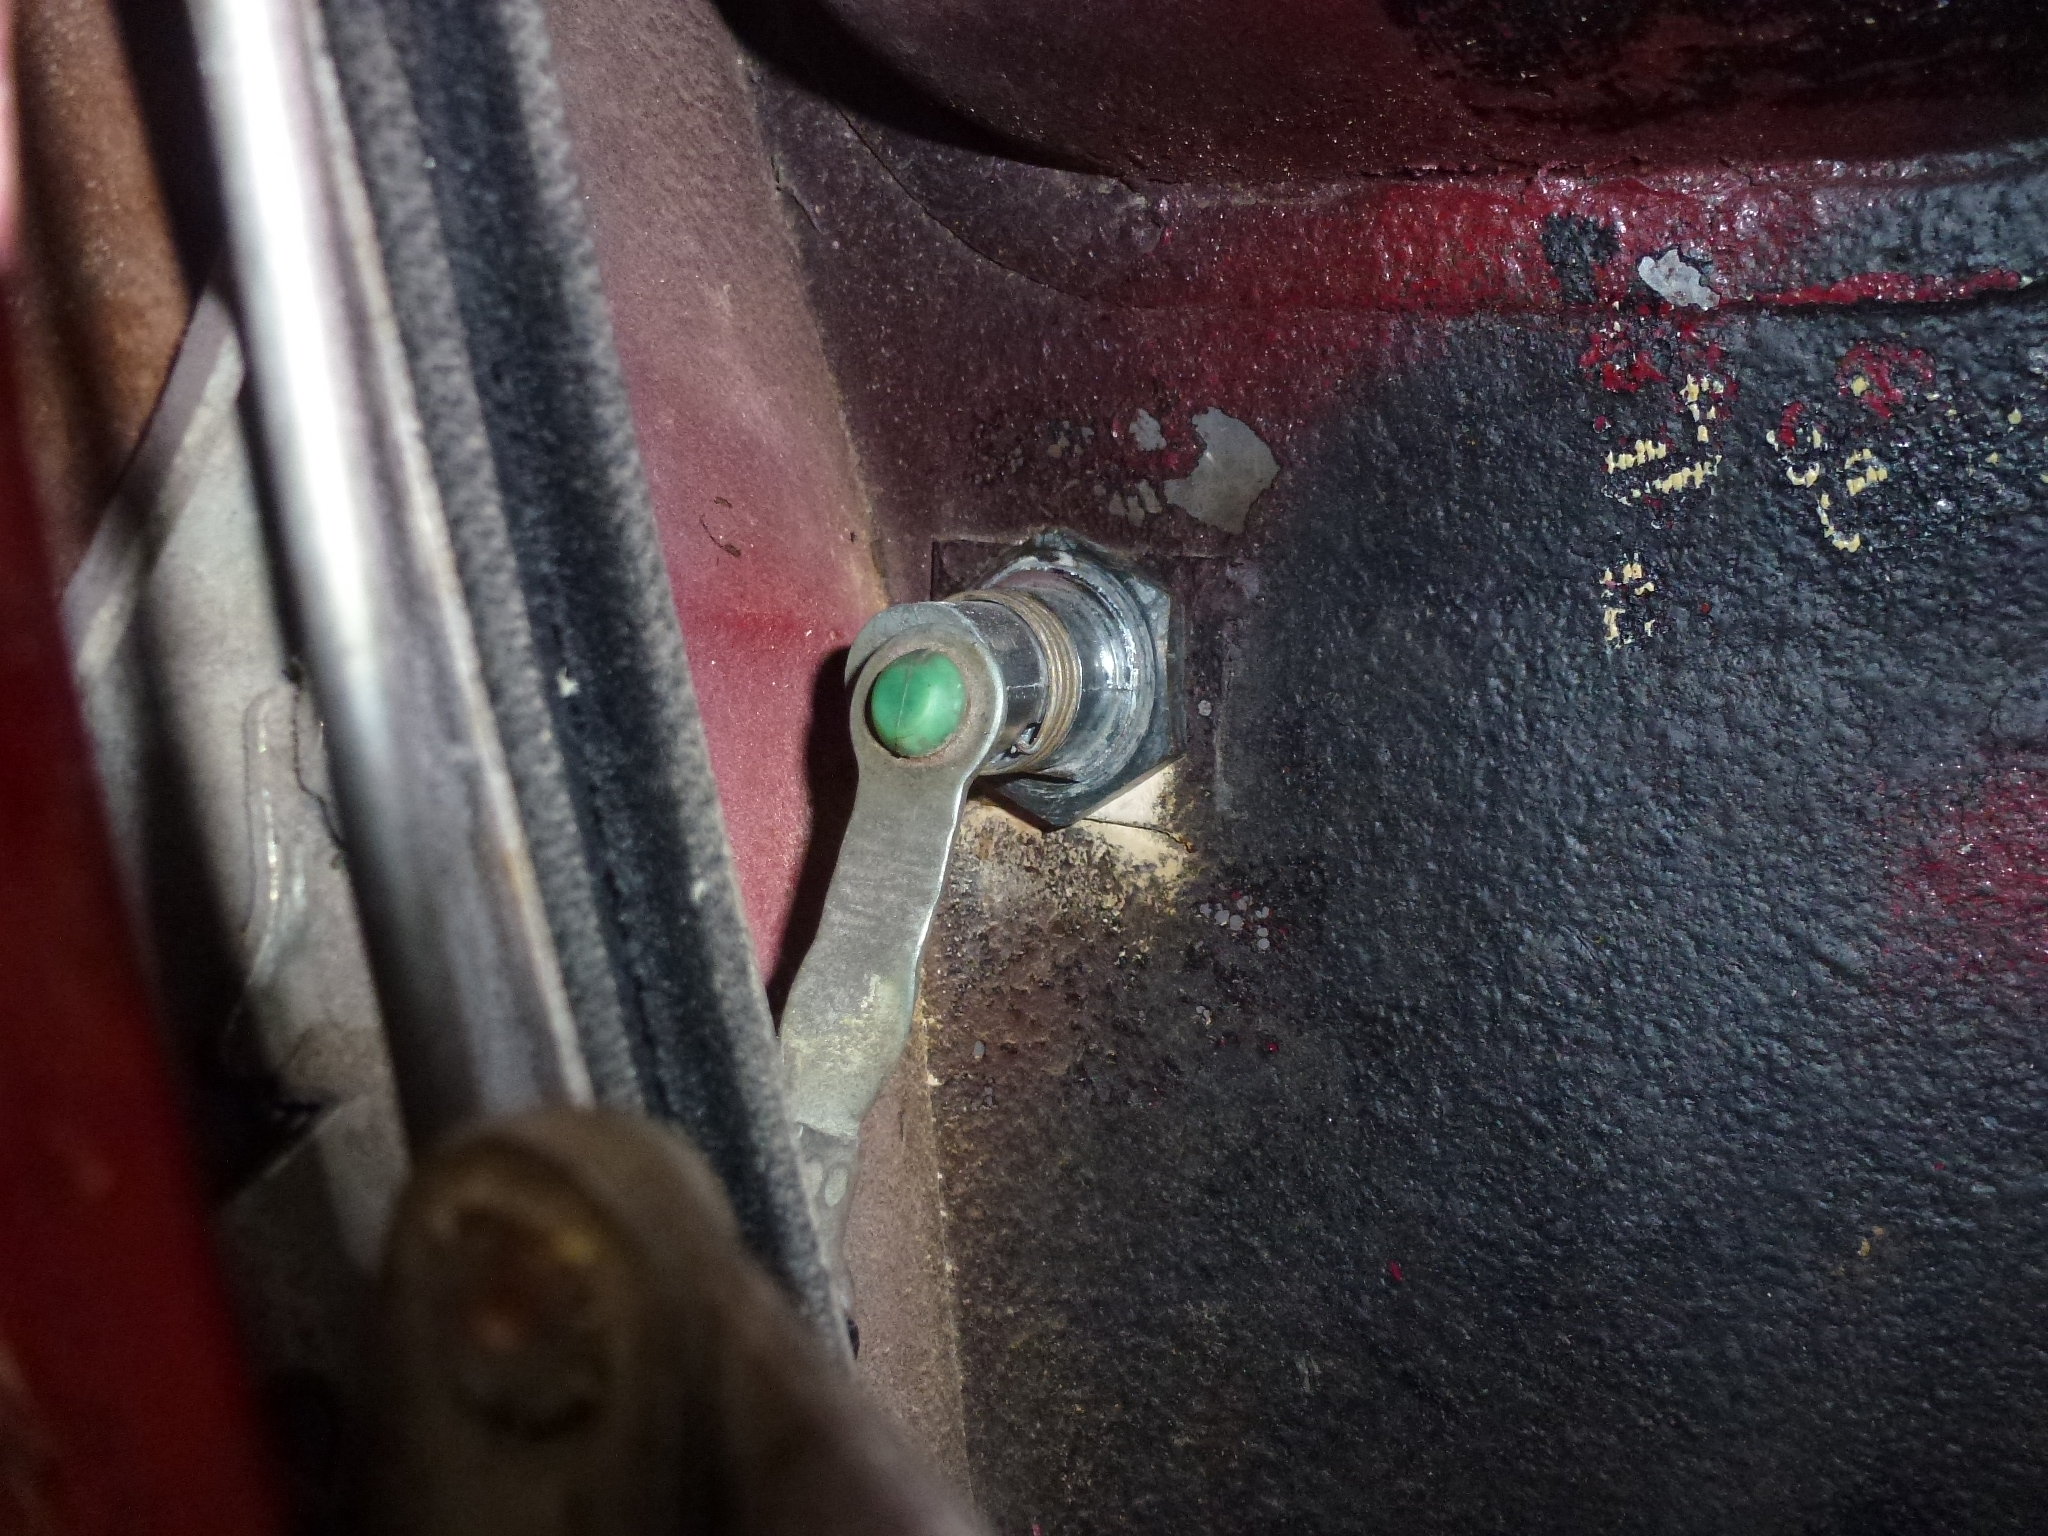
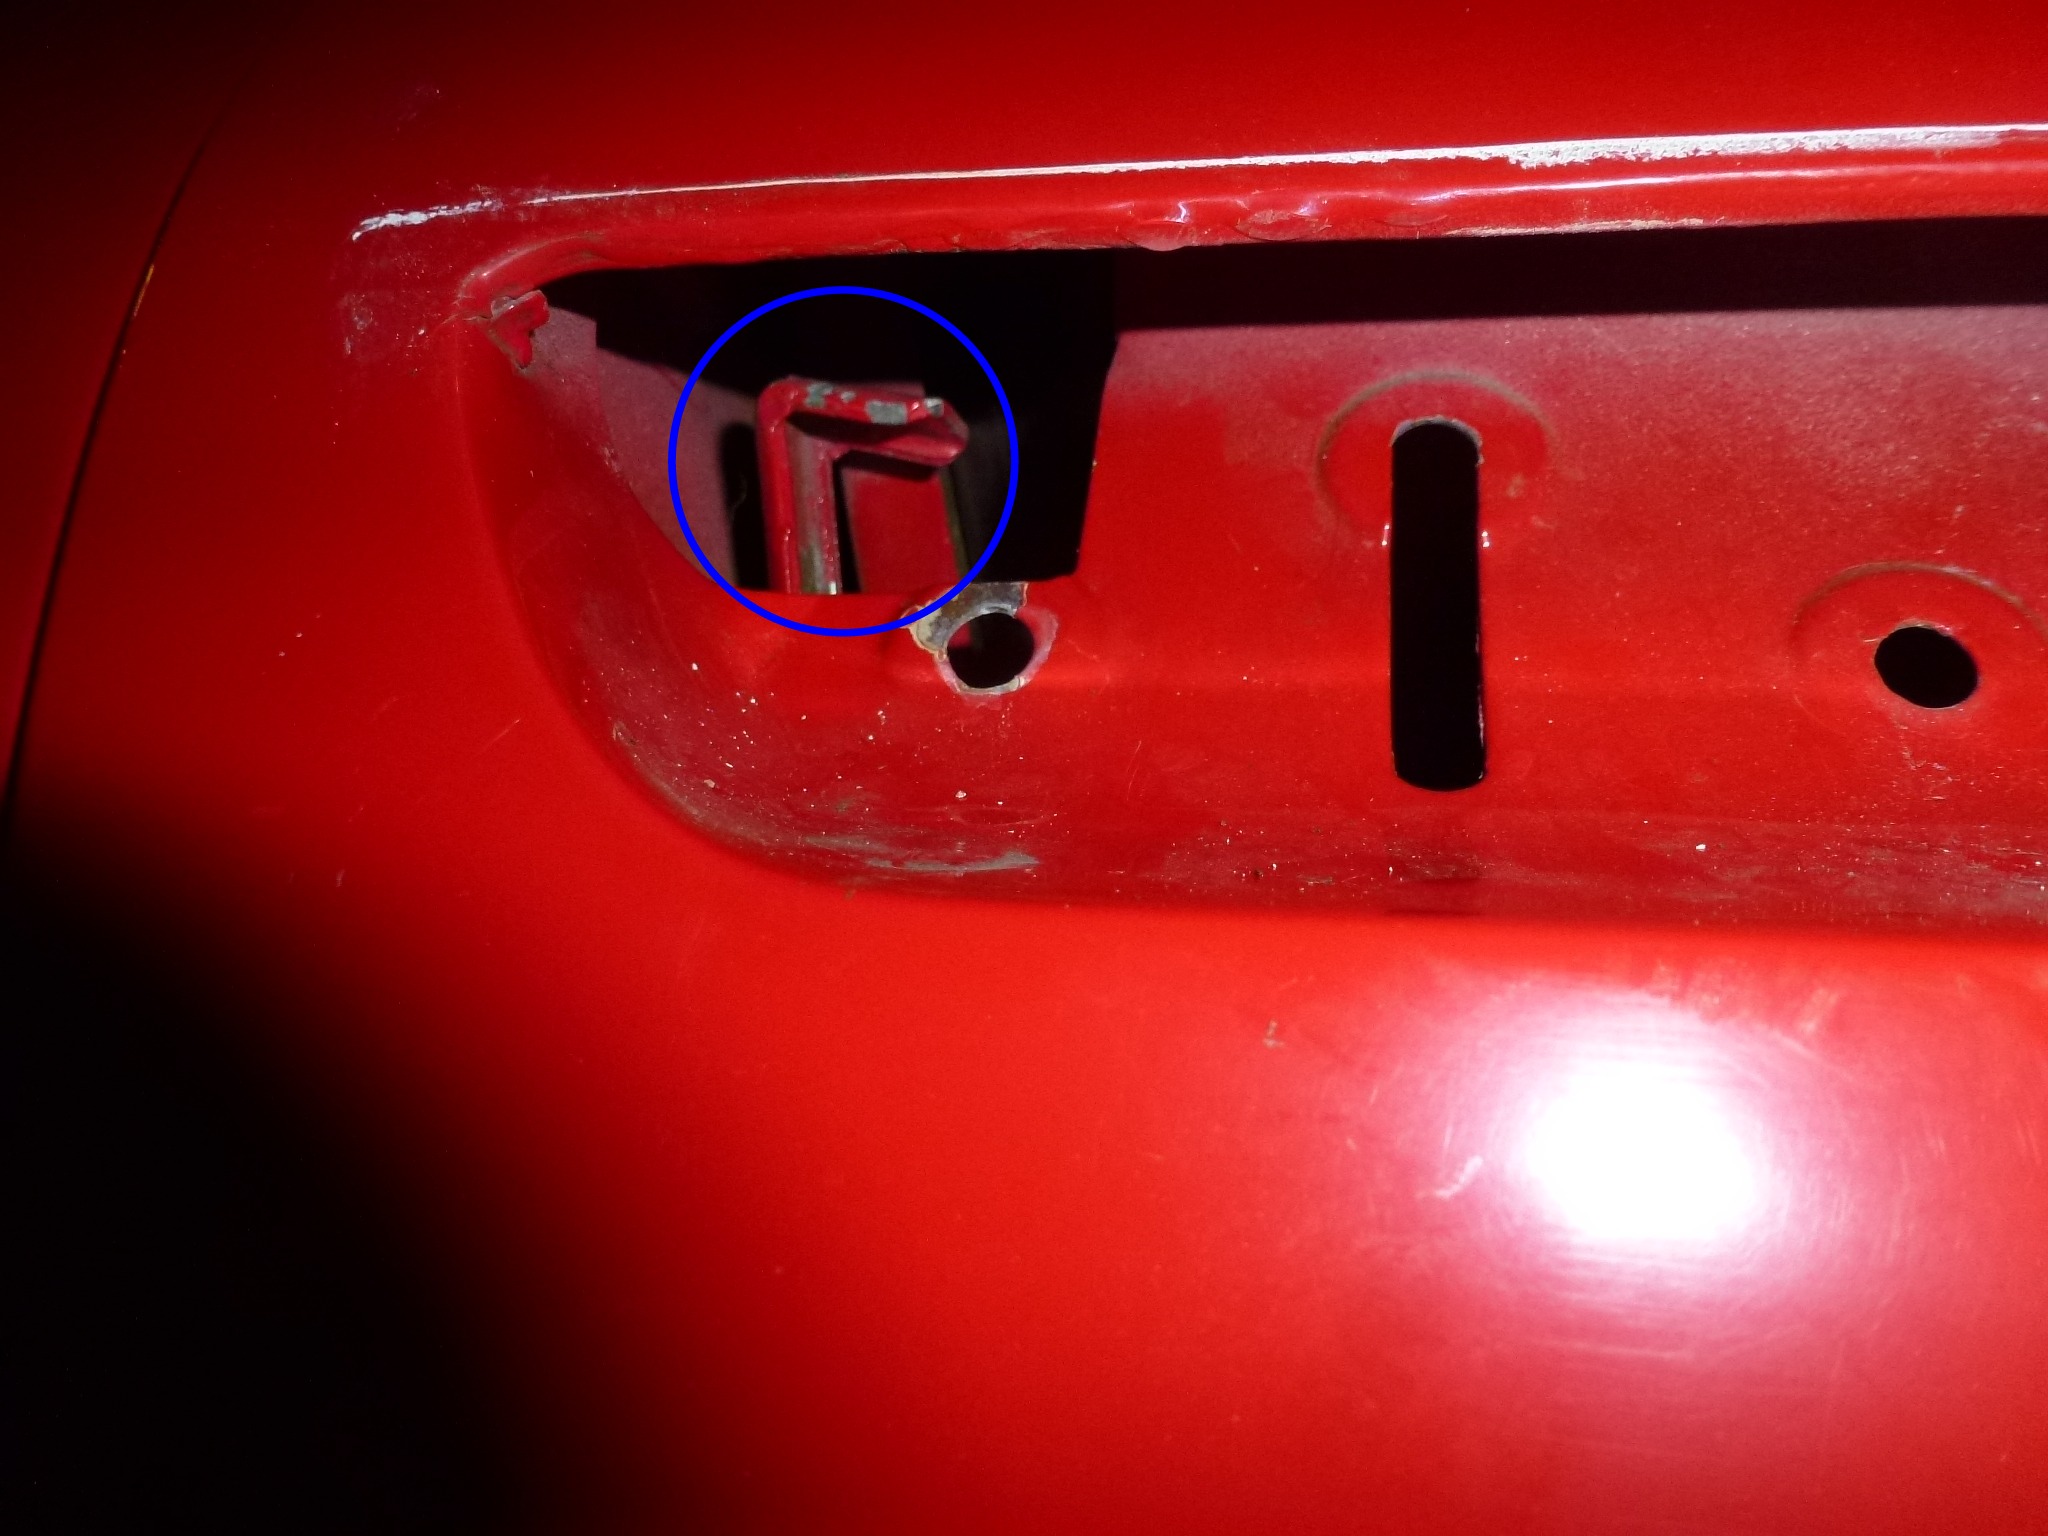
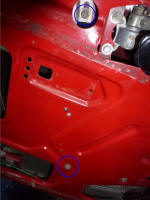
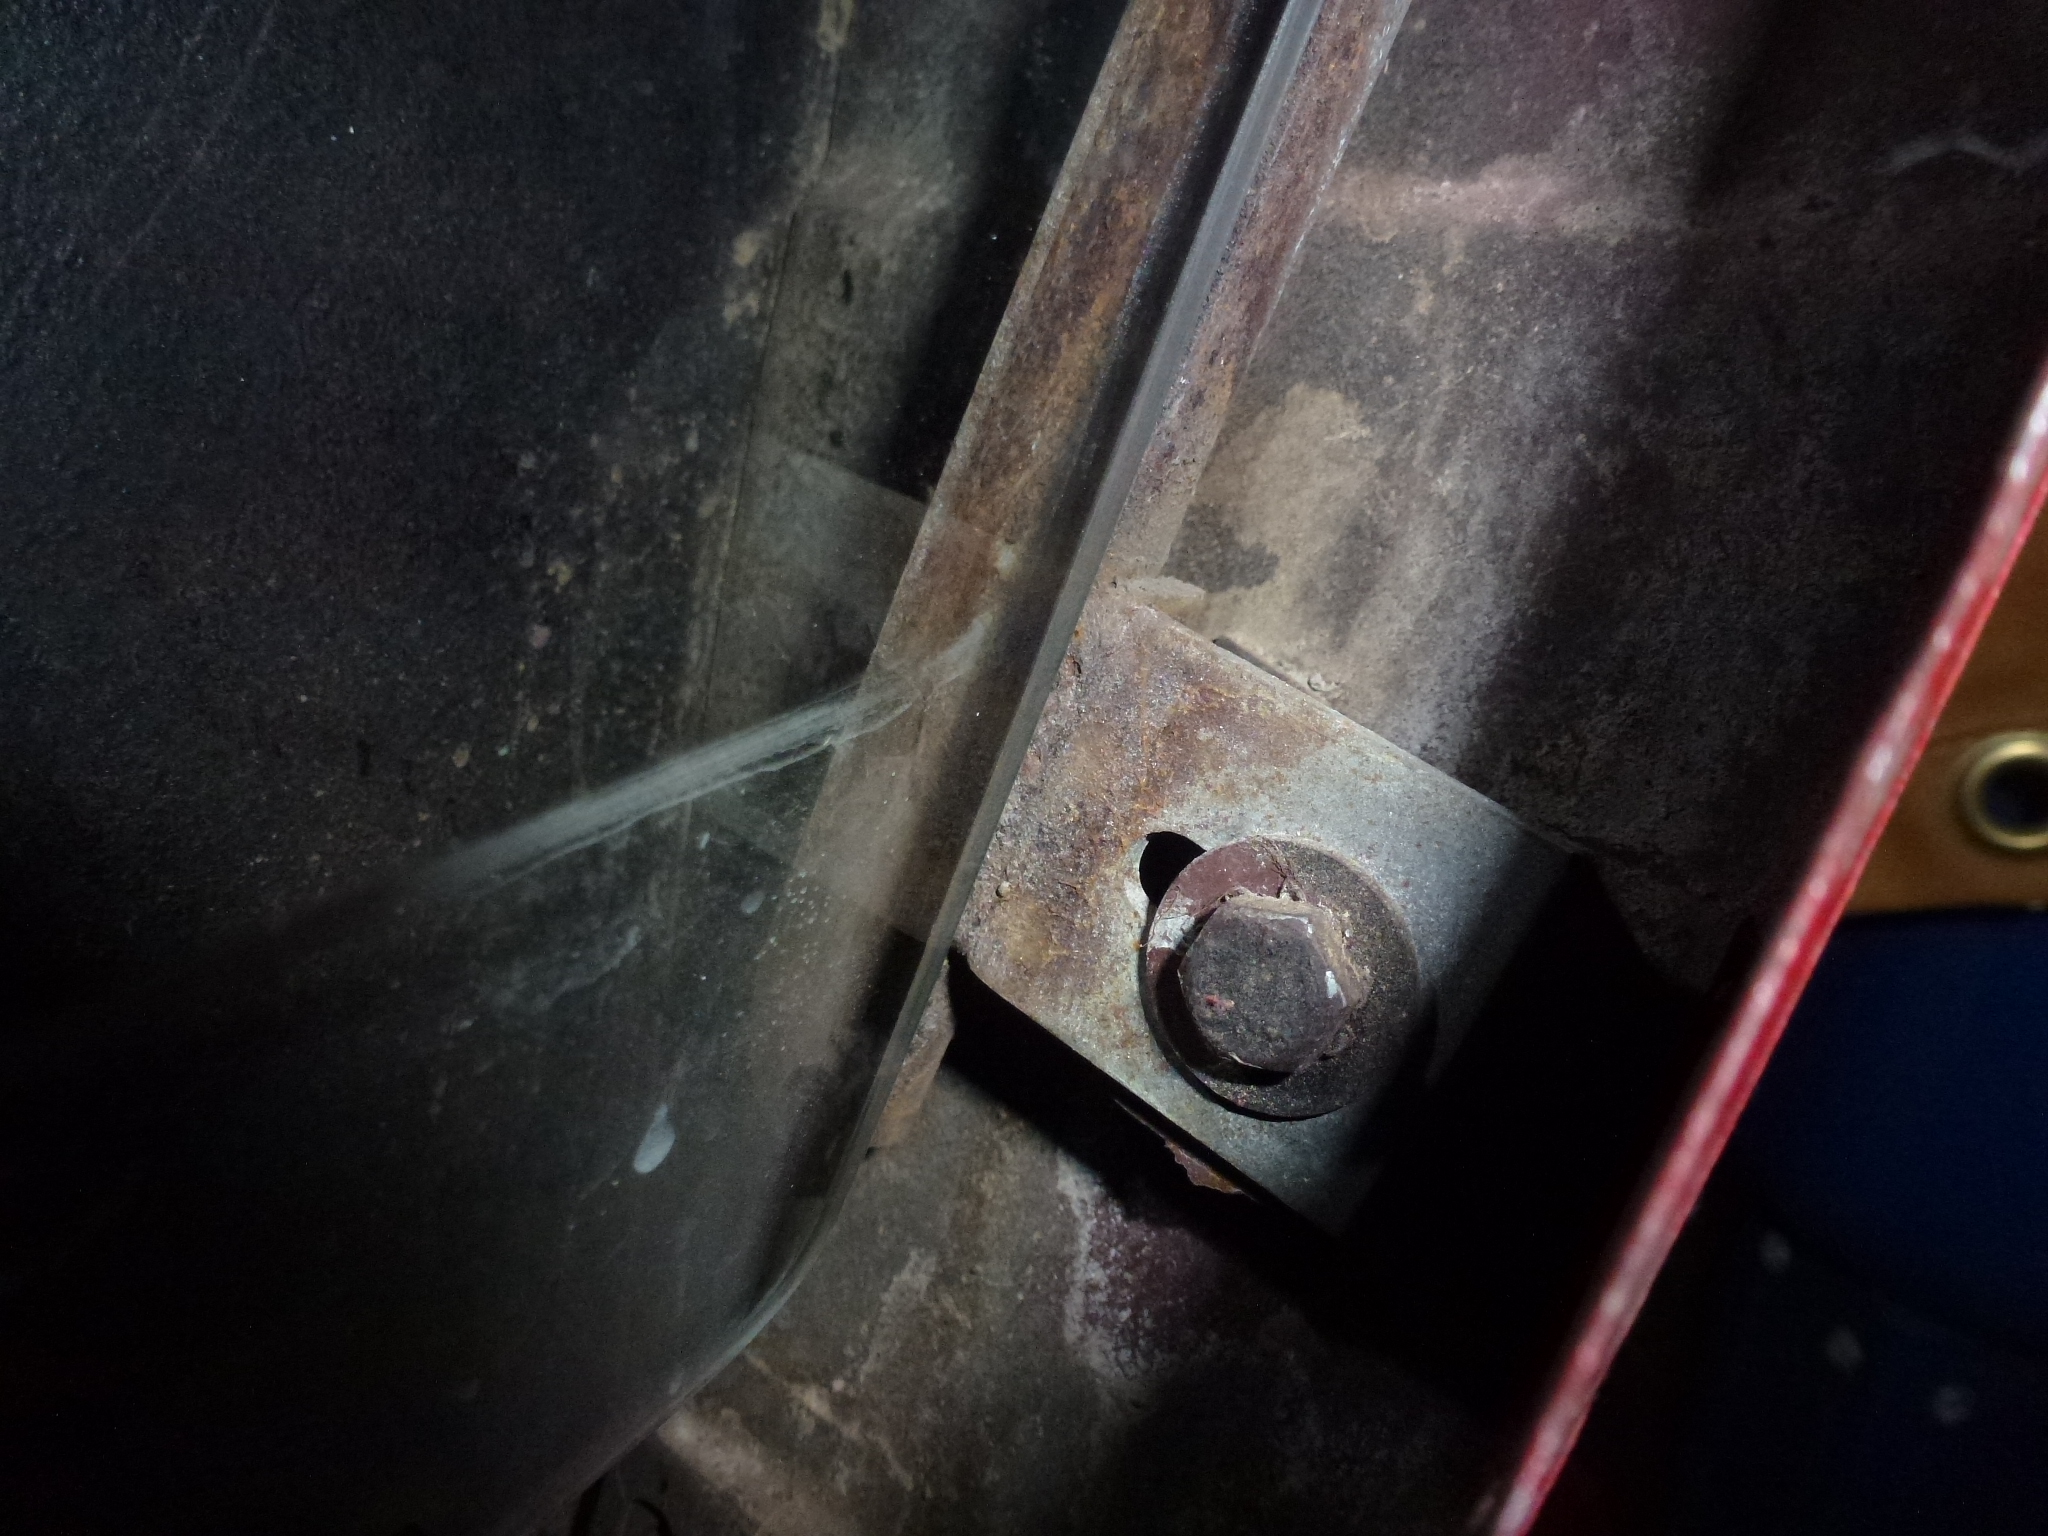
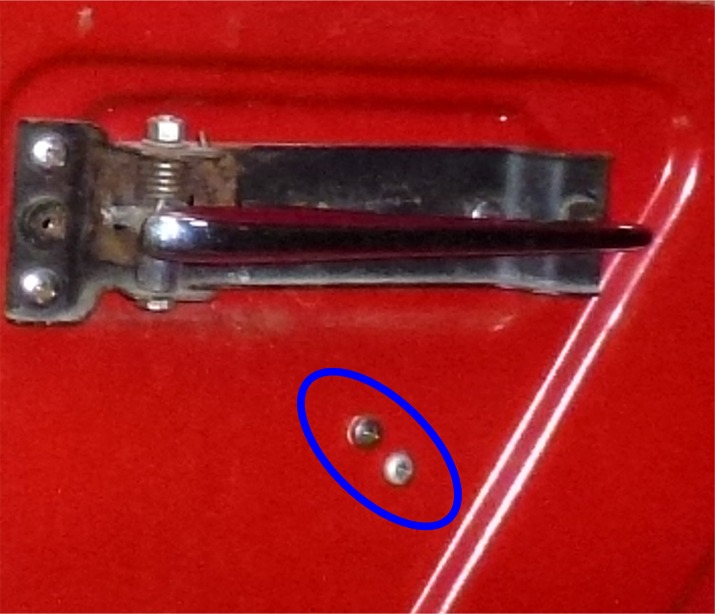
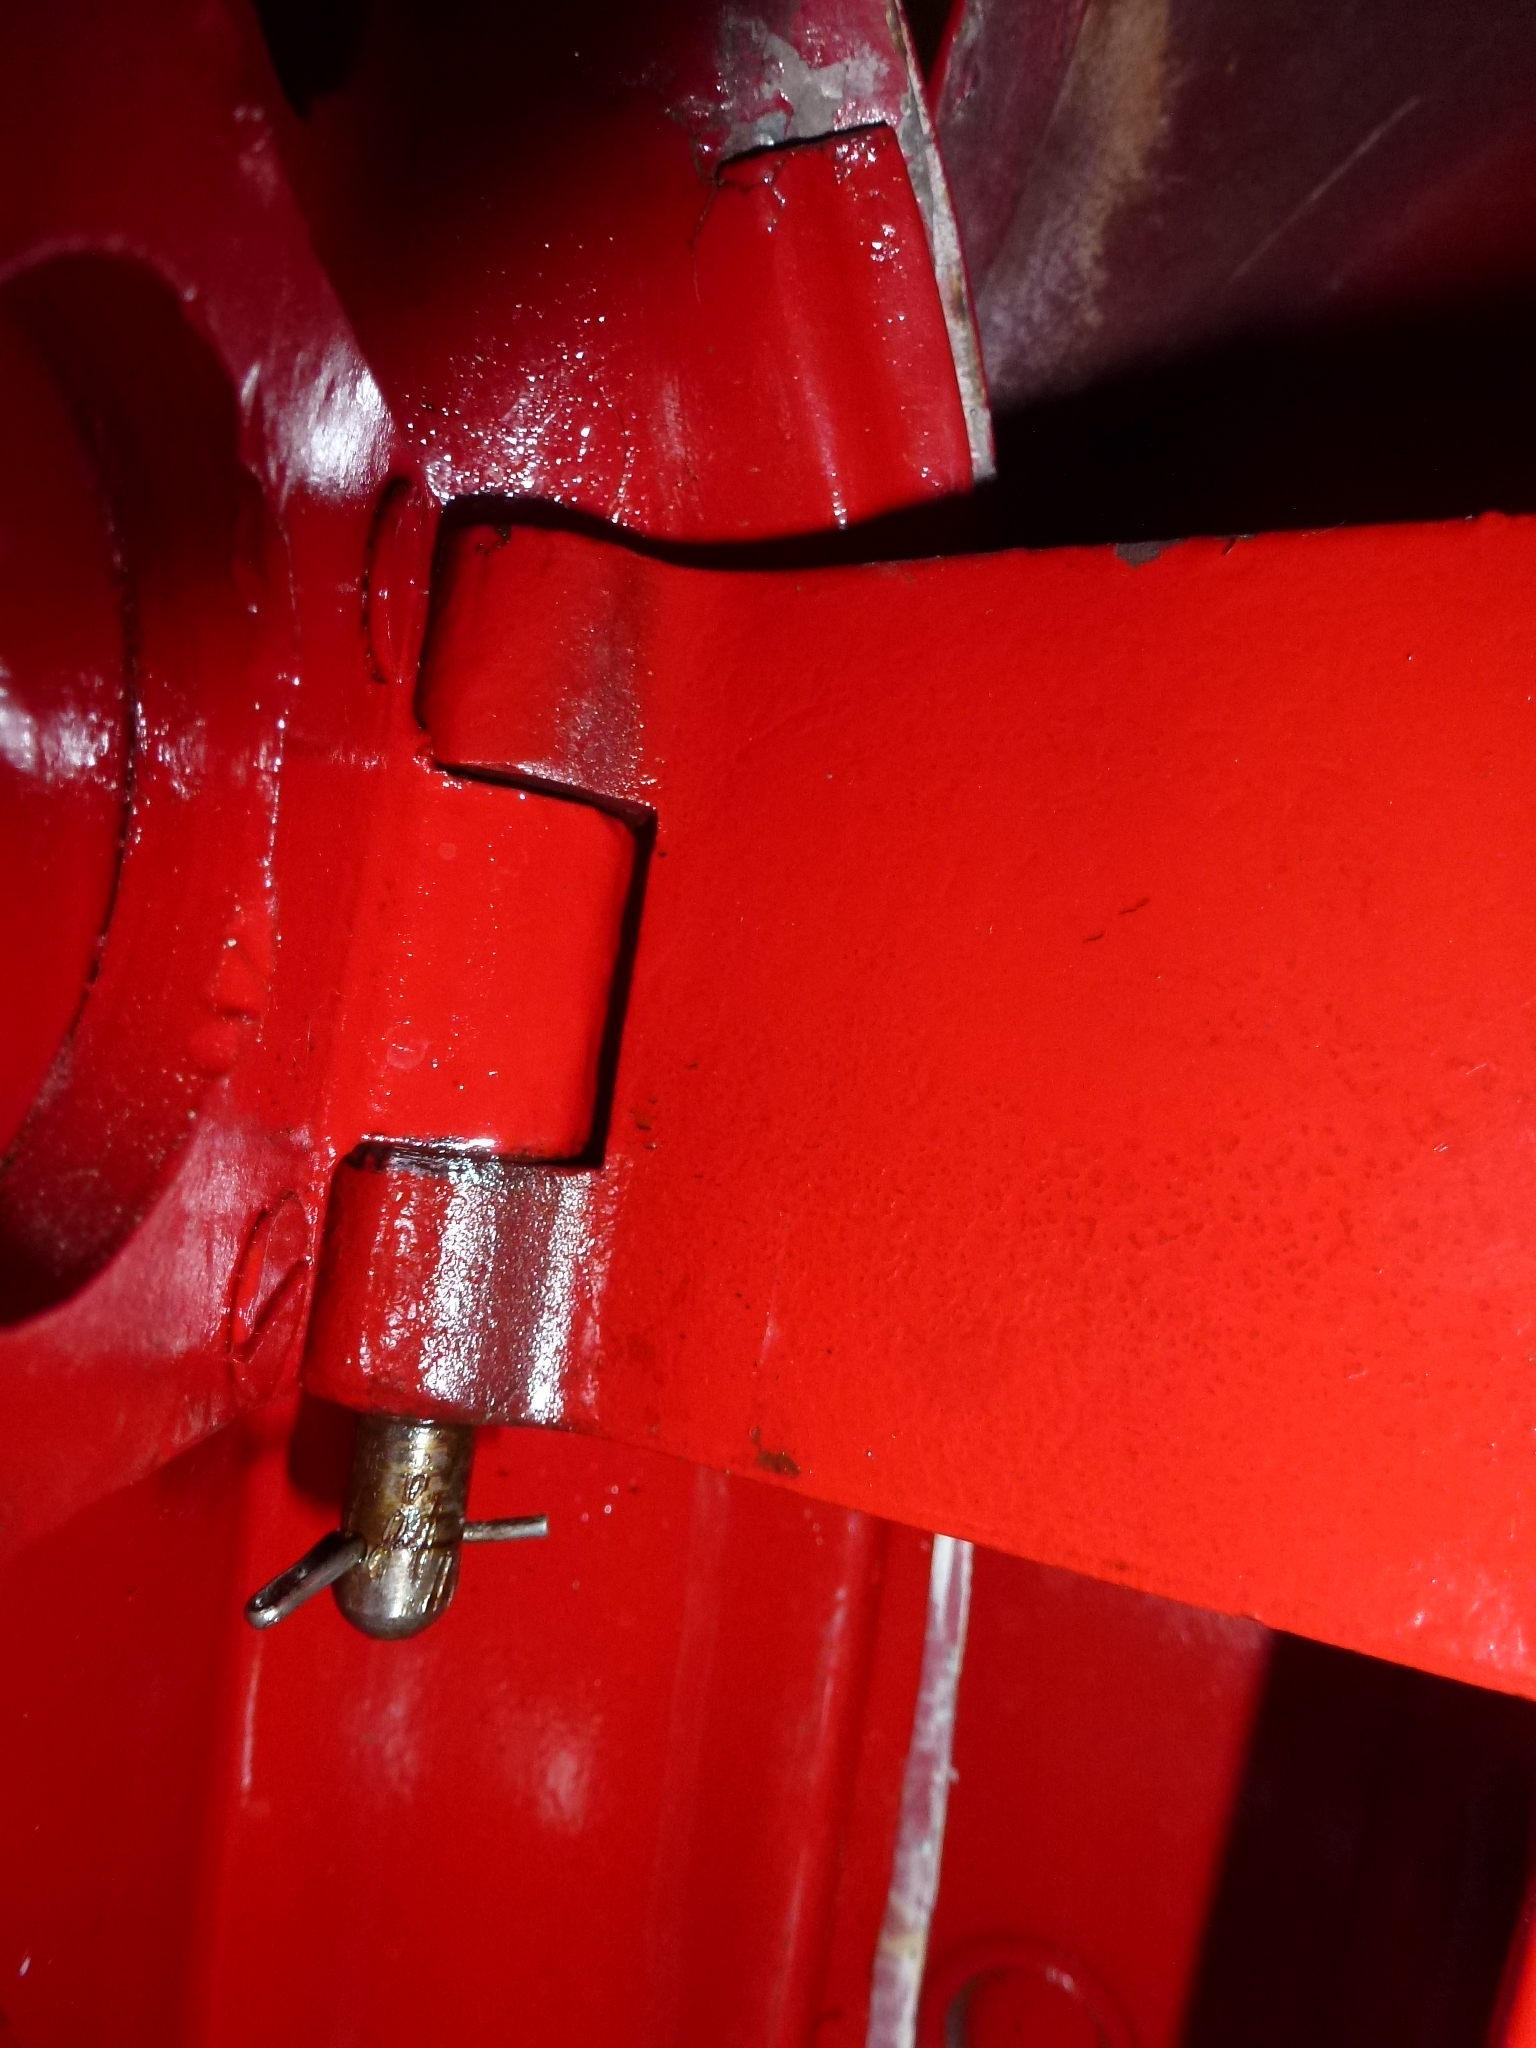
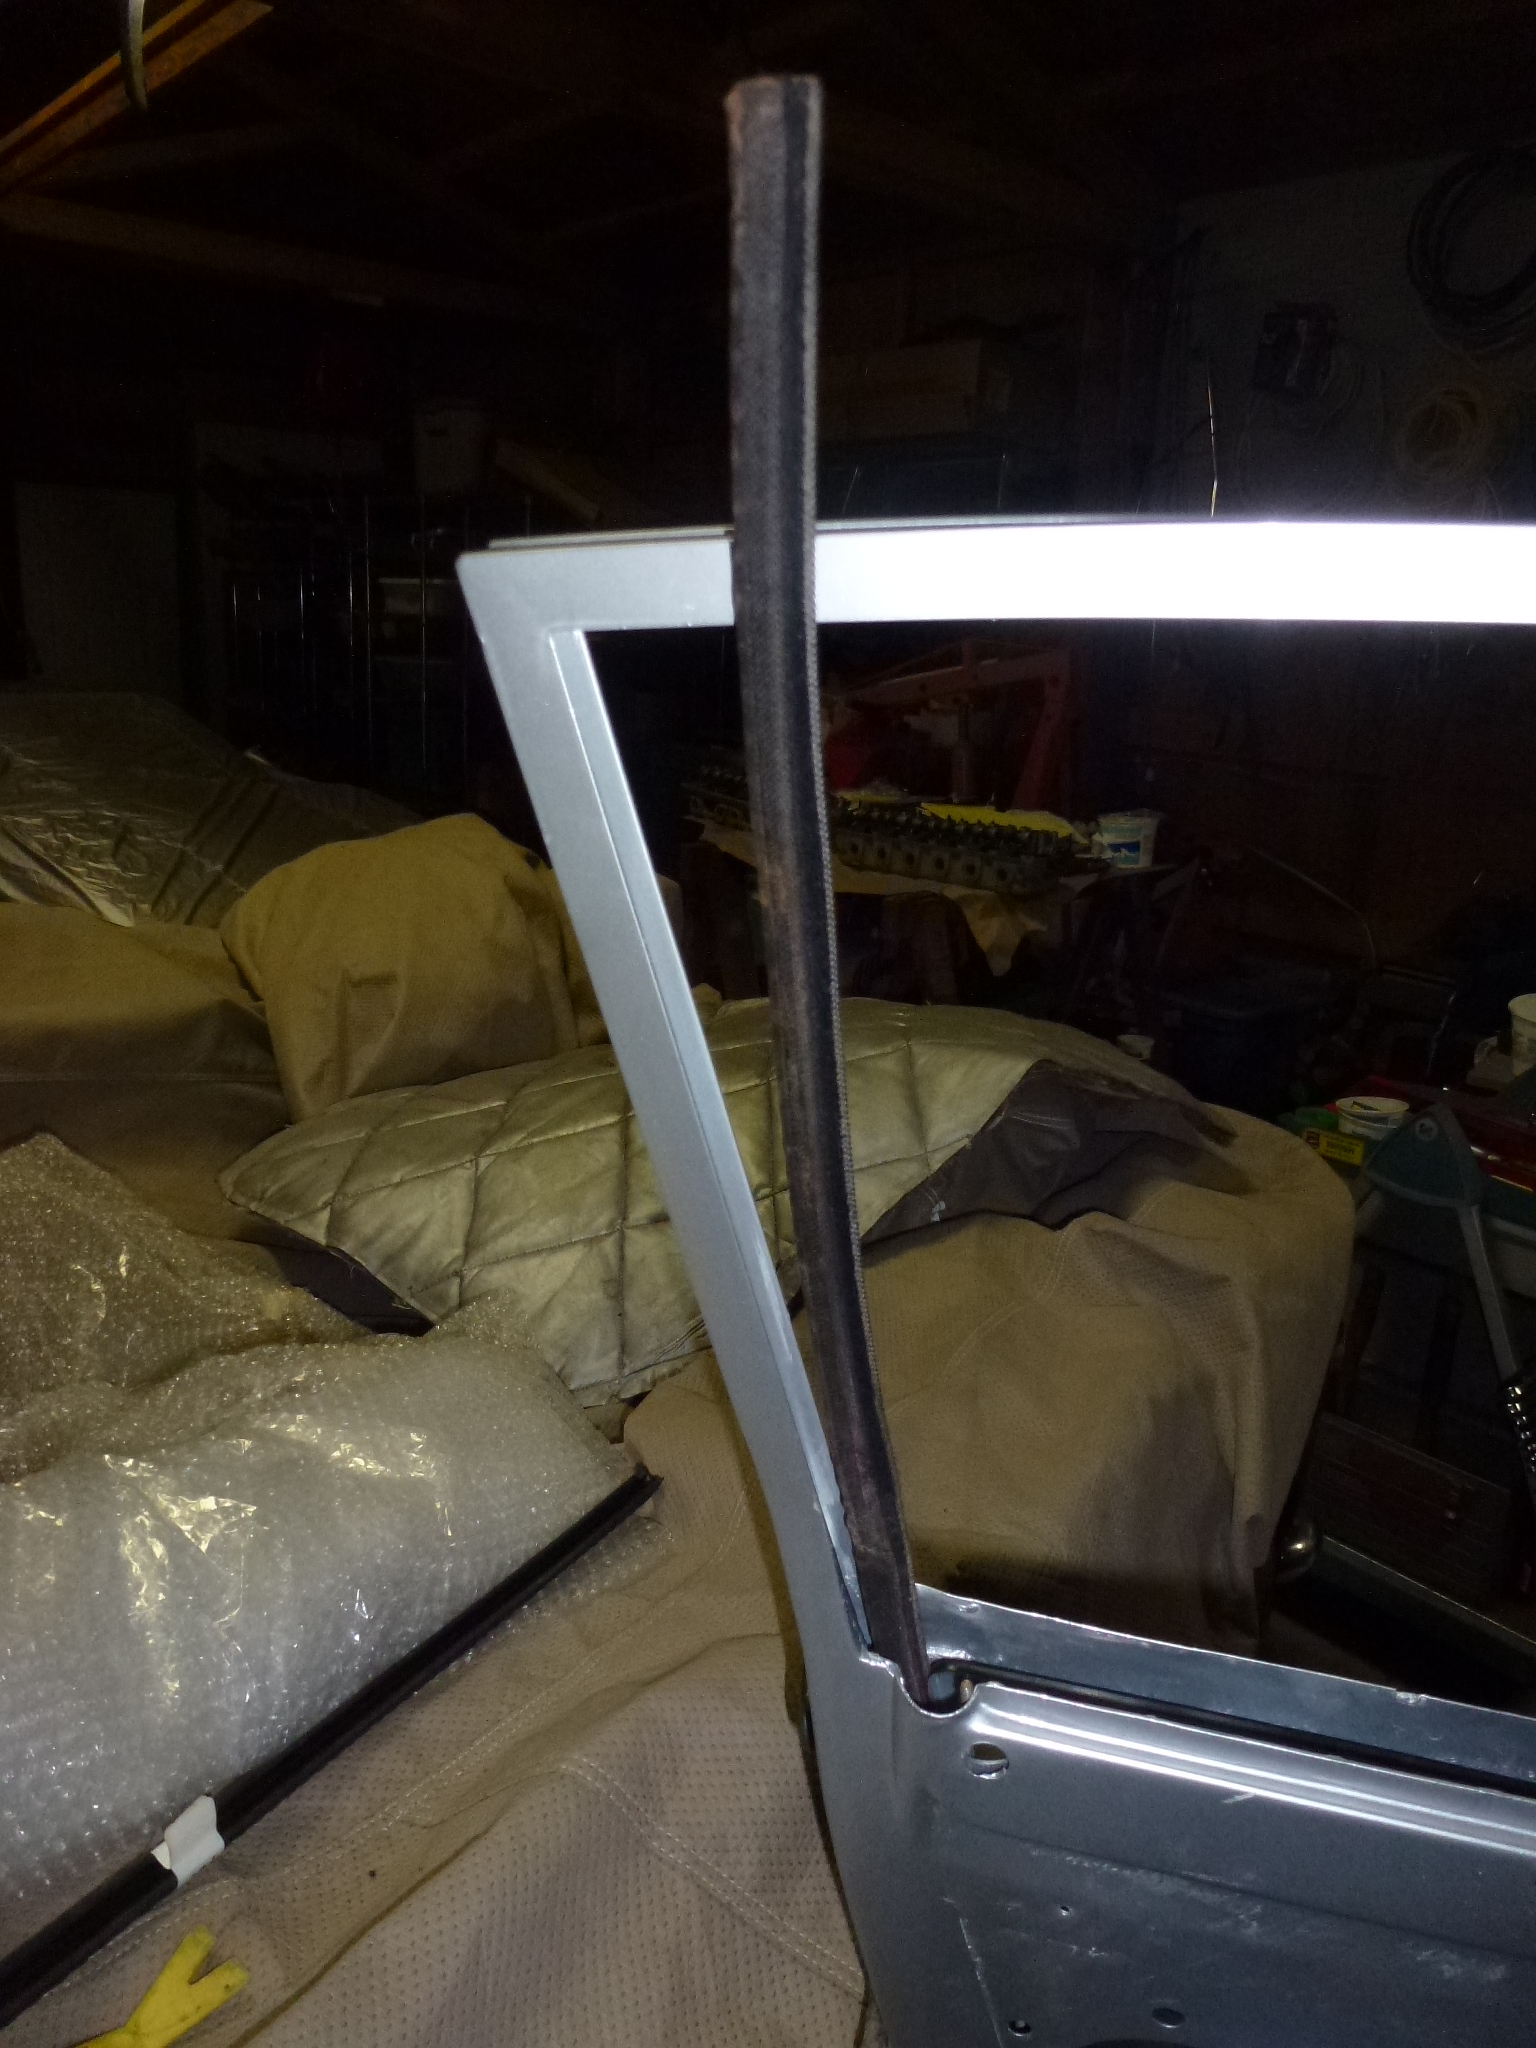
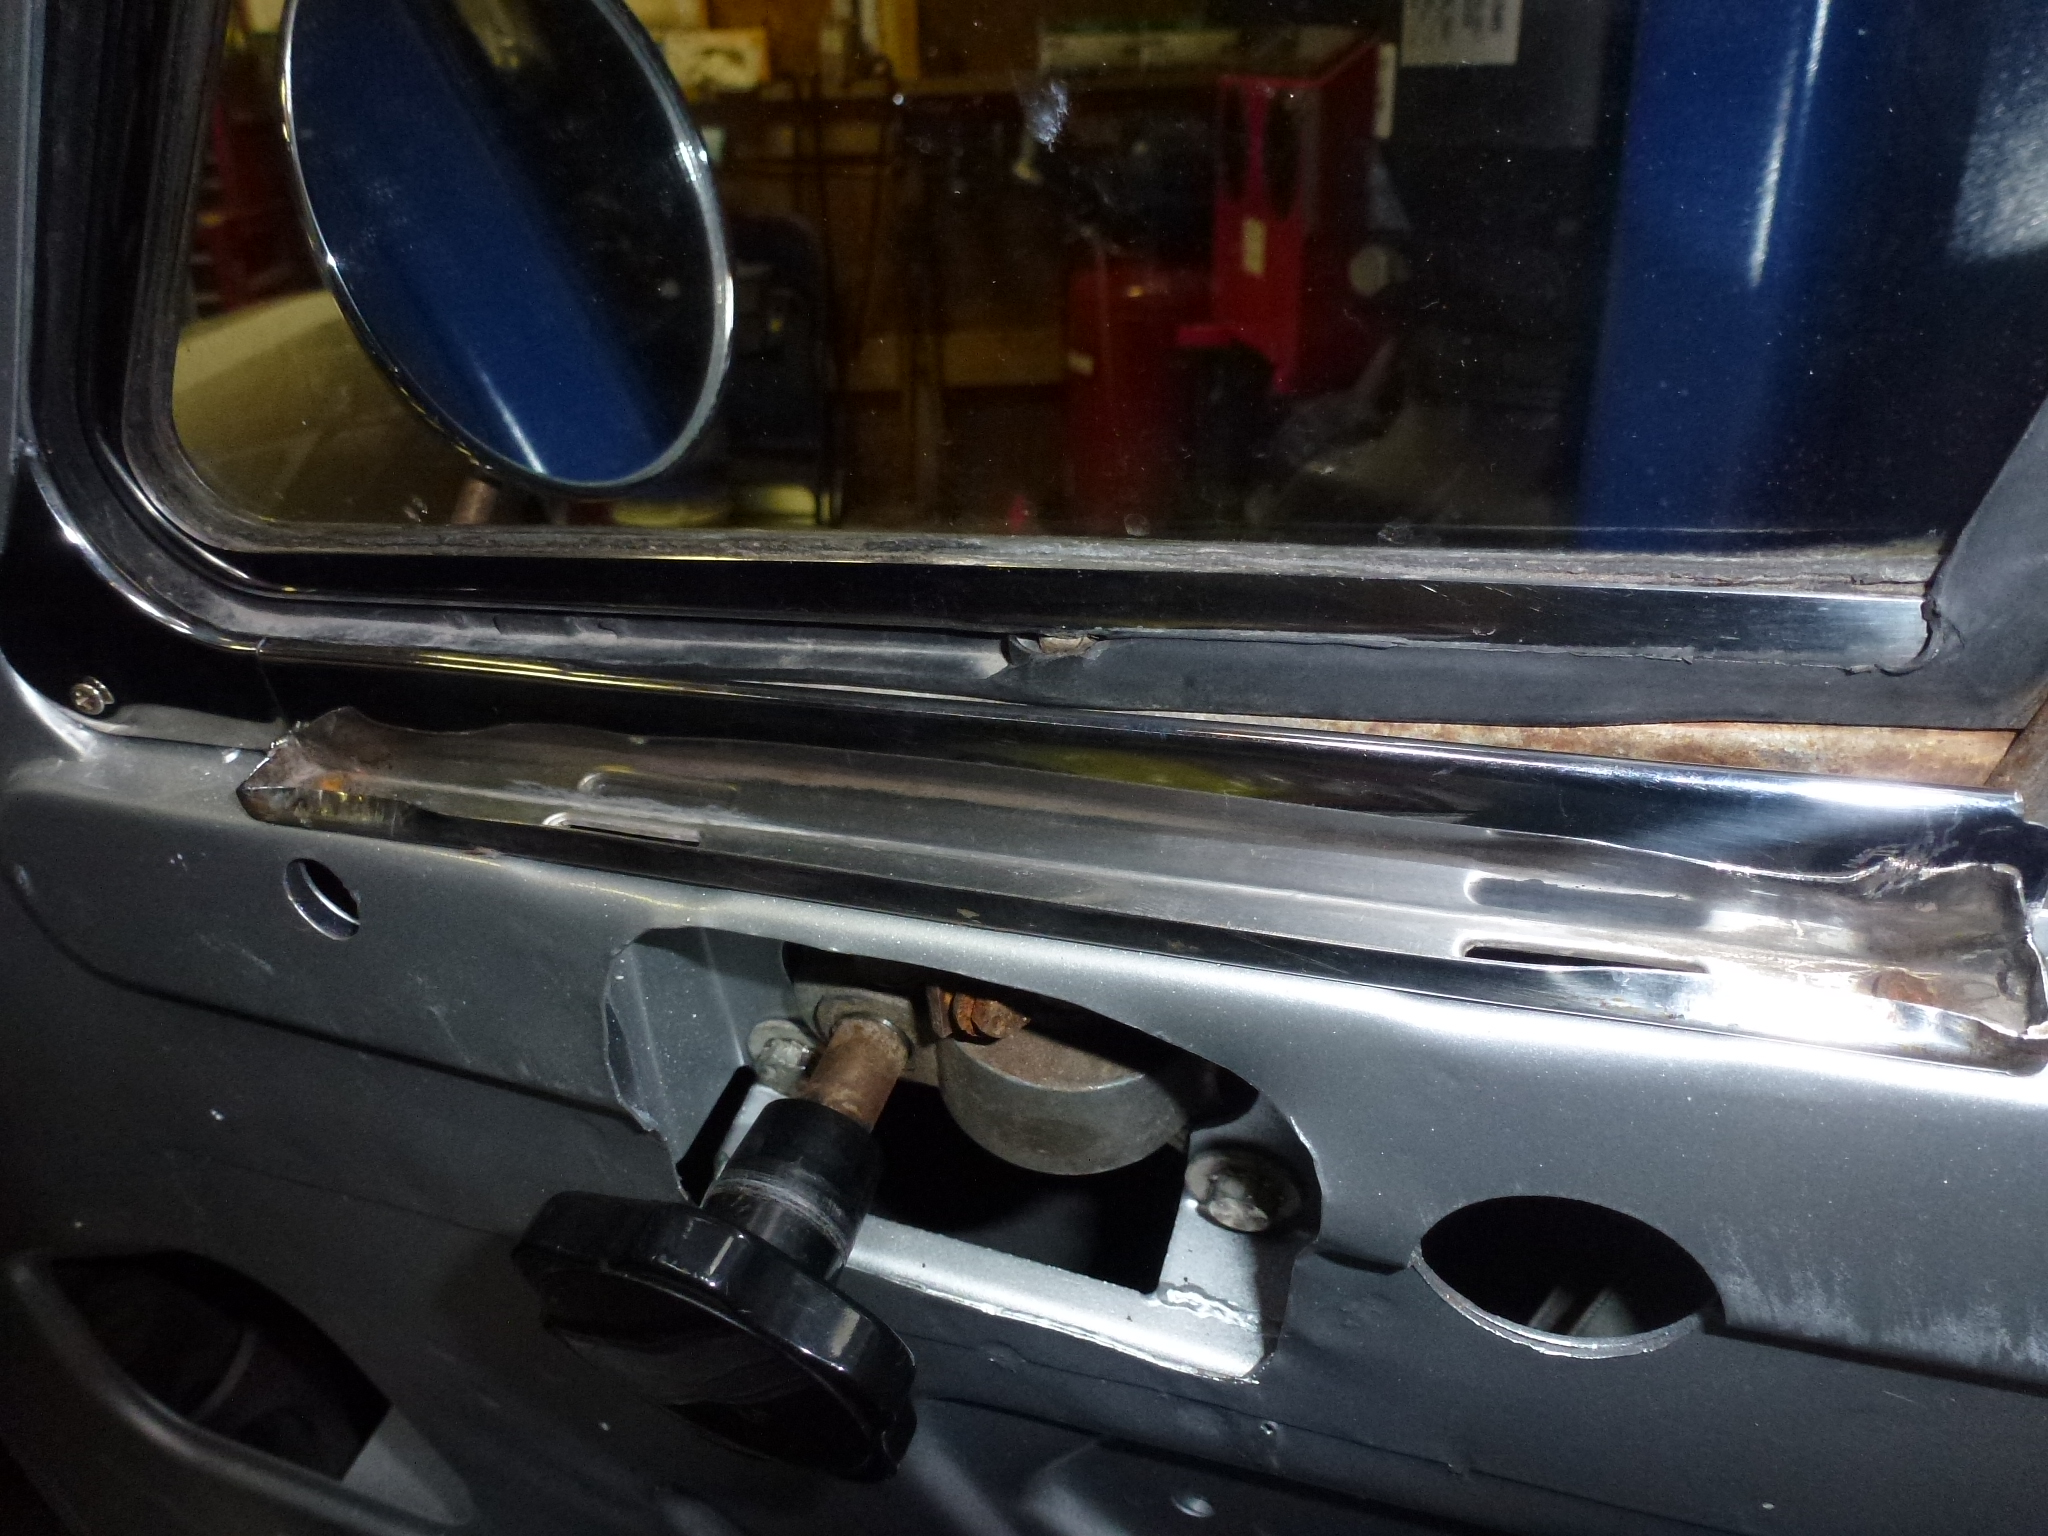
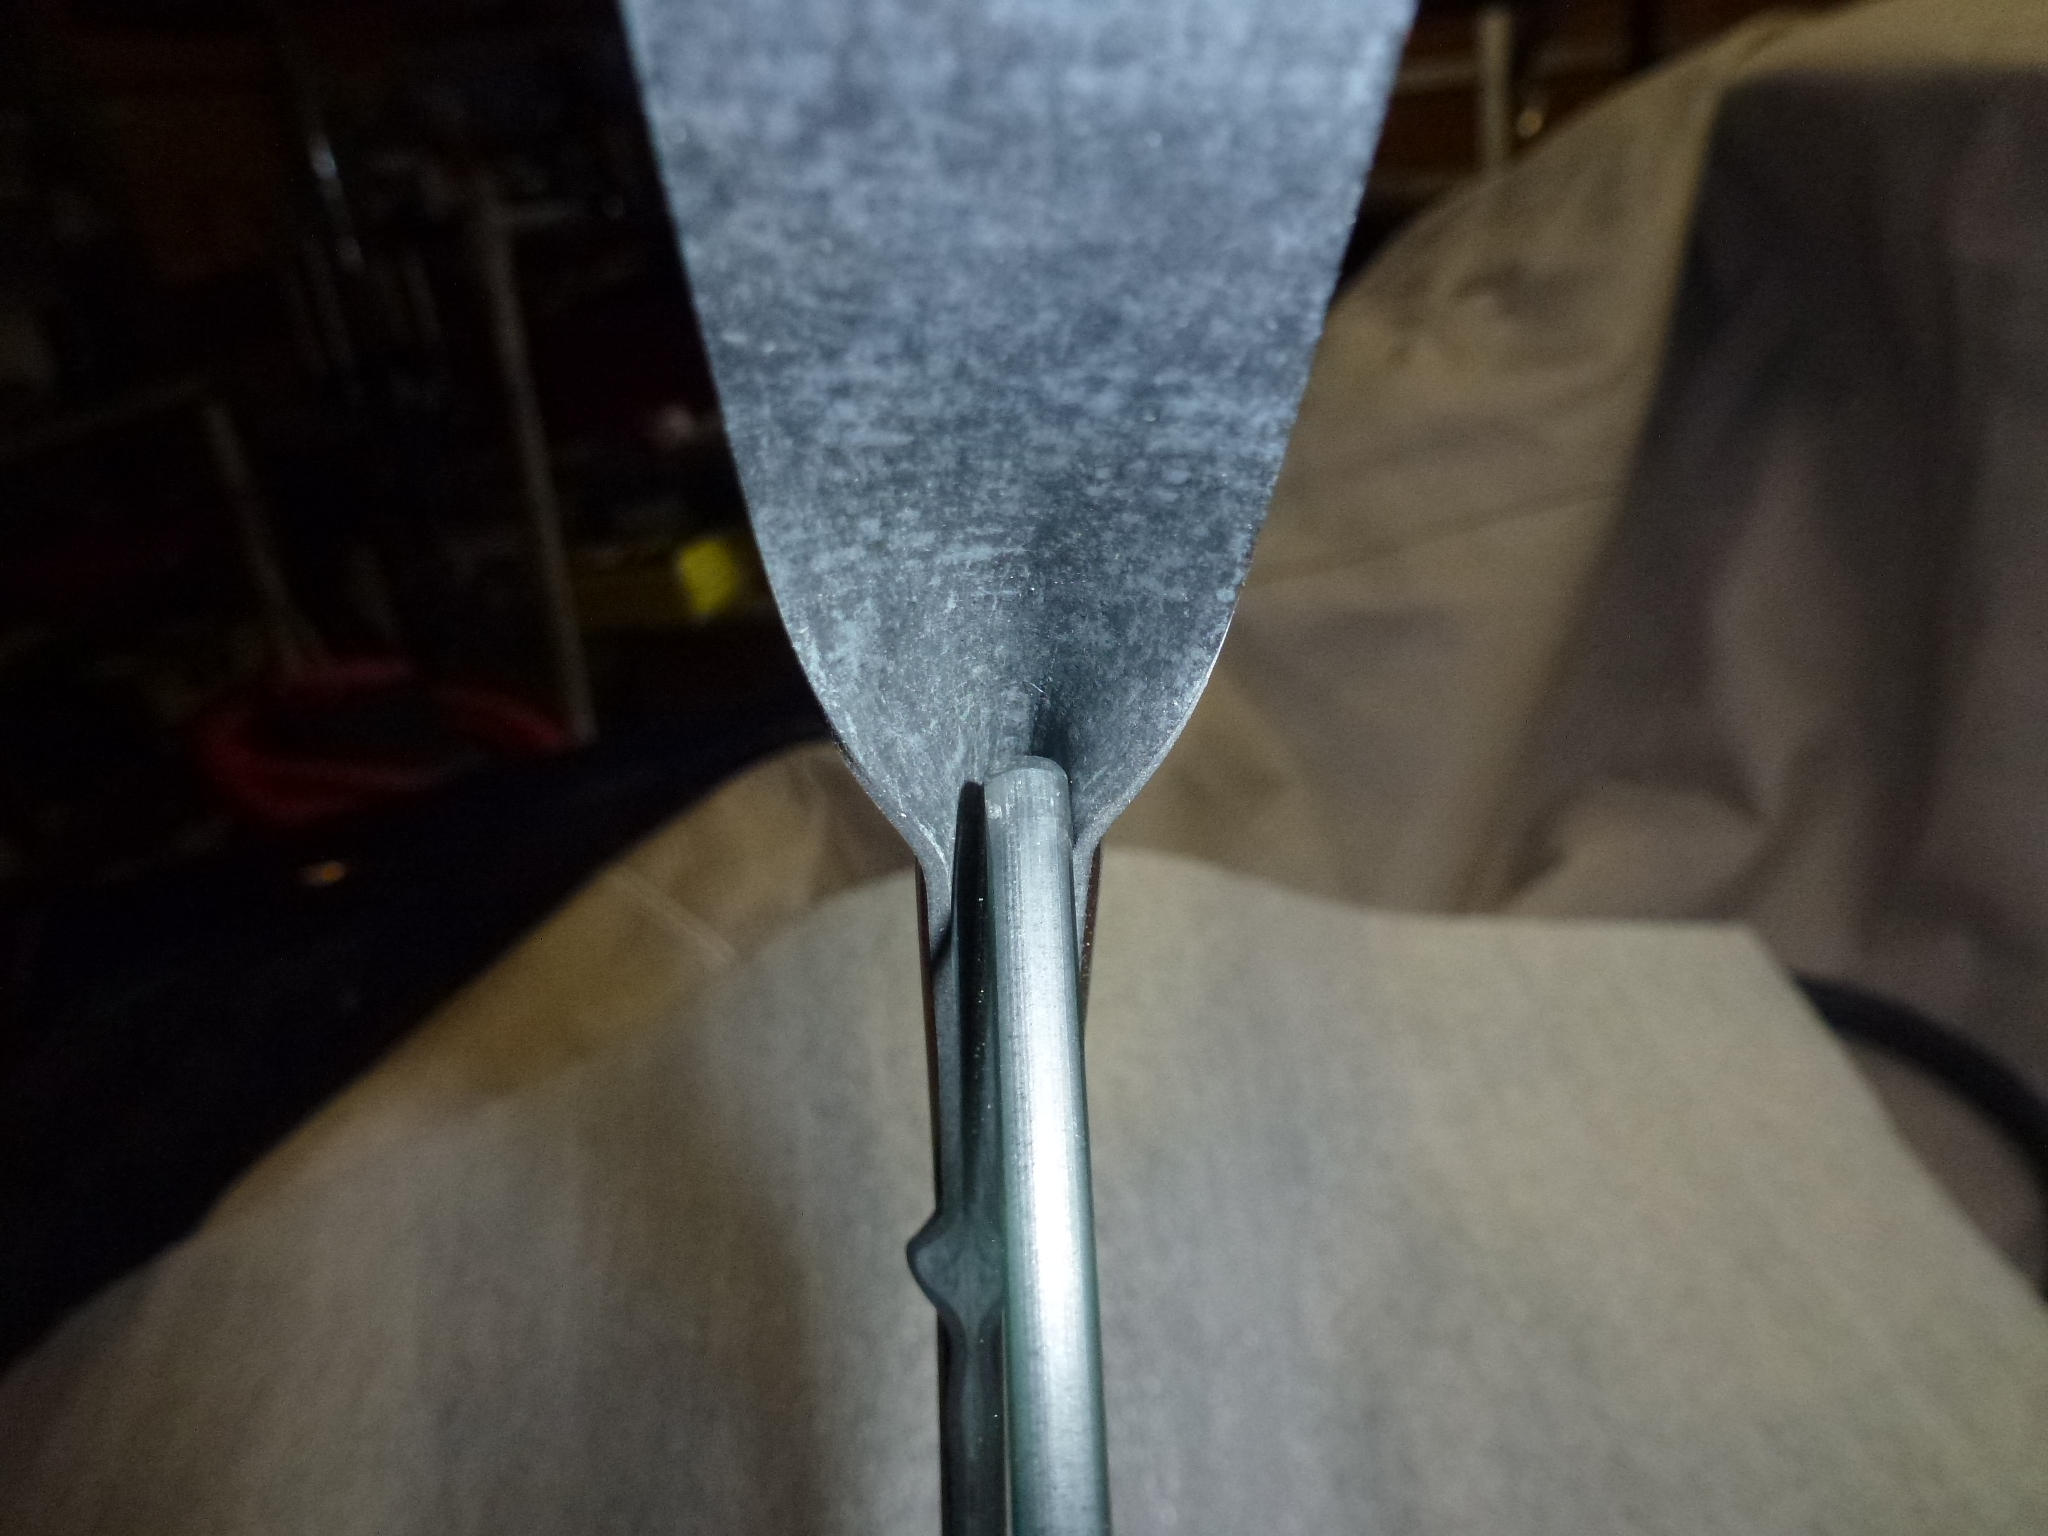
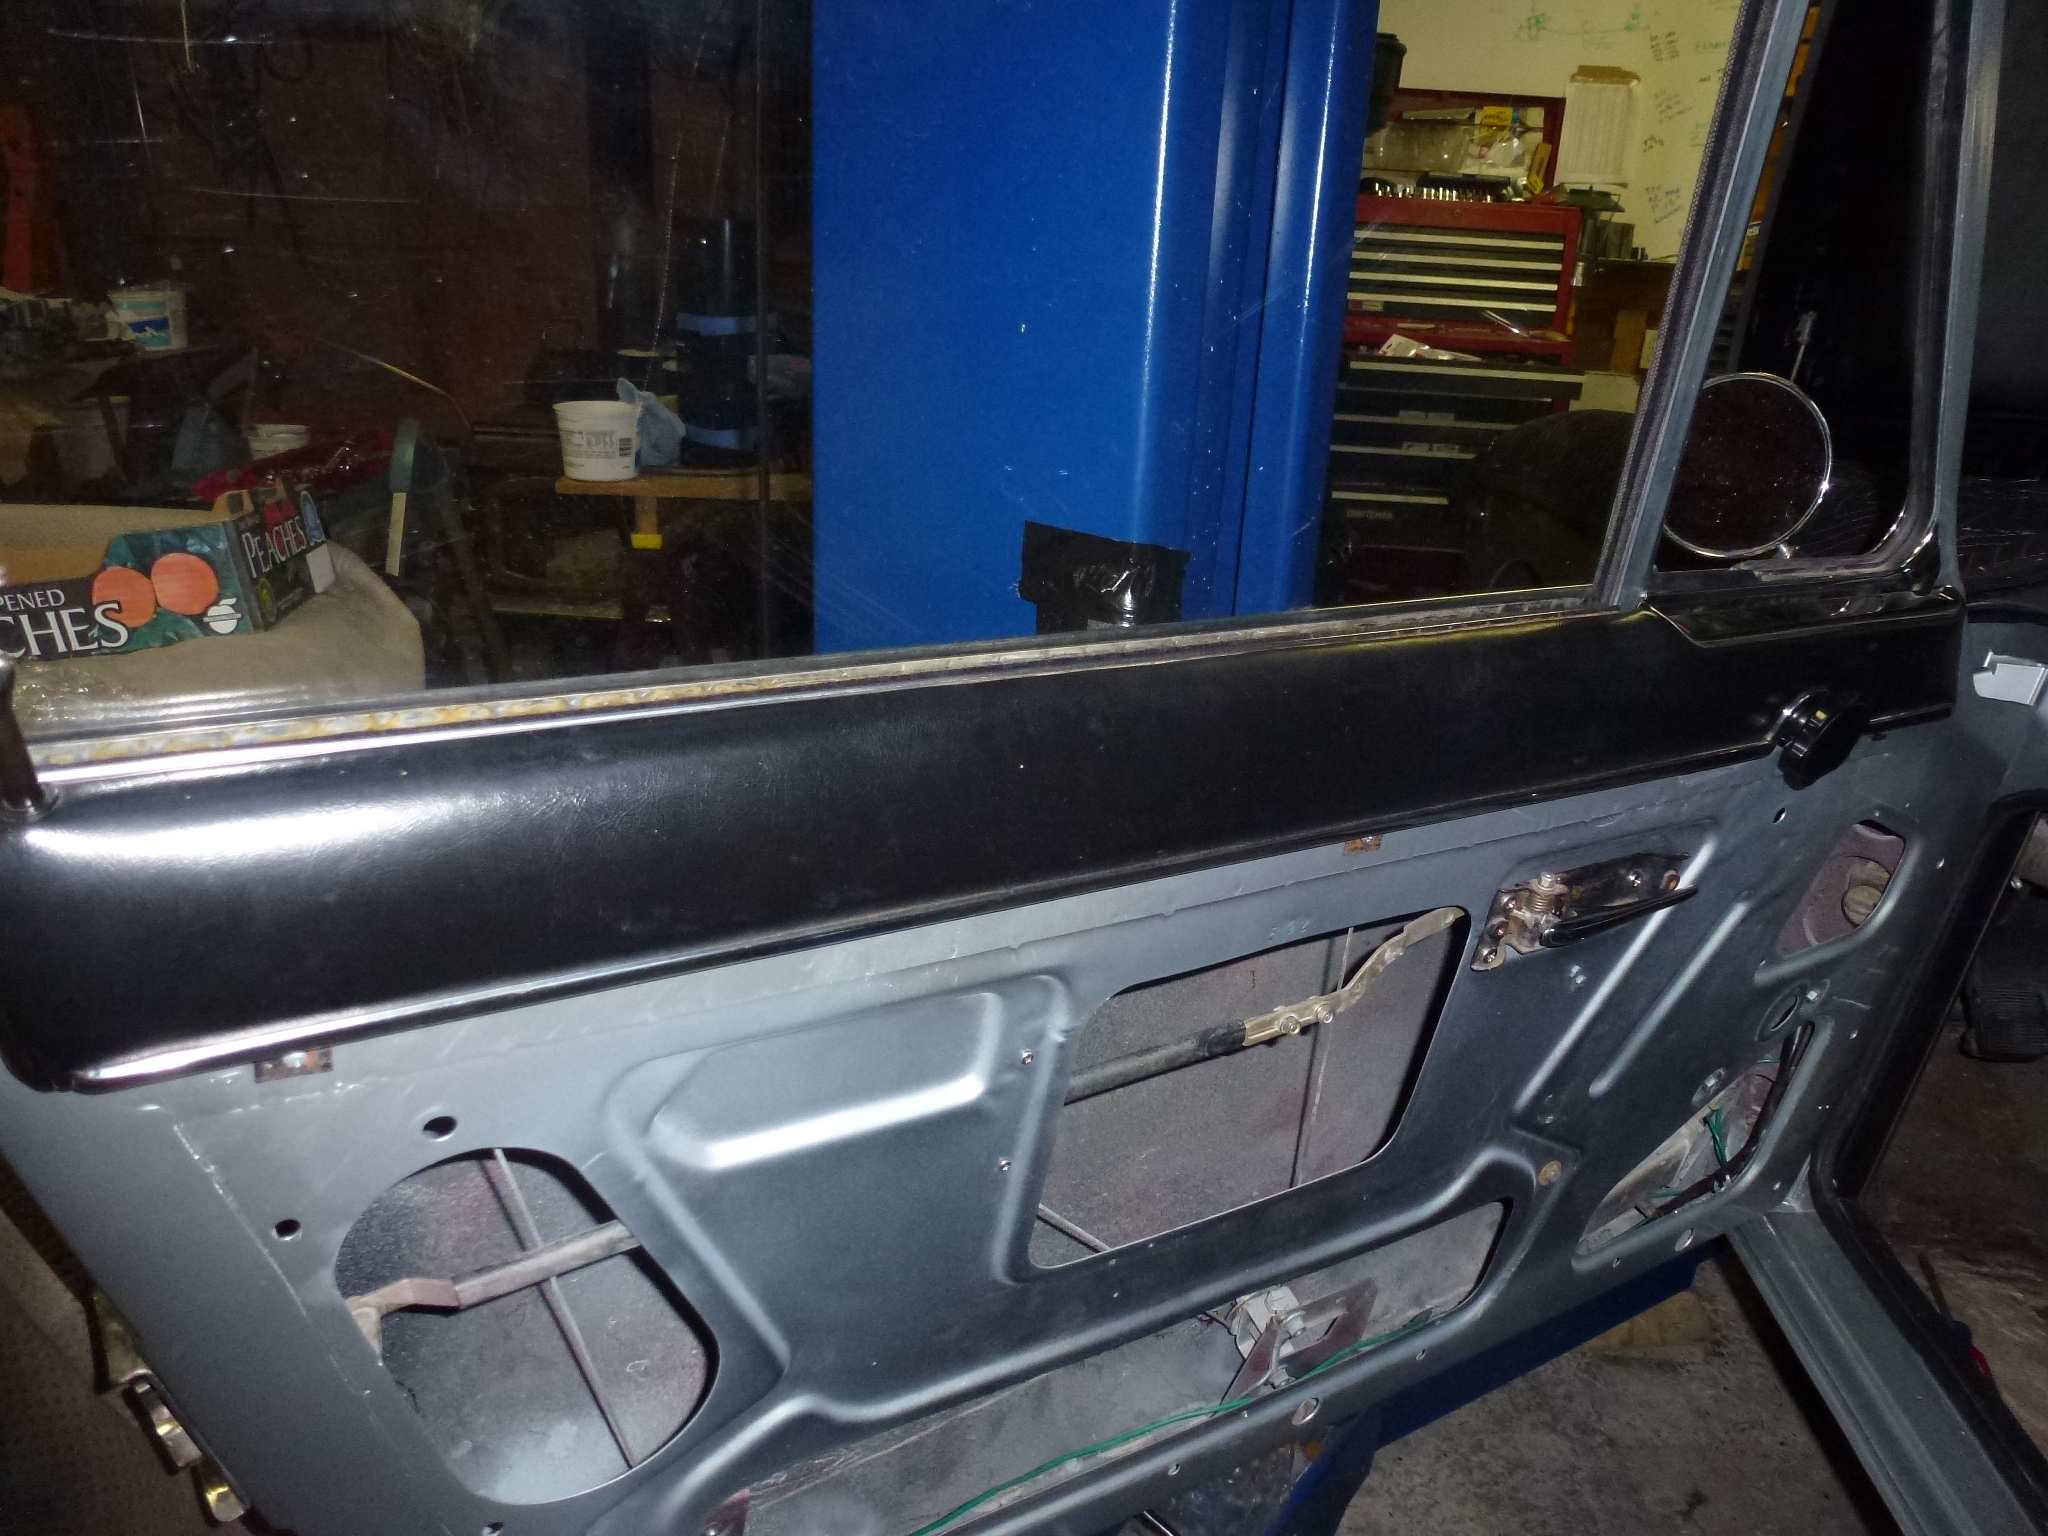
Remove the vent window. Remove the Allen screw at the top, loosen the bolt (blue circle) and loosen the screw (red circle). Then the window can be pulled outside of the rubber molding and pulled up while rotating slightly. If the window won't come free, then something isn't loose enough.

-
Remove the vent window mechanism. Four bolts and then rotate vertically and it can be worked out of the door.
-
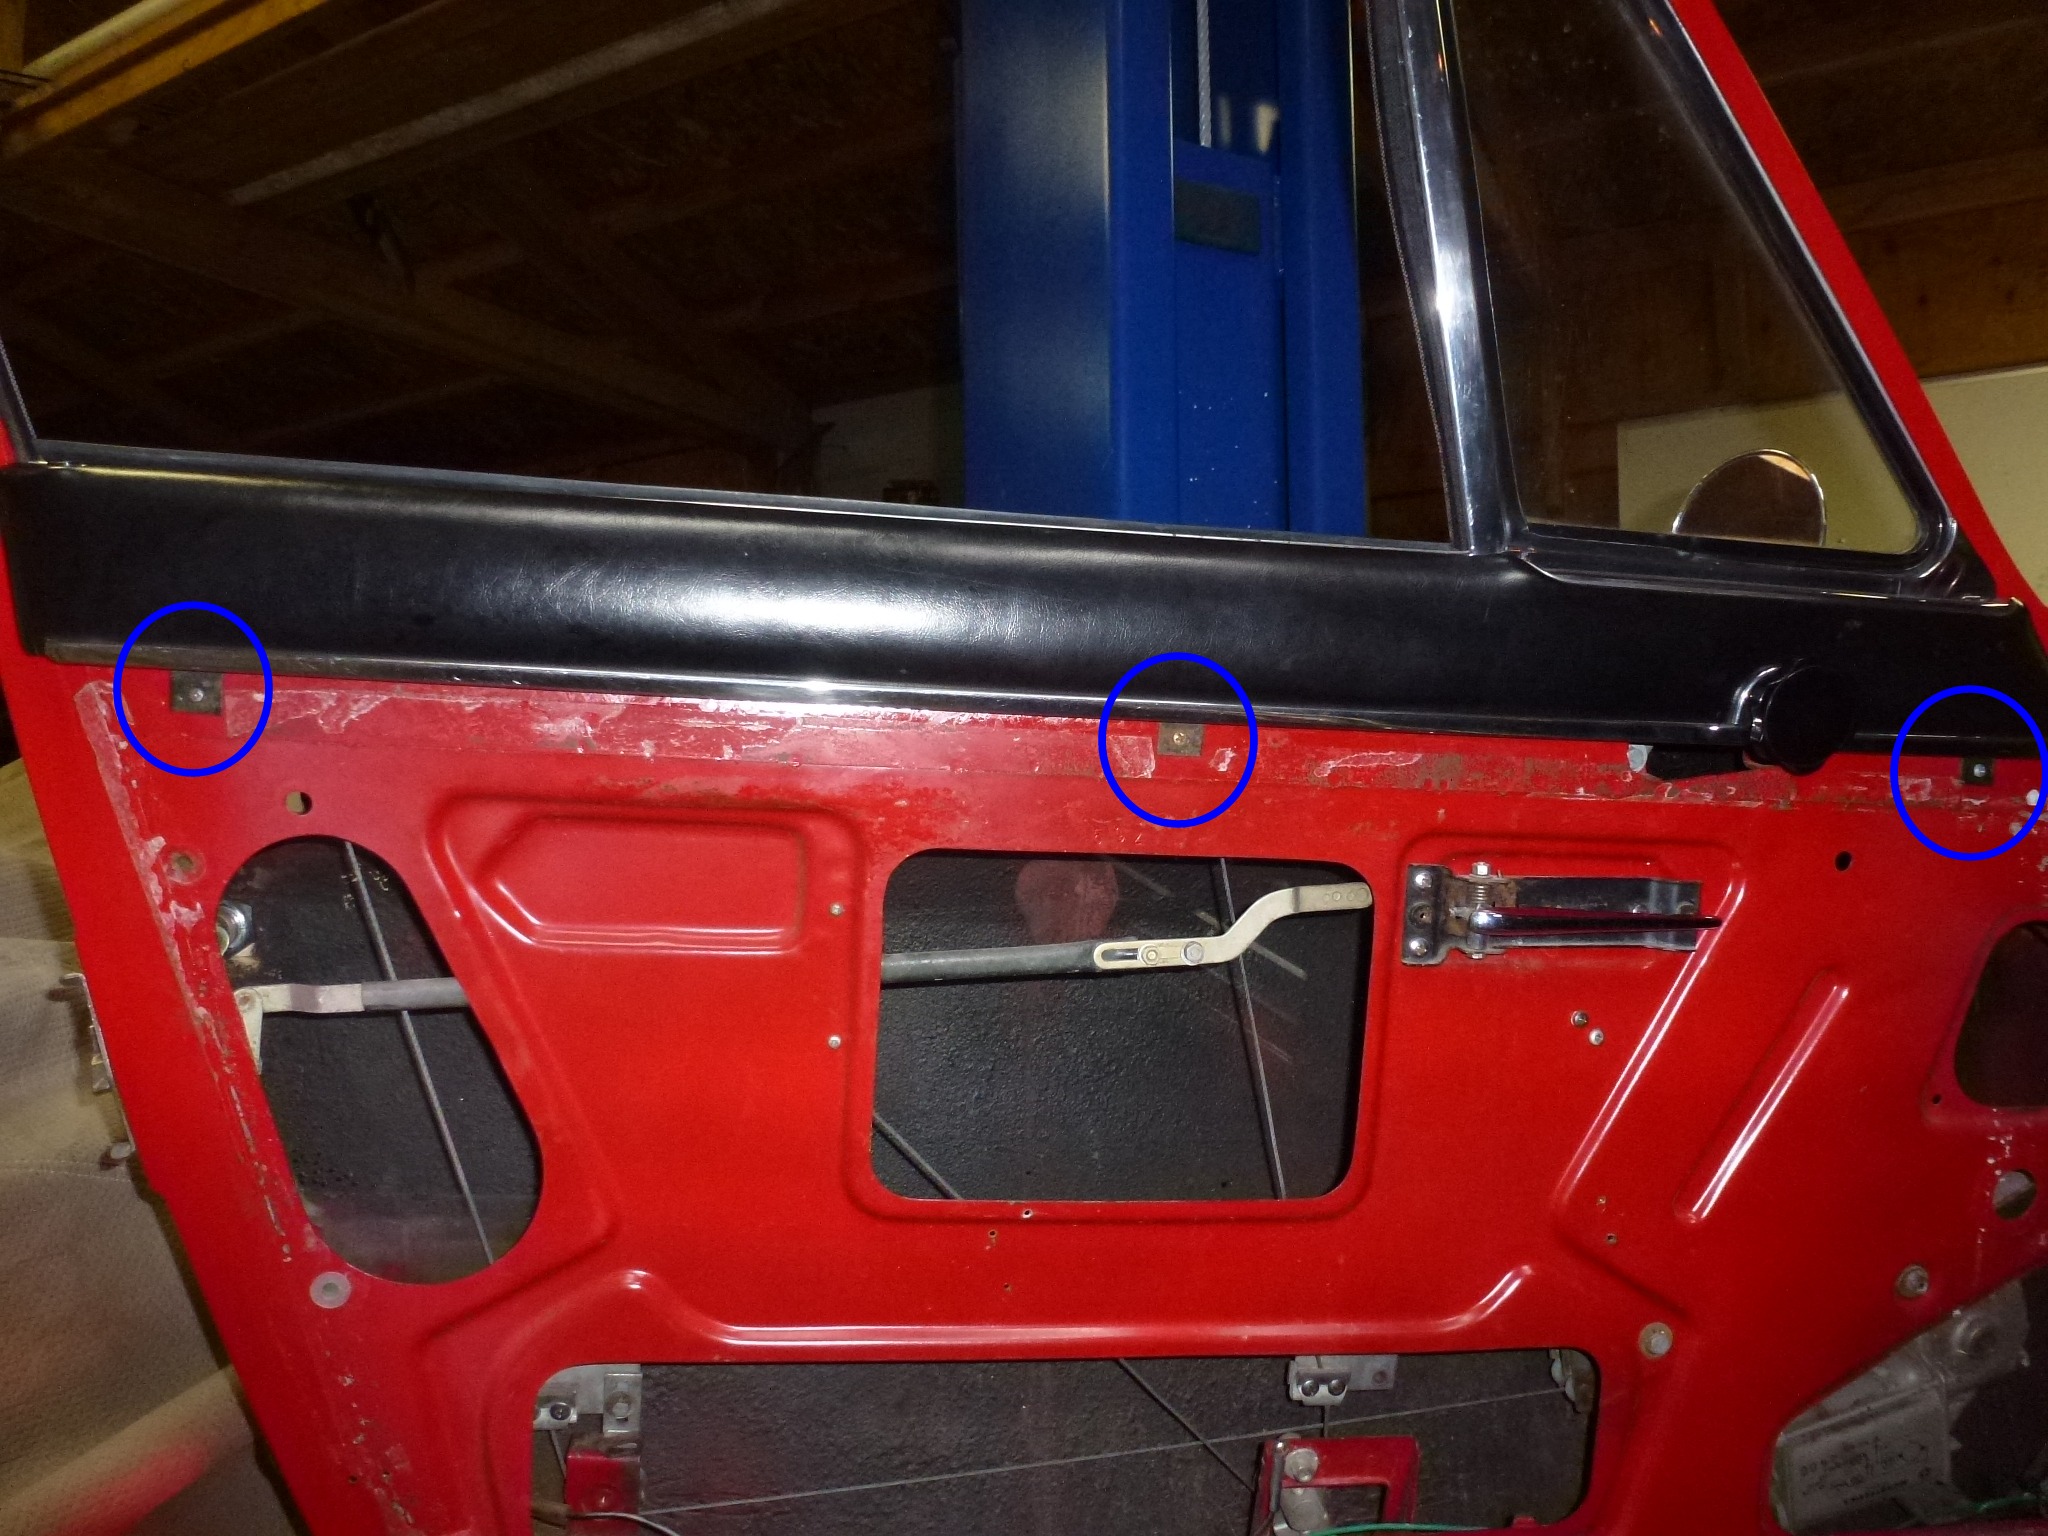
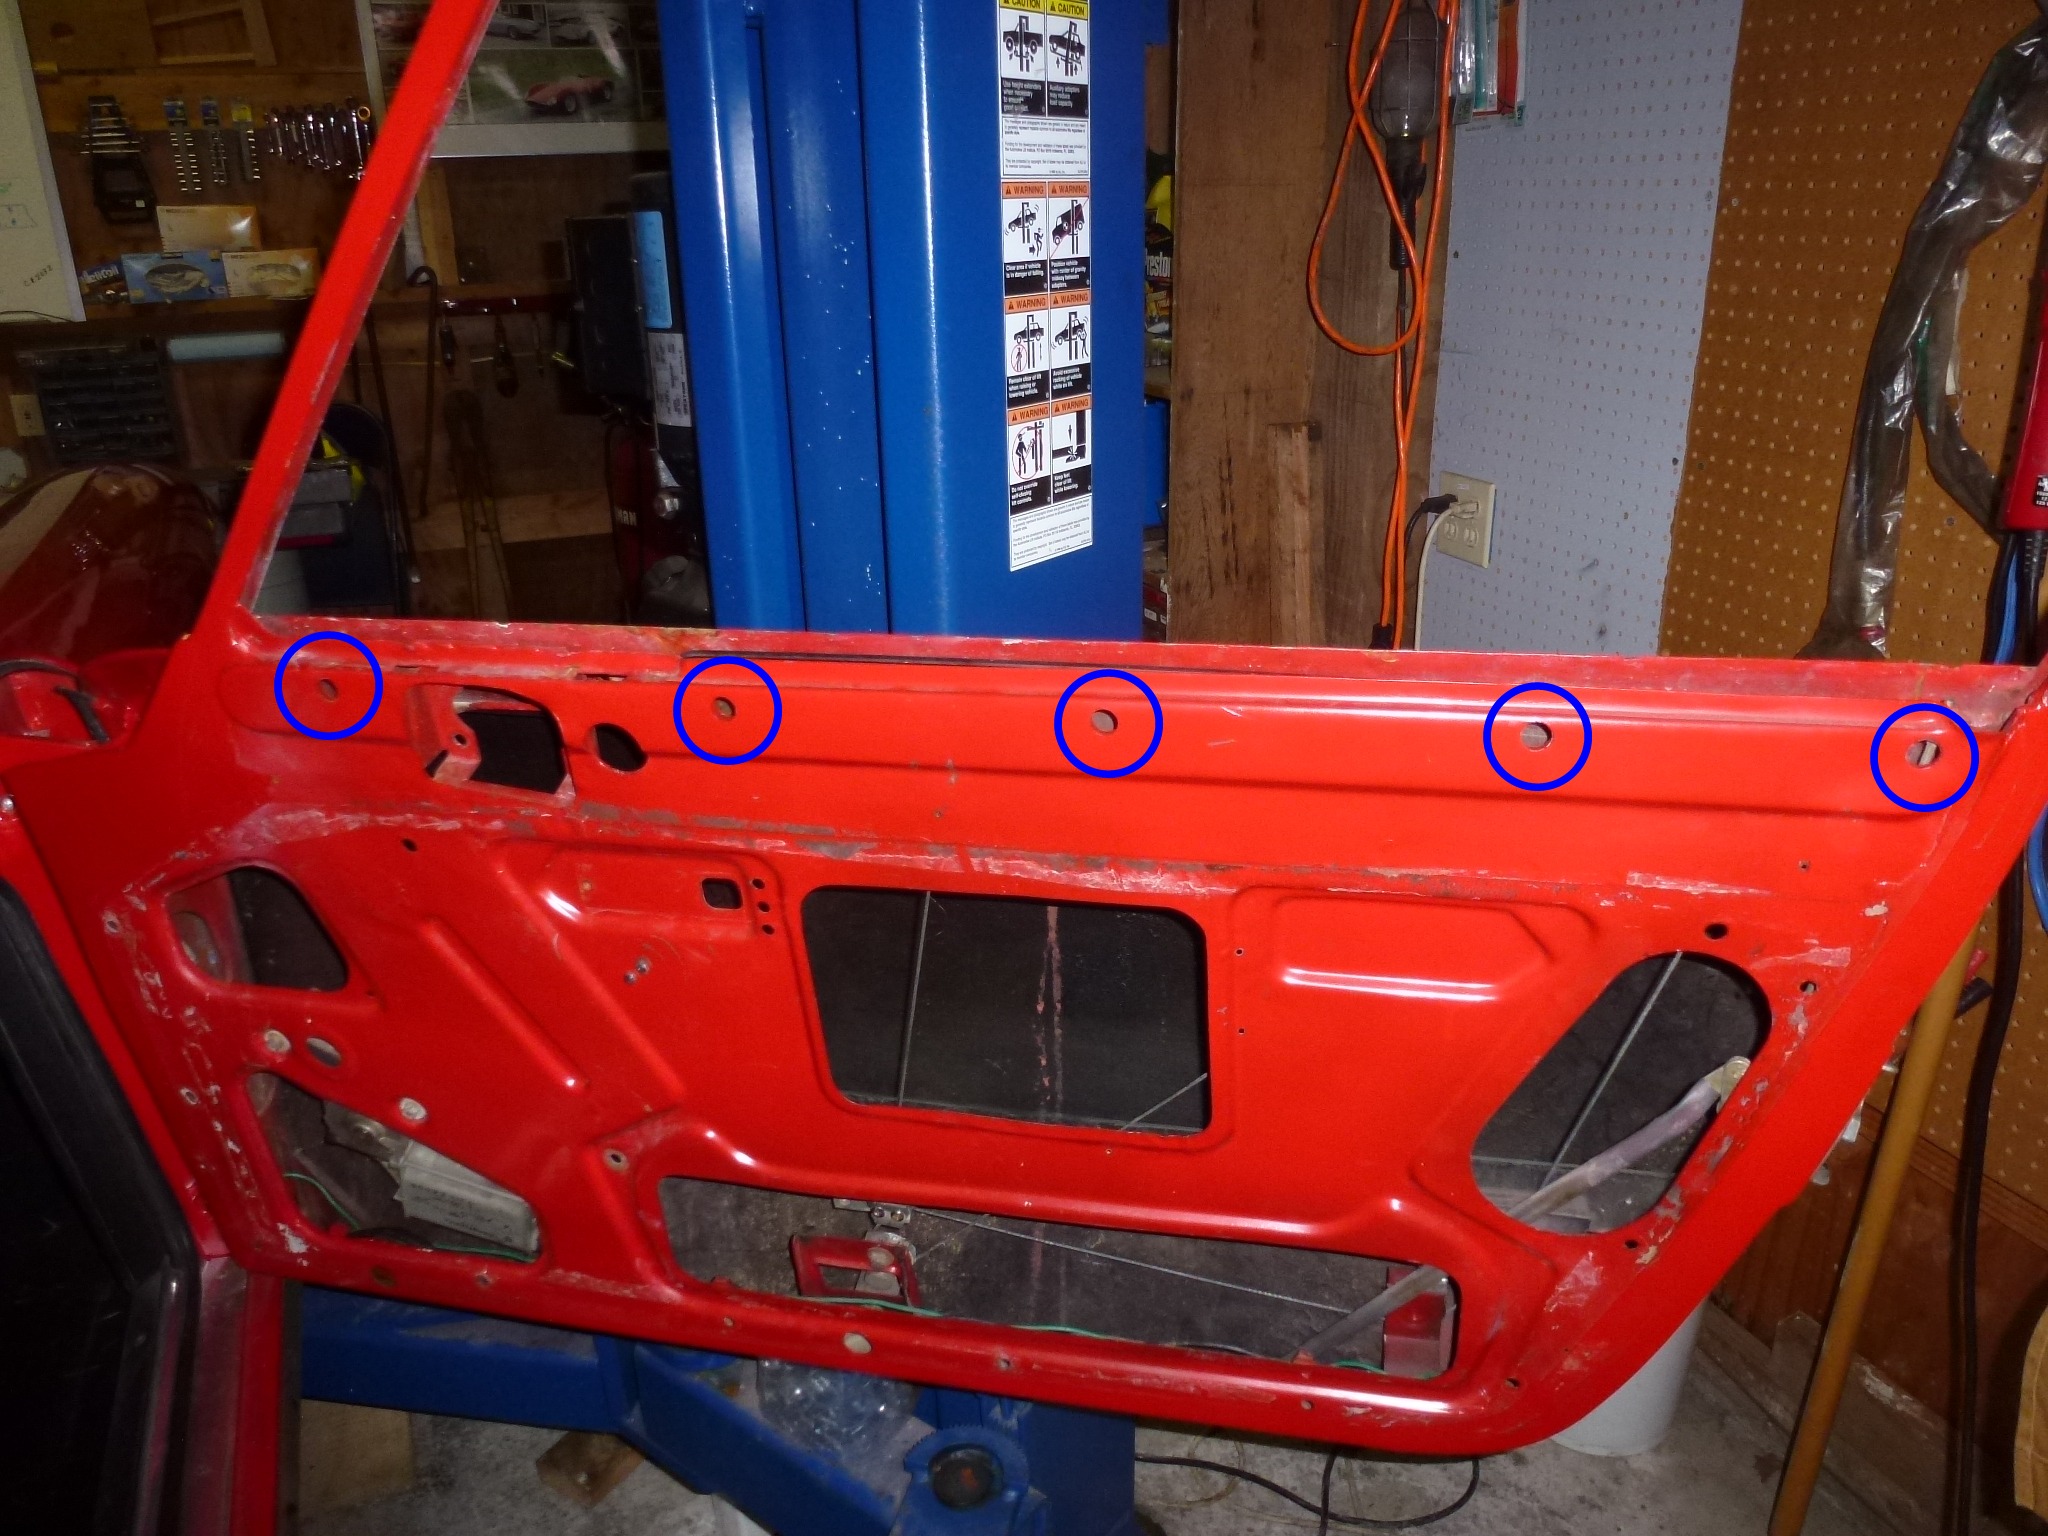
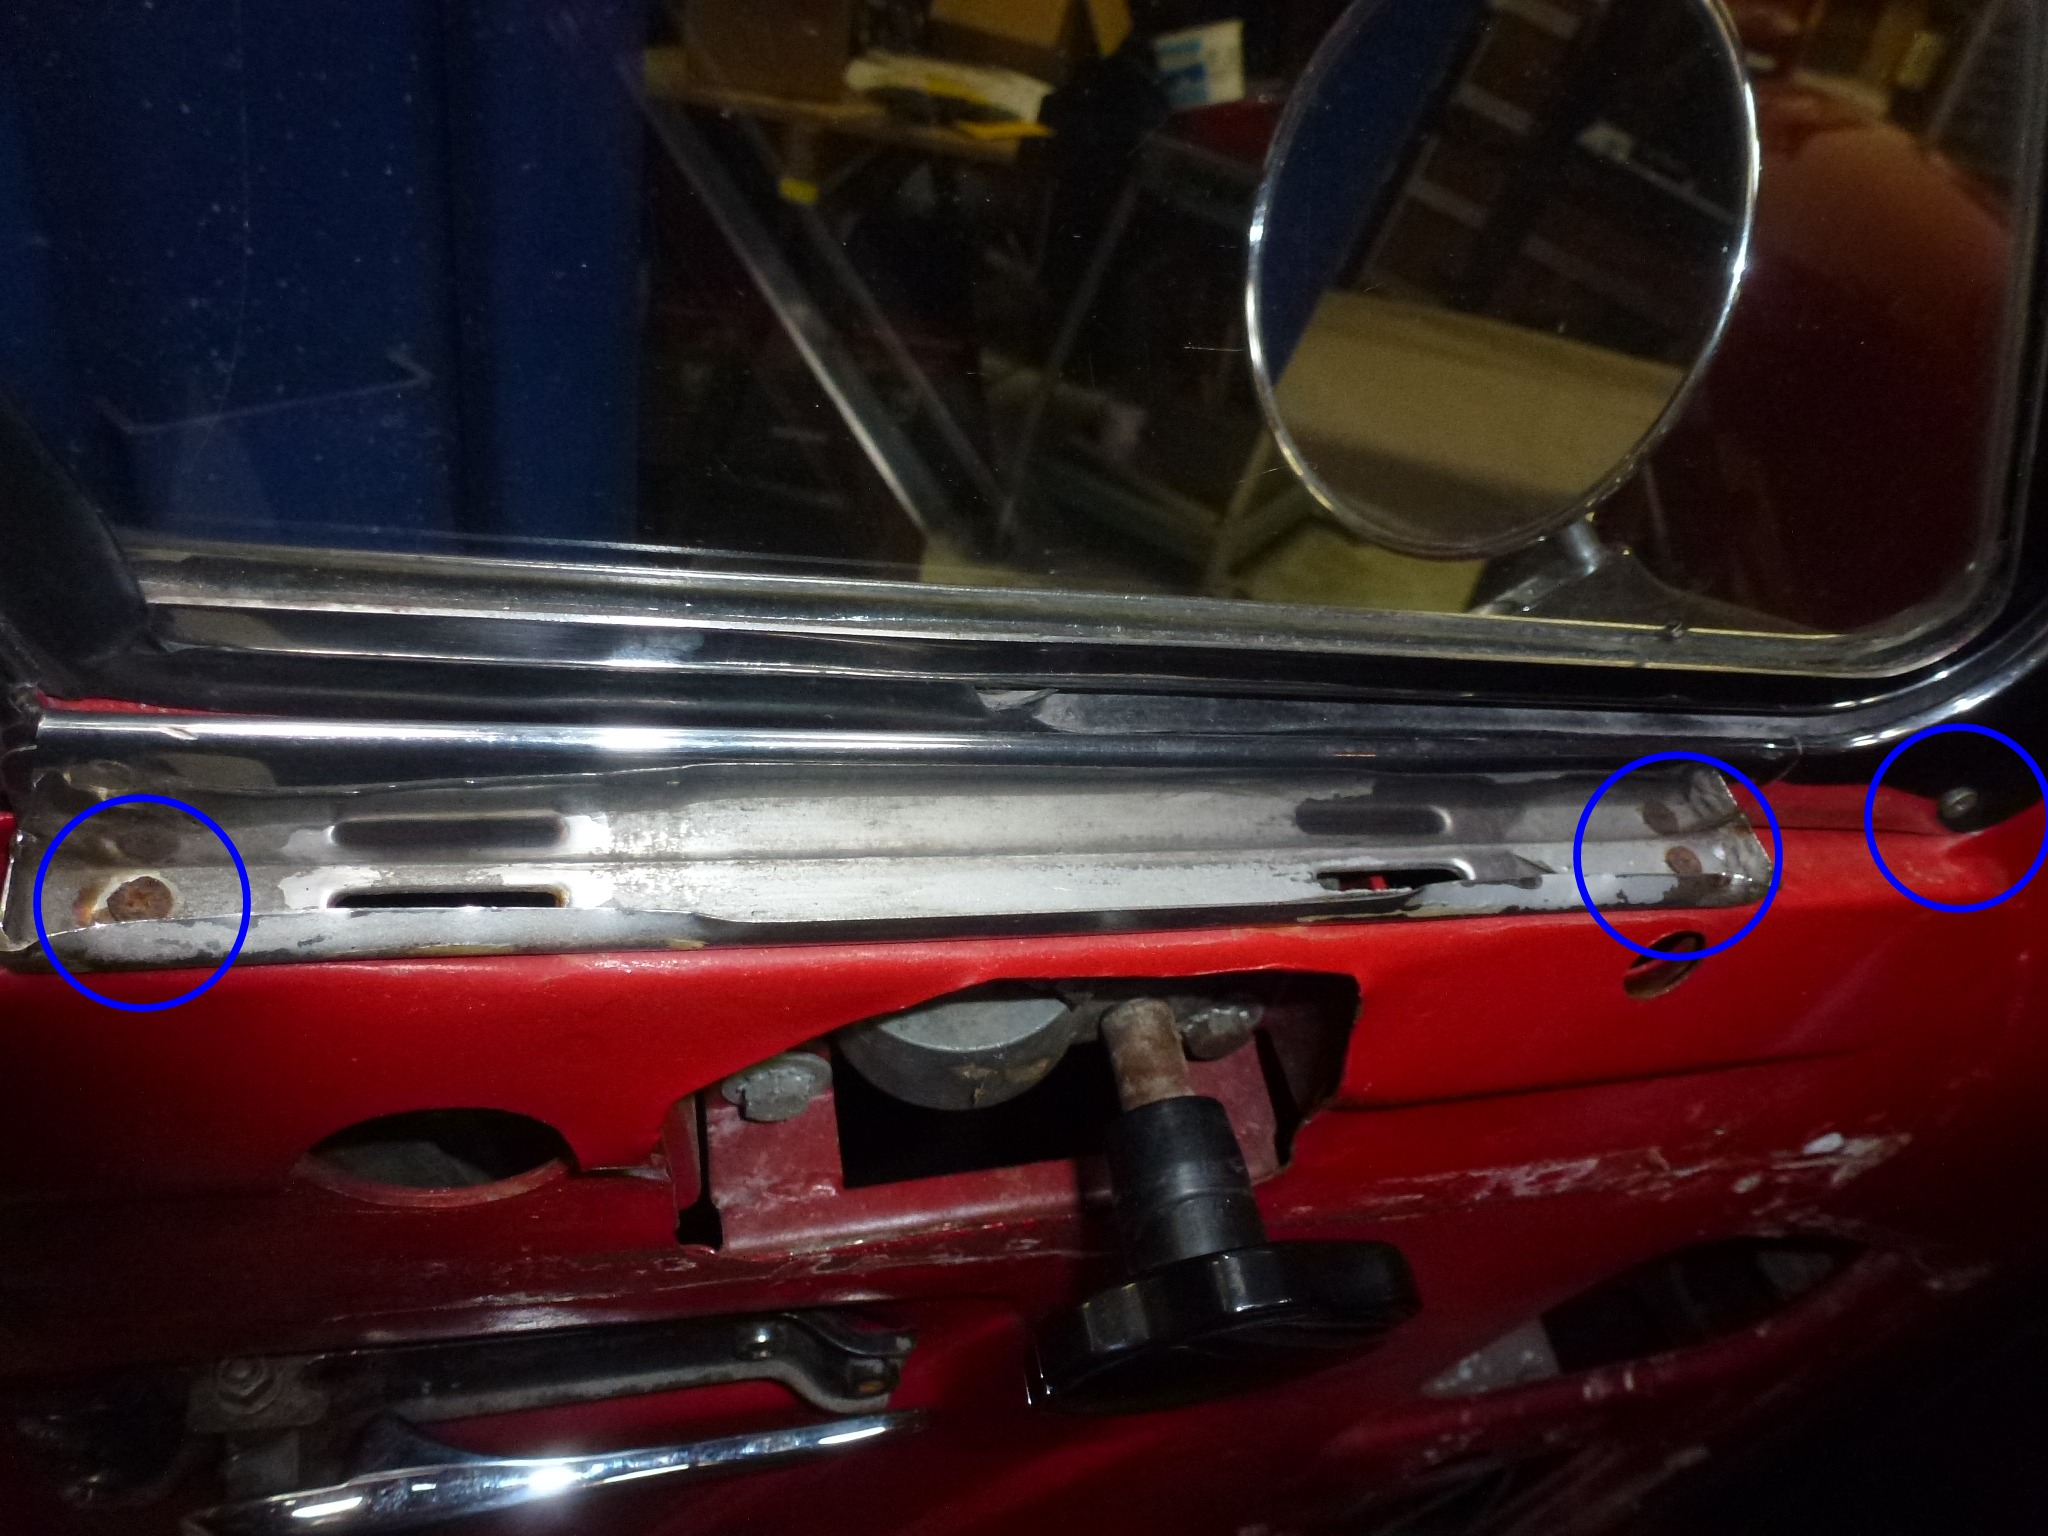
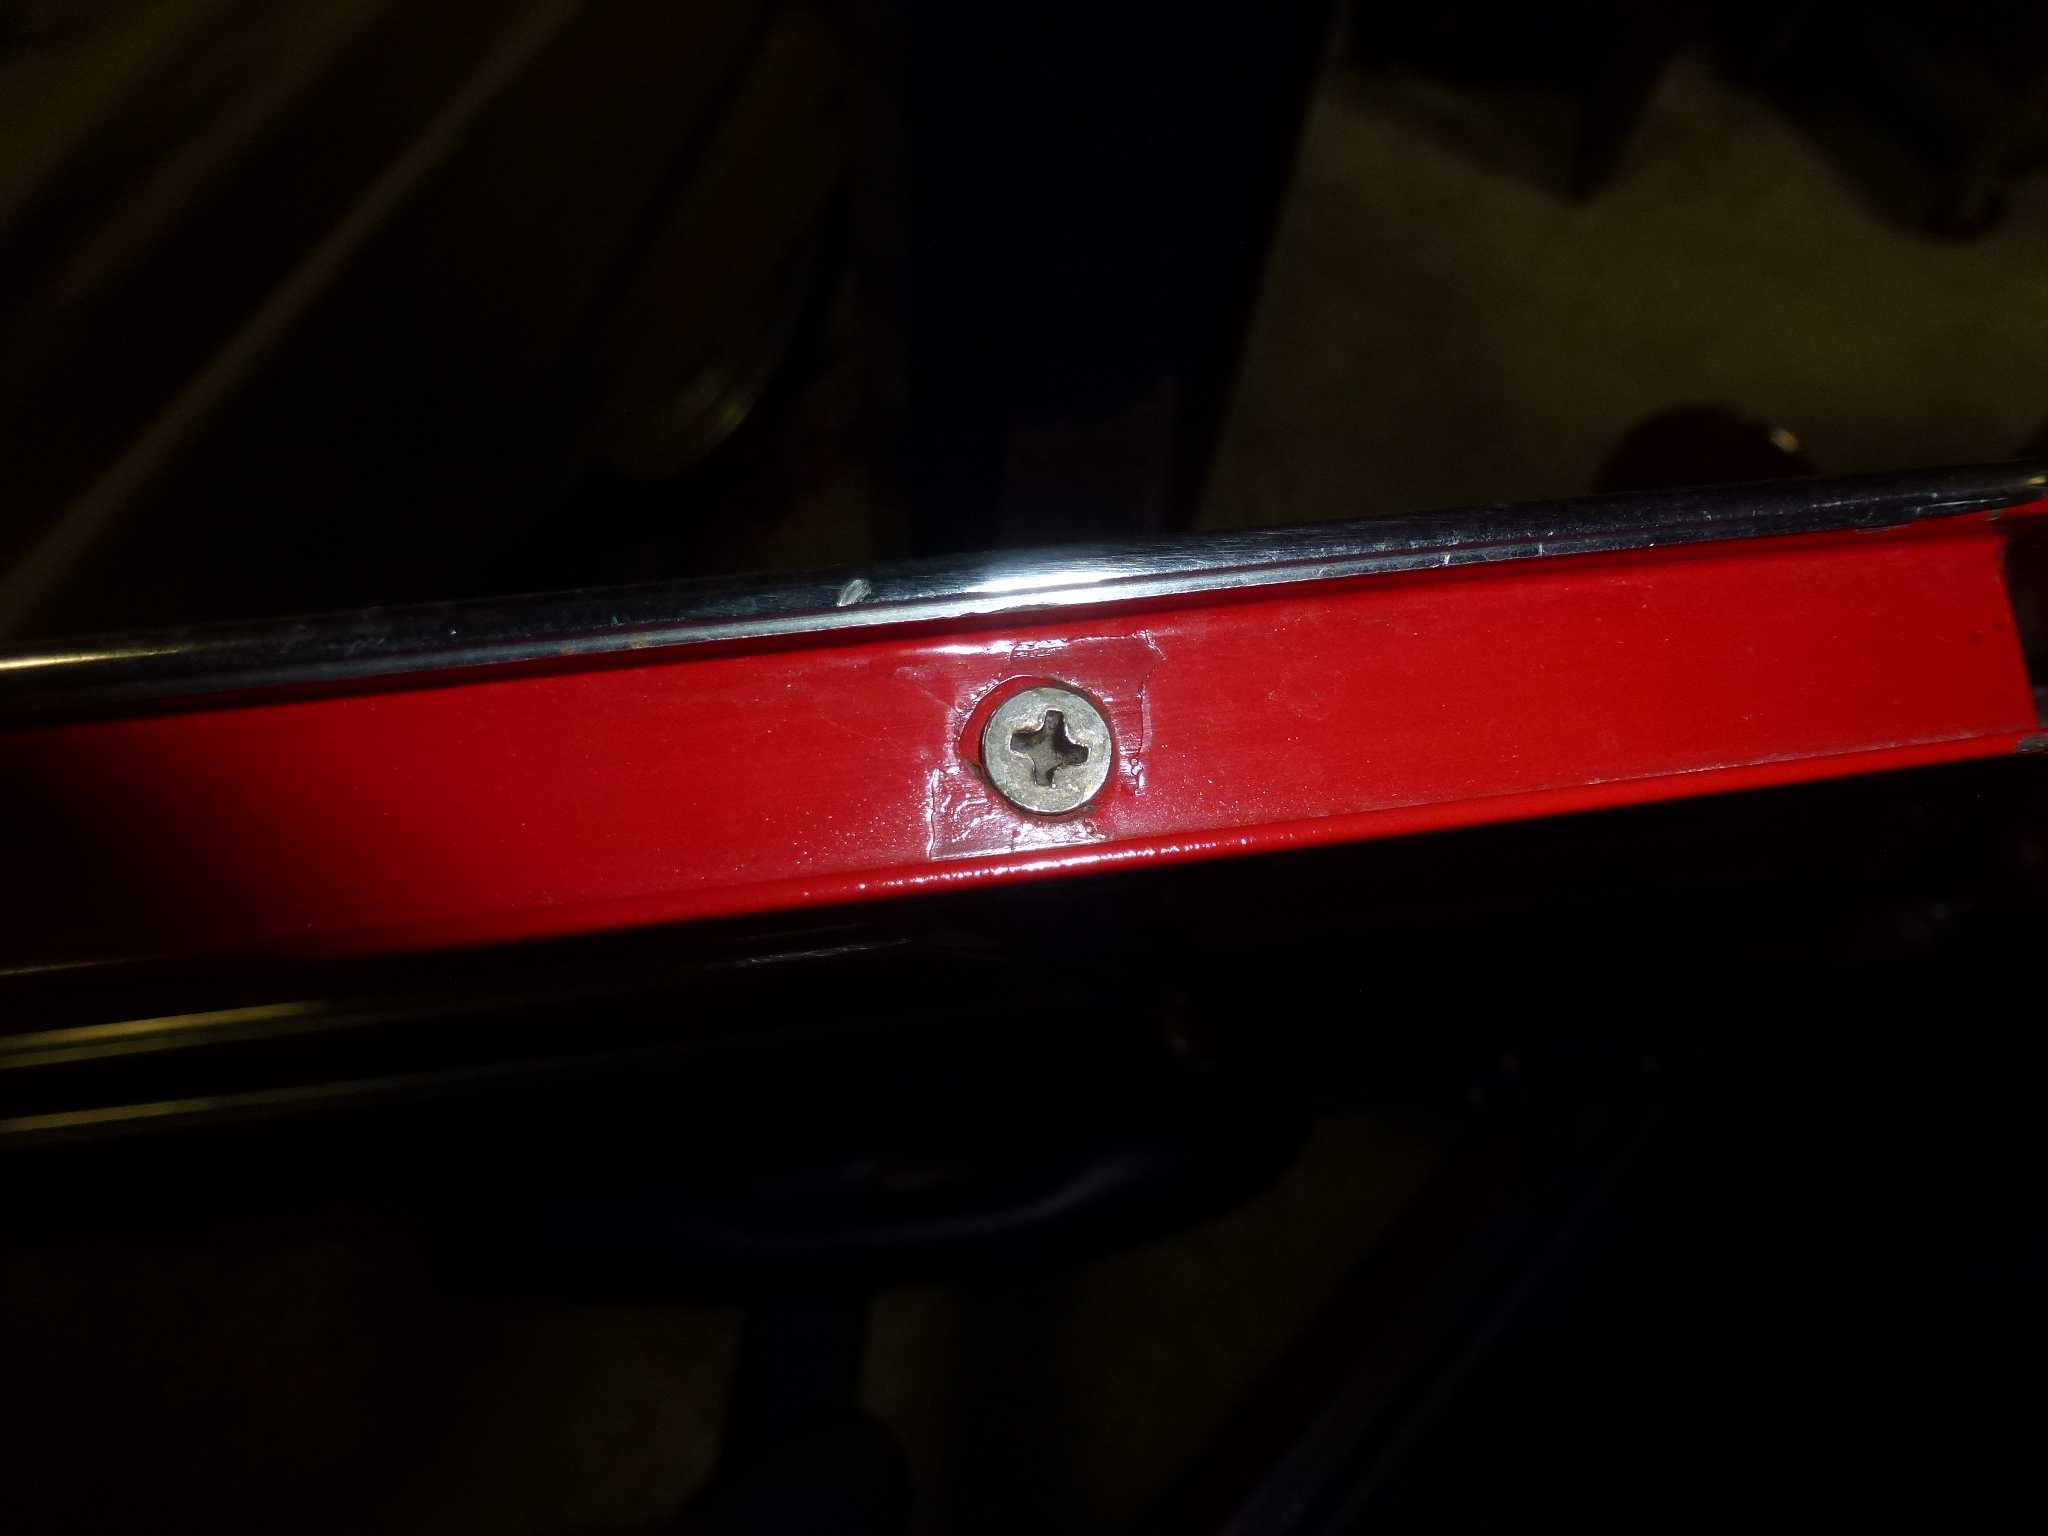
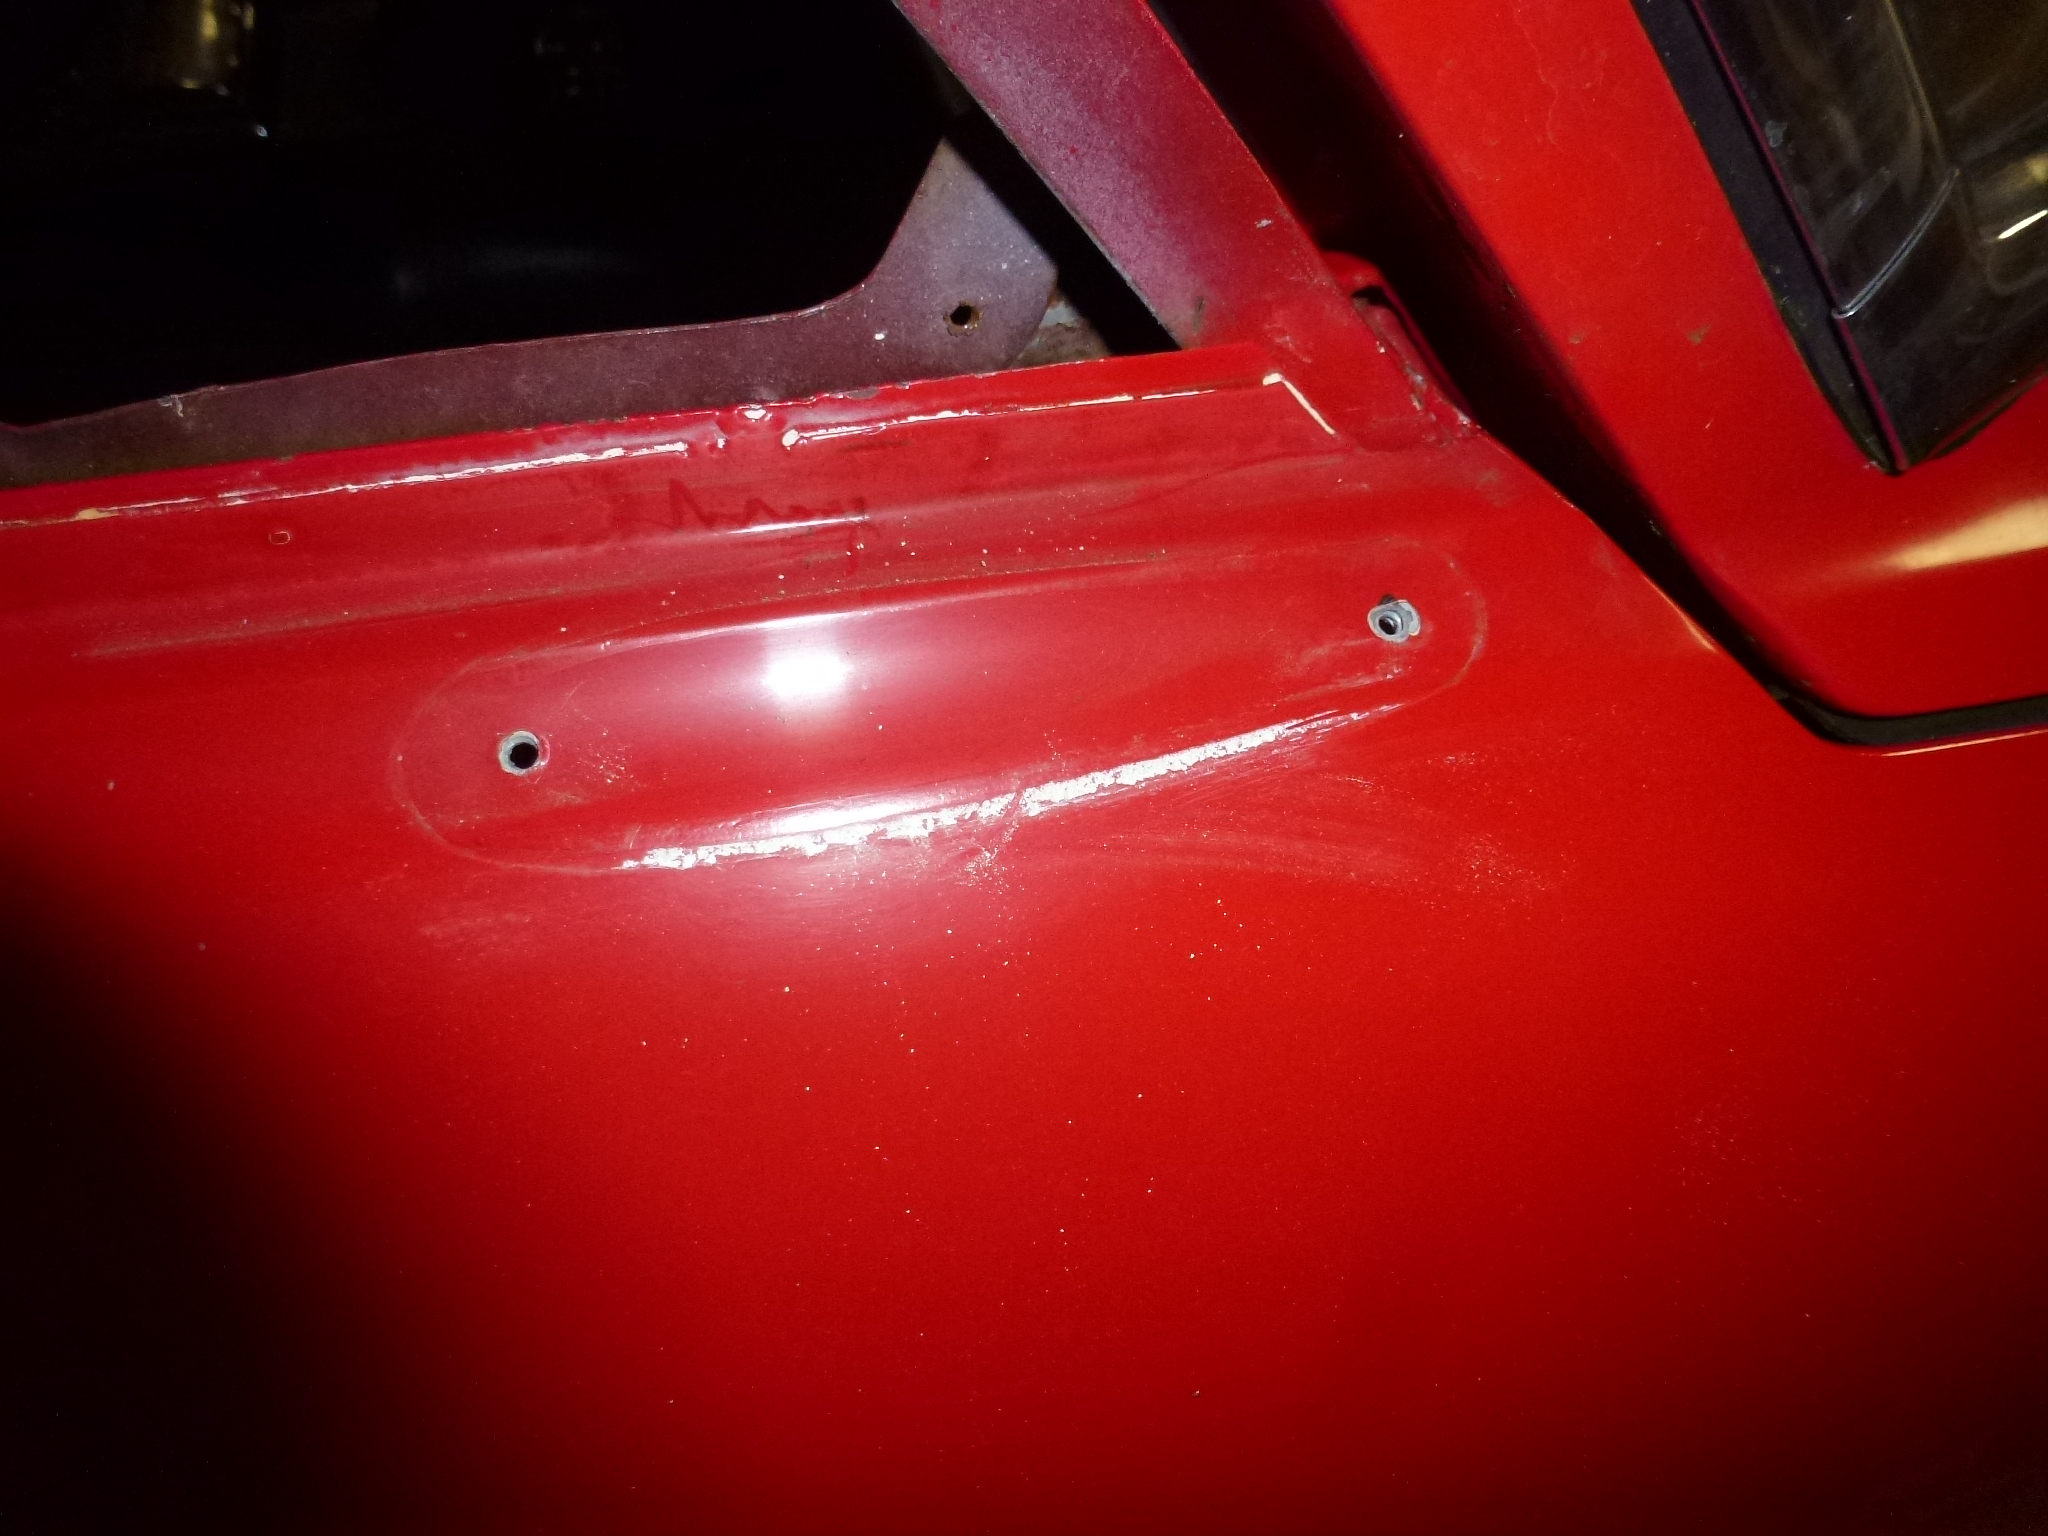
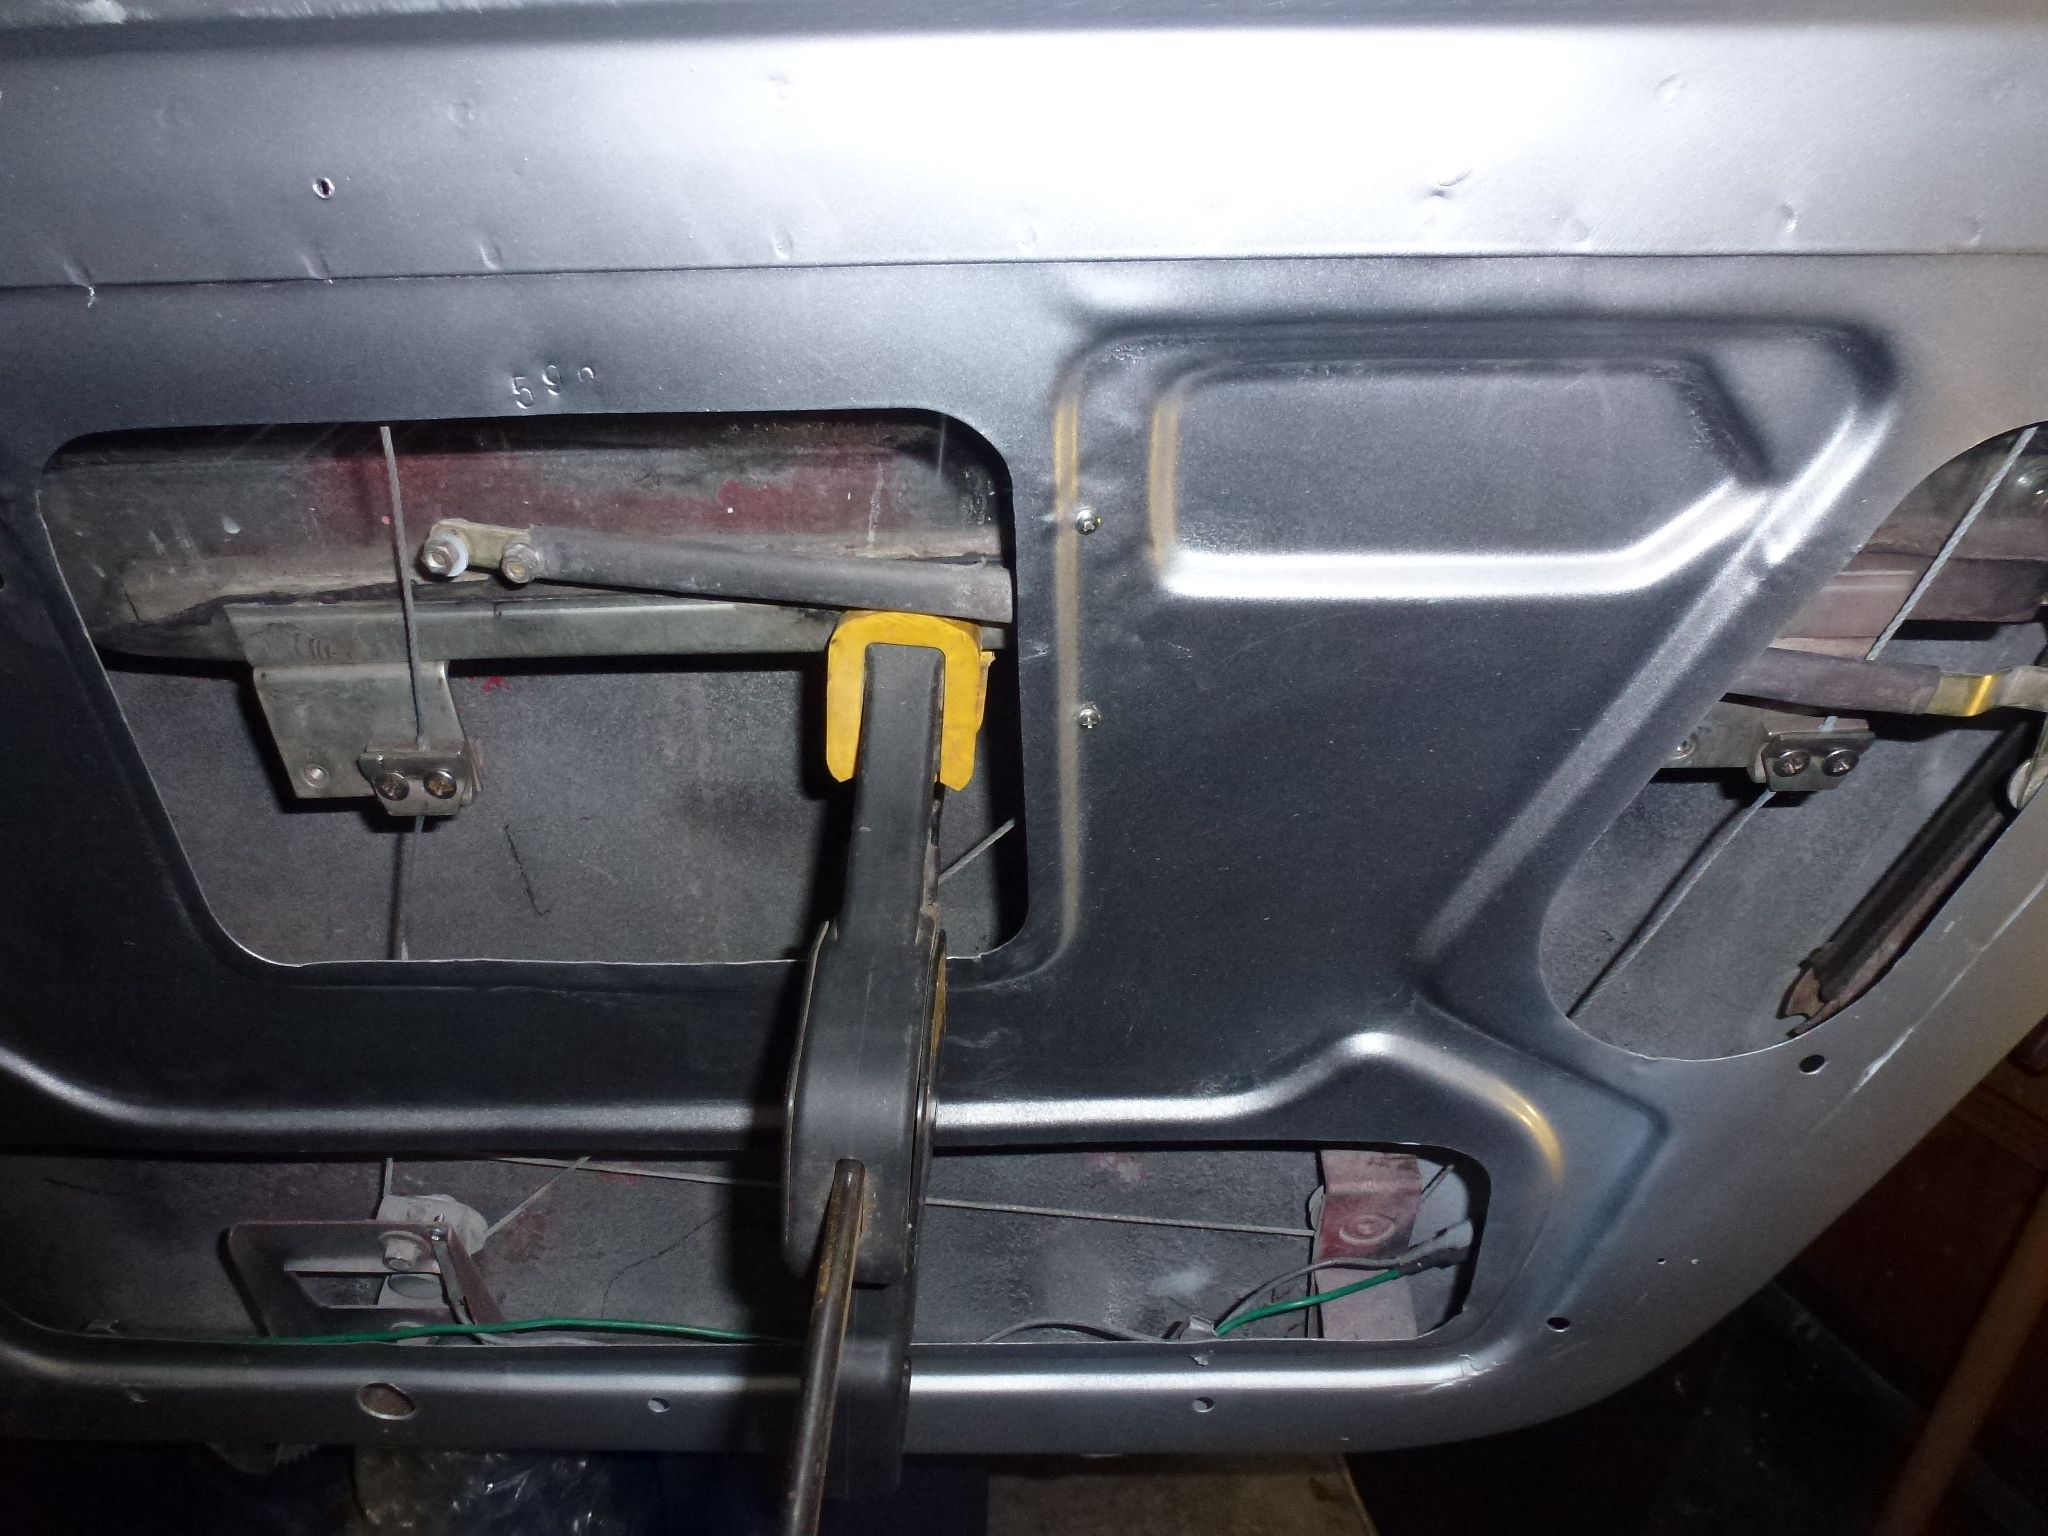
Remove the outside rubber scraper strip. Five screws accessed through holes in the inner door skin. But first, remove the window stop and lower the window as far as possible so it is not in front of the screws. Note, this also required pushing the window bottom towards the outside so the frame slid past the stop on the door. Notice the magnet used to catch the screws as they come loose. Once all five screws are off, carefully pull up as you don't want to bend the strip. Note, the forward screw (leftmost in the picture) also holds the outside vent window trim.
-
Remove the outside vent window trim. One screws (on the inside of the door). Another screw was removed with the outside scraper strip was taken off. Then pull up hard. It is a tight fit.
-
Remove the inside vent window trim. Three screws.

-
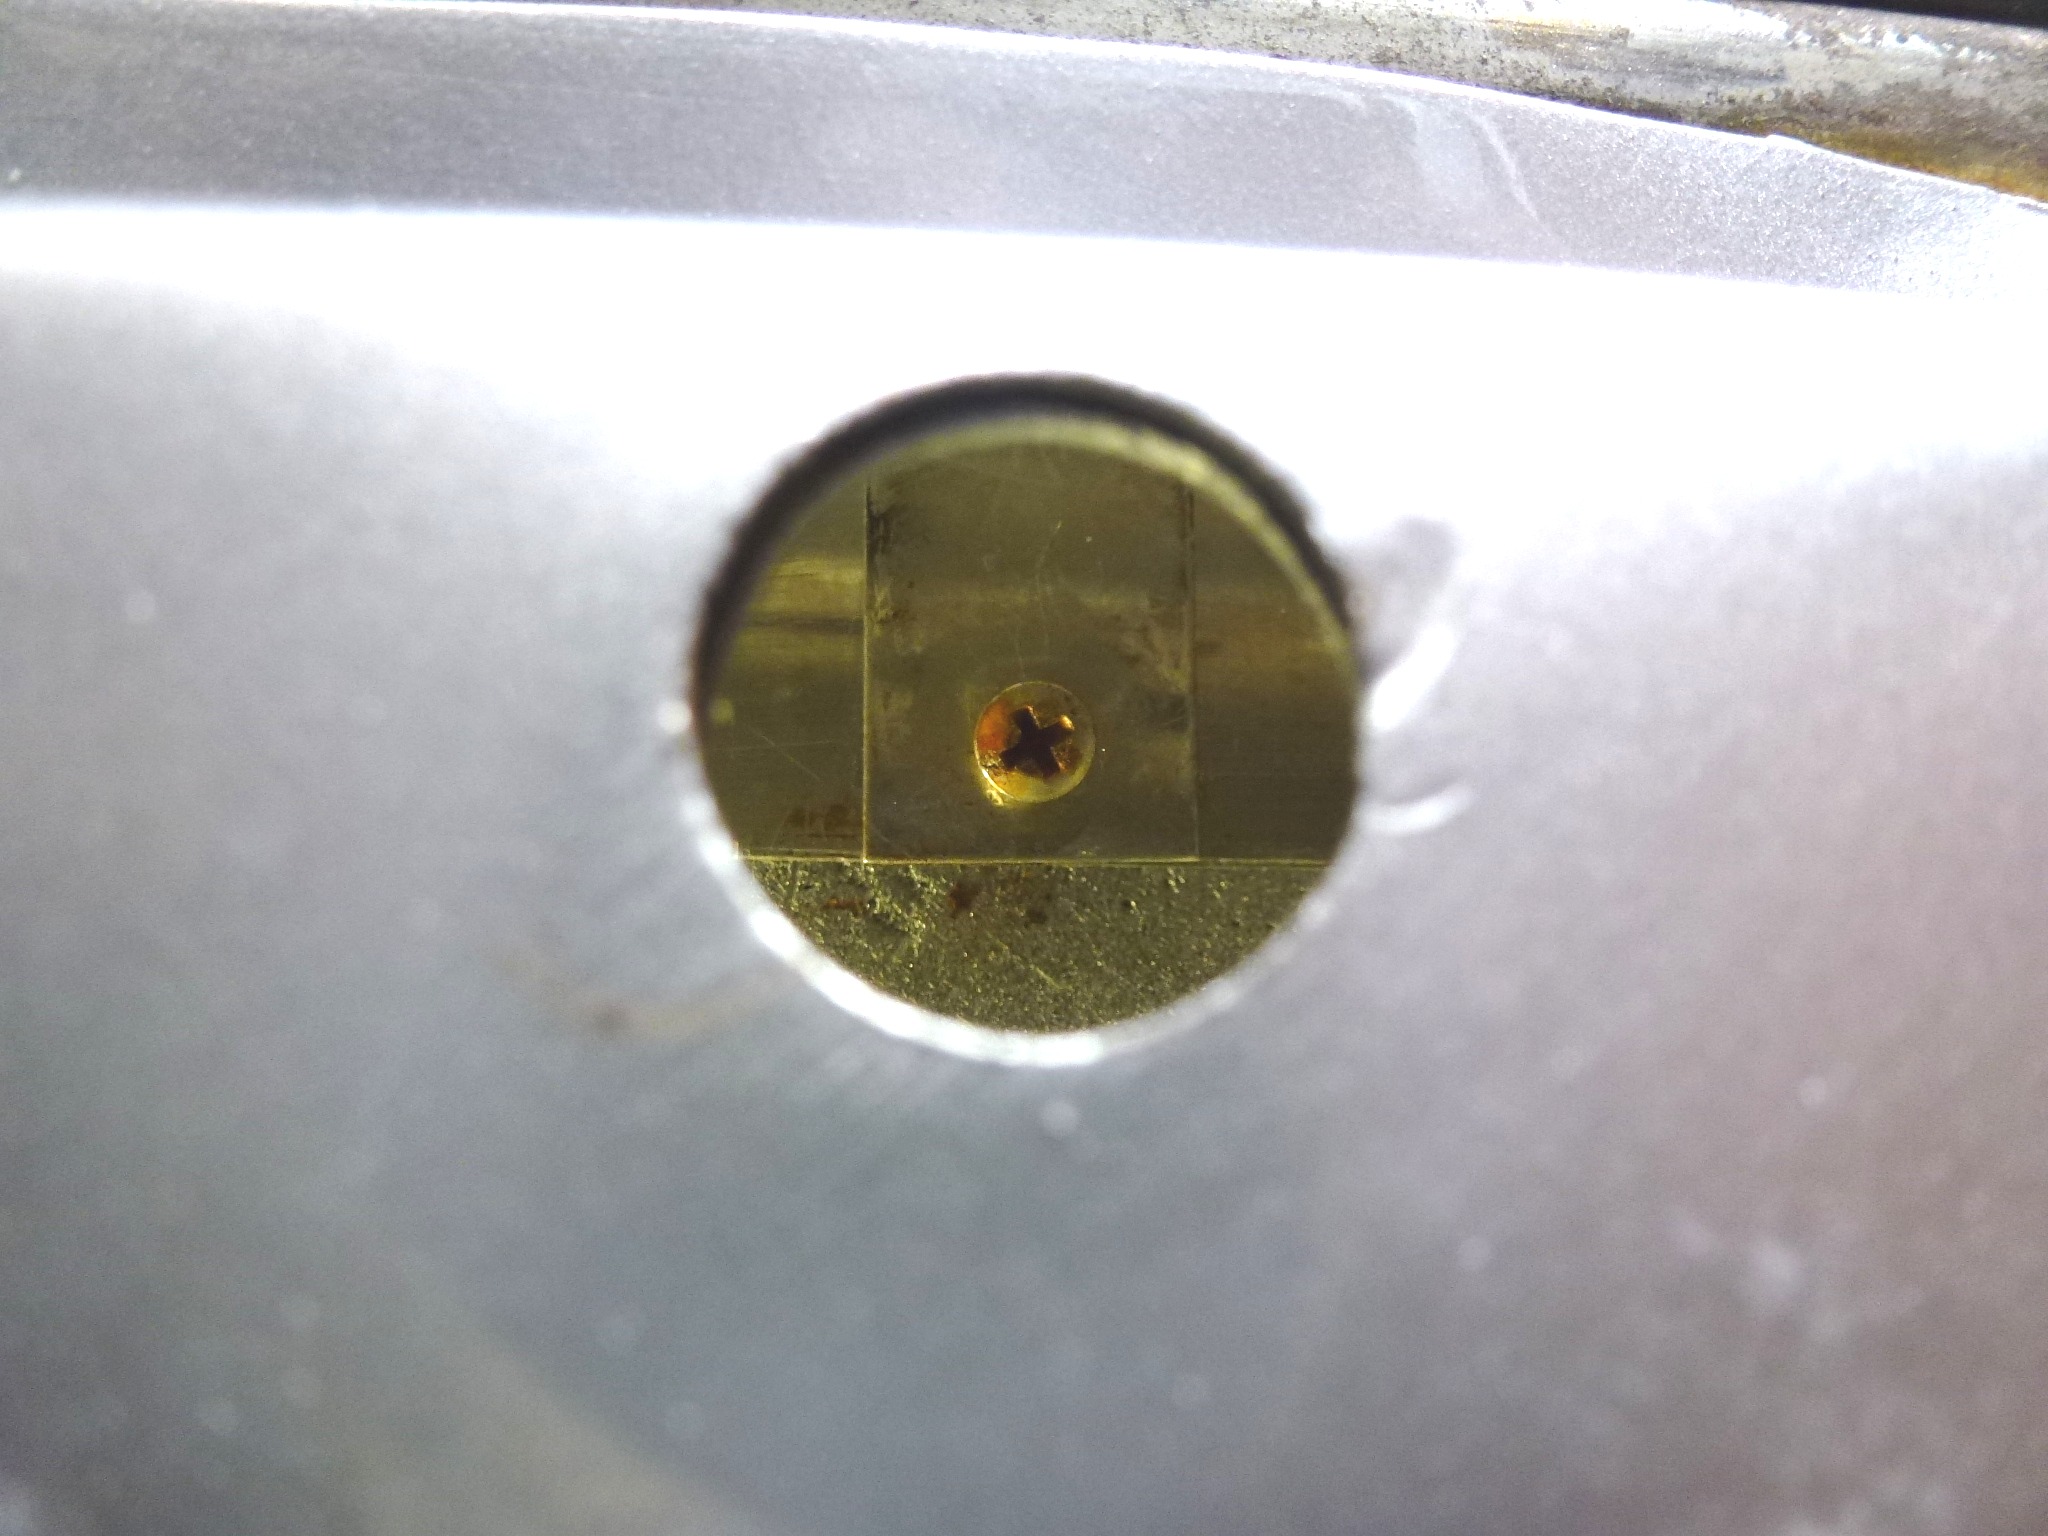
Remove the door lock. First pop off the arm from the ball on the back of the lock. Then unscrew the large nut and the lock comes off to the outside. Note the passenger side was already off when I looked. One of my to do items was to figure out why the passenger lock no longer worked. Well, now I know why.
-
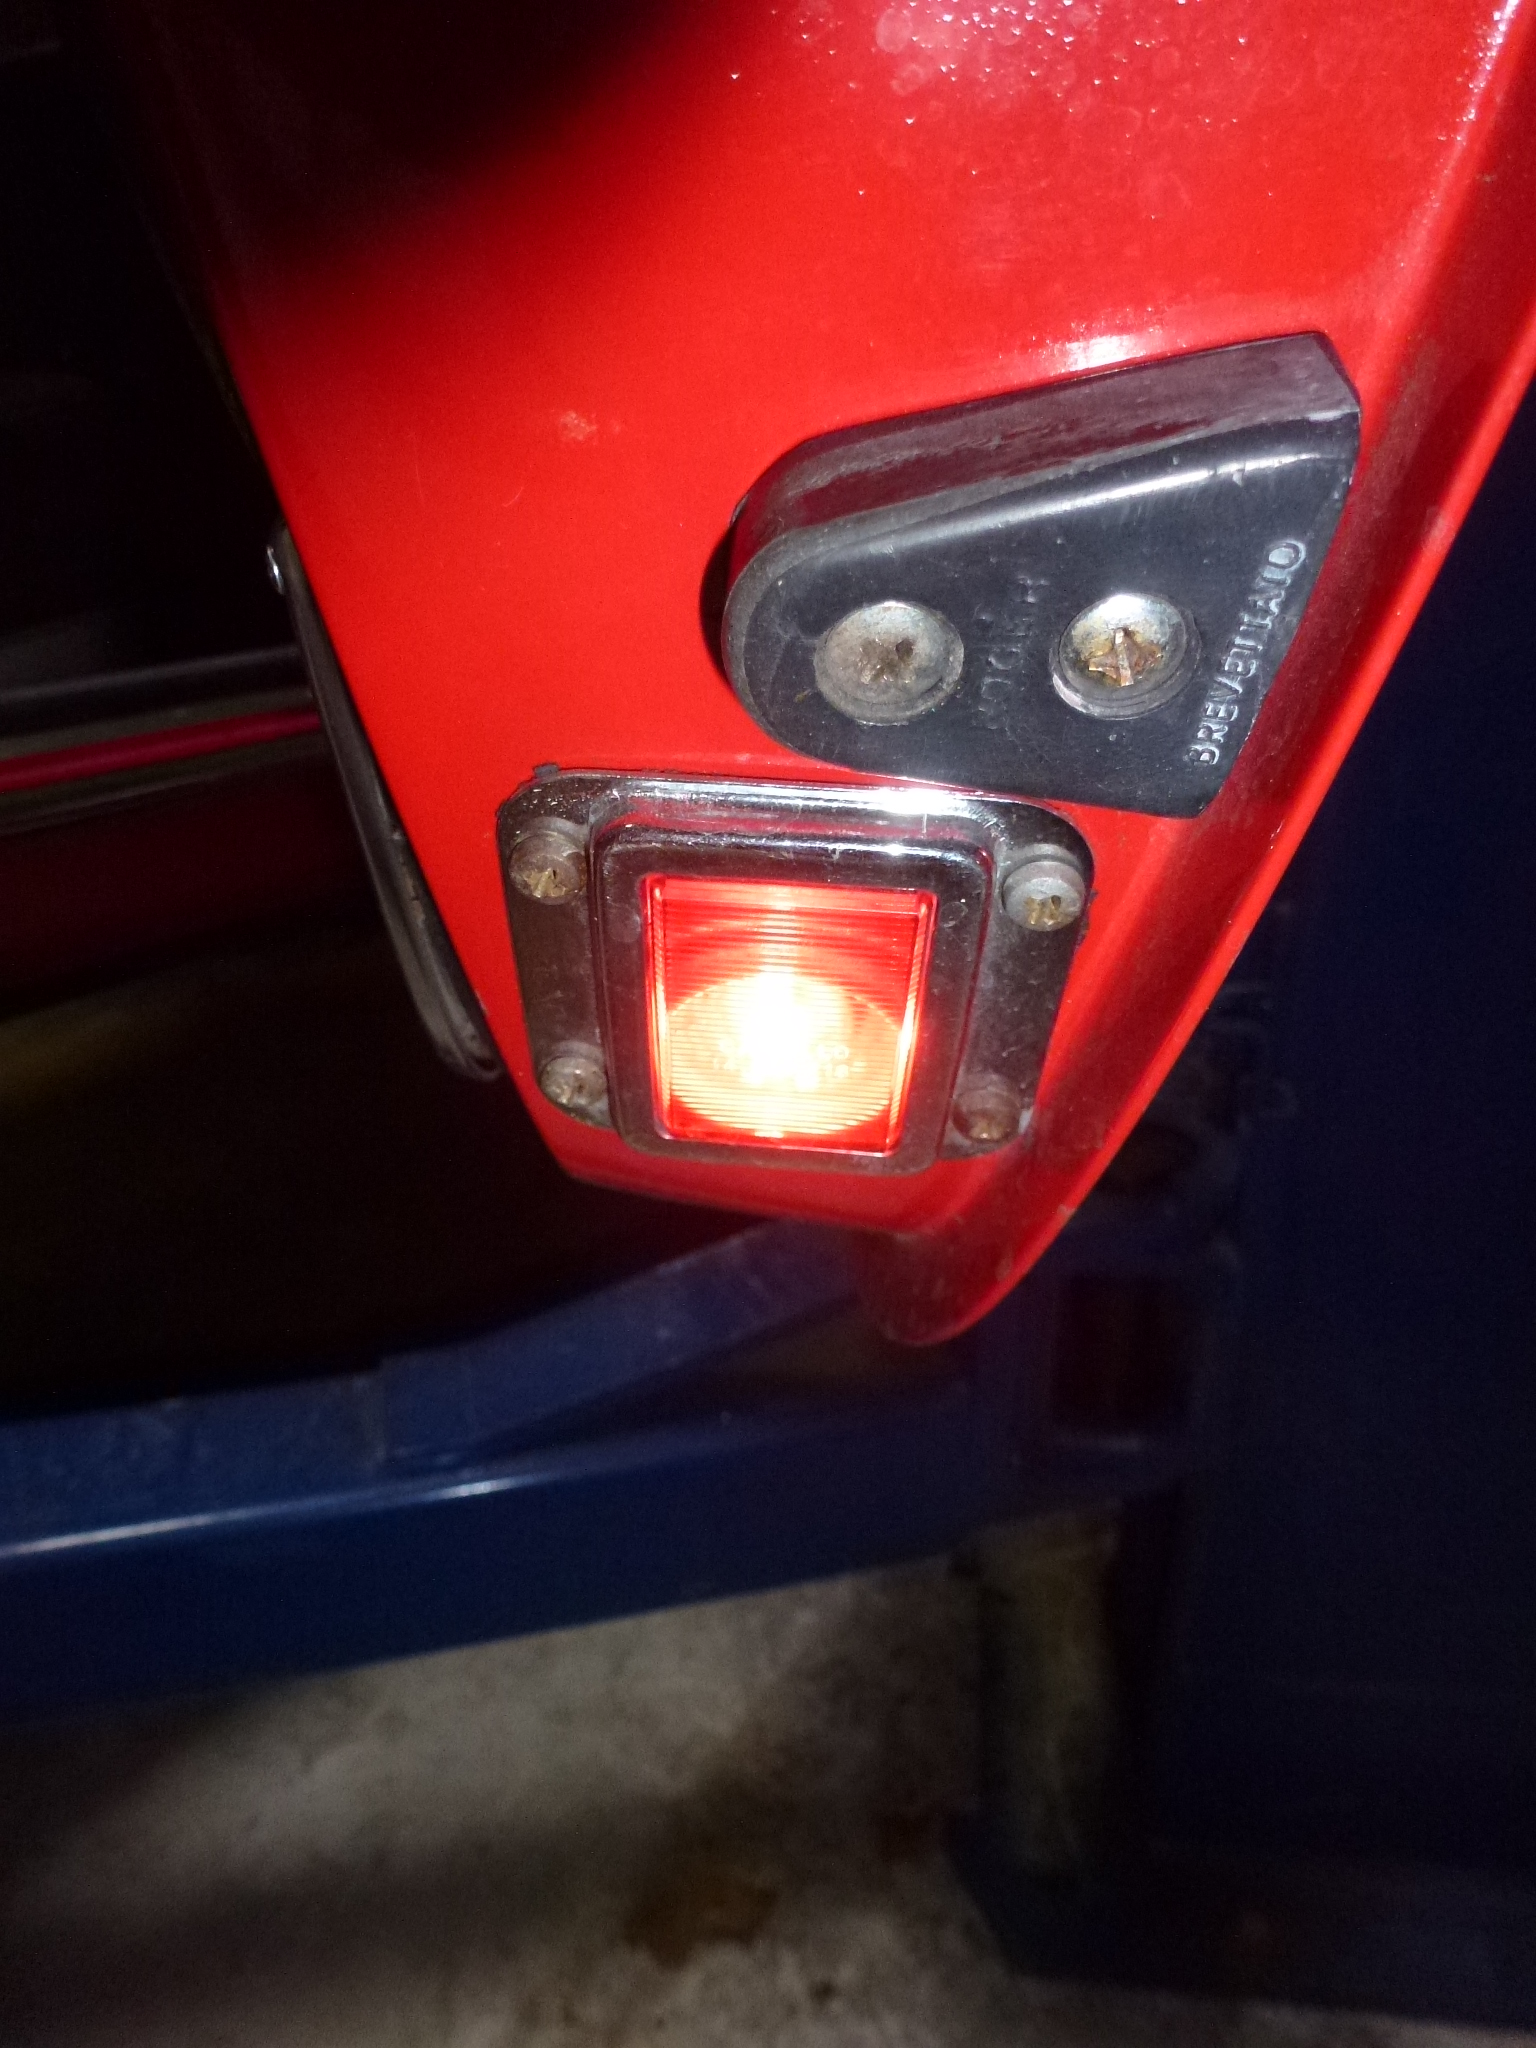
Remove the door light. Unplug the wires, four screws and some force as the rubber housing will be stuck to the door. Remove the rubber positioning blocks and receivers on the door frame. Note, I'm leaving one installed so the door will still latch.
-
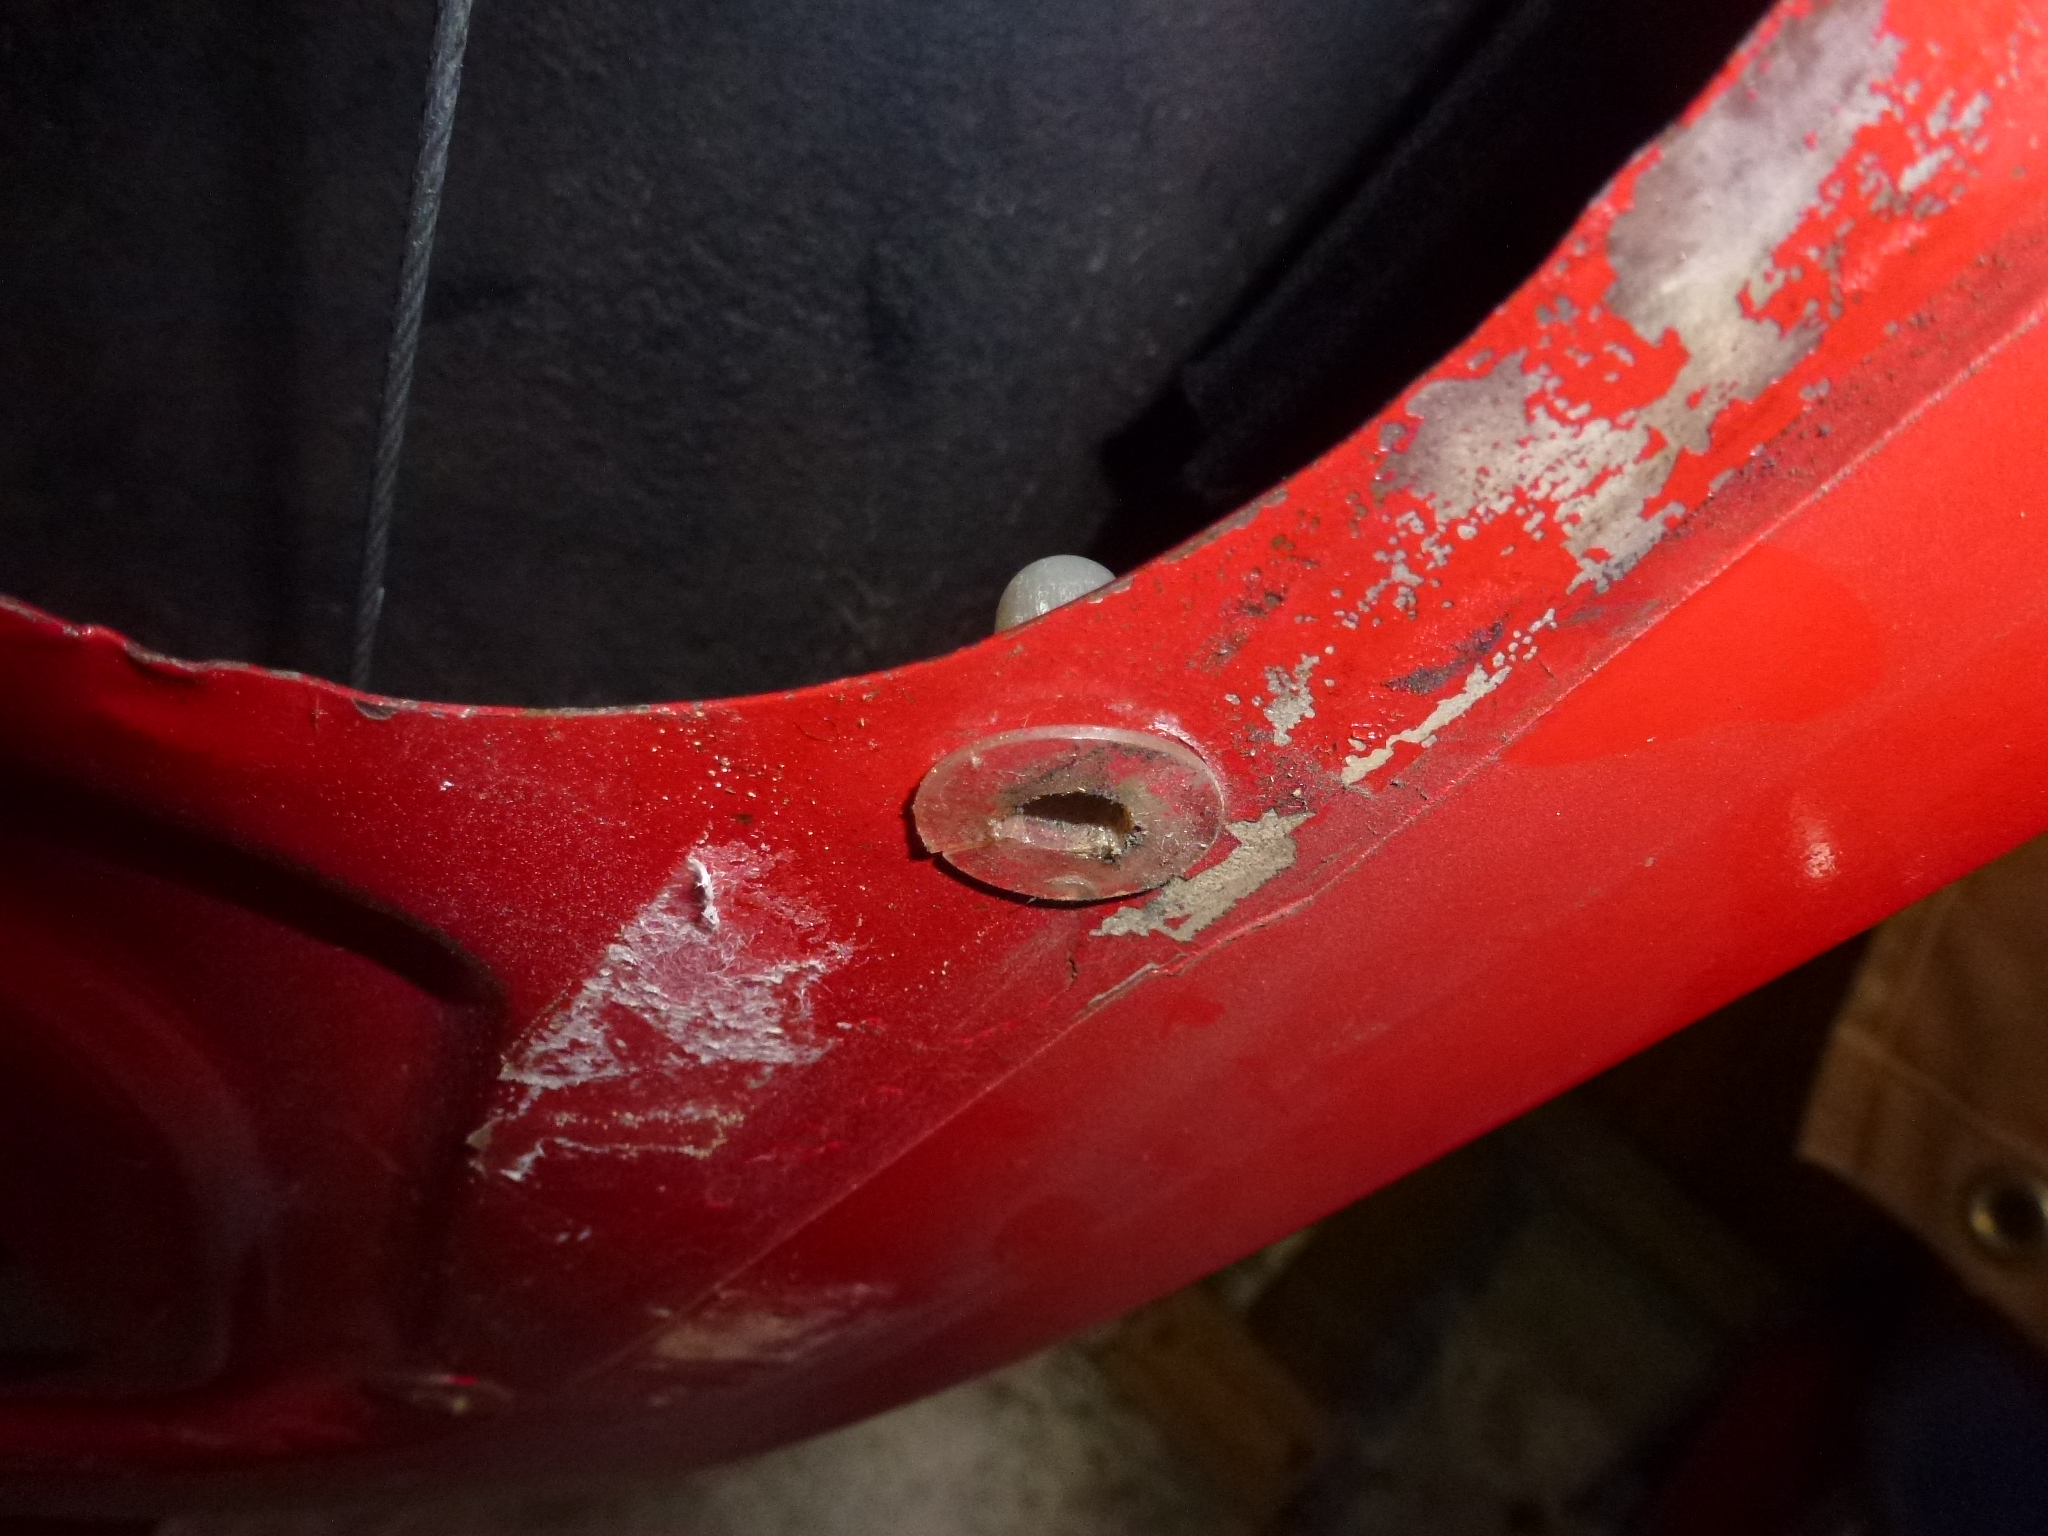
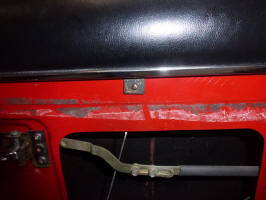
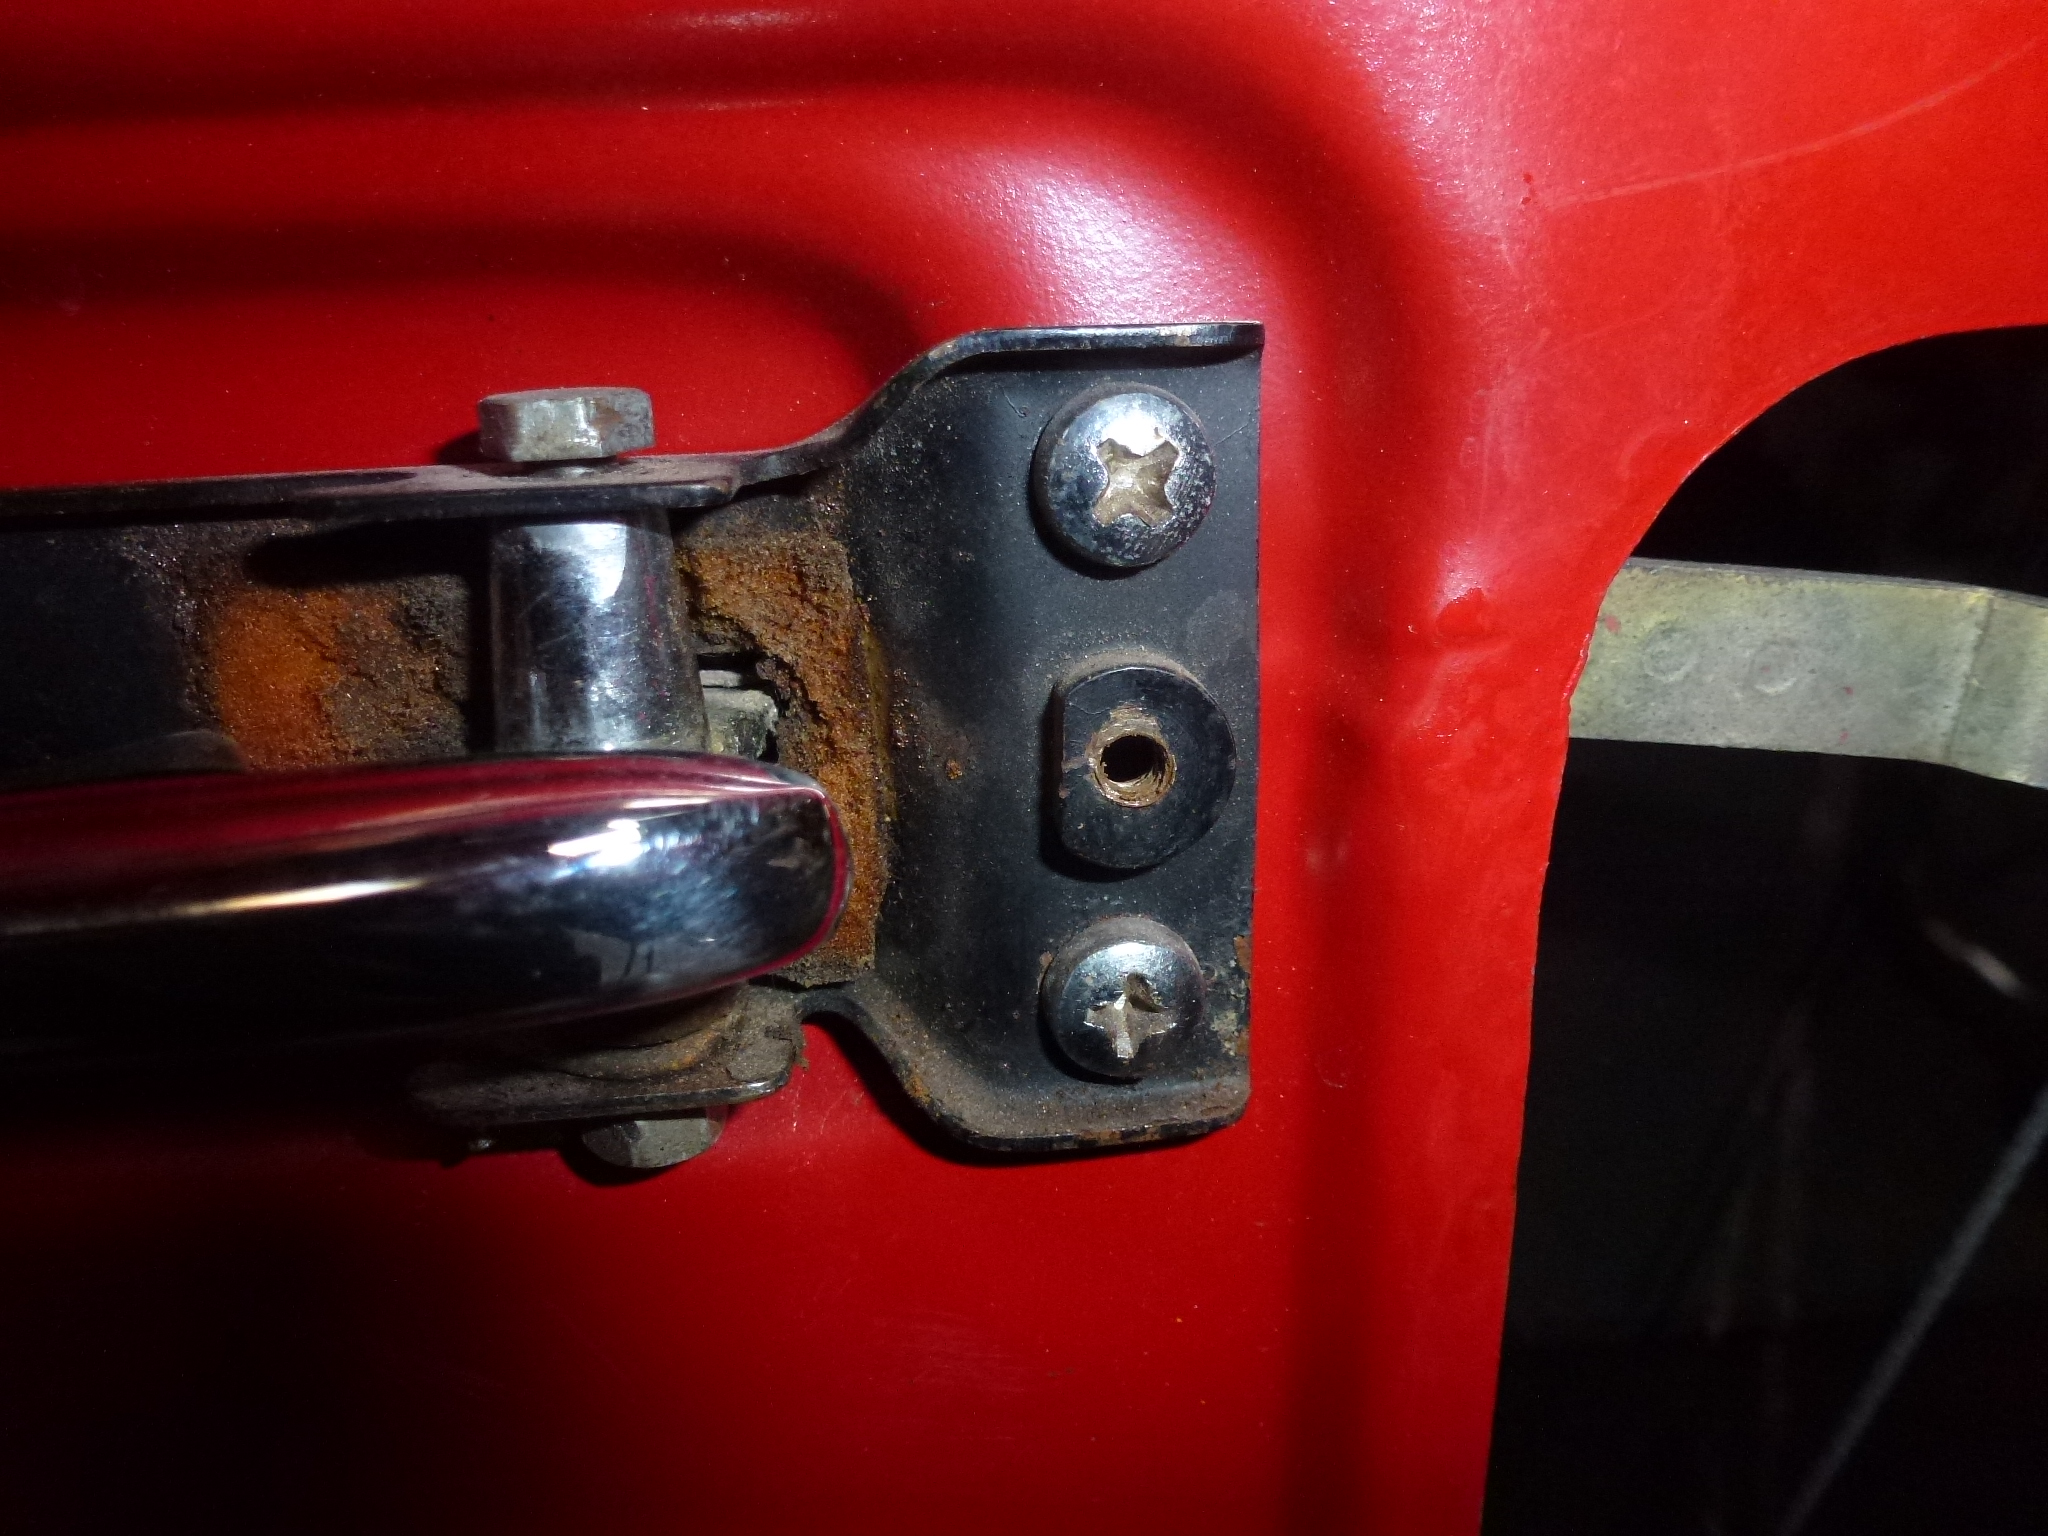
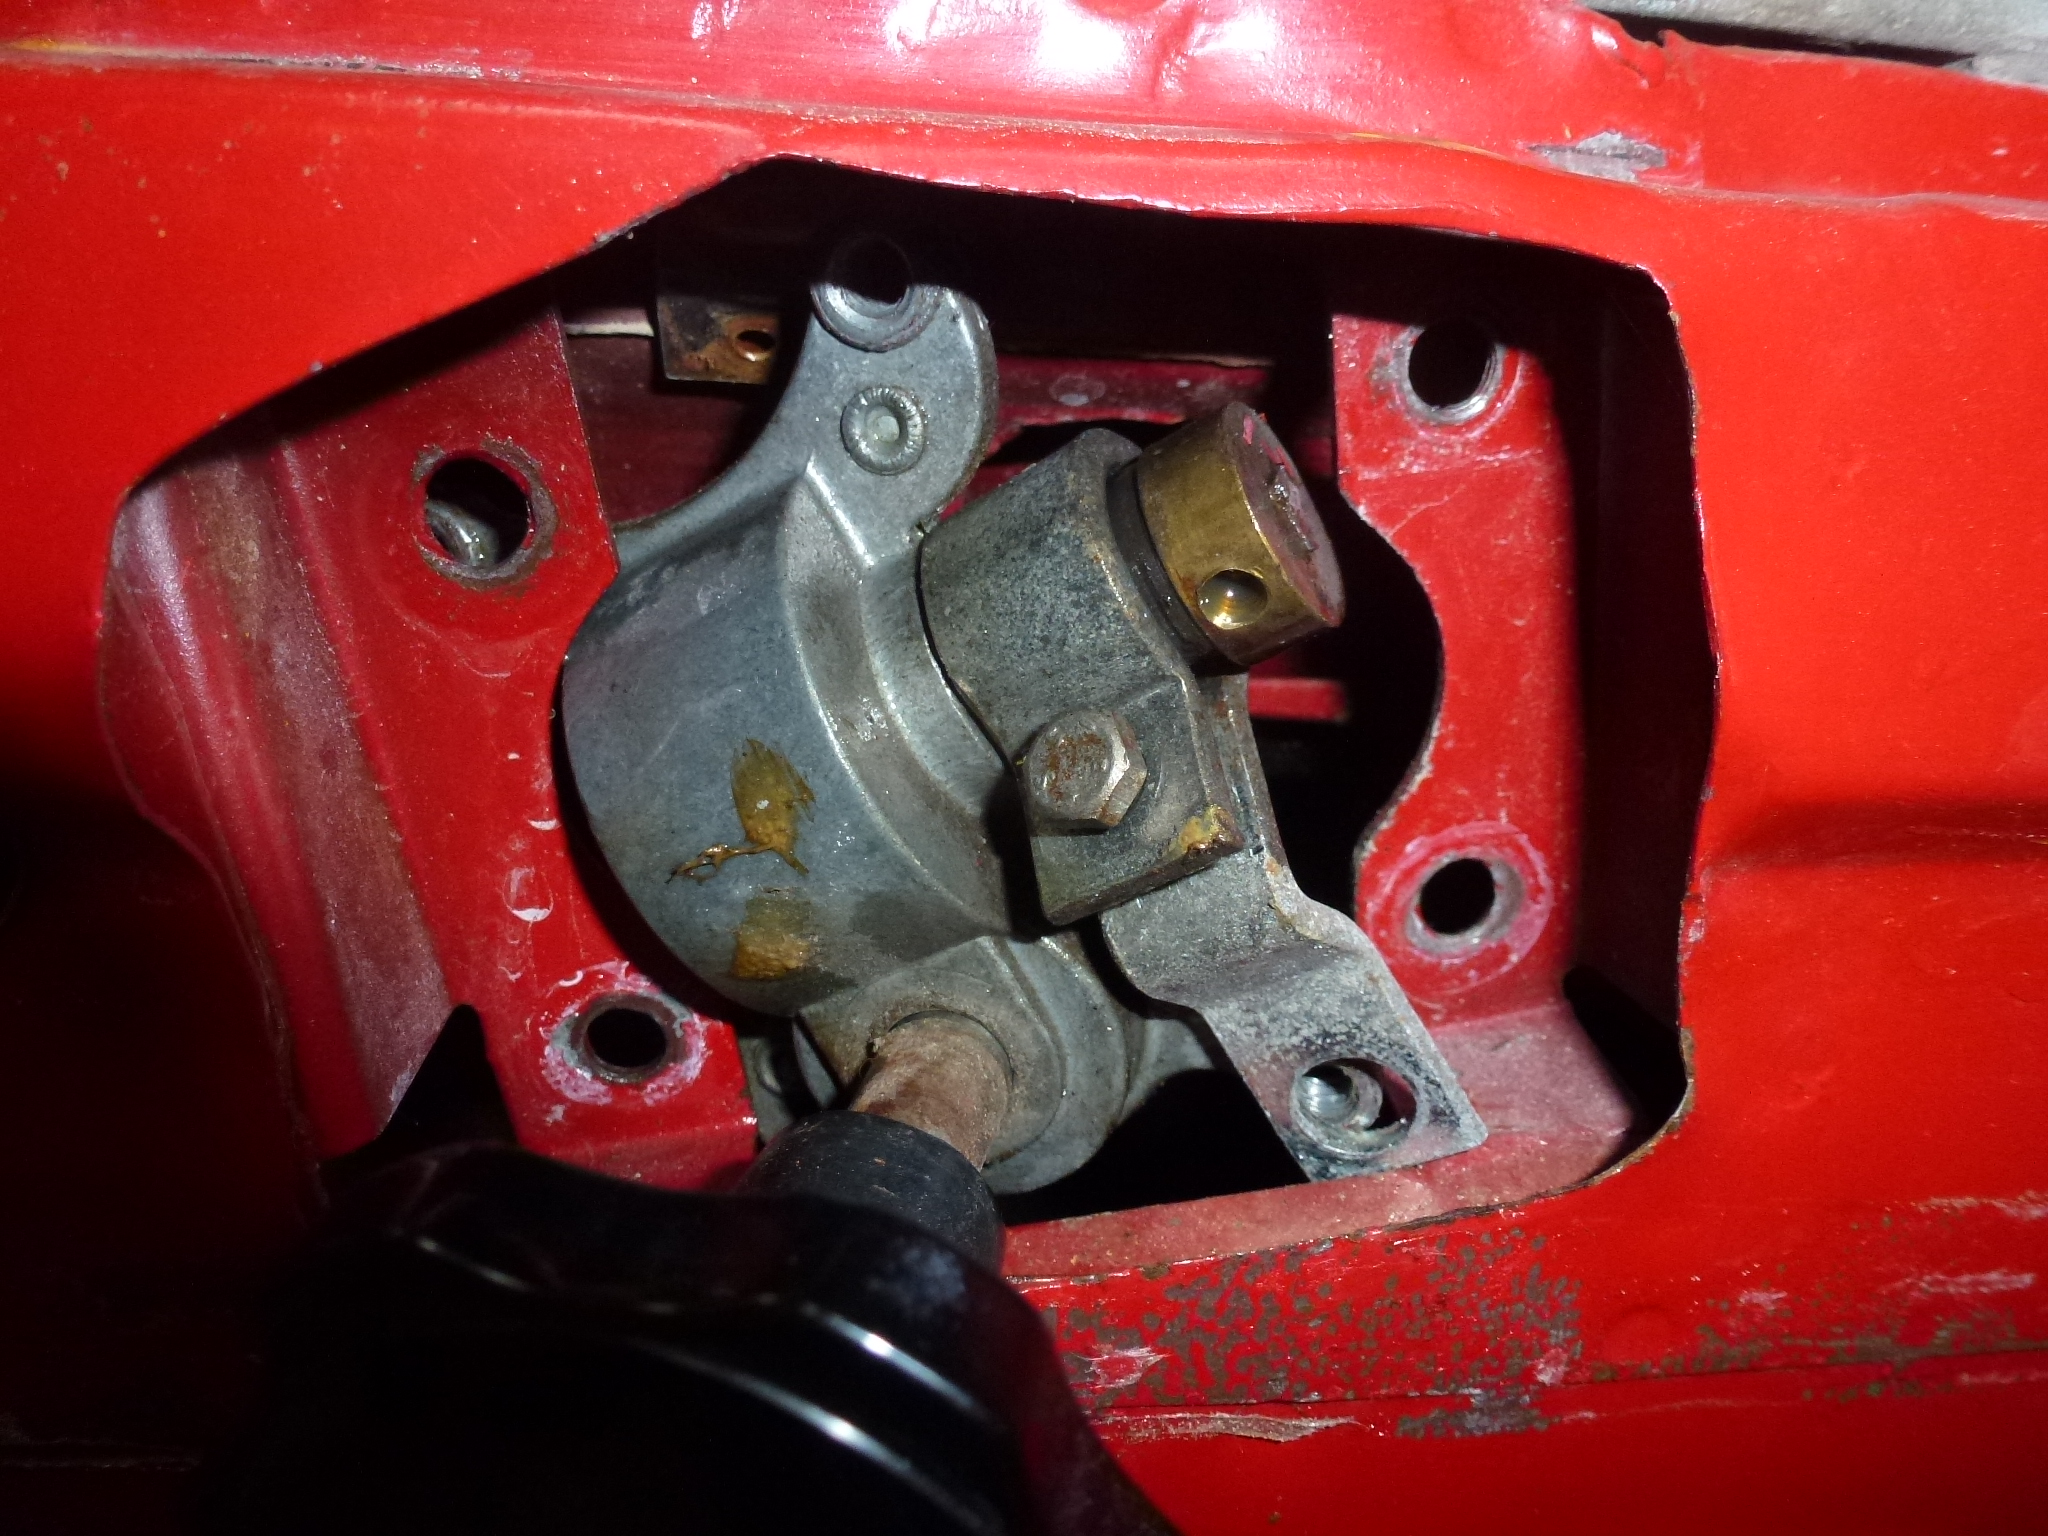
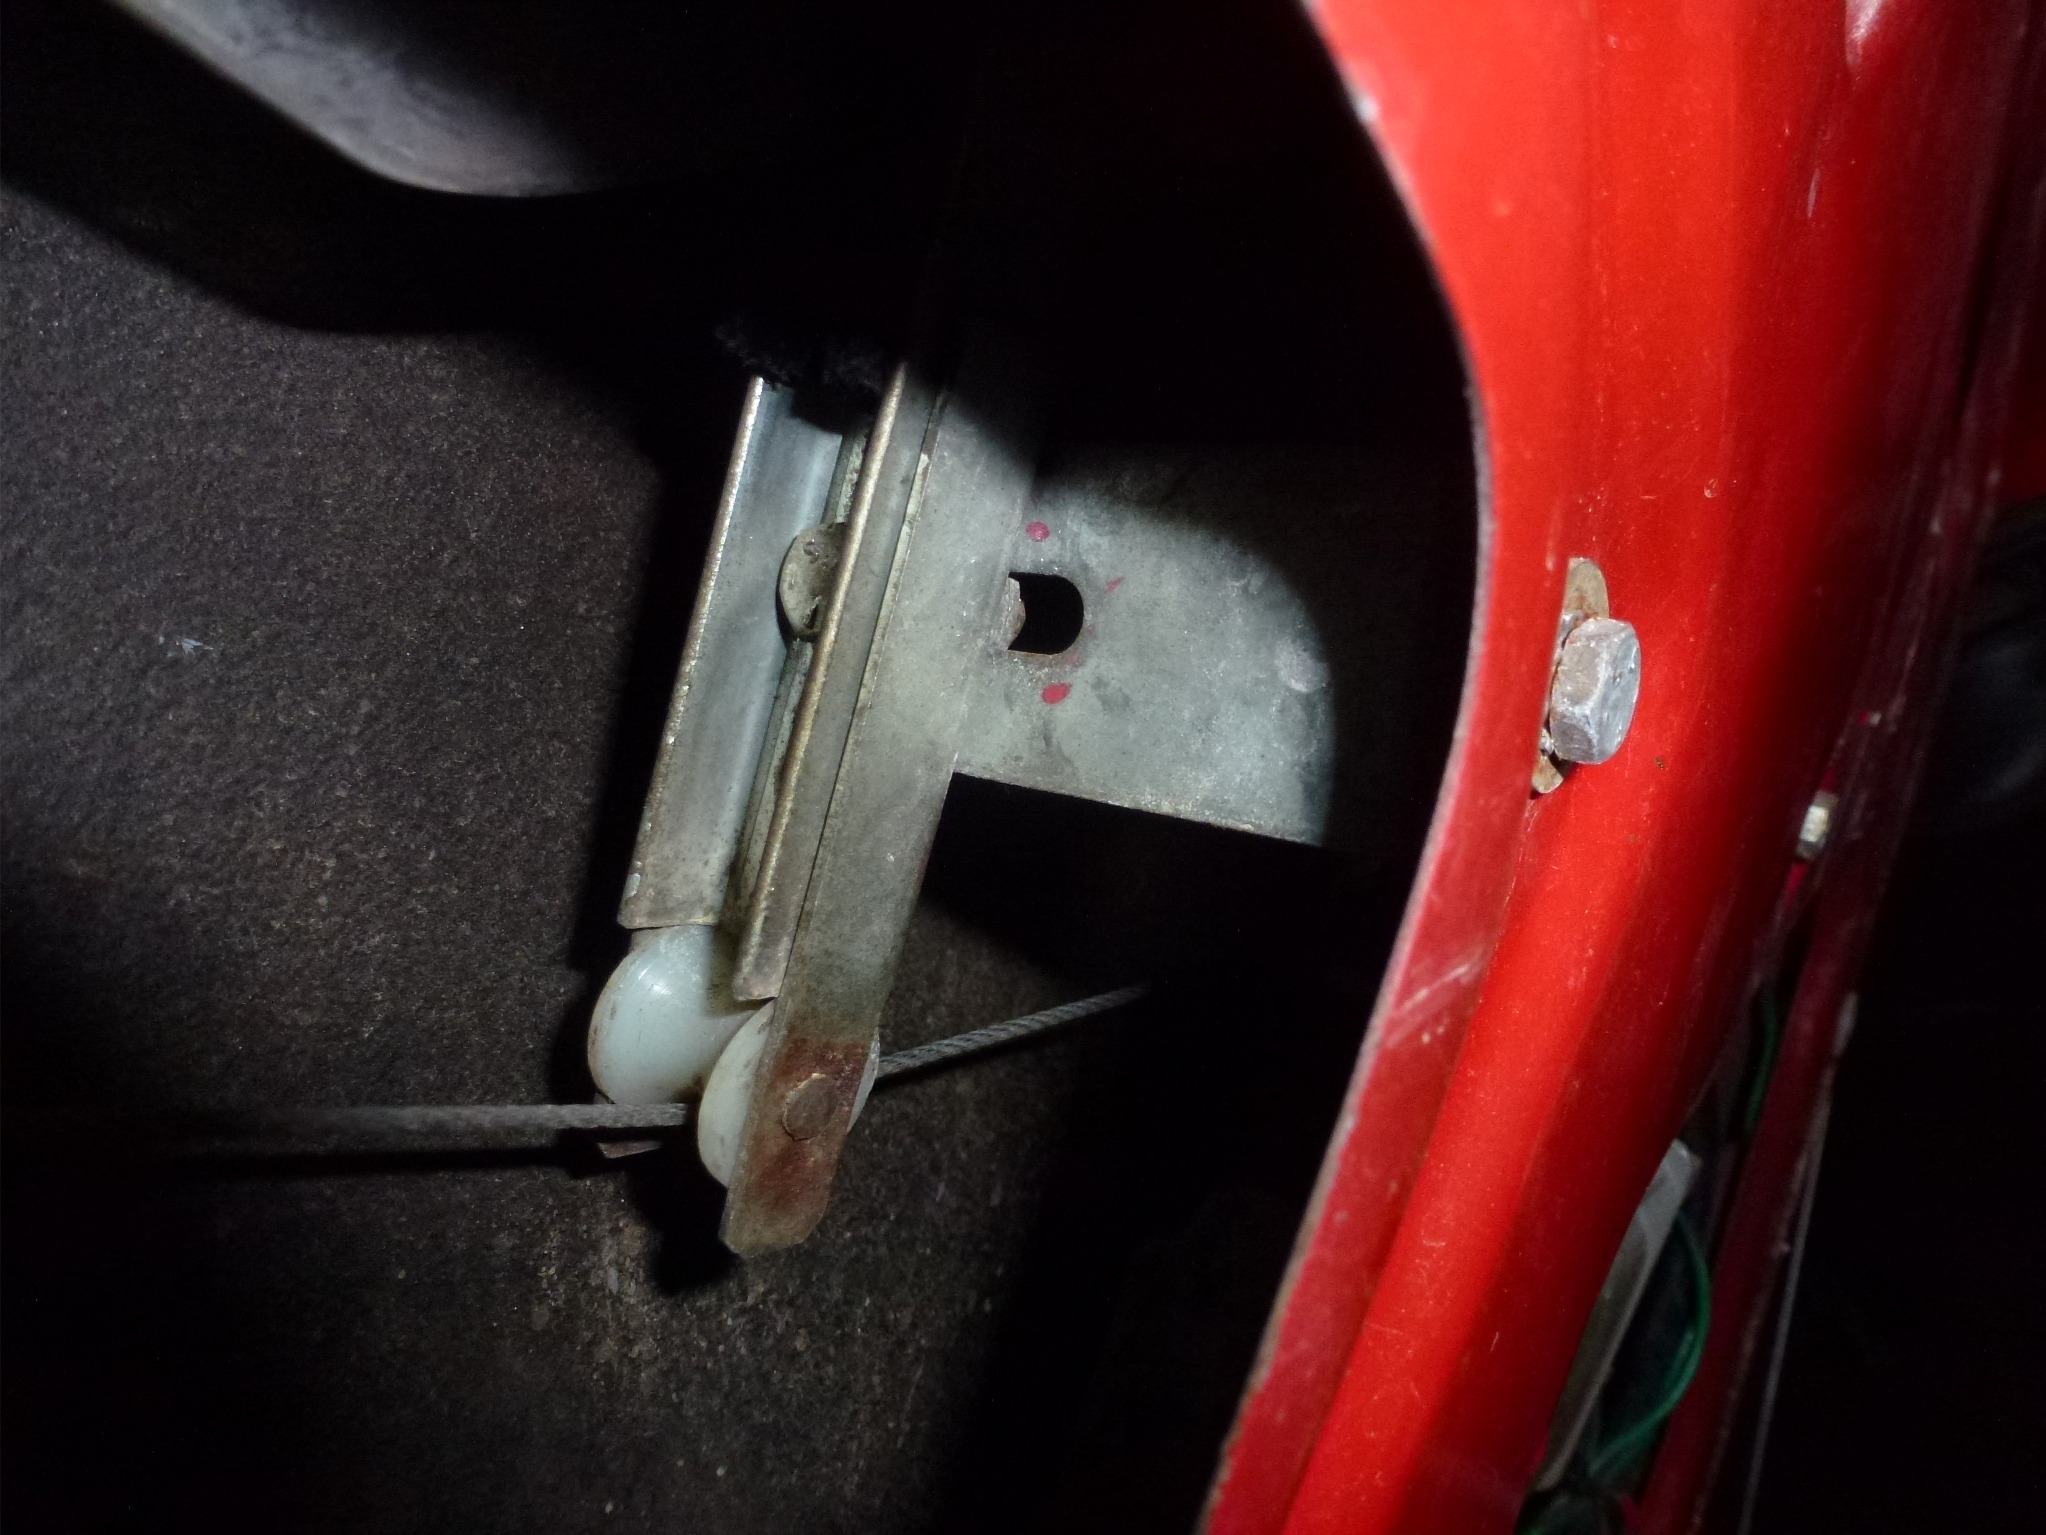
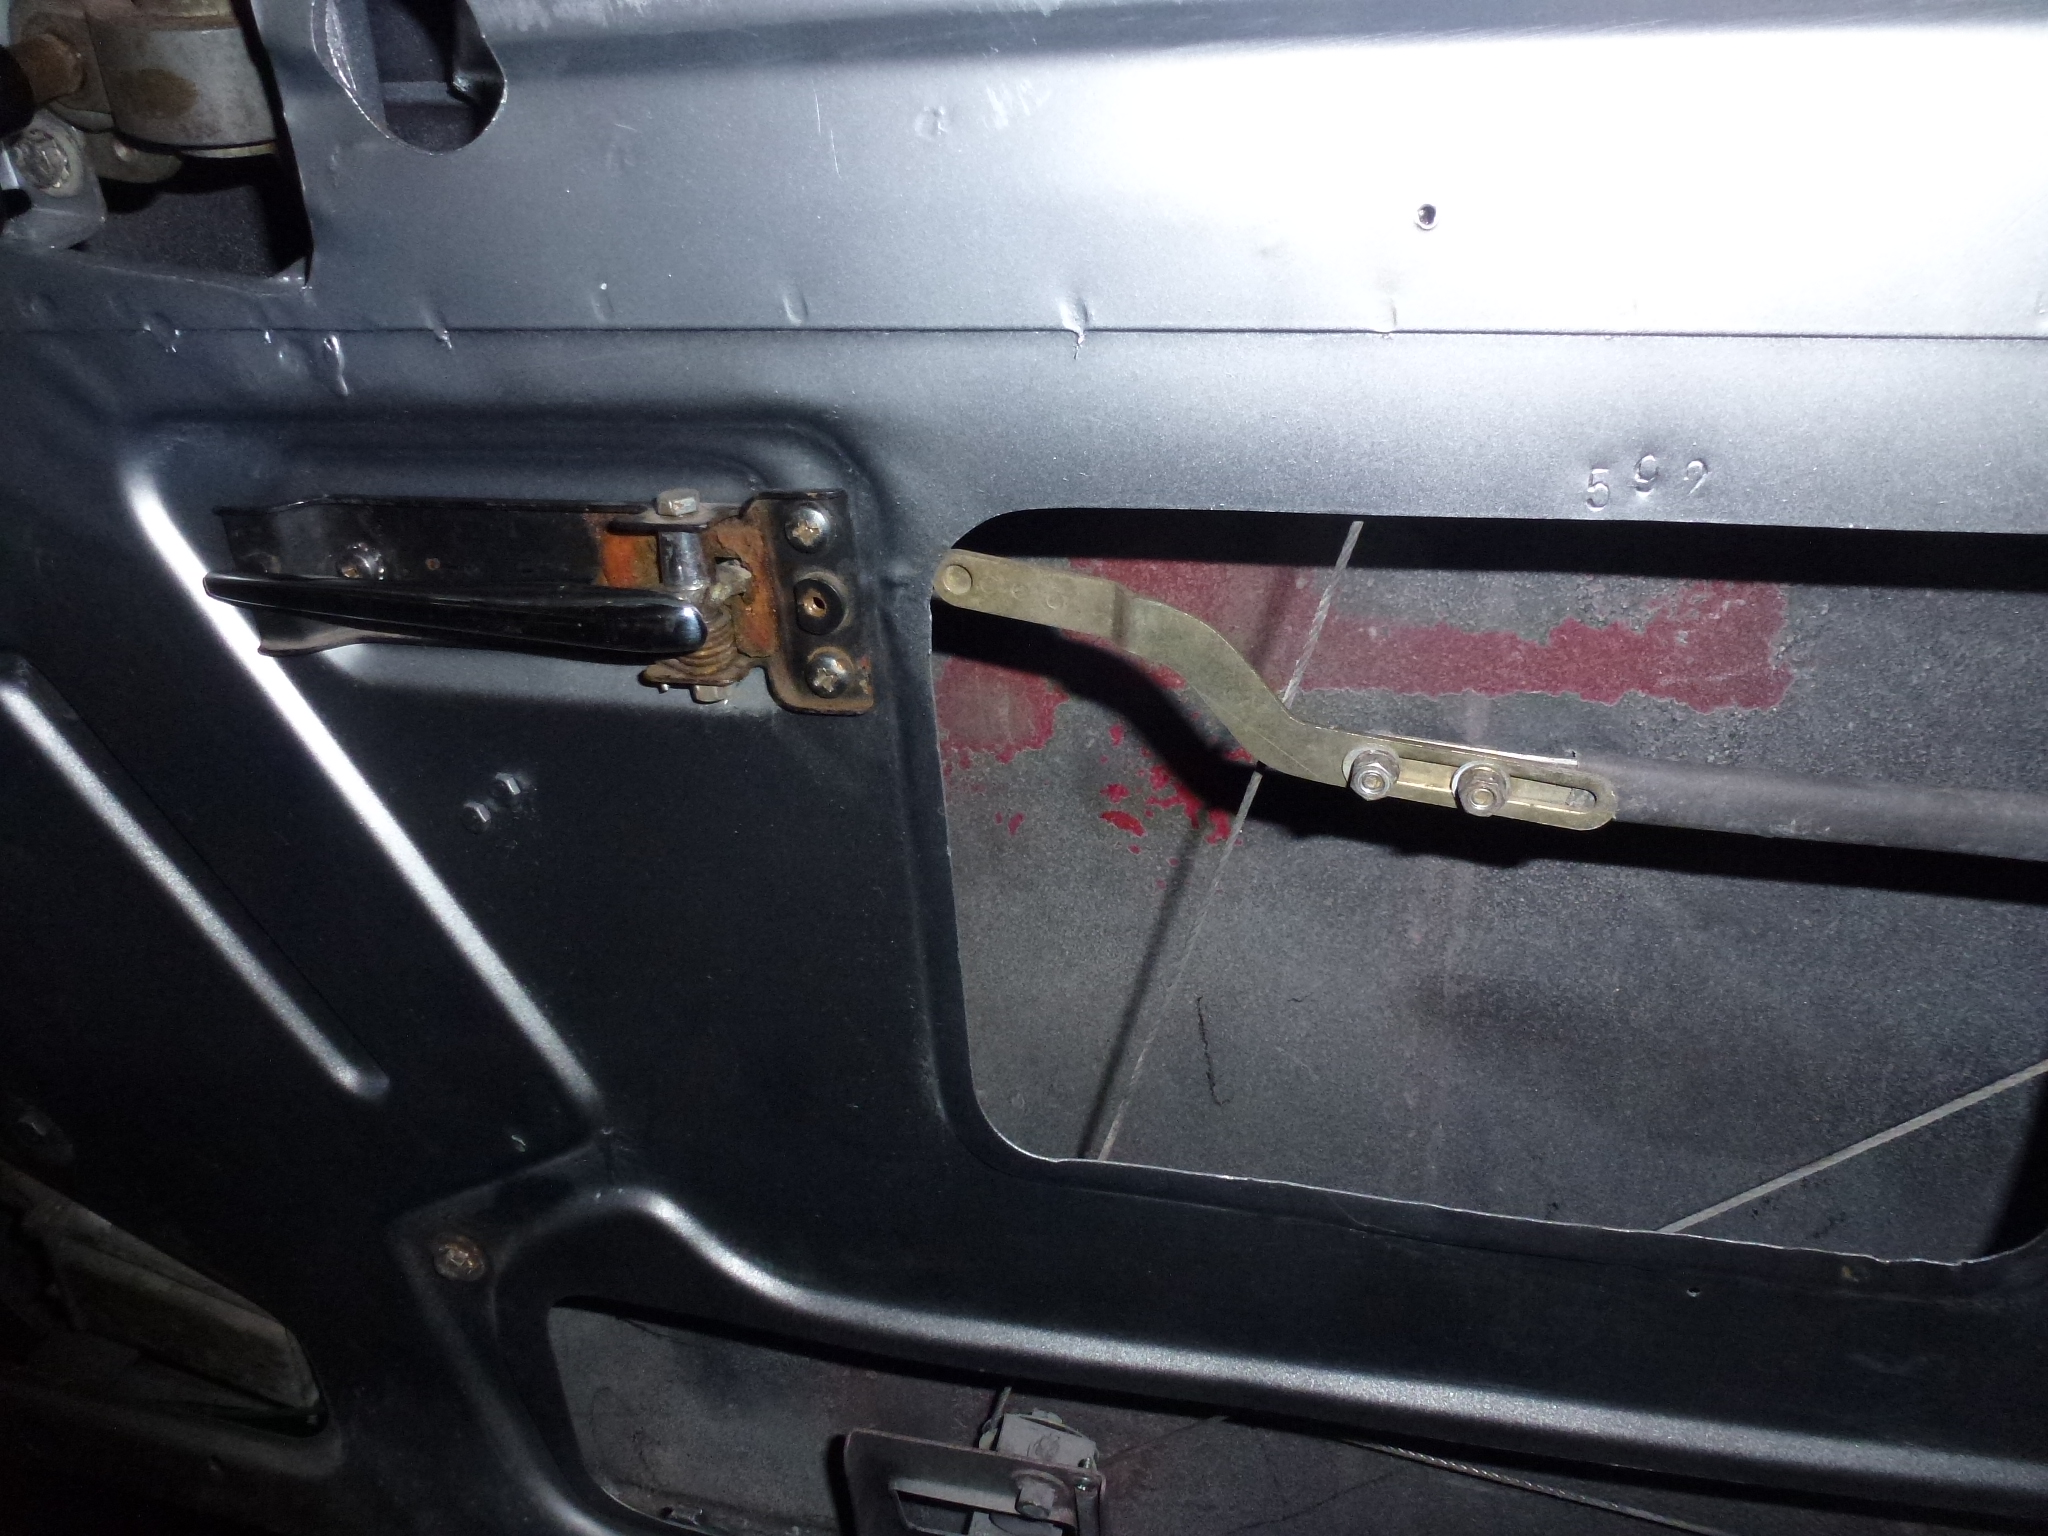
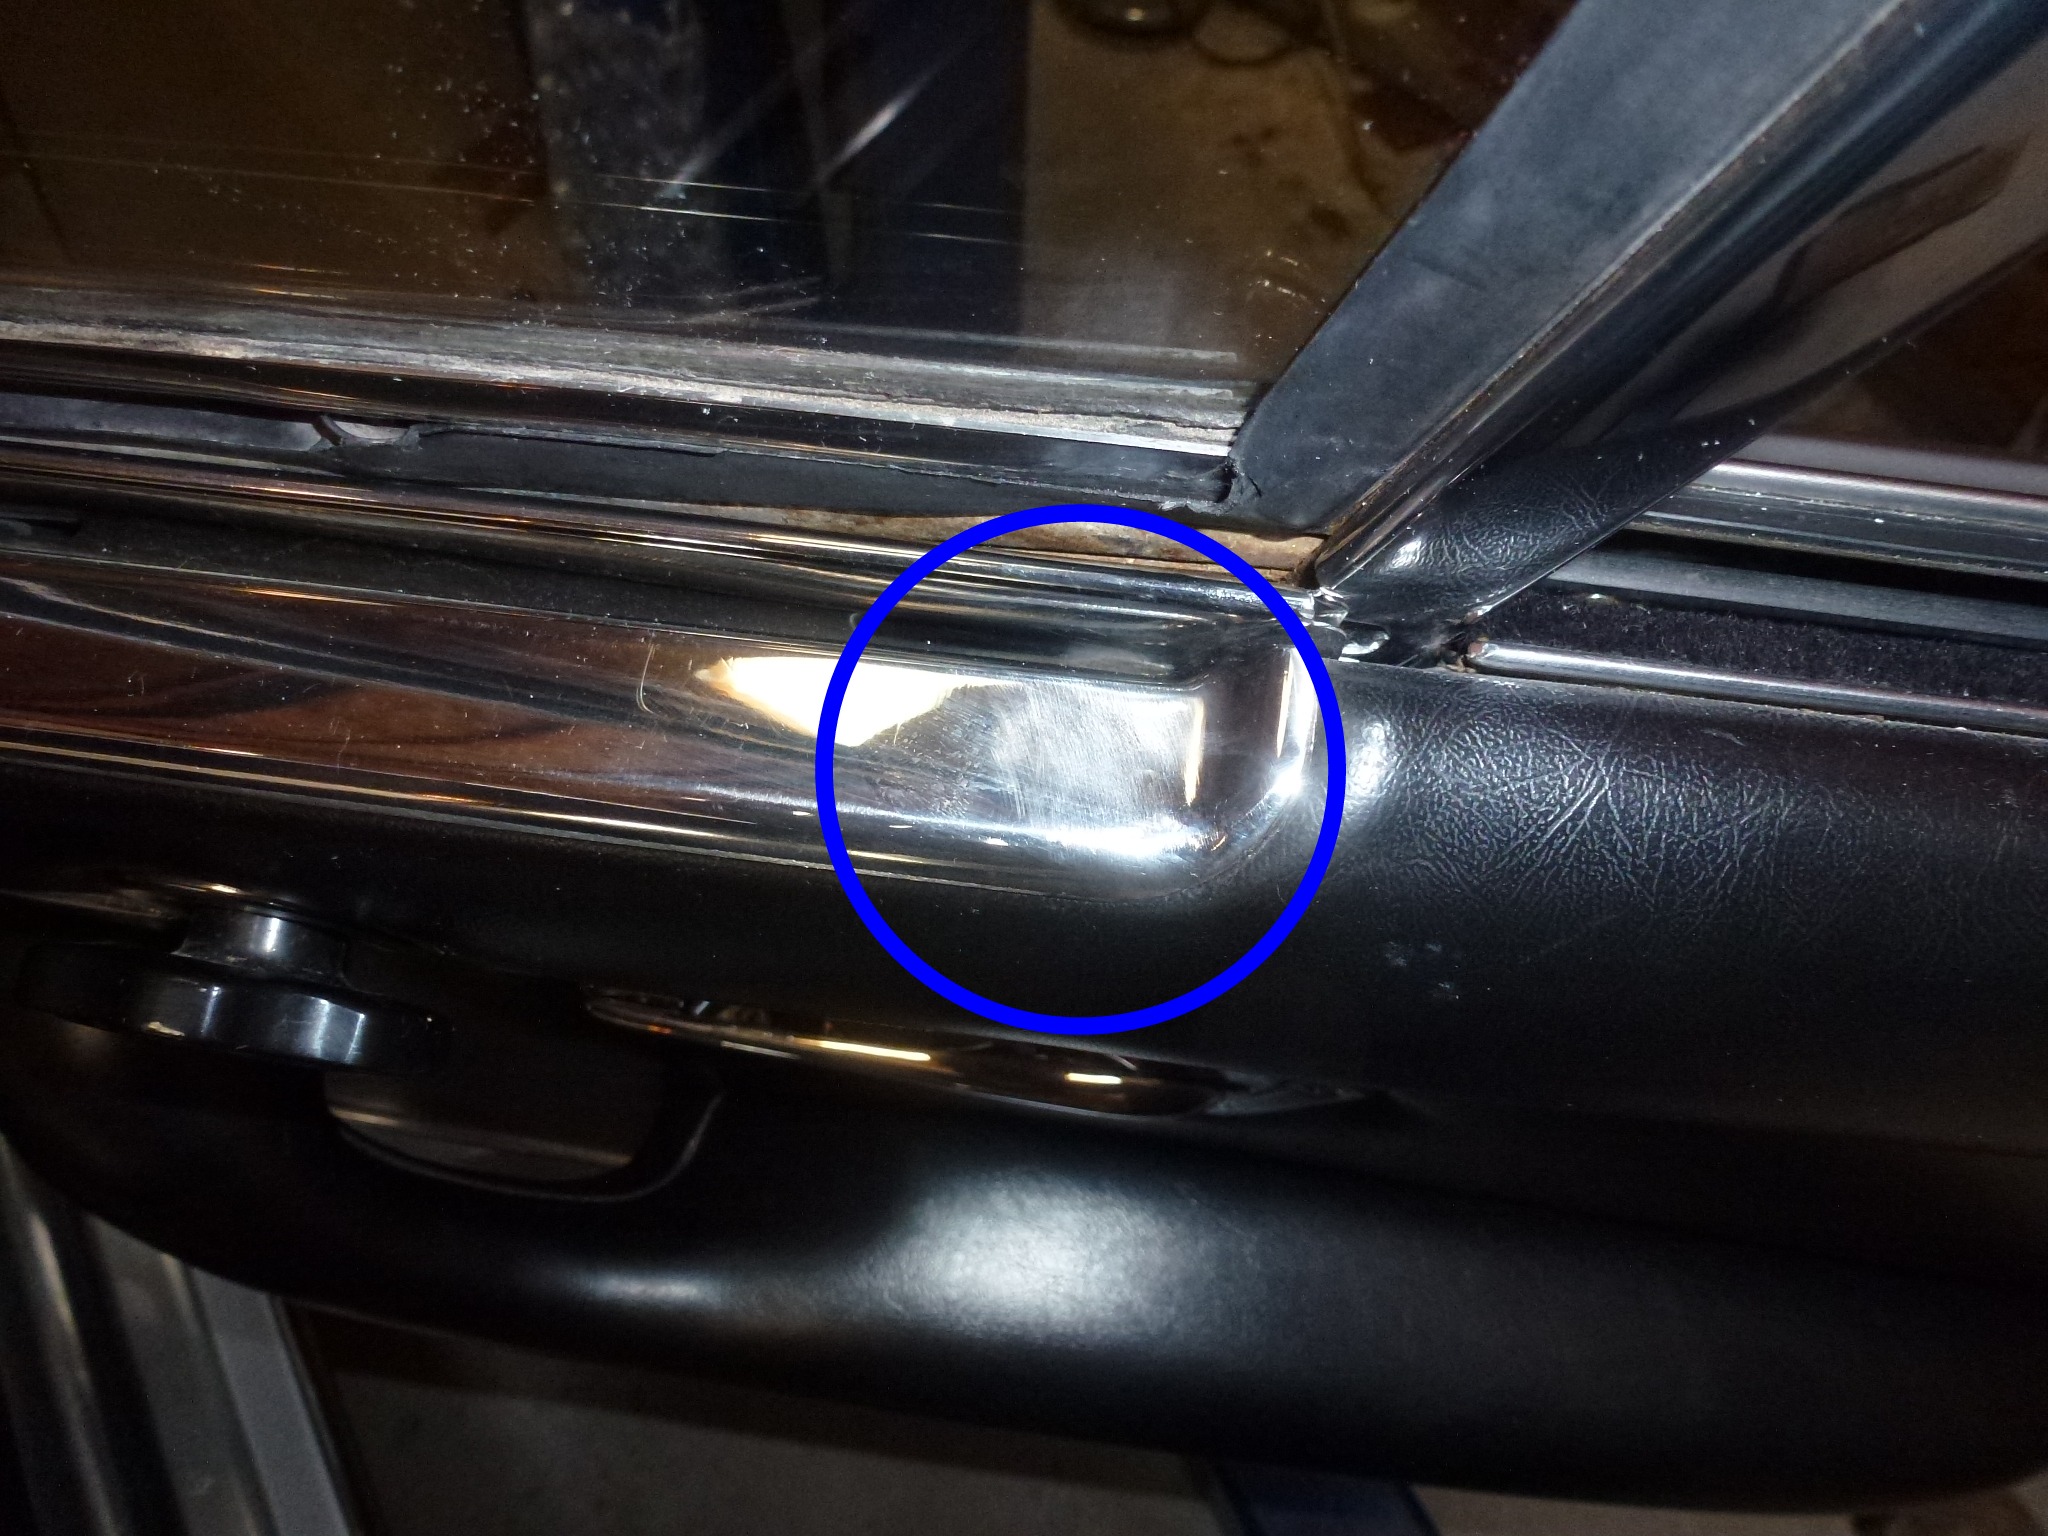
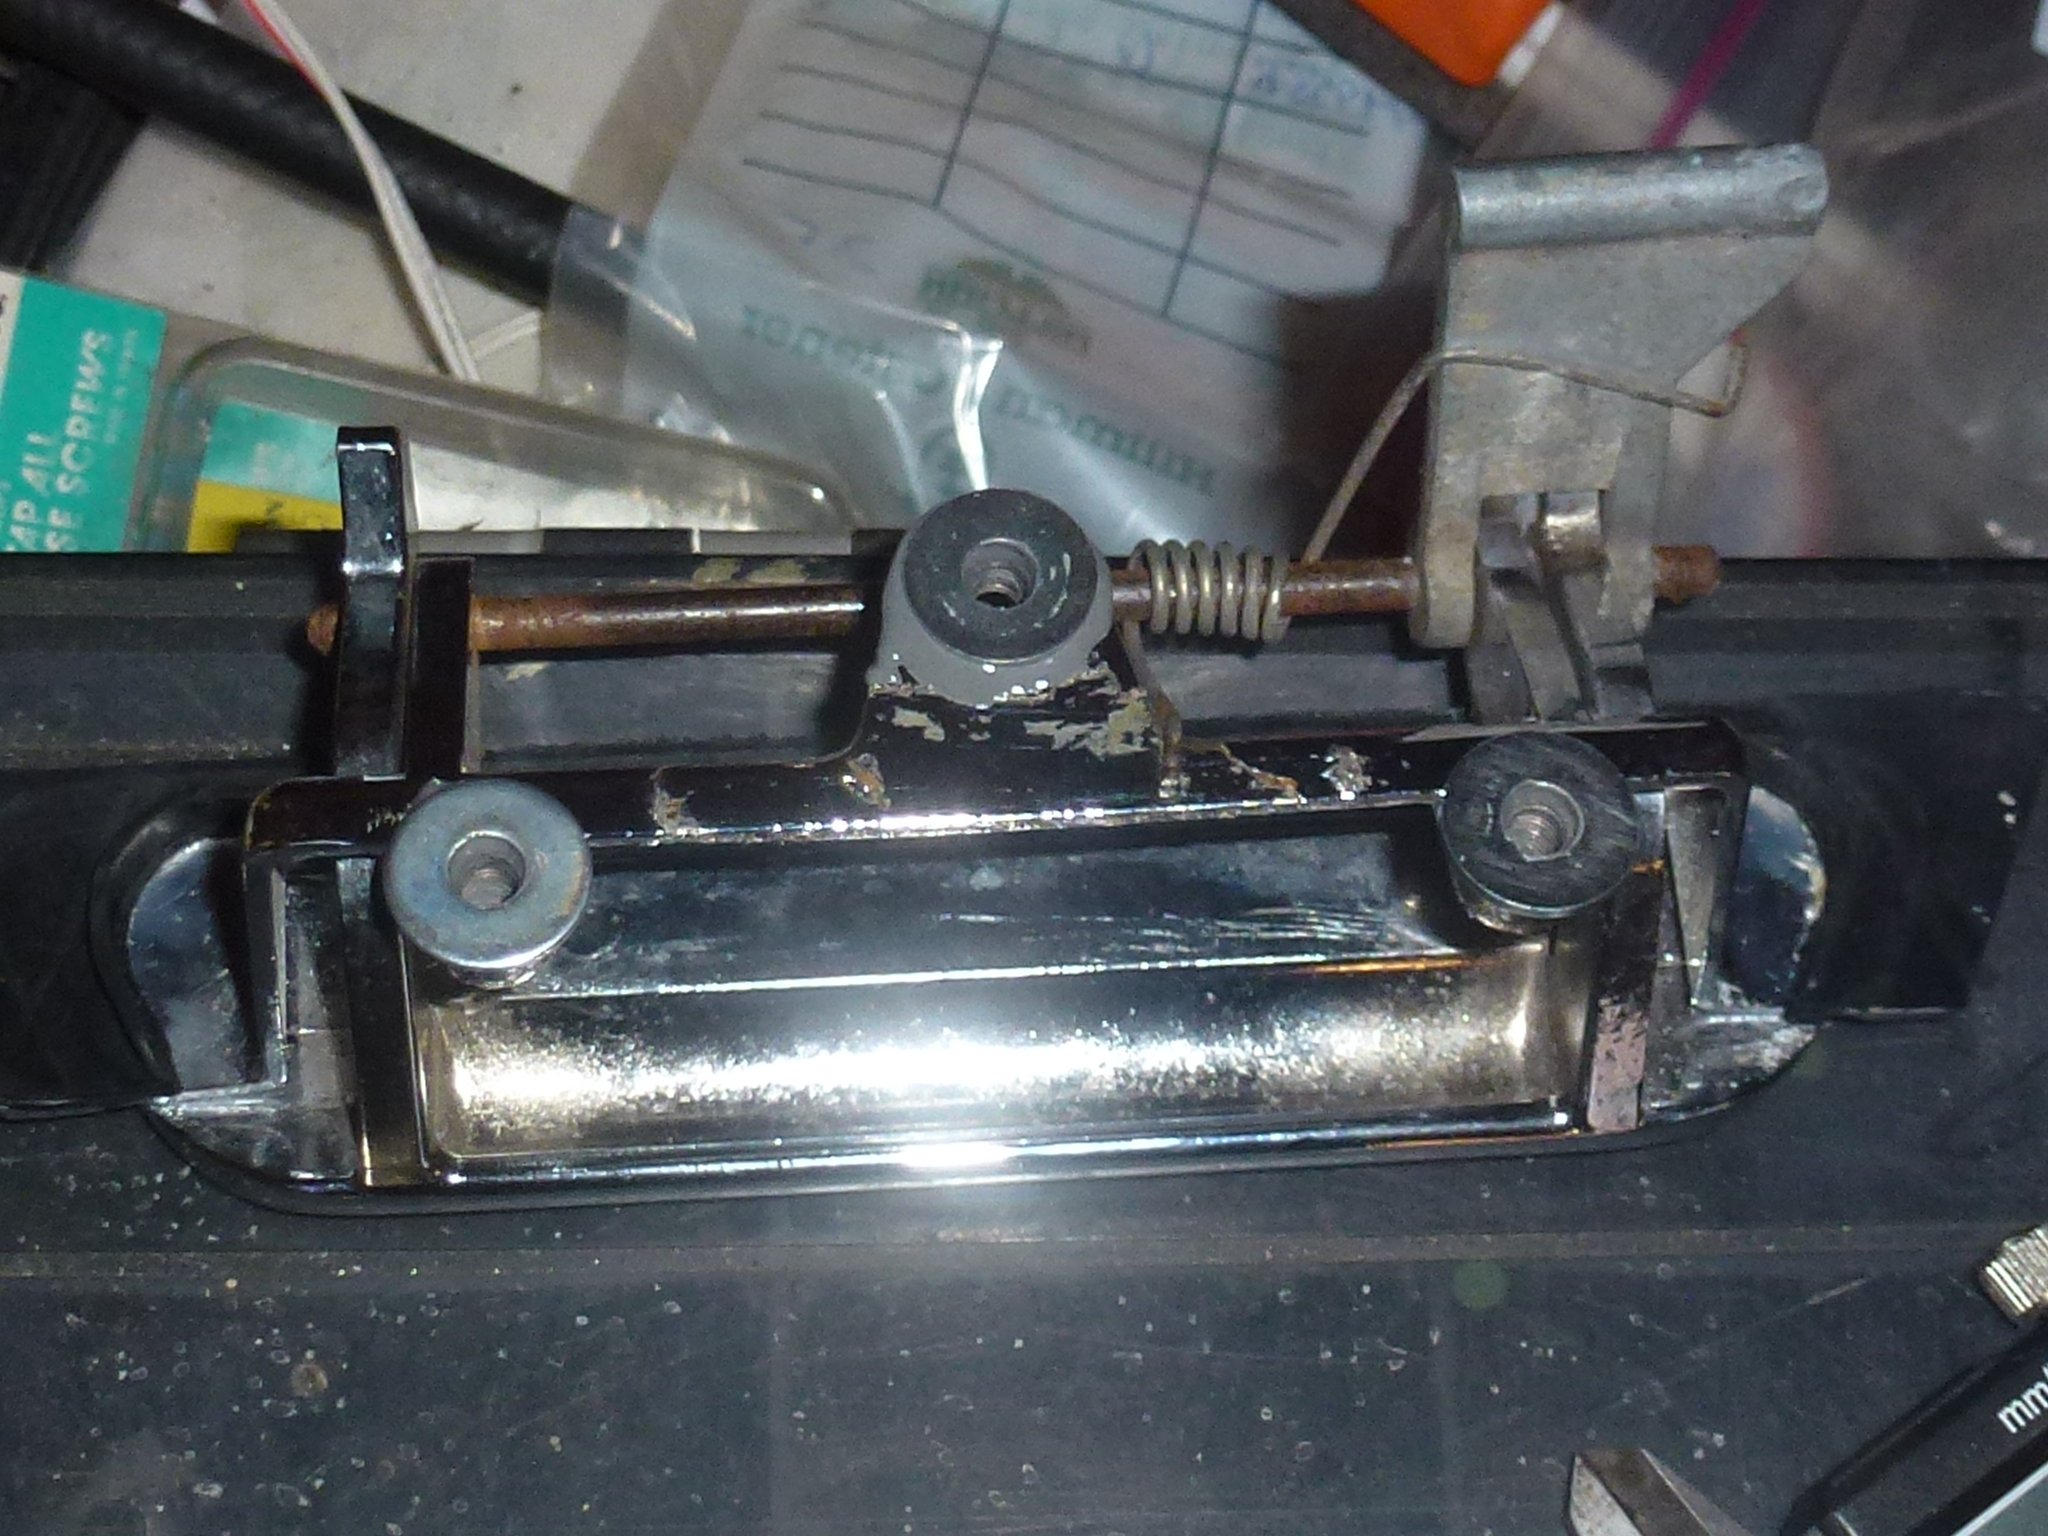
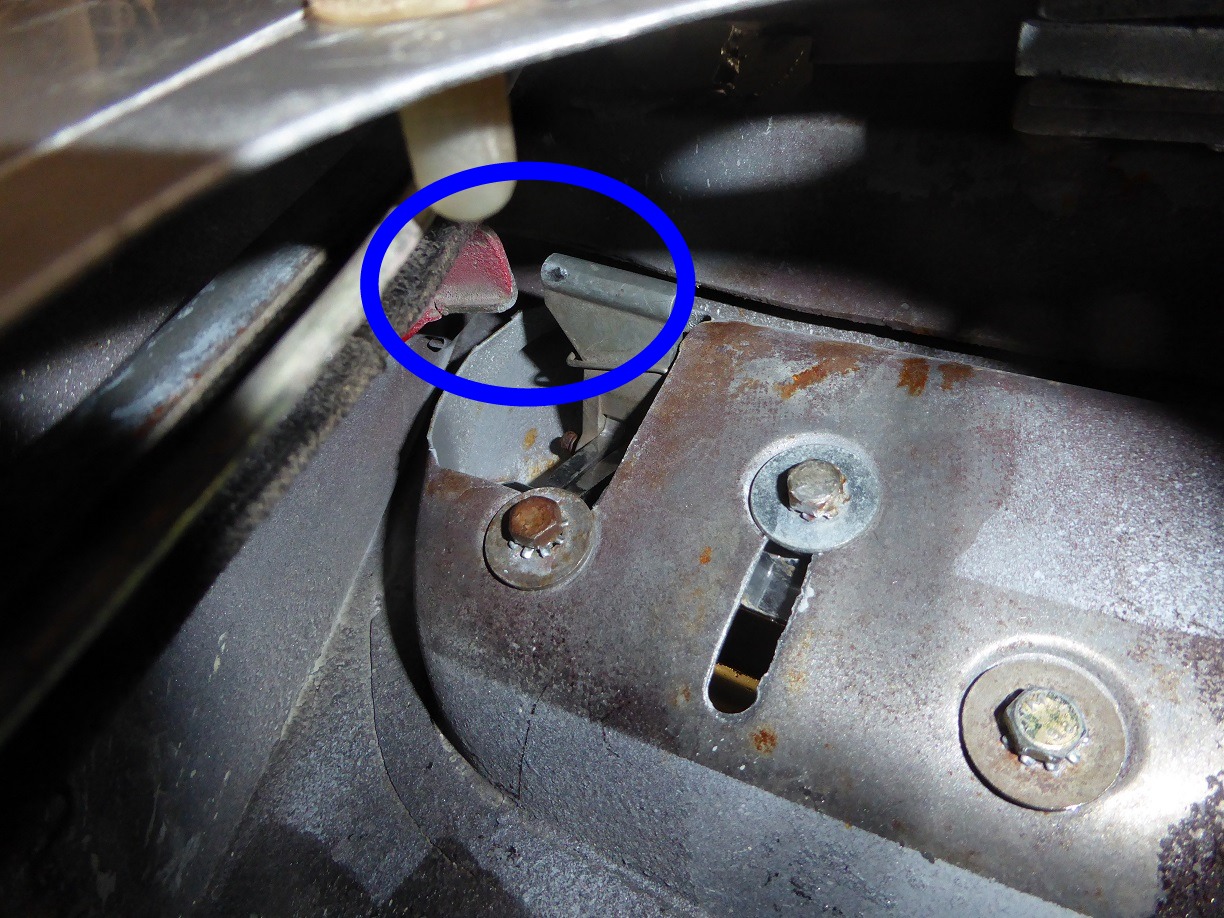
Remove the outside door latch. Three bolts and then some finagling to get it clear of the unlatch arm. When this is removed, you can still unlatch the door by sticking your thumb into the opening and pushing down of the latch arm (circled in blue).
-
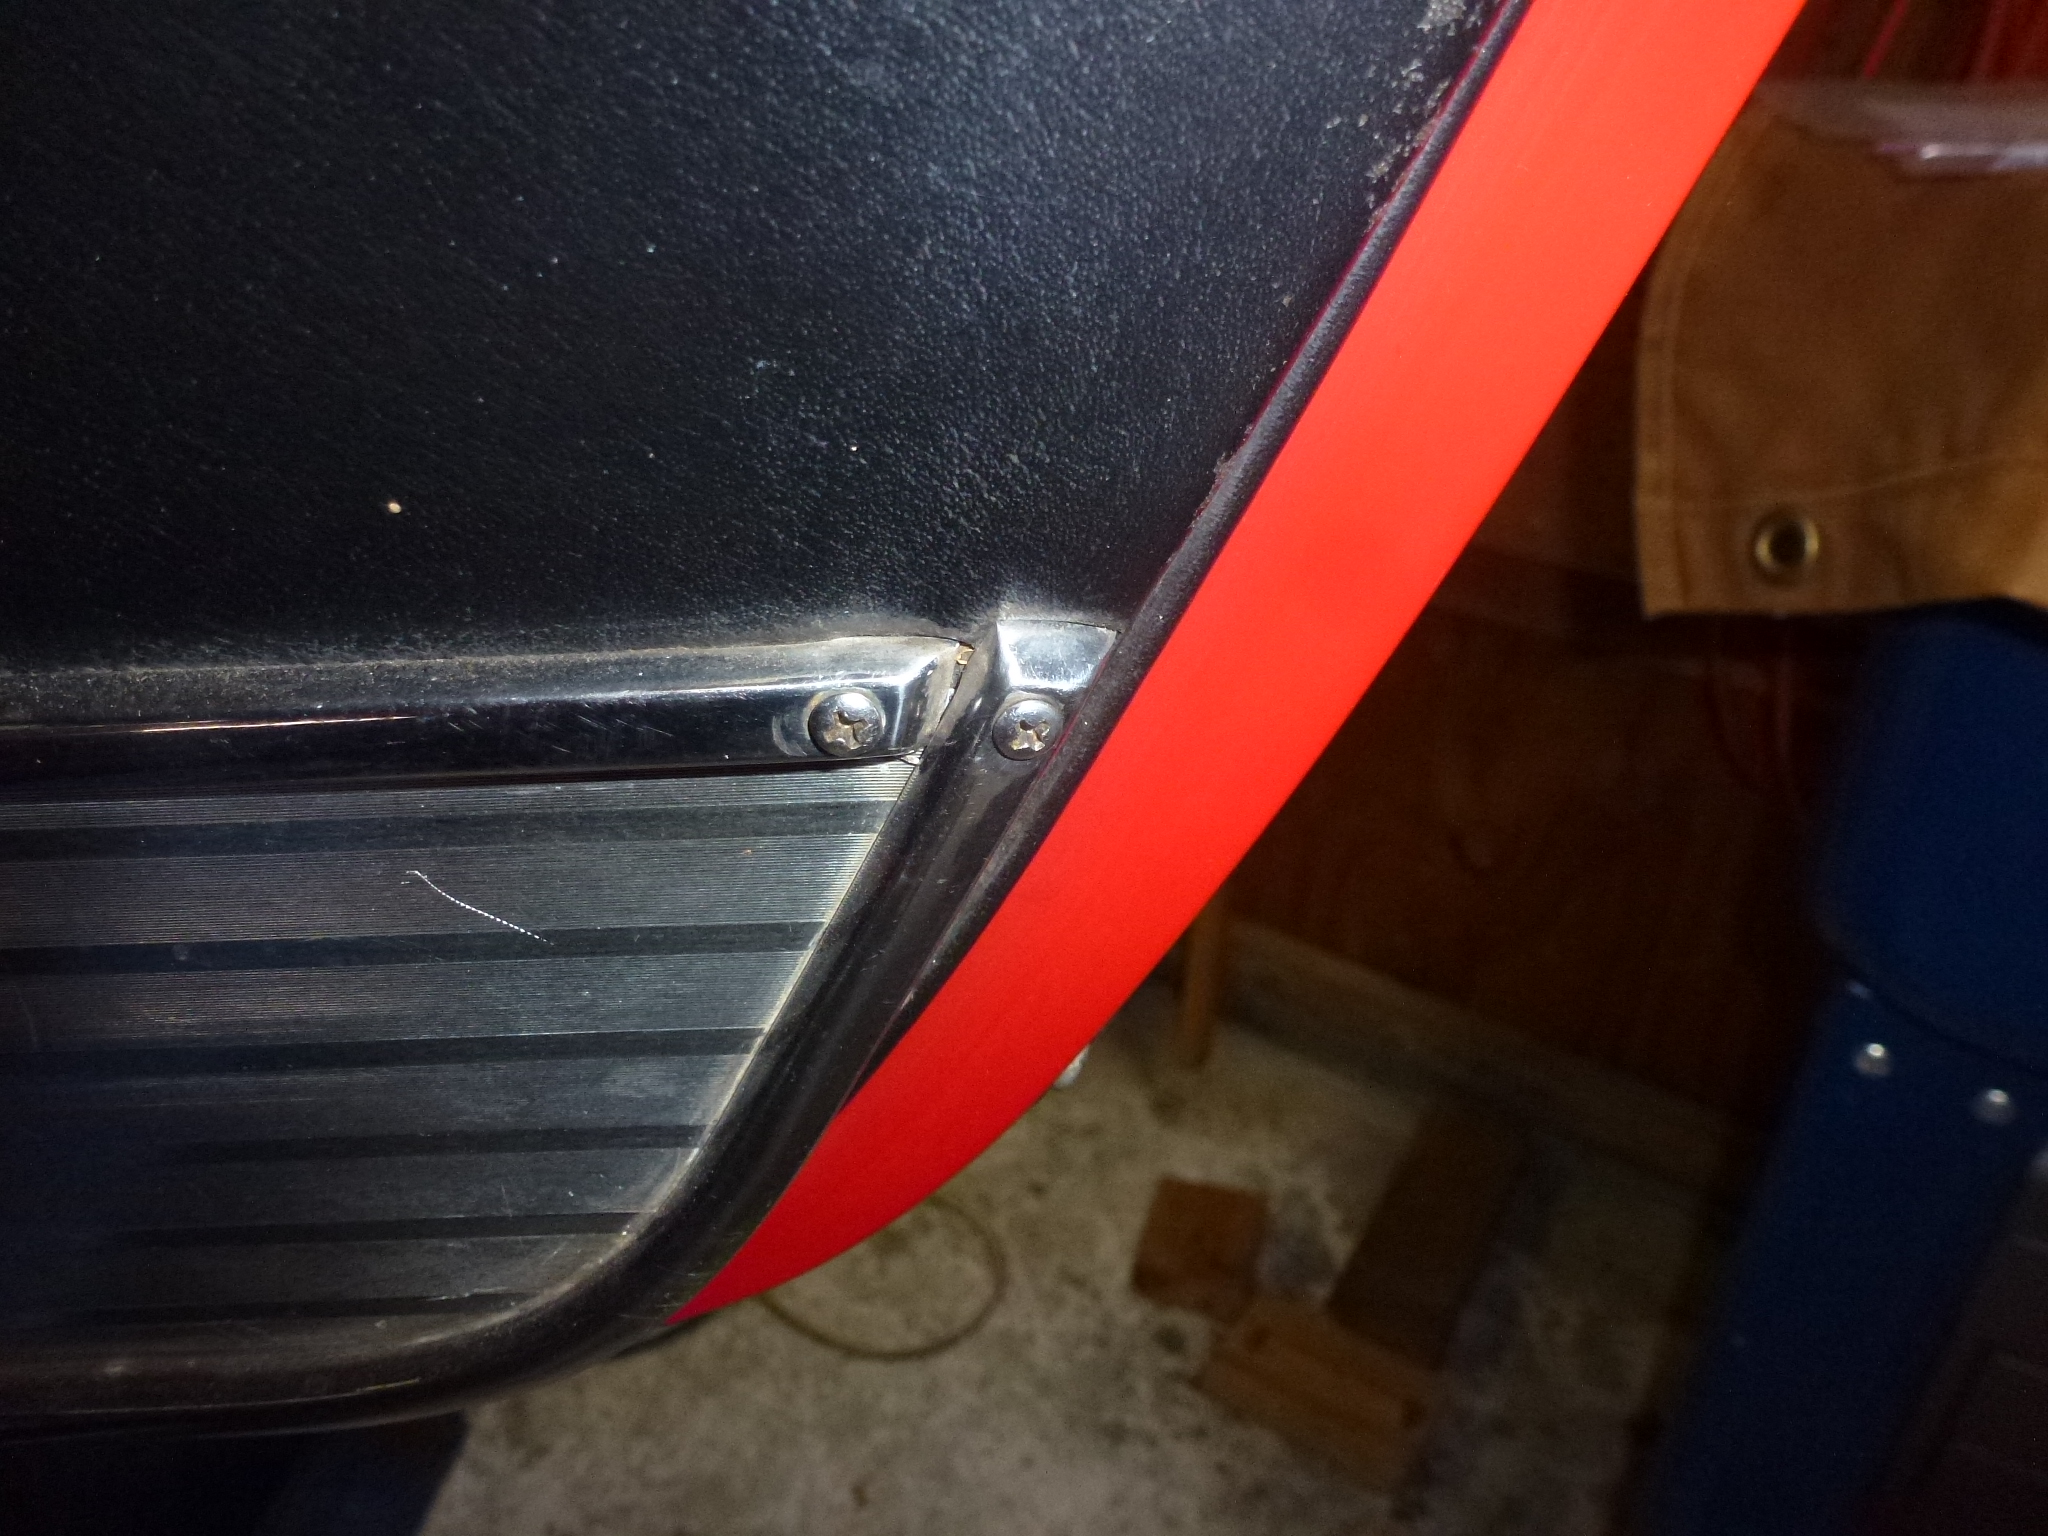
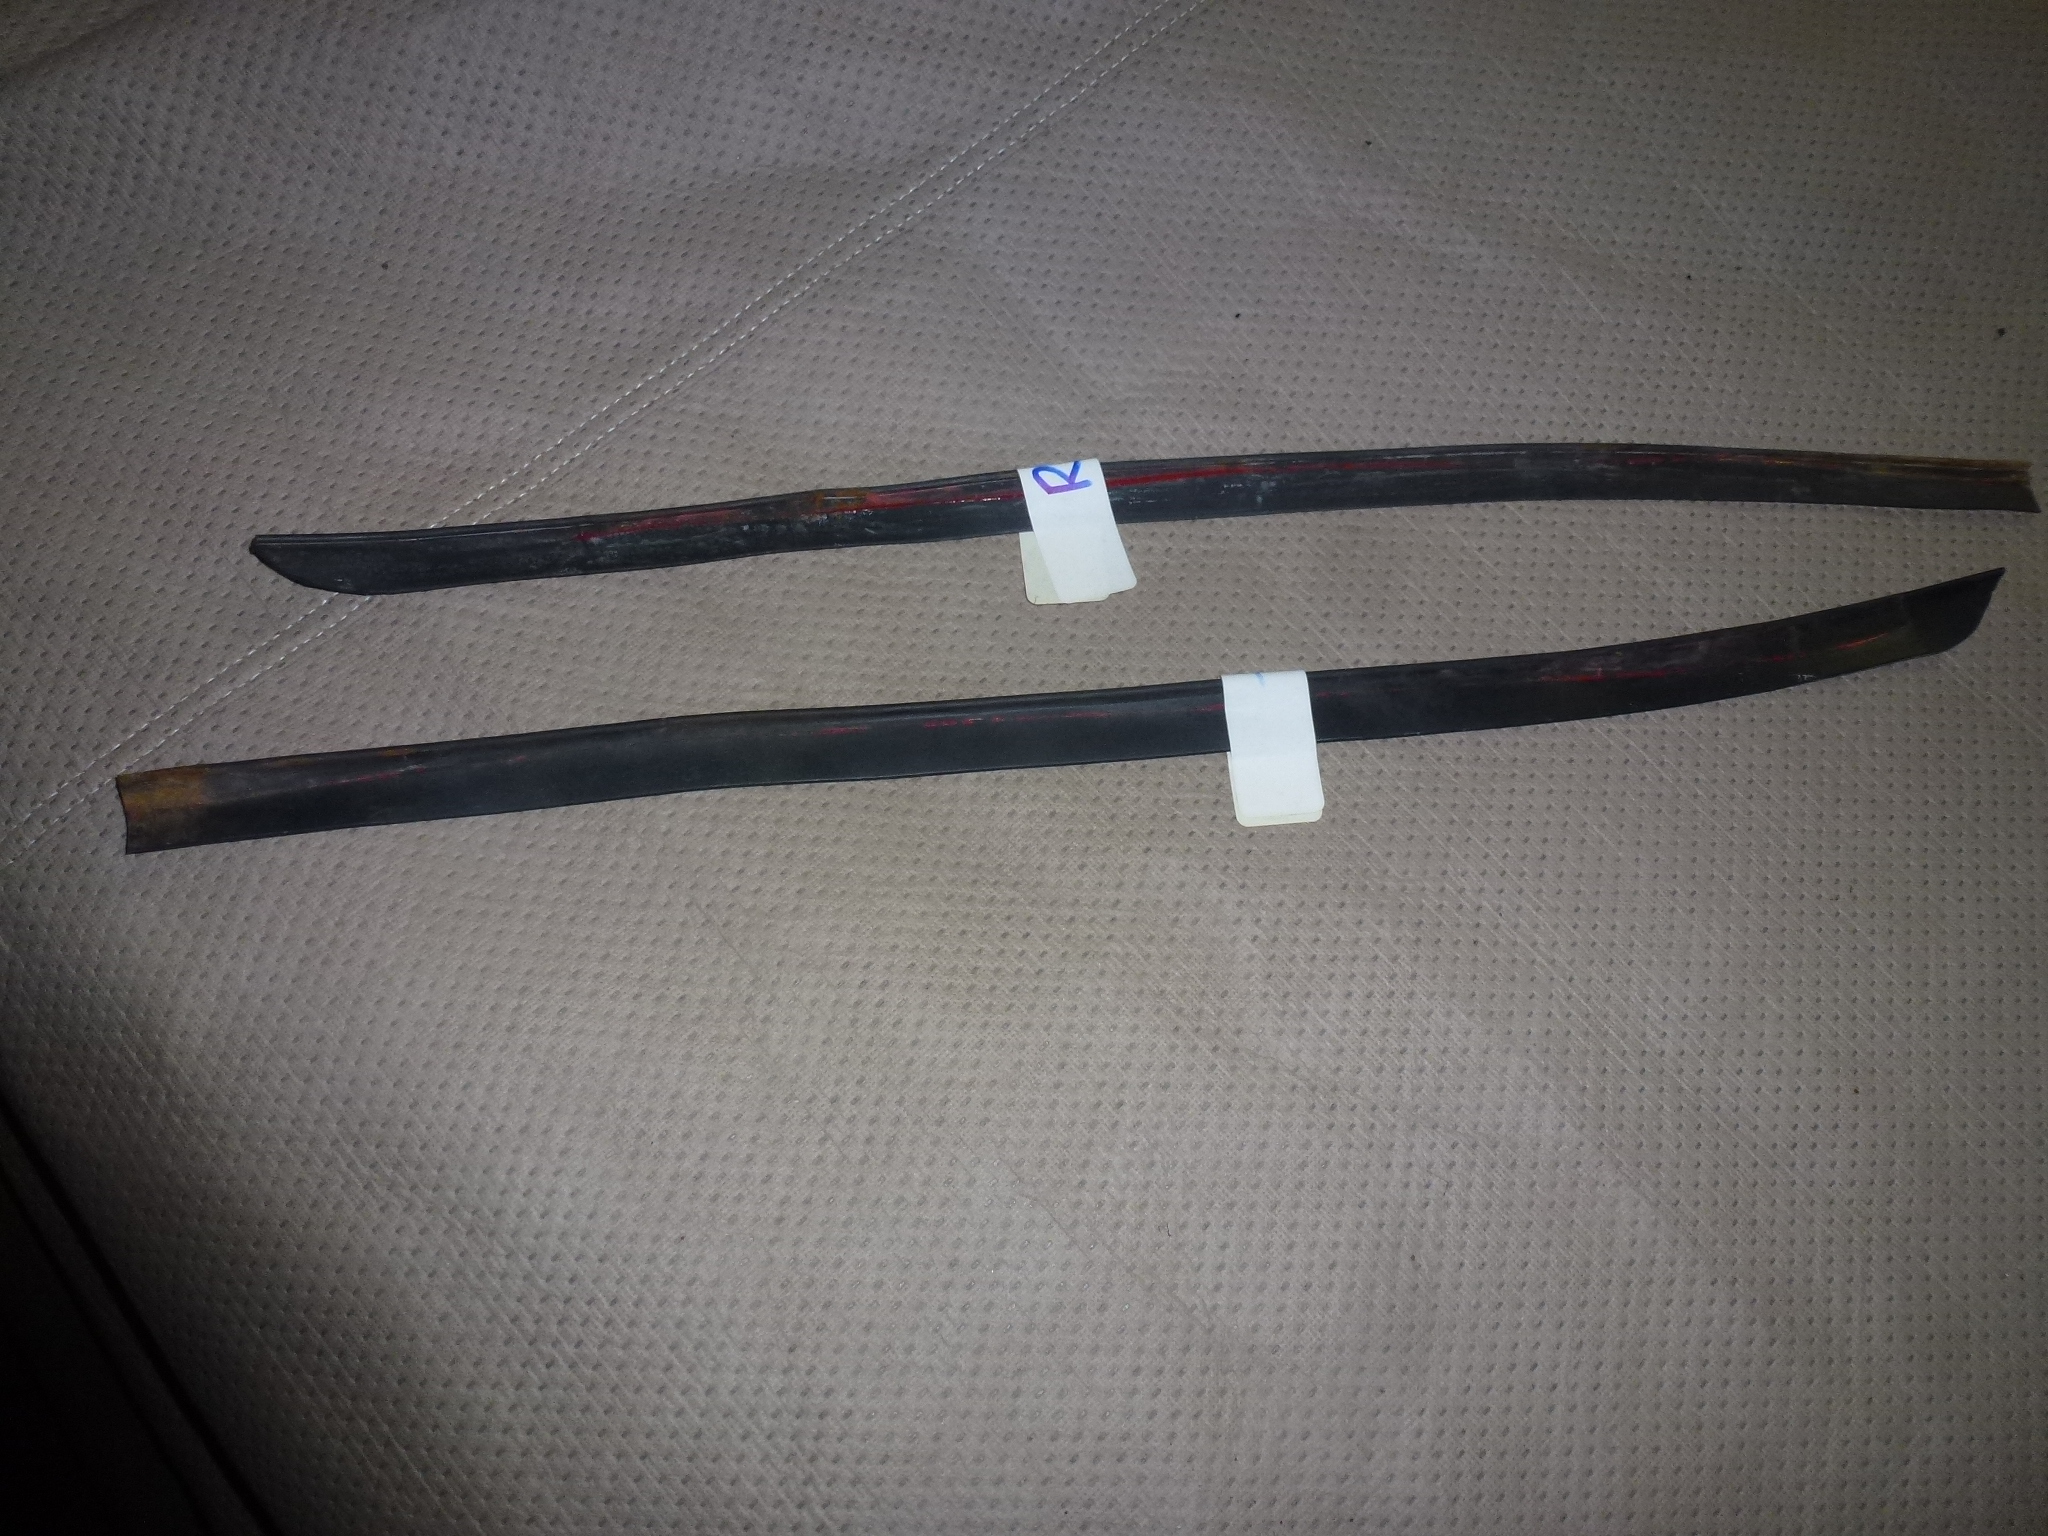
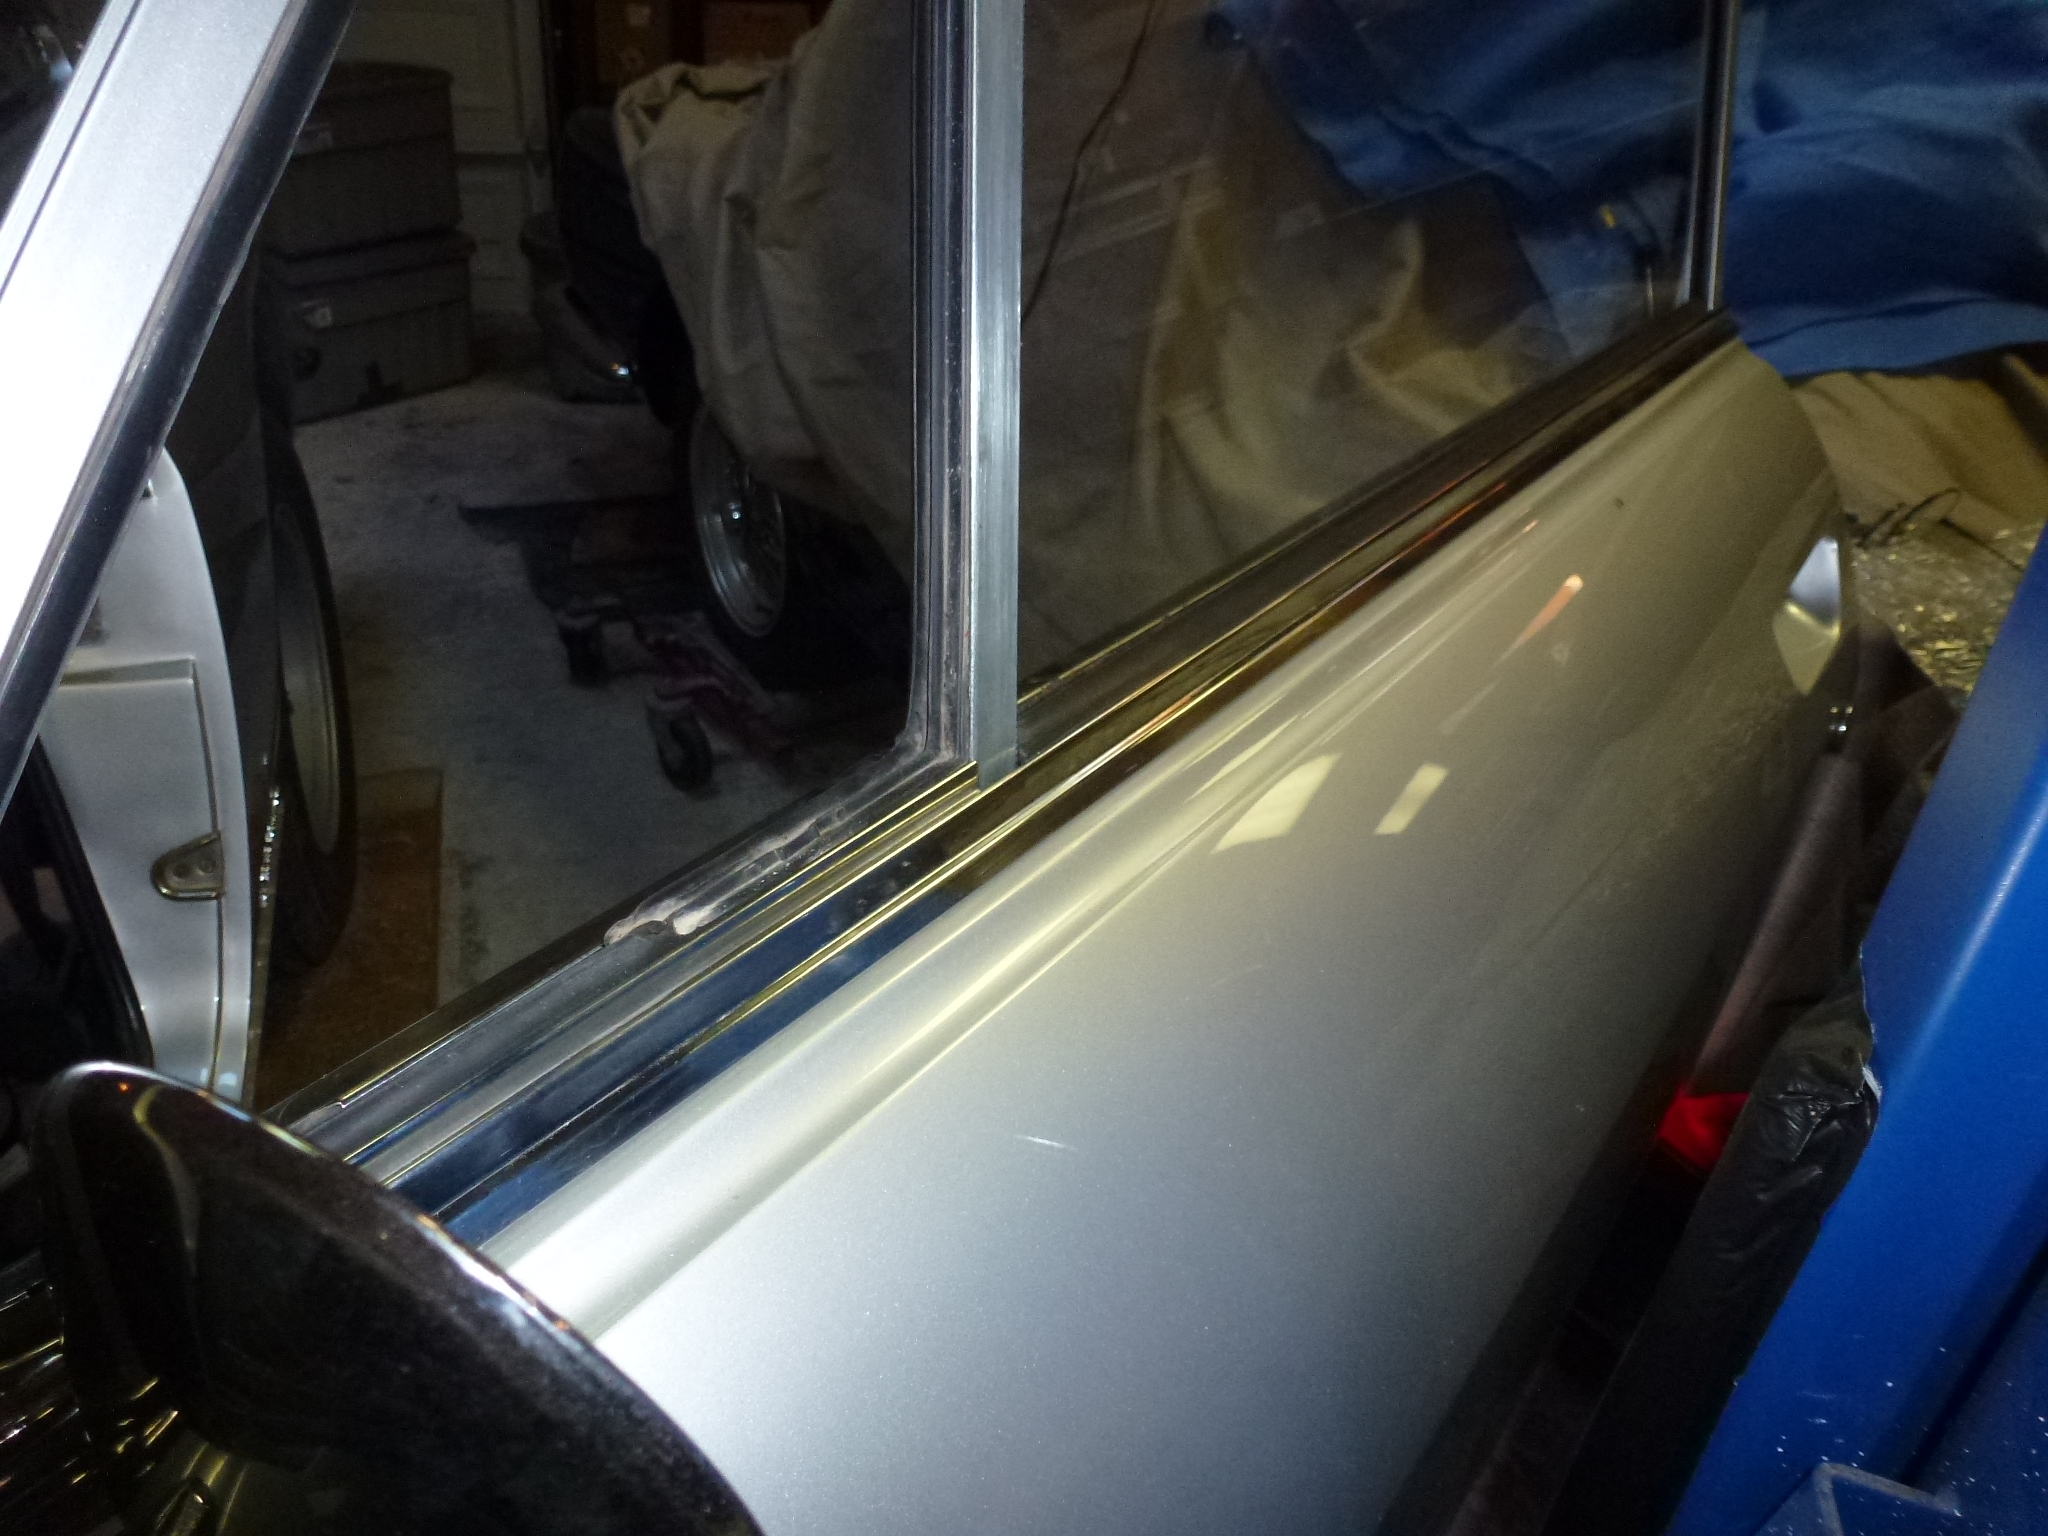
Remove the stainless steel strips from the door frame. These just clip around the frame, but are hard to get started. Once an edge at an end is loose, just work along that edge until the whole strip is loose. Never pry against the inside of the strip as it will dent. Always pry against the window frame. The top one is first and then the vertical ones. The vertical ones stick down into the door, so you have to start at the top of them so you can pull out the bottom end once everything is loose.
-
Remove the window channel strips. You'll have to look to see the order that they were installed. In my case, the top was last, so it needed to come off first. Getting the vertical ones can be difficult, particularly if they were glued in. The window has to be down and you might have to loosen the vent window frame so the window is loose. Pull out the strip at the top until it can clear the top of the window frame. Then pull up and it will slide along the window and come off.
-
Remove the vent window frame. This is pretty tricky. First two bolts and one screw. Then remove the attachment arm and roller at the bottom. Now it is possible to pull the frame to the rear so it clears the window channel in the front. Then pull it in so it clears the frame at the top and it can be removed vertically. Protect the paint in the inside of the frame if you aren't going to paint that area.


On the driver's side, I also had to remove the lower window track at the rear. Then the window moved back enough to allow the vent window frame to come loose from the door frame.

-
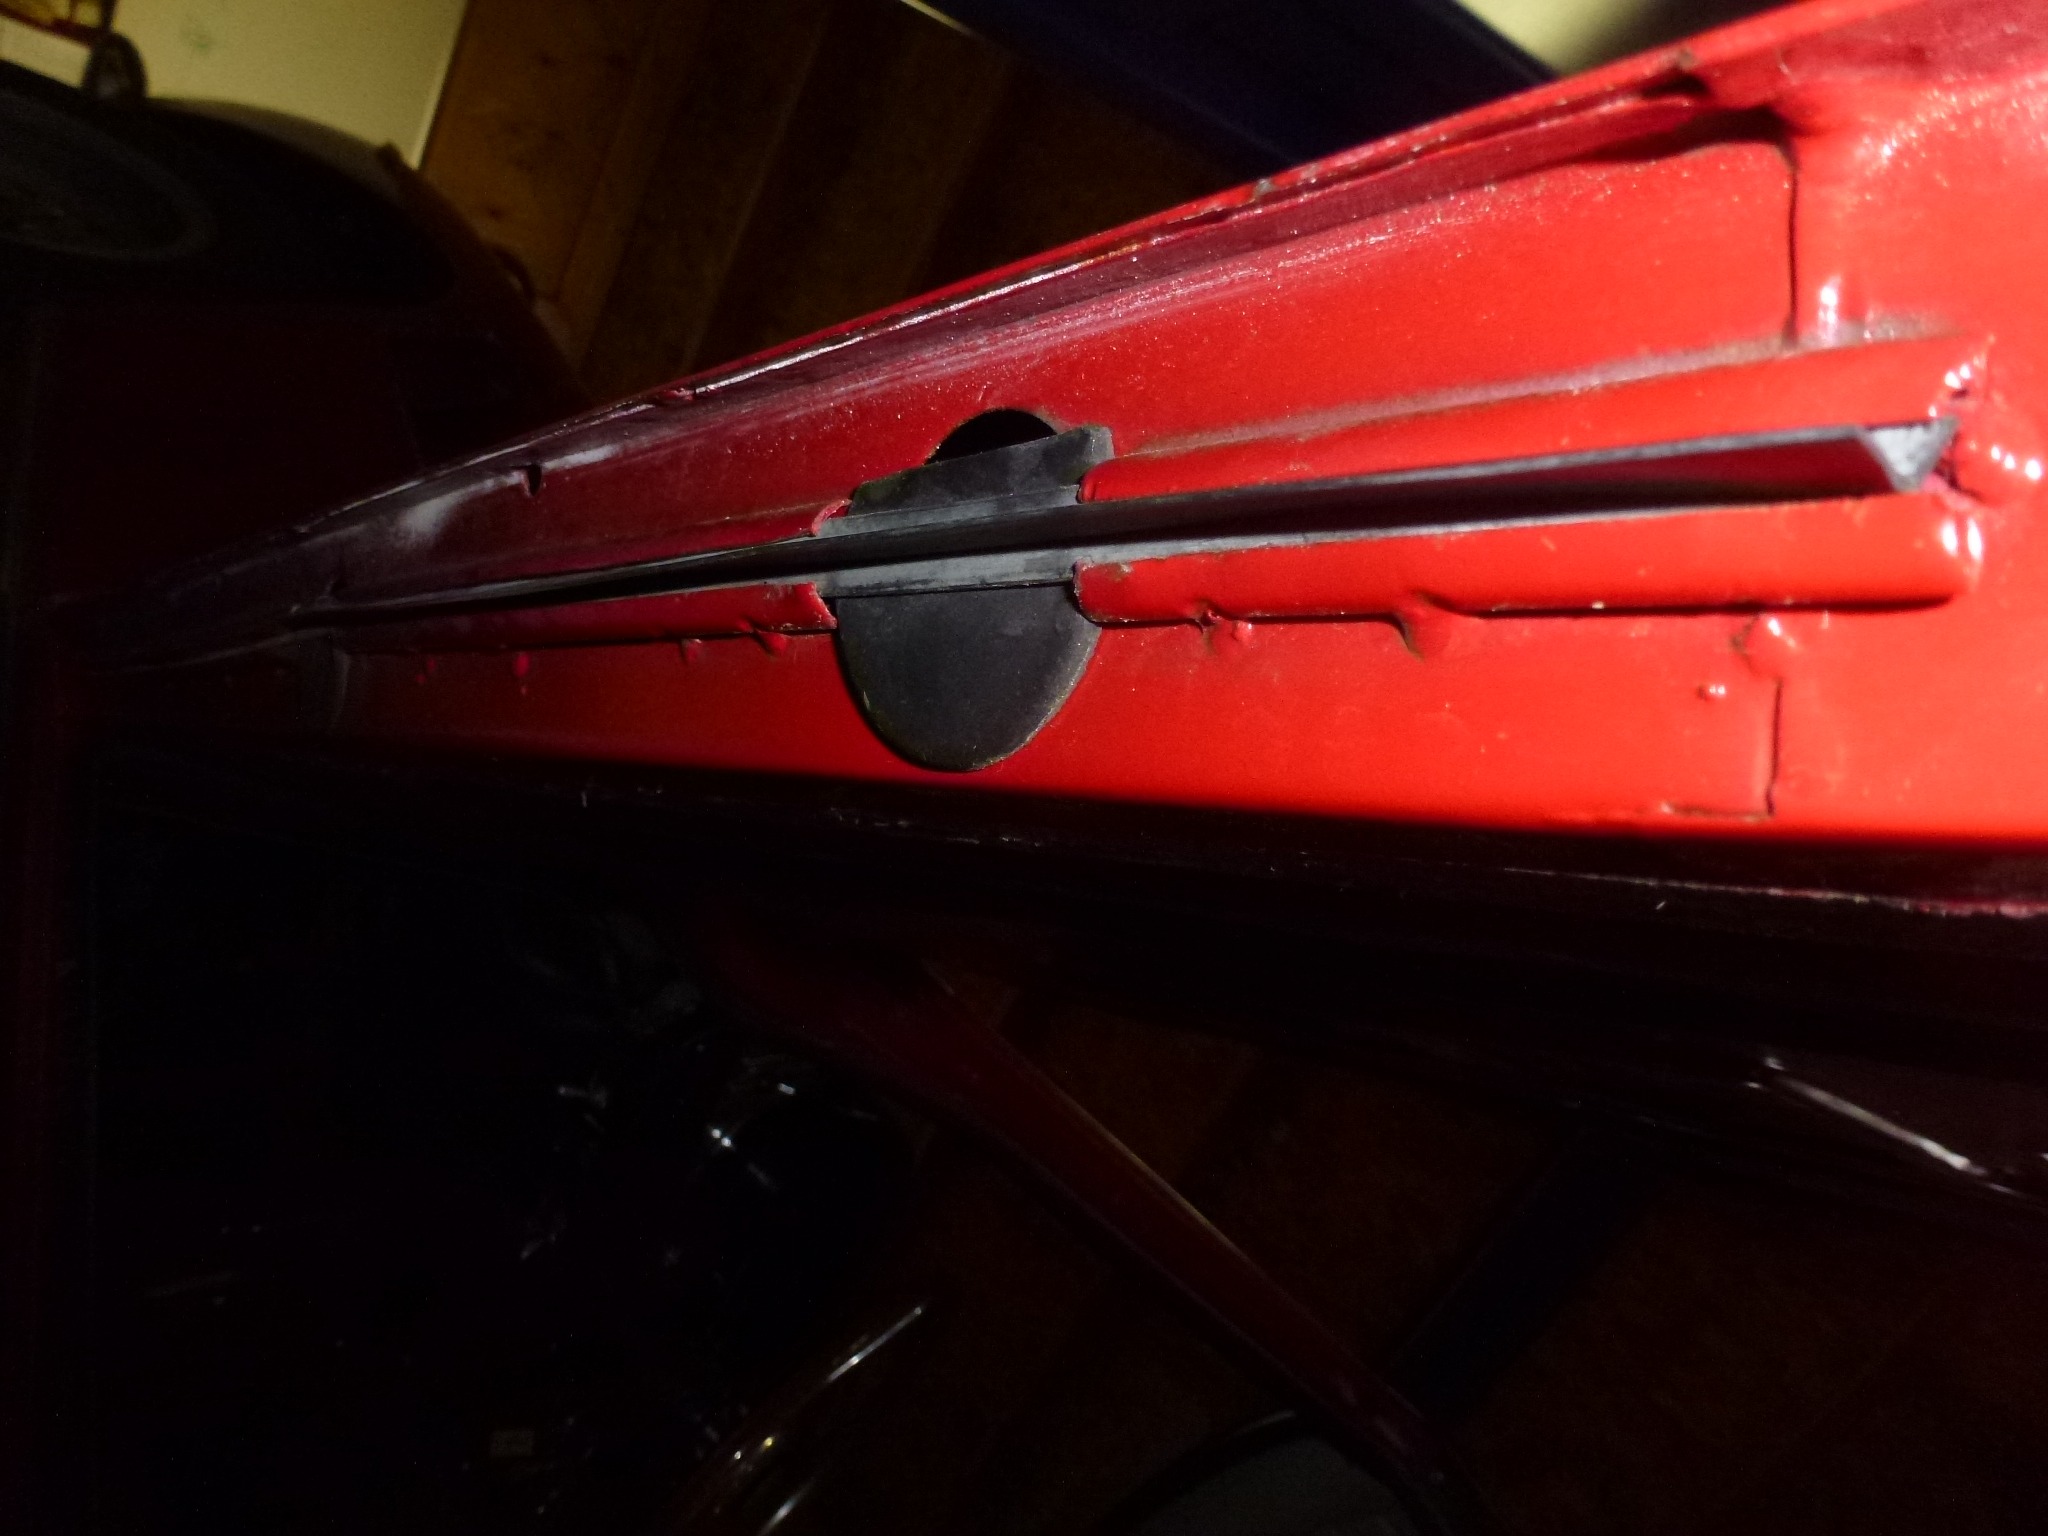
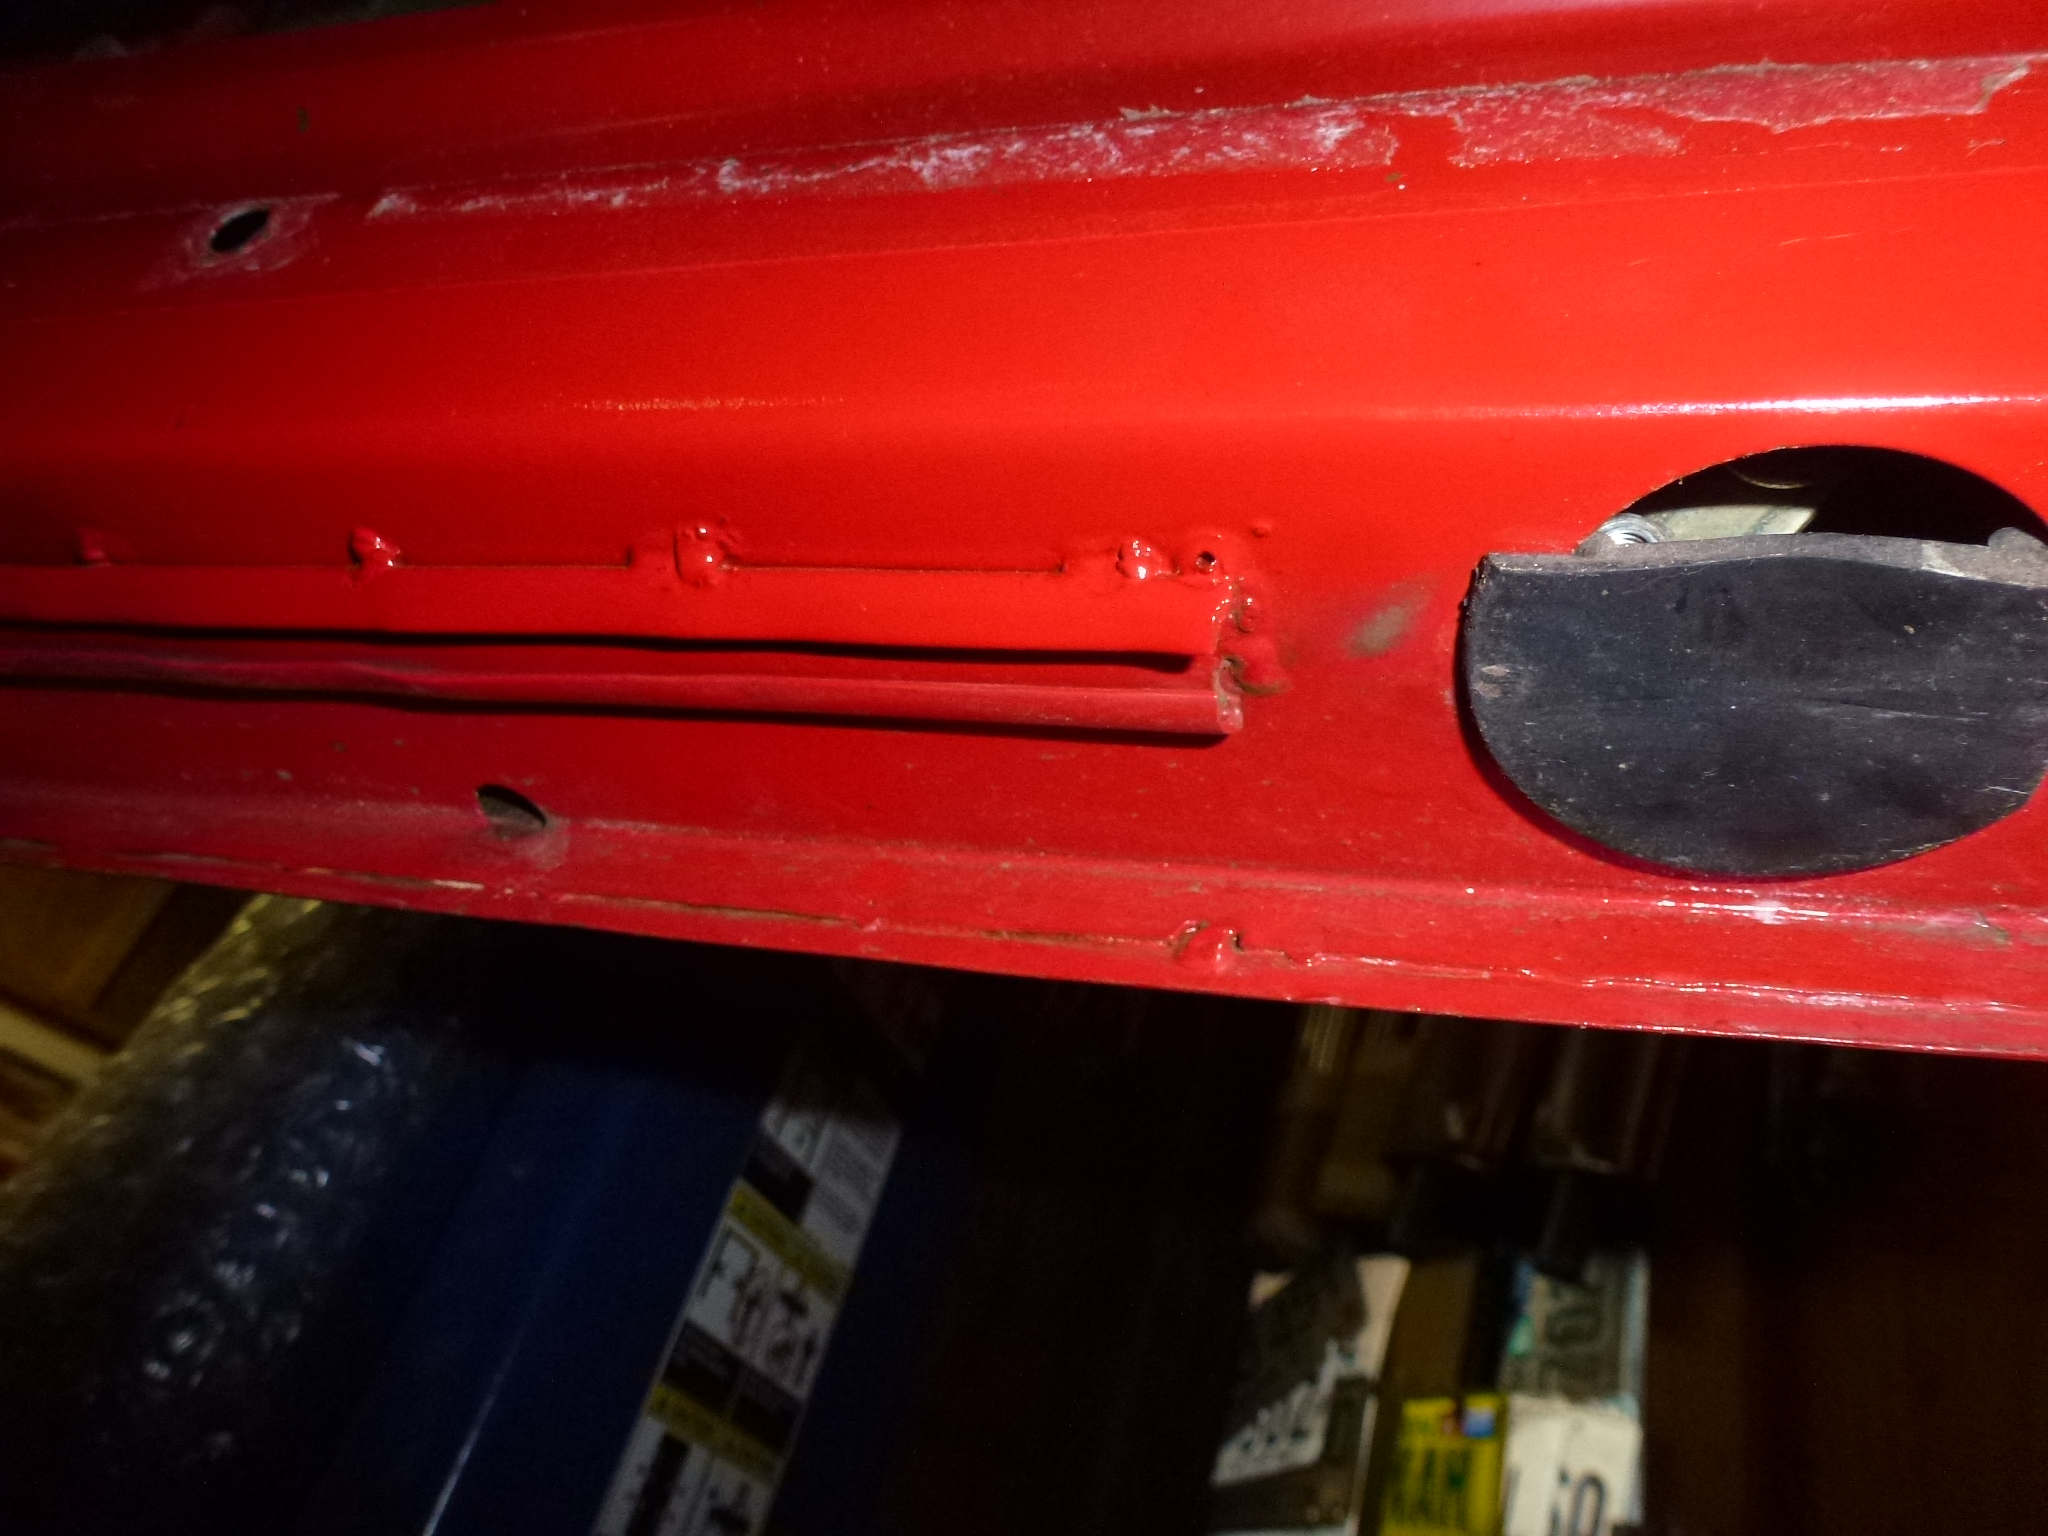
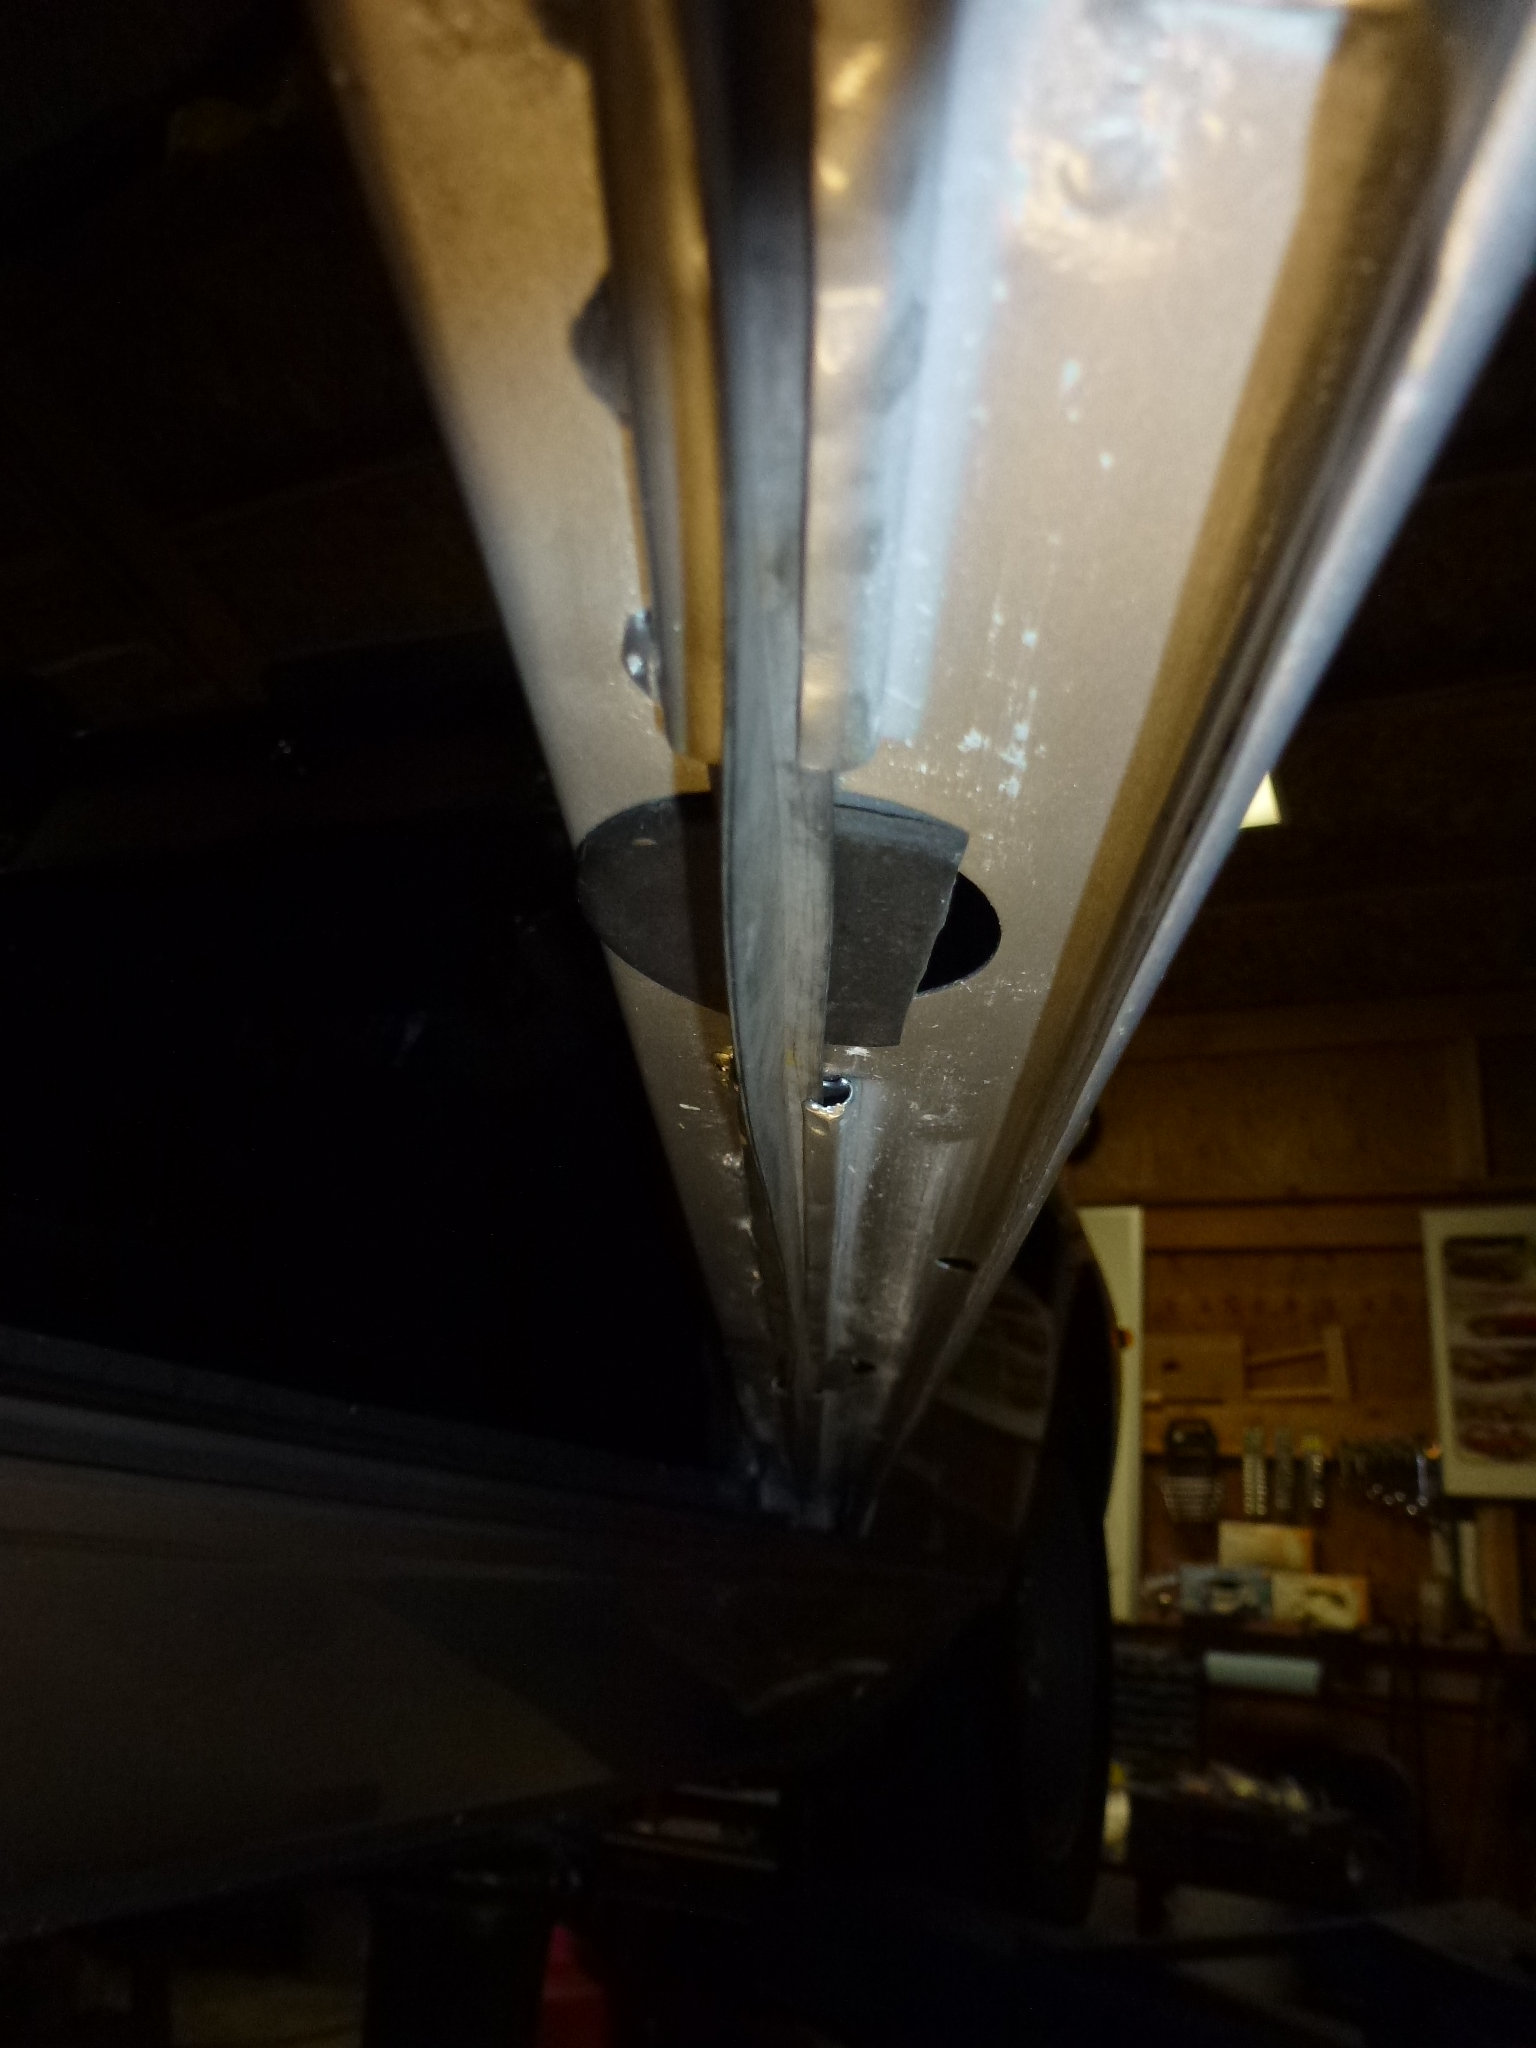
Remove the outside channel rubber sealing plugs. Note, many cars have lost these over the years or they are painted over. Particularly the front one prevents a lot of water from draining through the door.
-
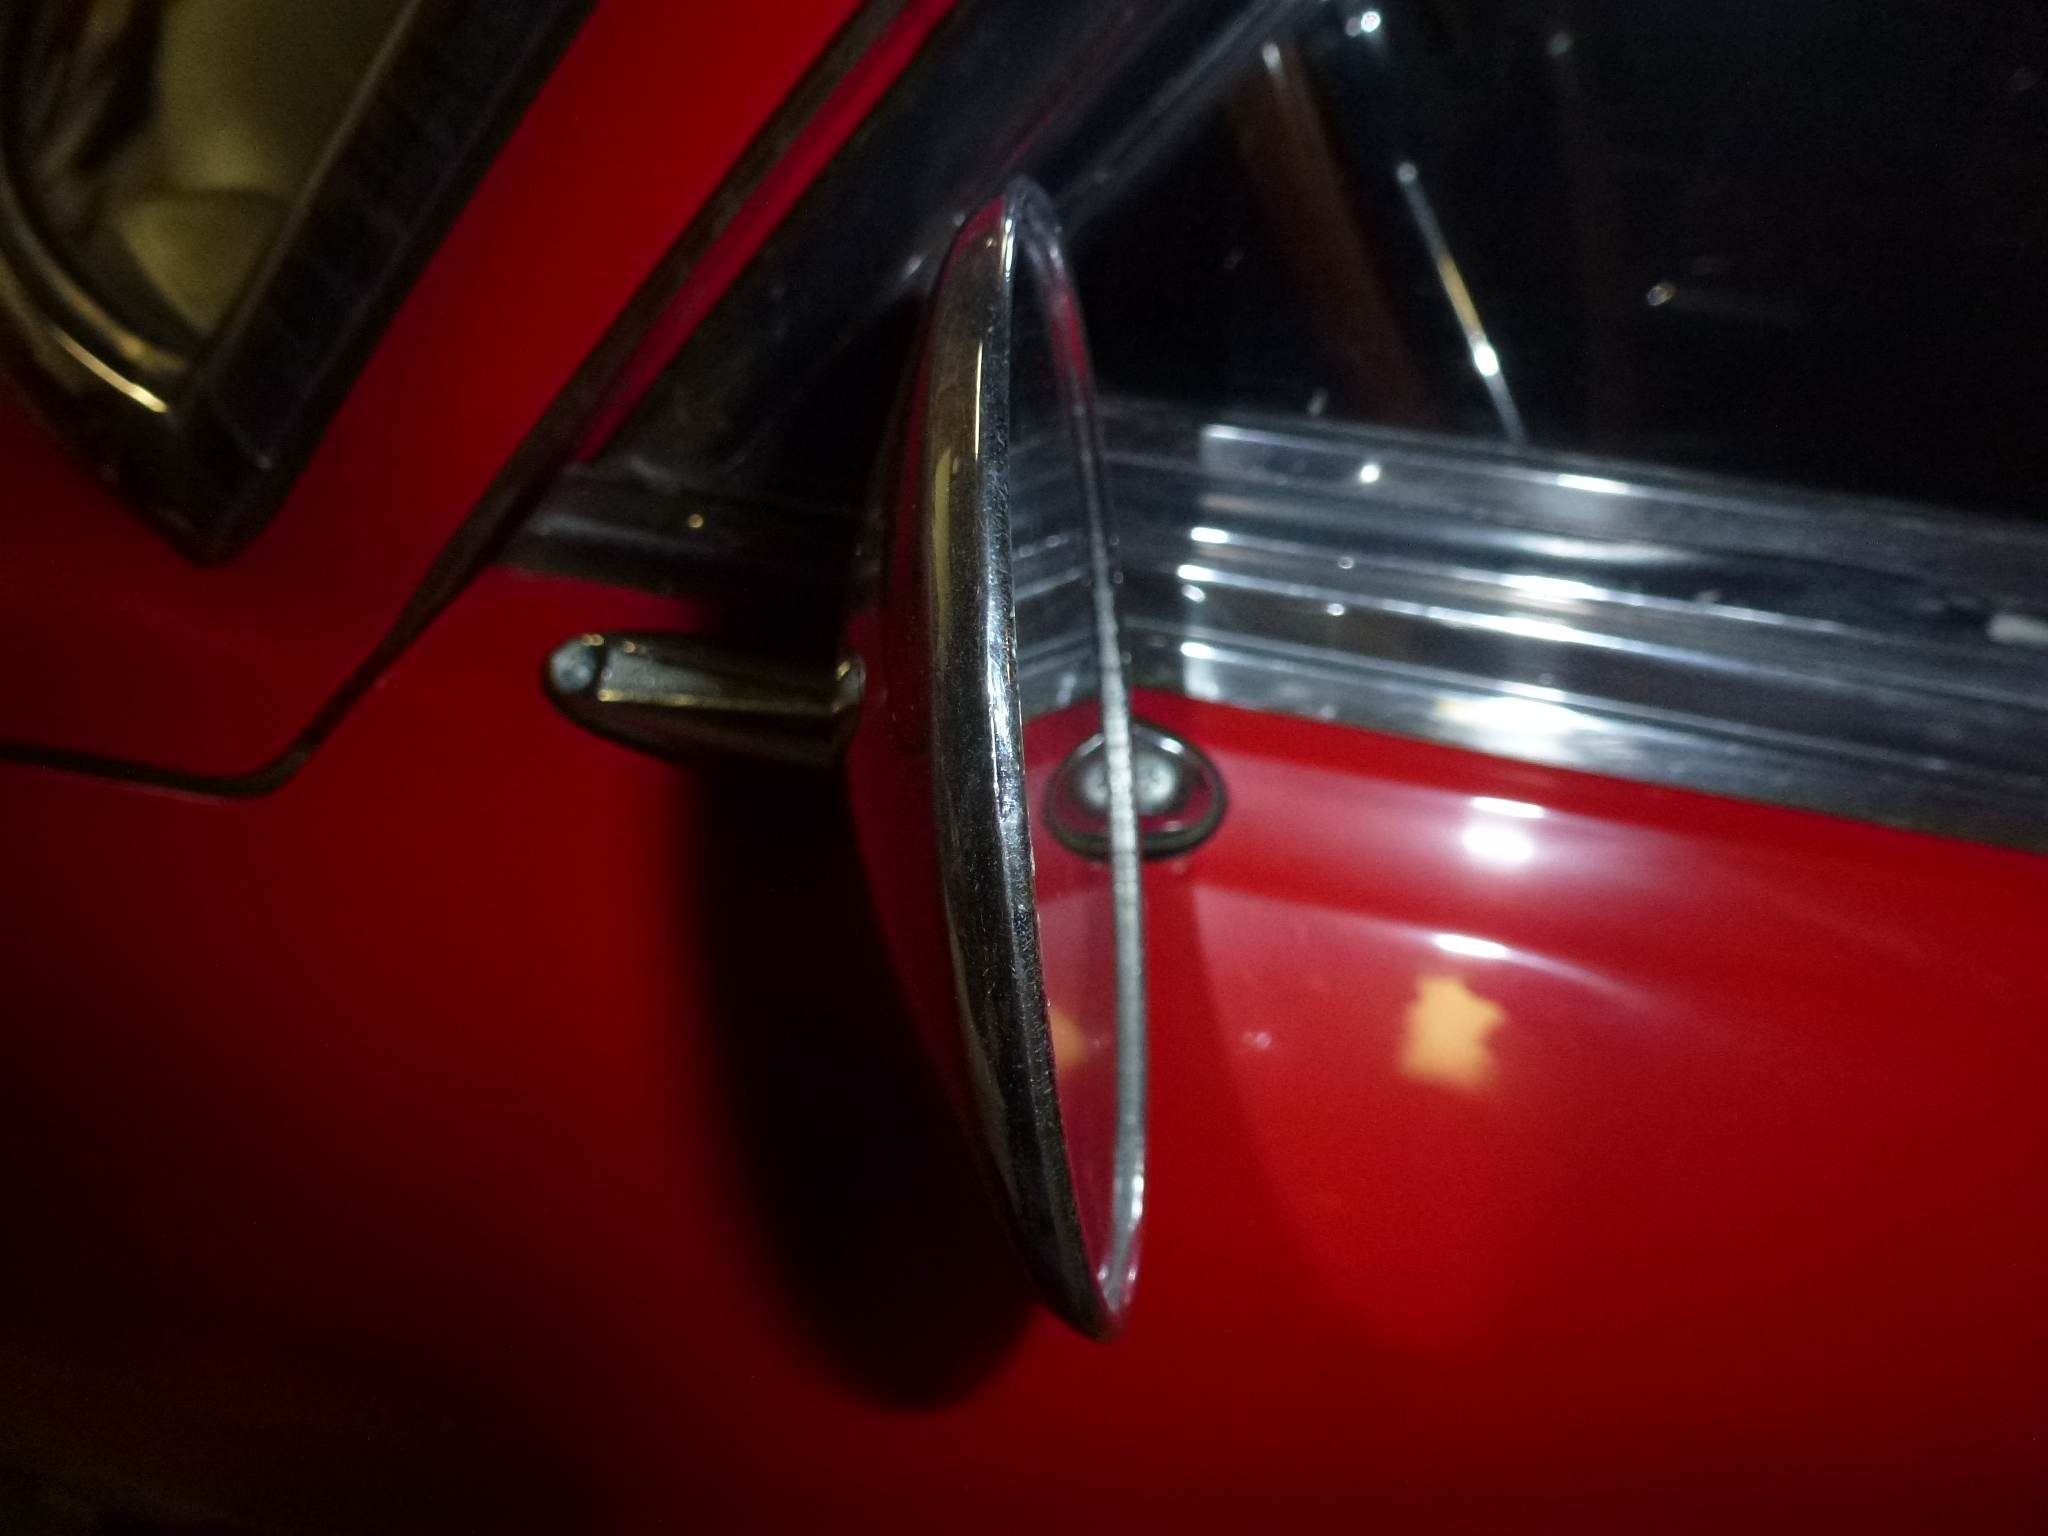
Remove the outside mirror if installed. As these were usually dealer installed, the mounting varies with the type of mirror. In my case, they just have sheet metal screws into the door skin.
-
There are some rubber parts on the door. Under the door, there is a sealing strip and some plugs. The plugs are partially cut to allow water near the inside of the door to drain out. There are drain holes near the outside of the door for the same purpose. There is also a rubber sealing strip on the front edge of the door, but that can't be removed until the door is taken off the car.
-
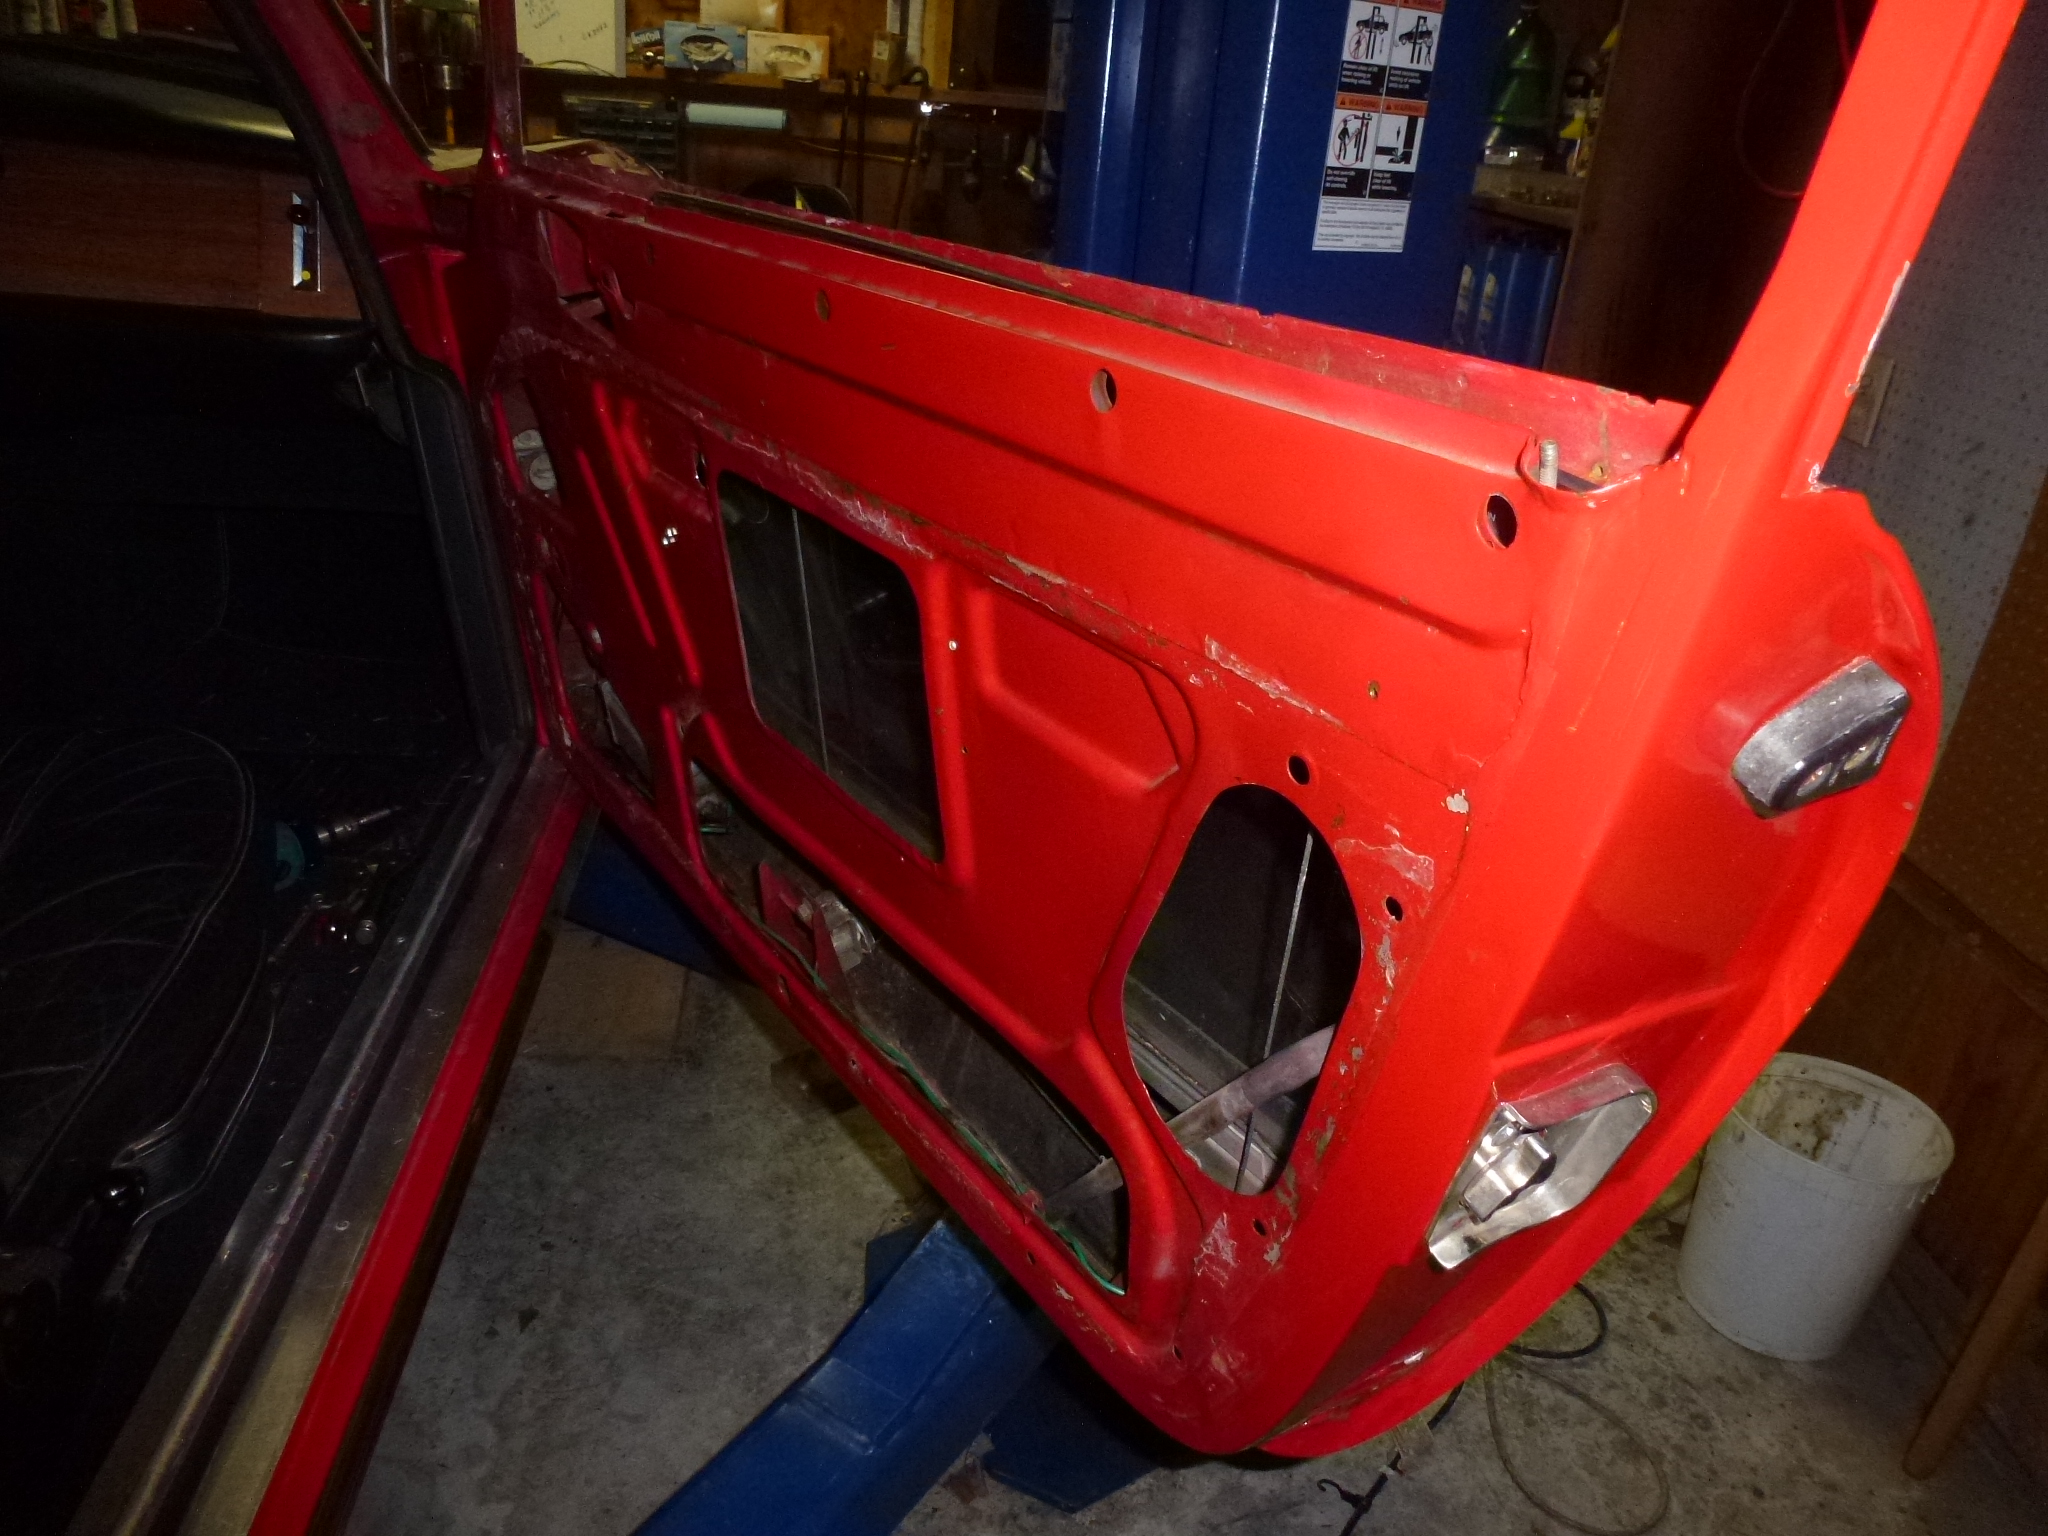
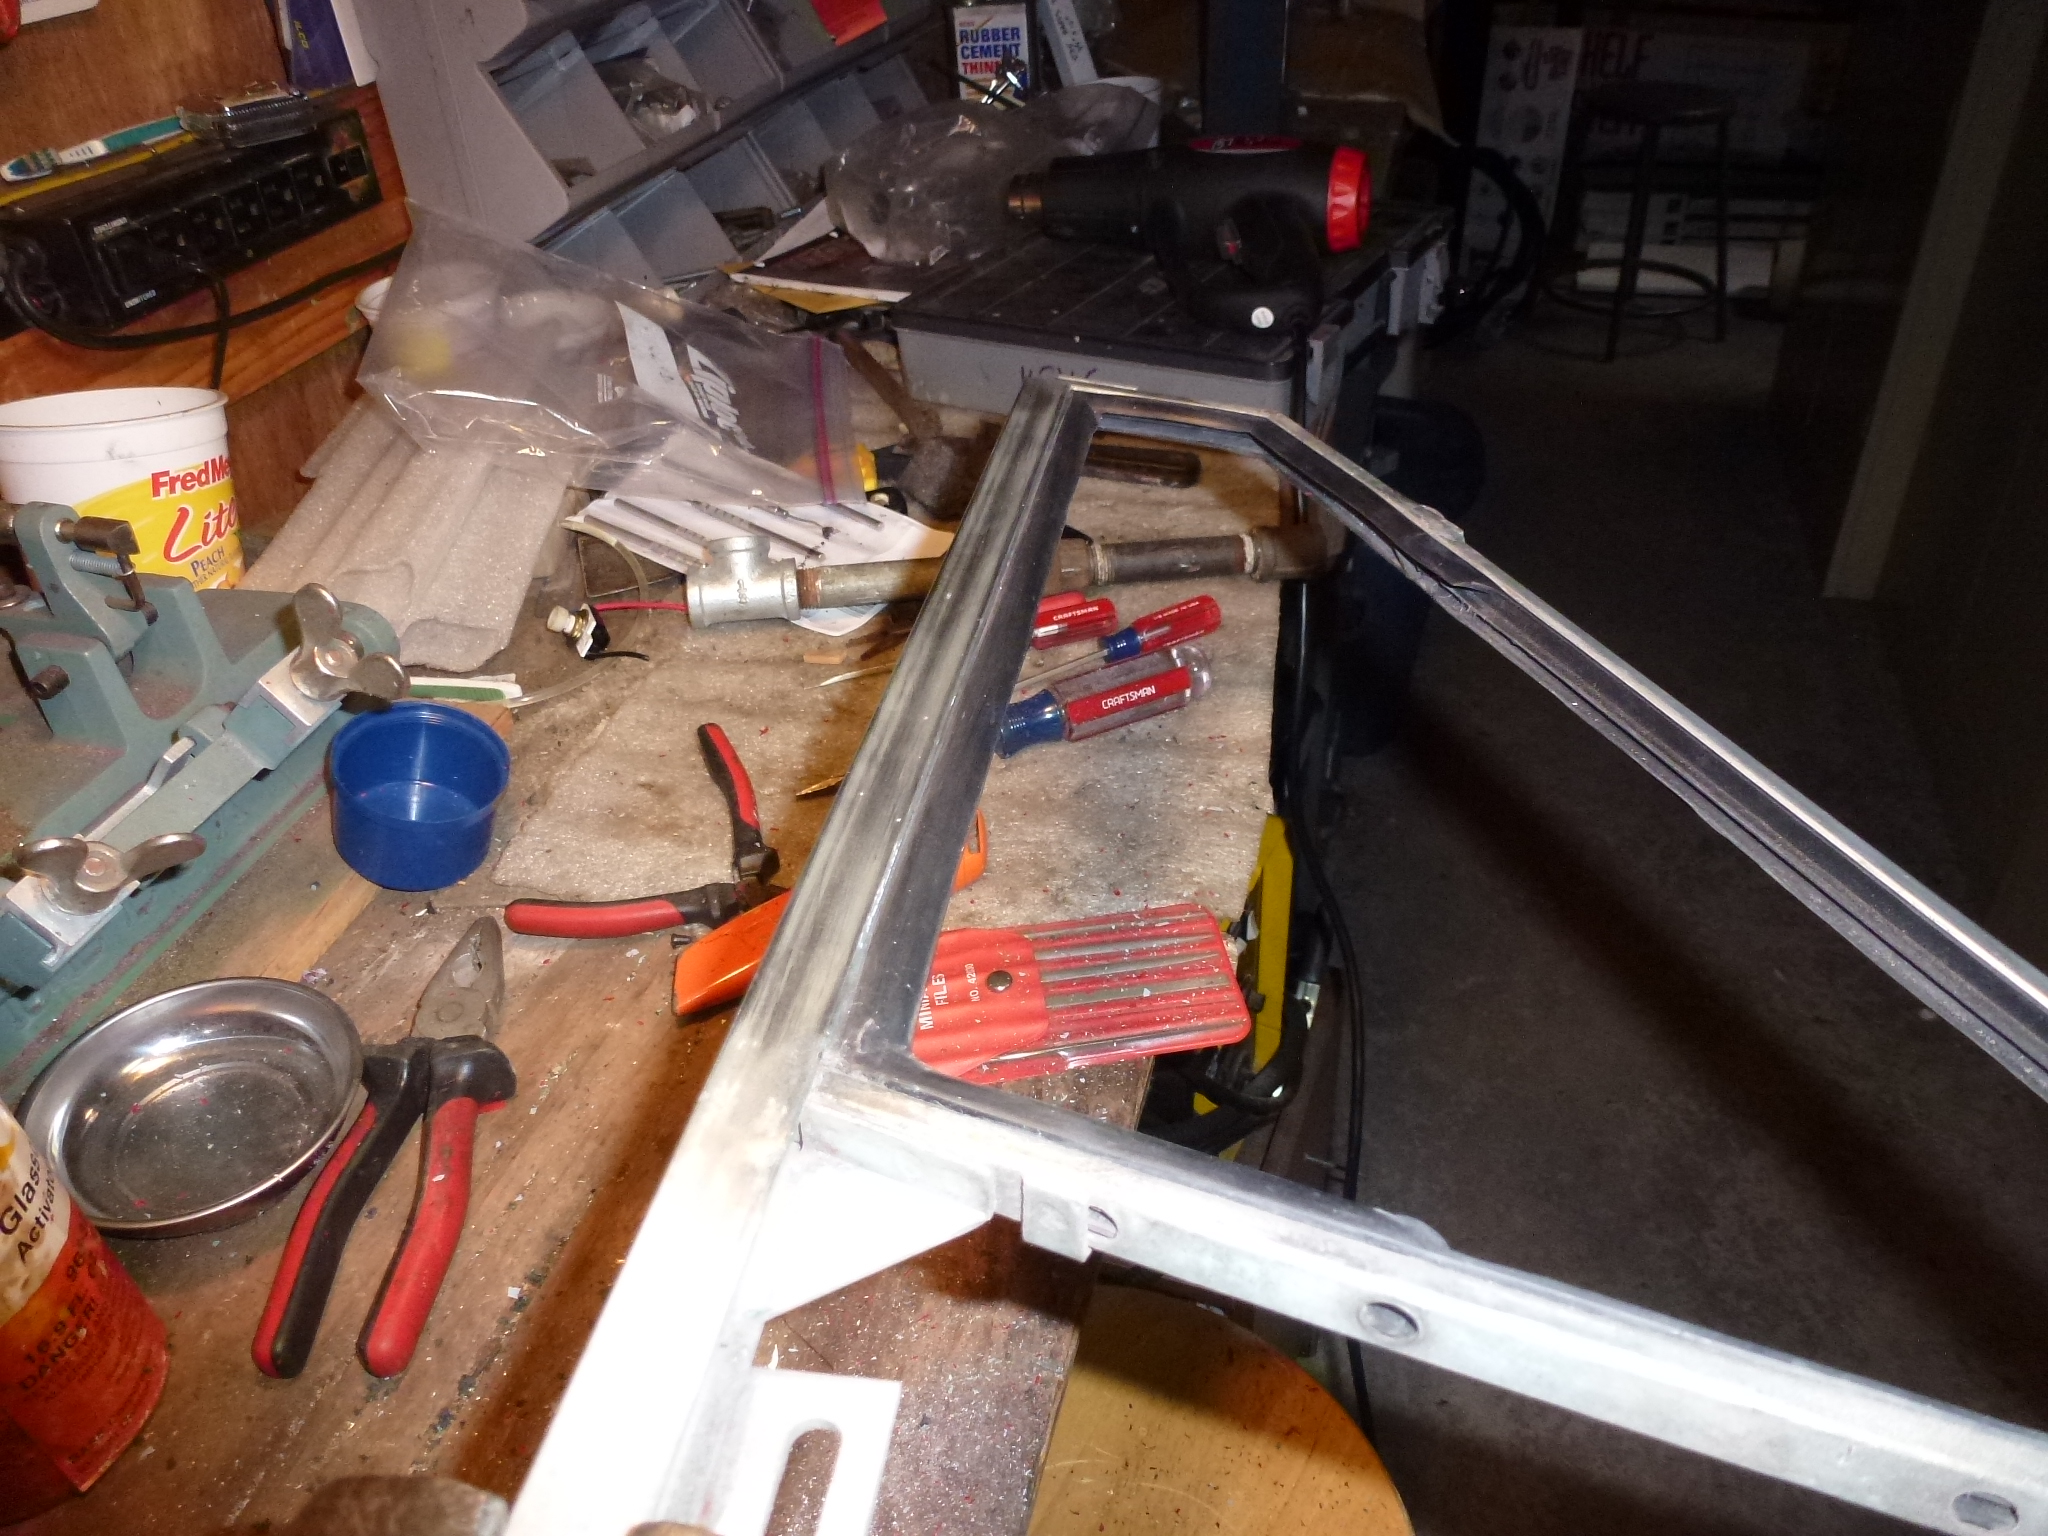
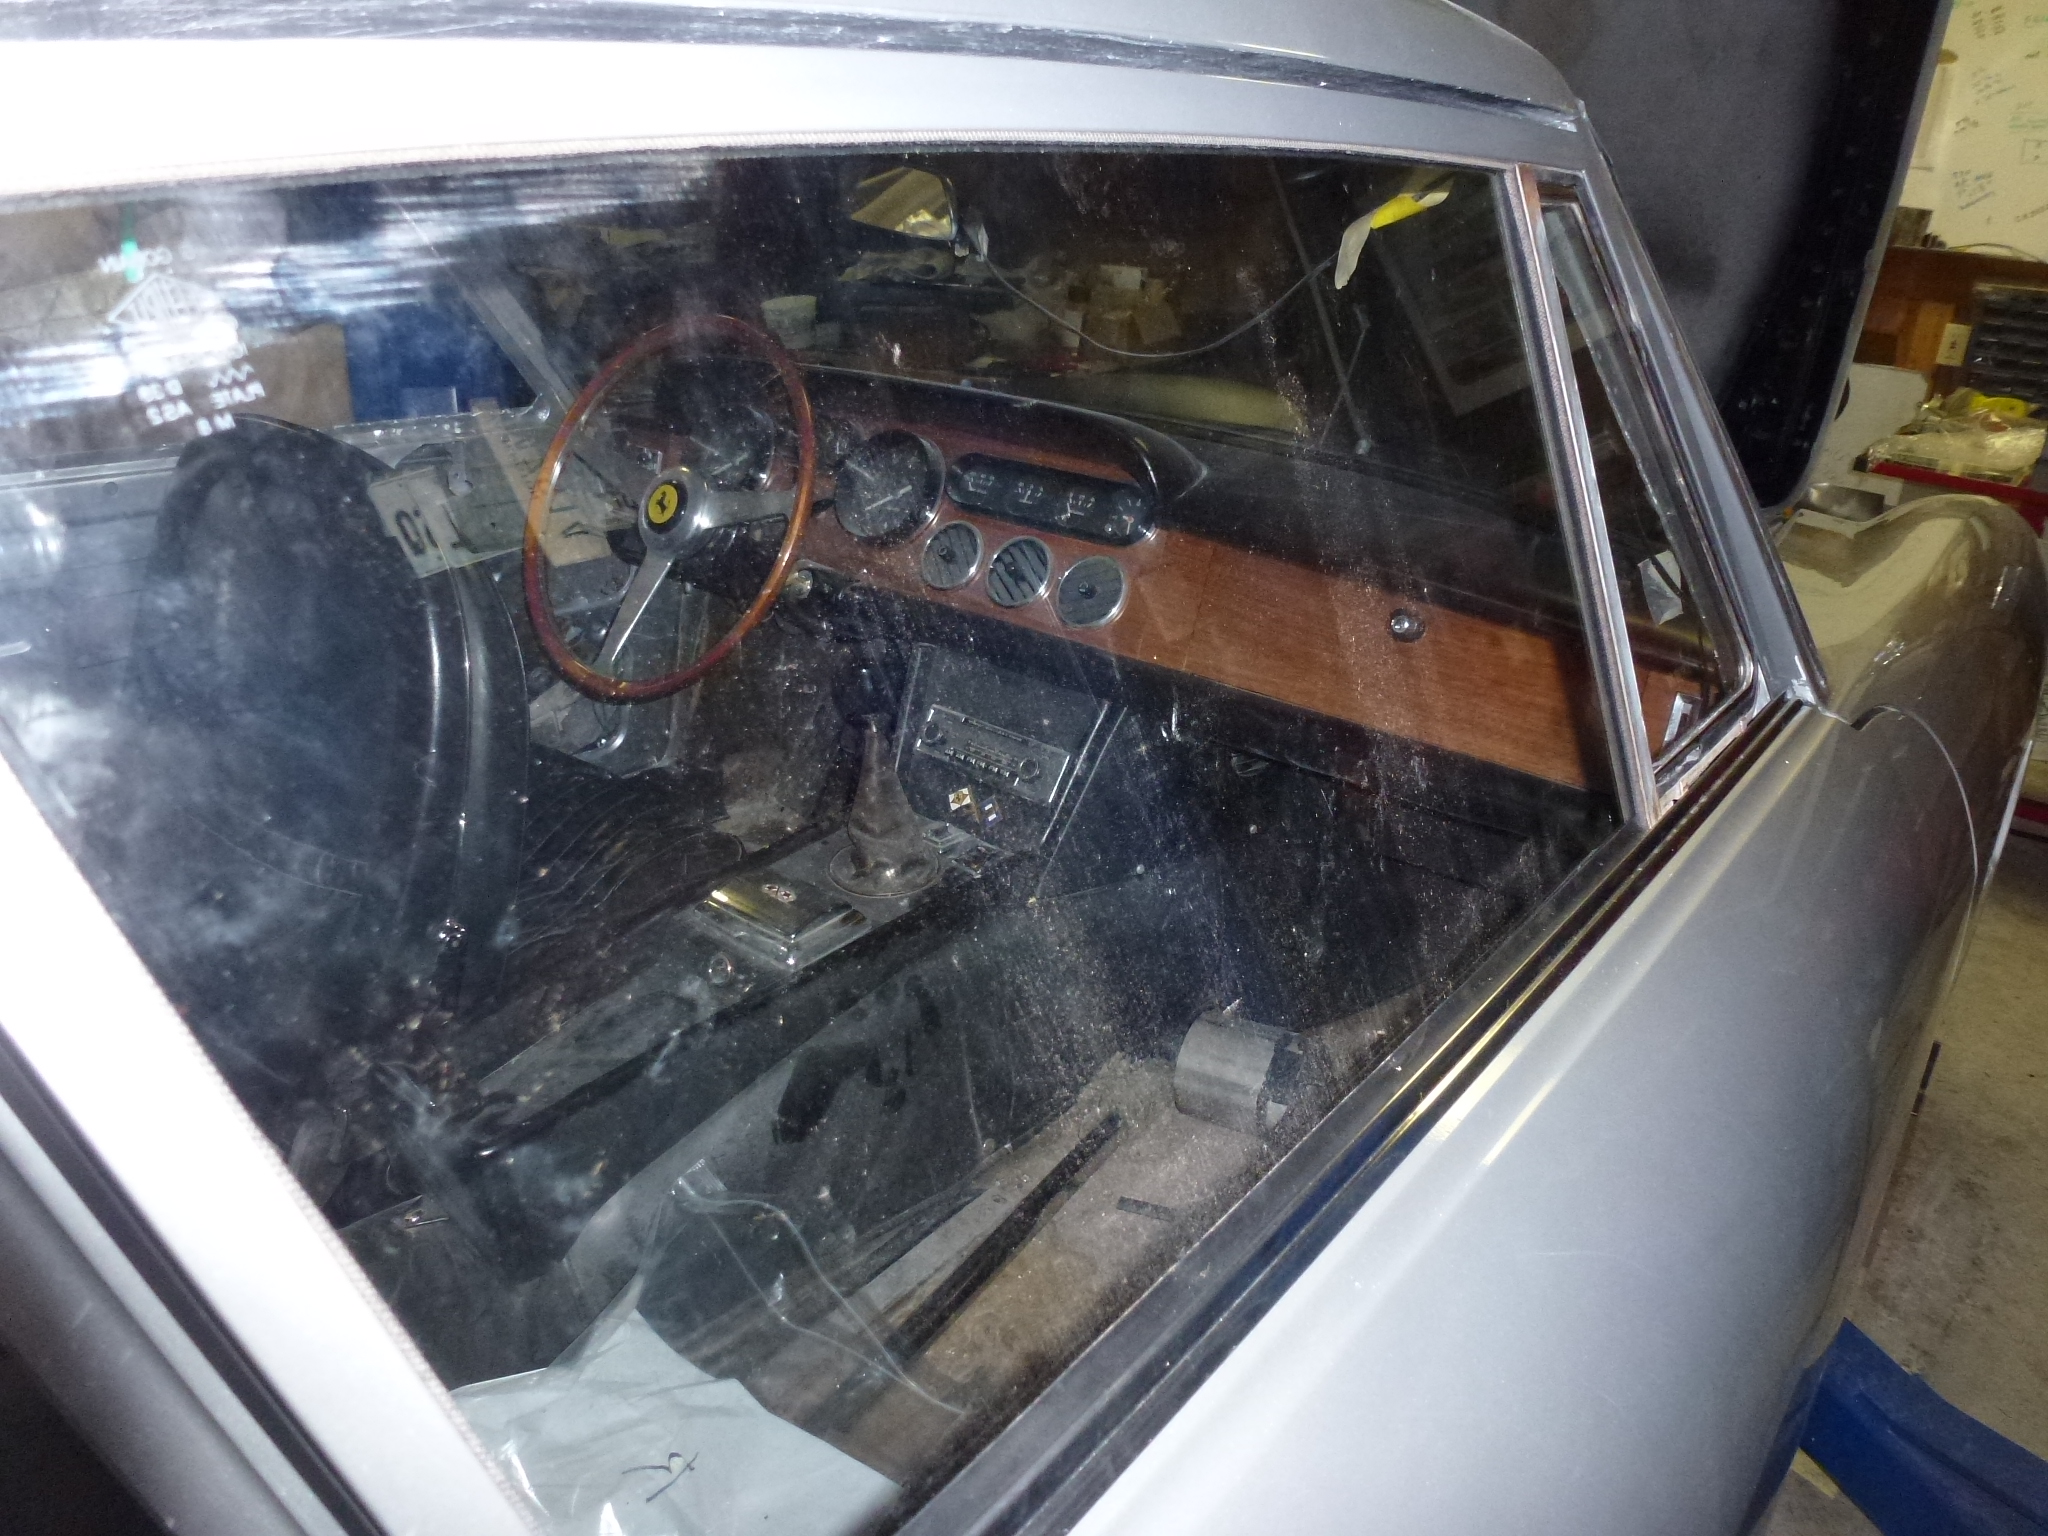
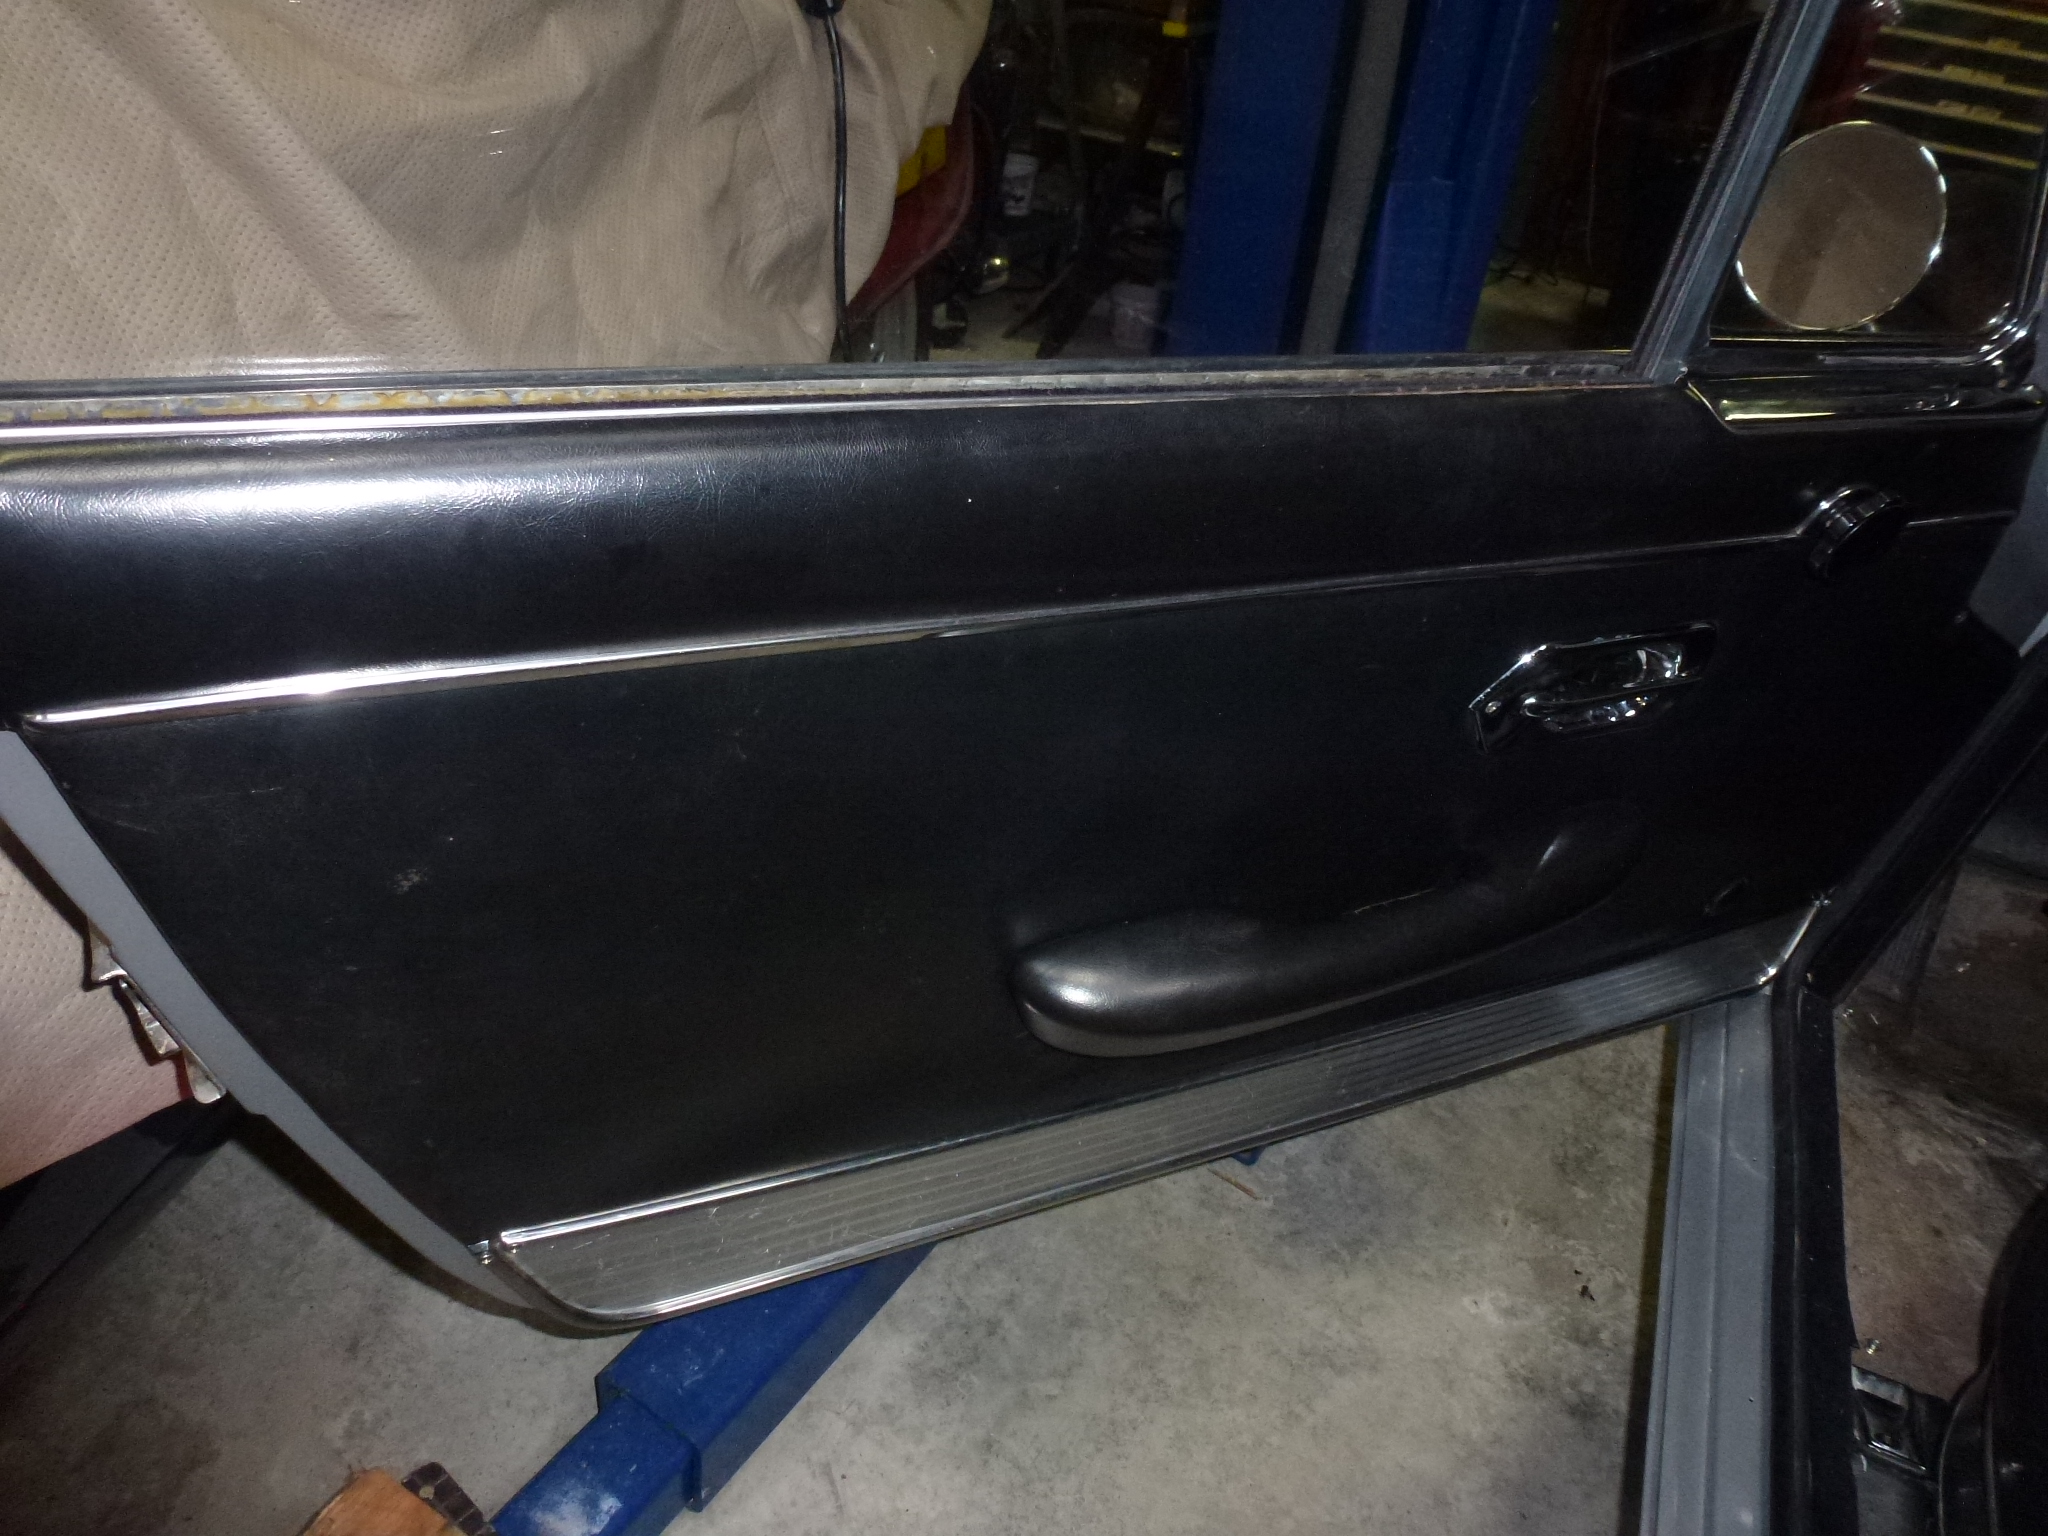
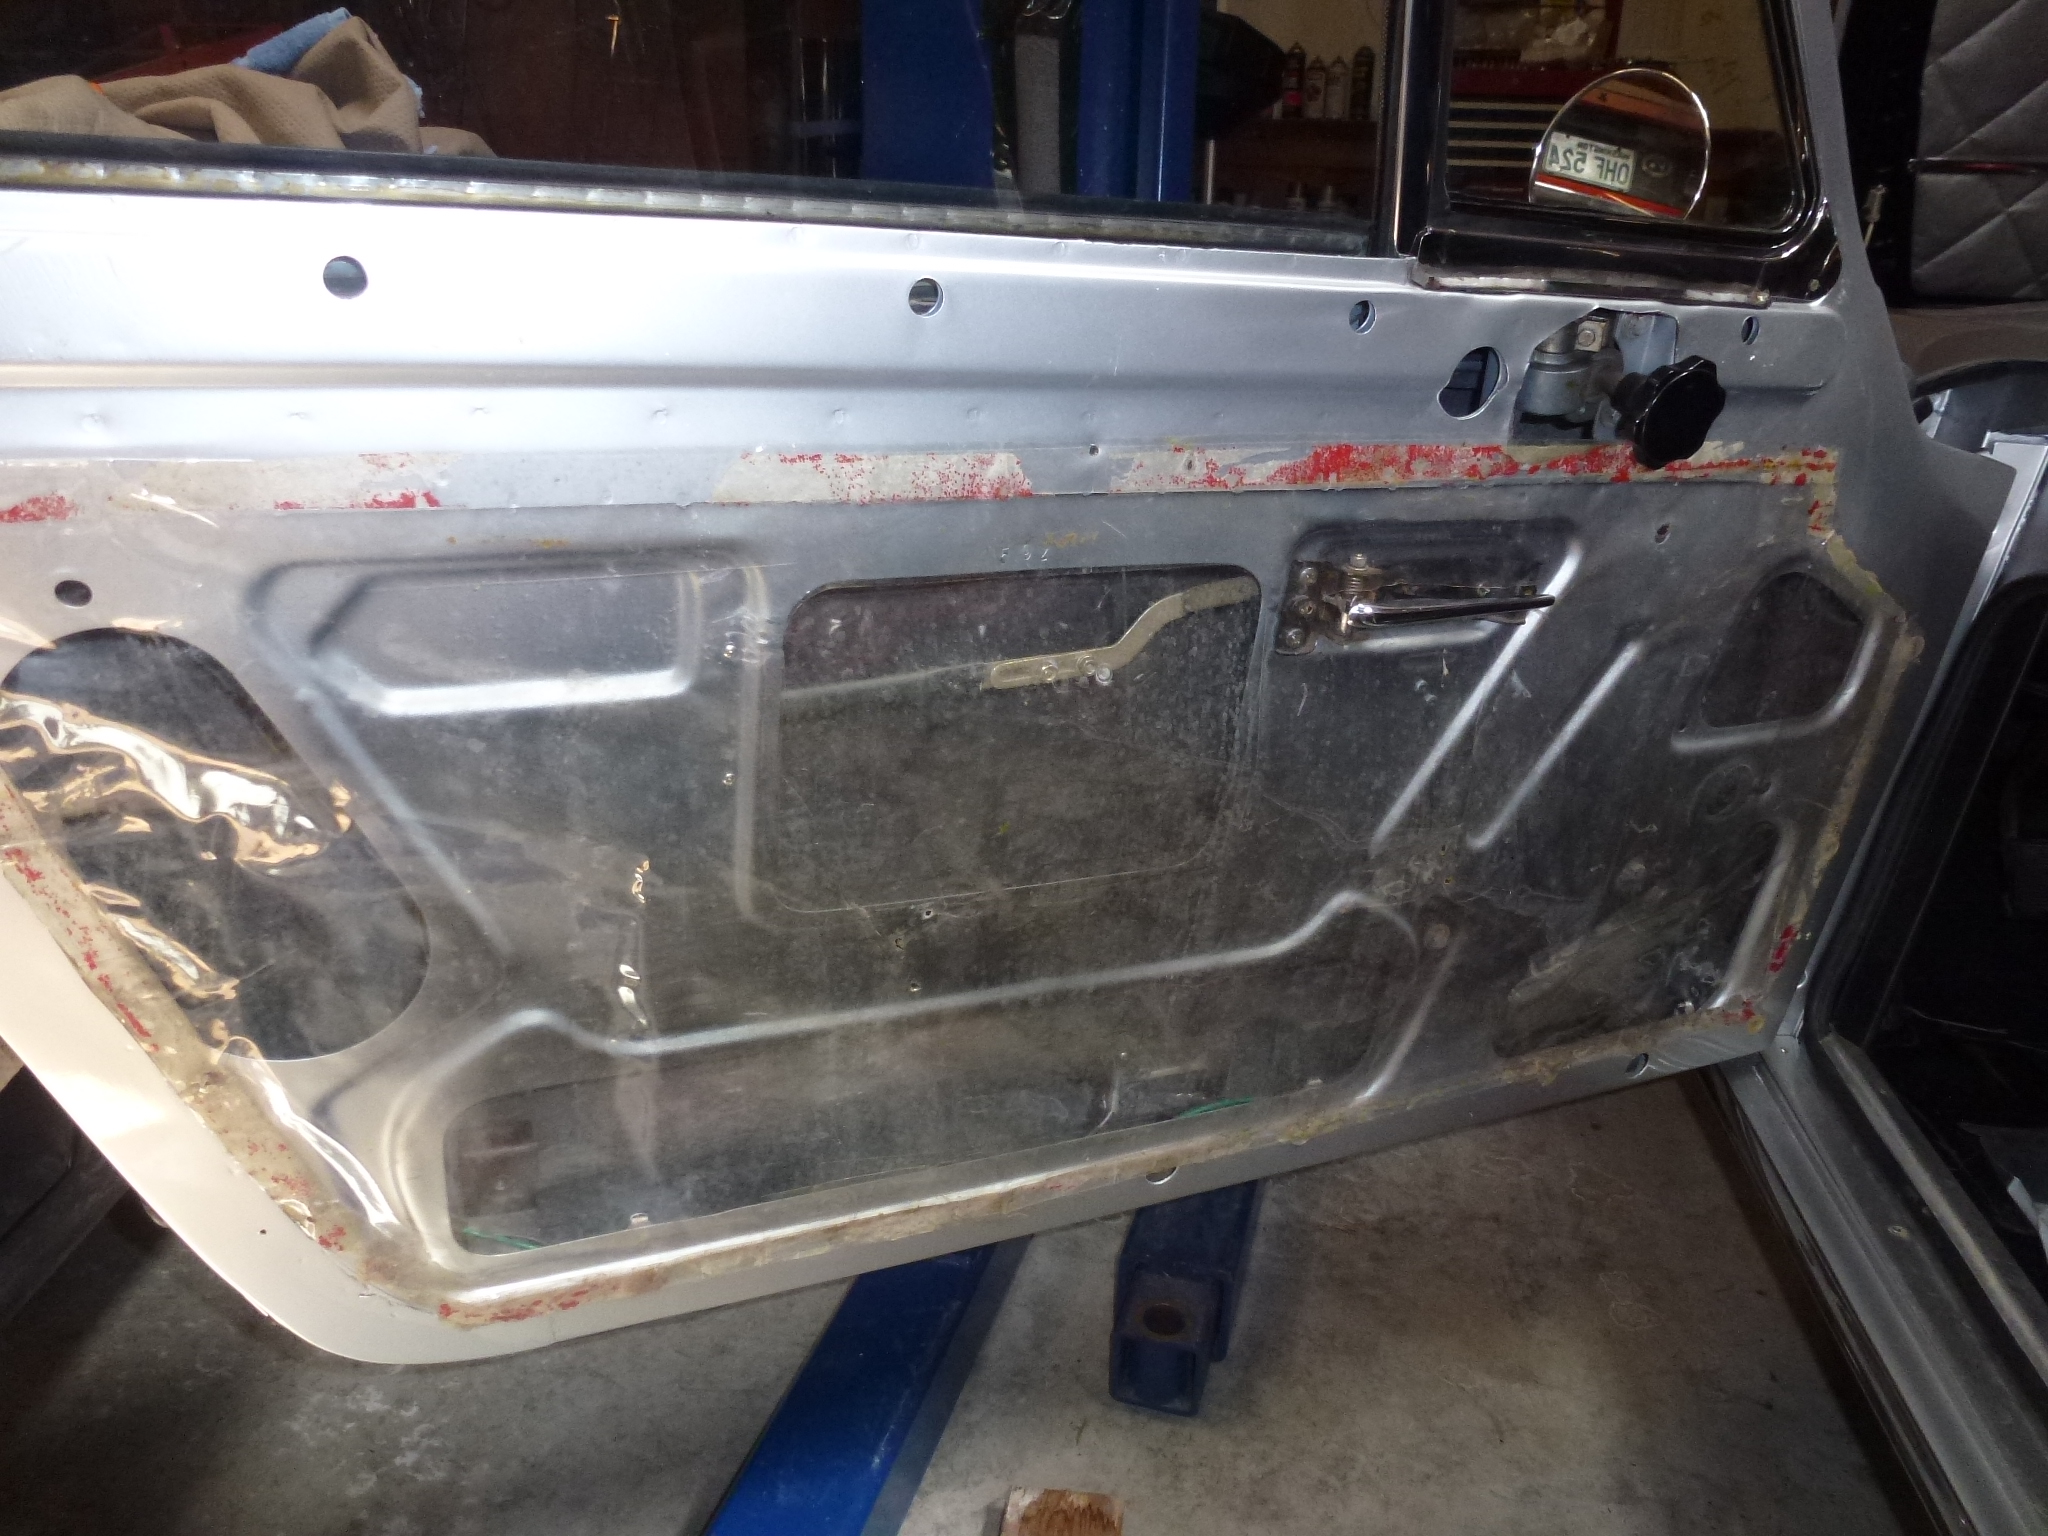
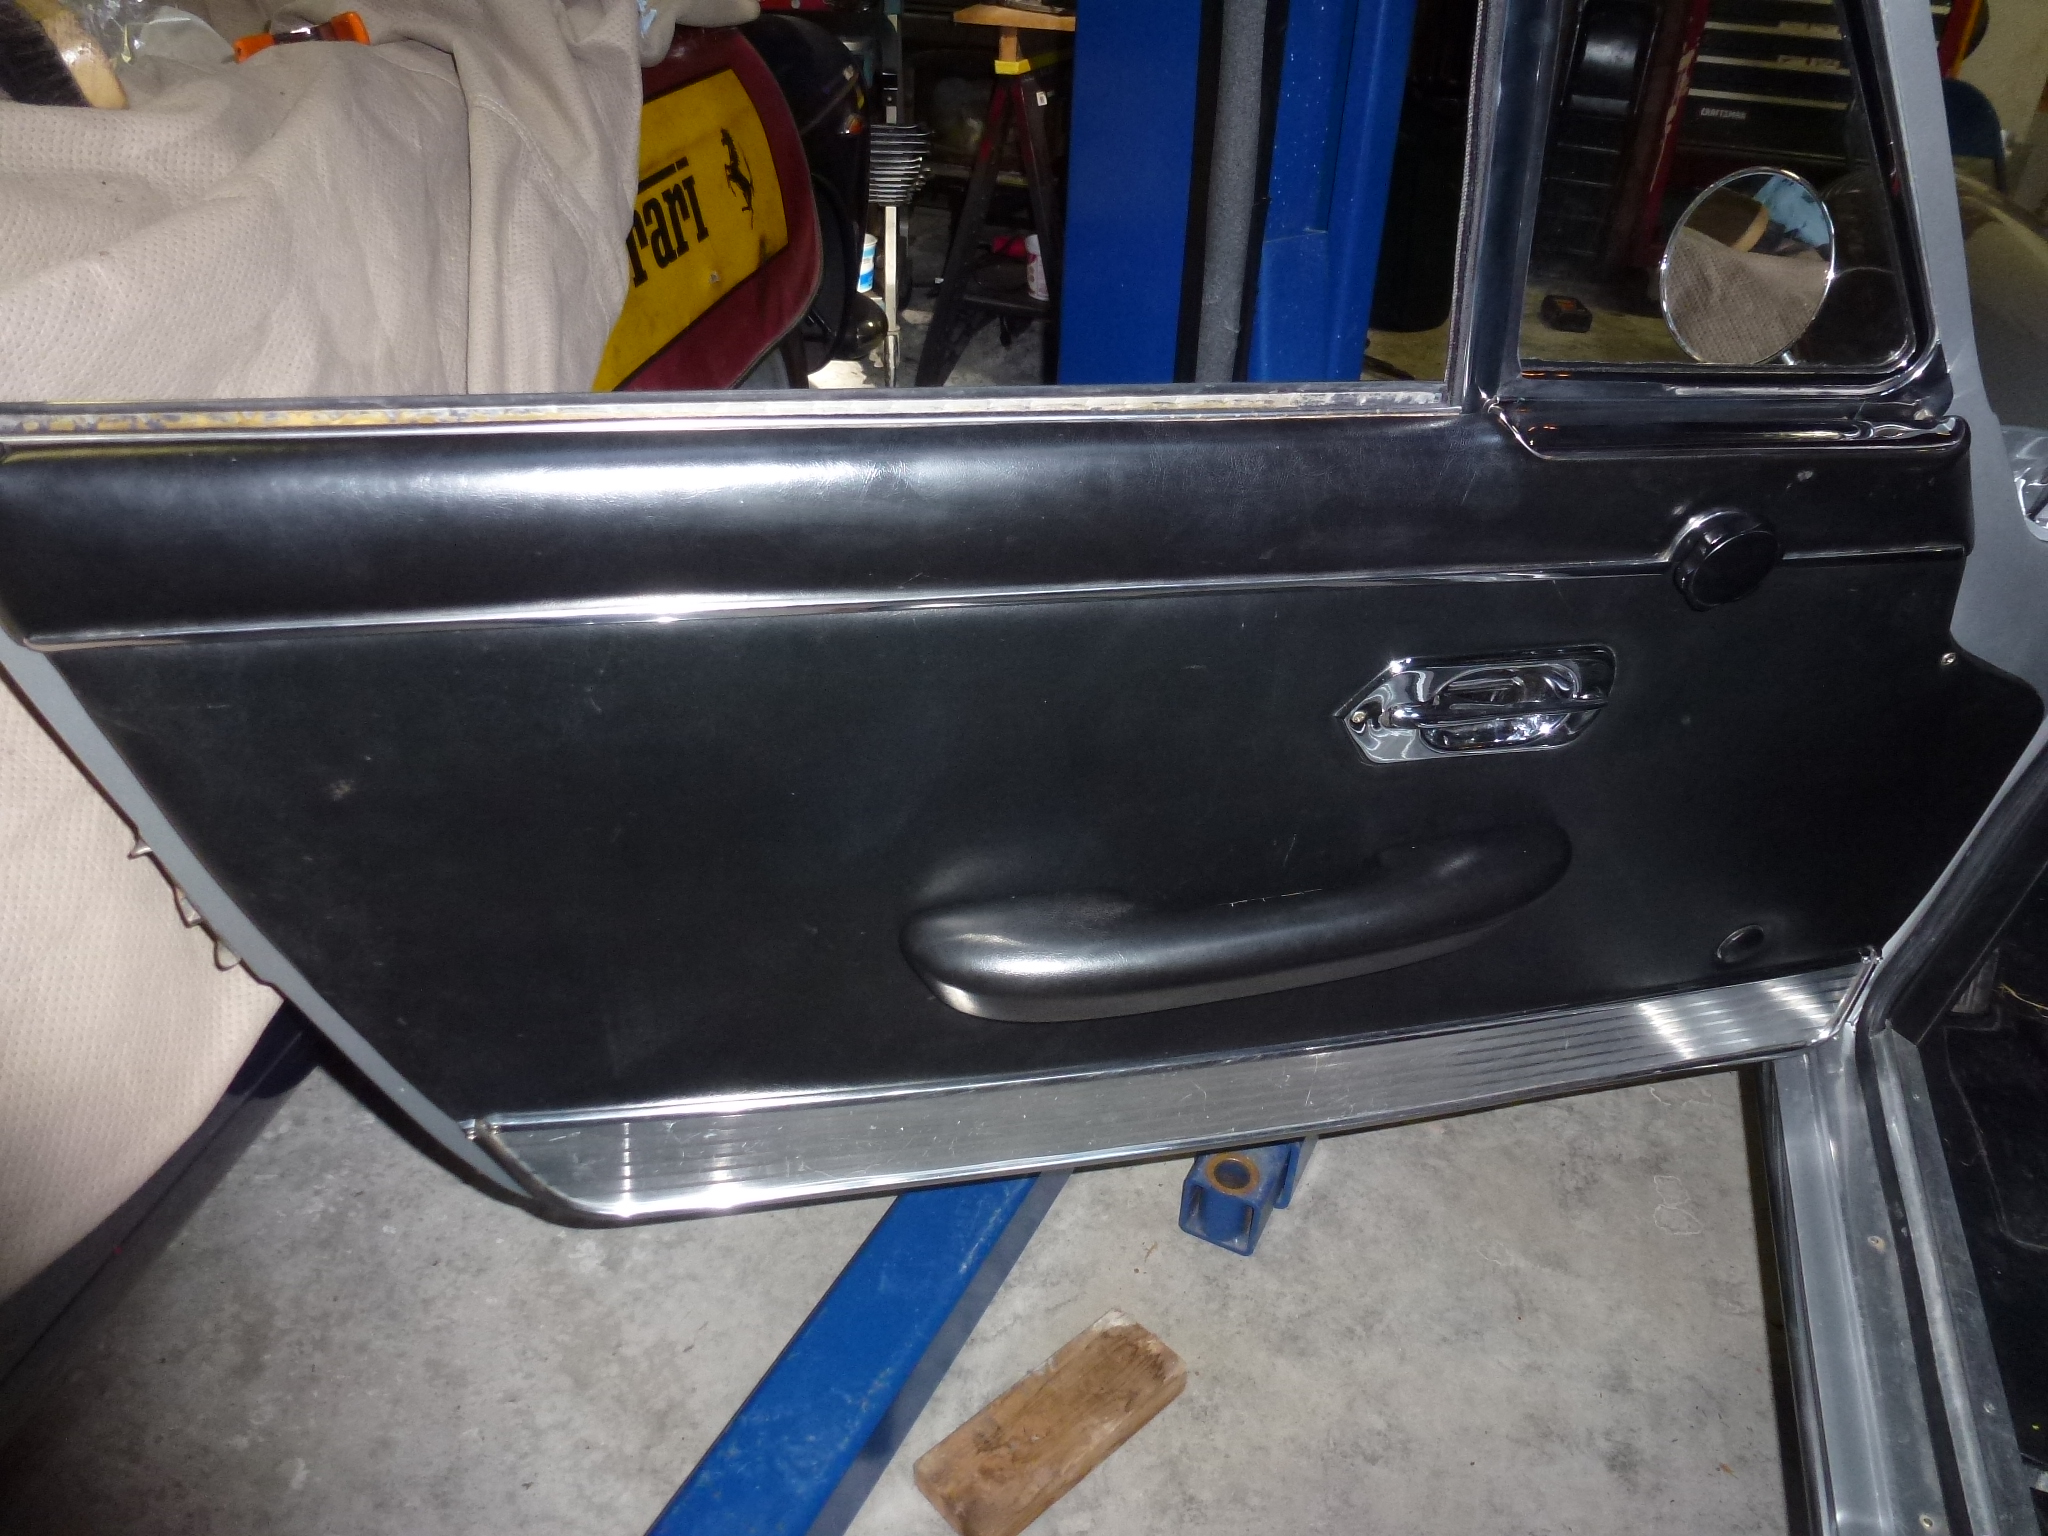
Here's the door as stripped as I need it to be. I'm leaving in the window, motor and cabling. These will be masked off when the door is painted. The latch and single positioning block will be taken off after I drive the car to the body shop.
As I was removing all of these items, I noticed a few things I need to address, either now or when I put everything back together.
-
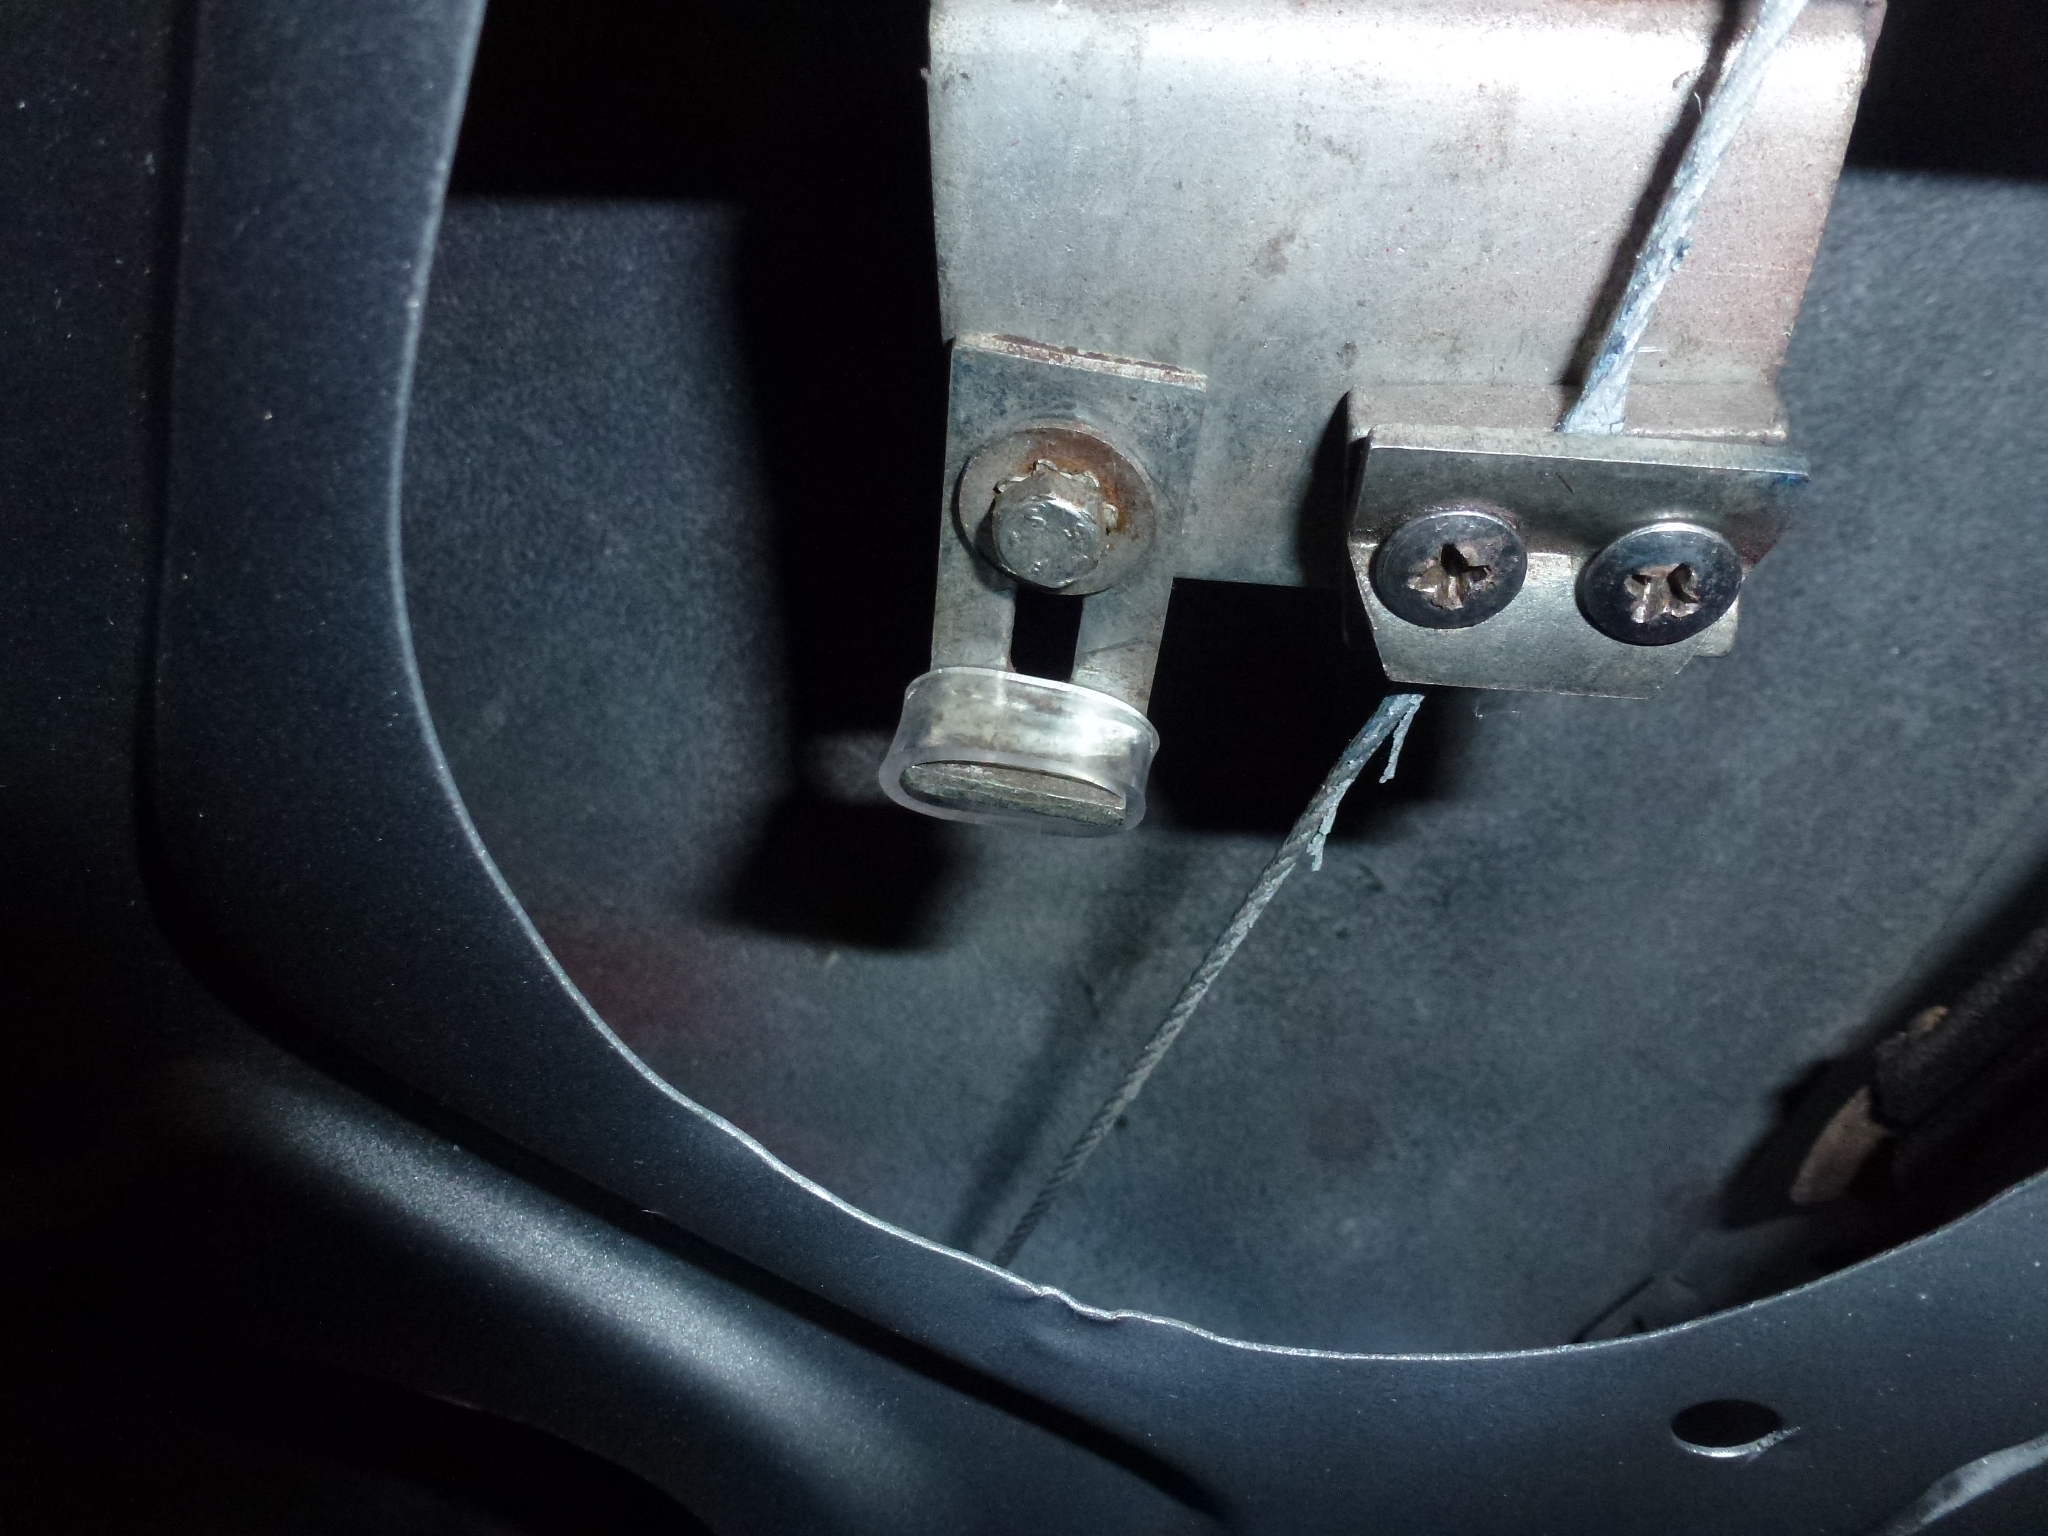
One of the electric window stops had a piece of vinyl tubing on it, probably for a cushion when the window hits the bottom. The other side was bare, so I need to find a piece of tubing that fits and put it on that side.
-
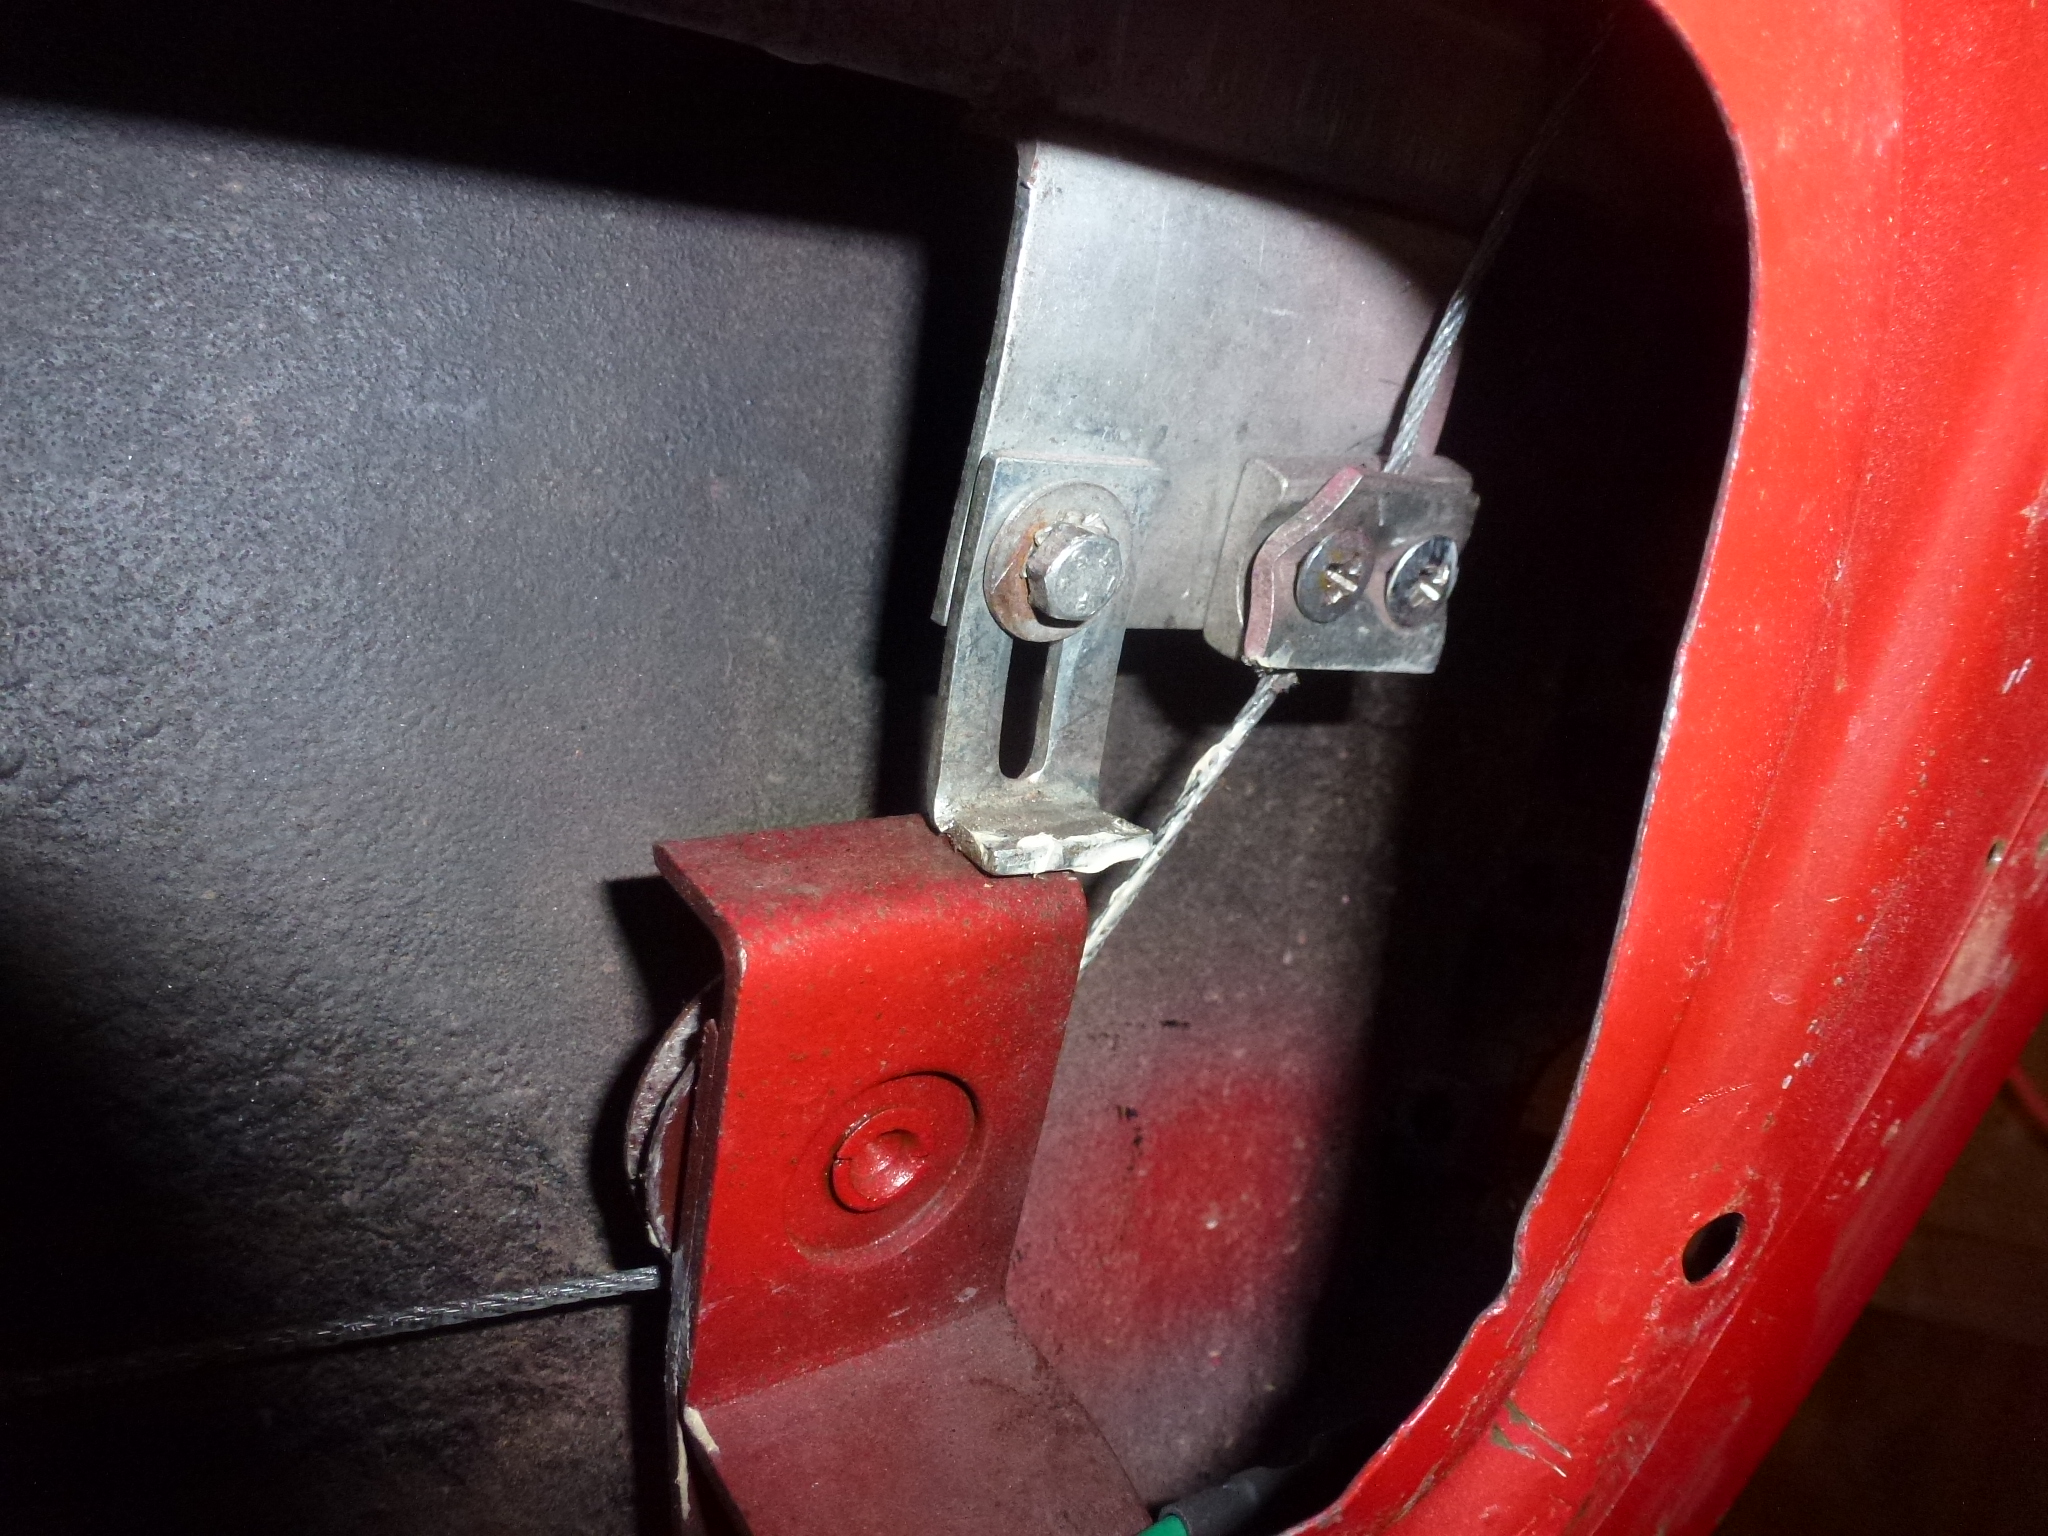
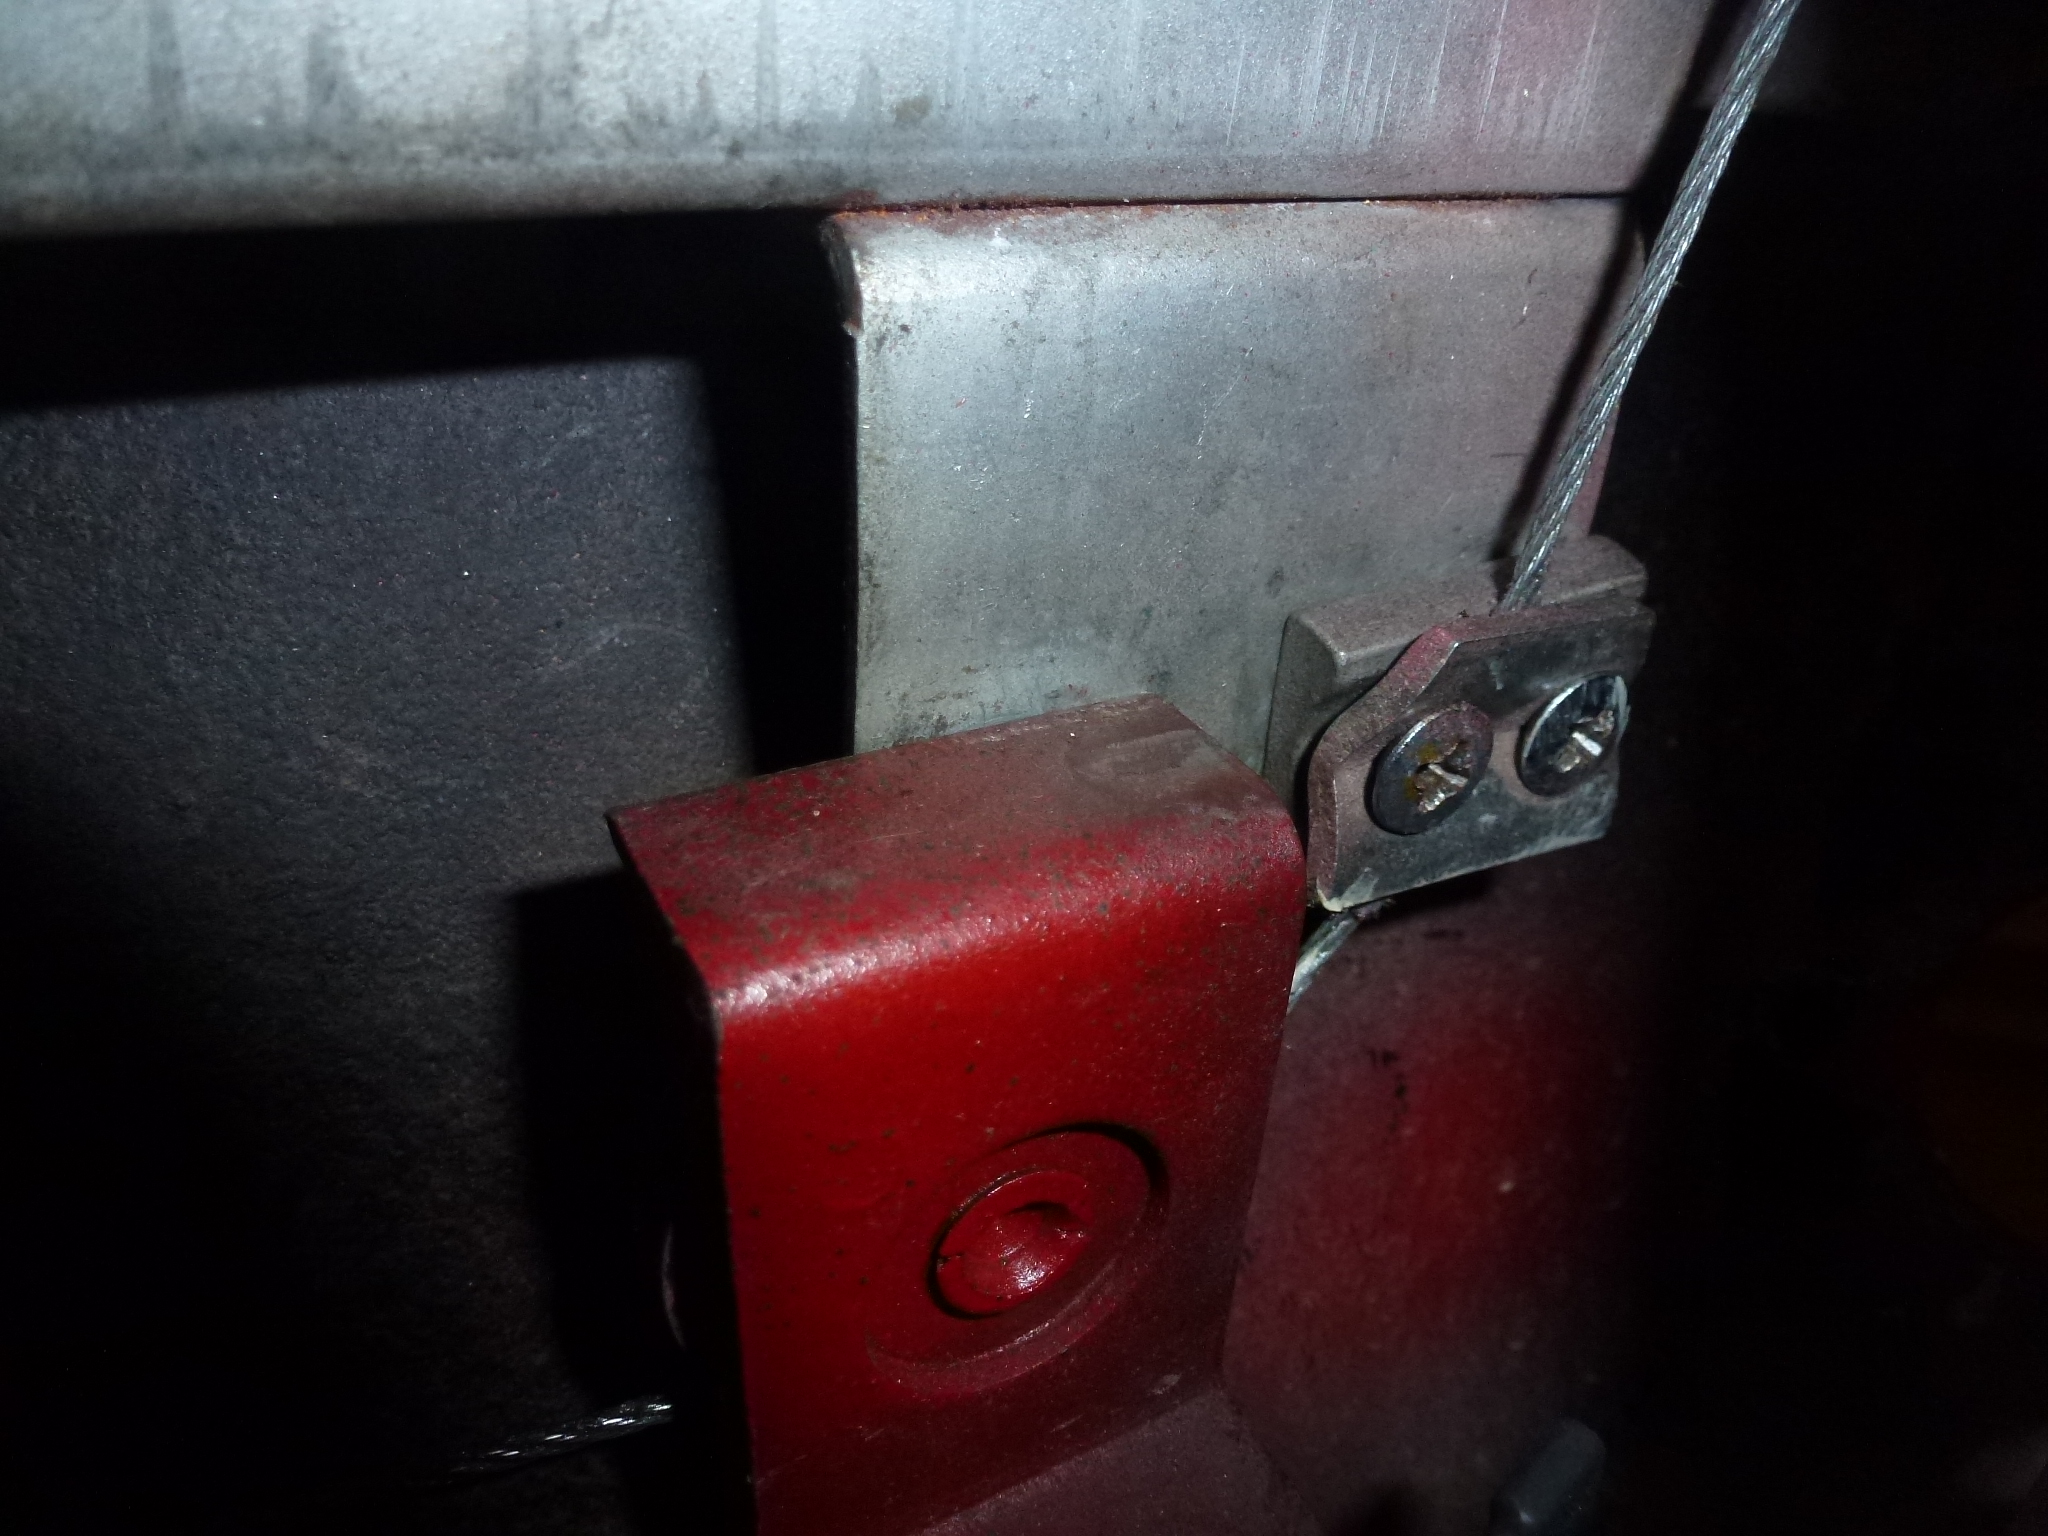
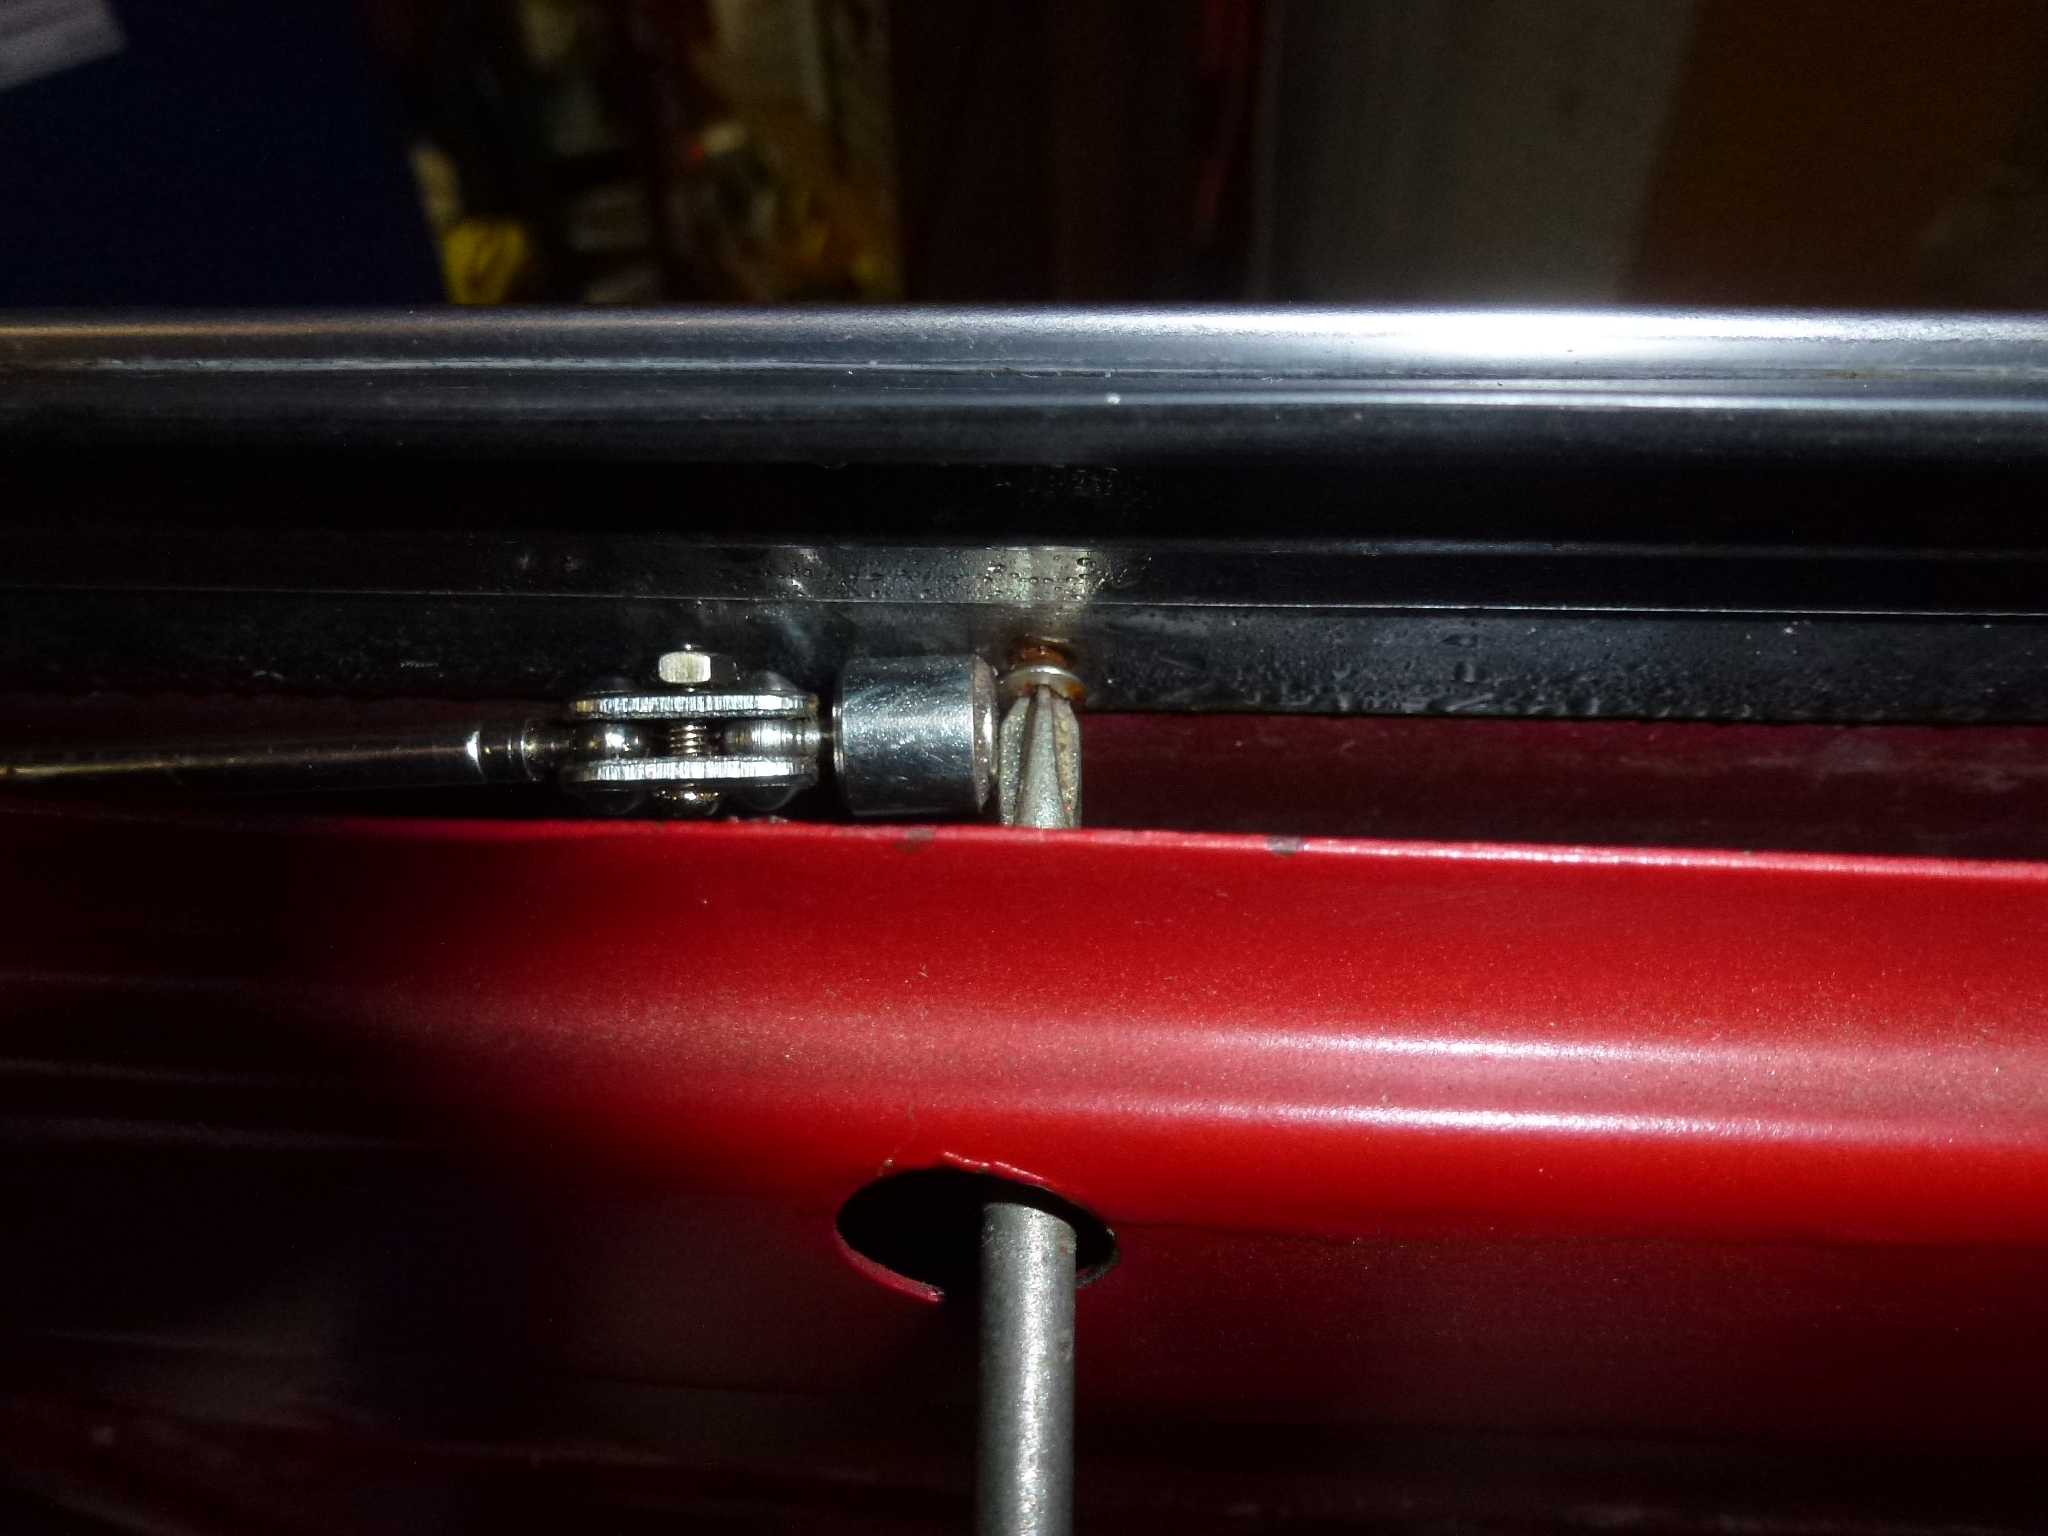
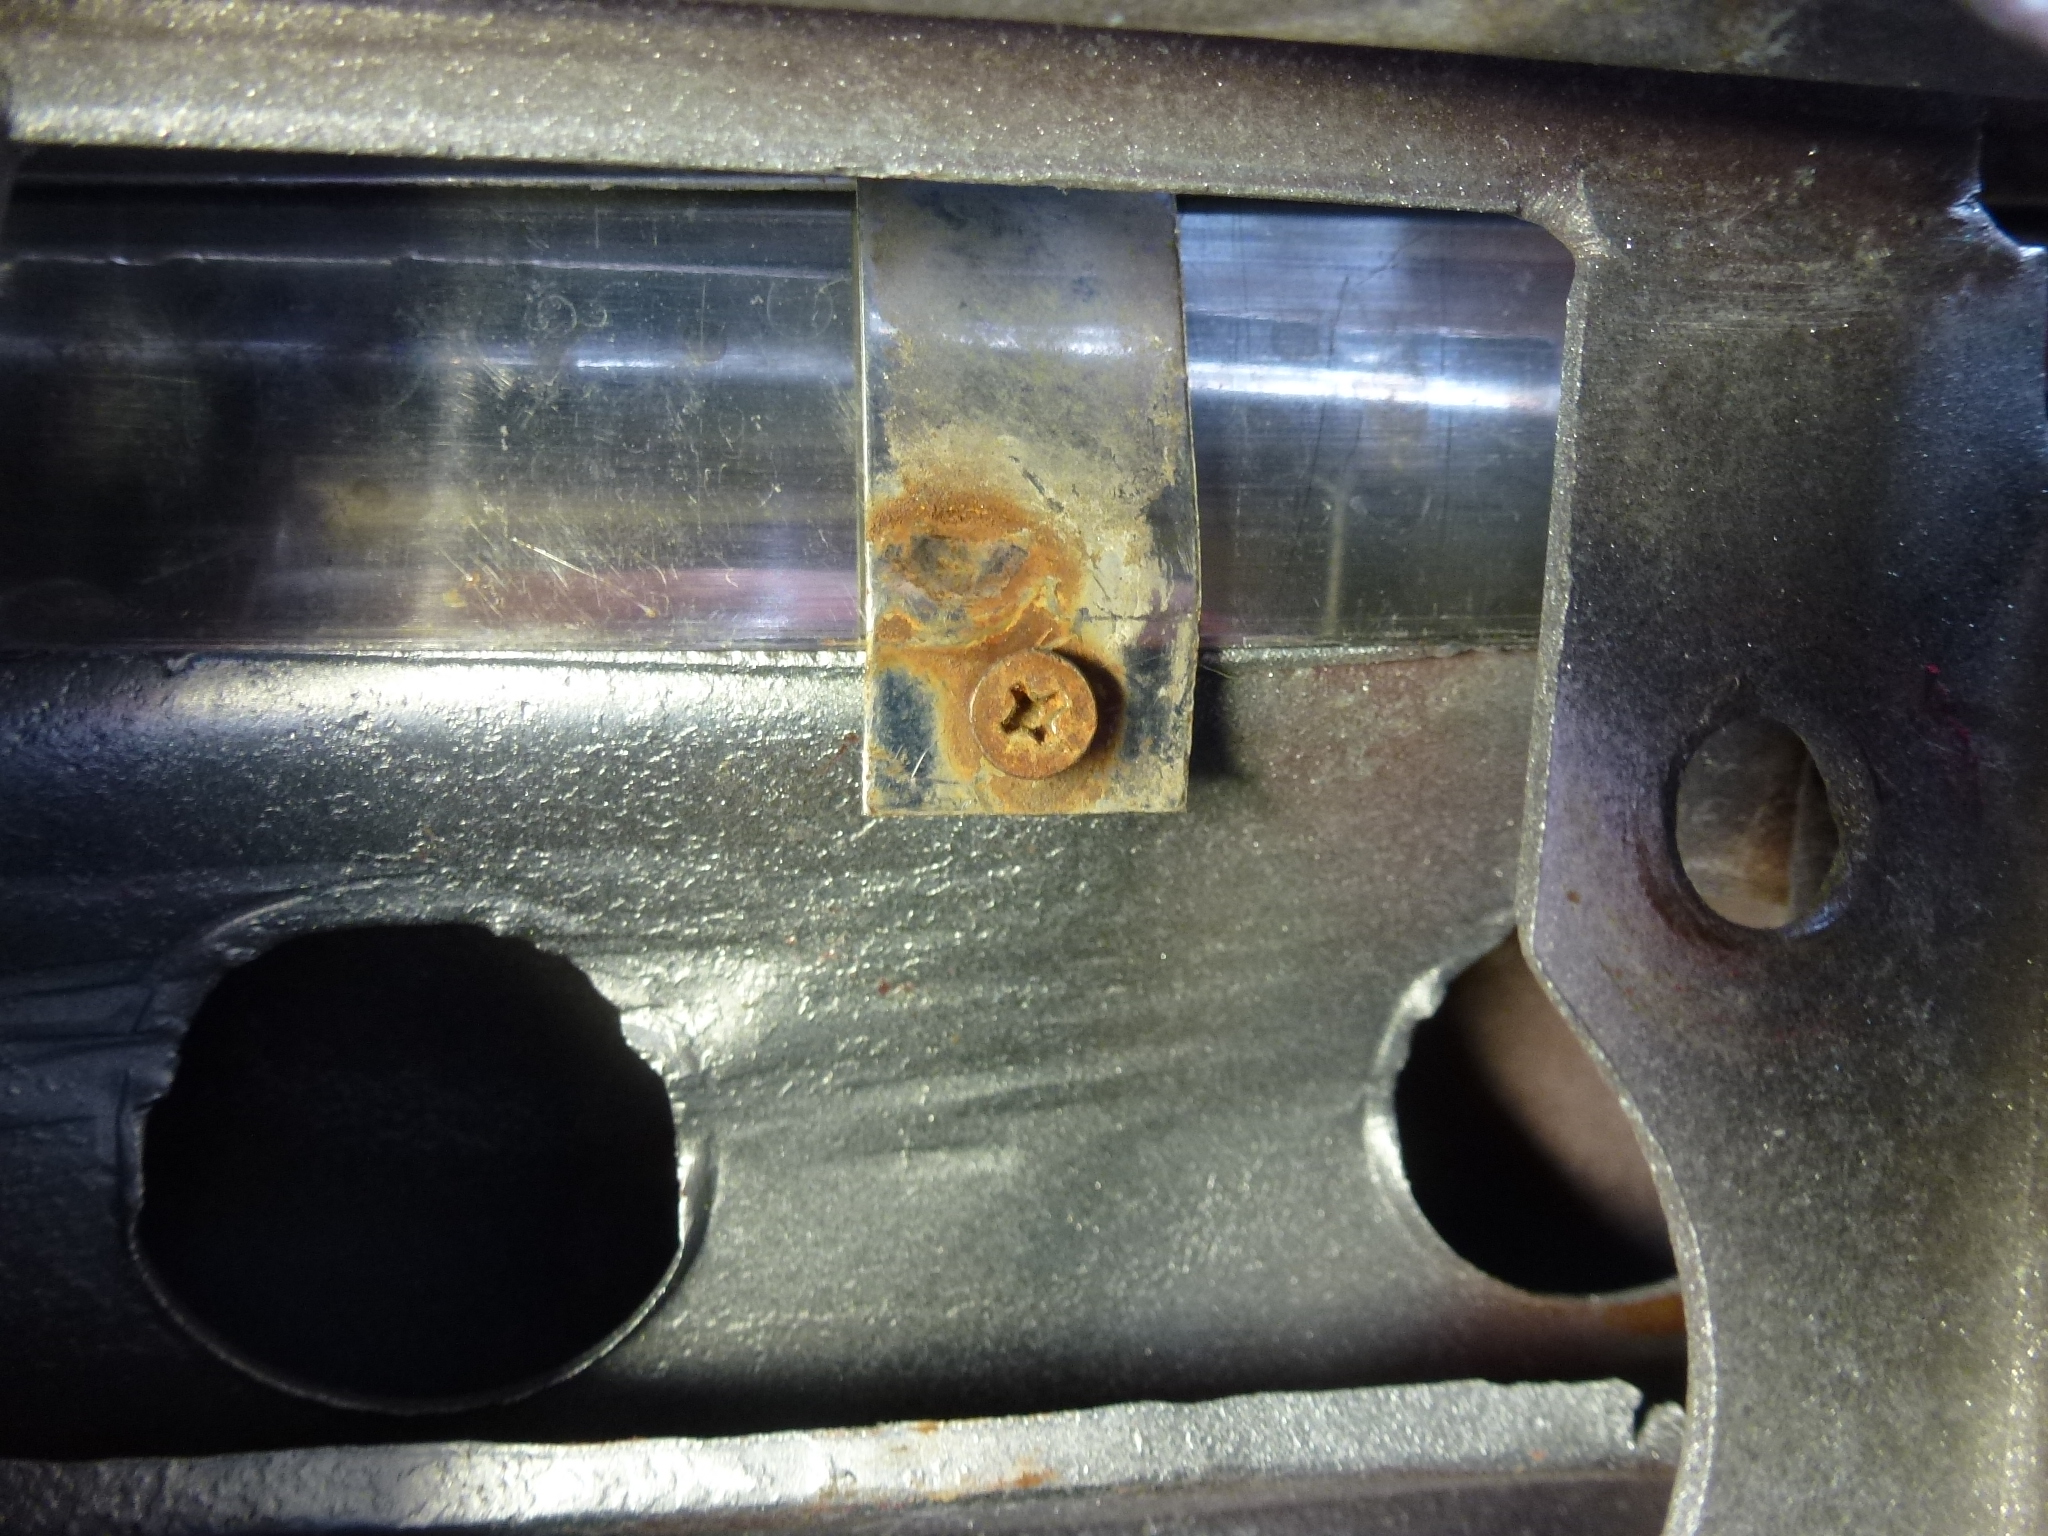
The screws holding a clip for the electric window cable sheave were Philips head. These should be have hex head screws. So I replaced them.

-
There were a couple of screws missing and I had to drill one out, so I just made a note on the respective plastic bag for the future.
There were just a couple more items to deal with related to the door.
-
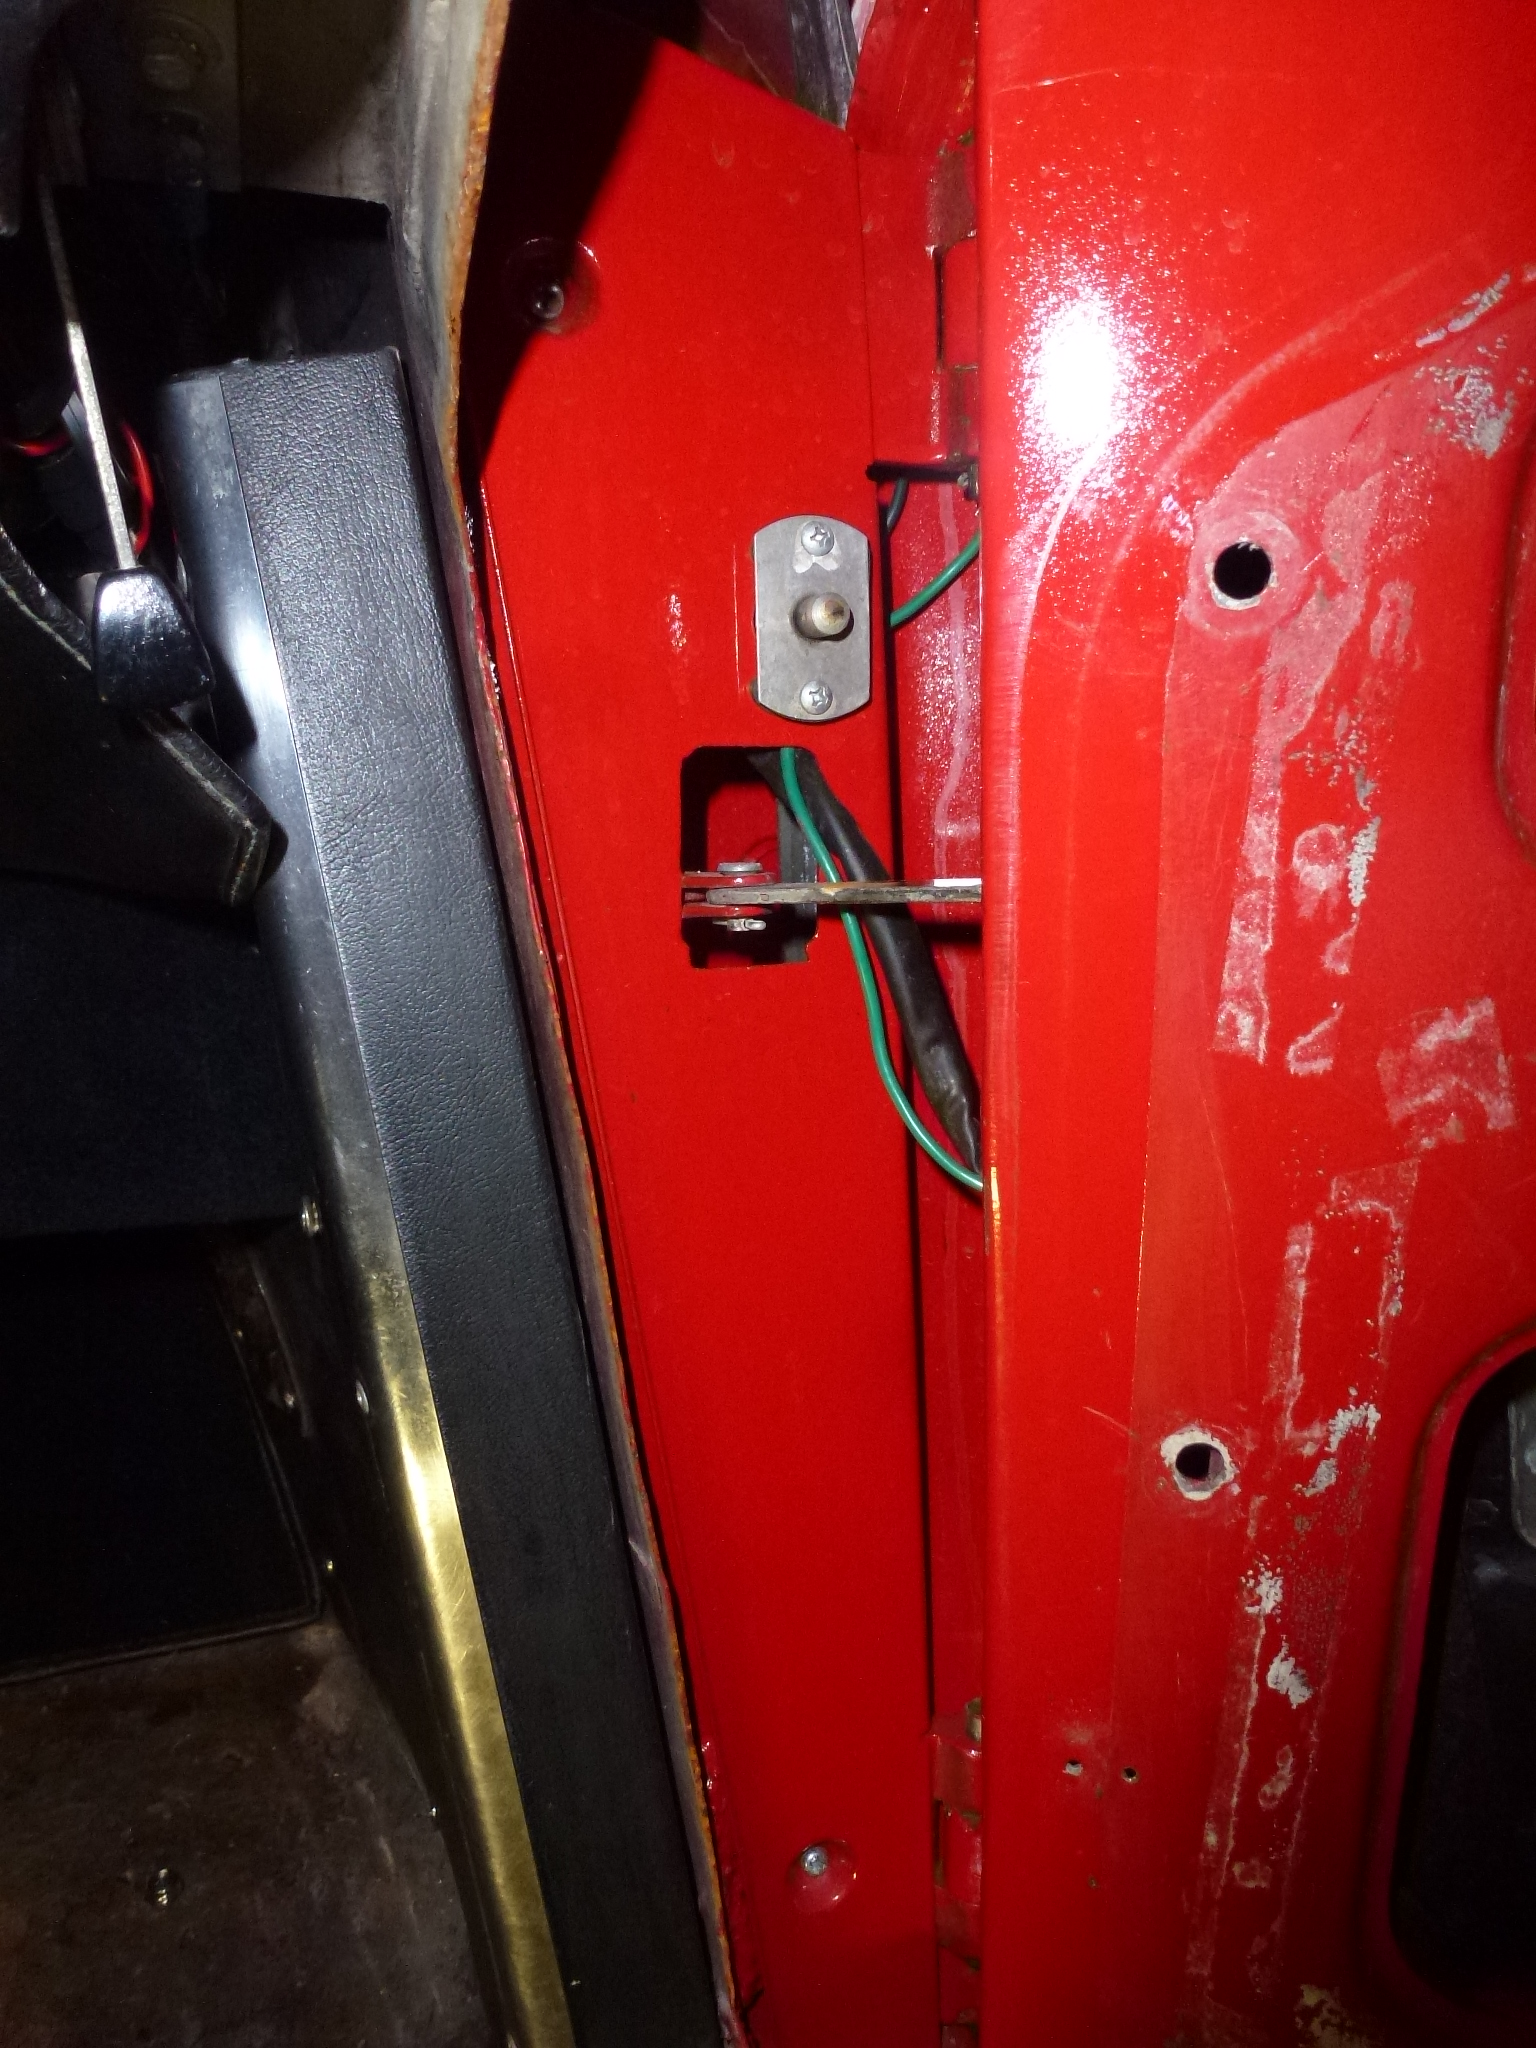
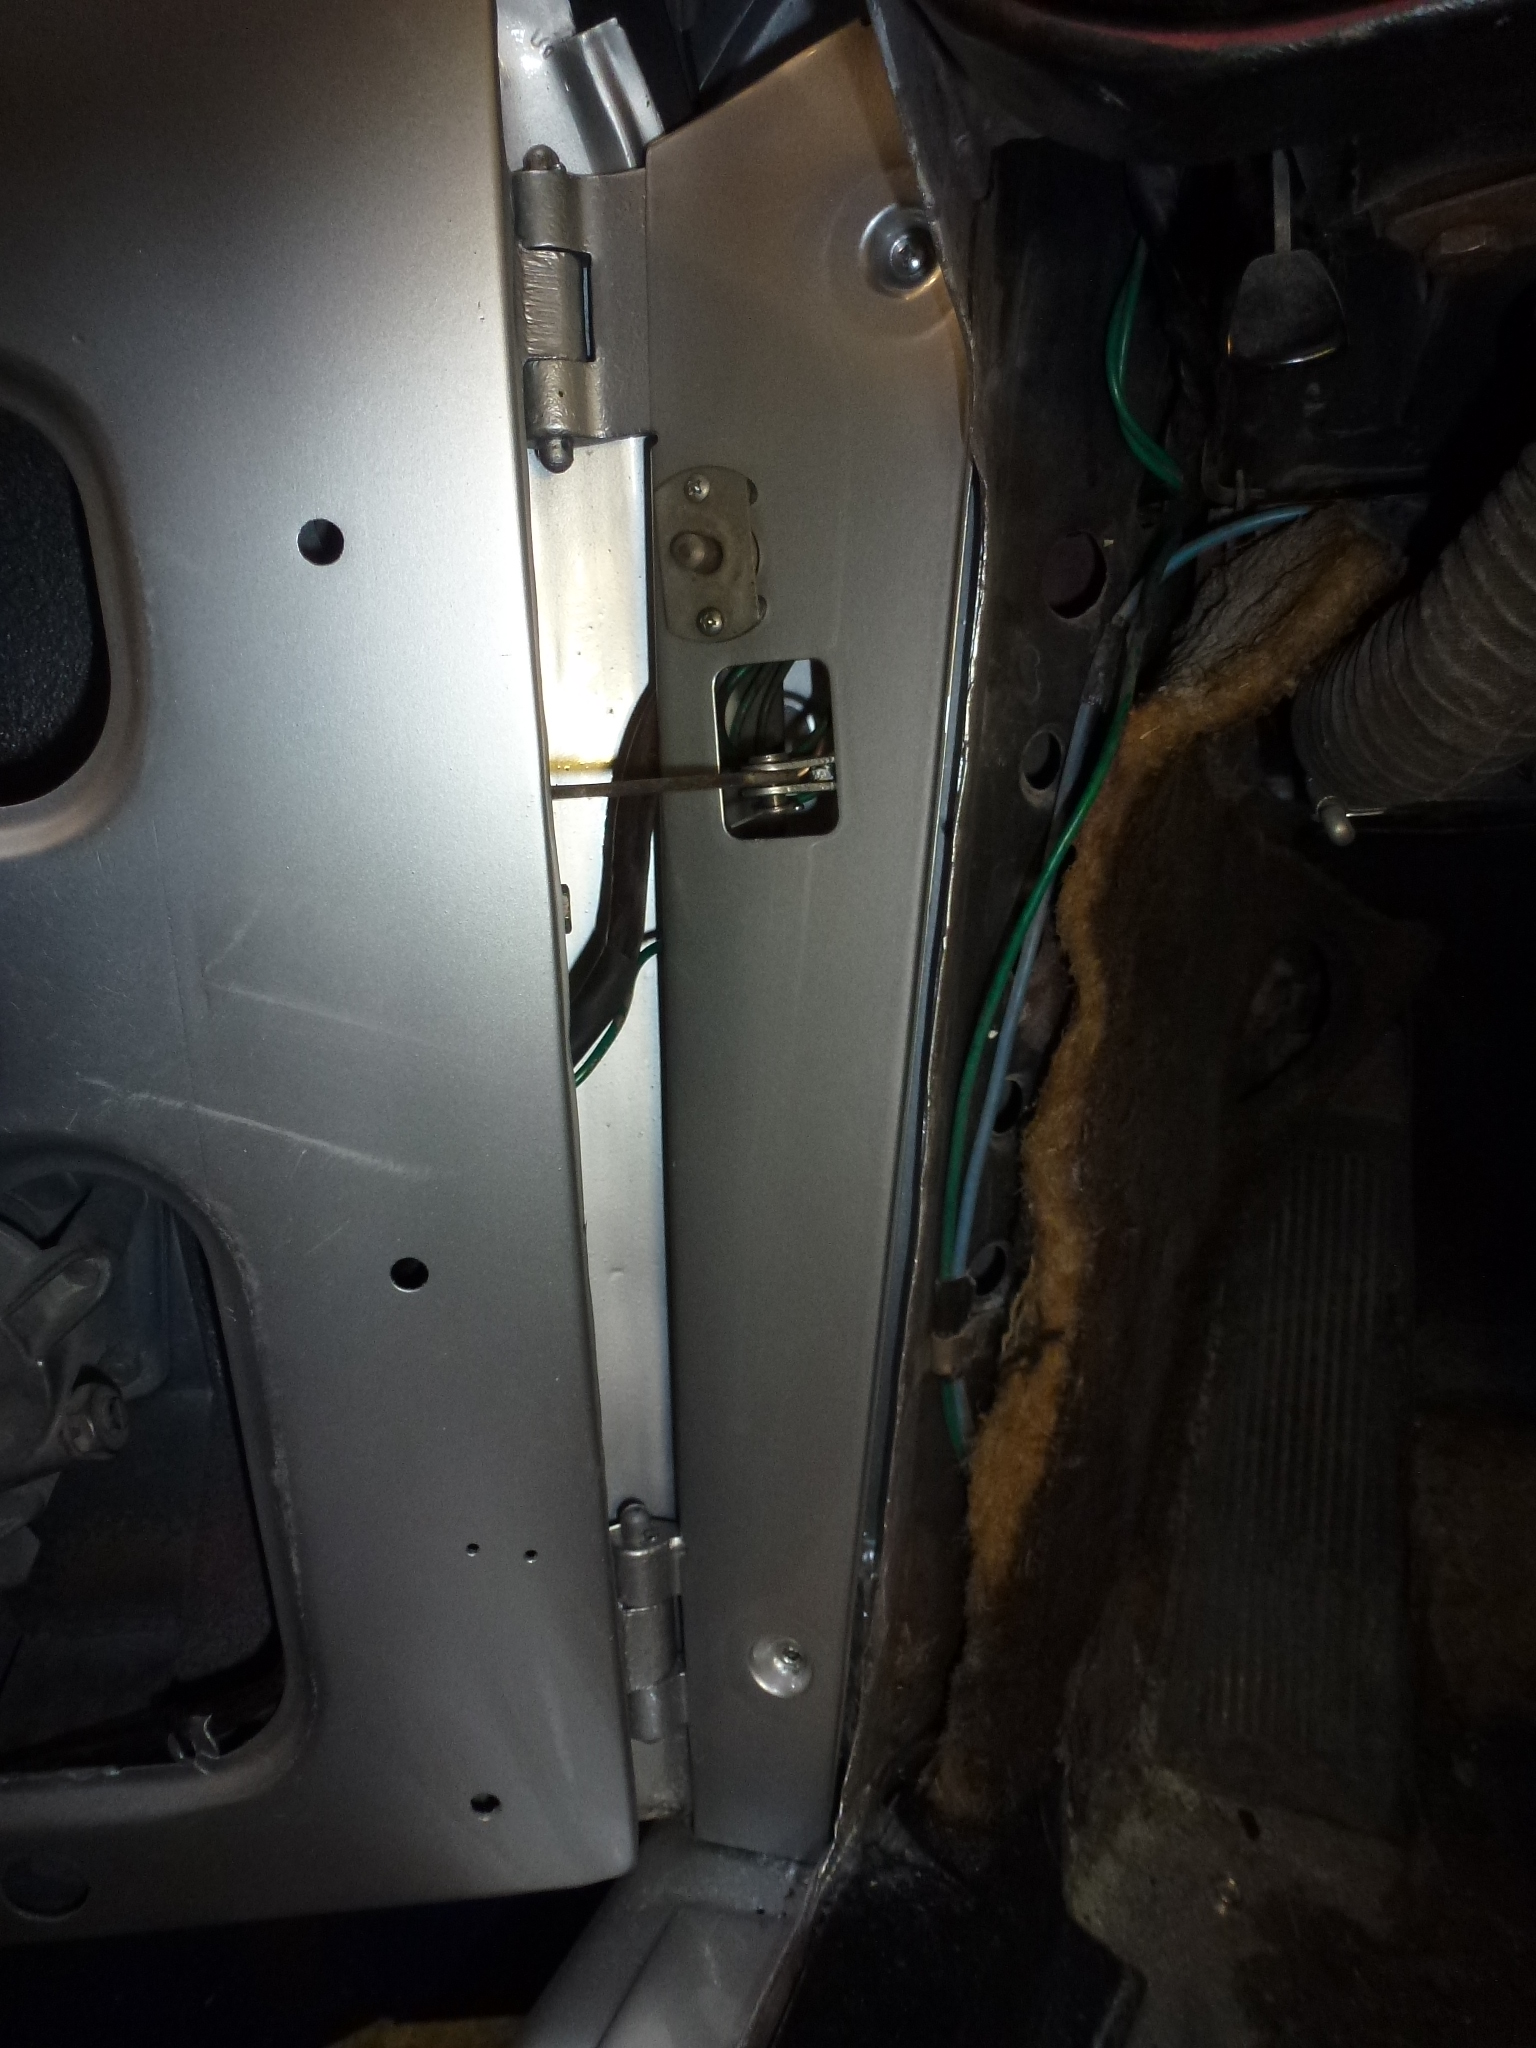
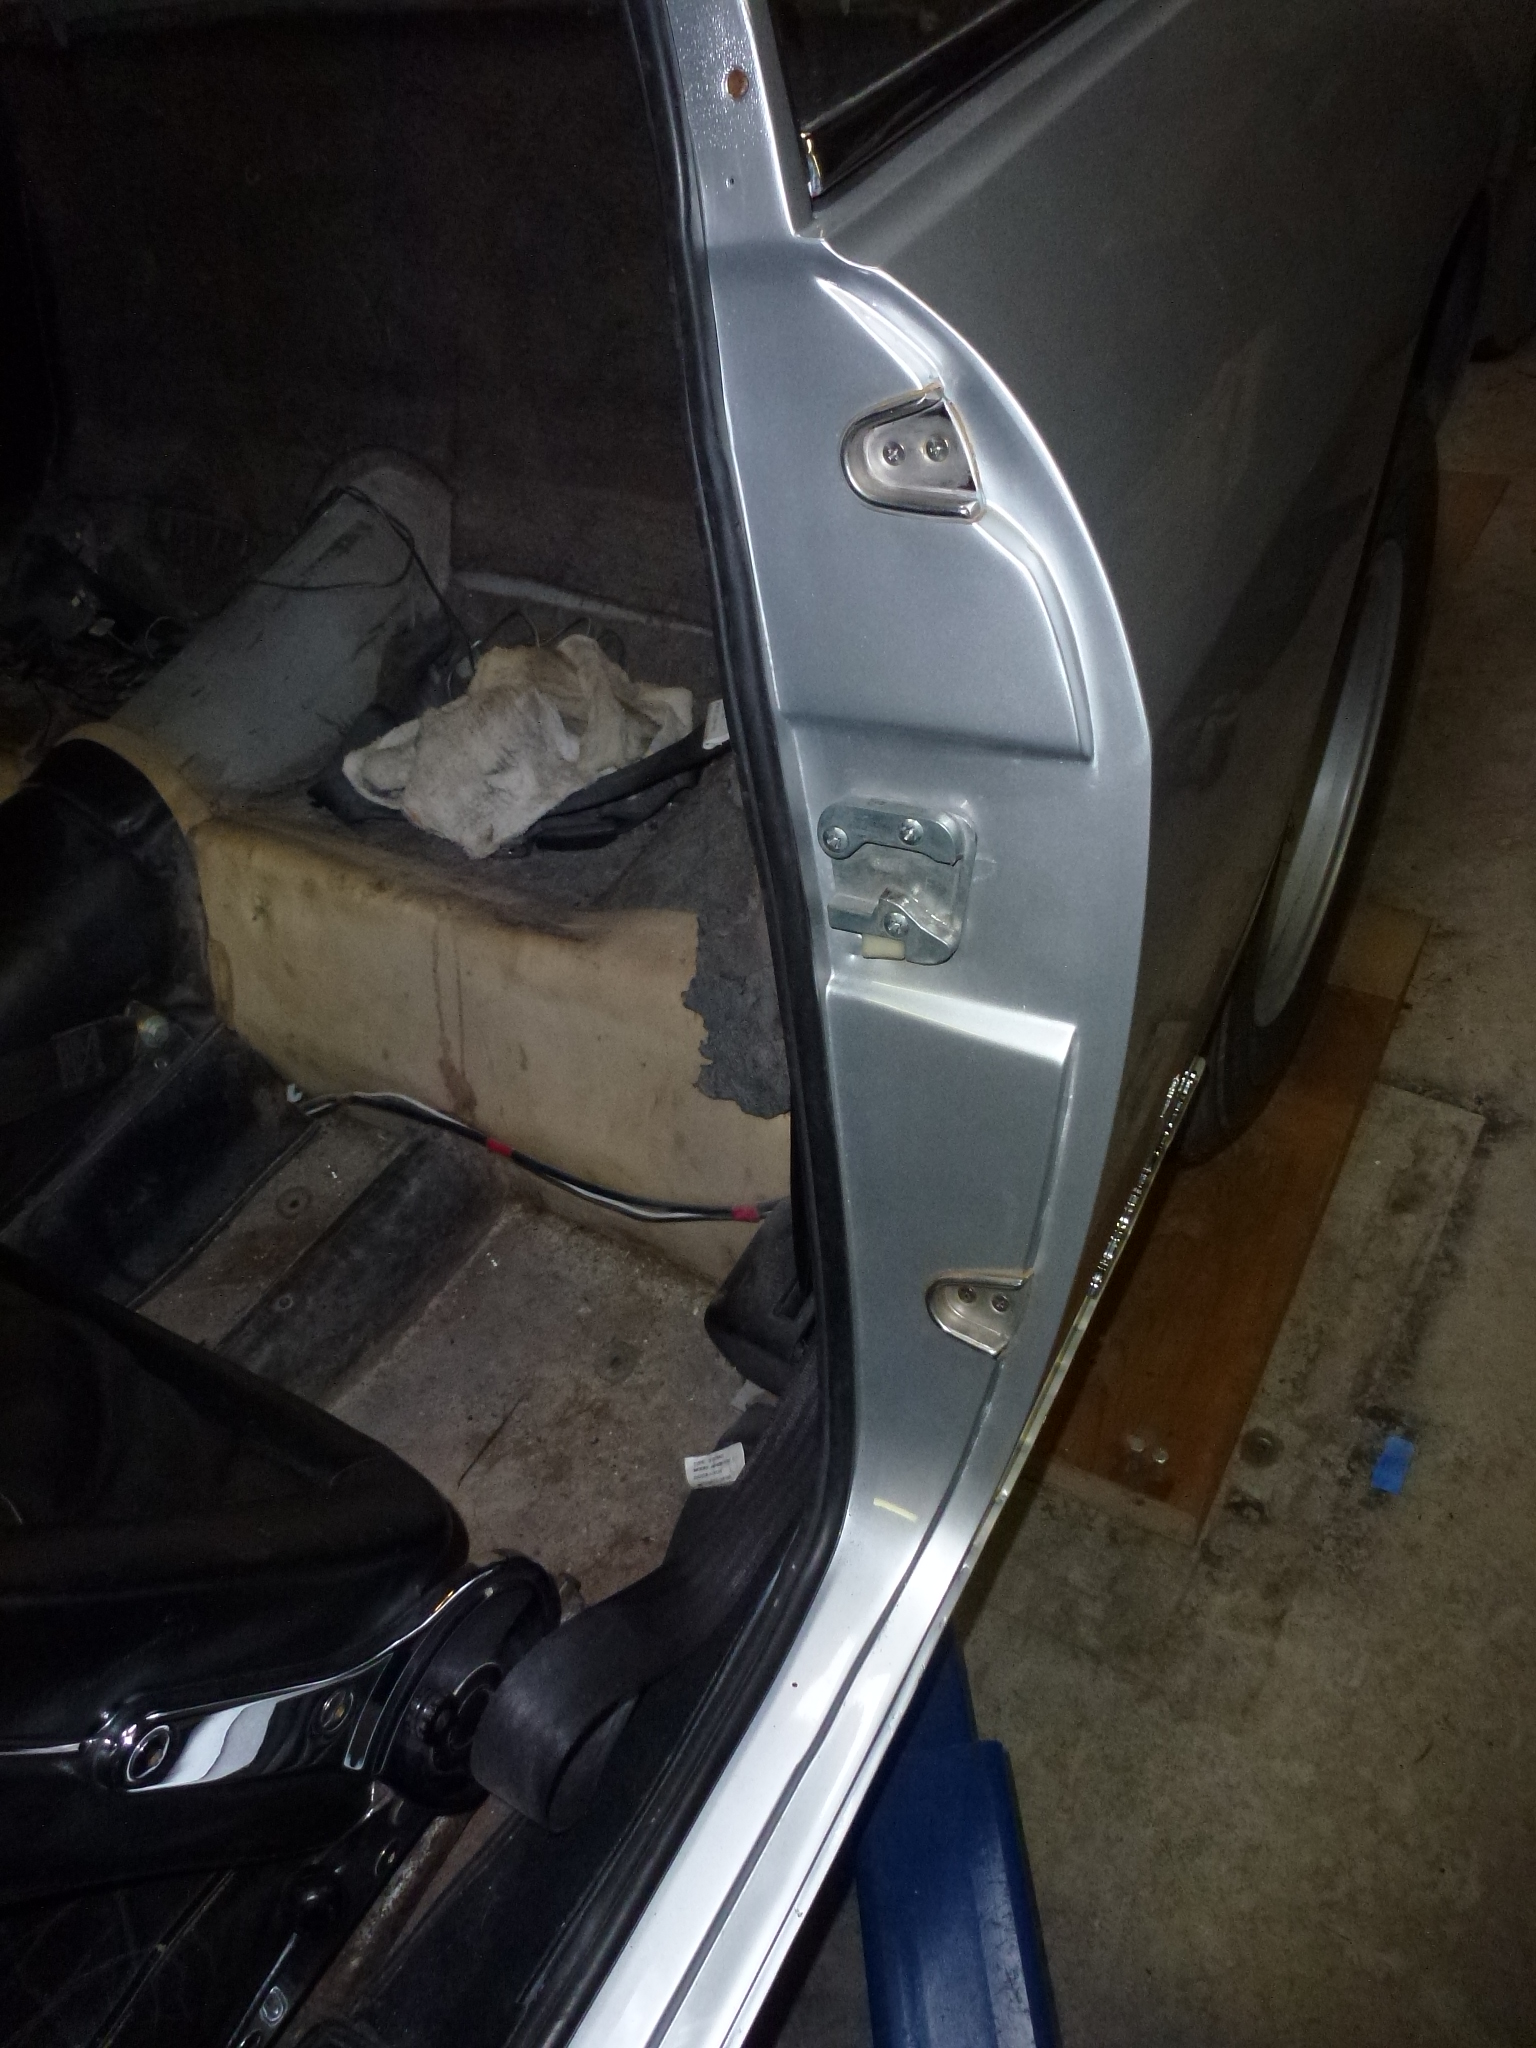
The panel covering the hinge area needed to be removed. To start, you have to remove the wiring in the door that goes to the electric window motor and the light in the rear edge of the door. These go through a grommet in the front edge of the door. Then you need to remove the pin holding the door catch to the body. Next, remove the two screws holding the panel, pull the wiring through the opening and slip the panel away from the door catch. Now you can remove the wires leading to the door light switch and remember, the single wire going to one side of the switch is hot unless you disconnected the battery.
-
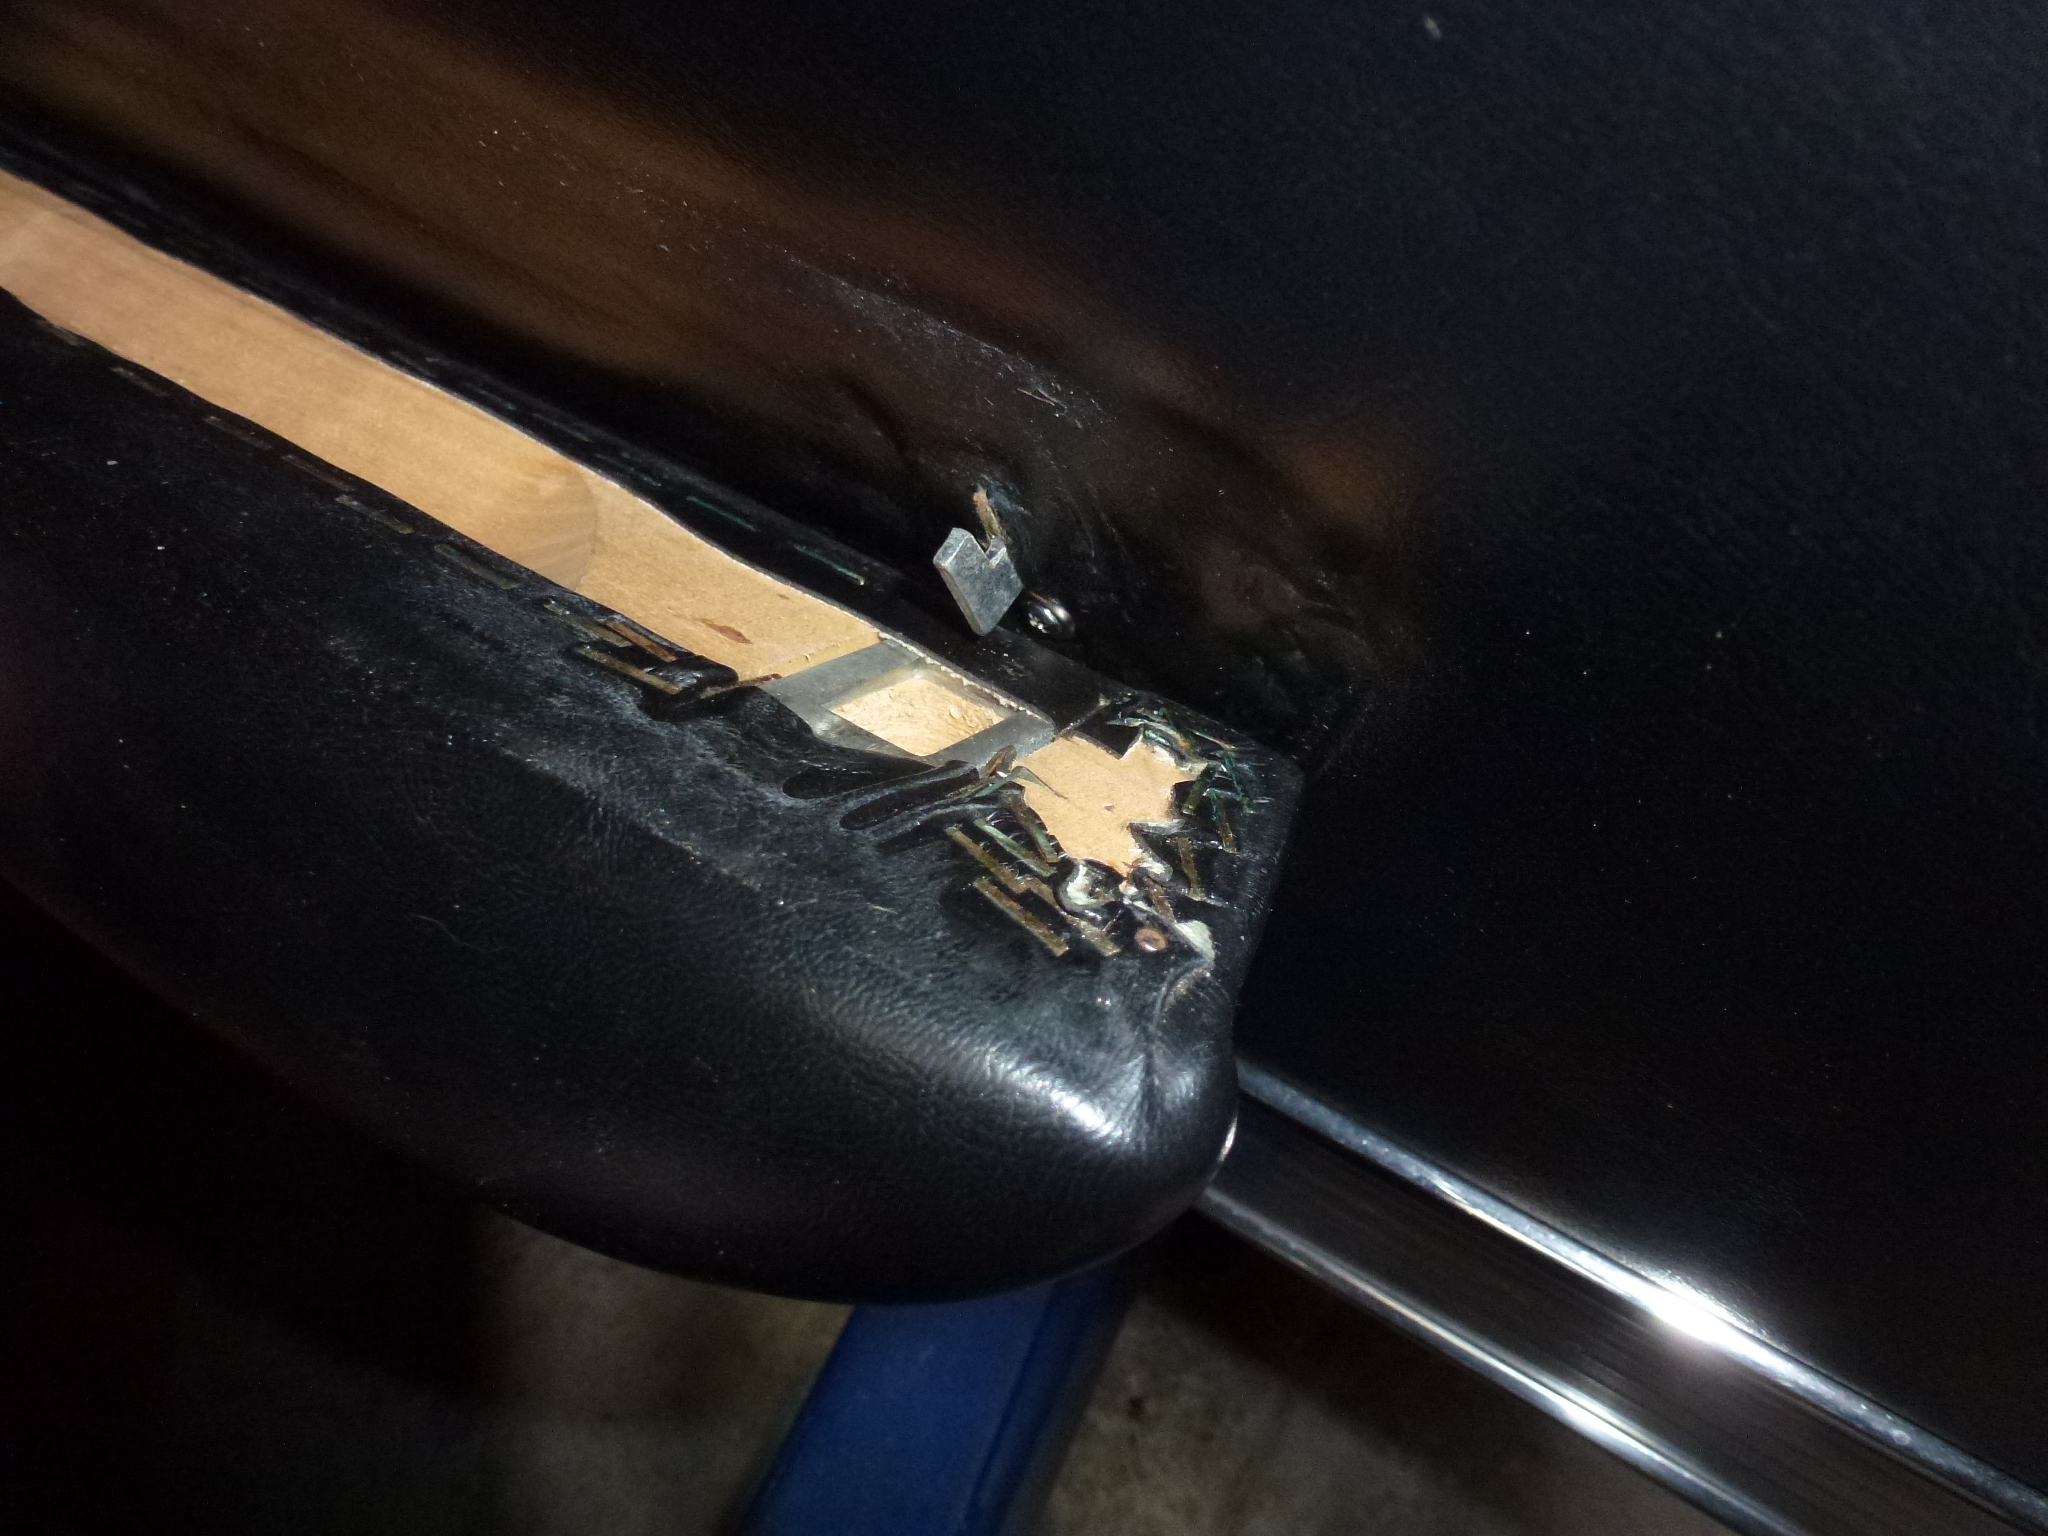
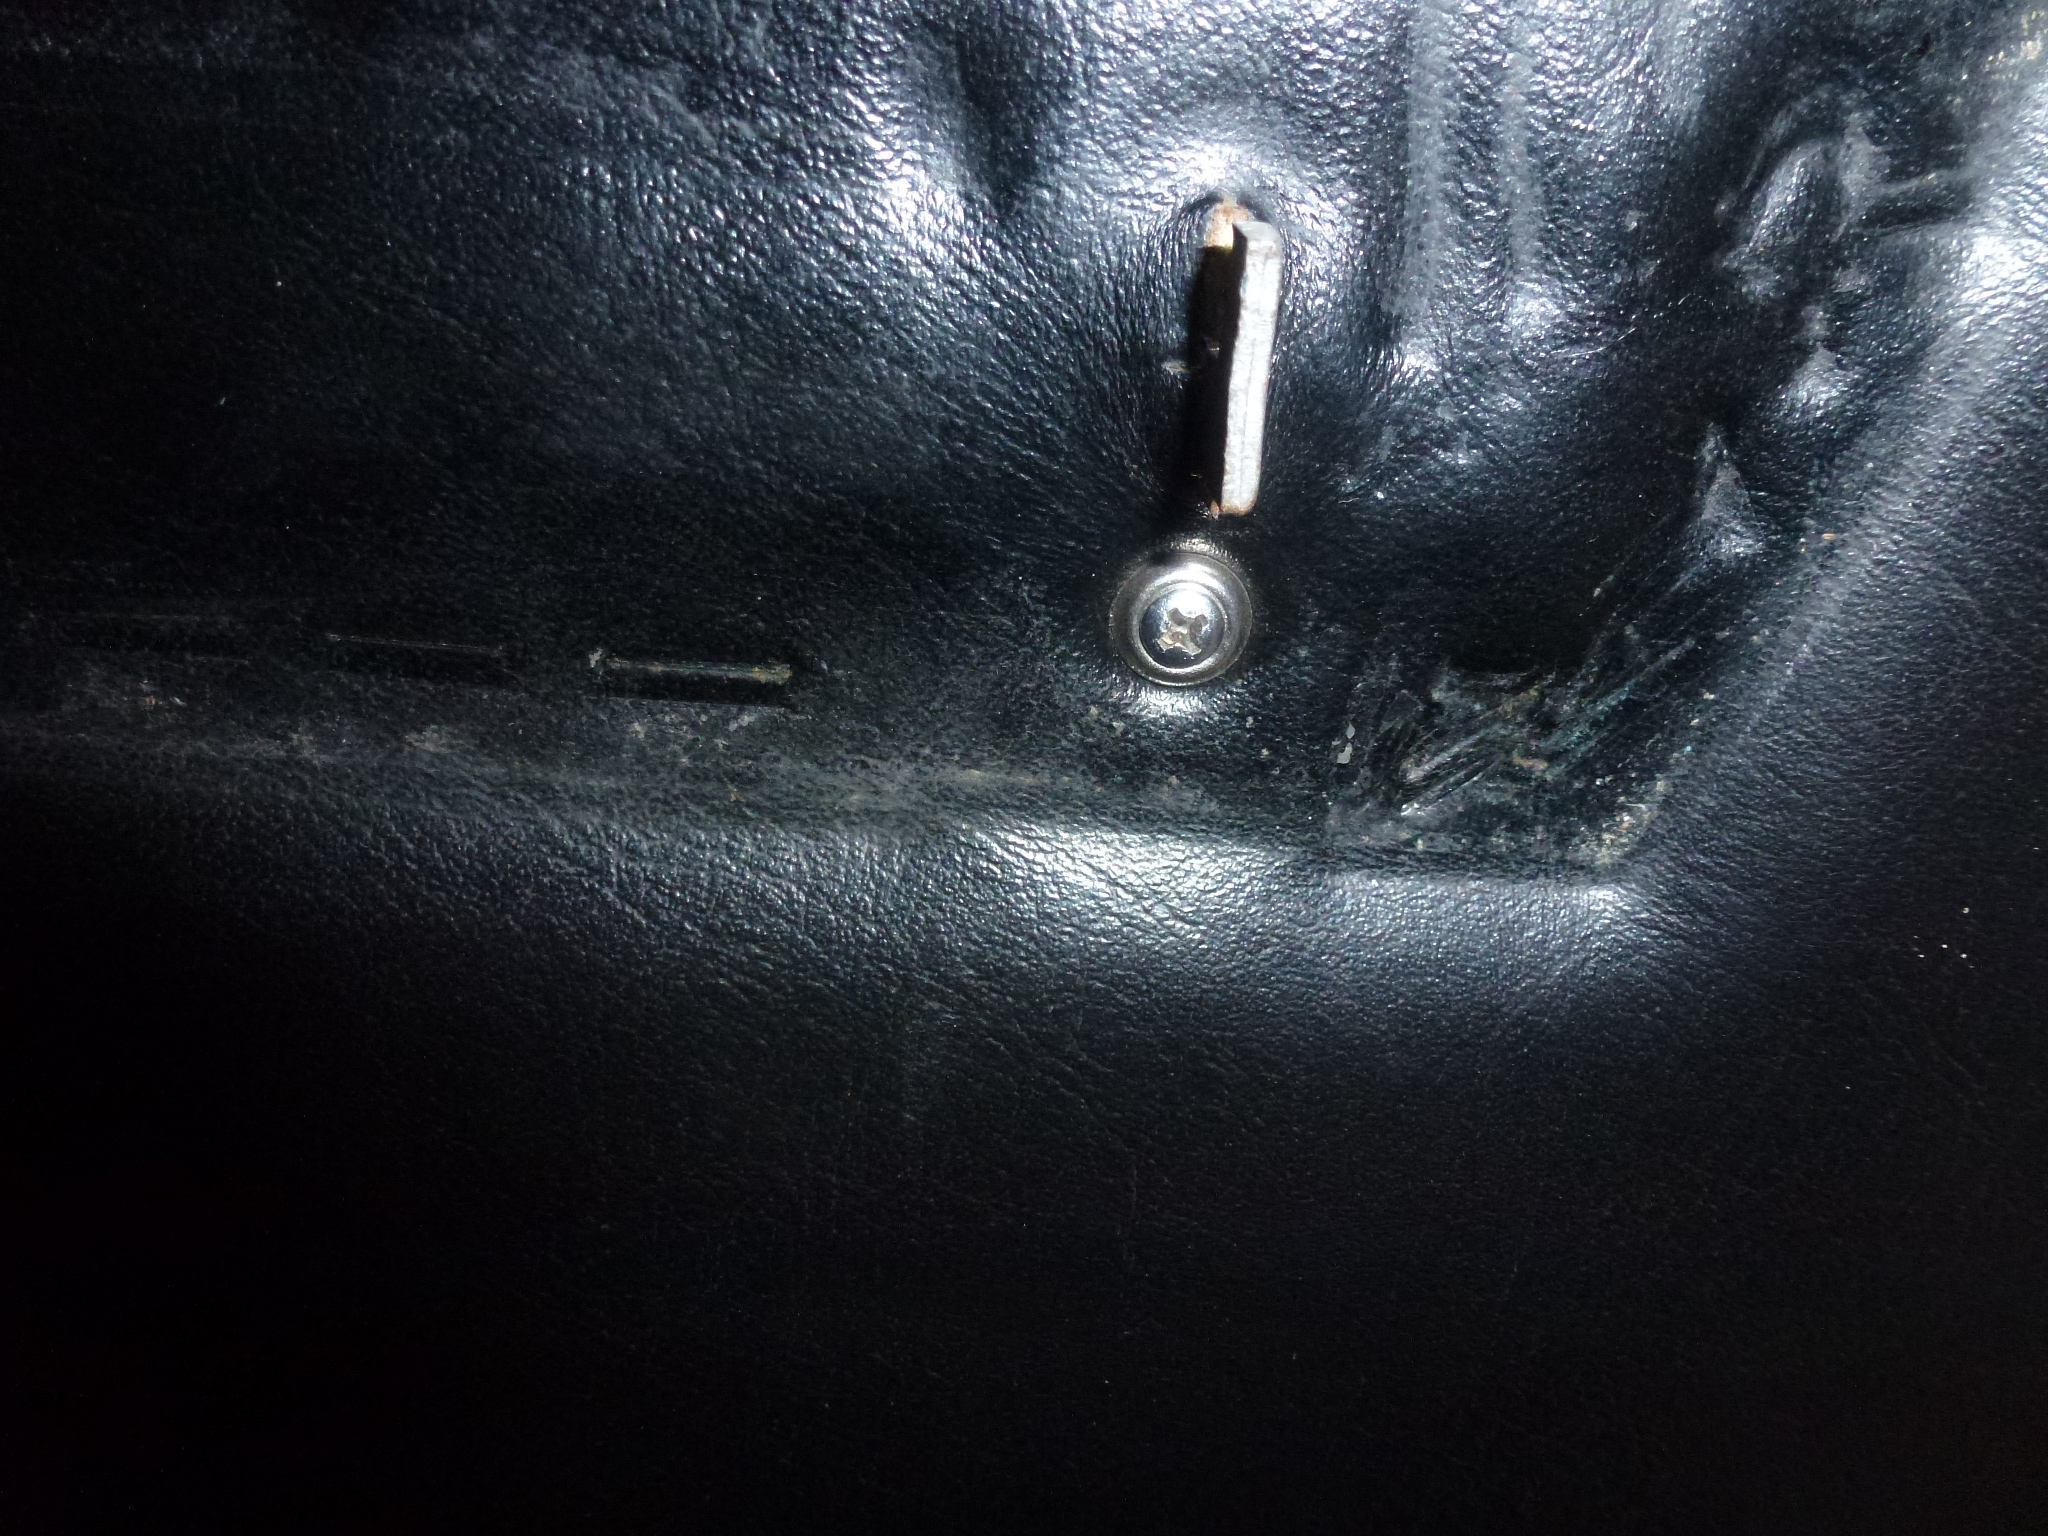
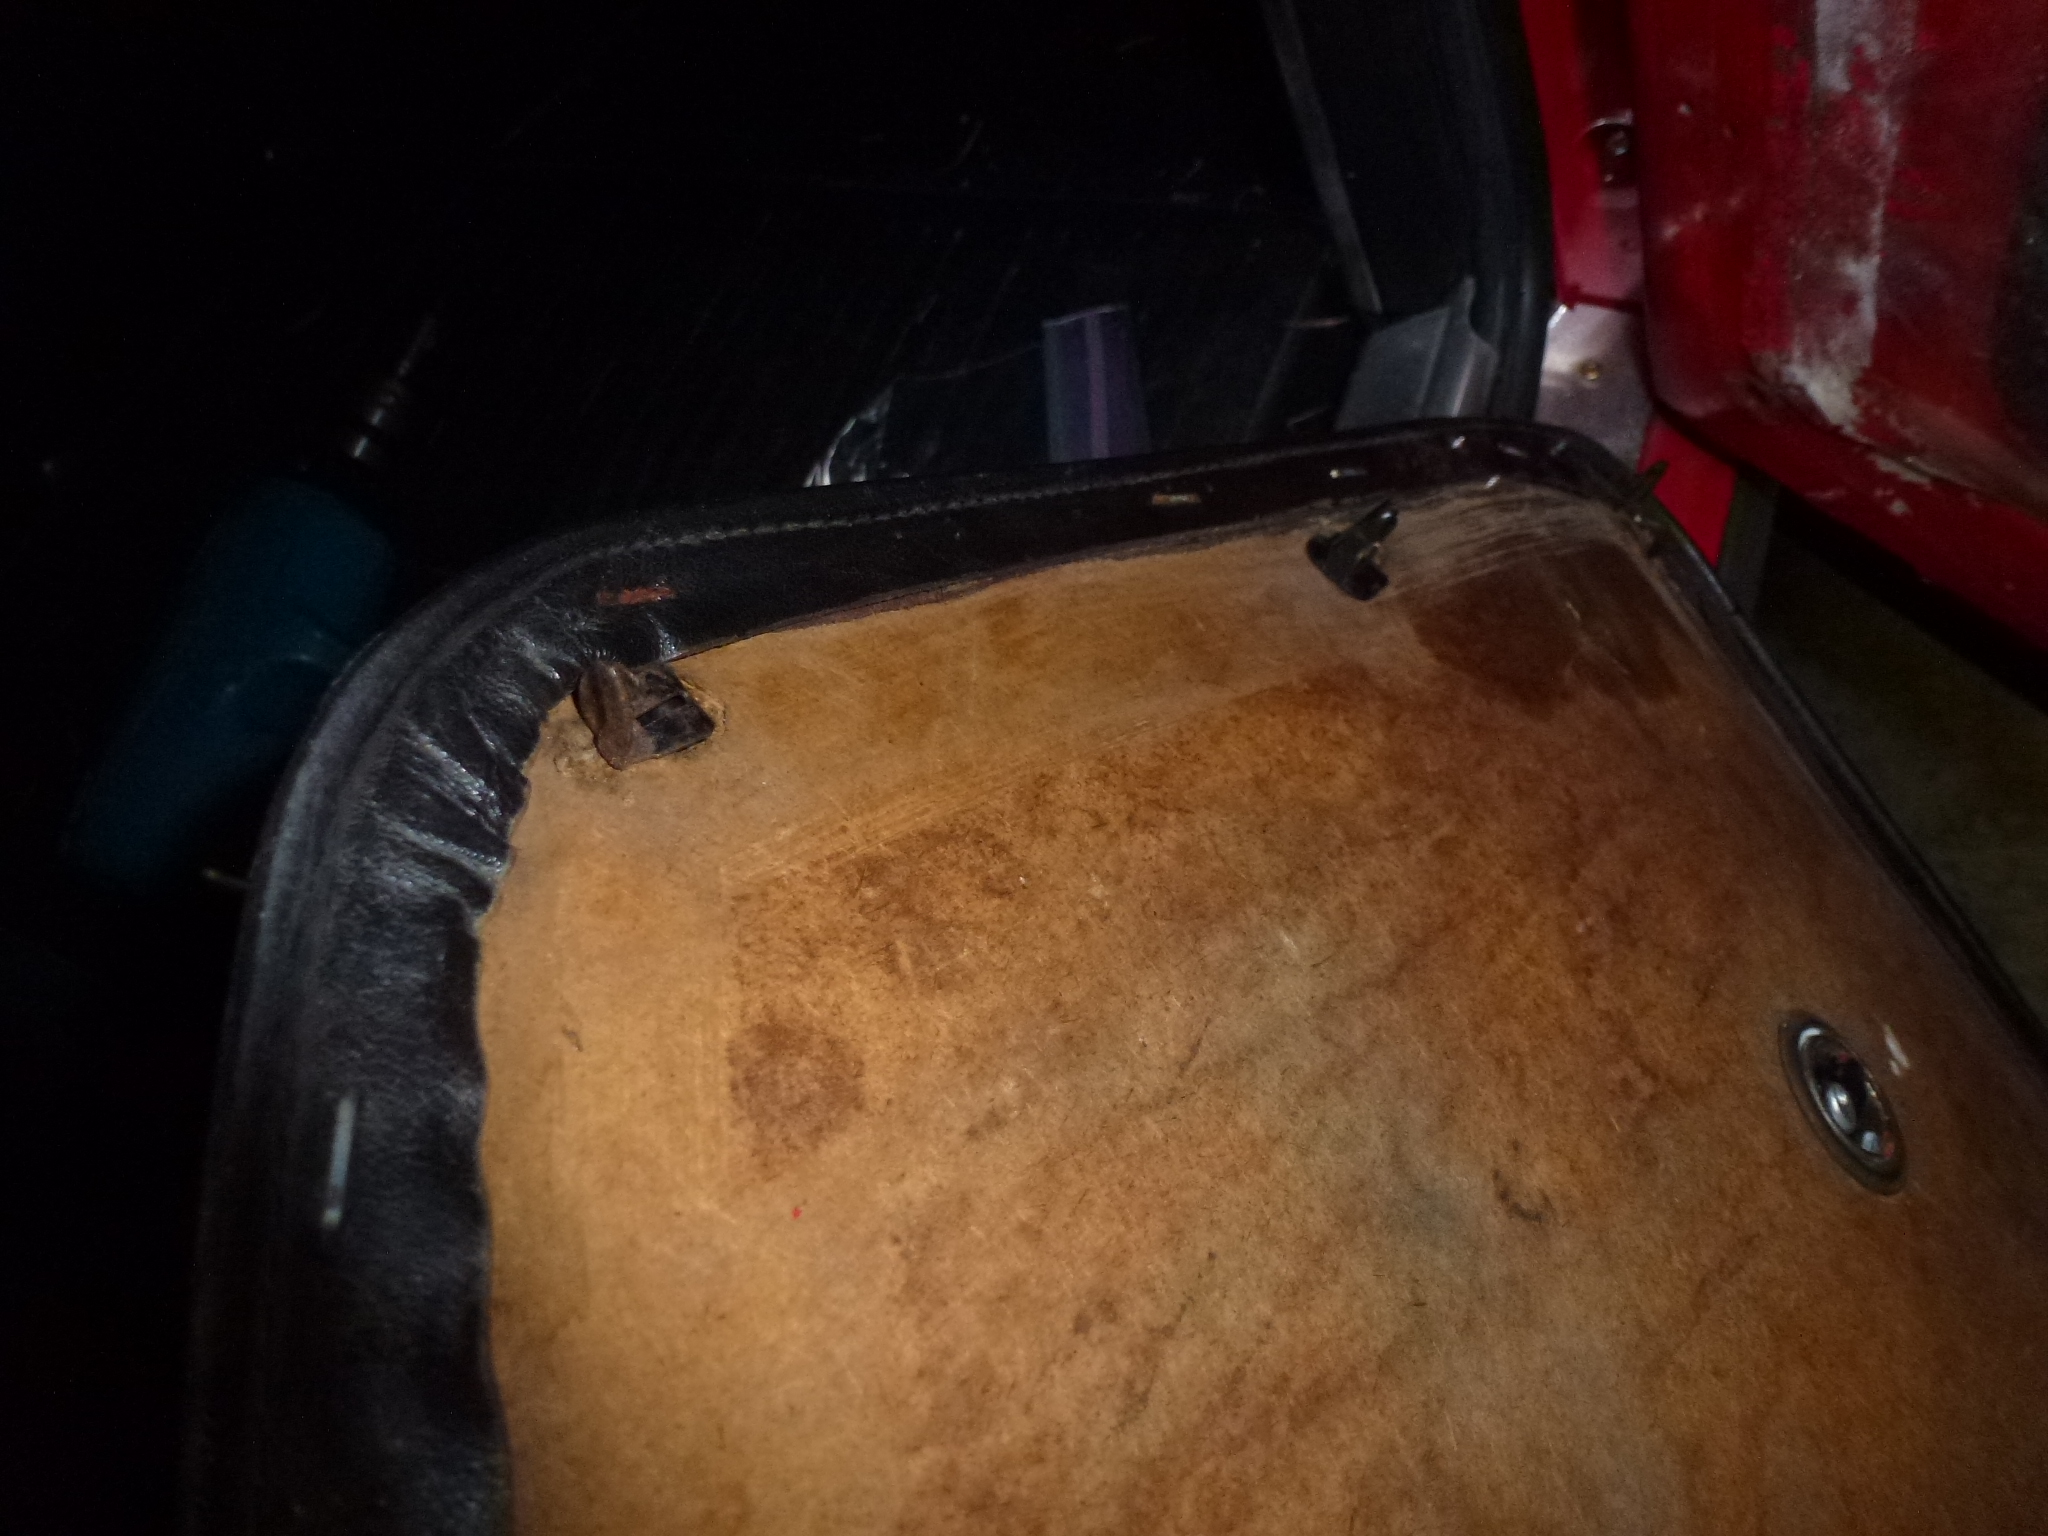
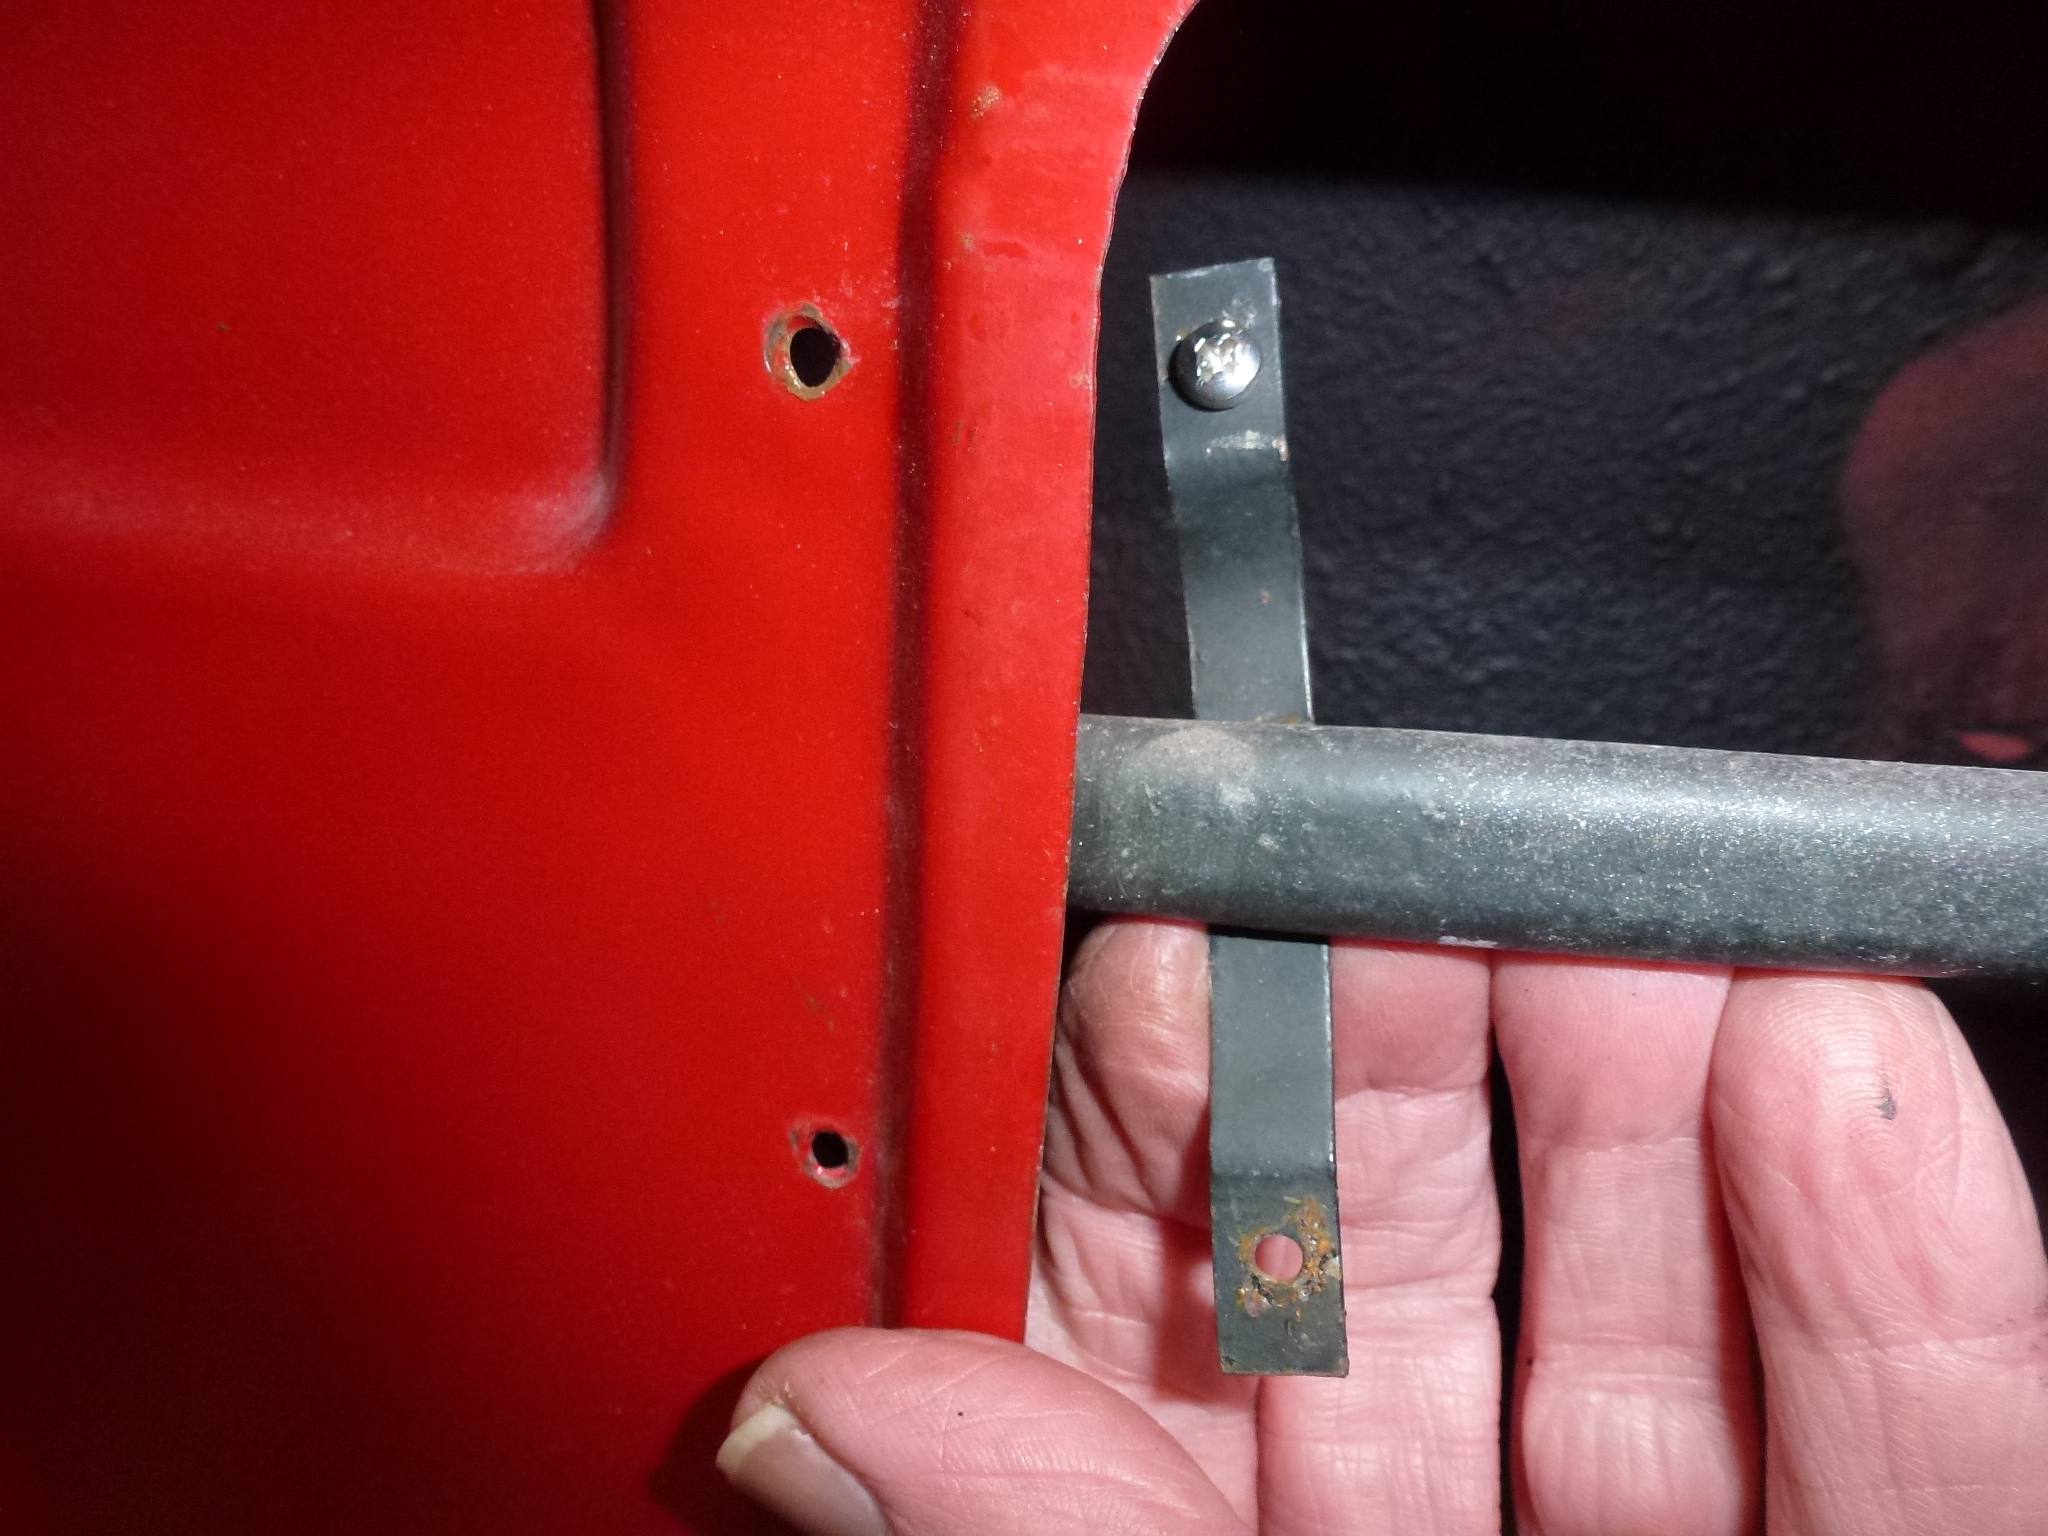
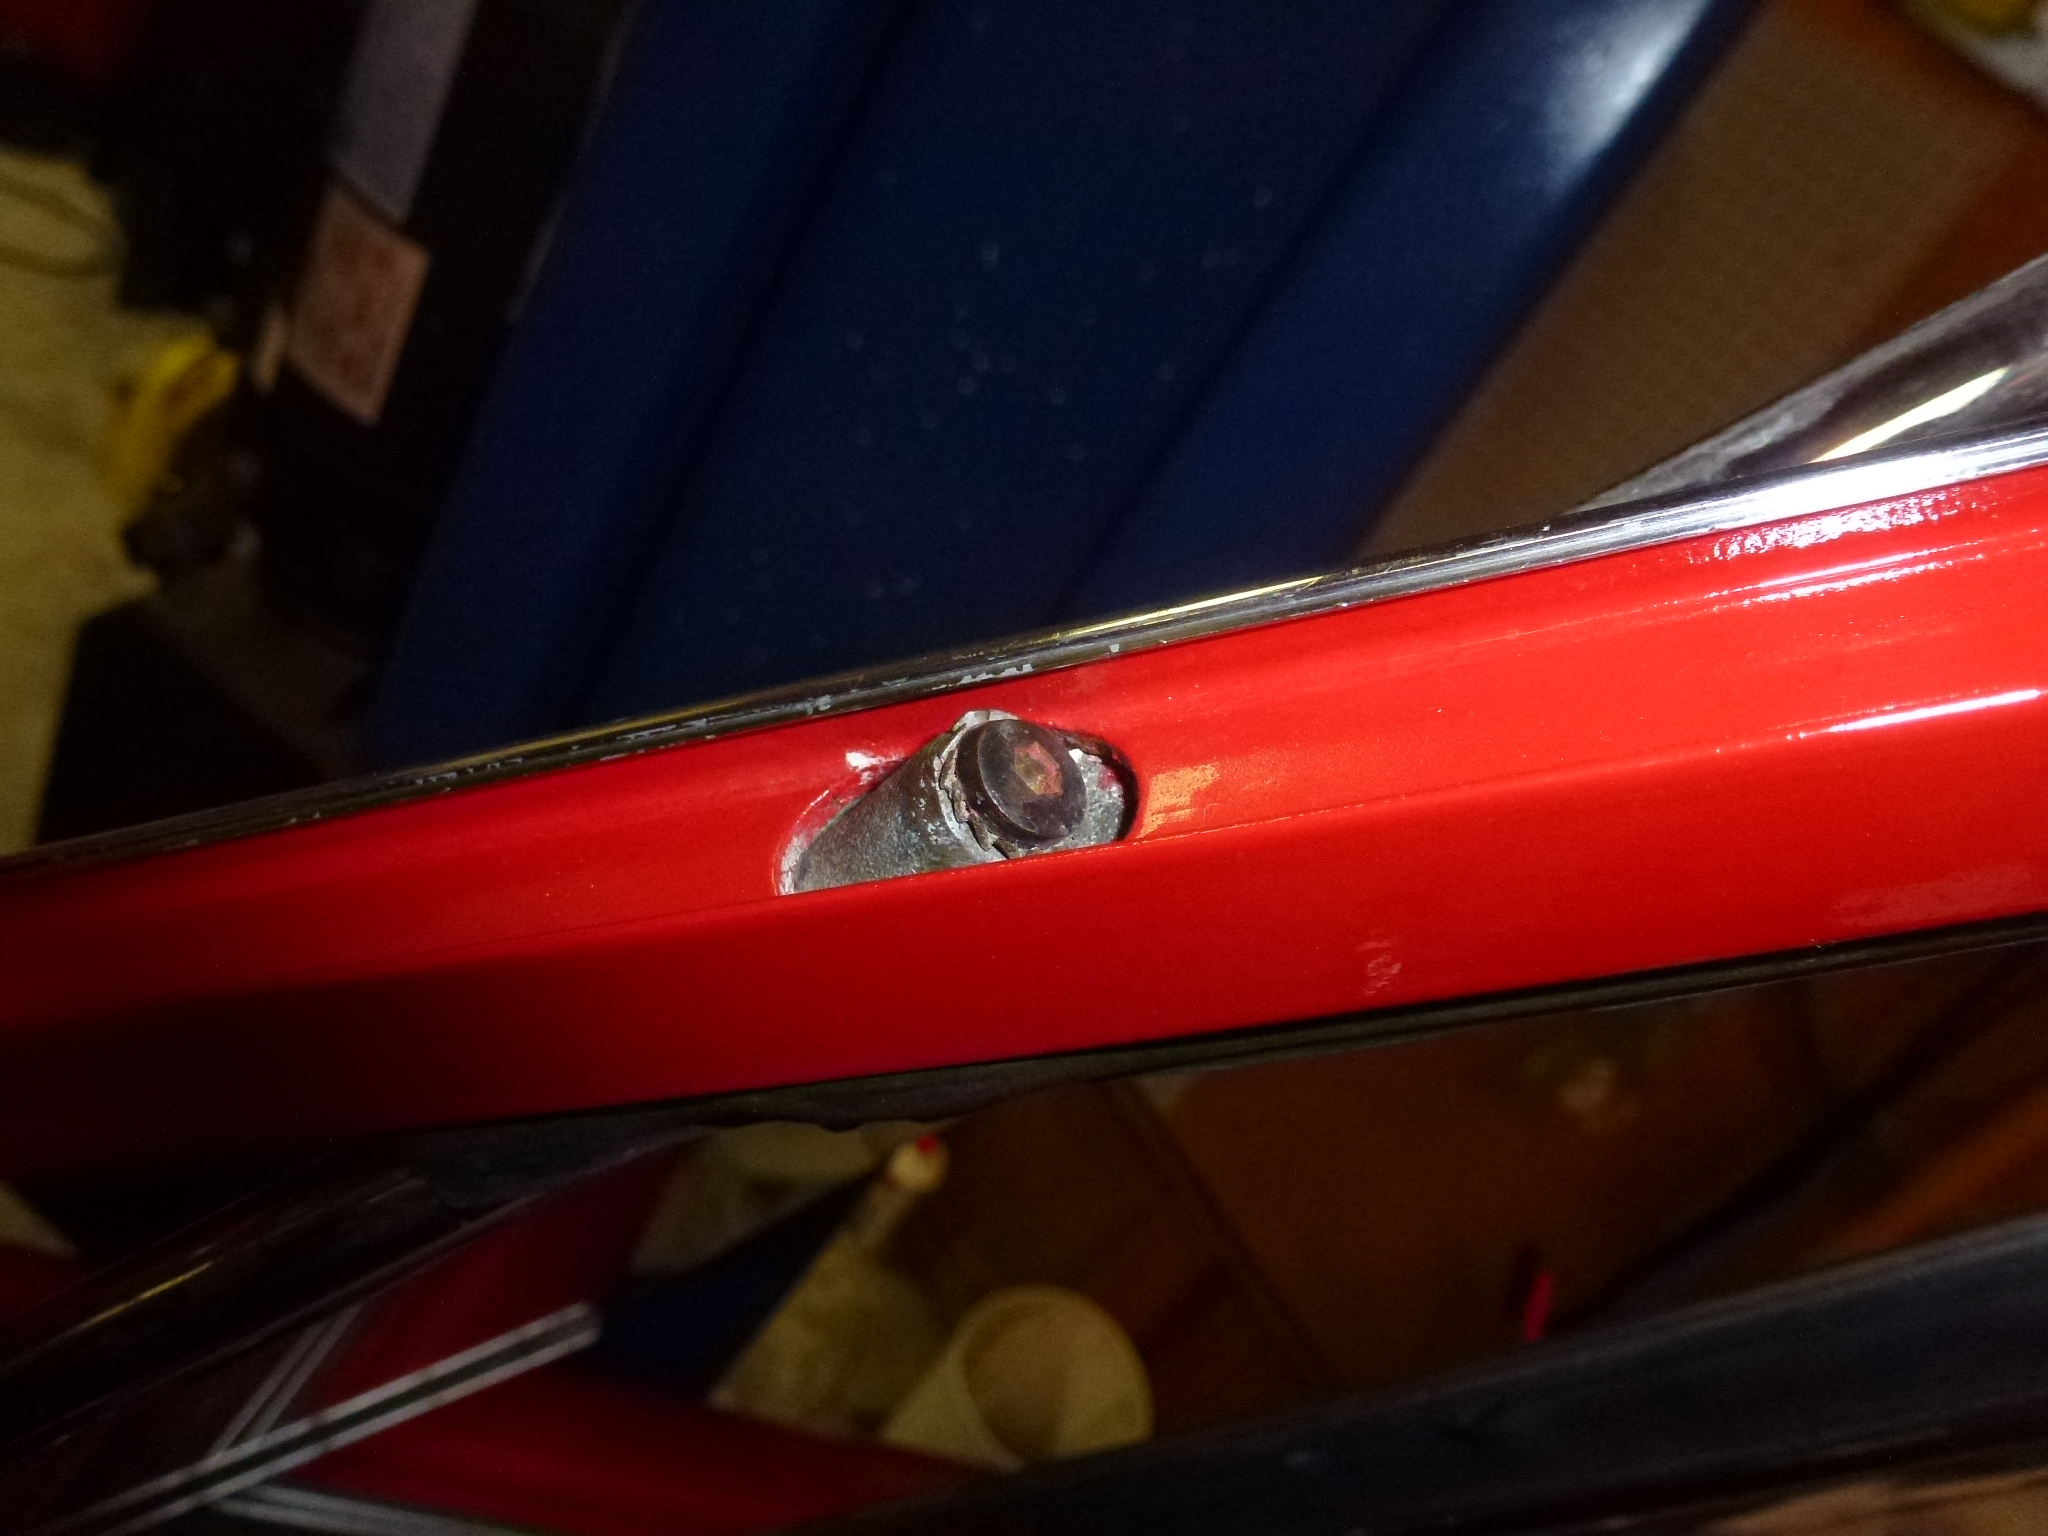
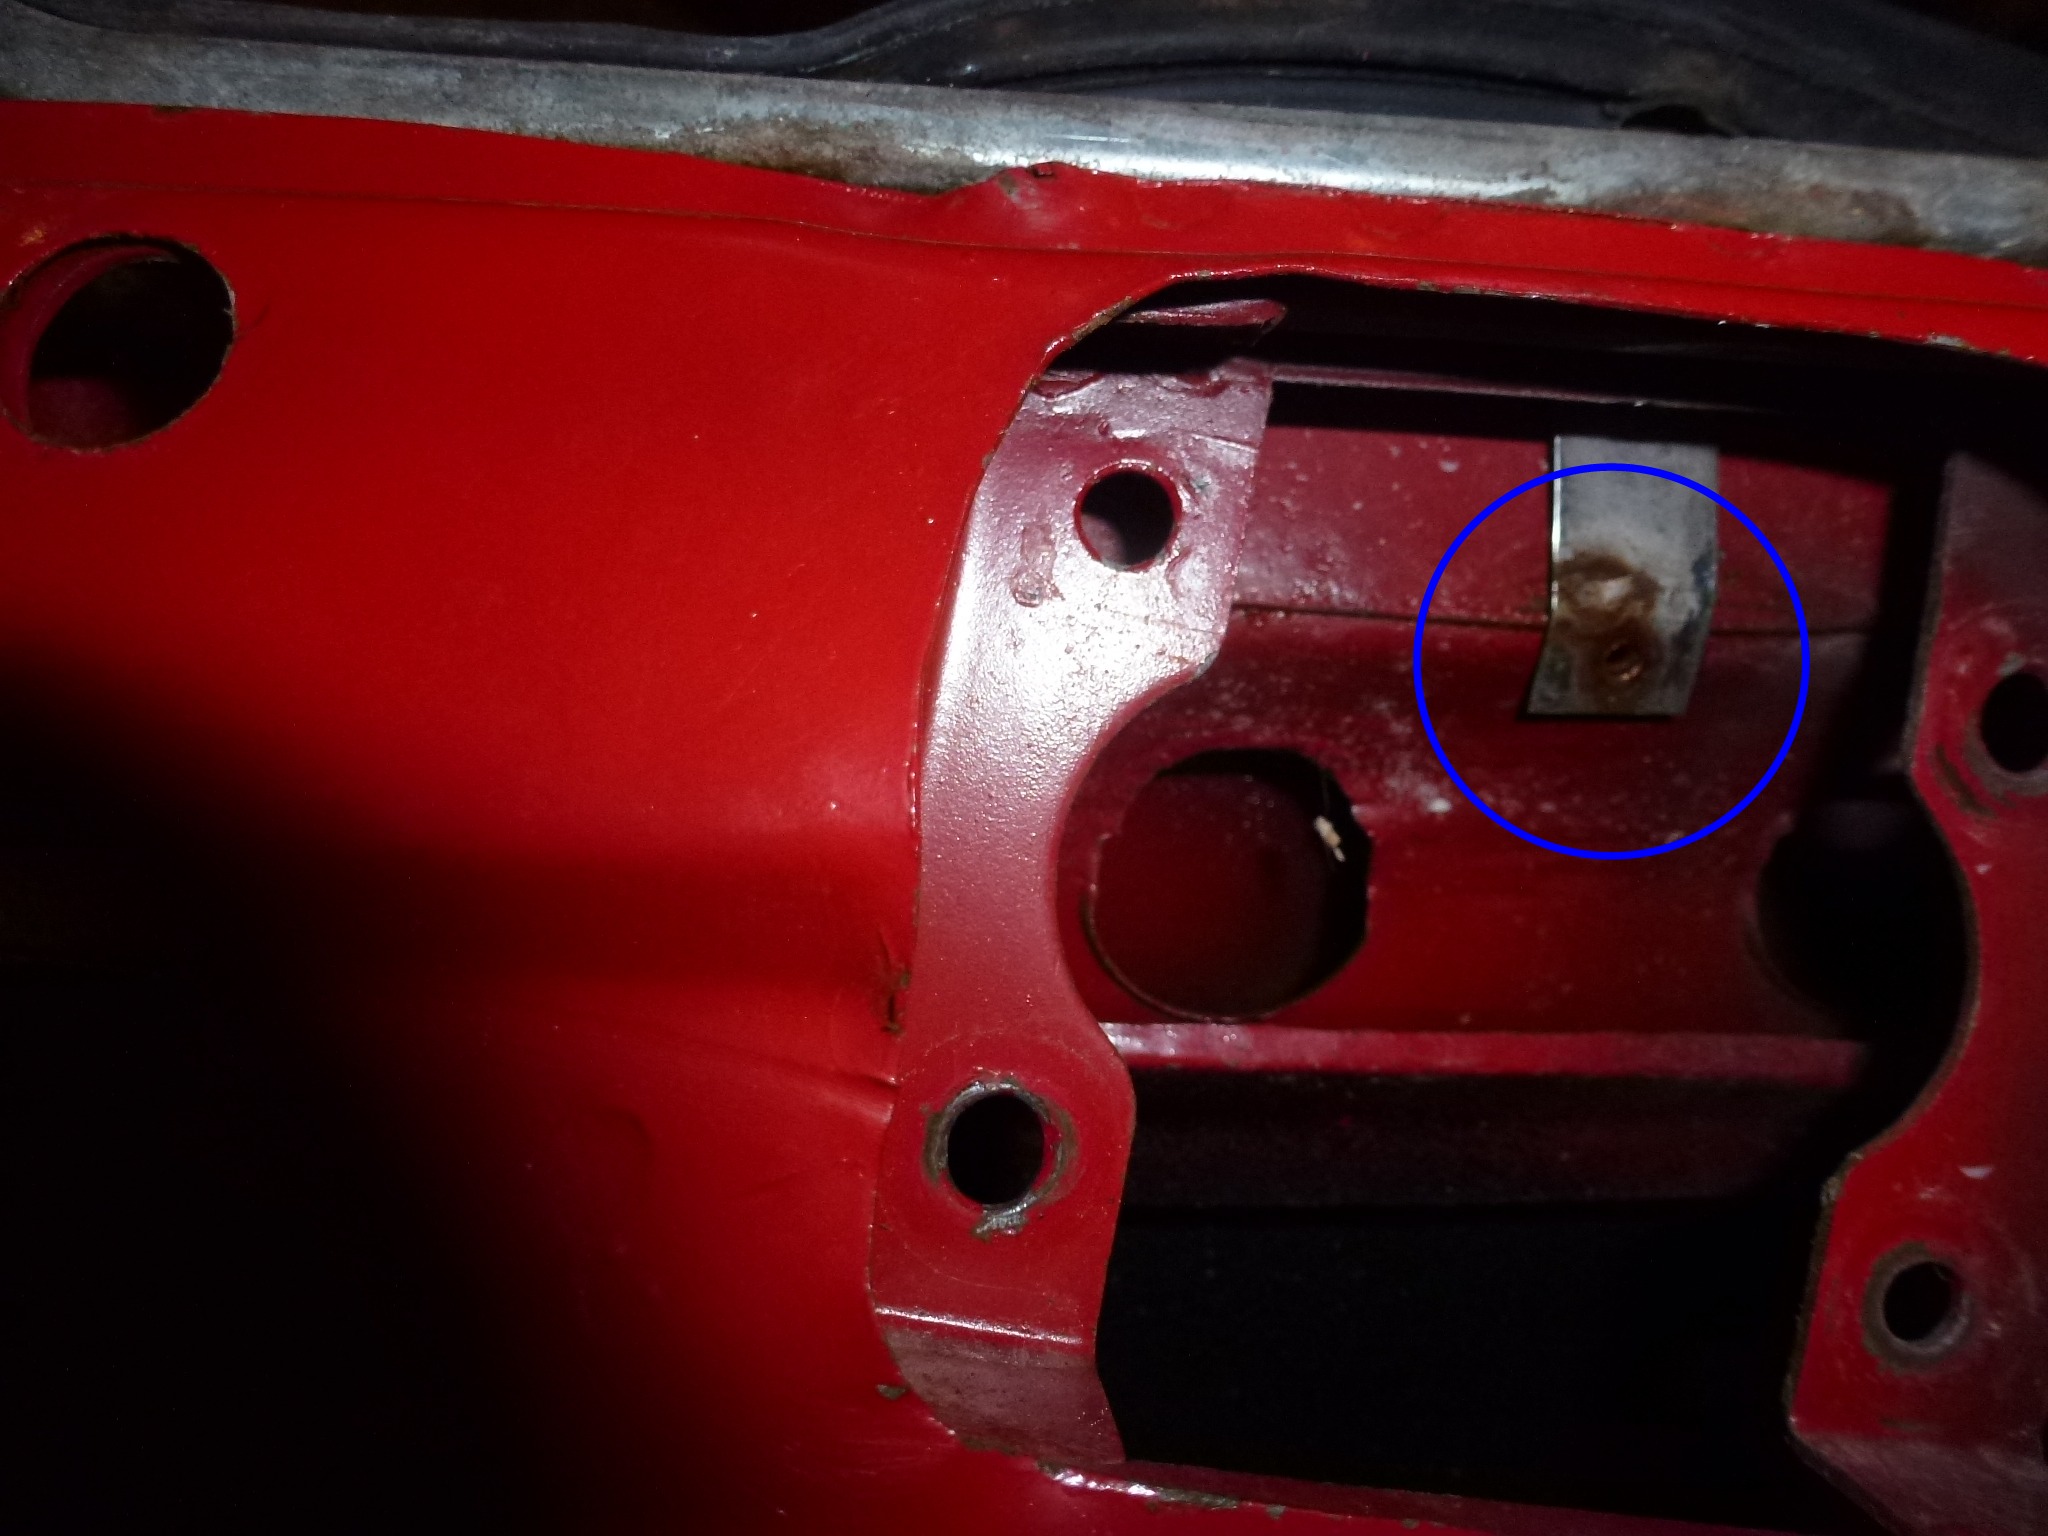
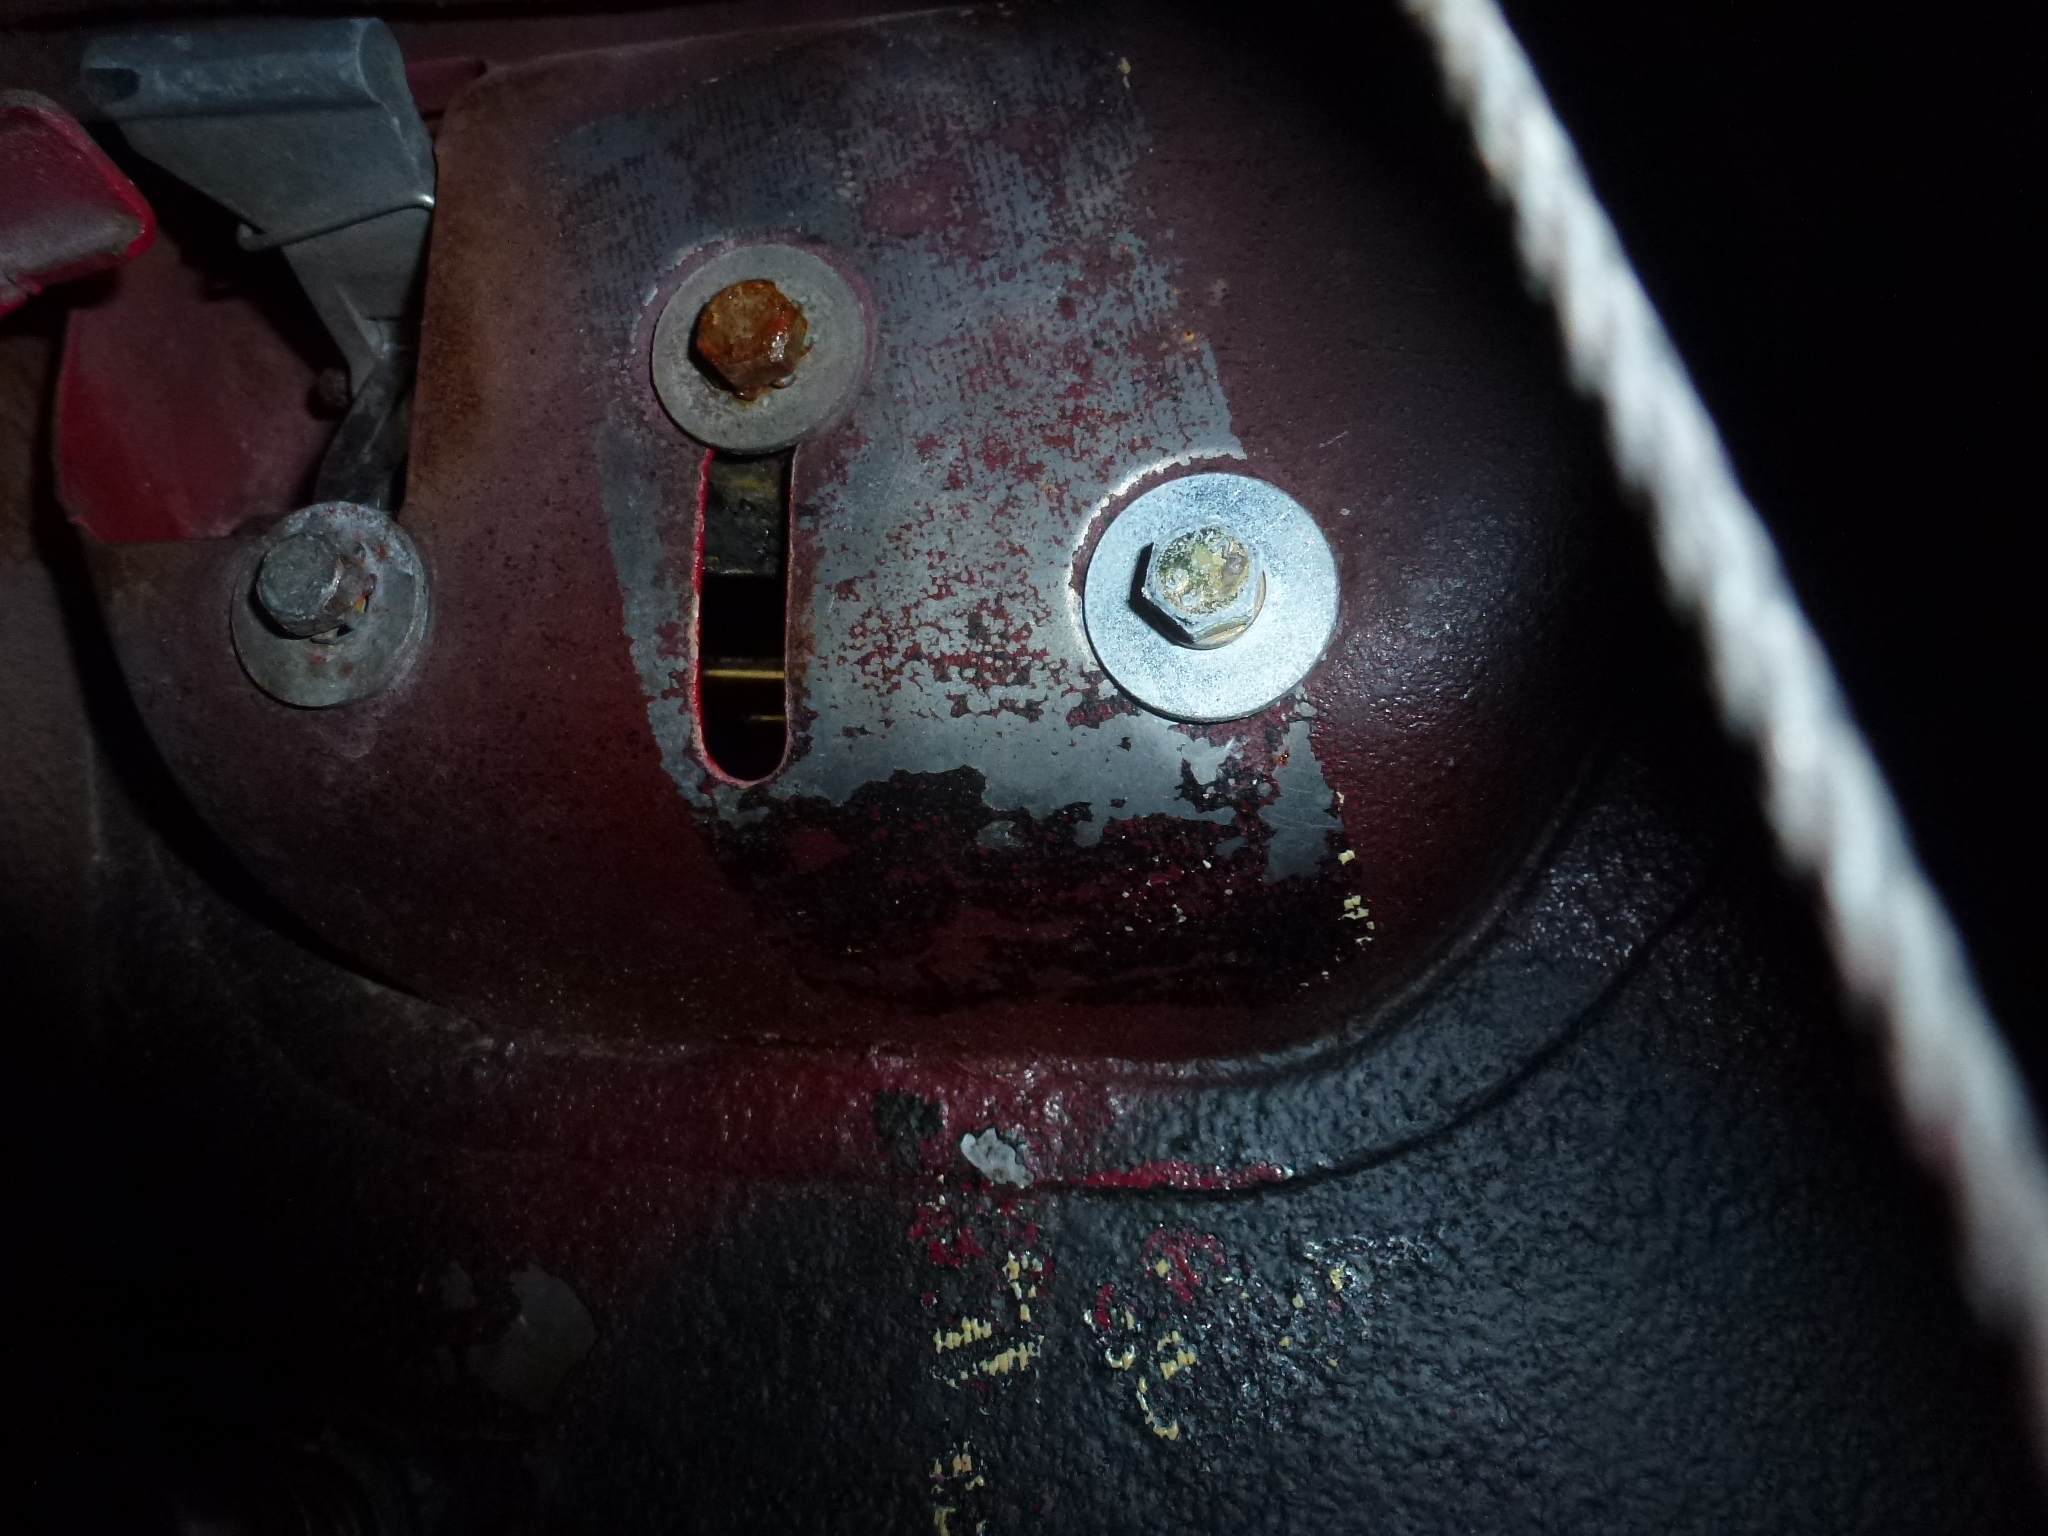
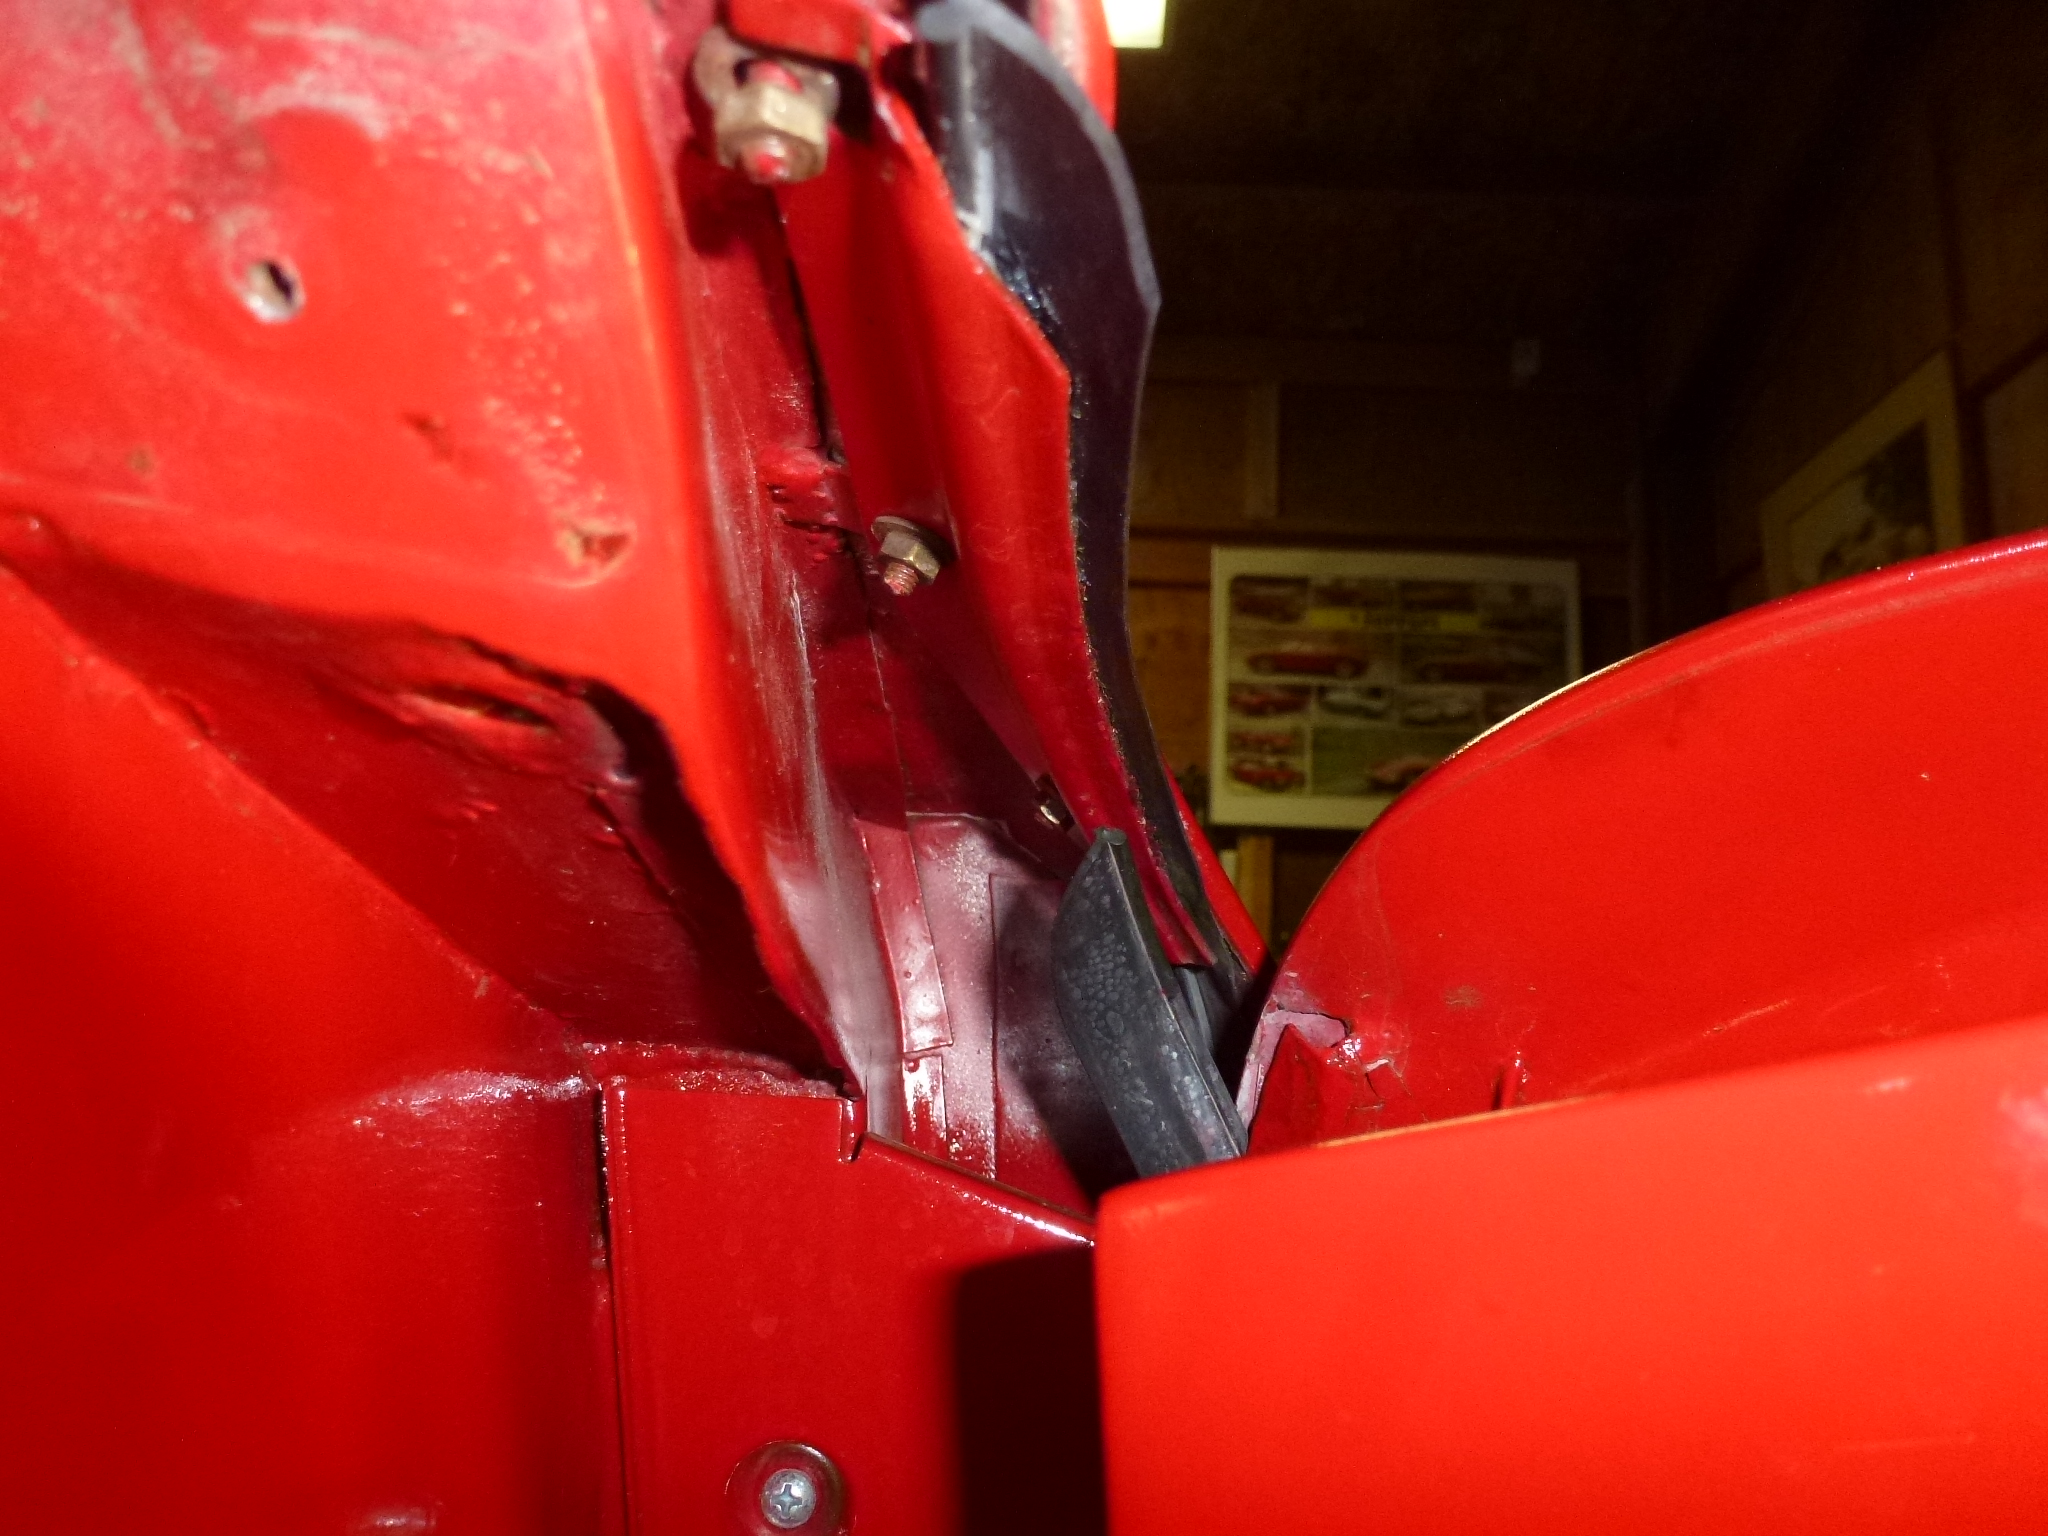
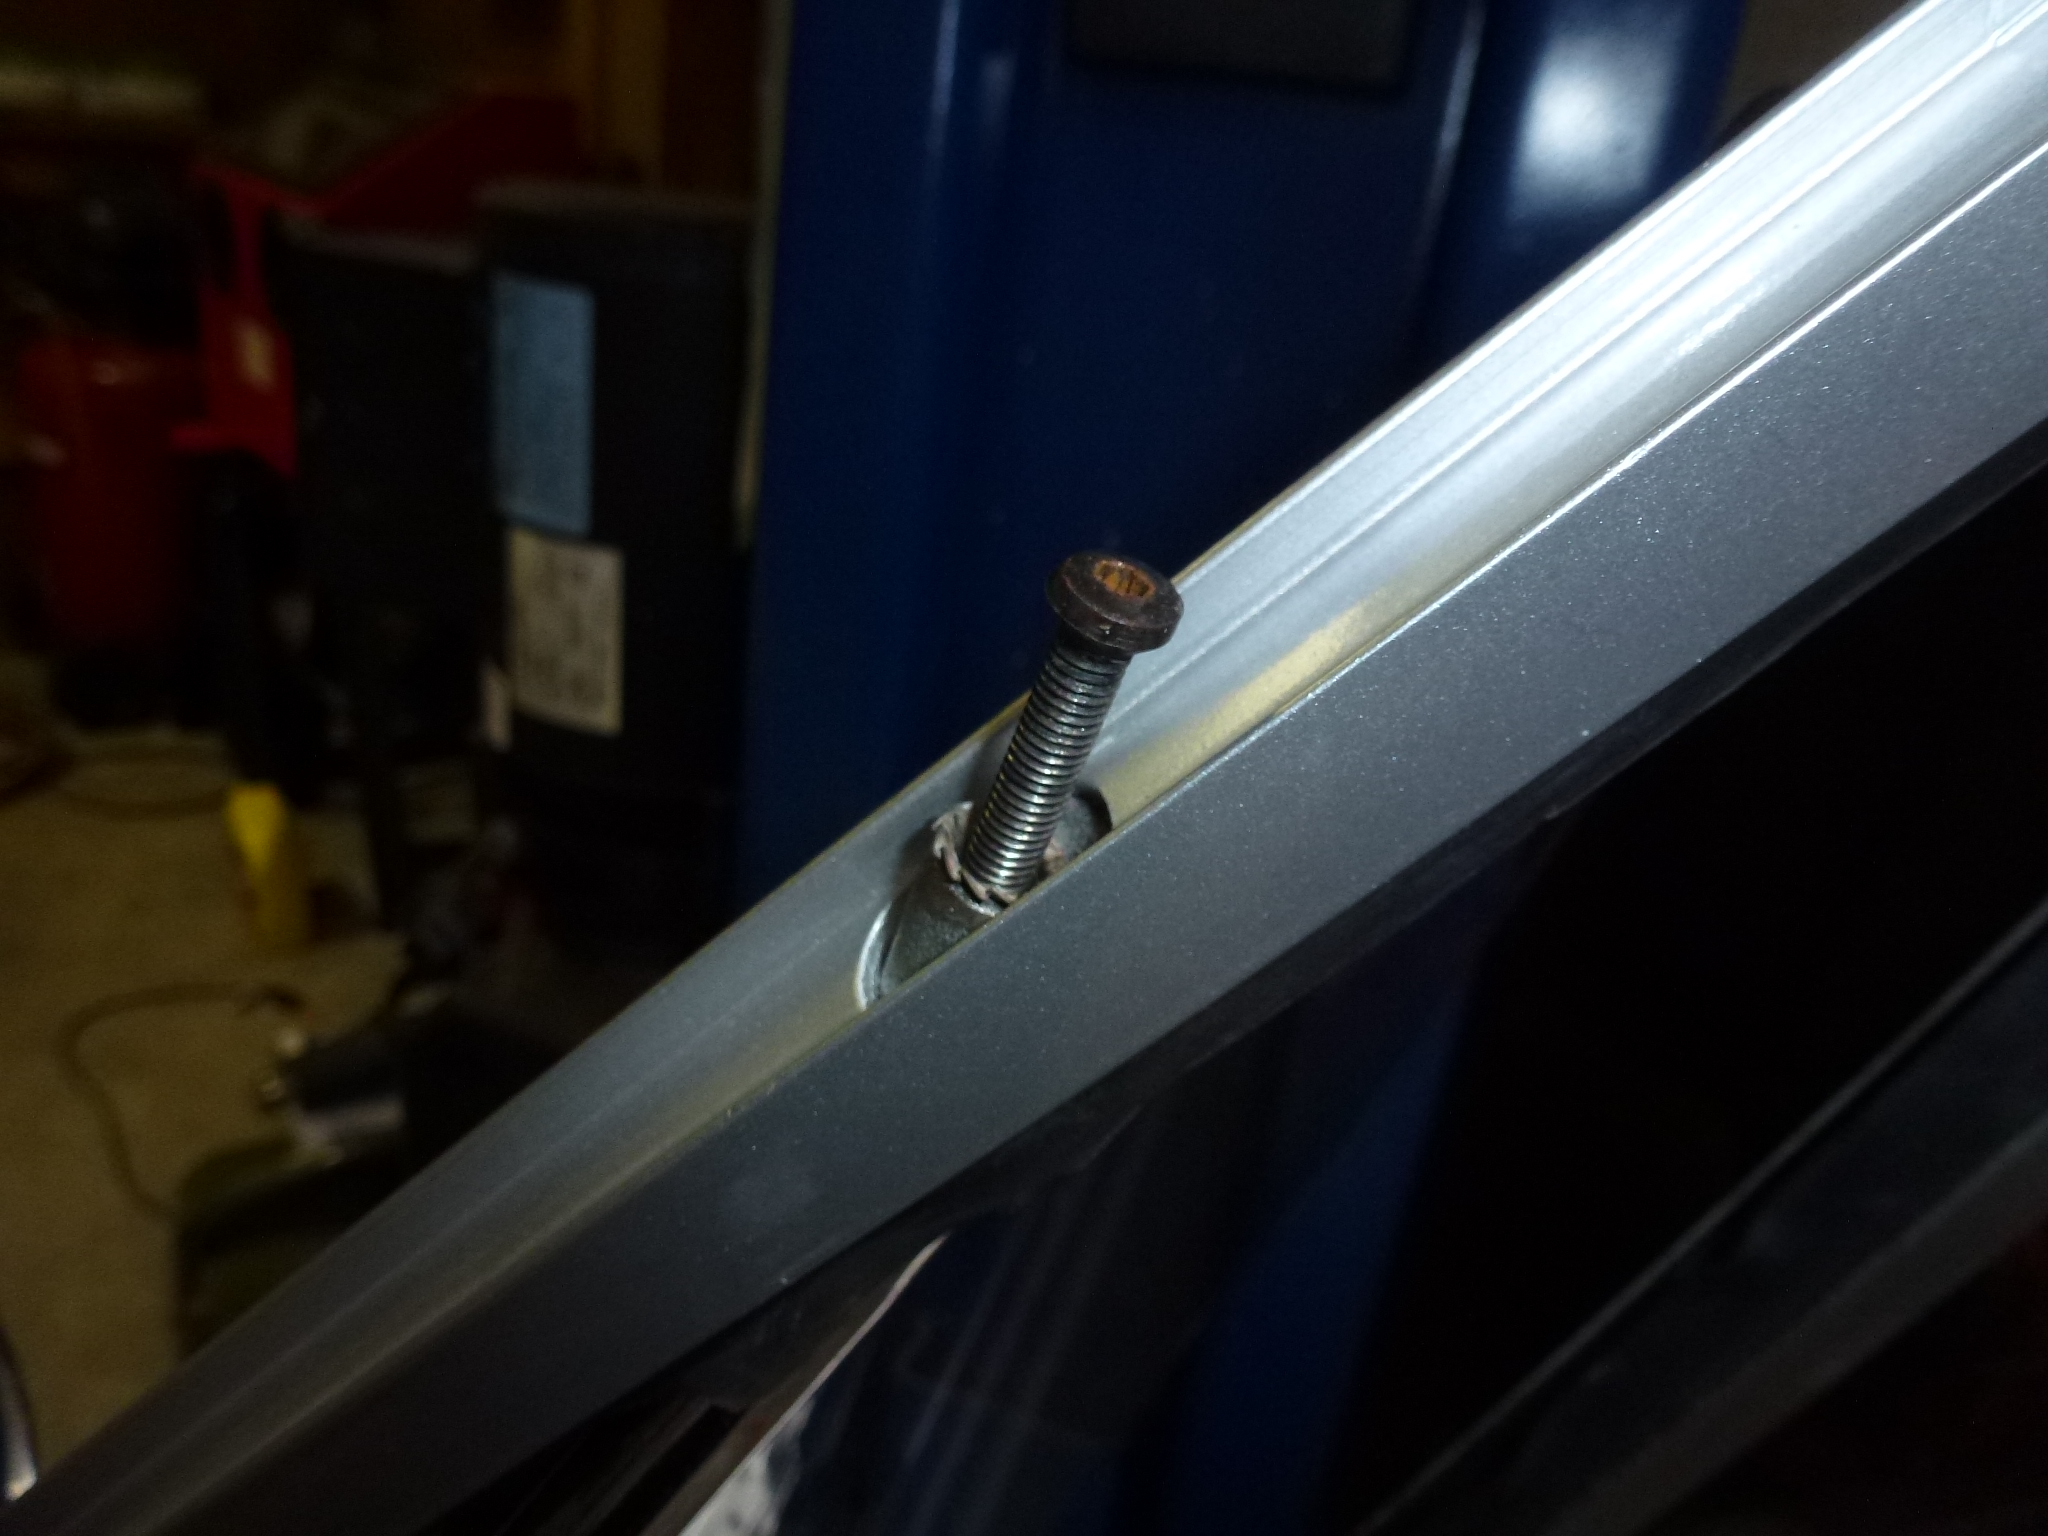
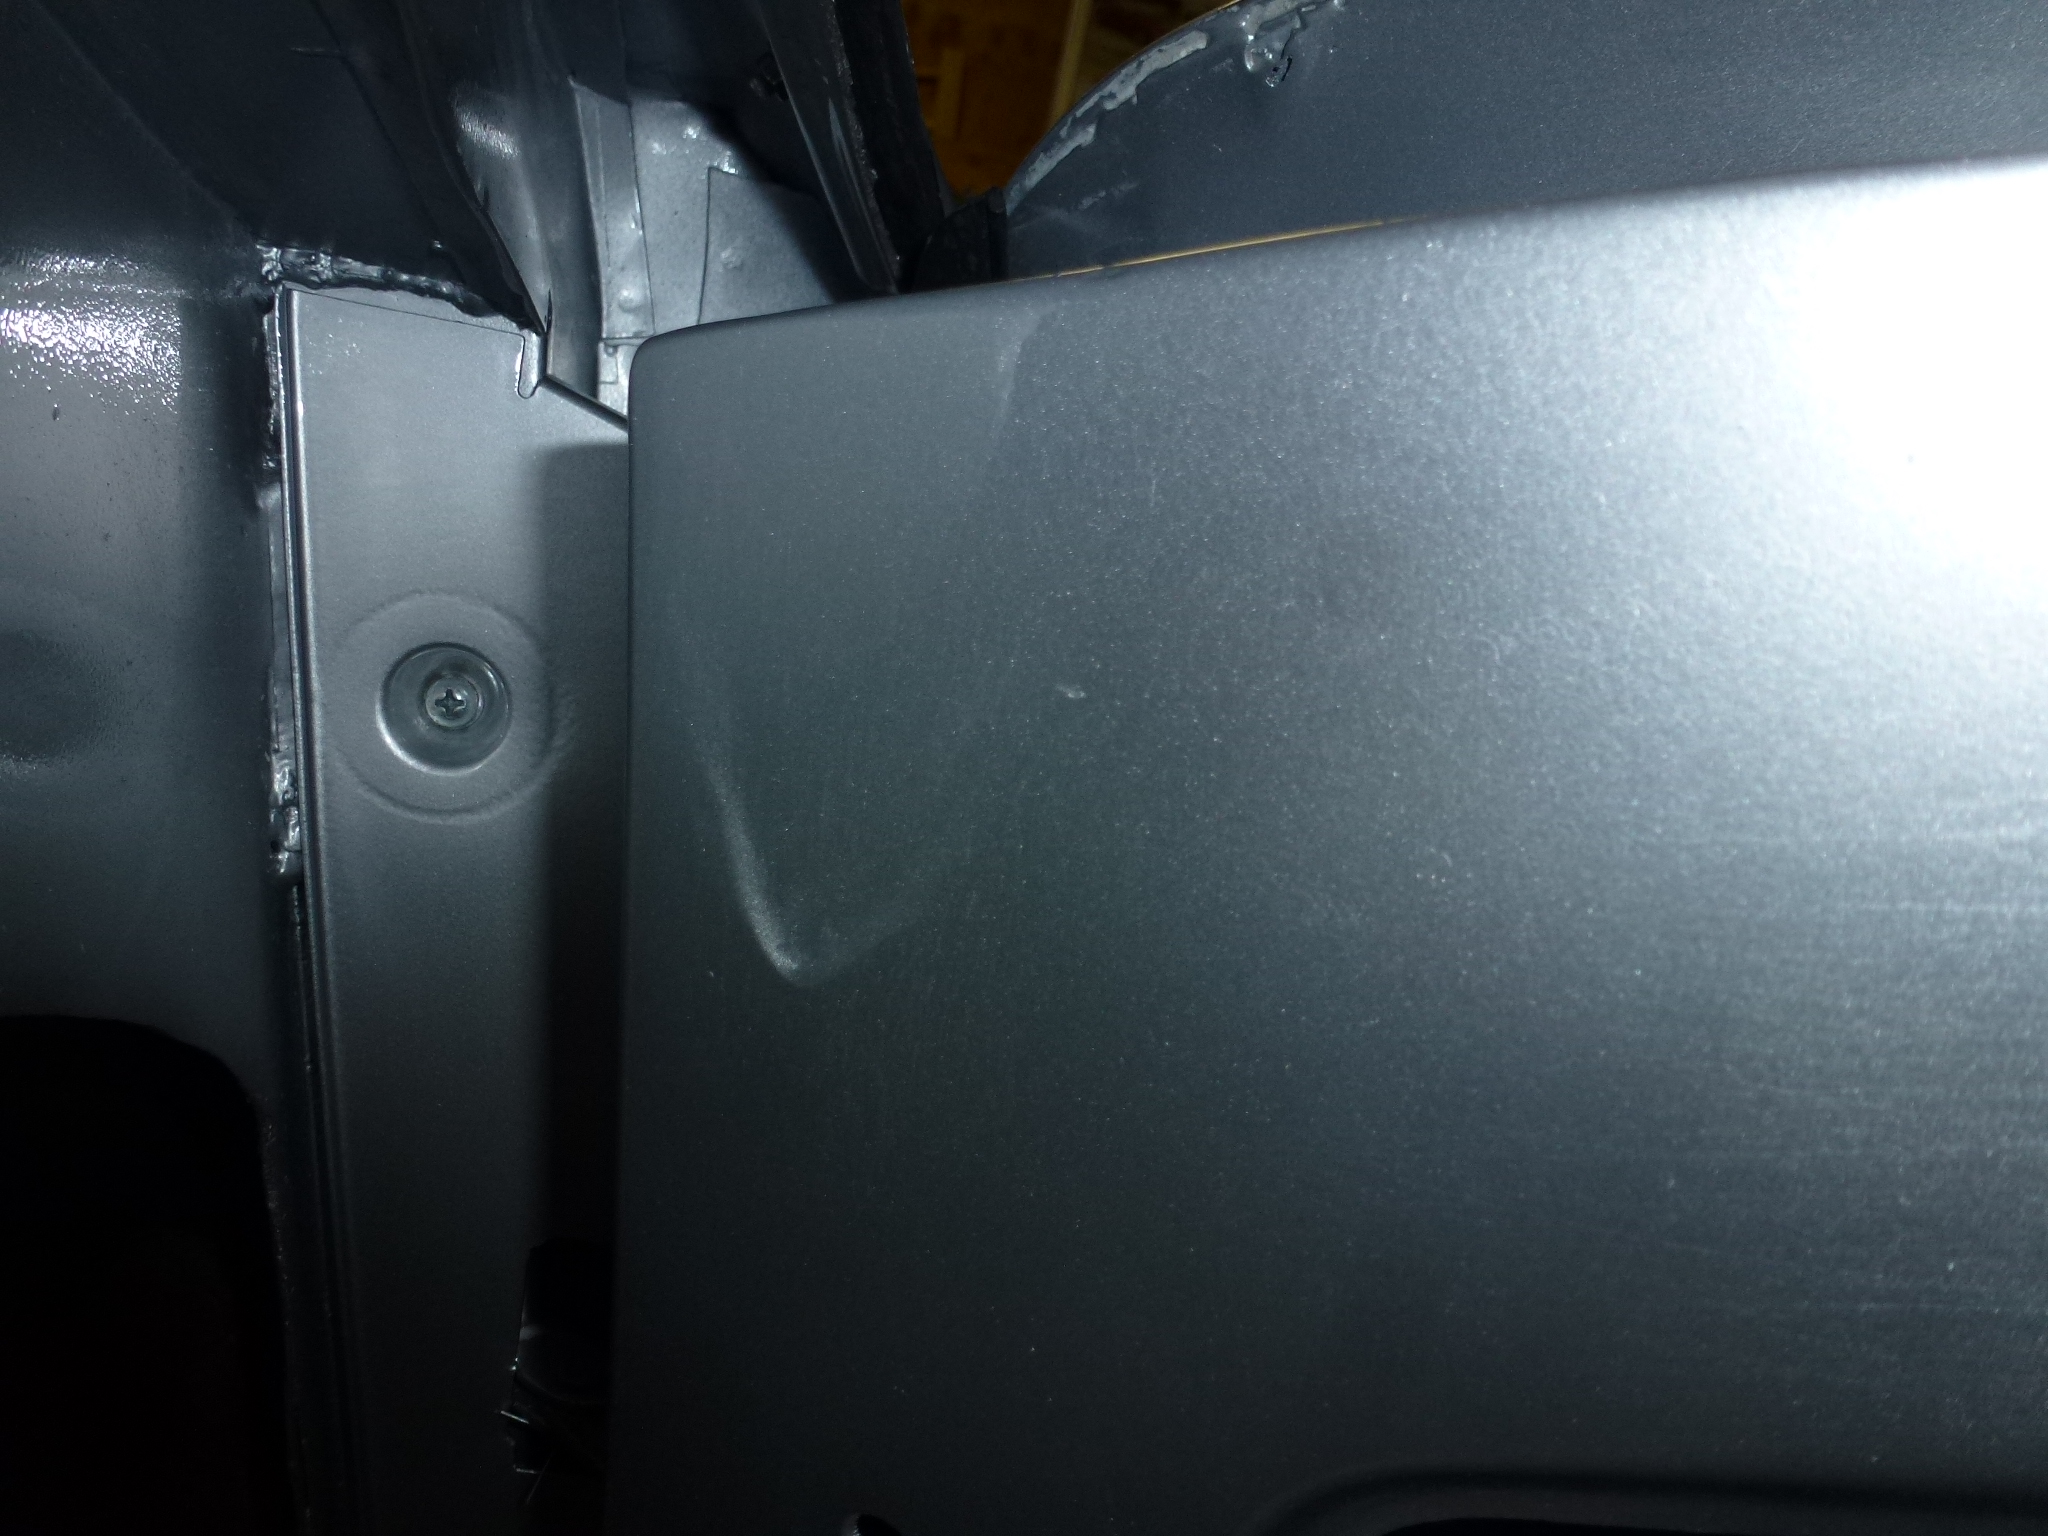
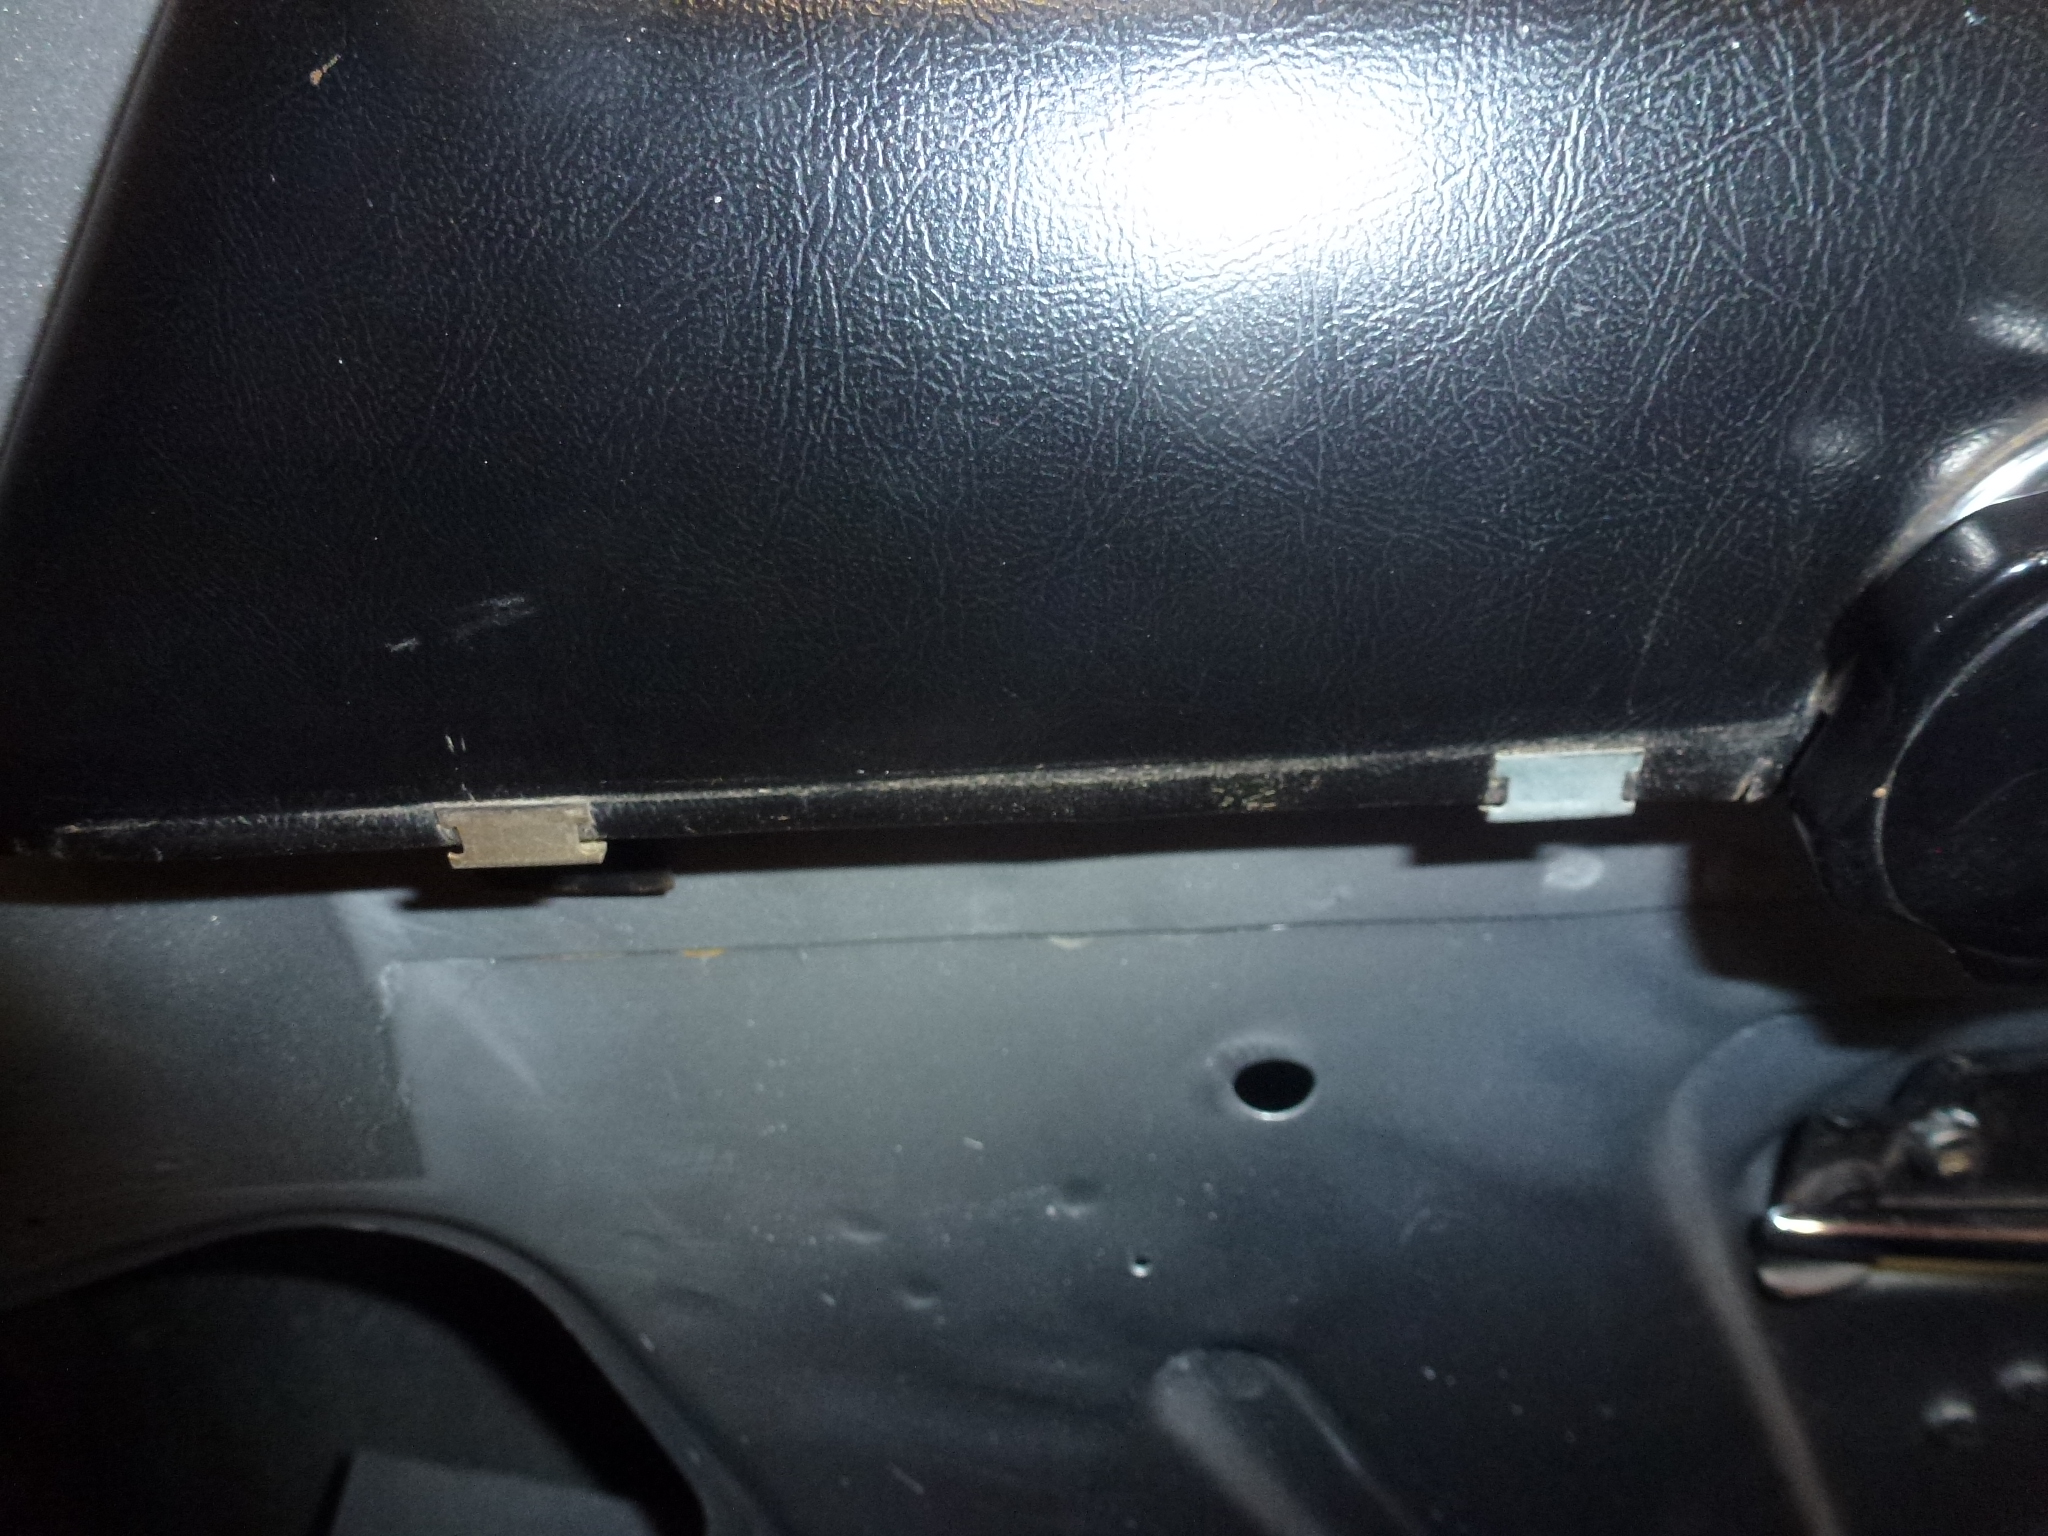
There is a small panel that holds a rubber seal that is bolted in the hinge area. This seals the front upper corner on the door. It is attached via three studs with washers and nuts. These are a pain to get to, but it is easier if the door is removed. On one side, the middle stud was broken off when I bought the car. I may fix this now, but with the panel fastened at both ends, it may not be worth the effort, particularly since there is some lead near there at the corner of the windshield. If I fix it, I run the risk of melting the lead to weld on a new plate and stud.
-
I ended up deciding to remove the door glass. I realized that I just had to loosen it from the cabling and didn't have to take out the motors and the cable. I did mark the cable where the doors were clamped on.
-
I also sprayed penetrating oil on the hinge pins and drove them enough to make sure that they were loose. I was worried that the autobody shop would have some problems removing the doors since it's been 28 years since they were off the car. The bottom one gets driven up while the top one has to go down.
-
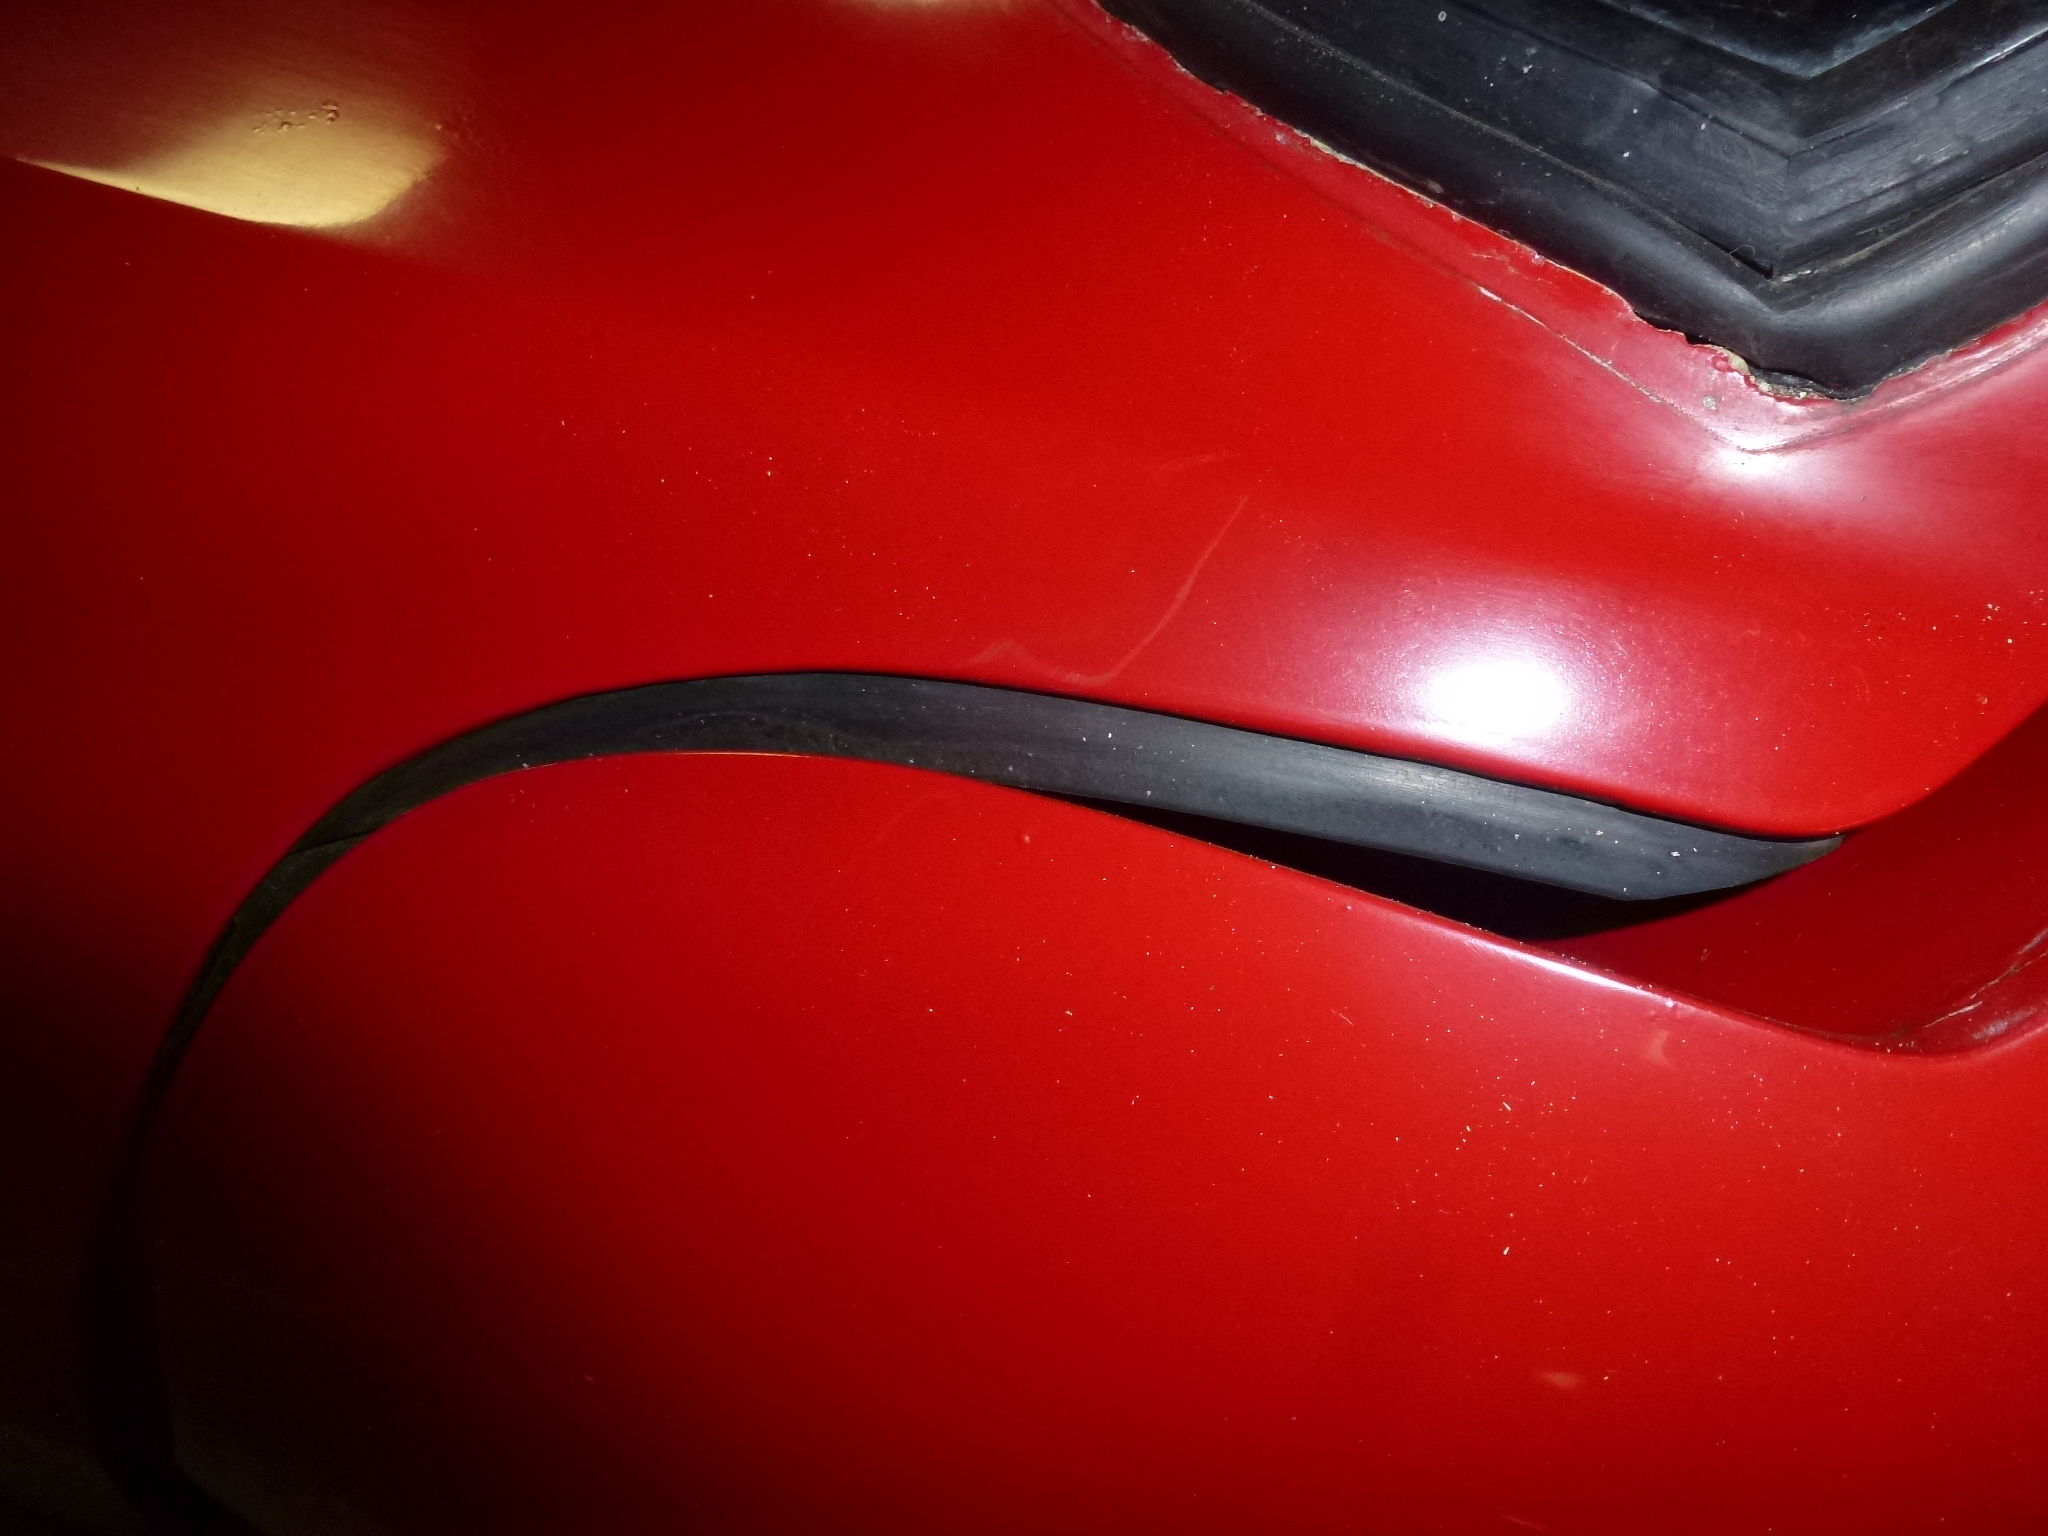
The last item on the door was to remove the rubber seal on the leading edge. This just pulls off unless someone really flattened the metal holding strip. In that case, the door has to be off so the strip can be pried up to free the rubber.
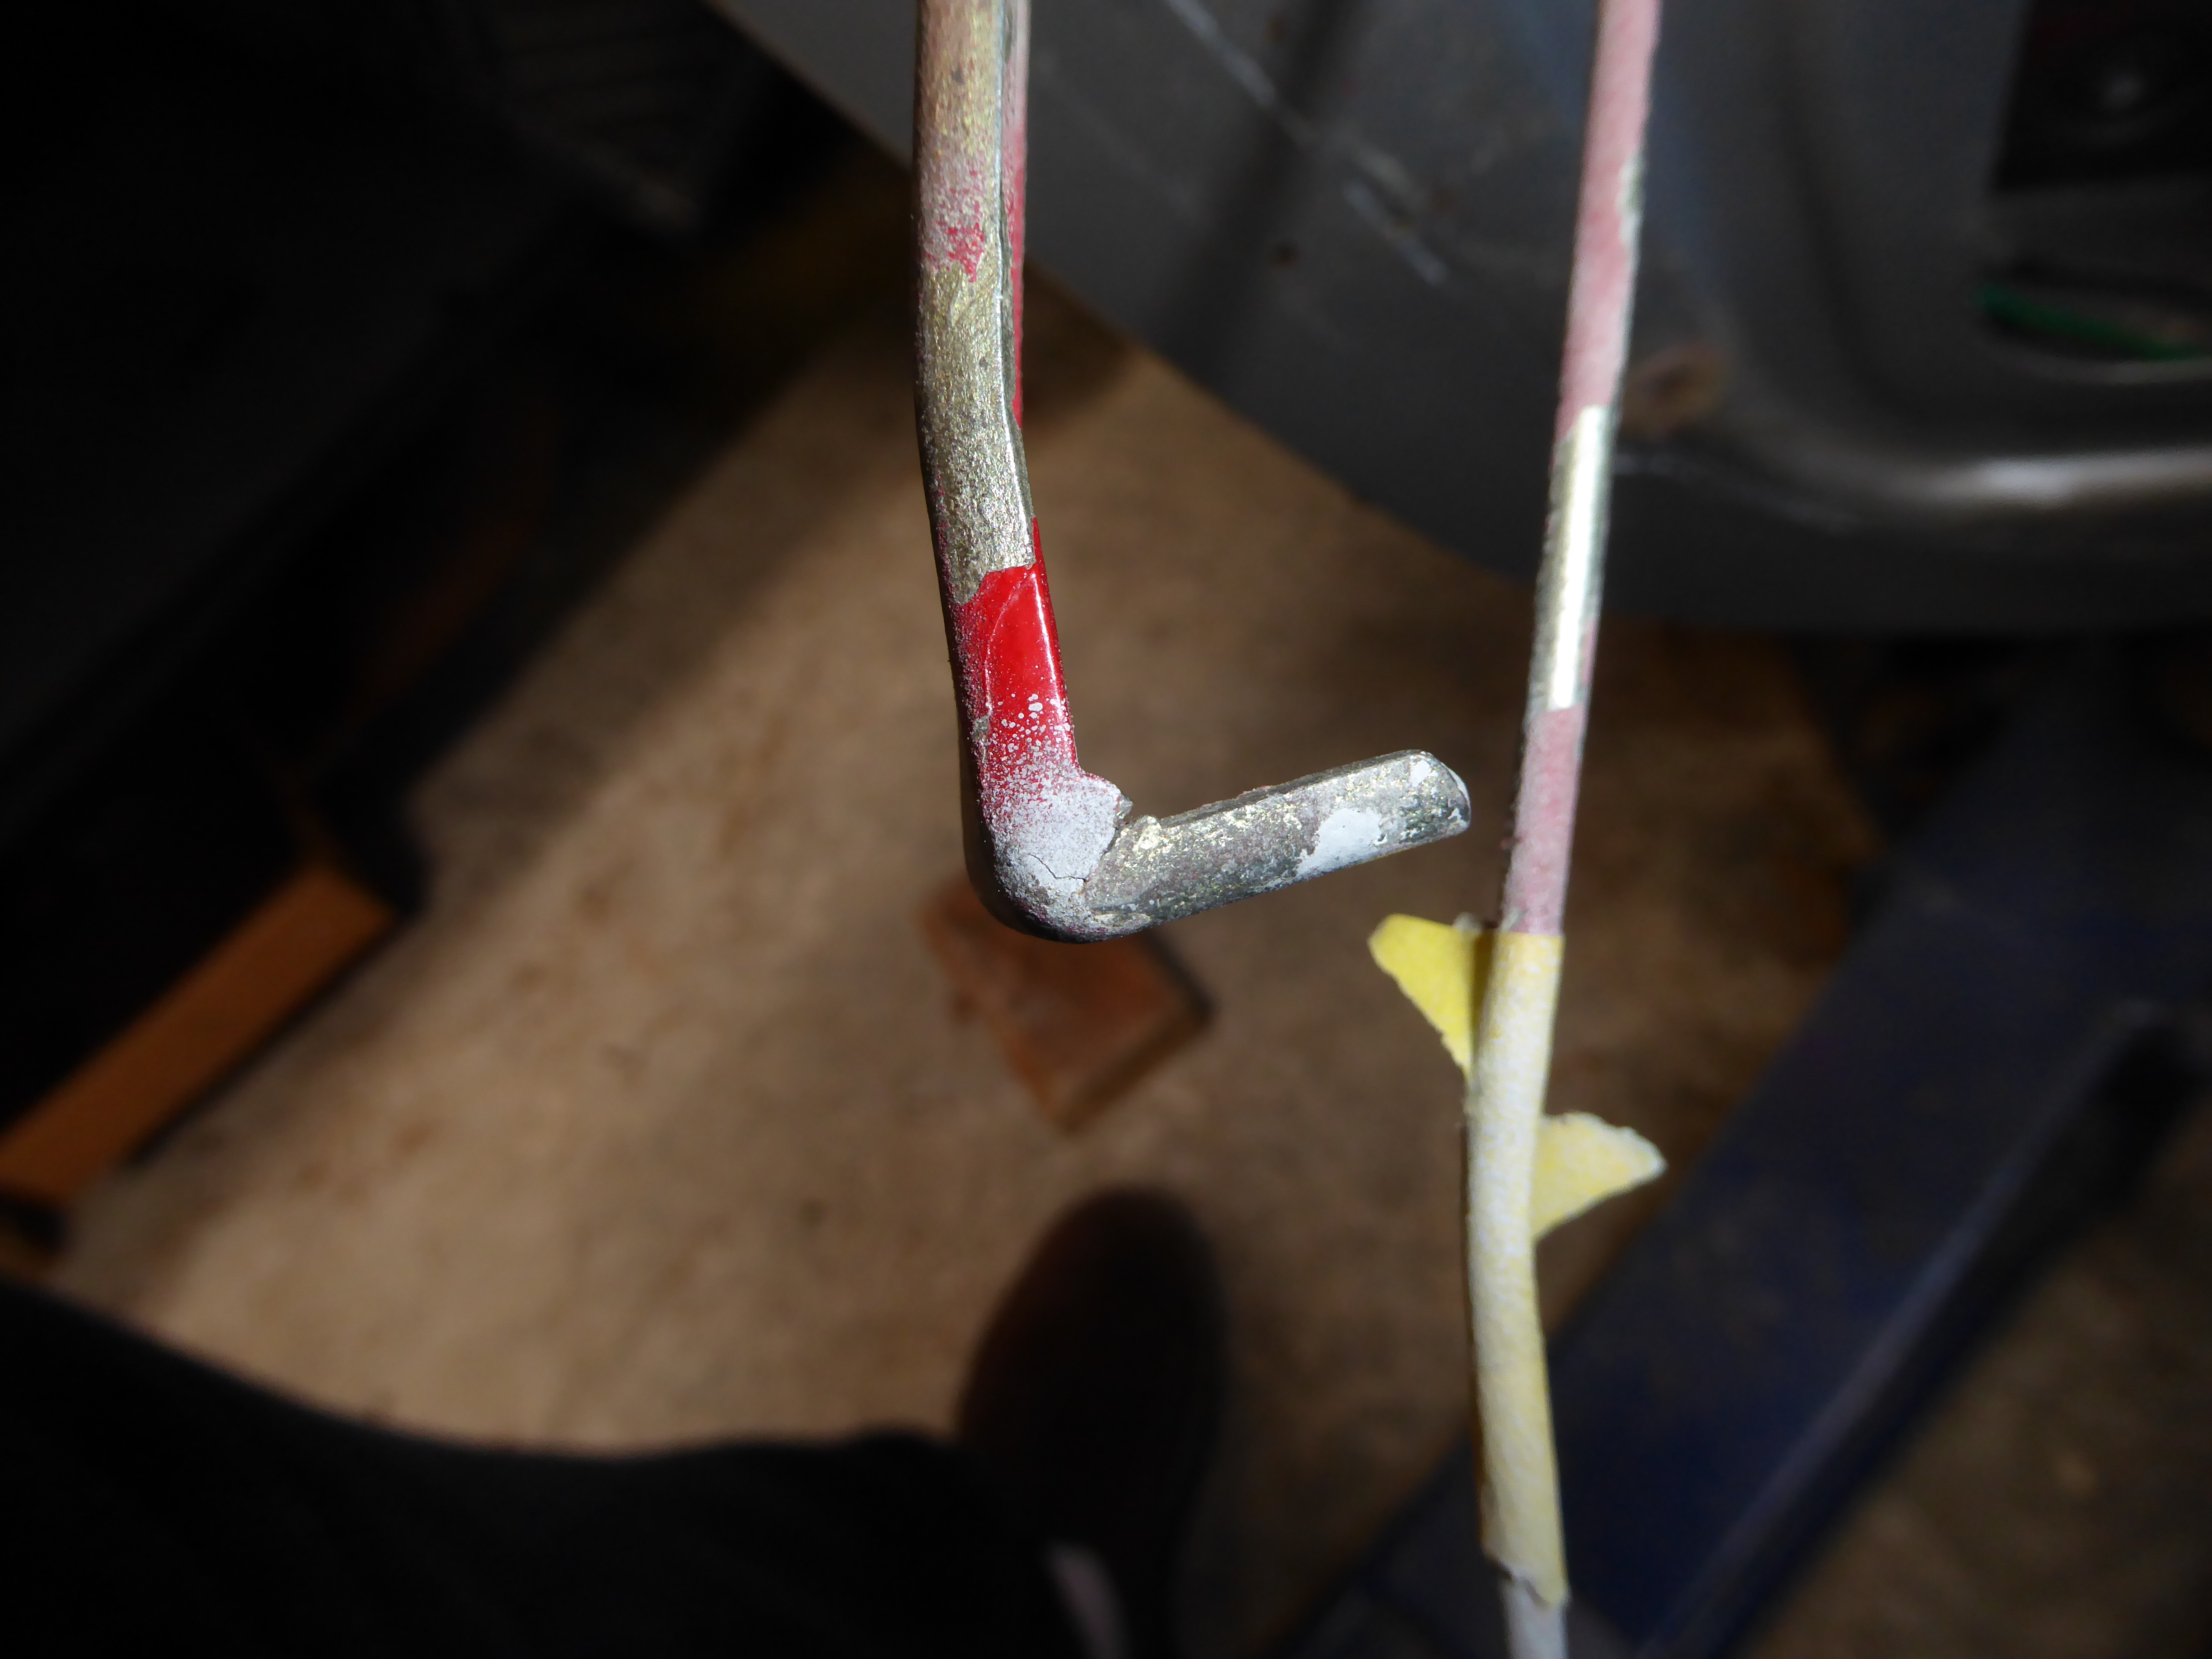
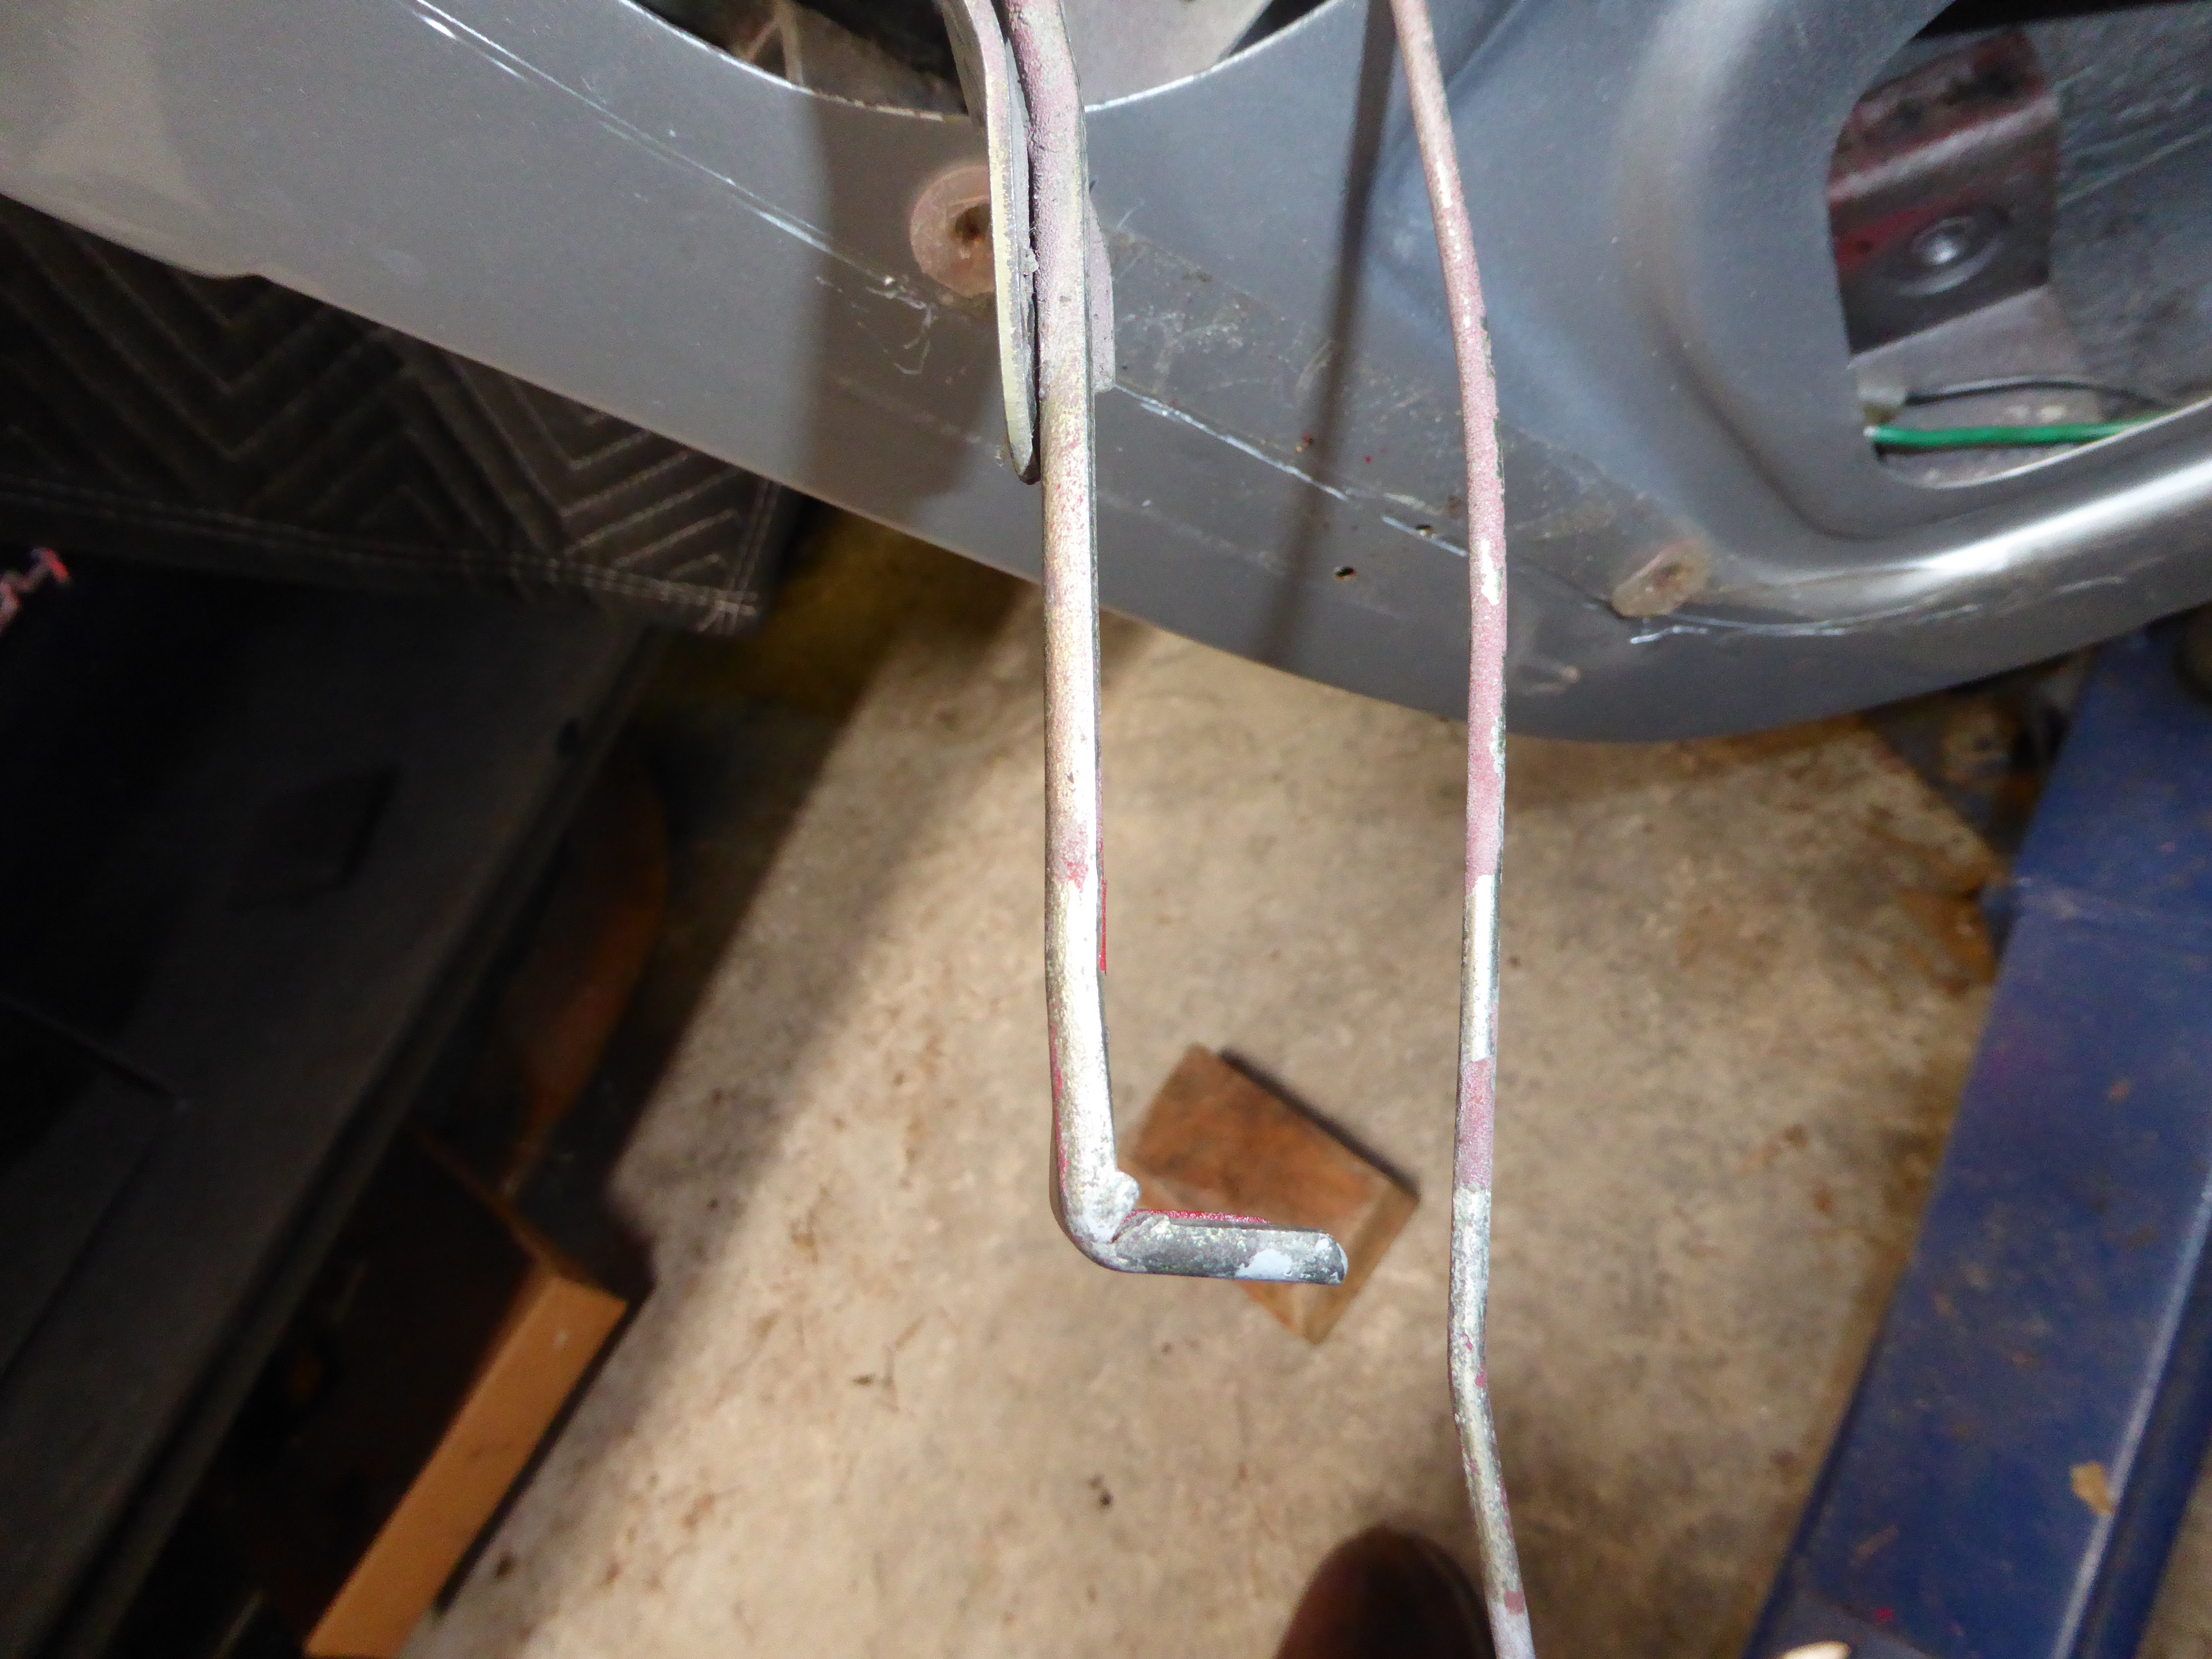
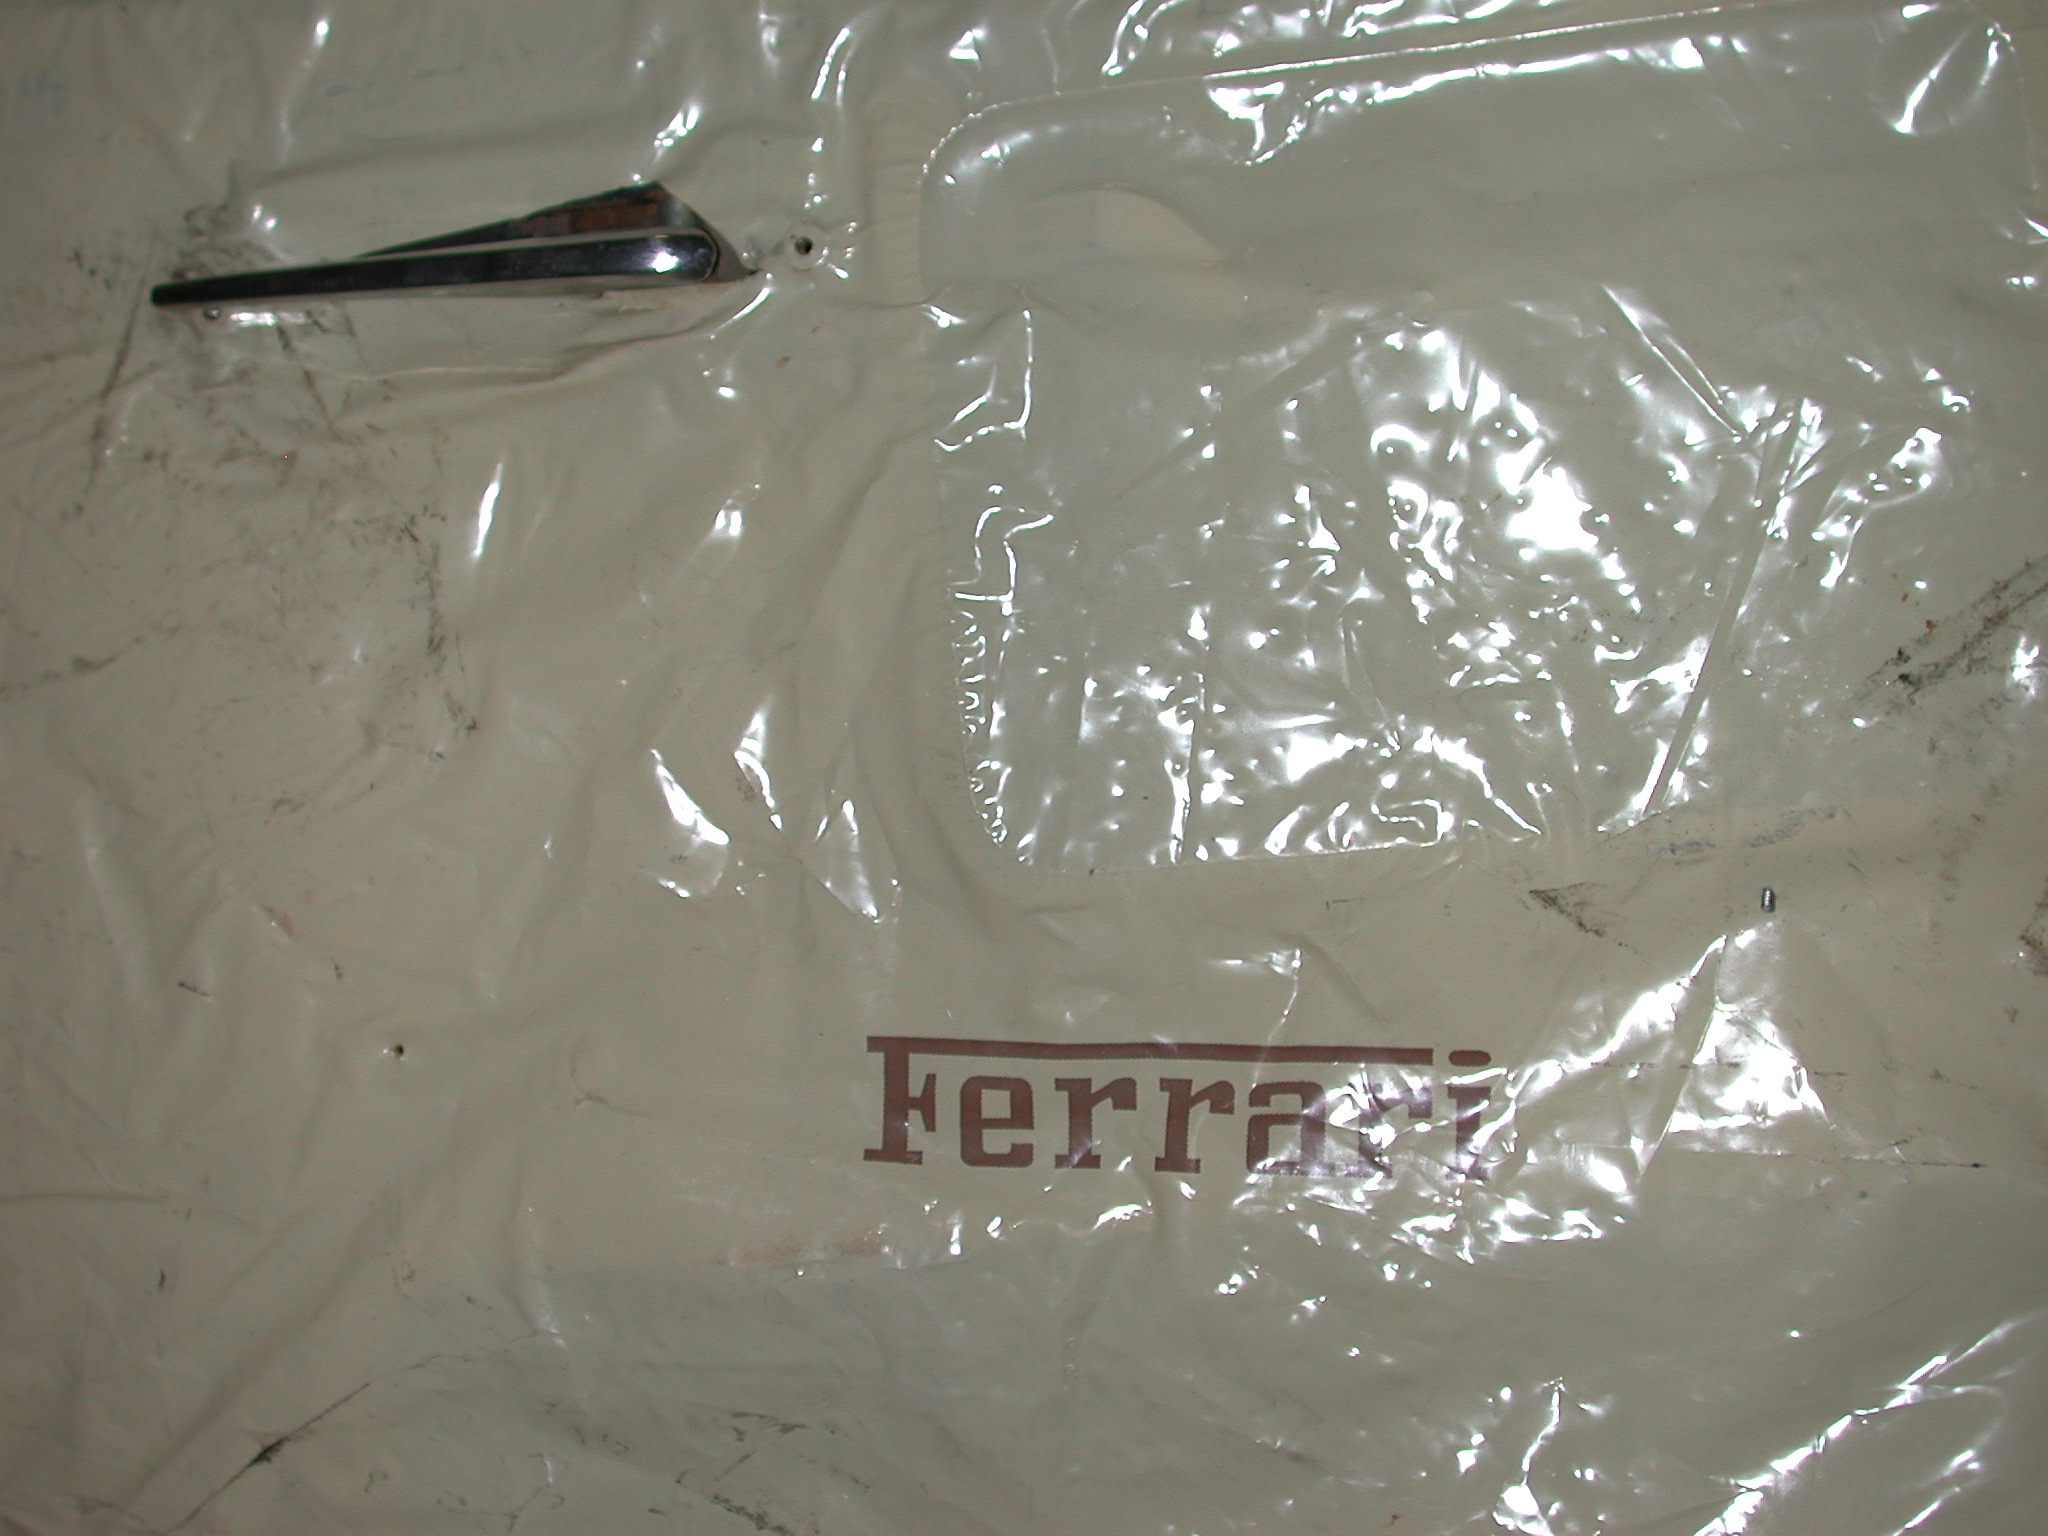
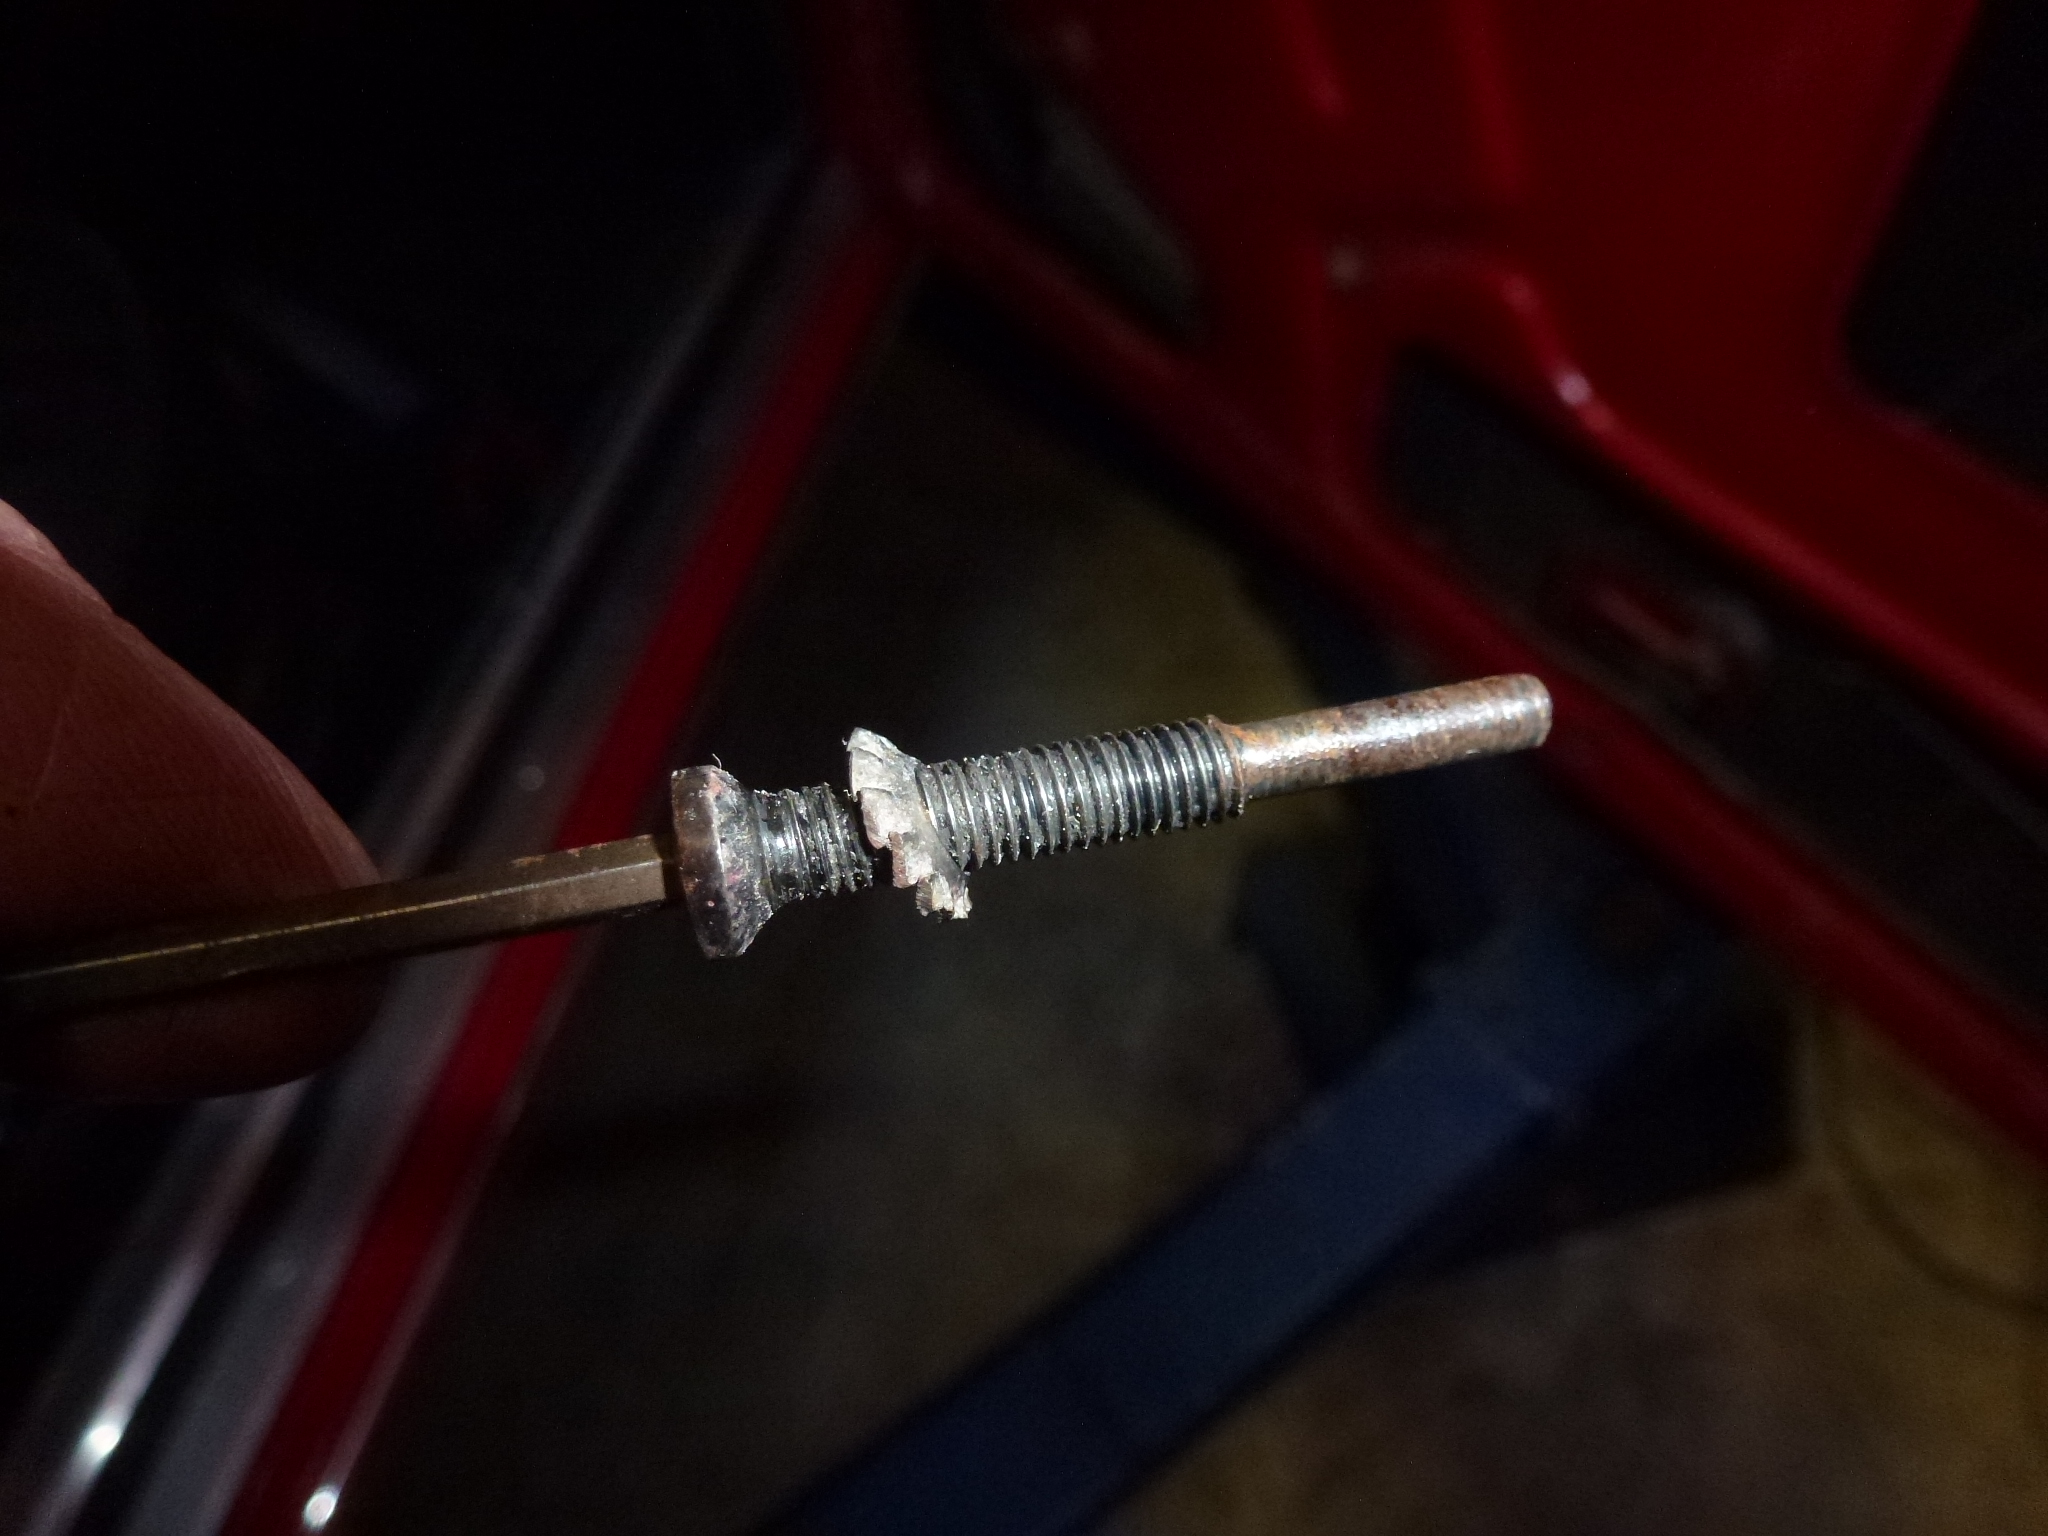
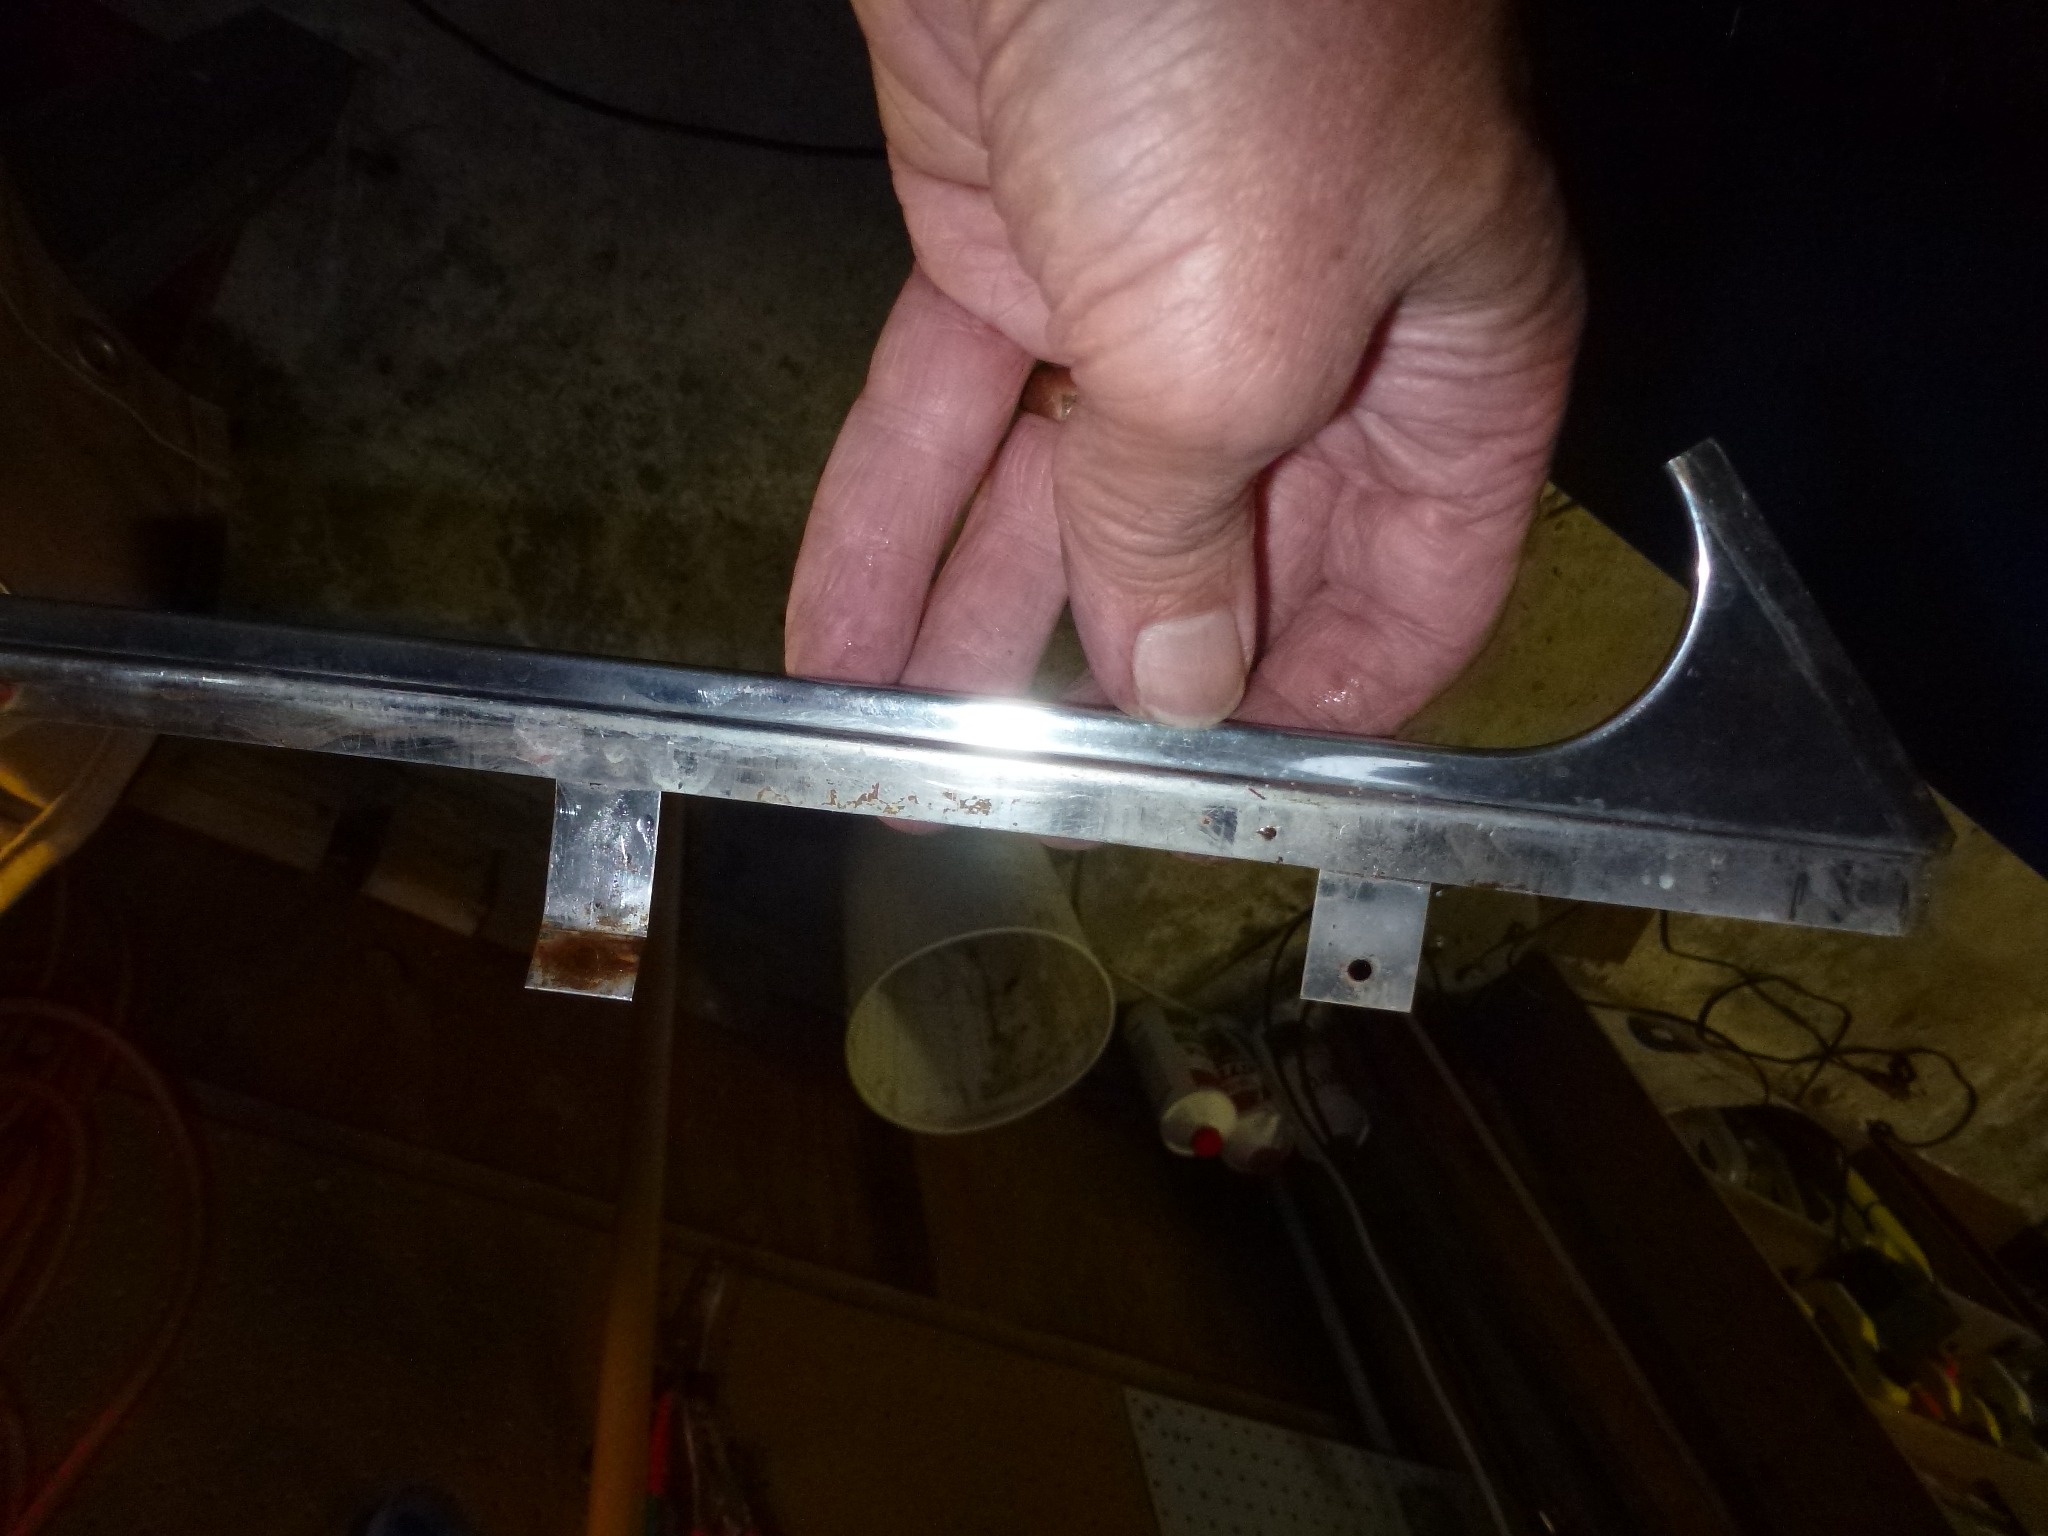
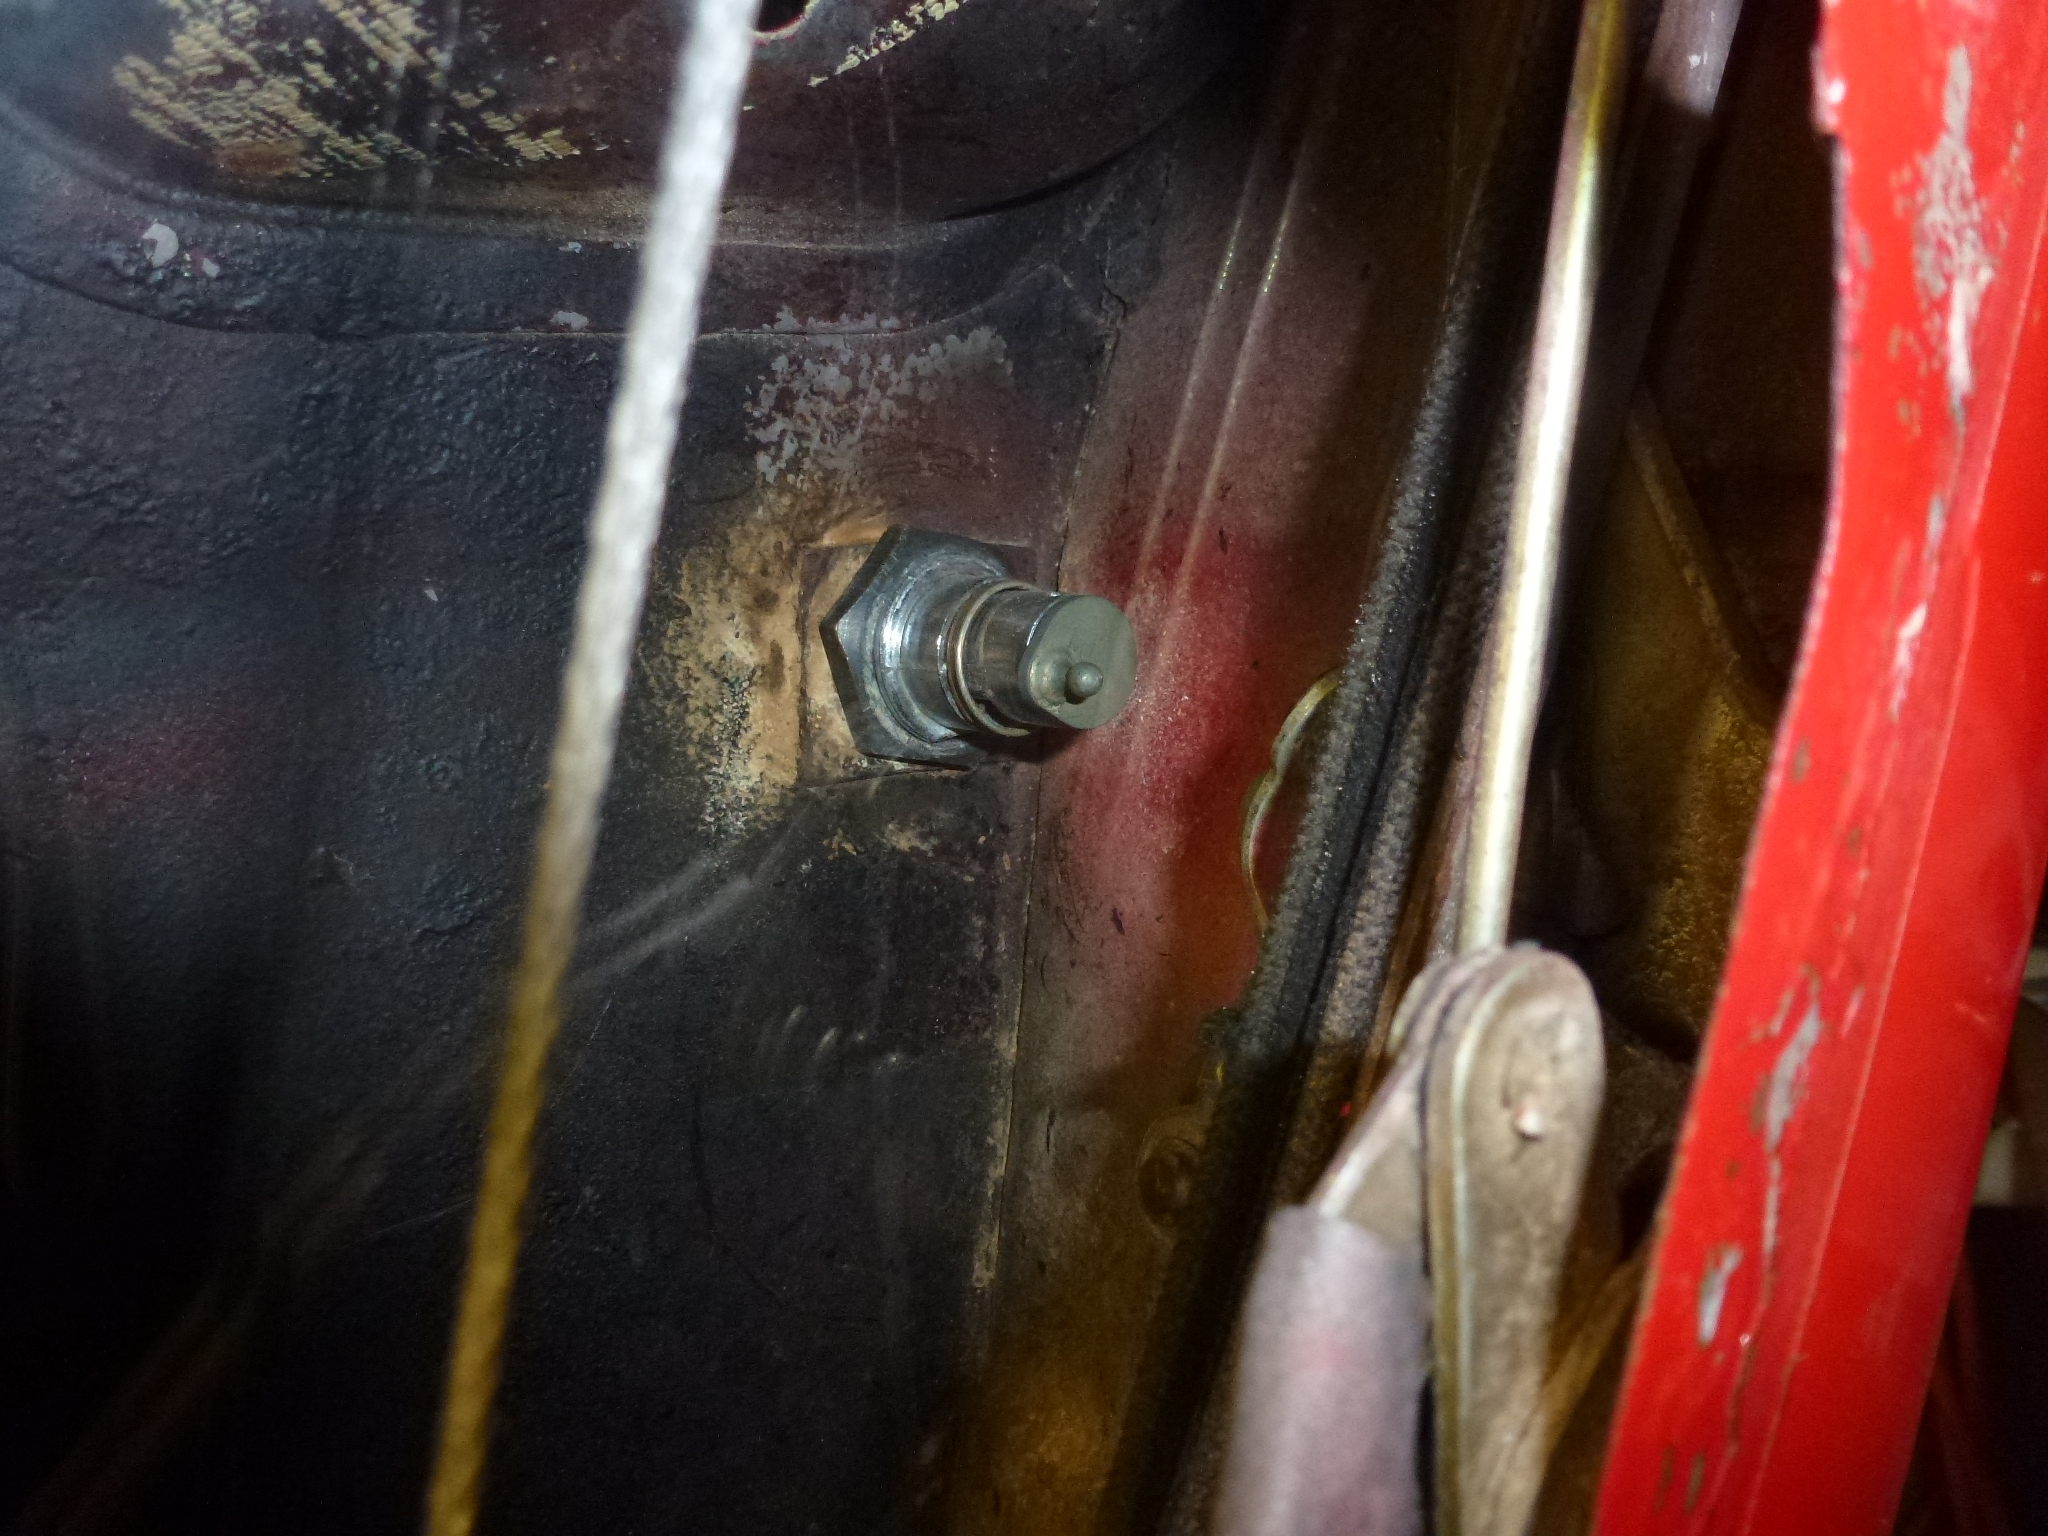
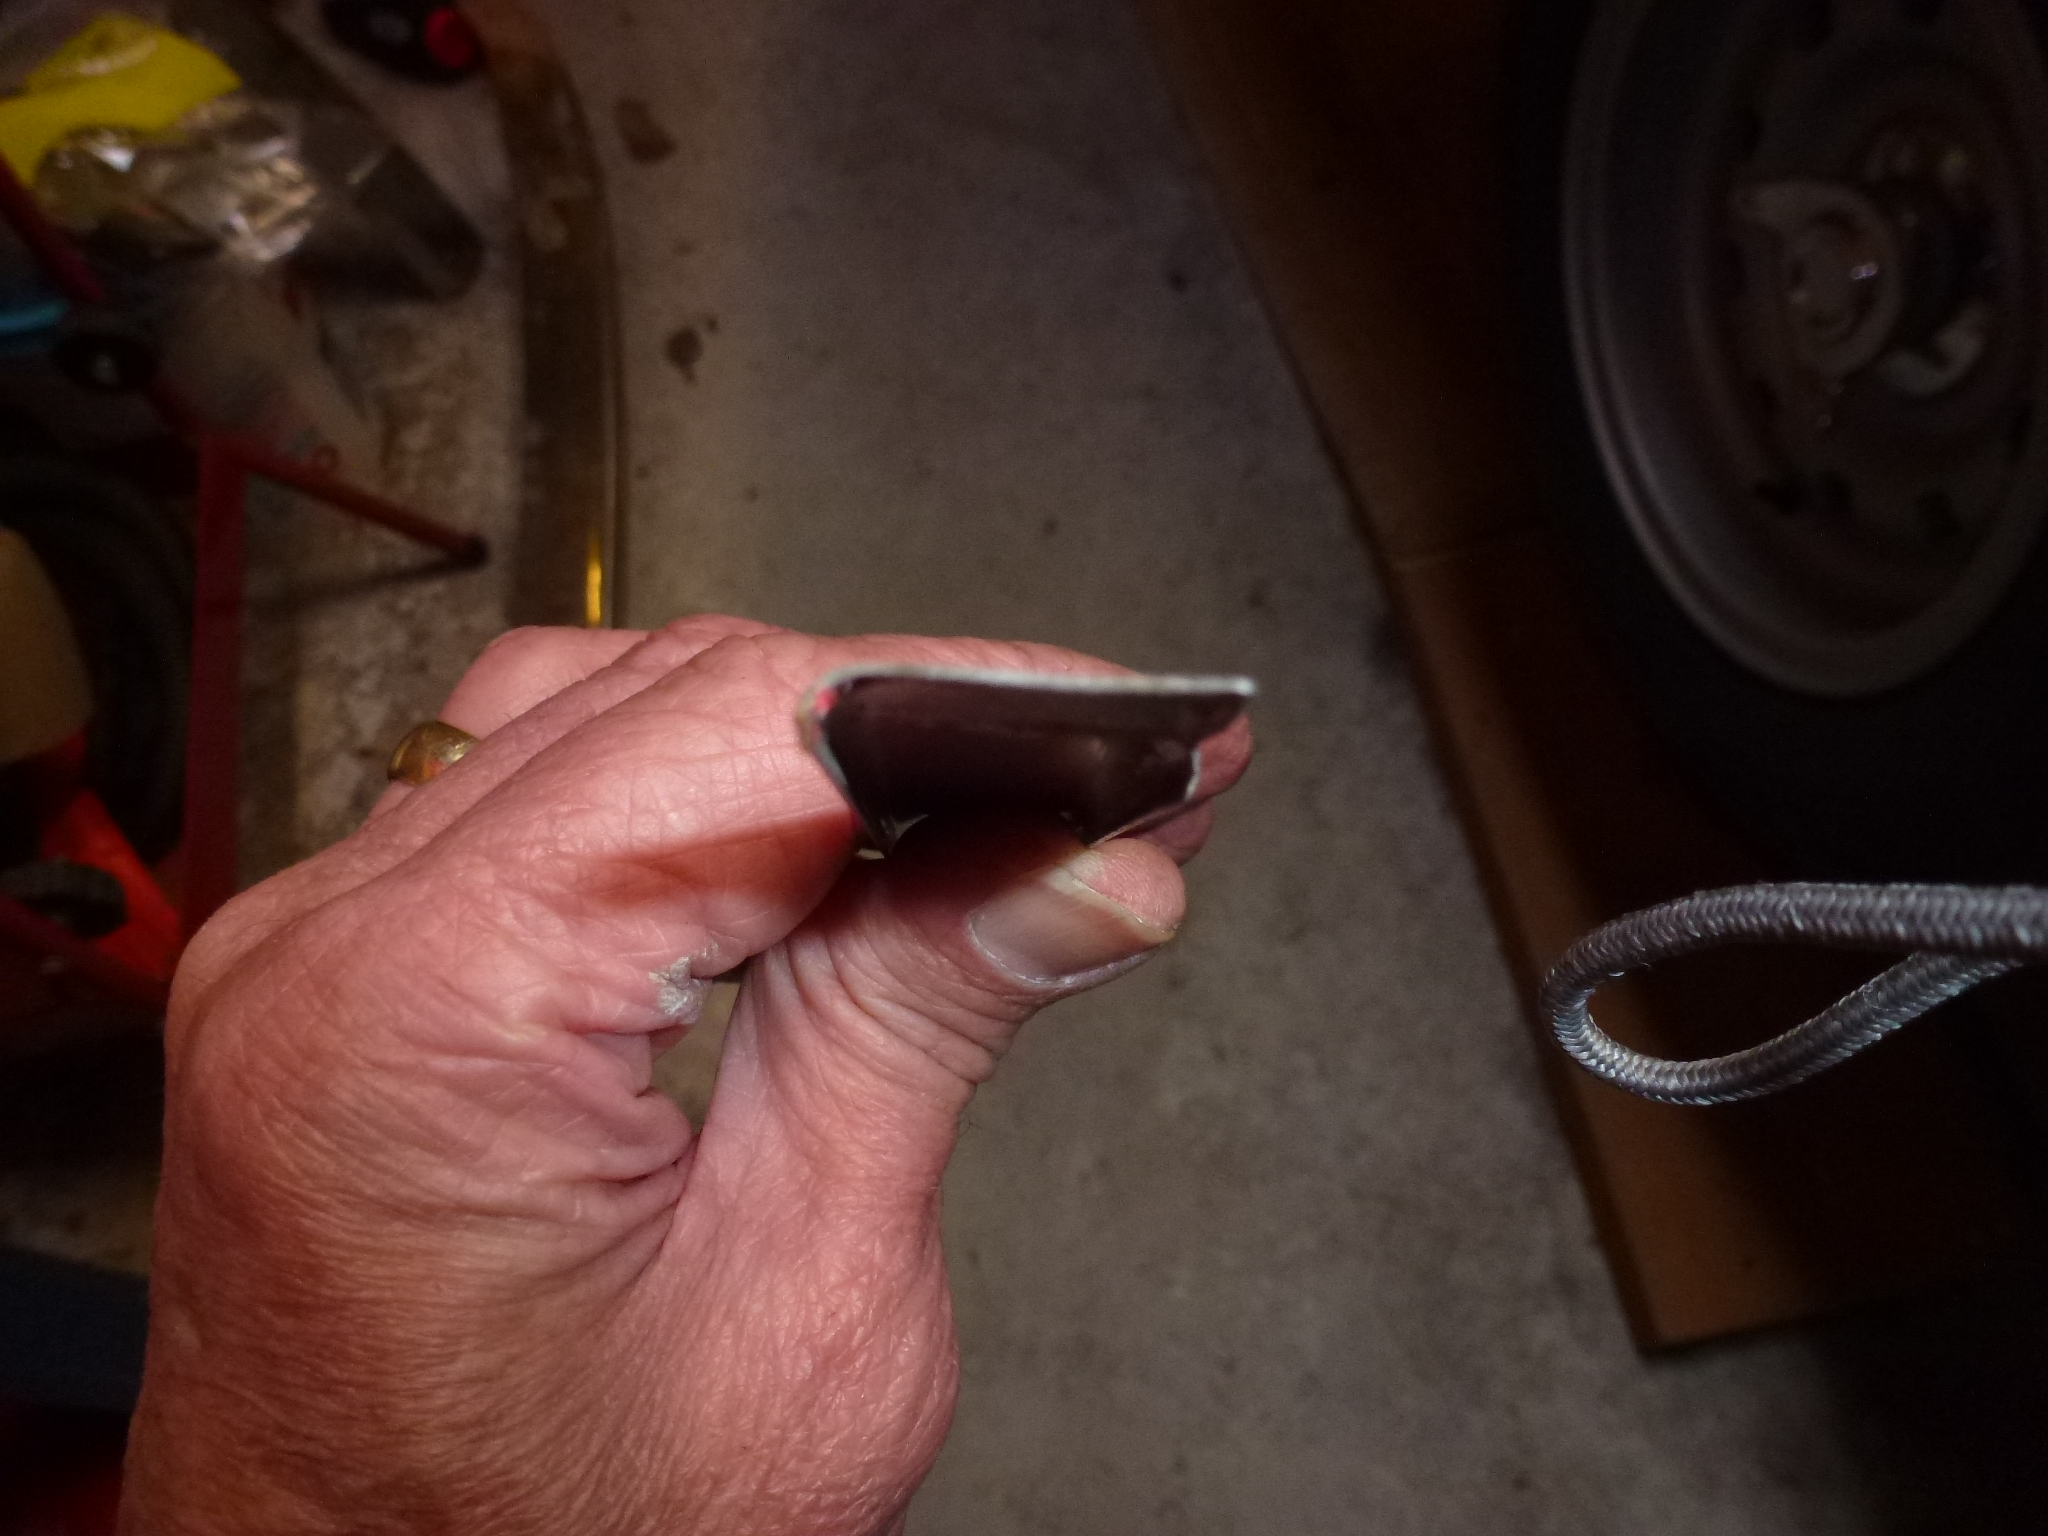
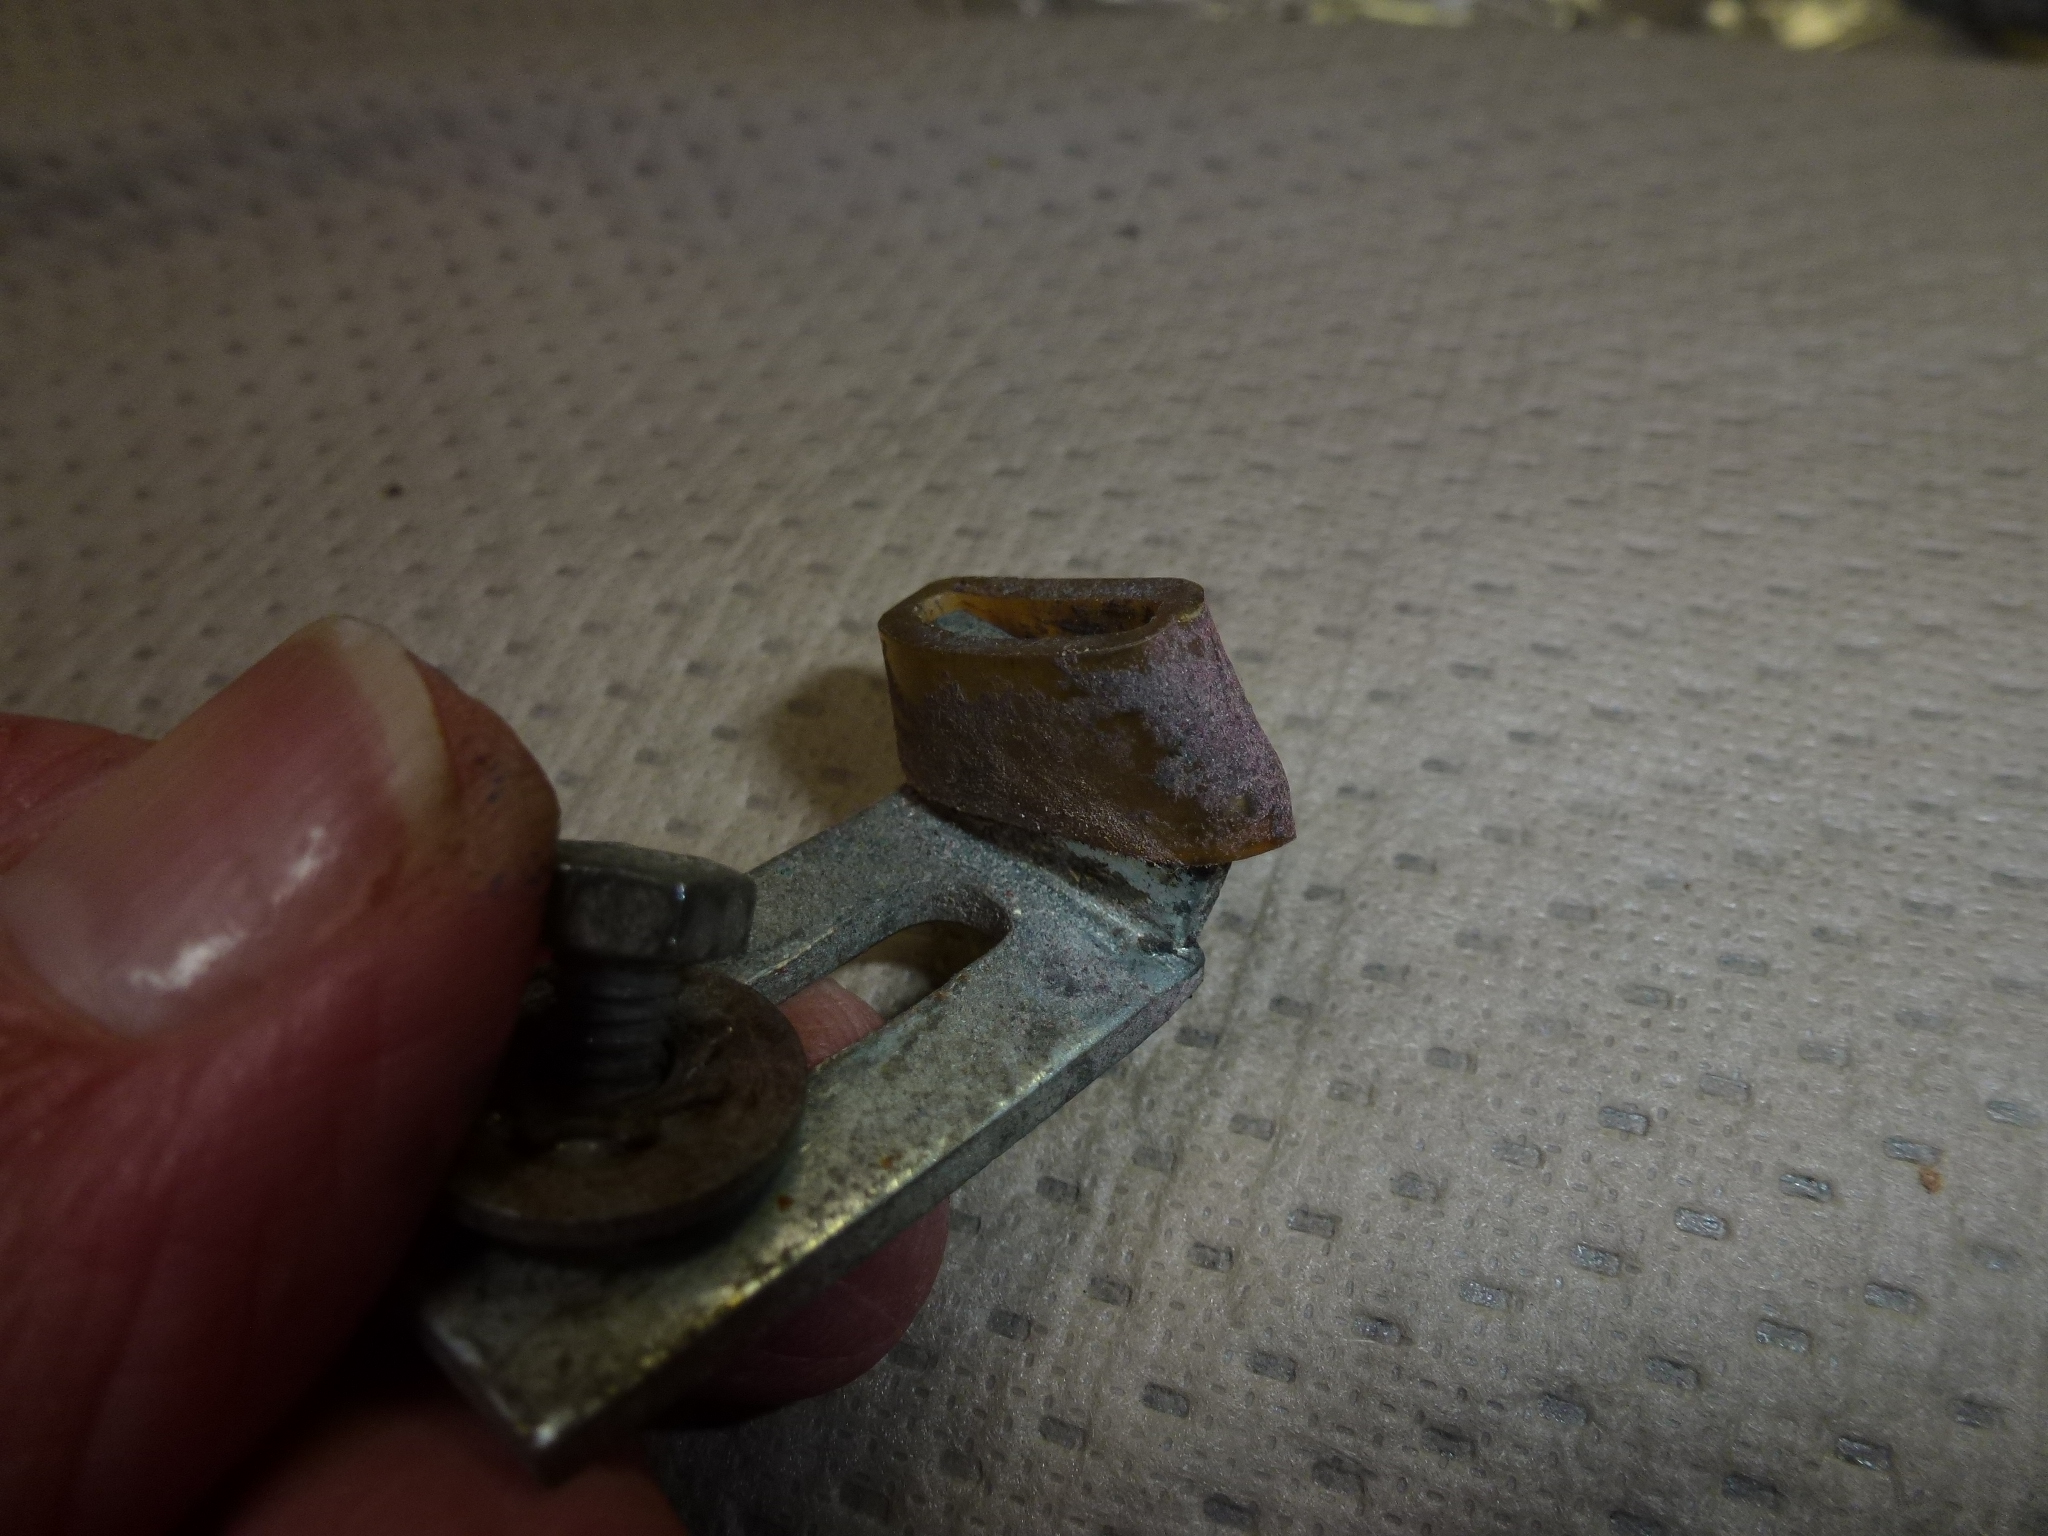
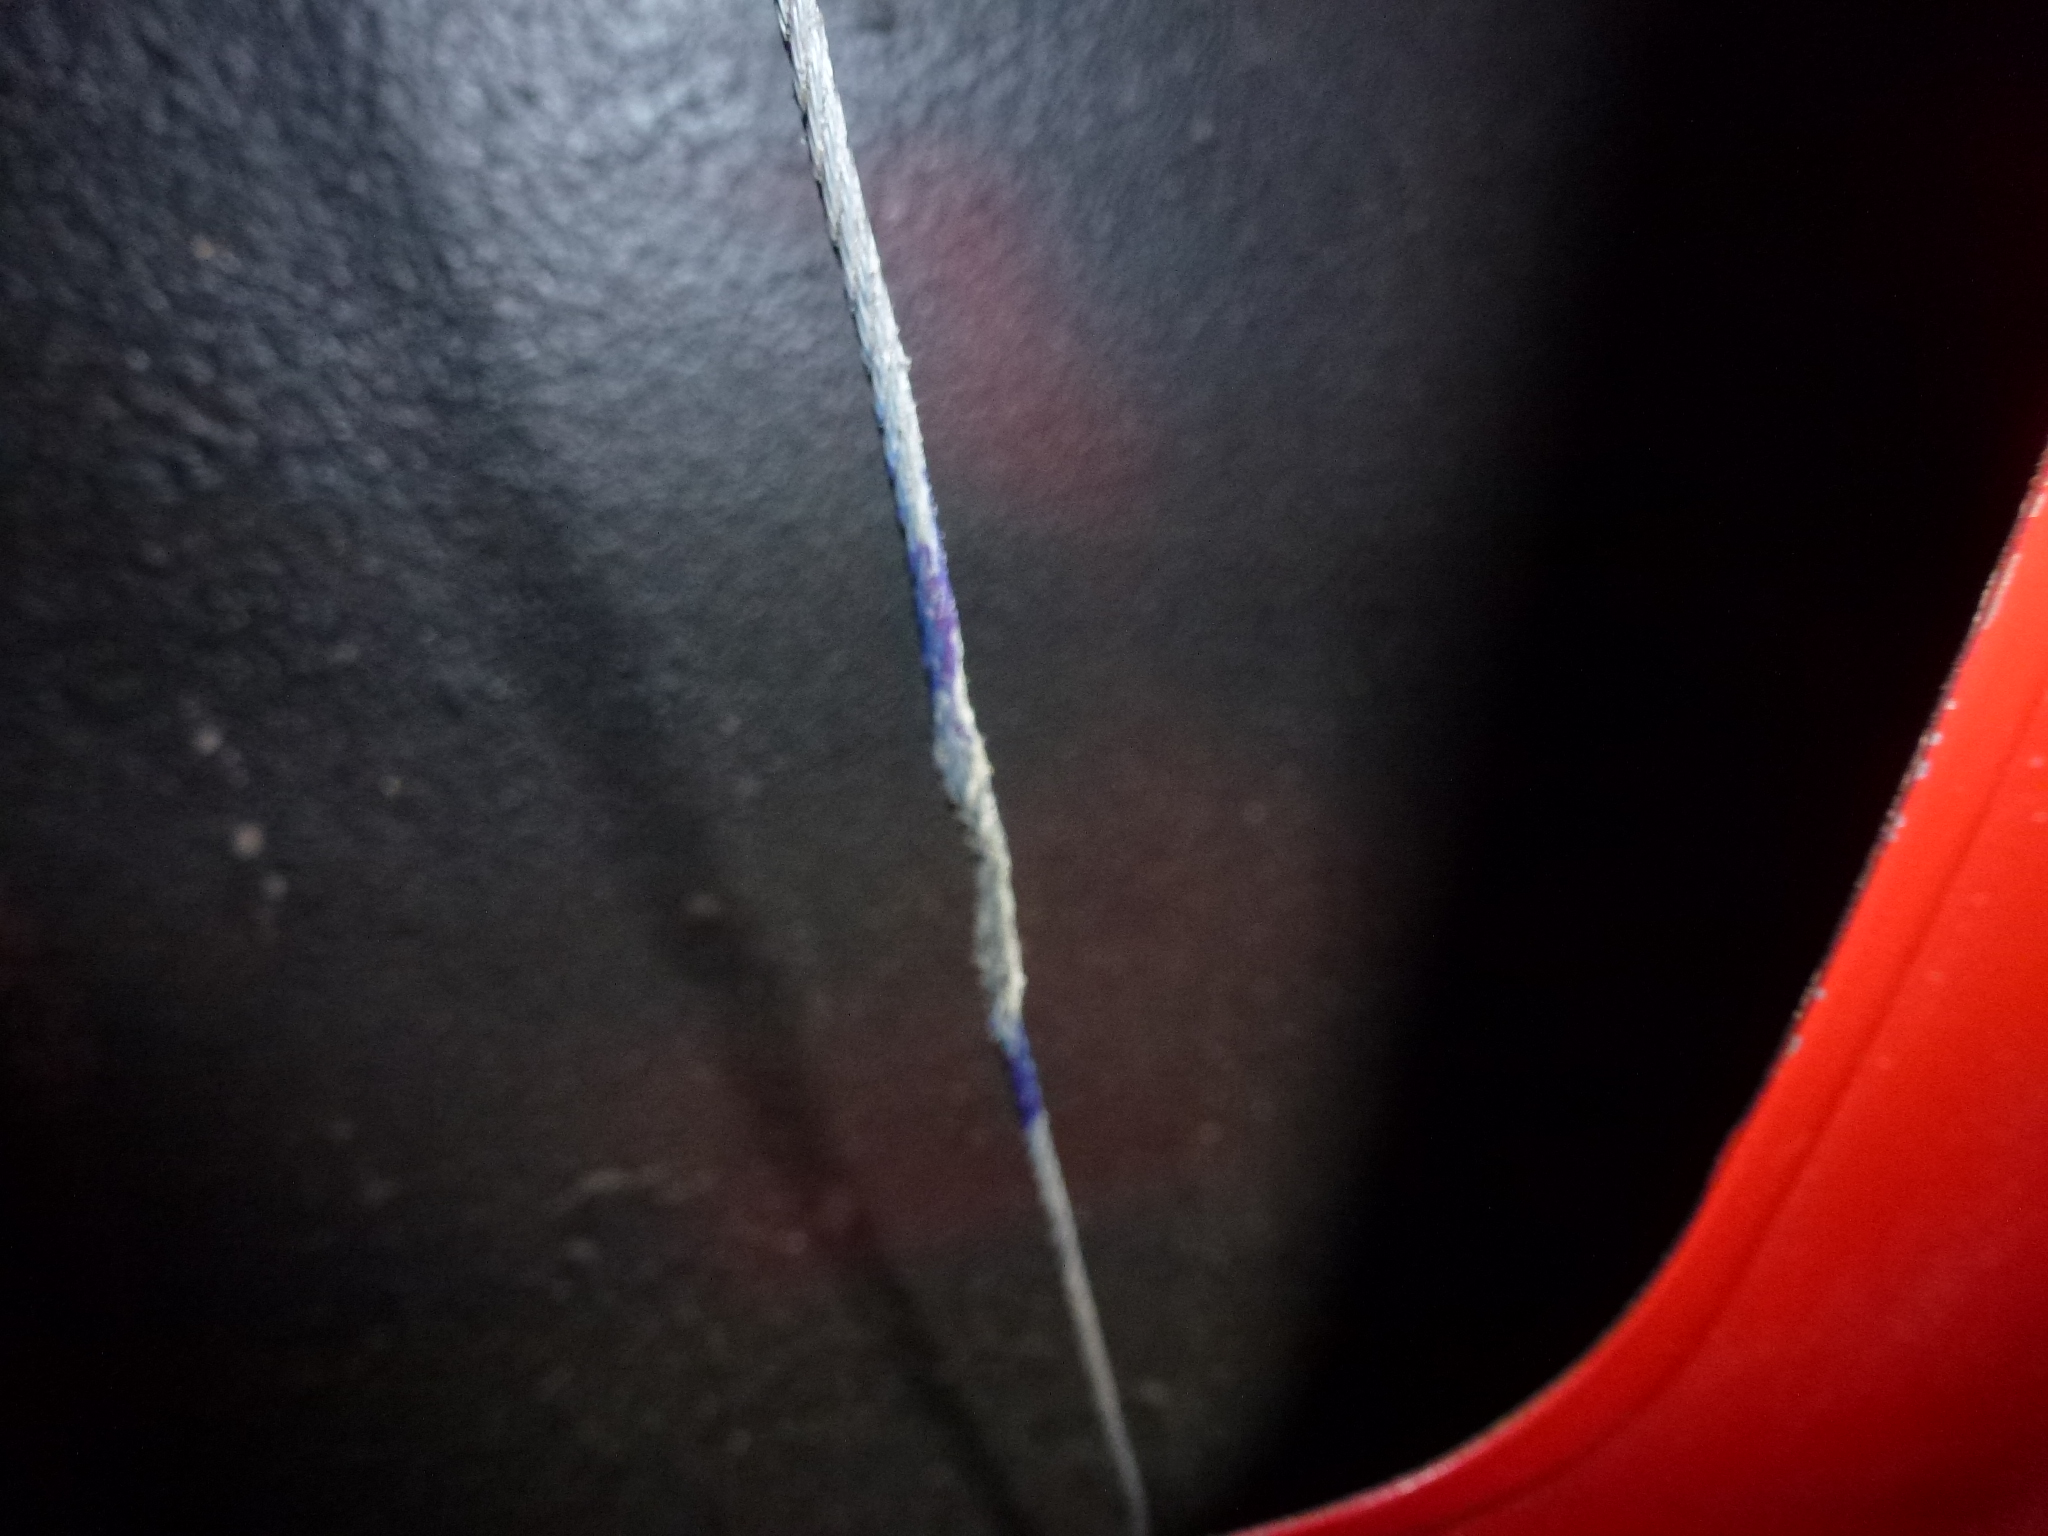
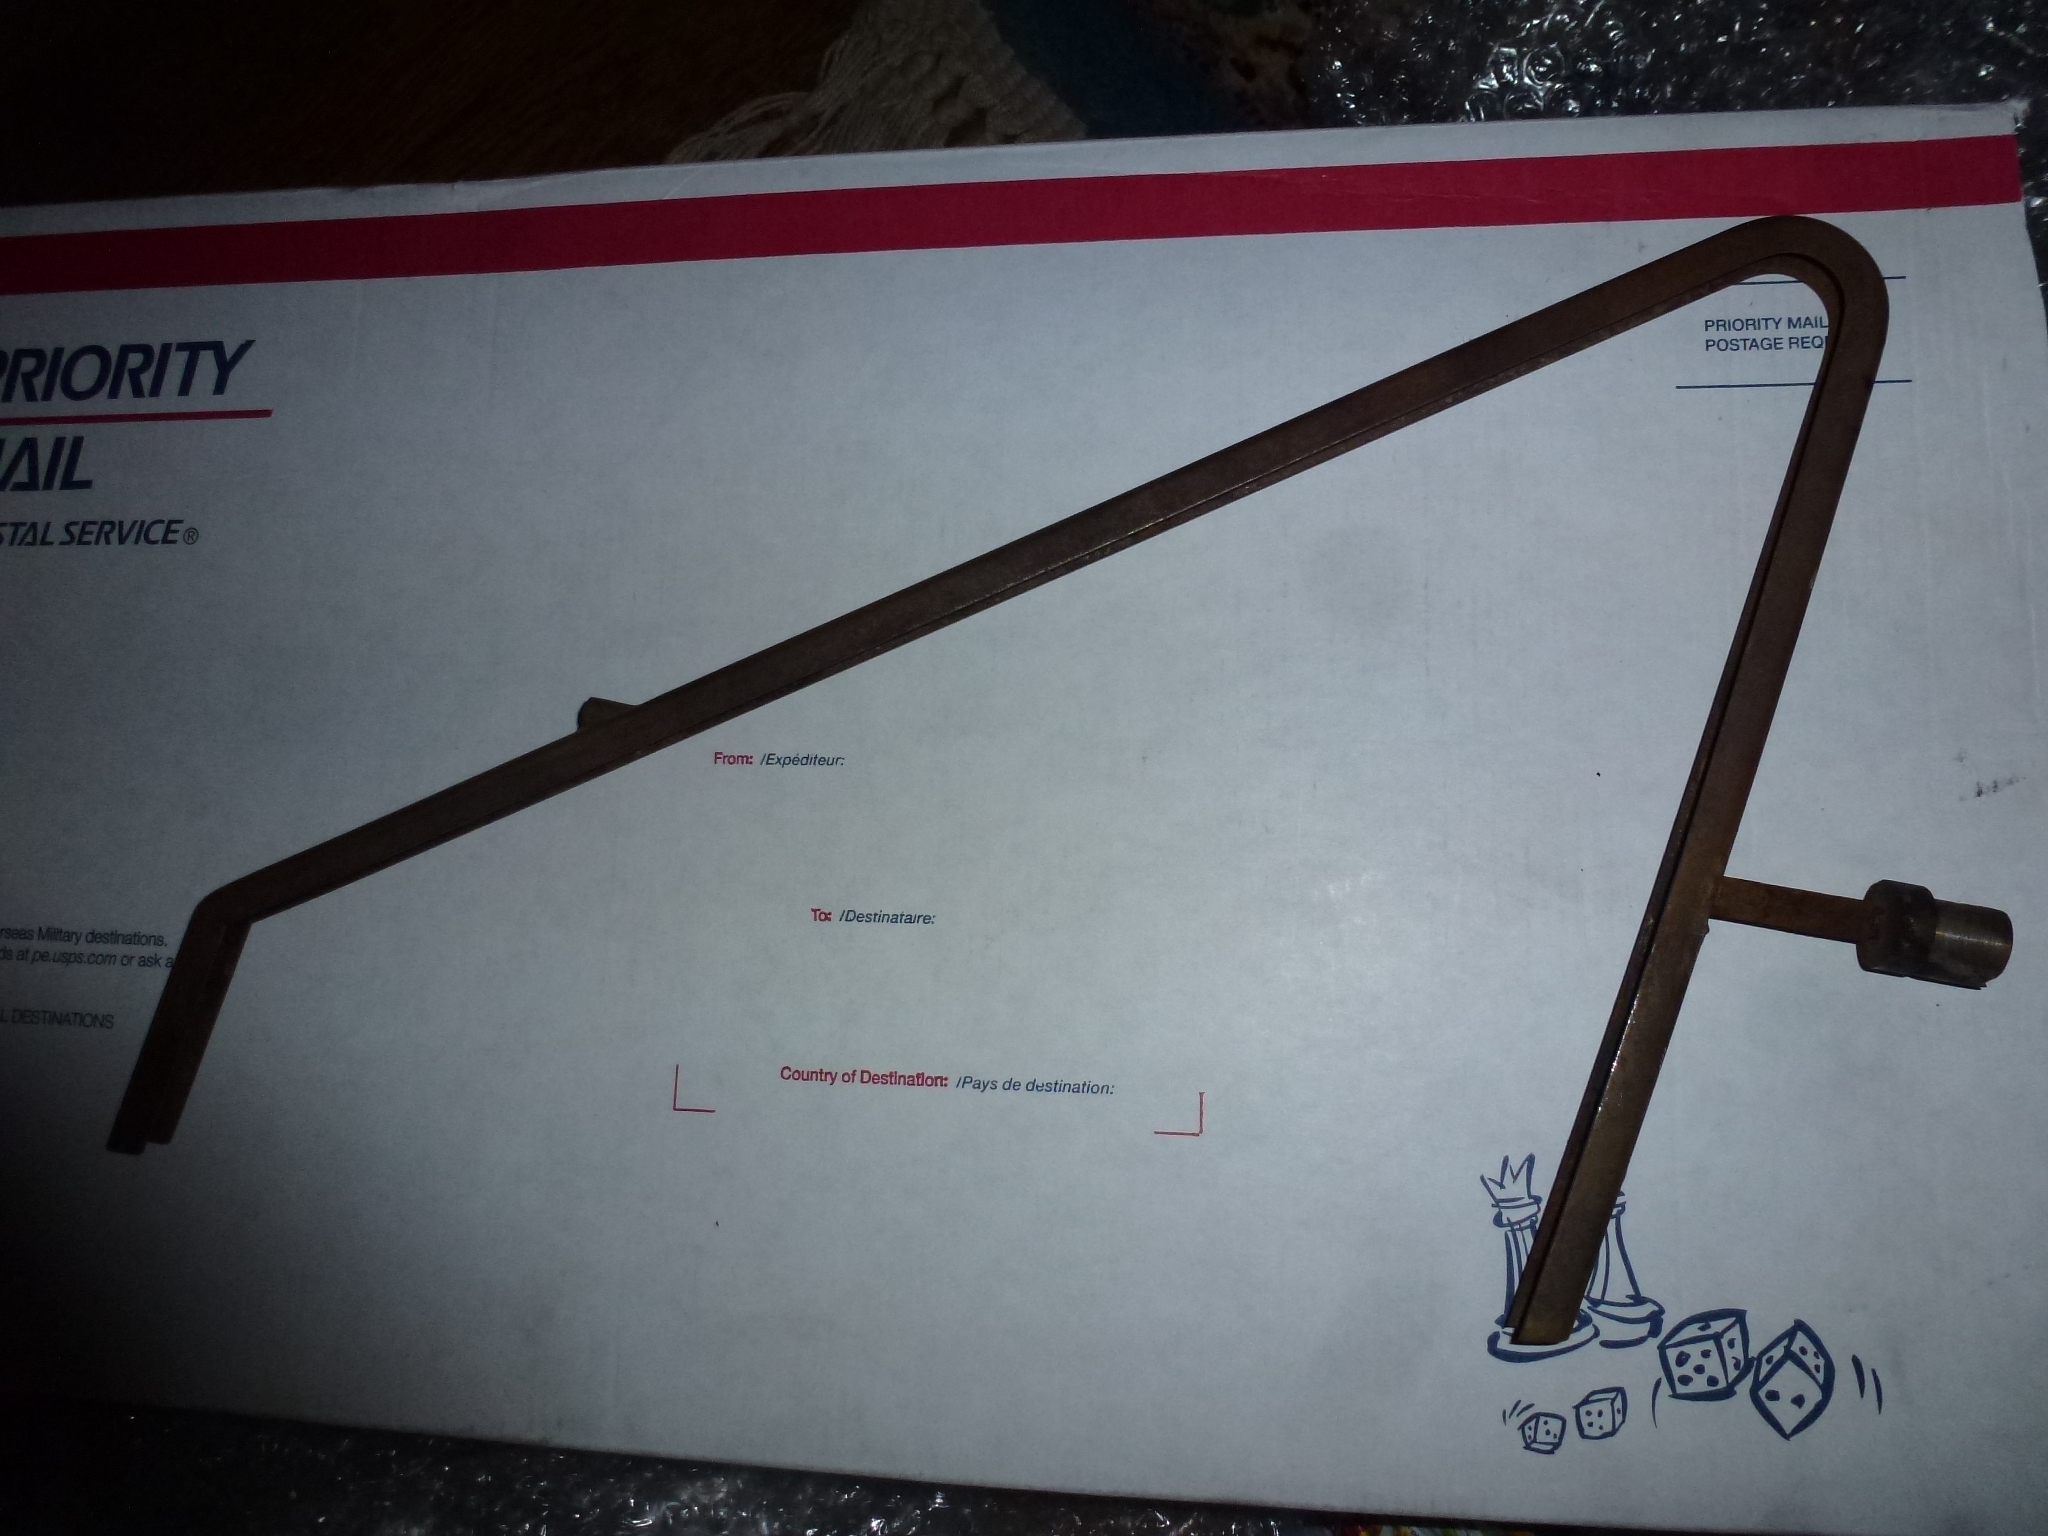
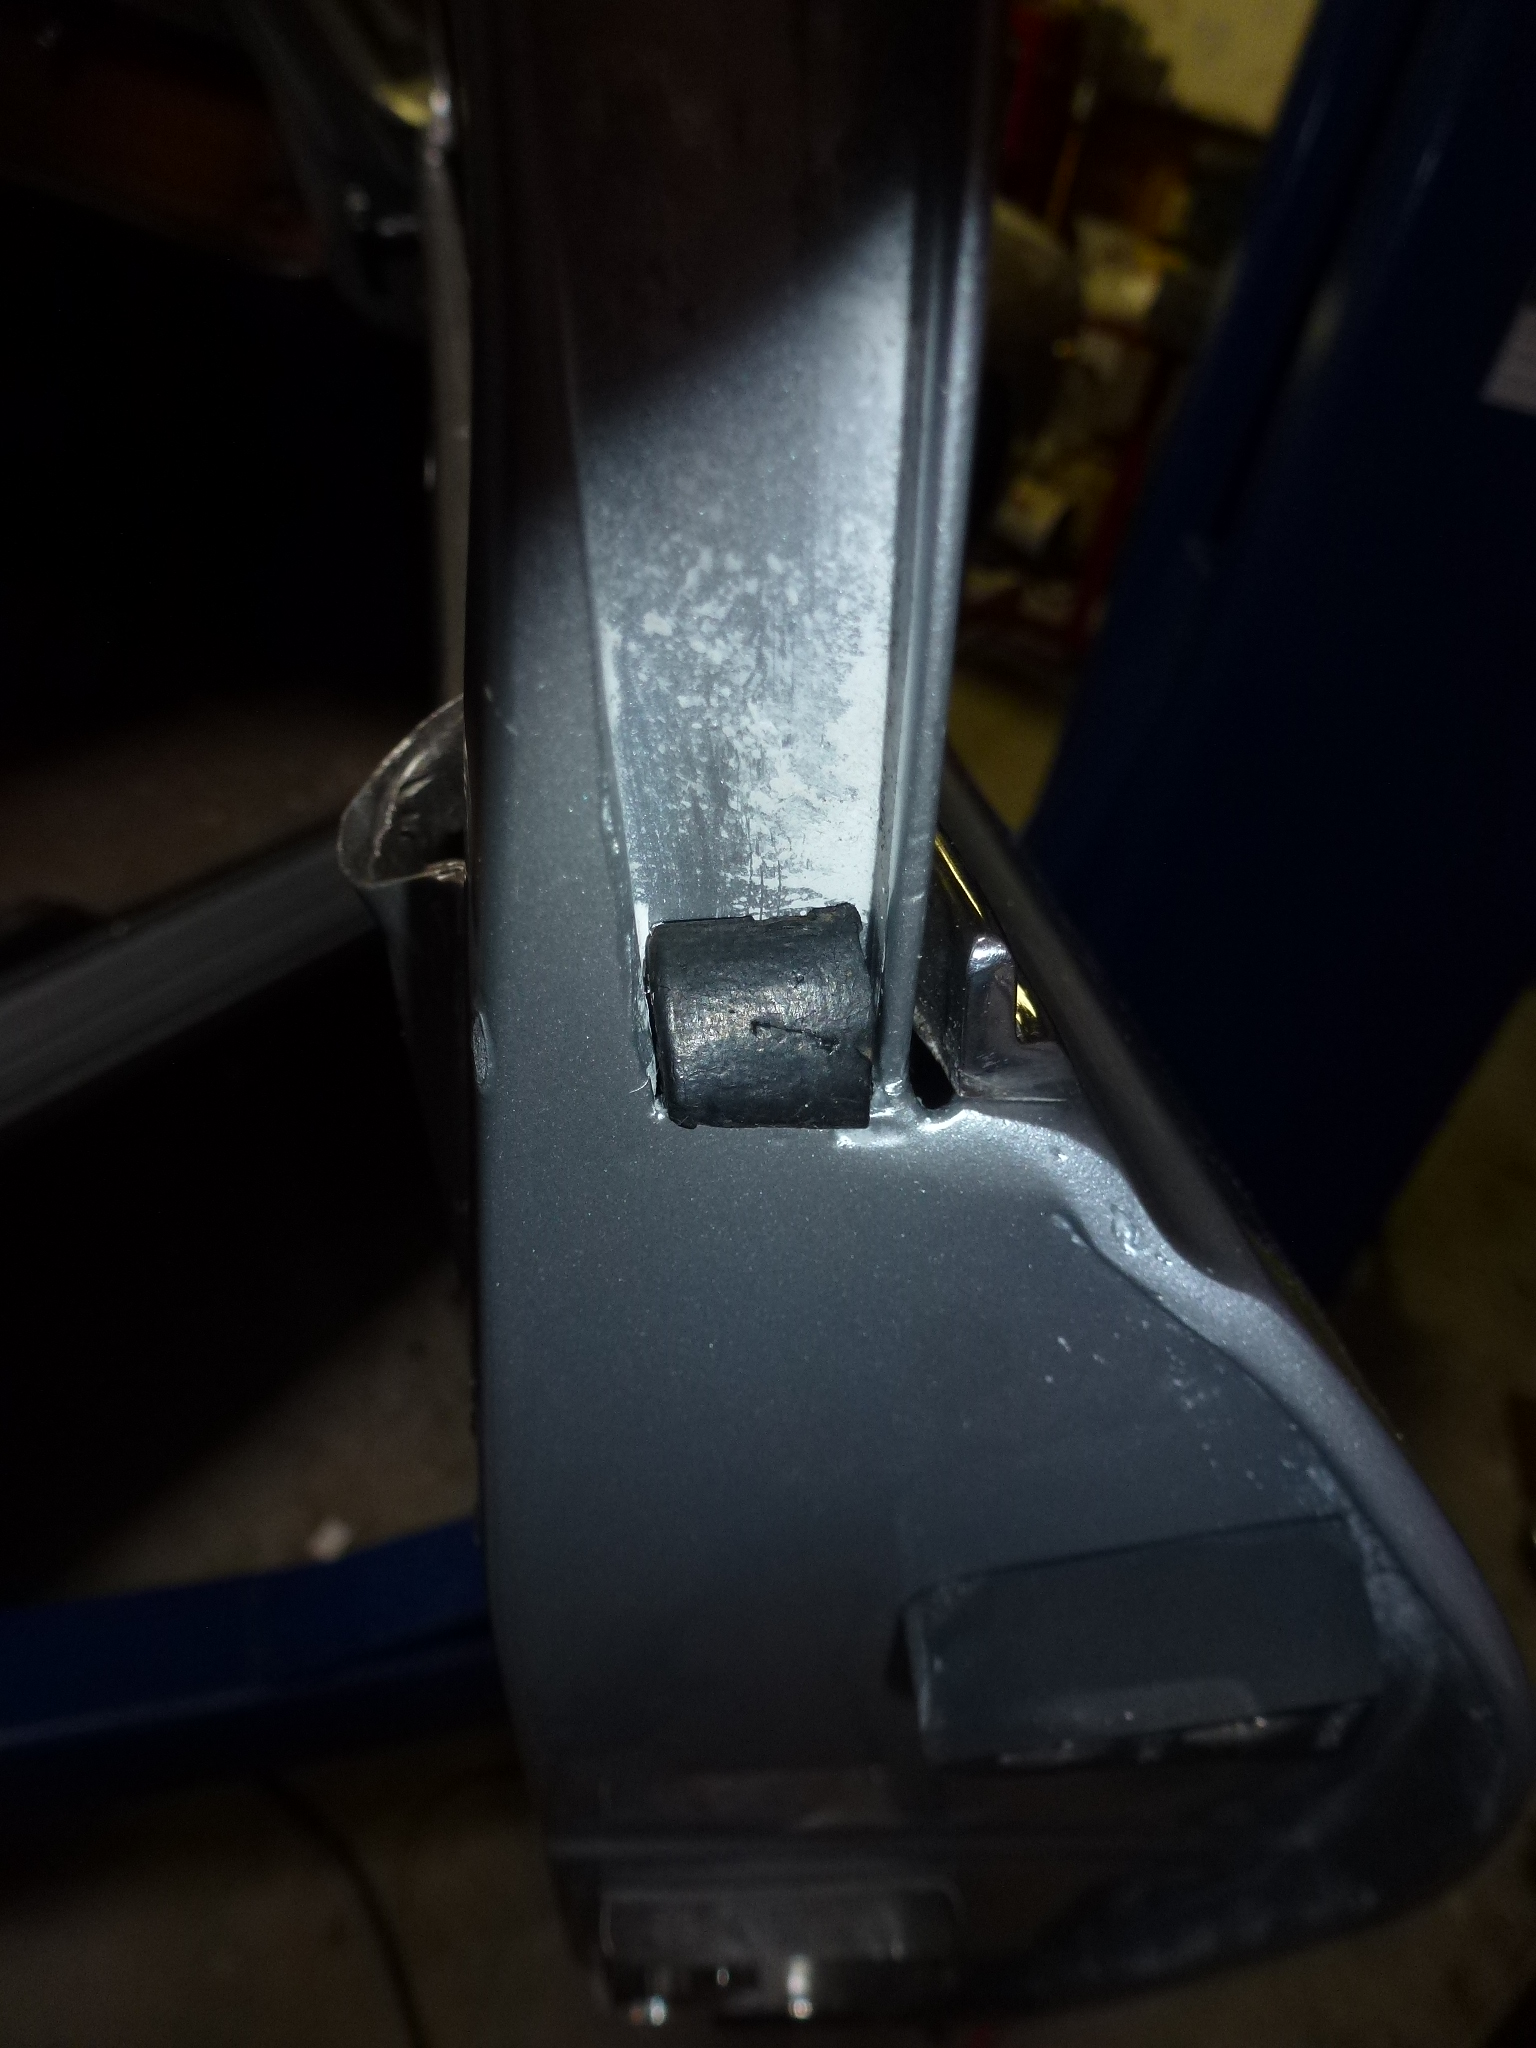
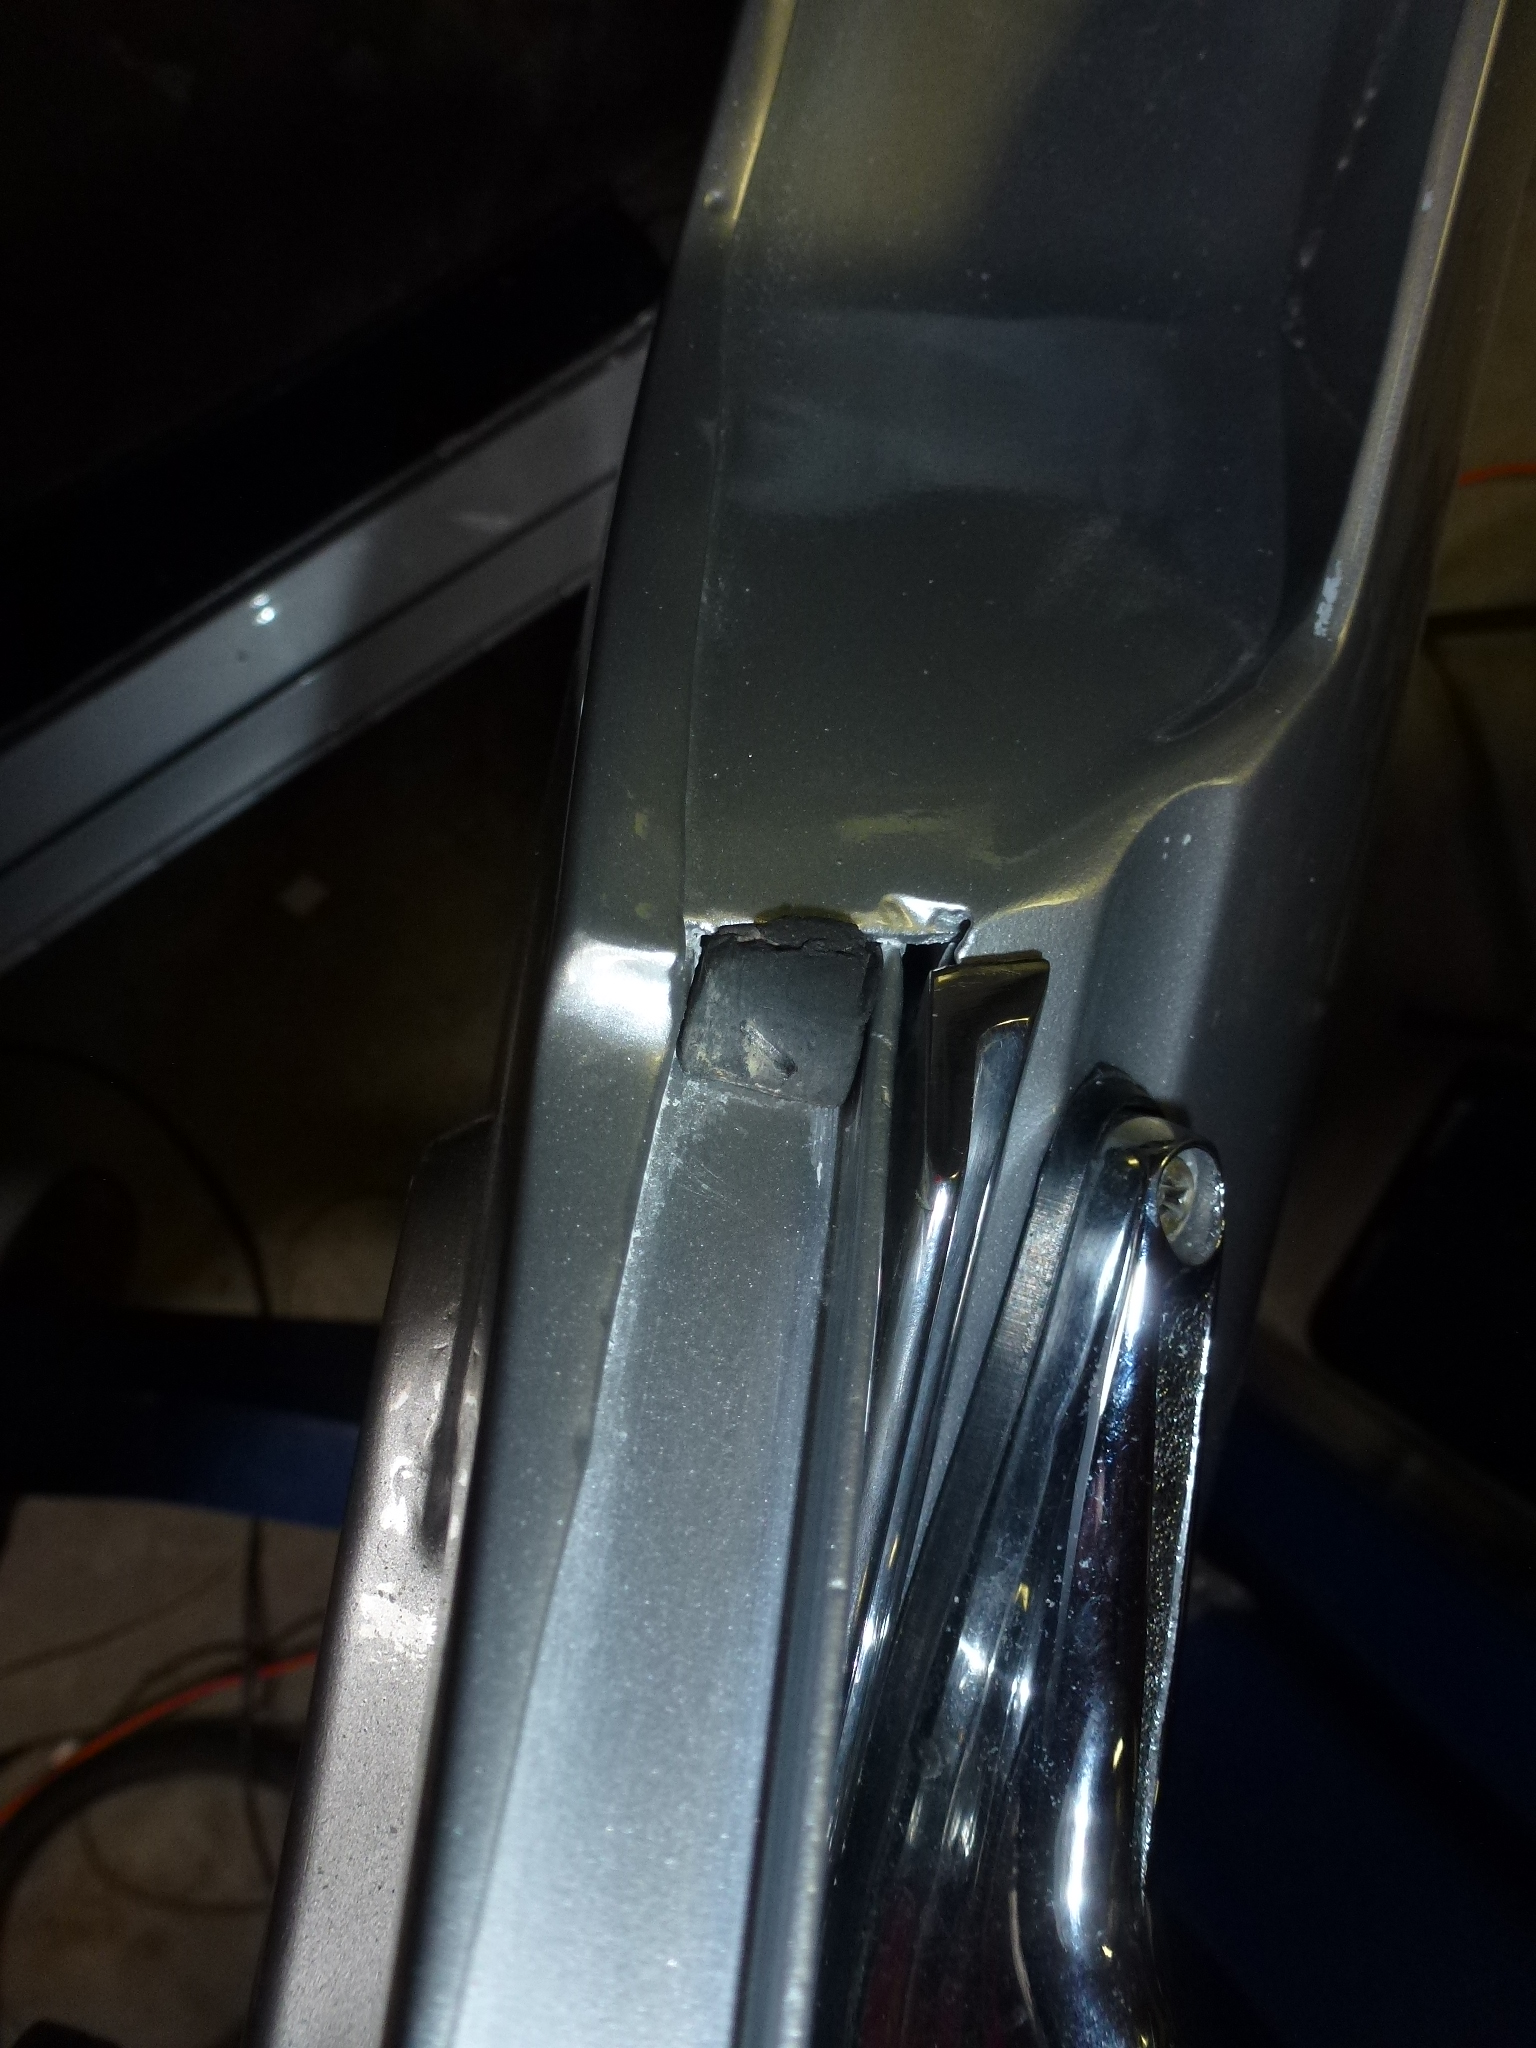
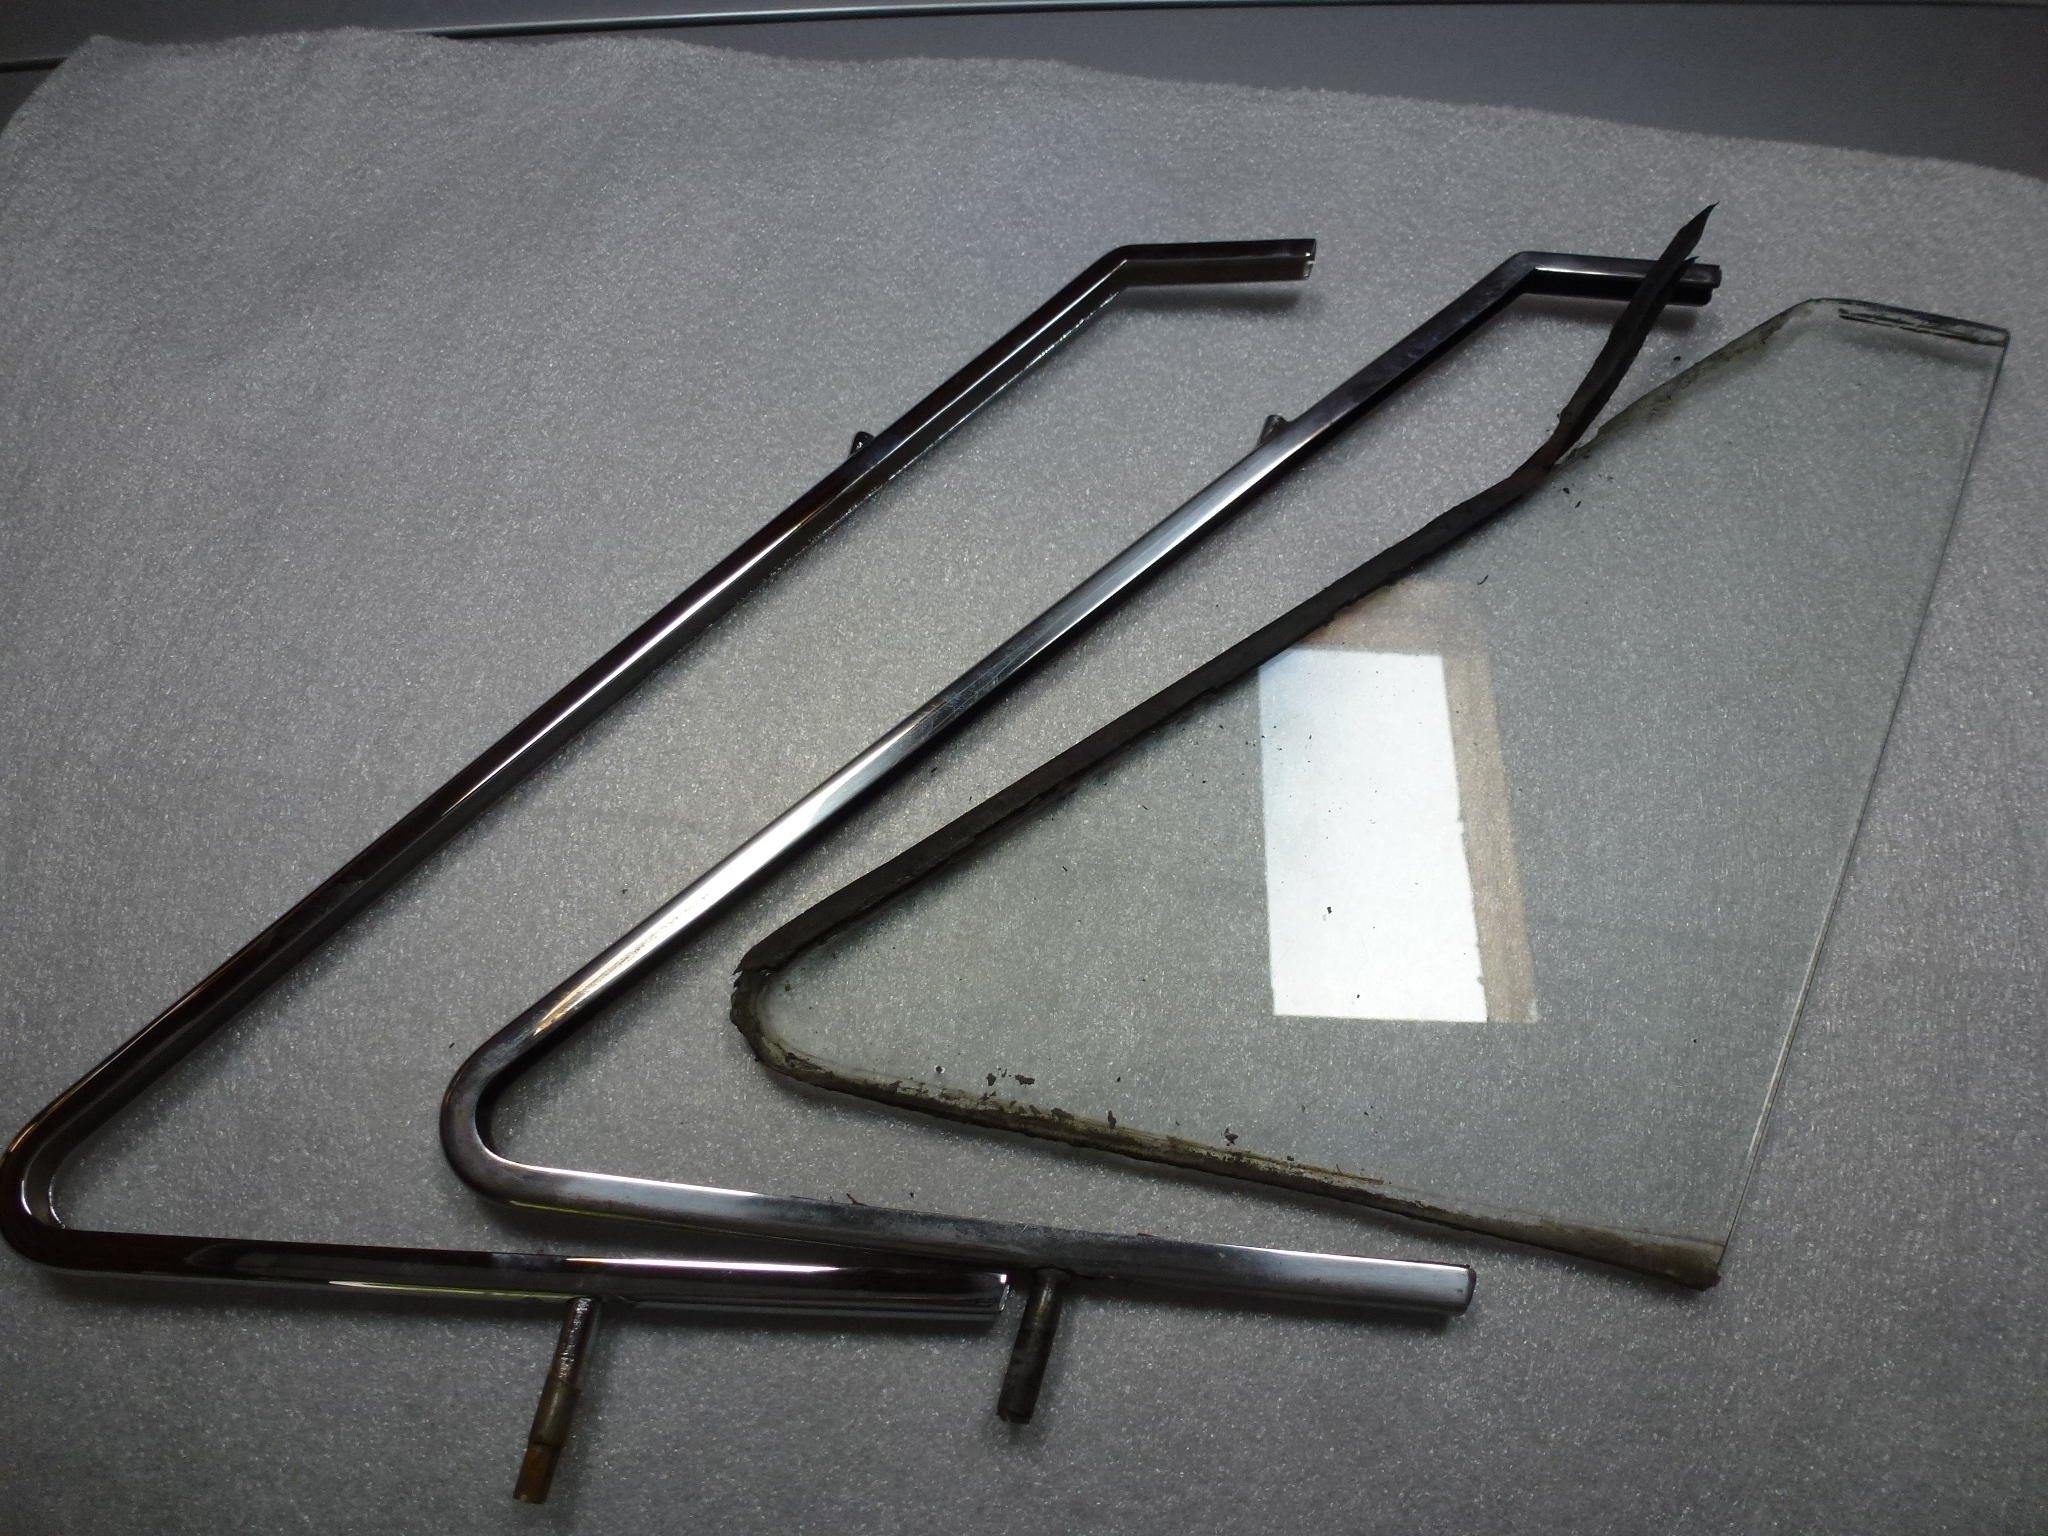
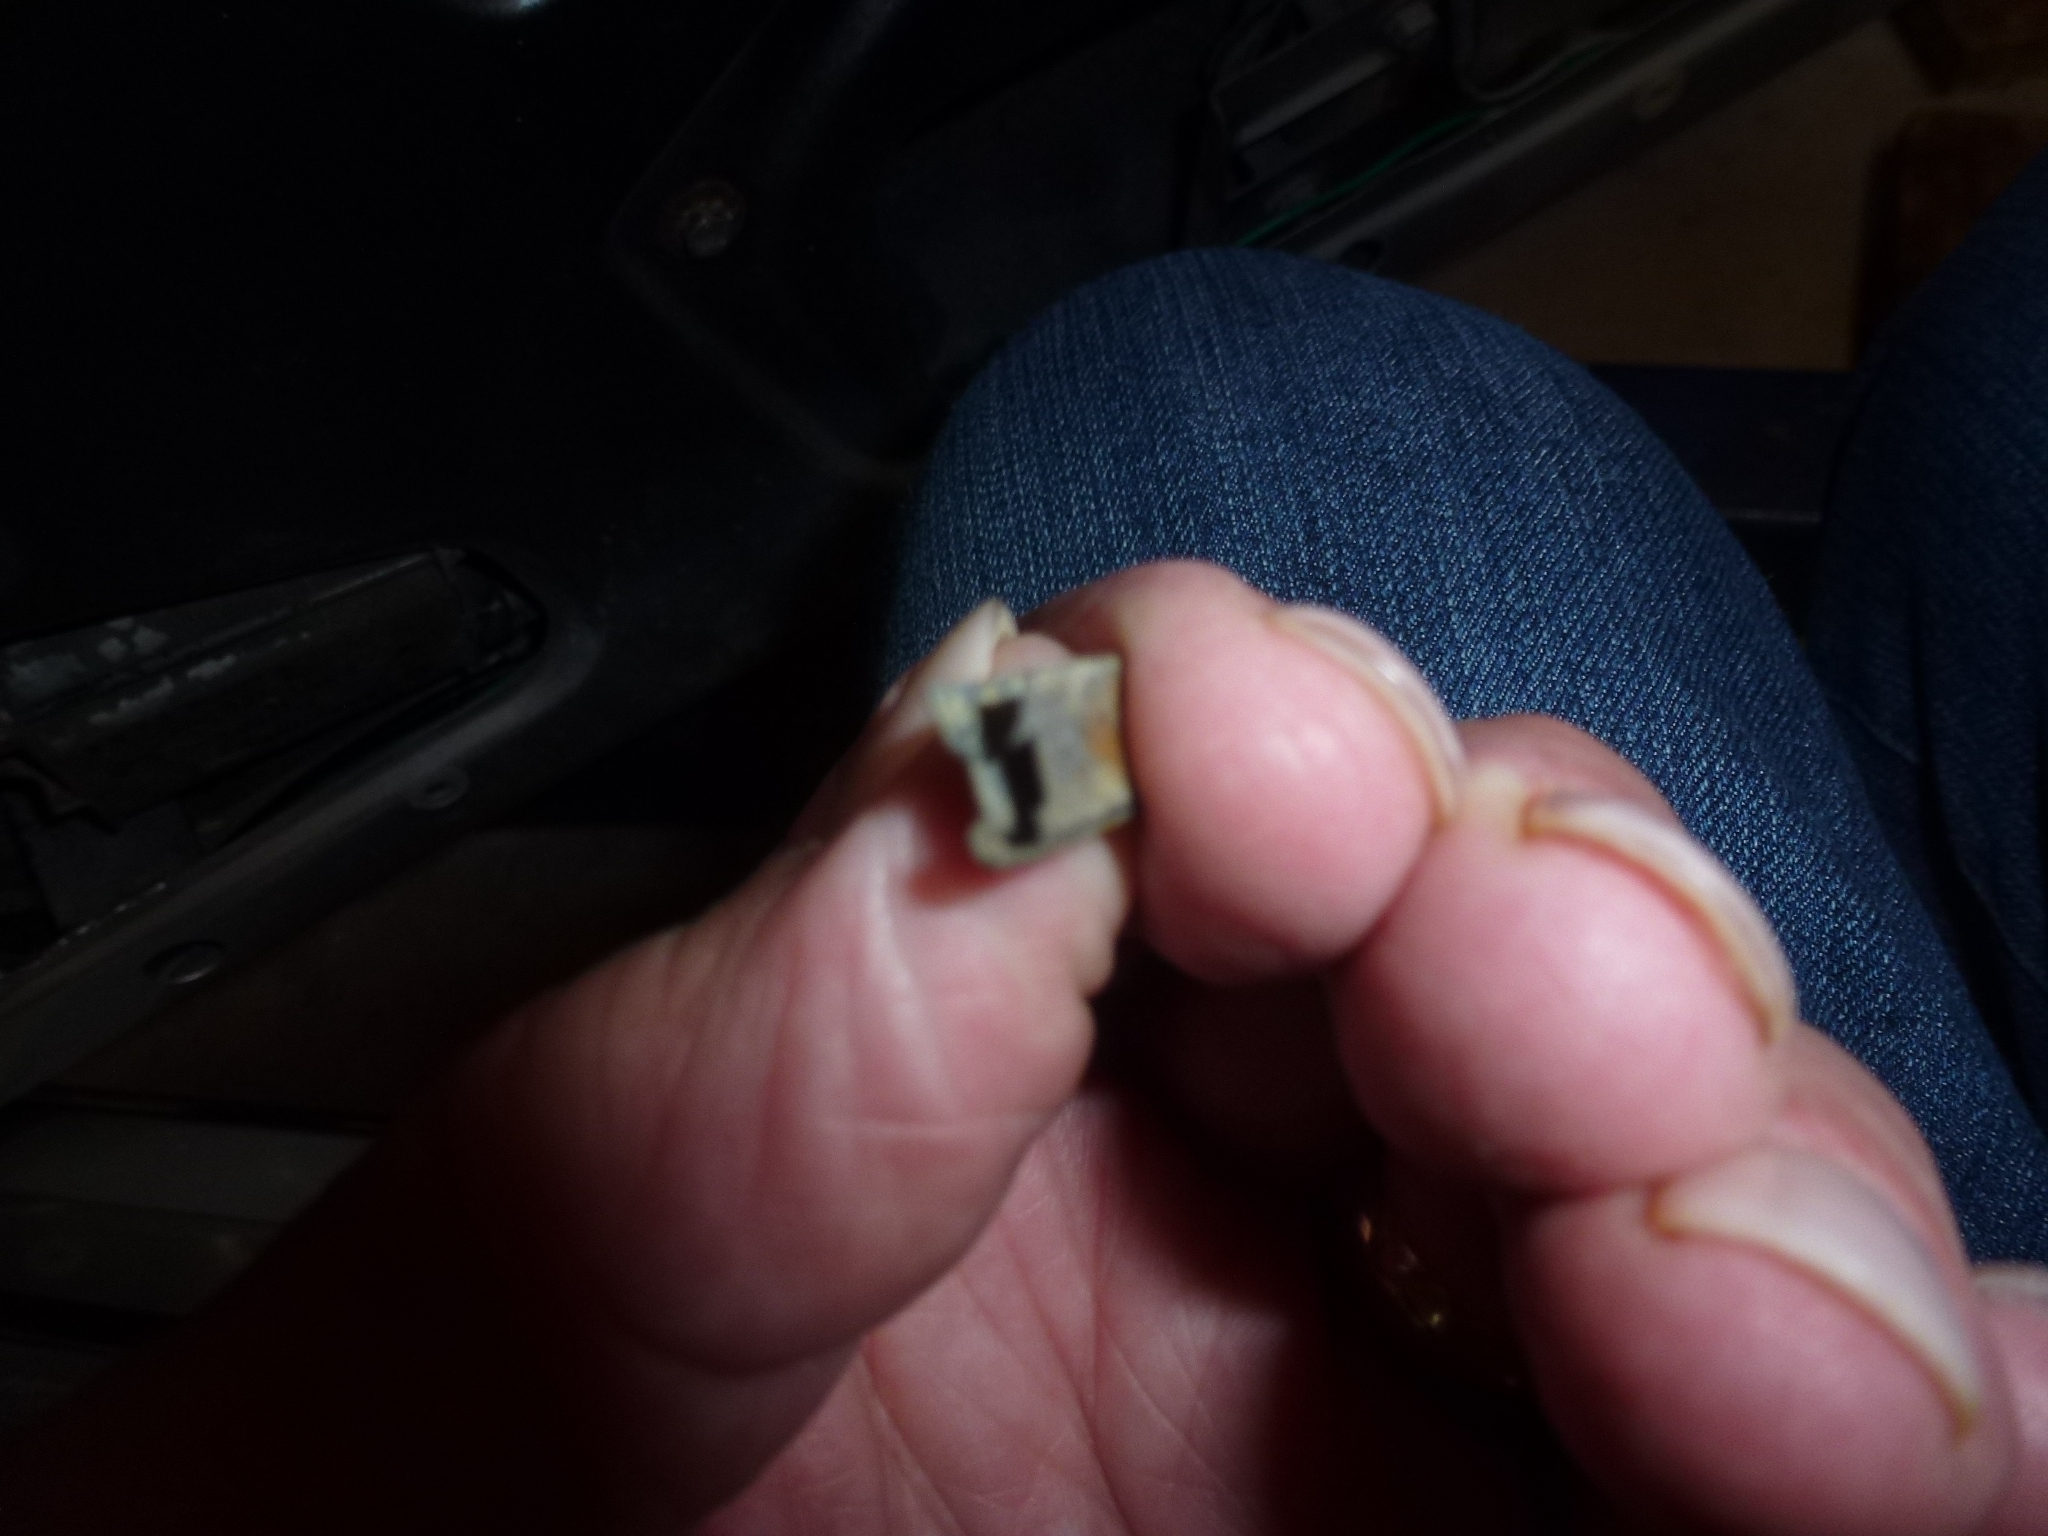
In the process of taking out the left vent window, I sheared off the lower portion of the shaft that fits down into the rotation mechanism. You can see the shorter shaft in the left picture. I could have tried to weld the section back on, but Tom Shaughnessy happened to have the doors off a burned car (8357) and sent me the vent window frame. Of course, it will have to be chromed as the fire destroyed the chrome. But it is still better than trying to weld the shaft back together and try to get it straight so the window would rotate properly.
I started re-assembling the doors. To start, I snaked the wiring for the window motors and door warning light back through the grommets in the body and door edge. Then I wired up the door switches and tested that the door switch and lights were working properly. At first, nothing was working, but I found that the fuse was blown. With that replaced and a minor wiring error, it all worked from both door switches and the interior (I) switch. Once that was done, I installed the hinge panel area covers and door stops.

Since the car was on the lift, it was easy to install the rubber plugs and T strip in the bottoms of the doors.
I also spent quite a bit of time getting the door latches and triangular blocks adjusted so the doors closed and latched properly. I'm still not happy with the fit of the passenger door, but I got frustrated working on it, so that'll be addressed later when I'm not upset and can think about the problem more clearly. I also put on the door locks and made sure that they were working the mechanism correctly.

As I was pulling out parts for the door, I noticed that the vent window frame had some red paint on it. Since this doesn't show, I wondered why I painted it red many years ago. Then I remembered that I was missing one of the stainless steel trim covers, so I painted it to match the inside window frame that doesn't have covers. I took the time to strip off the red.
I went back to work on the passenger door, specifically to get the glass installed. When I took the doors apart, originally, I decided to leave in the roll-up glass so I didn't have to worry about aligning it on the cable for the power window motor. In the end, I did end up removing it, but the order I took things apart probably wasn't optimal. So I gave it quite a bit of thought on the best way to re-assemble the door.
First, I installed the vent window frame, roller crank and glass. Of course, one has to be super careful to not nick or scratch the new paint. Putting in the frame is straight forward except the roller and brace at the bottom need to be removed to easily get it into the opening. Then the frame is put in place with a screw at the top, bolt in the middle and brace at the bottom. Next, the outside vent window trim needs to be installed as one of the screws is behind where the crank mechanism goes in. Its forward screw is also the forward screw for the window scraper, so it doesn't get installed at this time.
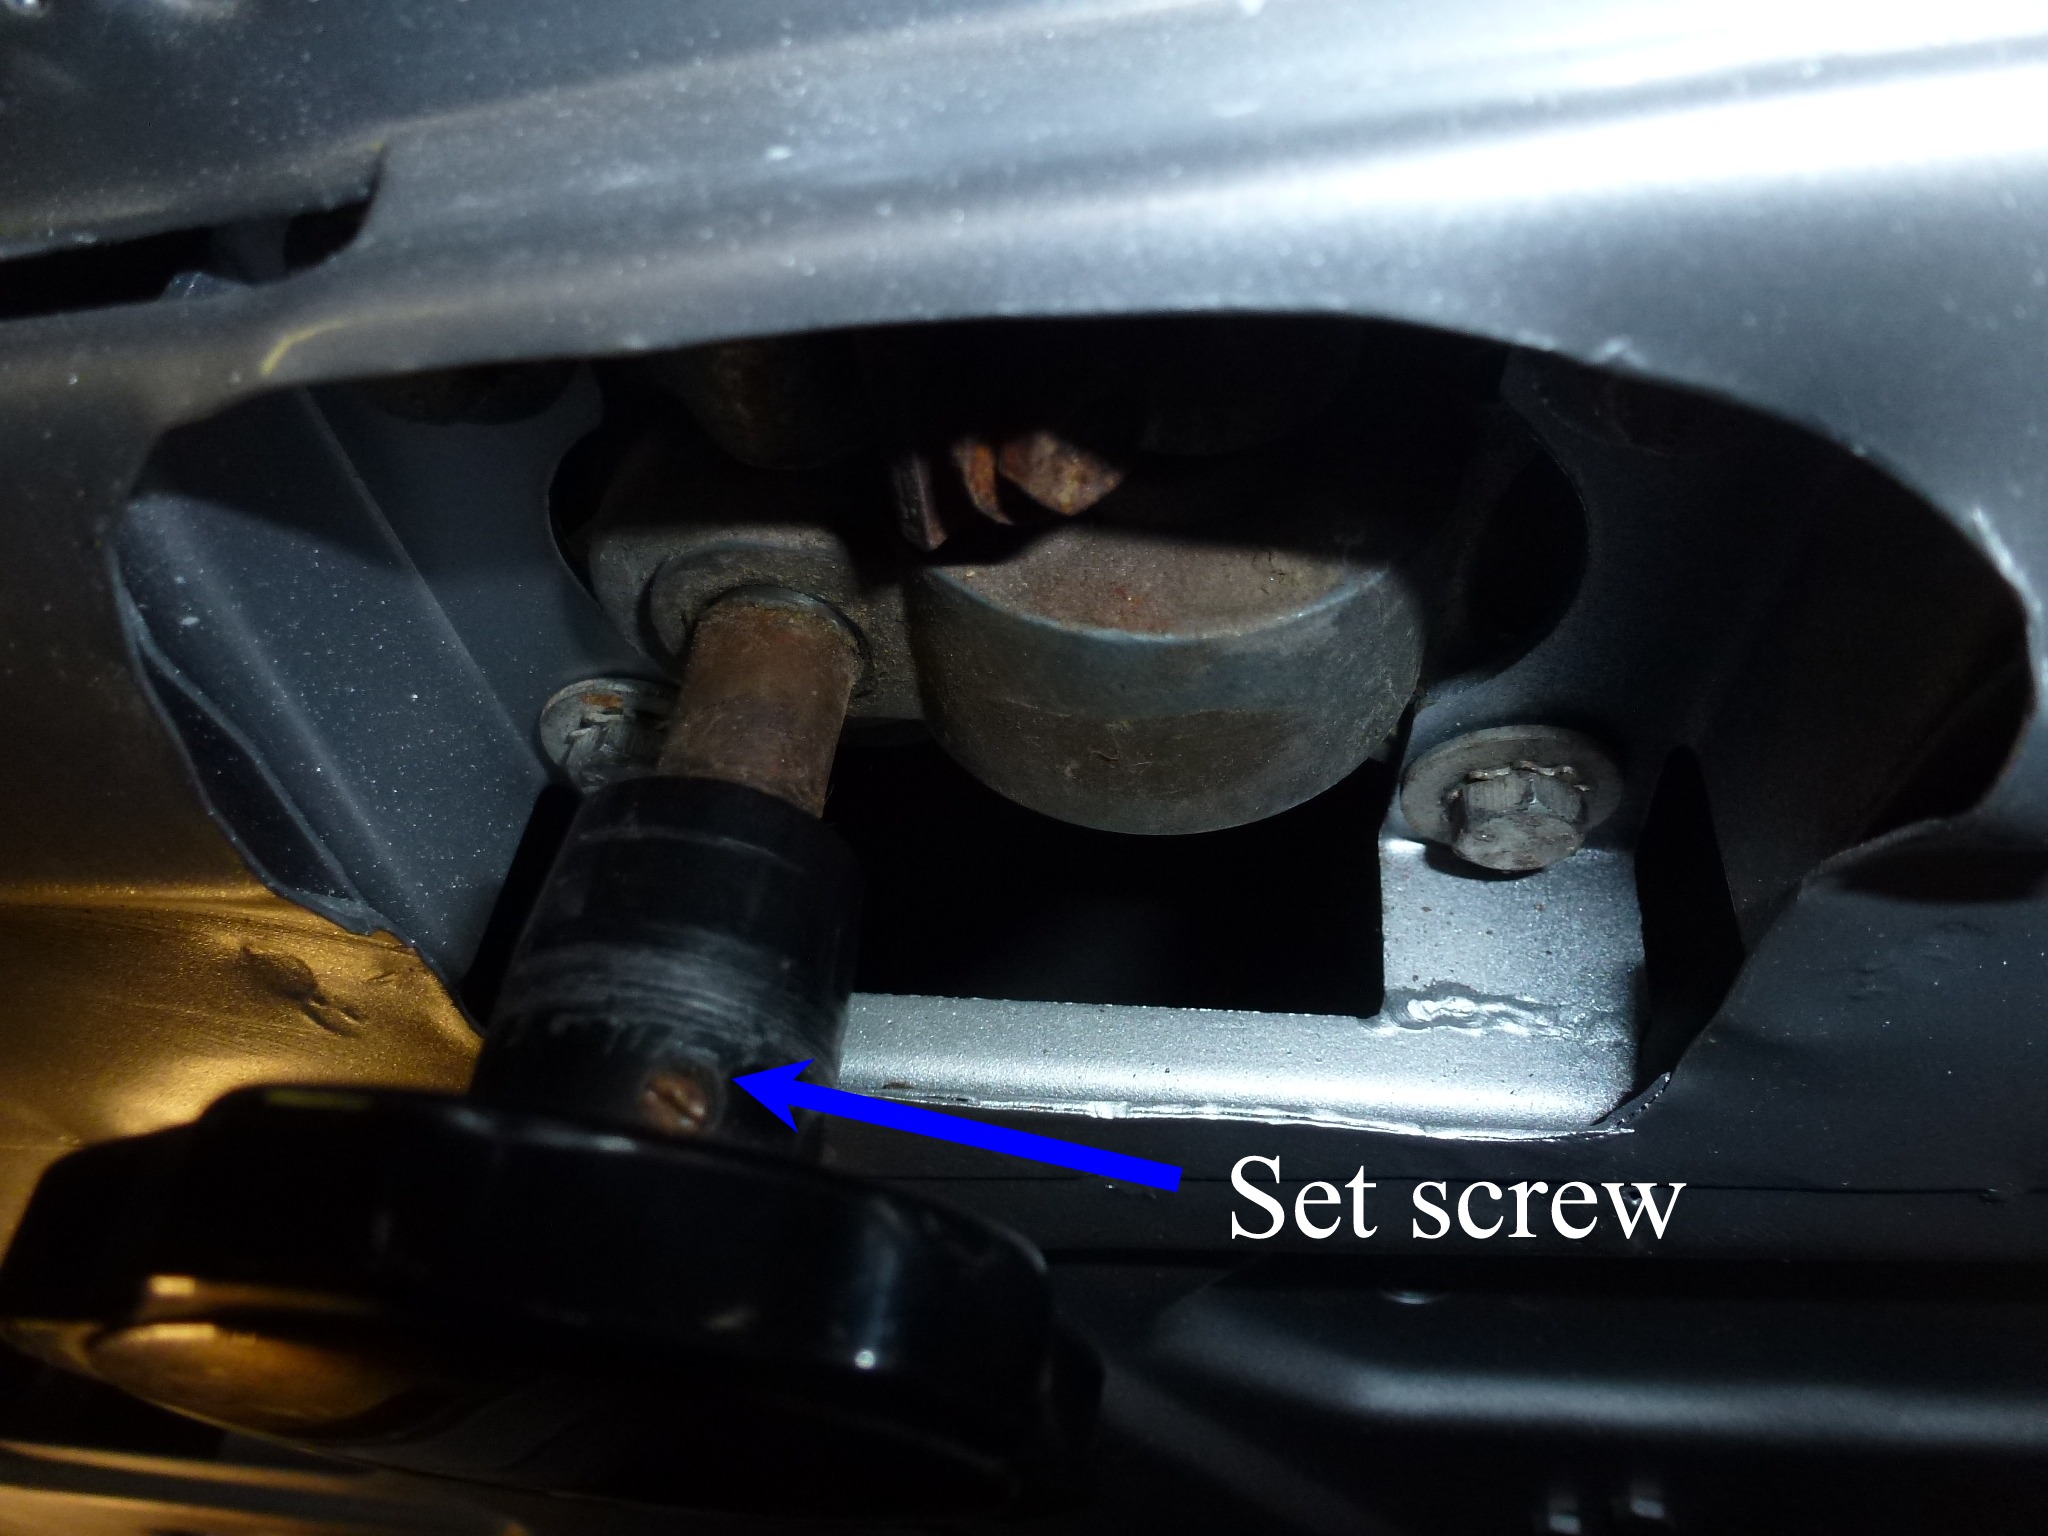
With the window glass out of the door, it is easy to position the vent window roller crank in position from the inside of the door. I also found that removing the crank handle by removing the set screw made it a lot easier to install and tighten the bolts holding the mechanism in place.

The glass is put in from the outside at a 90° angle fitting the shaft down through the rubber seal and into the square opening in the crank mechanism. Rotating the glass and the crank handle lines up the square shaft. Then the top of the glass is inside the frame and the top pivot screw can be inserted and tightened. Finally, the set screw holding the shaft in place is tightened.
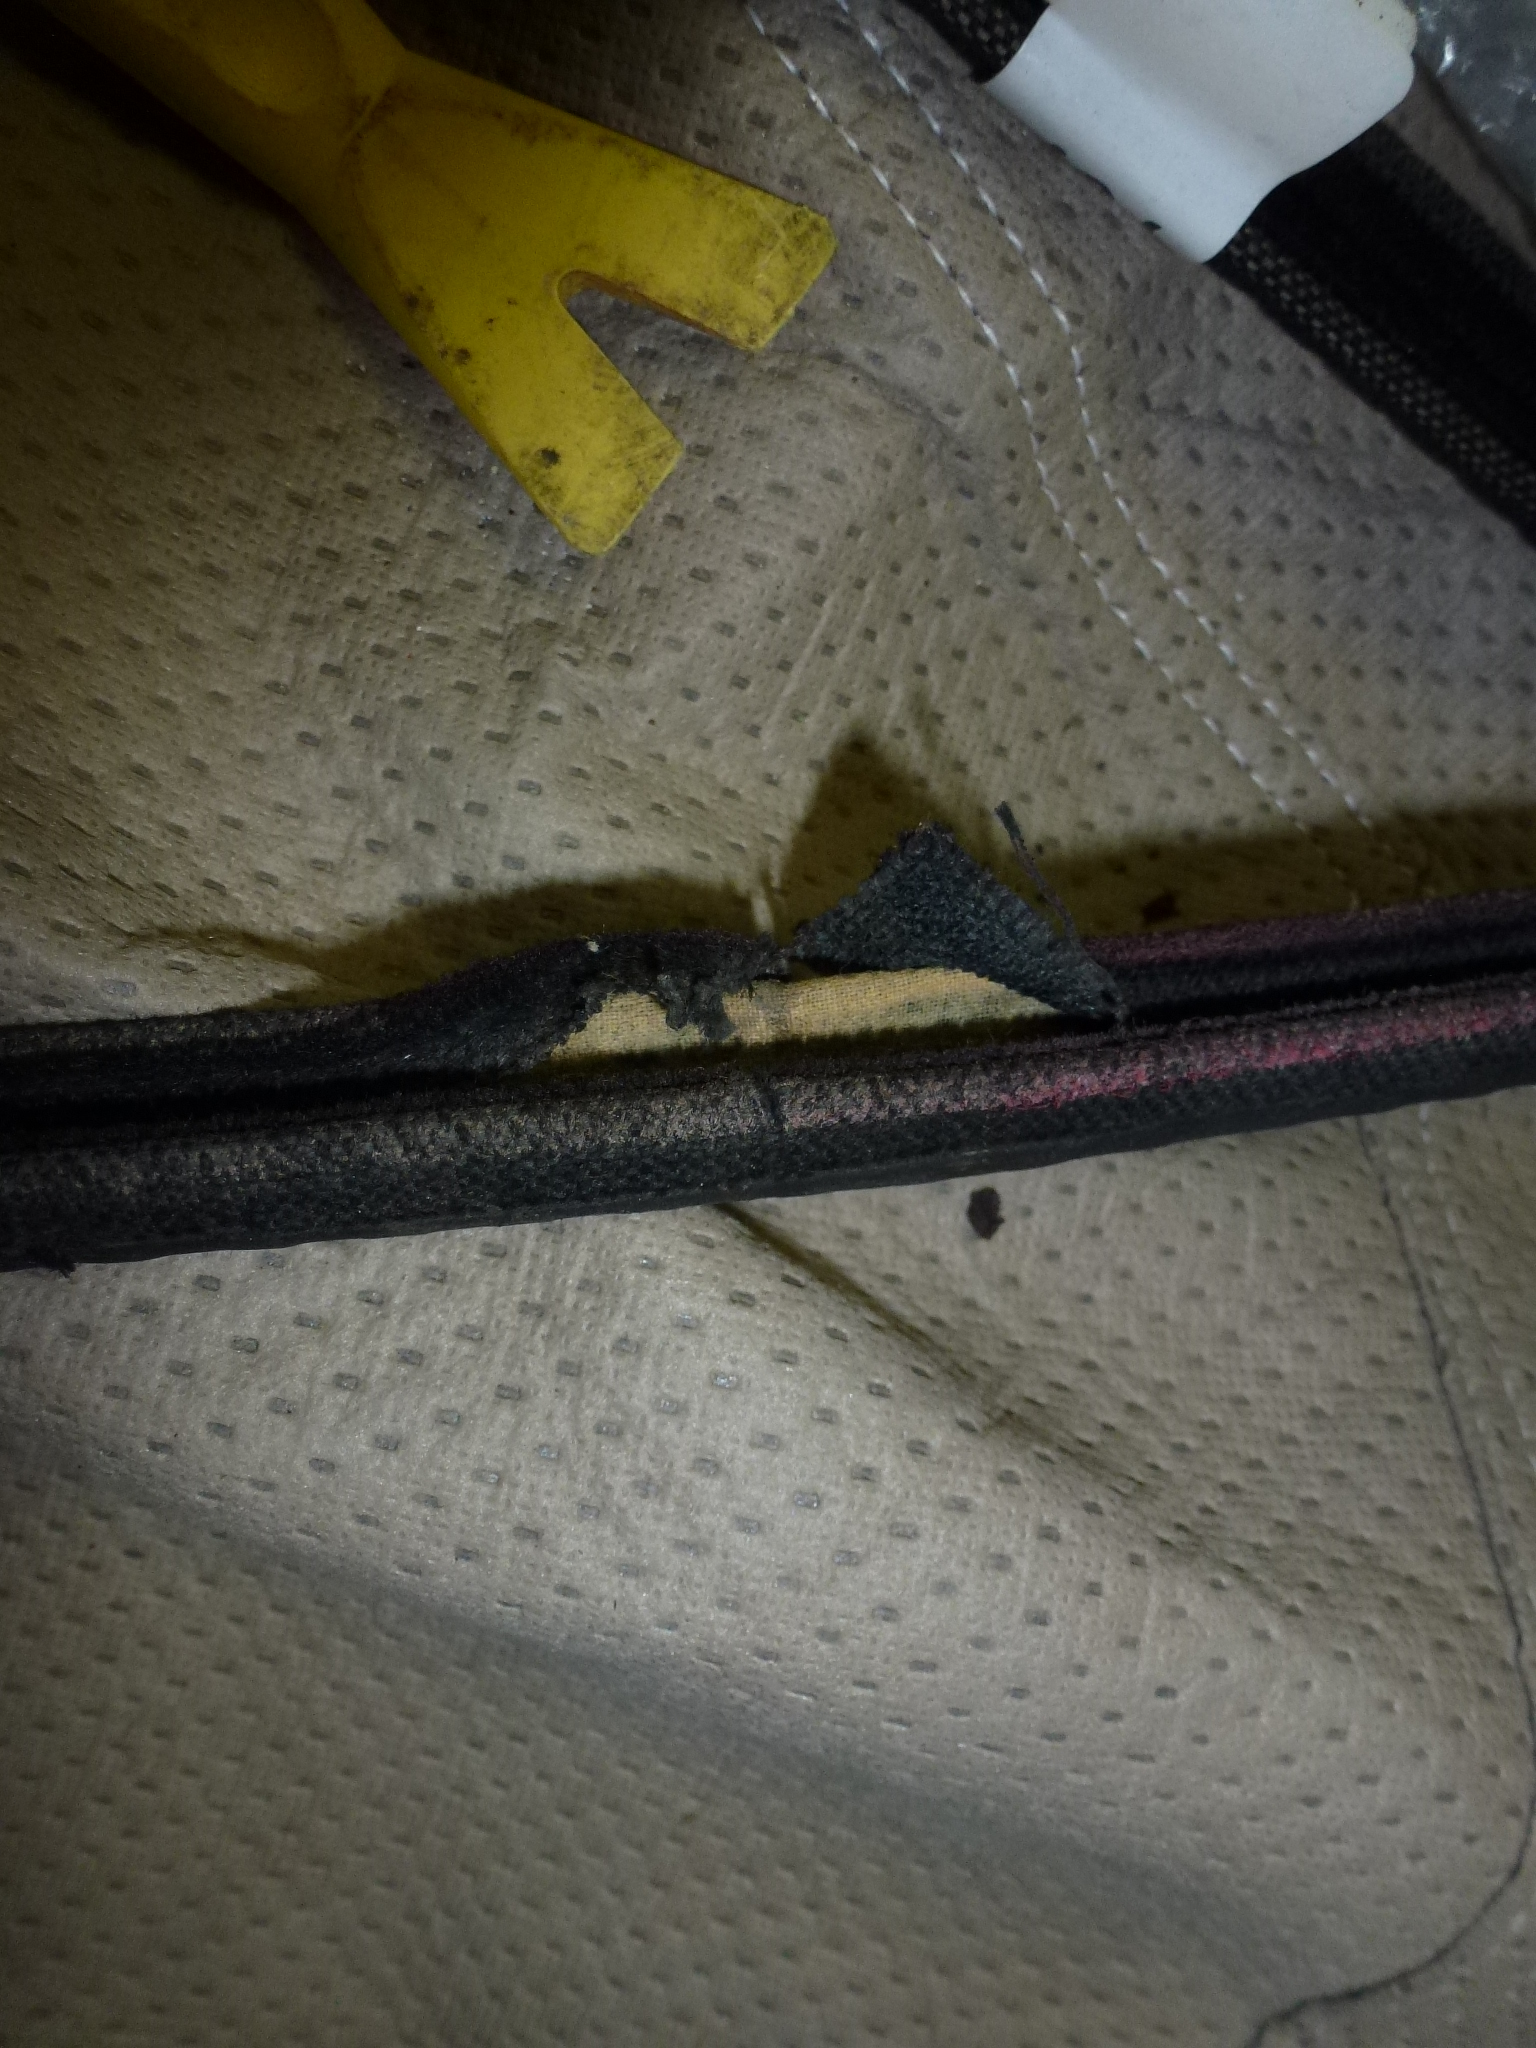
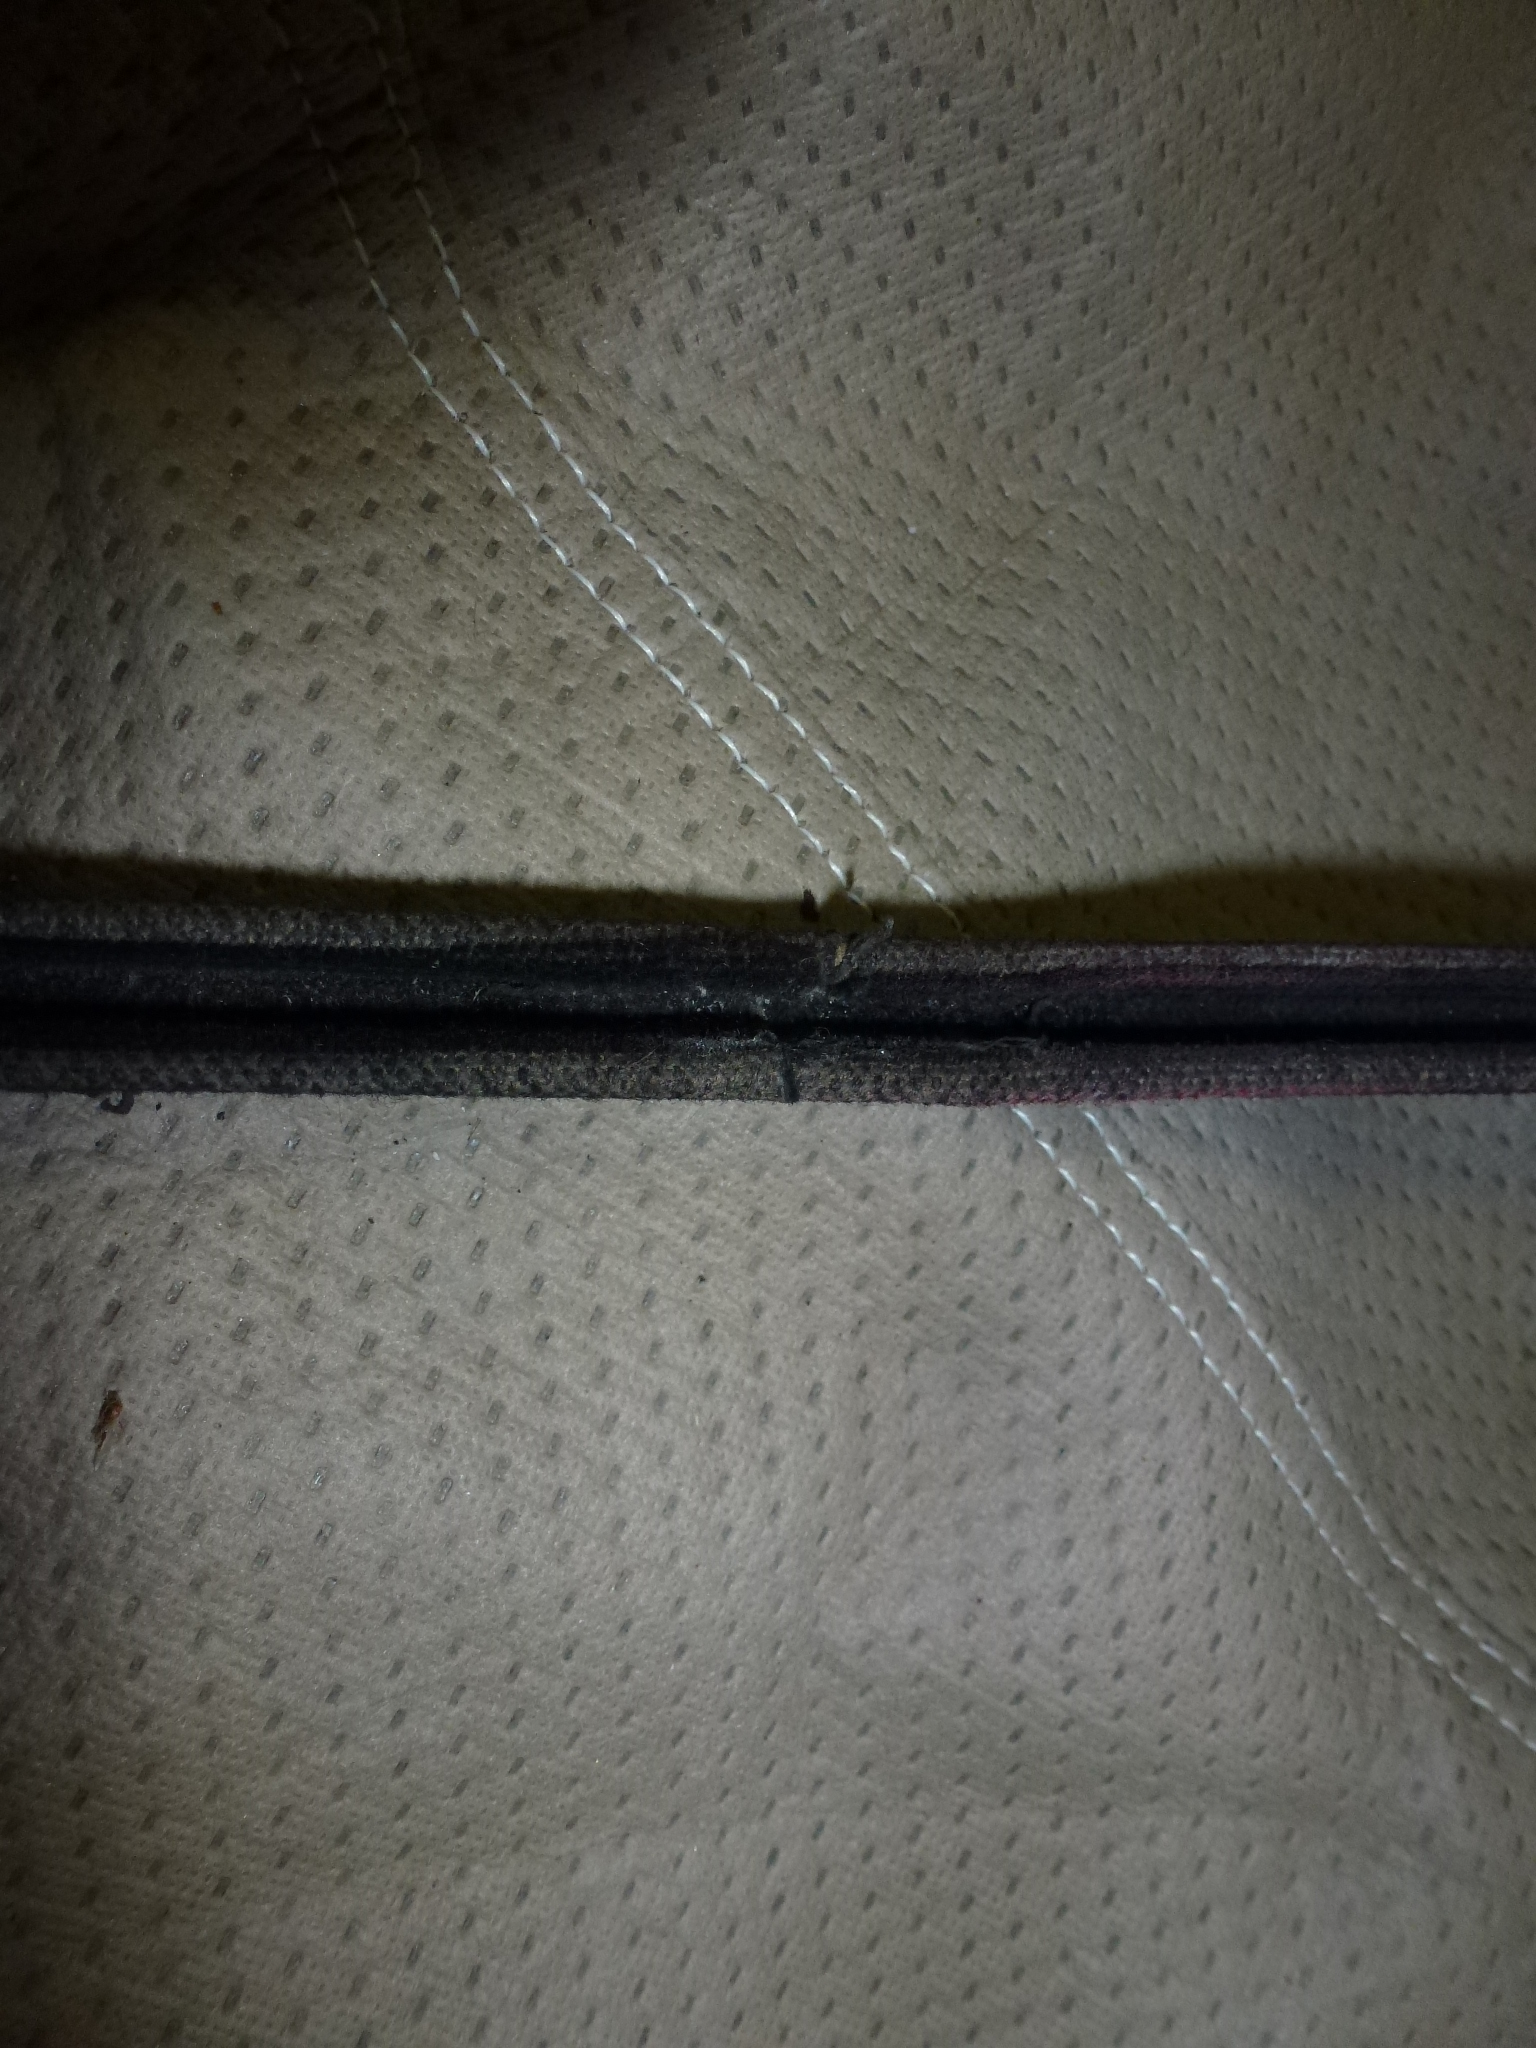
Next, I carefully slid the window glass into the channels starting with it vertically from the outside of the door. Once it was down in the door, I rotated it to the normal horizontal position. Then I installed the lower channel section at the rear of the door while holding the glass in the up position with the help of a clamp. Once the window was positioned in the channels, I took the window channel weather-strips and slid them down each channel around the glass into position. Lastly, the top weather-strip was put in place. One piece of weather-strip had the inside portion torn. Since this was down in the channel inside of the door, I just used some contact cement to glue it back in place so the window wouldn't bind or catch on it.
With the glass in the door, but not installed it was time to put on the window scraper and trim on the outside of the door. This is held in with five screws accessed through holes in the inside of the door and once the glass is installed, it can cover some of those screw locations. The forward screw also holds the vent window outside trim, so both holes need to be aligned with the hole in the body.
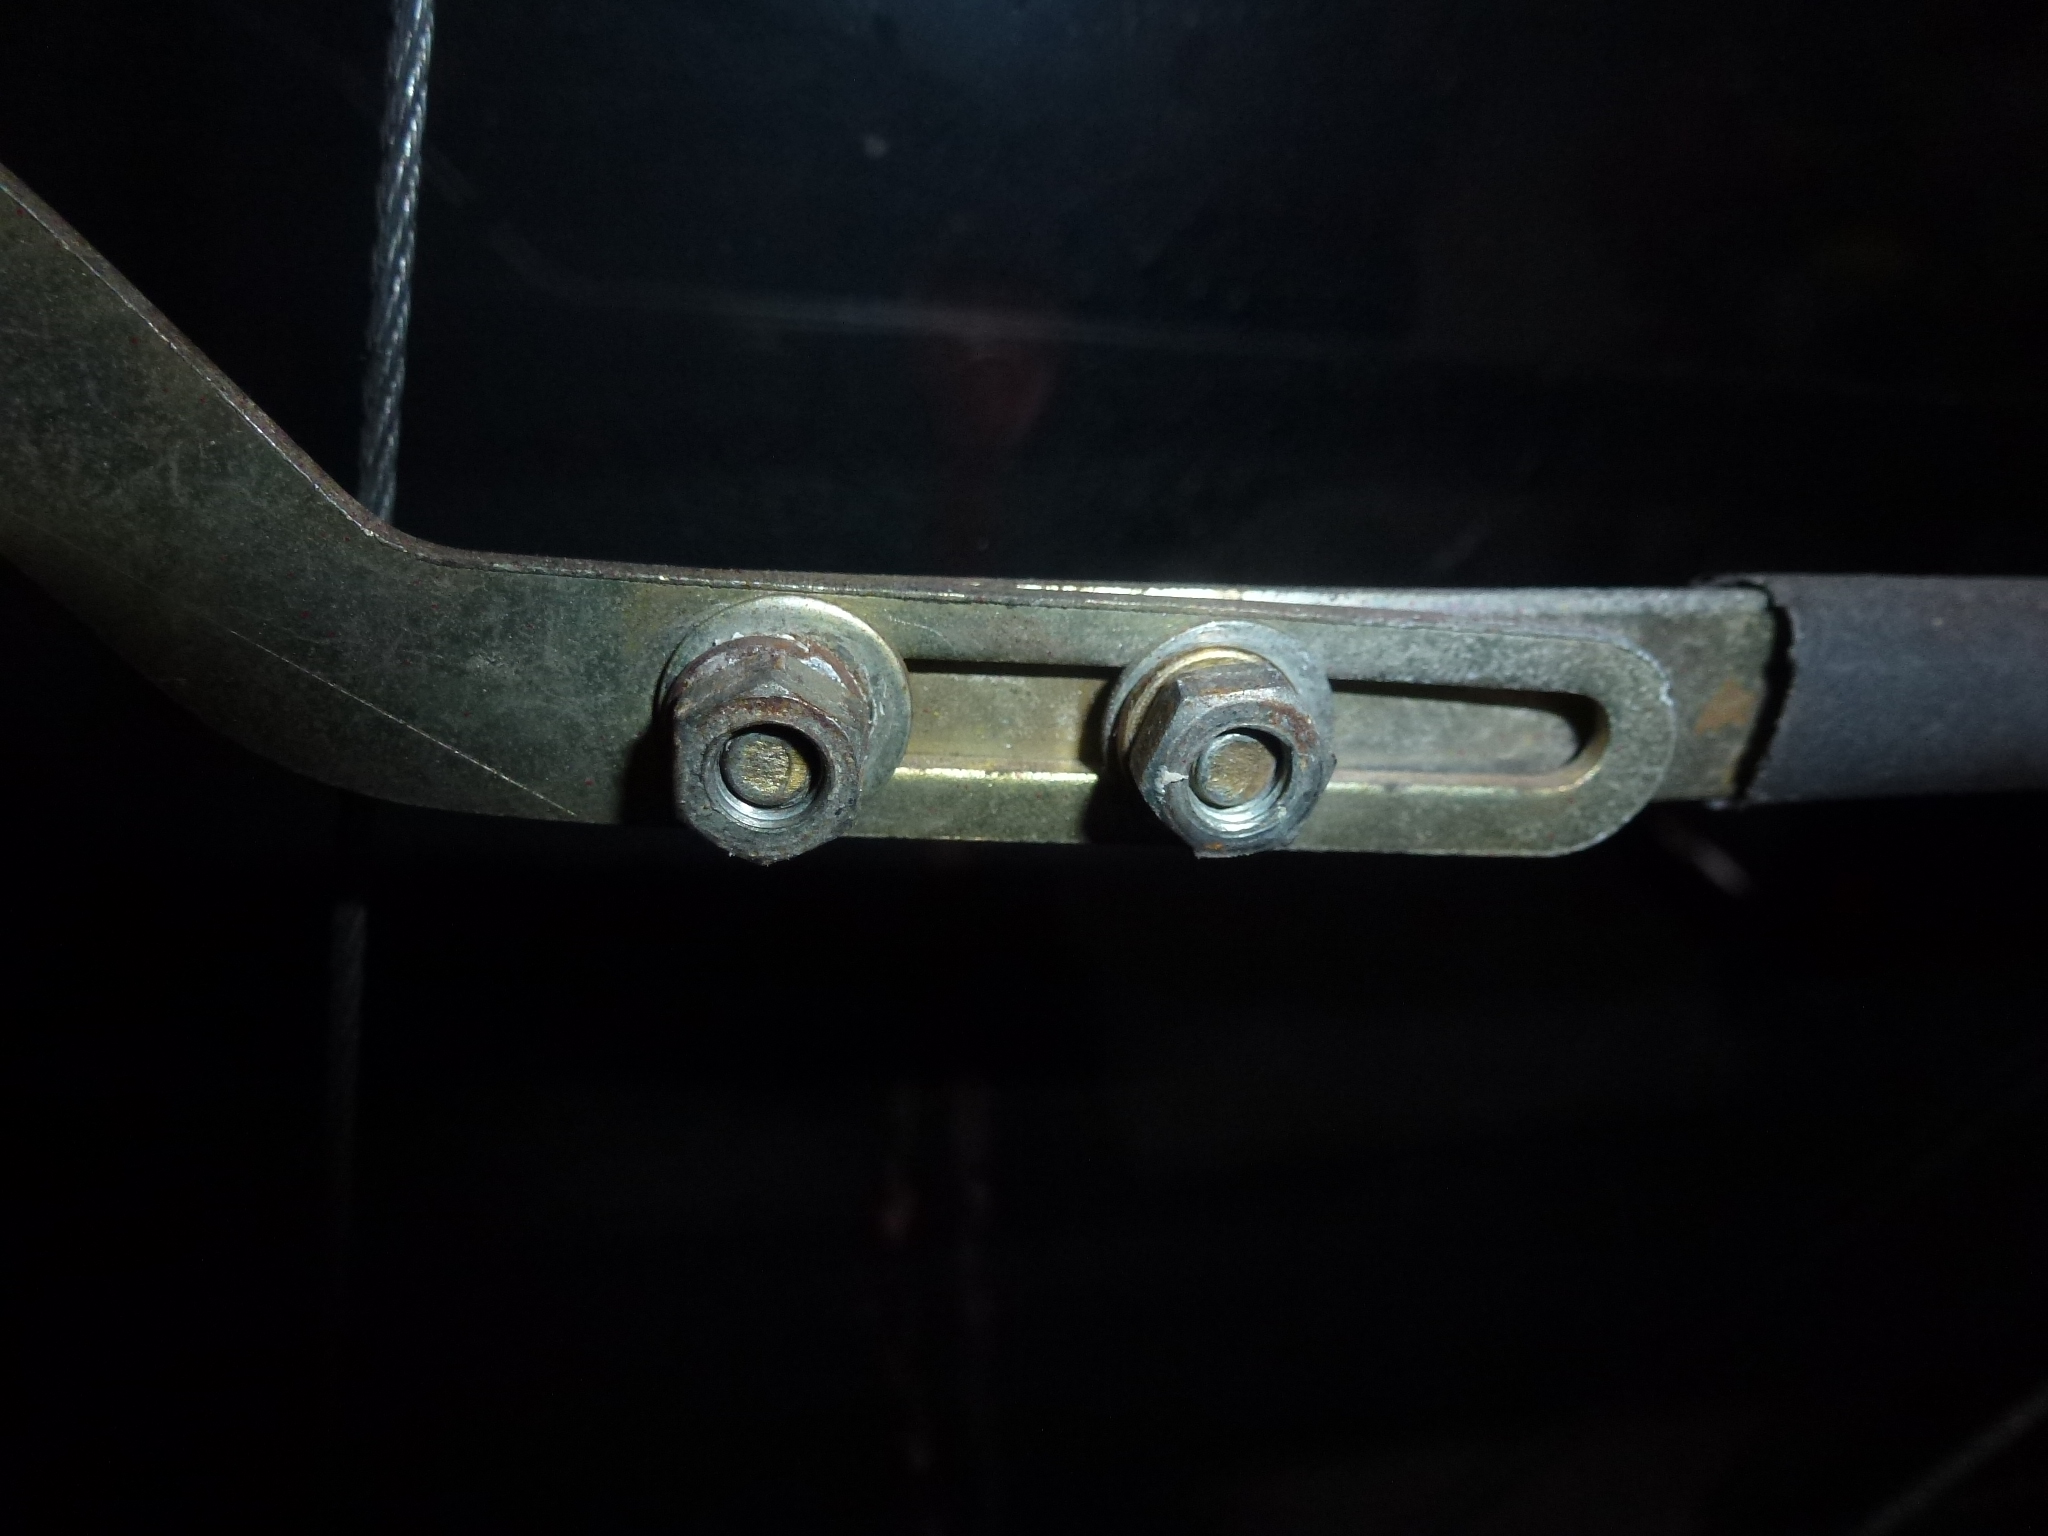
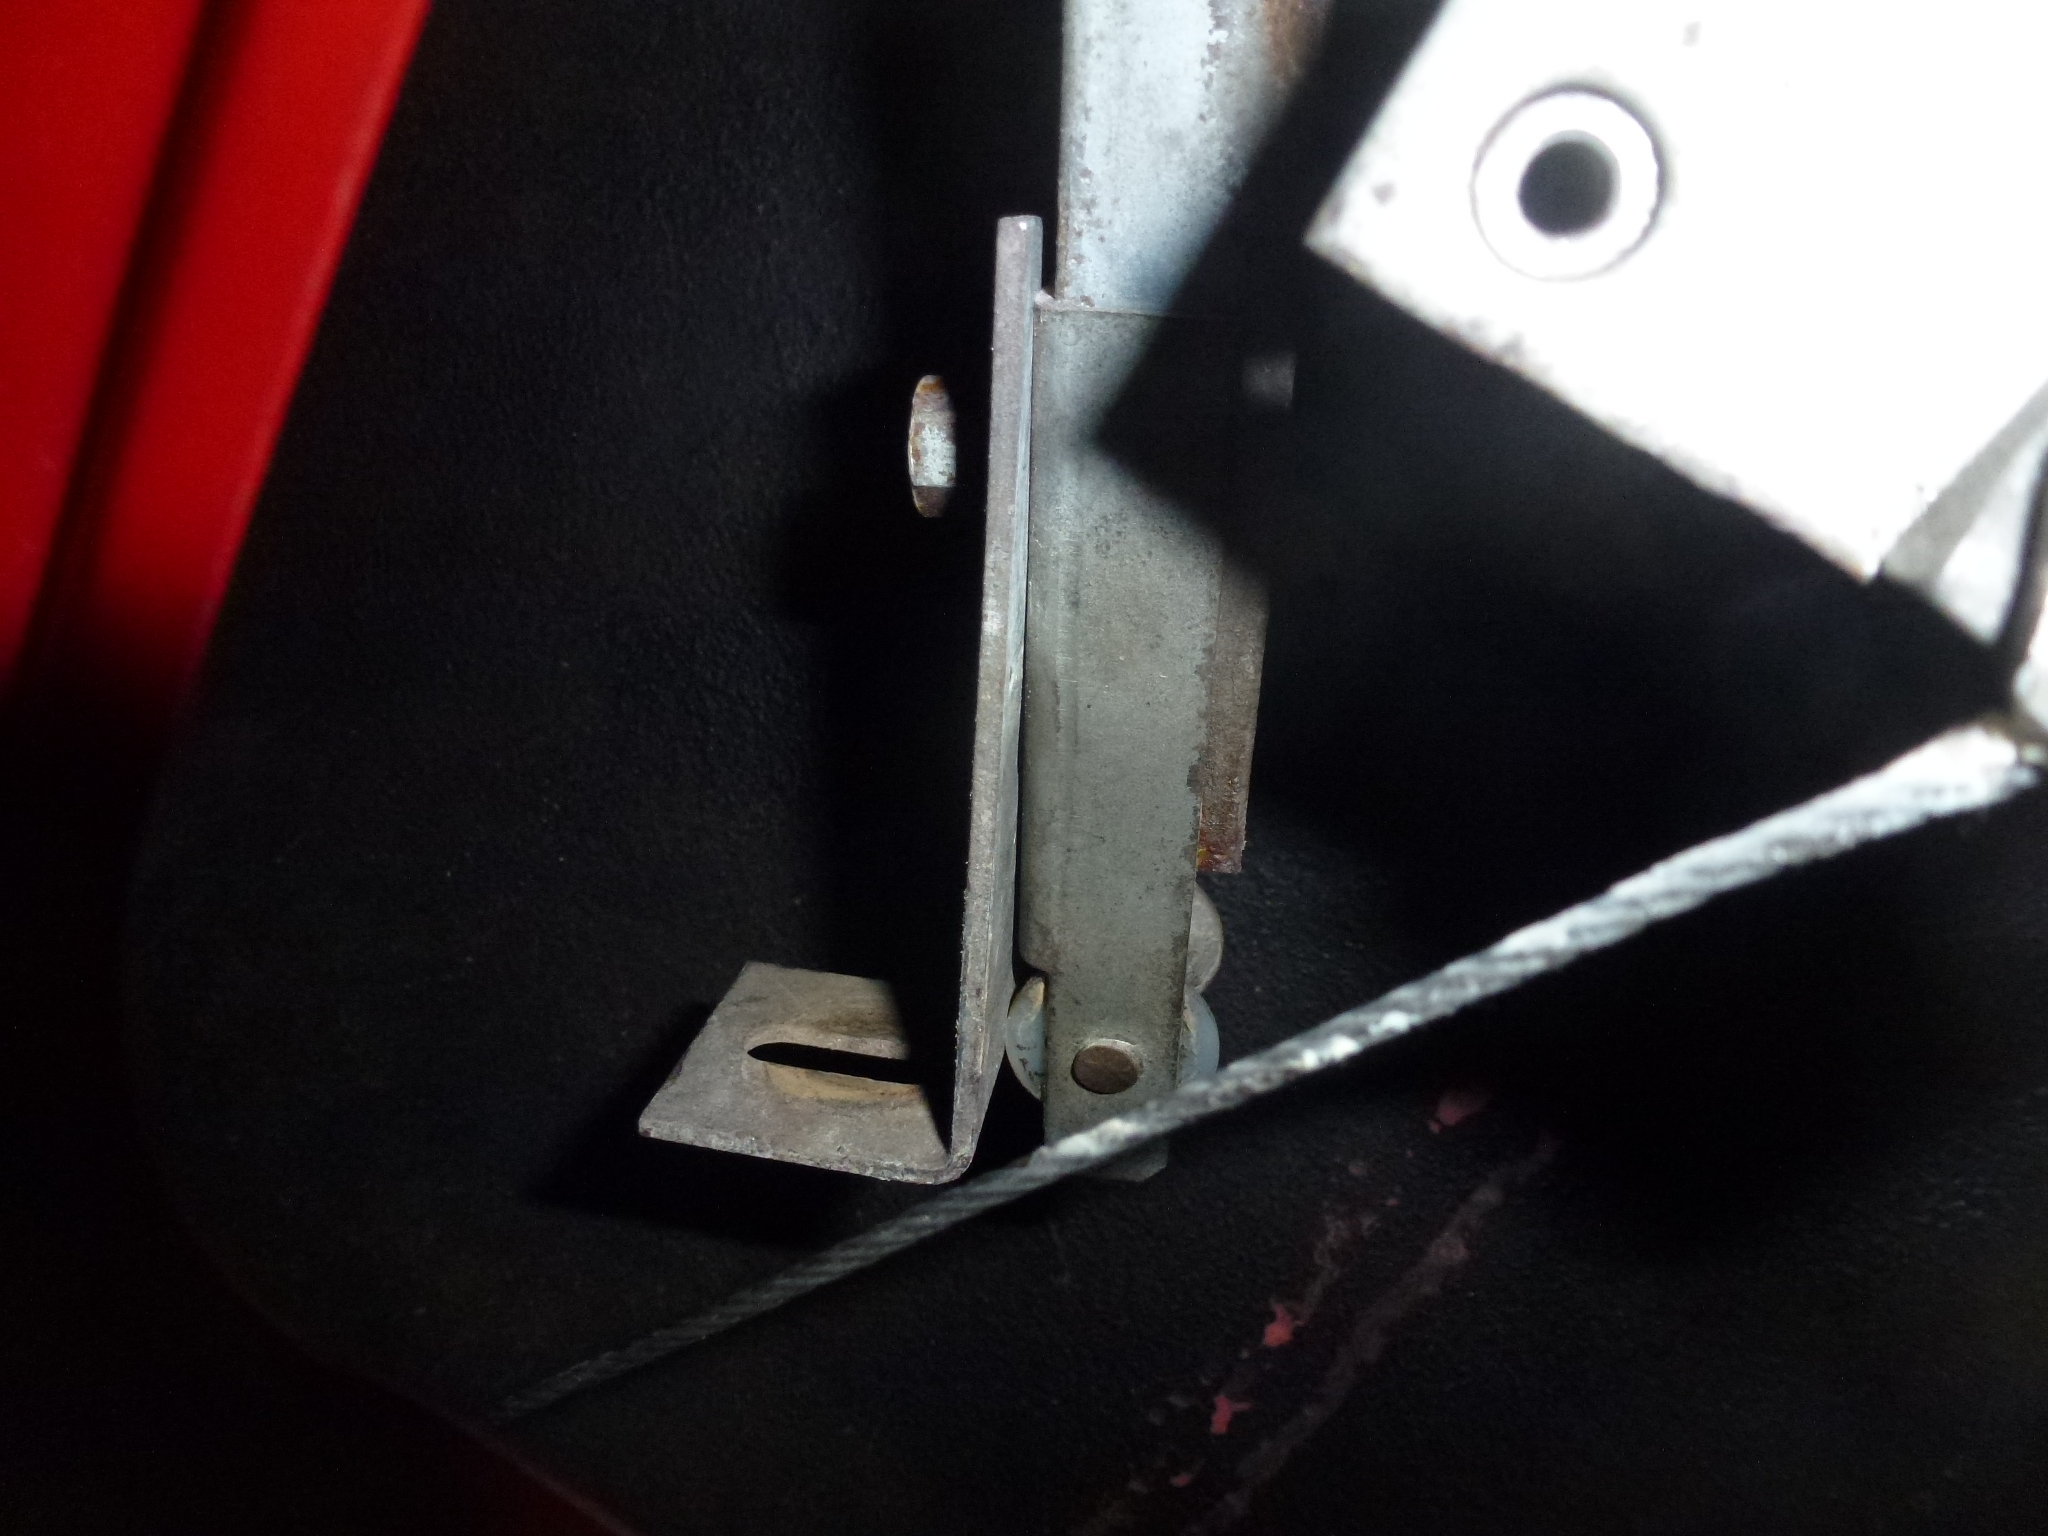
Then I positioned the glass in about the correct position to clamp the frame to the winder cables. The cables had indentations where they had been clamped previously, so it was obvious where to start. To hold the glass in position, I again used a clamp. Once the glass was clamped to the cable on each side, I raised it to see how even it was to the top of the window frame (right picture). A couple of adjustments got it even across the top. The last thing was to install the stop that prevents the window from being lowered too far. On one side, the cushion on the stop was missing, so I just cut a short piece of vinyl tubing that fit tightly.
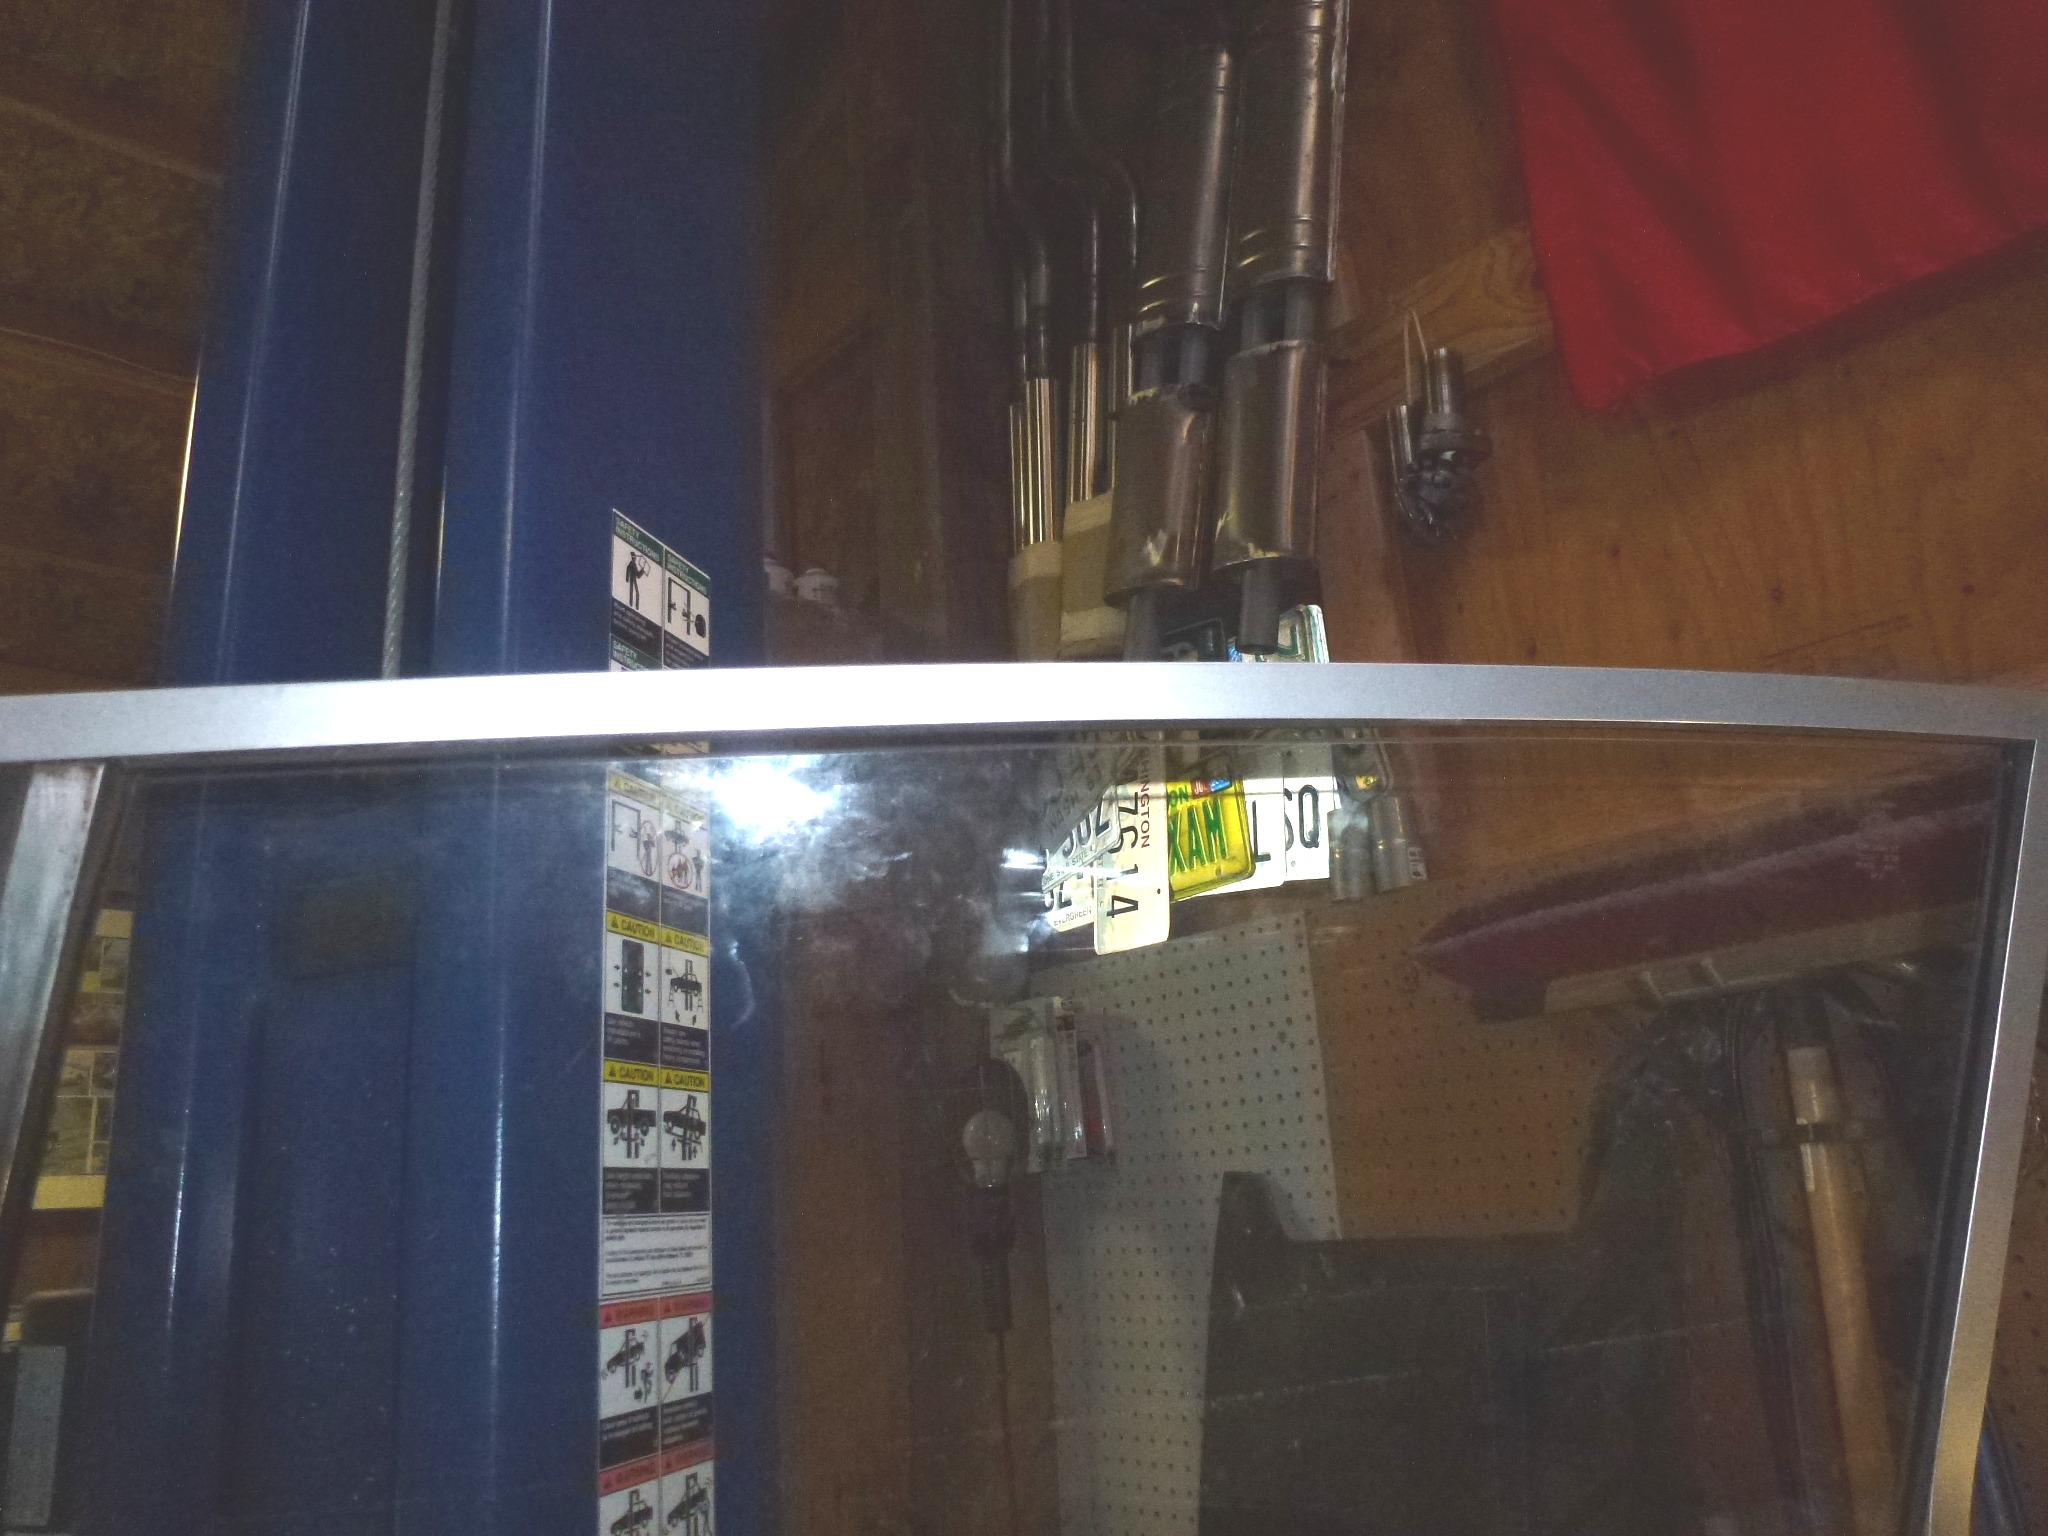
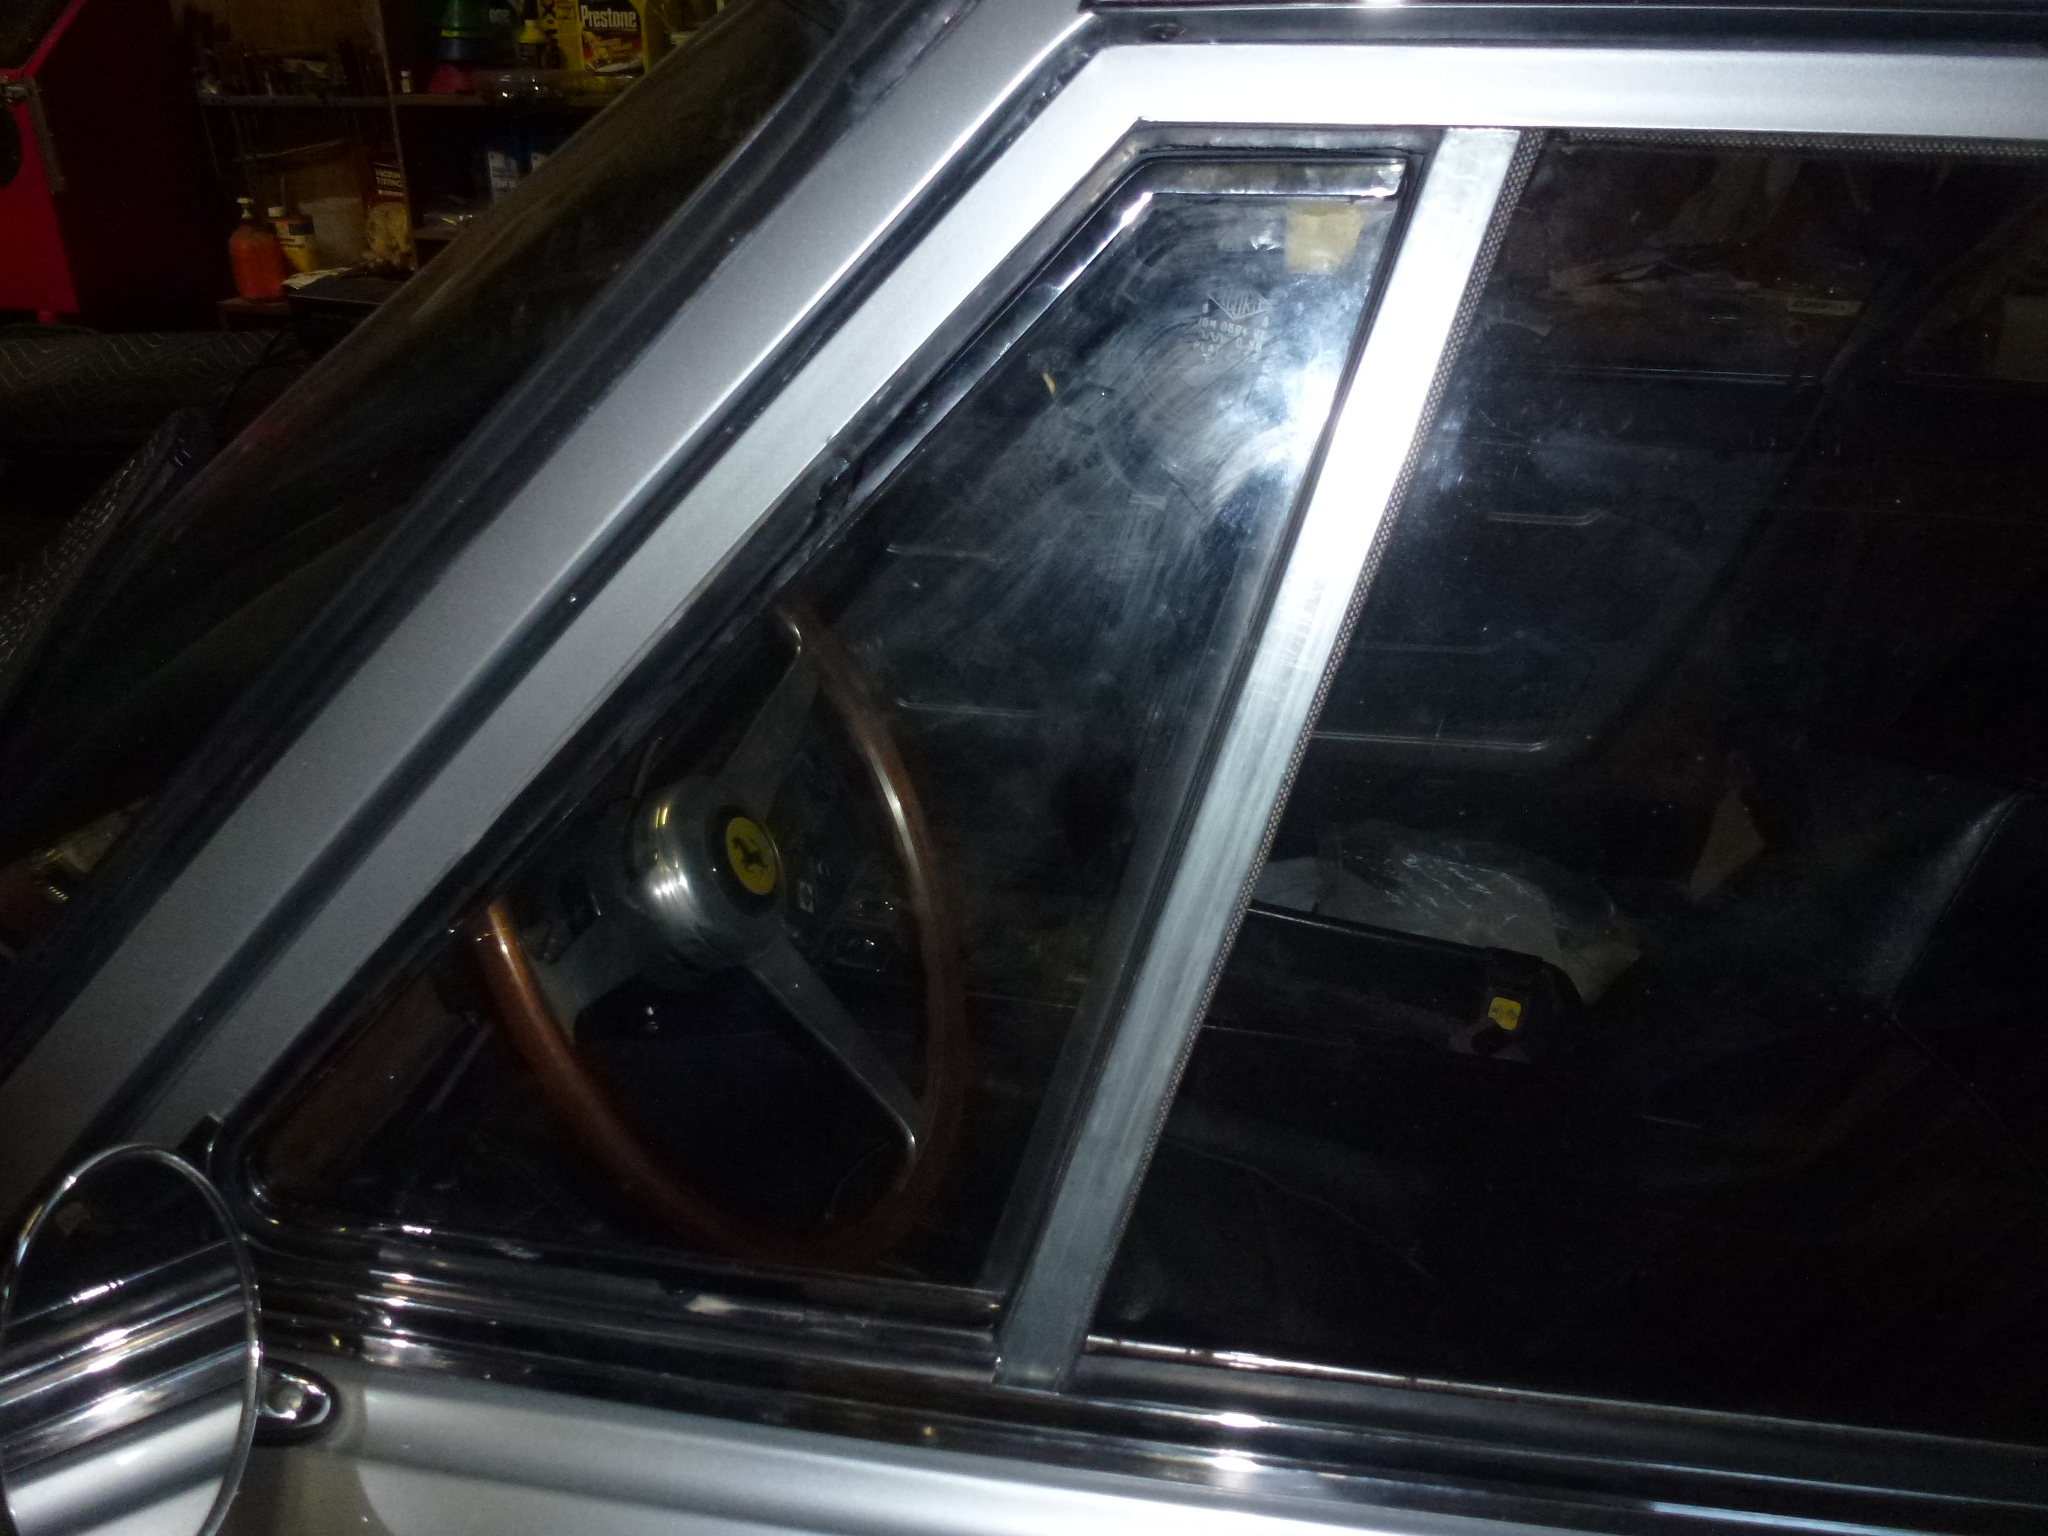
Here is the door with the glass all installed. It will need a lot of cleaner to remove all of the smudges.
Moving over the the driver's door, I went through the same steps.
Then I installed the inside vent window trim.
Next I installed the inside door handles and connected them to the latch mechanism.
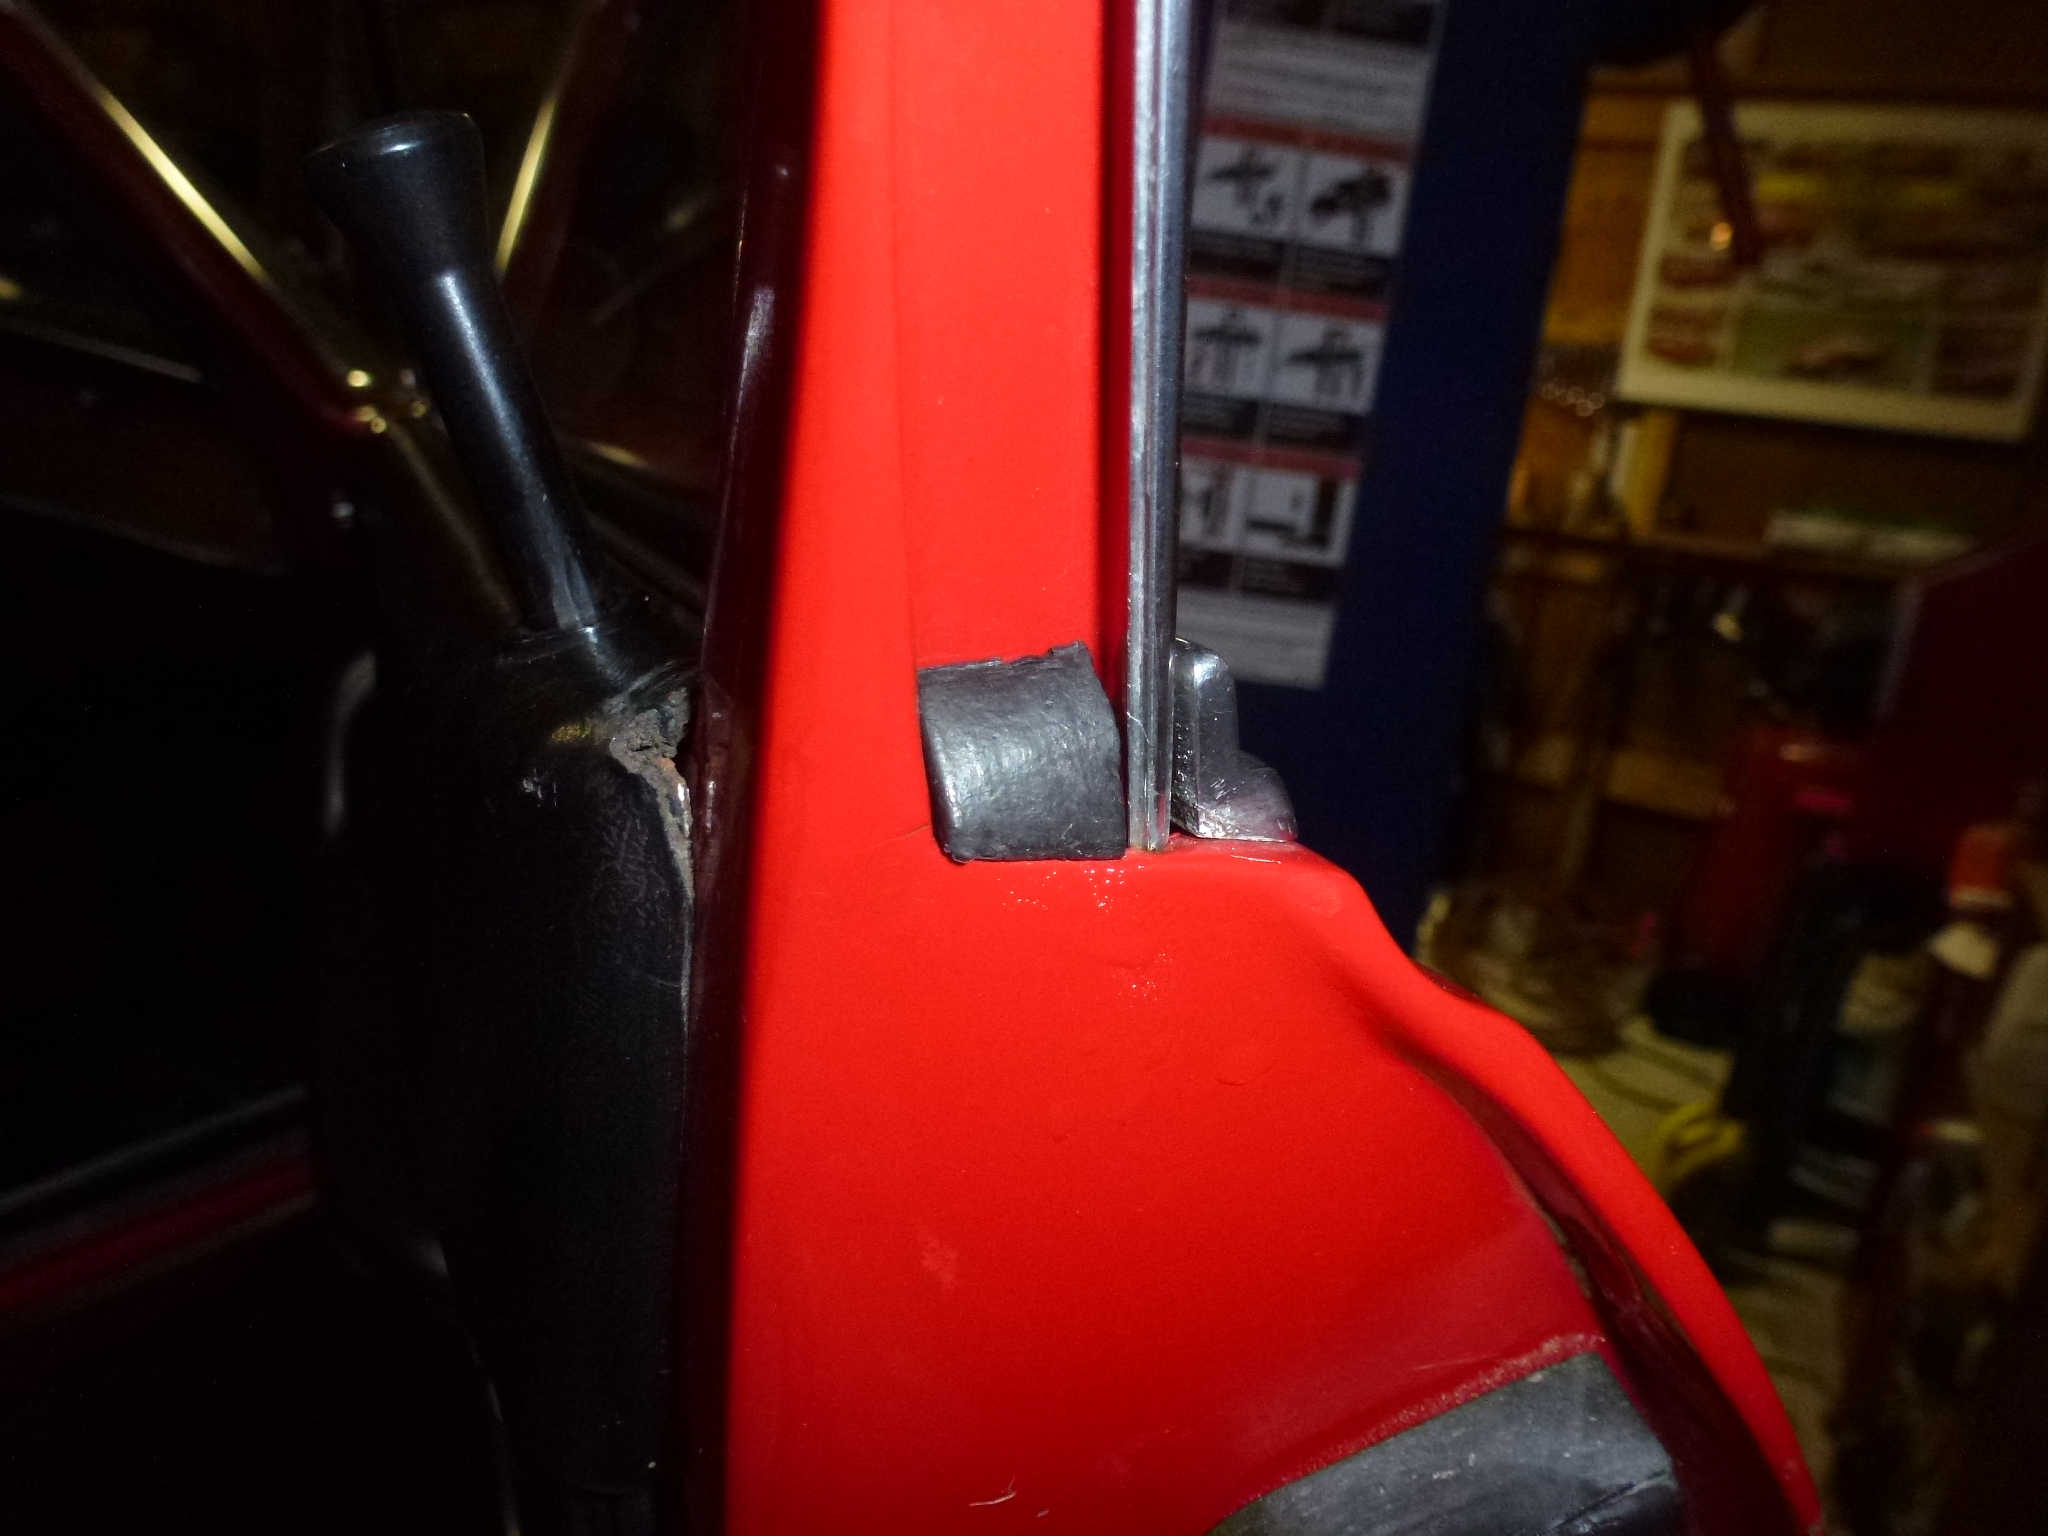
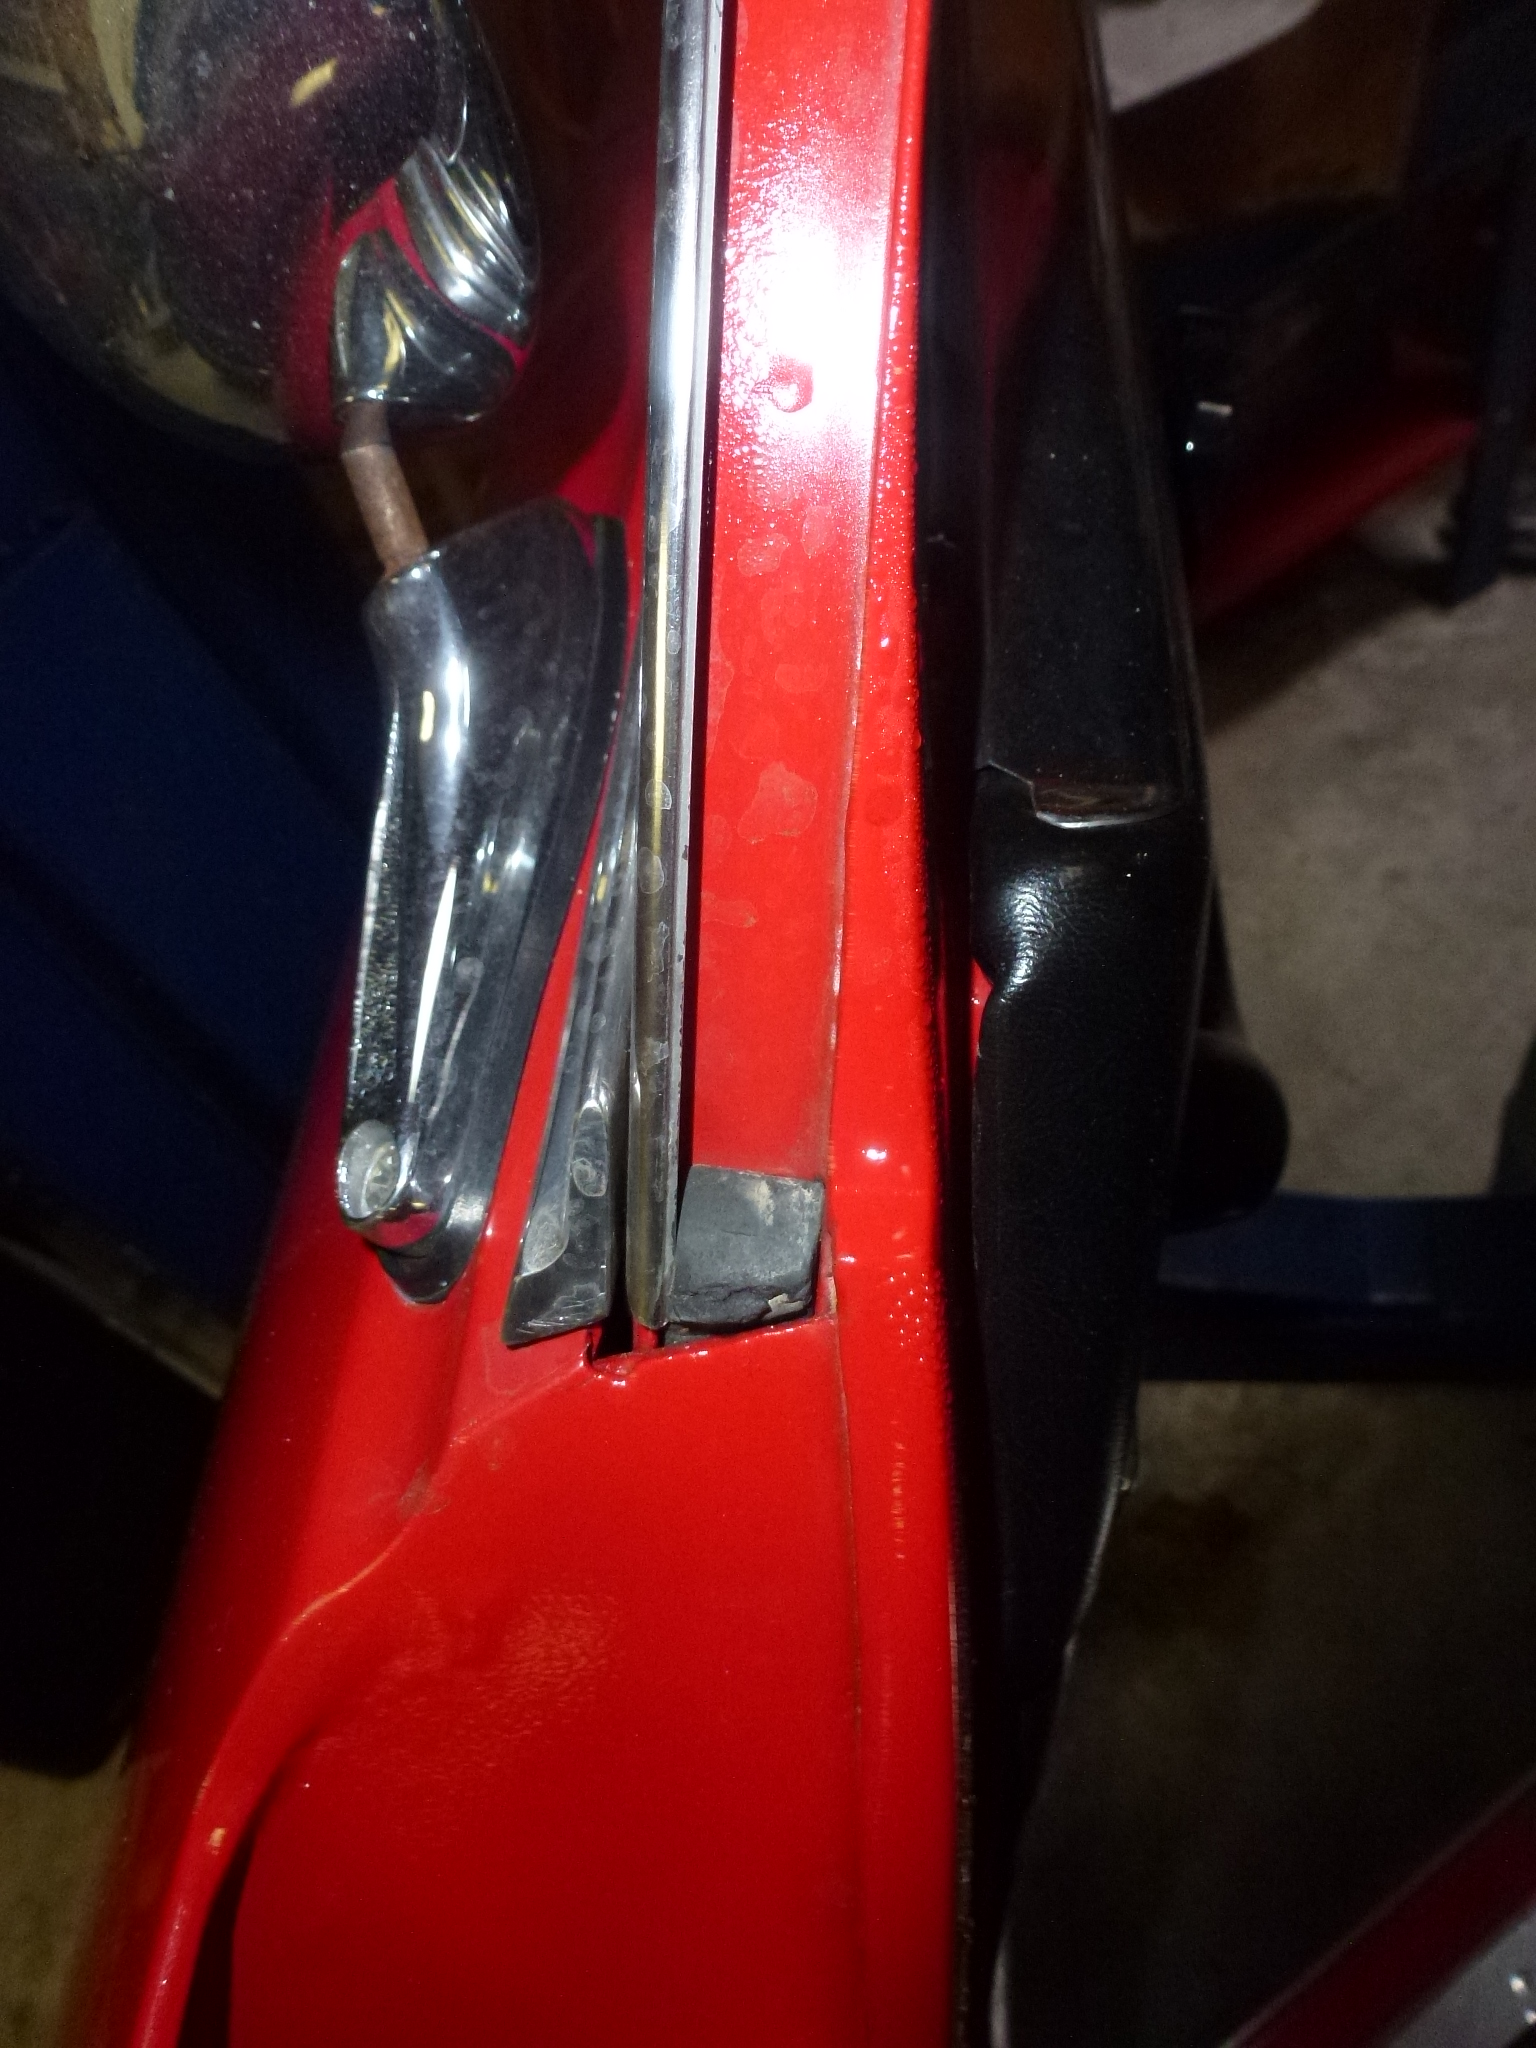
There are two rubber stops that fit into the window channels at the front and rear to prevent water from draining into the door. You will see these on many 330 GTs painted body color, probably because the body shop didn't know to take them out or were just too lazy to do it. The profiles are interesting, the right front one fits at the rear of the left door and visa-versa.
So now the doors are done except for the inner trim panels. These can't go on the passenger door as there is a paint run on the inside that will be visible and needs to be fixed.
Somehow, I've managed to misplace the window scraper for the driver's door. How one can lose a piece 3½' long, I don't know how, but I've done it. So the inner trim can't go on that door until I've located it. I'm also waiting for the chrome shop to finish the driver's vent window frame that I got to replace the one I broke.
I installed the rubber door seals so the car is reasonably water tight now.
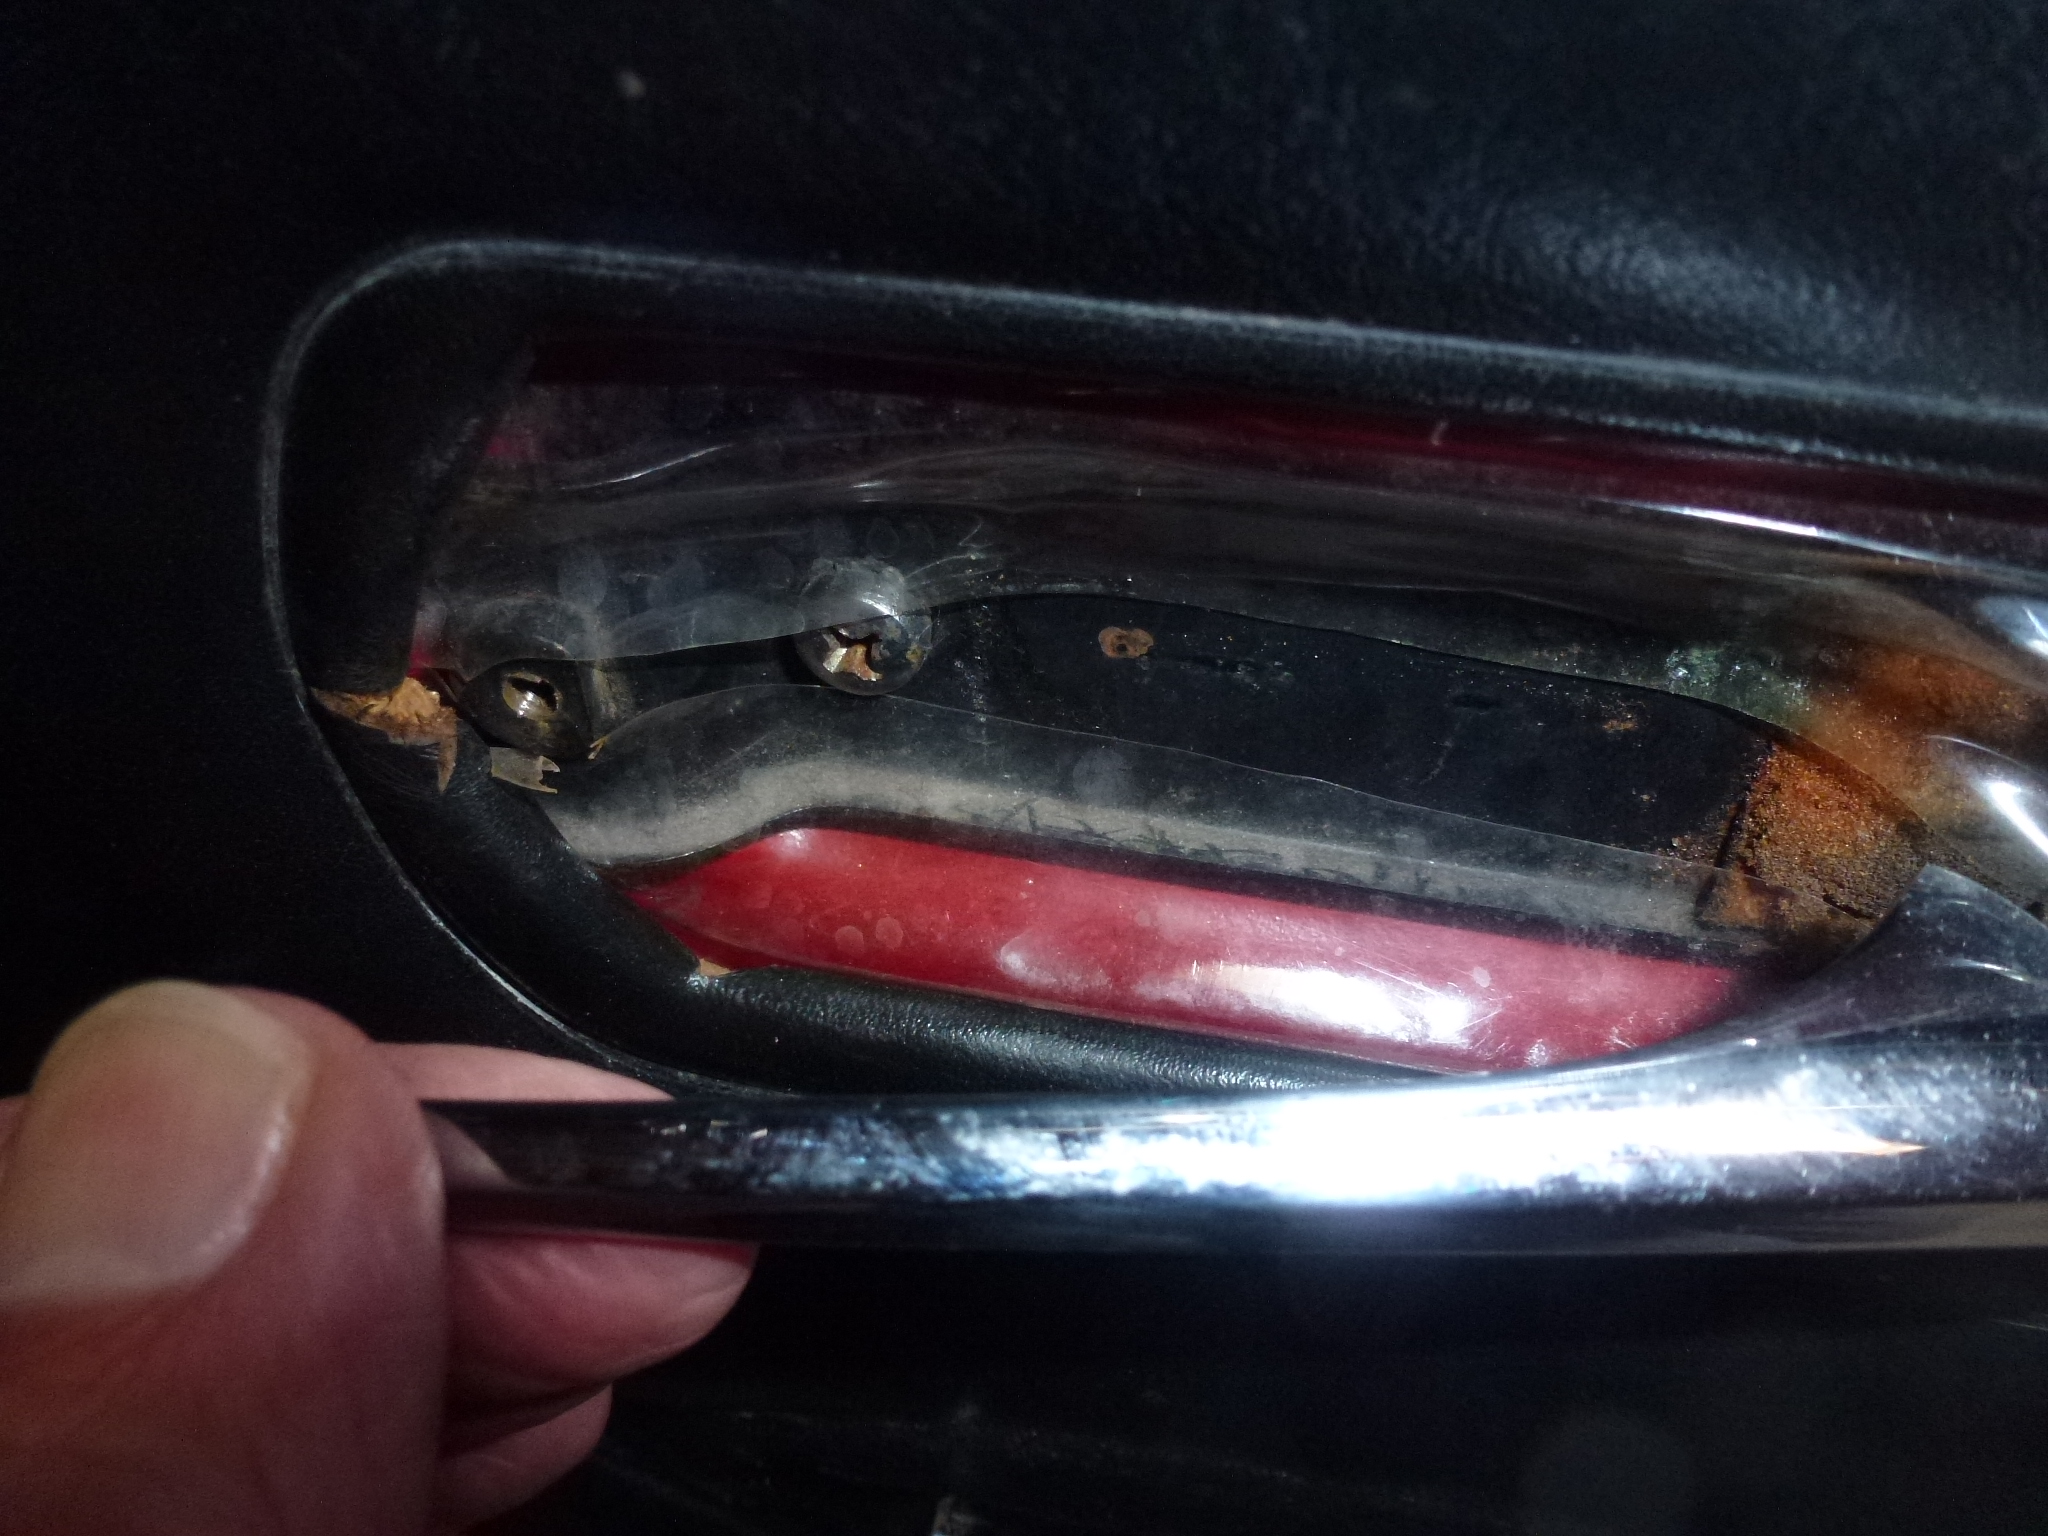
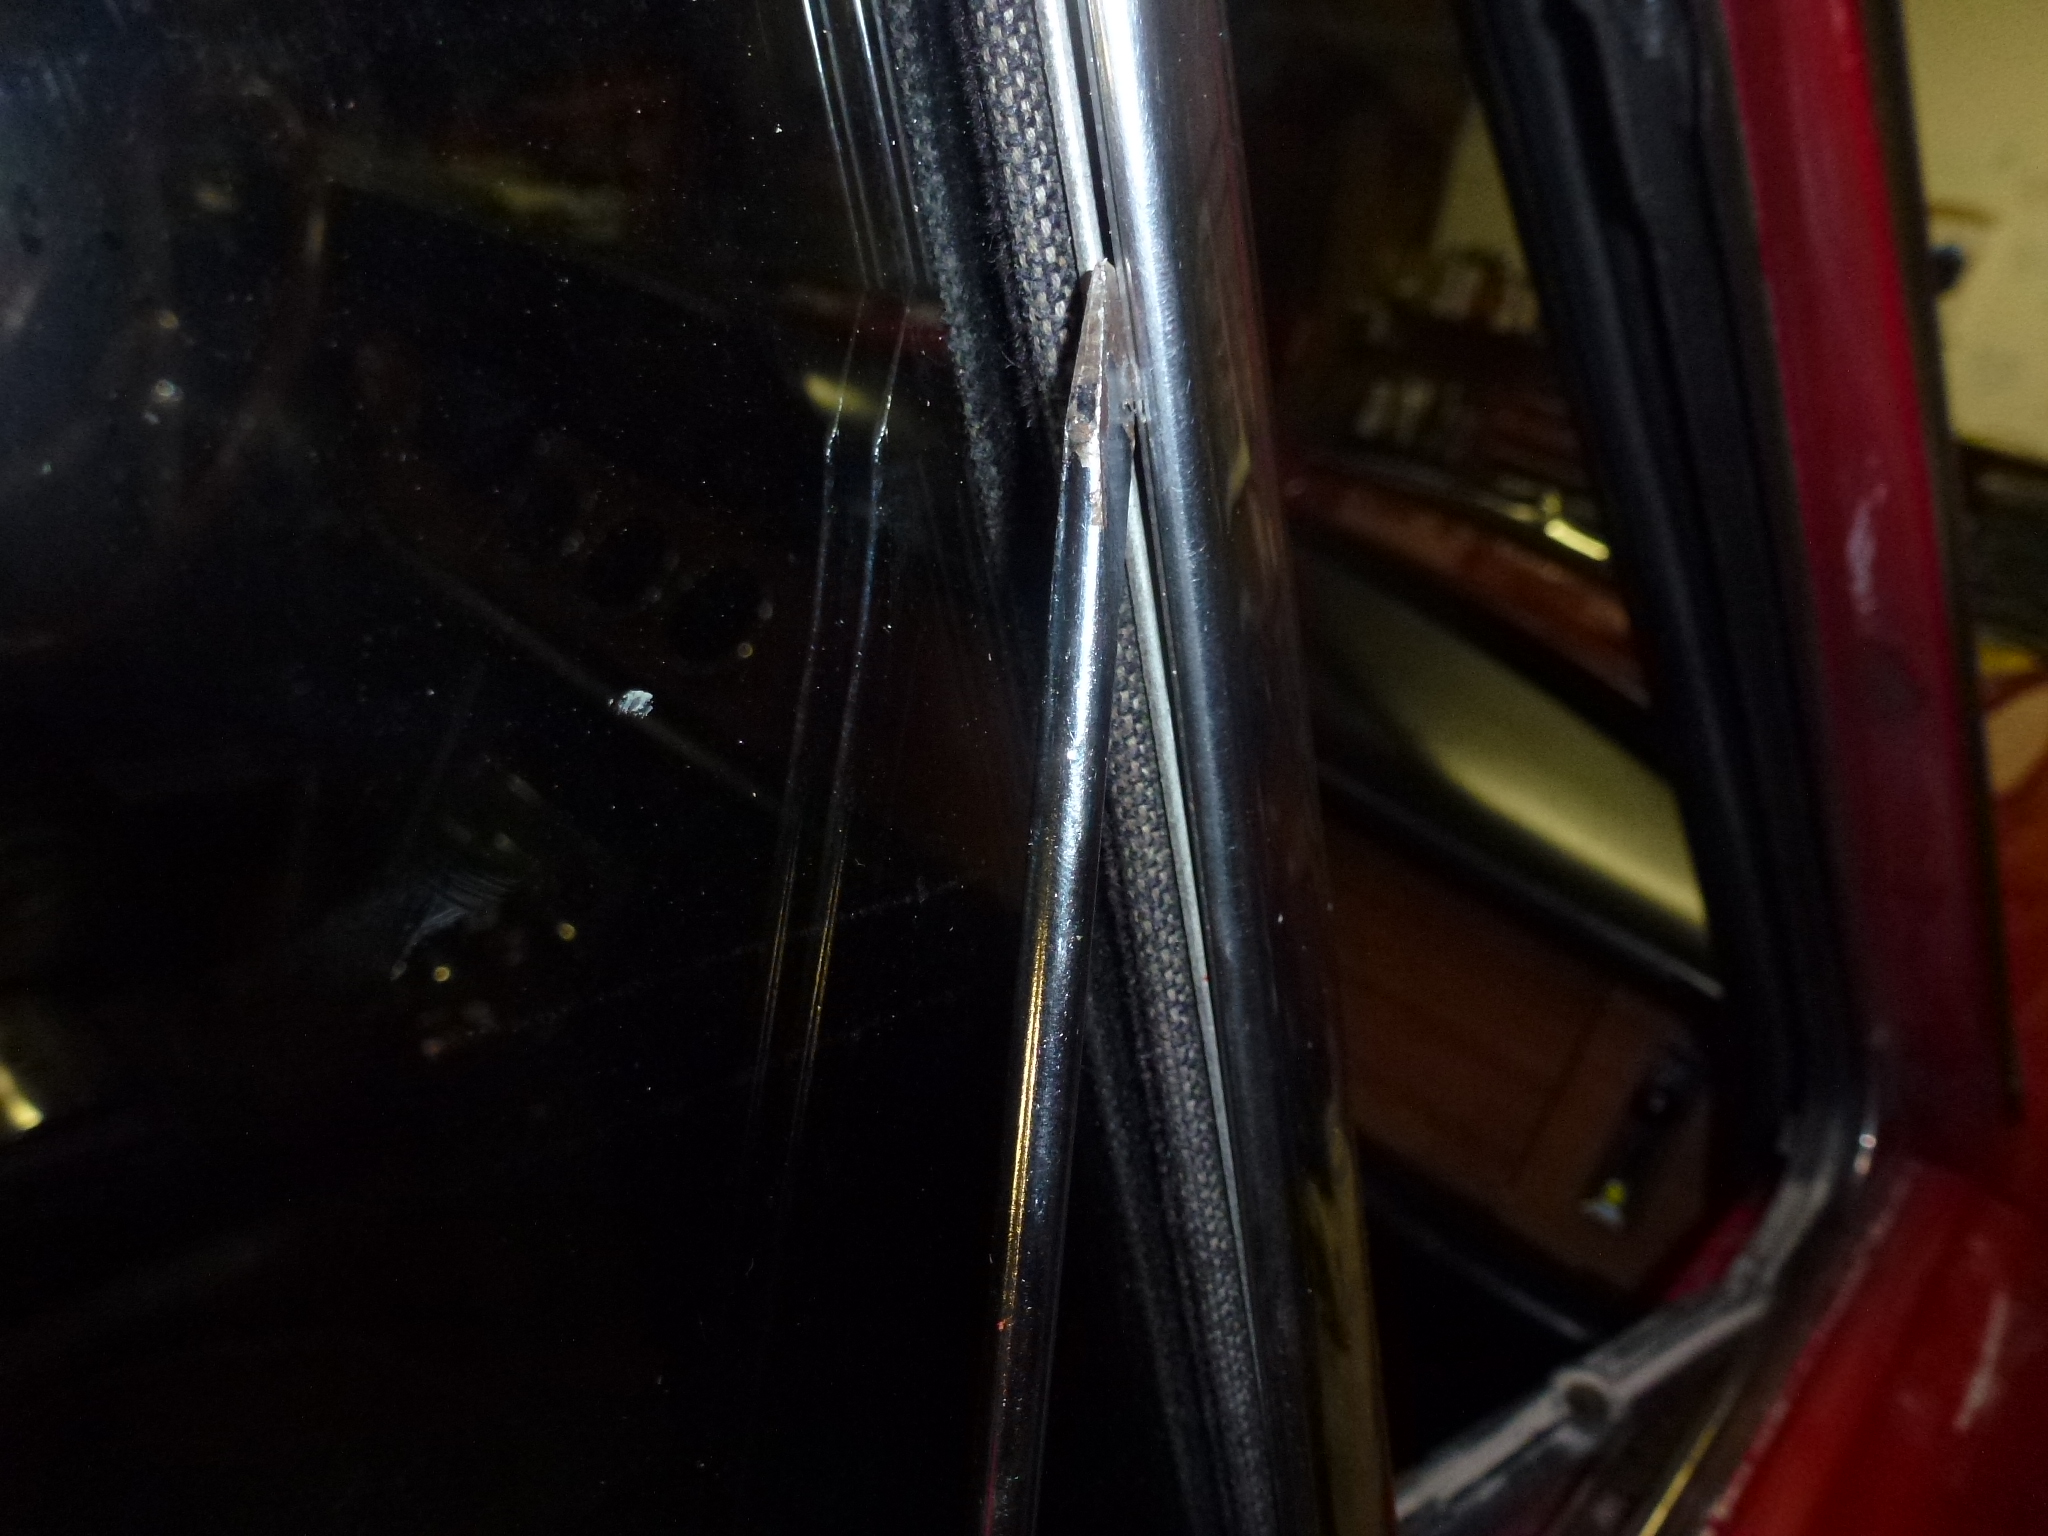
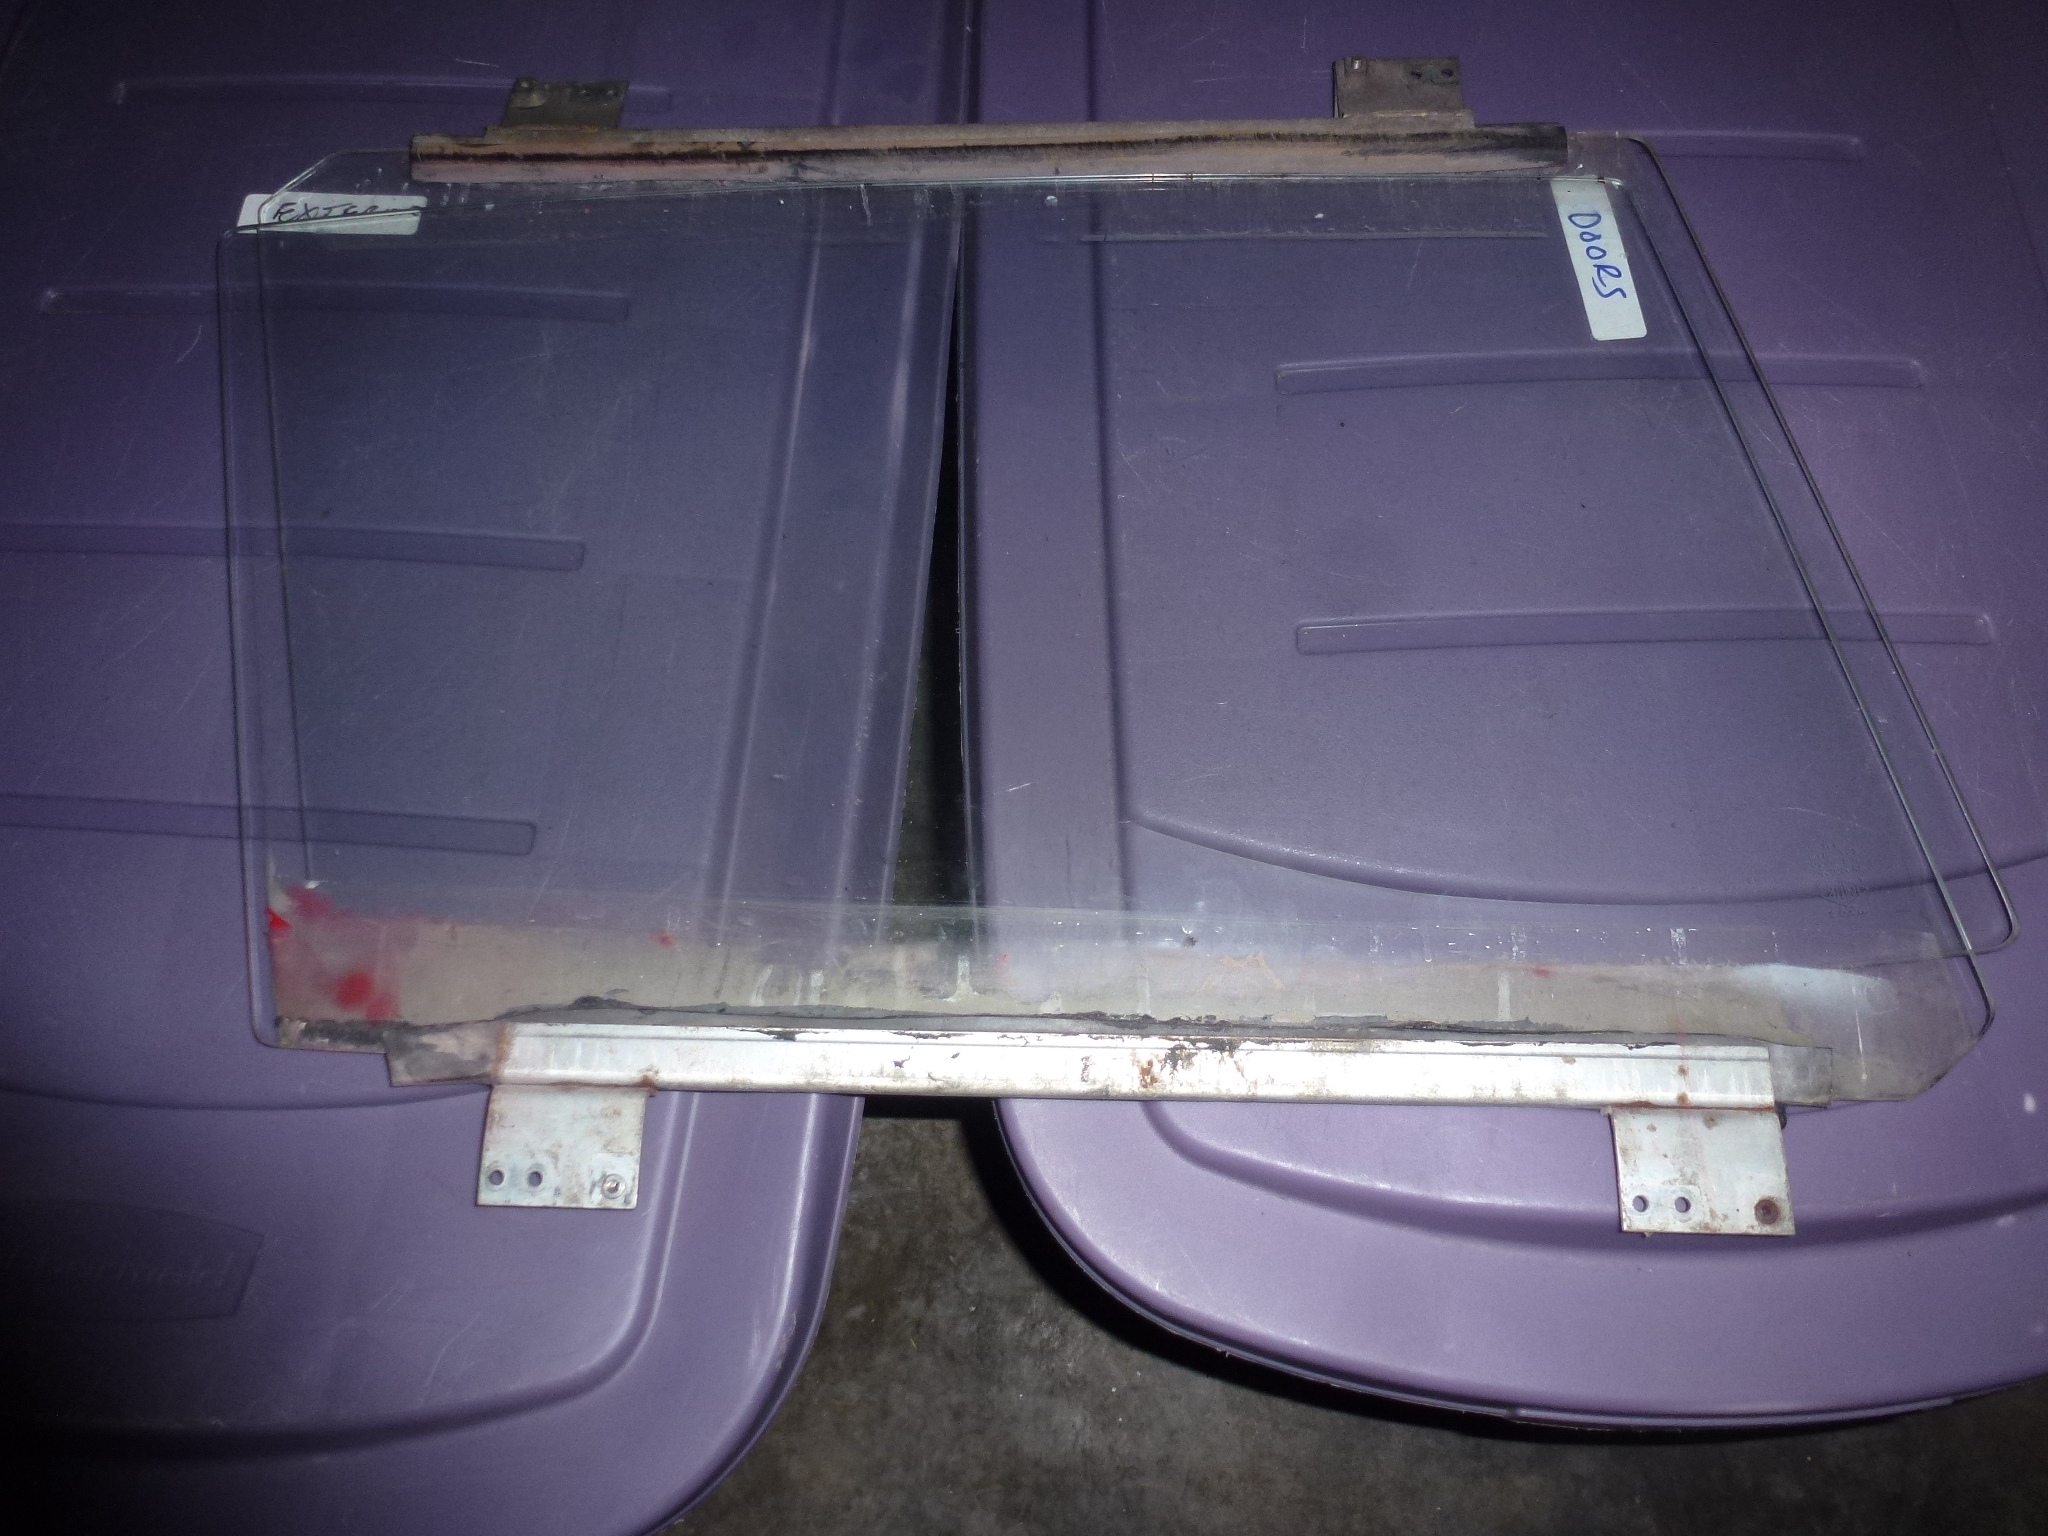
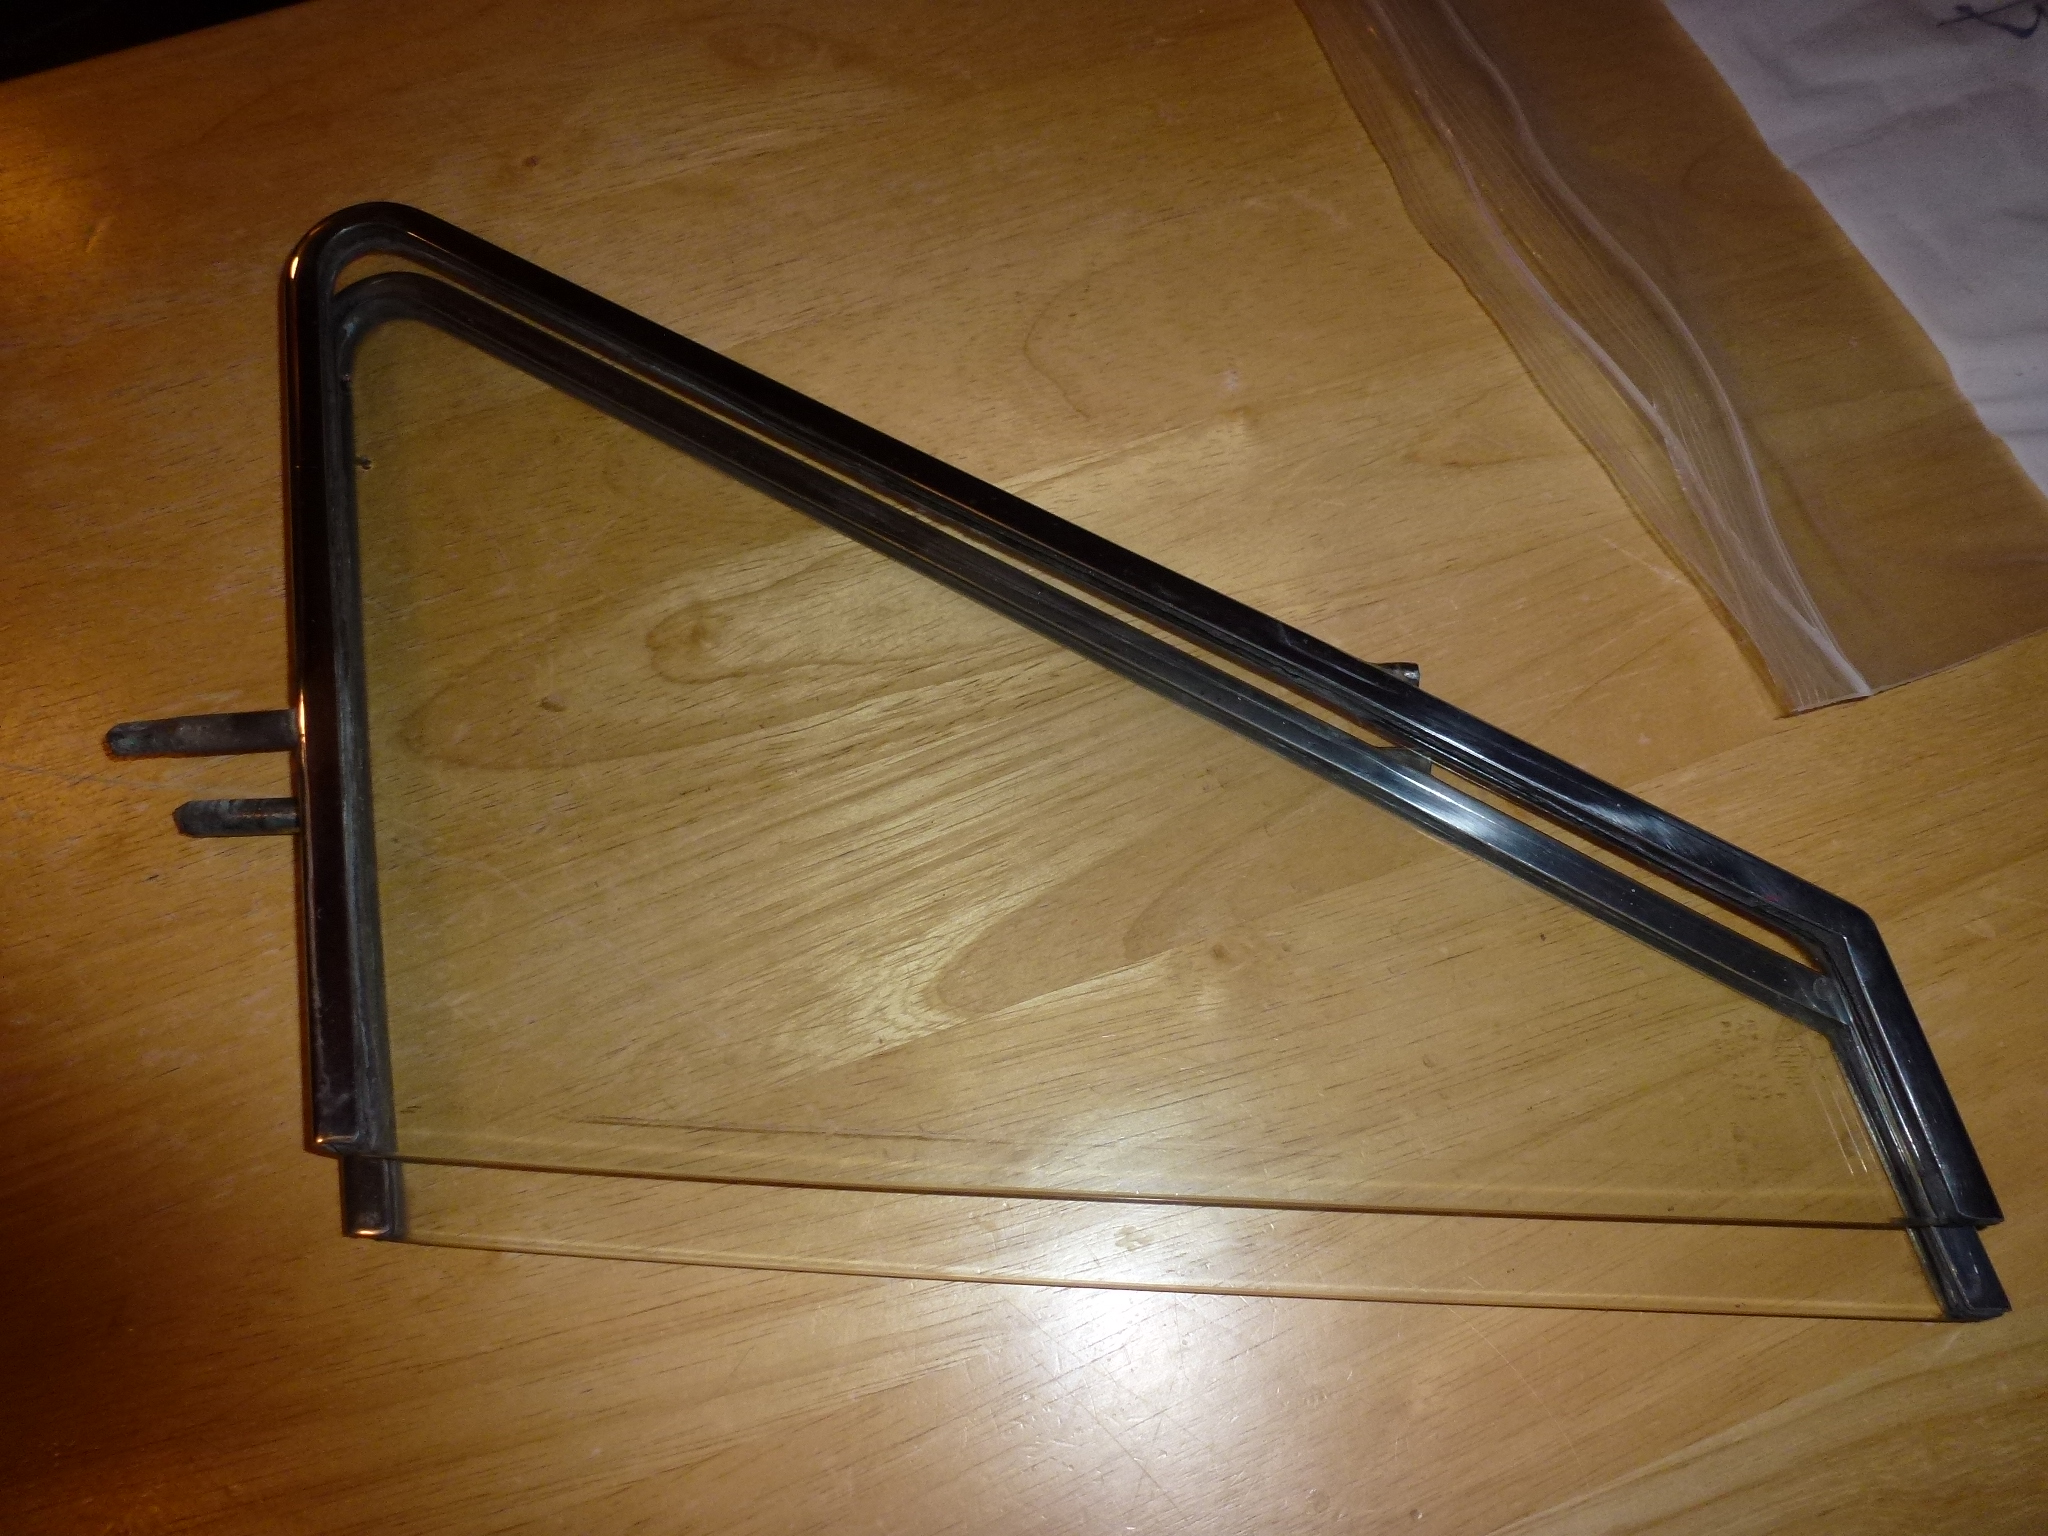
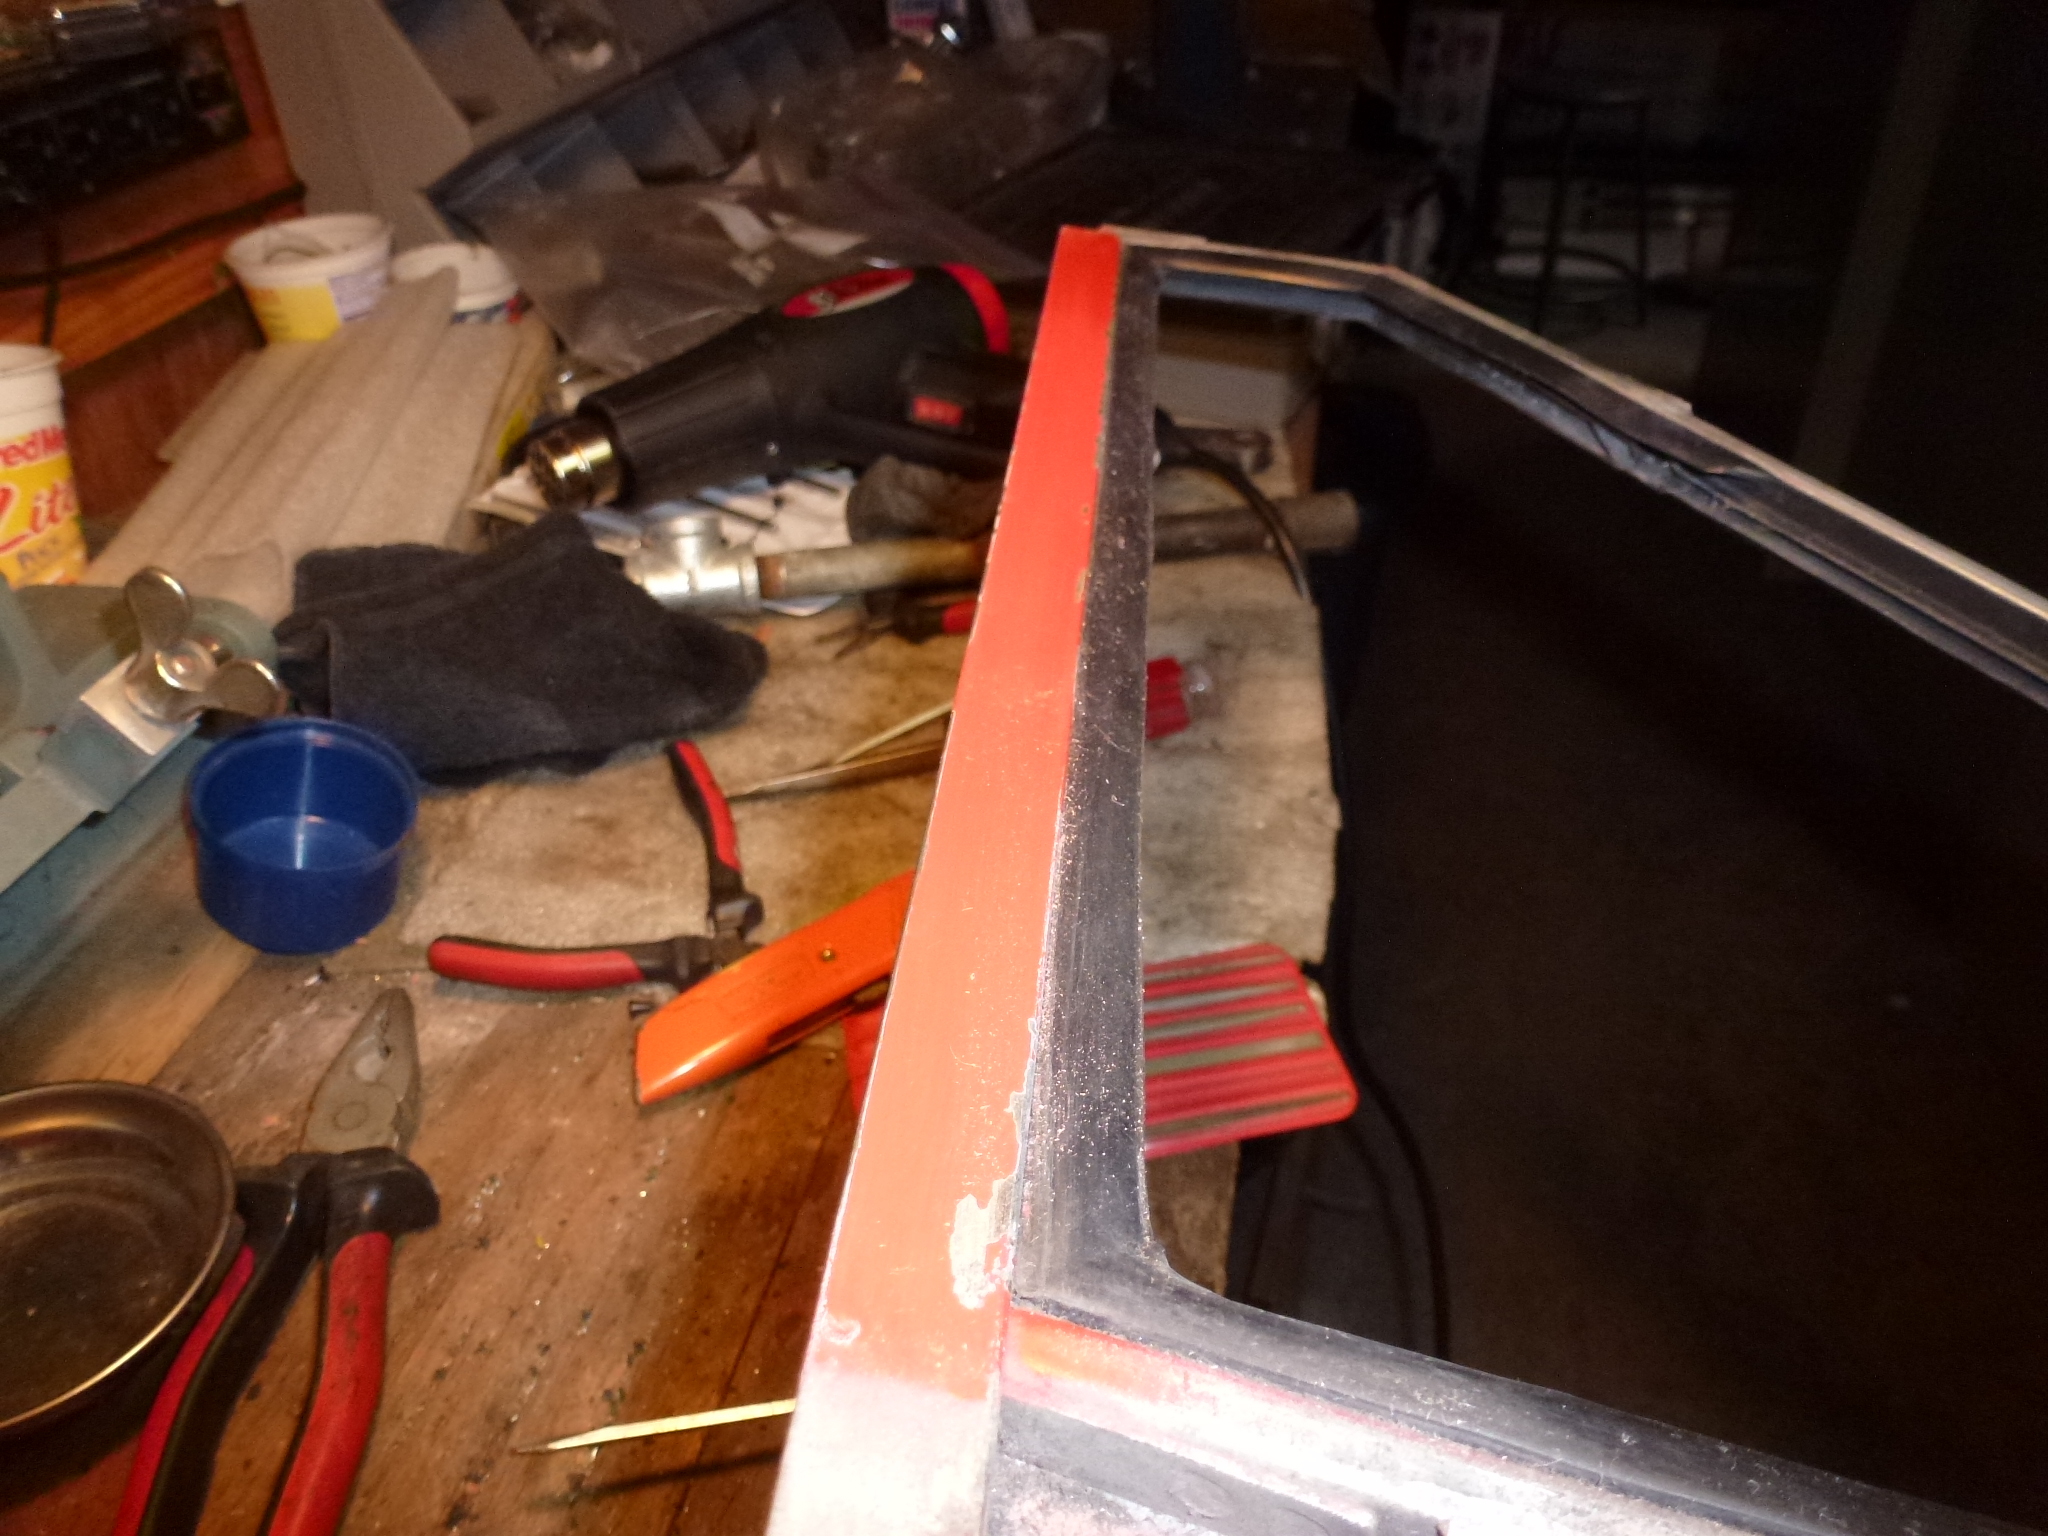
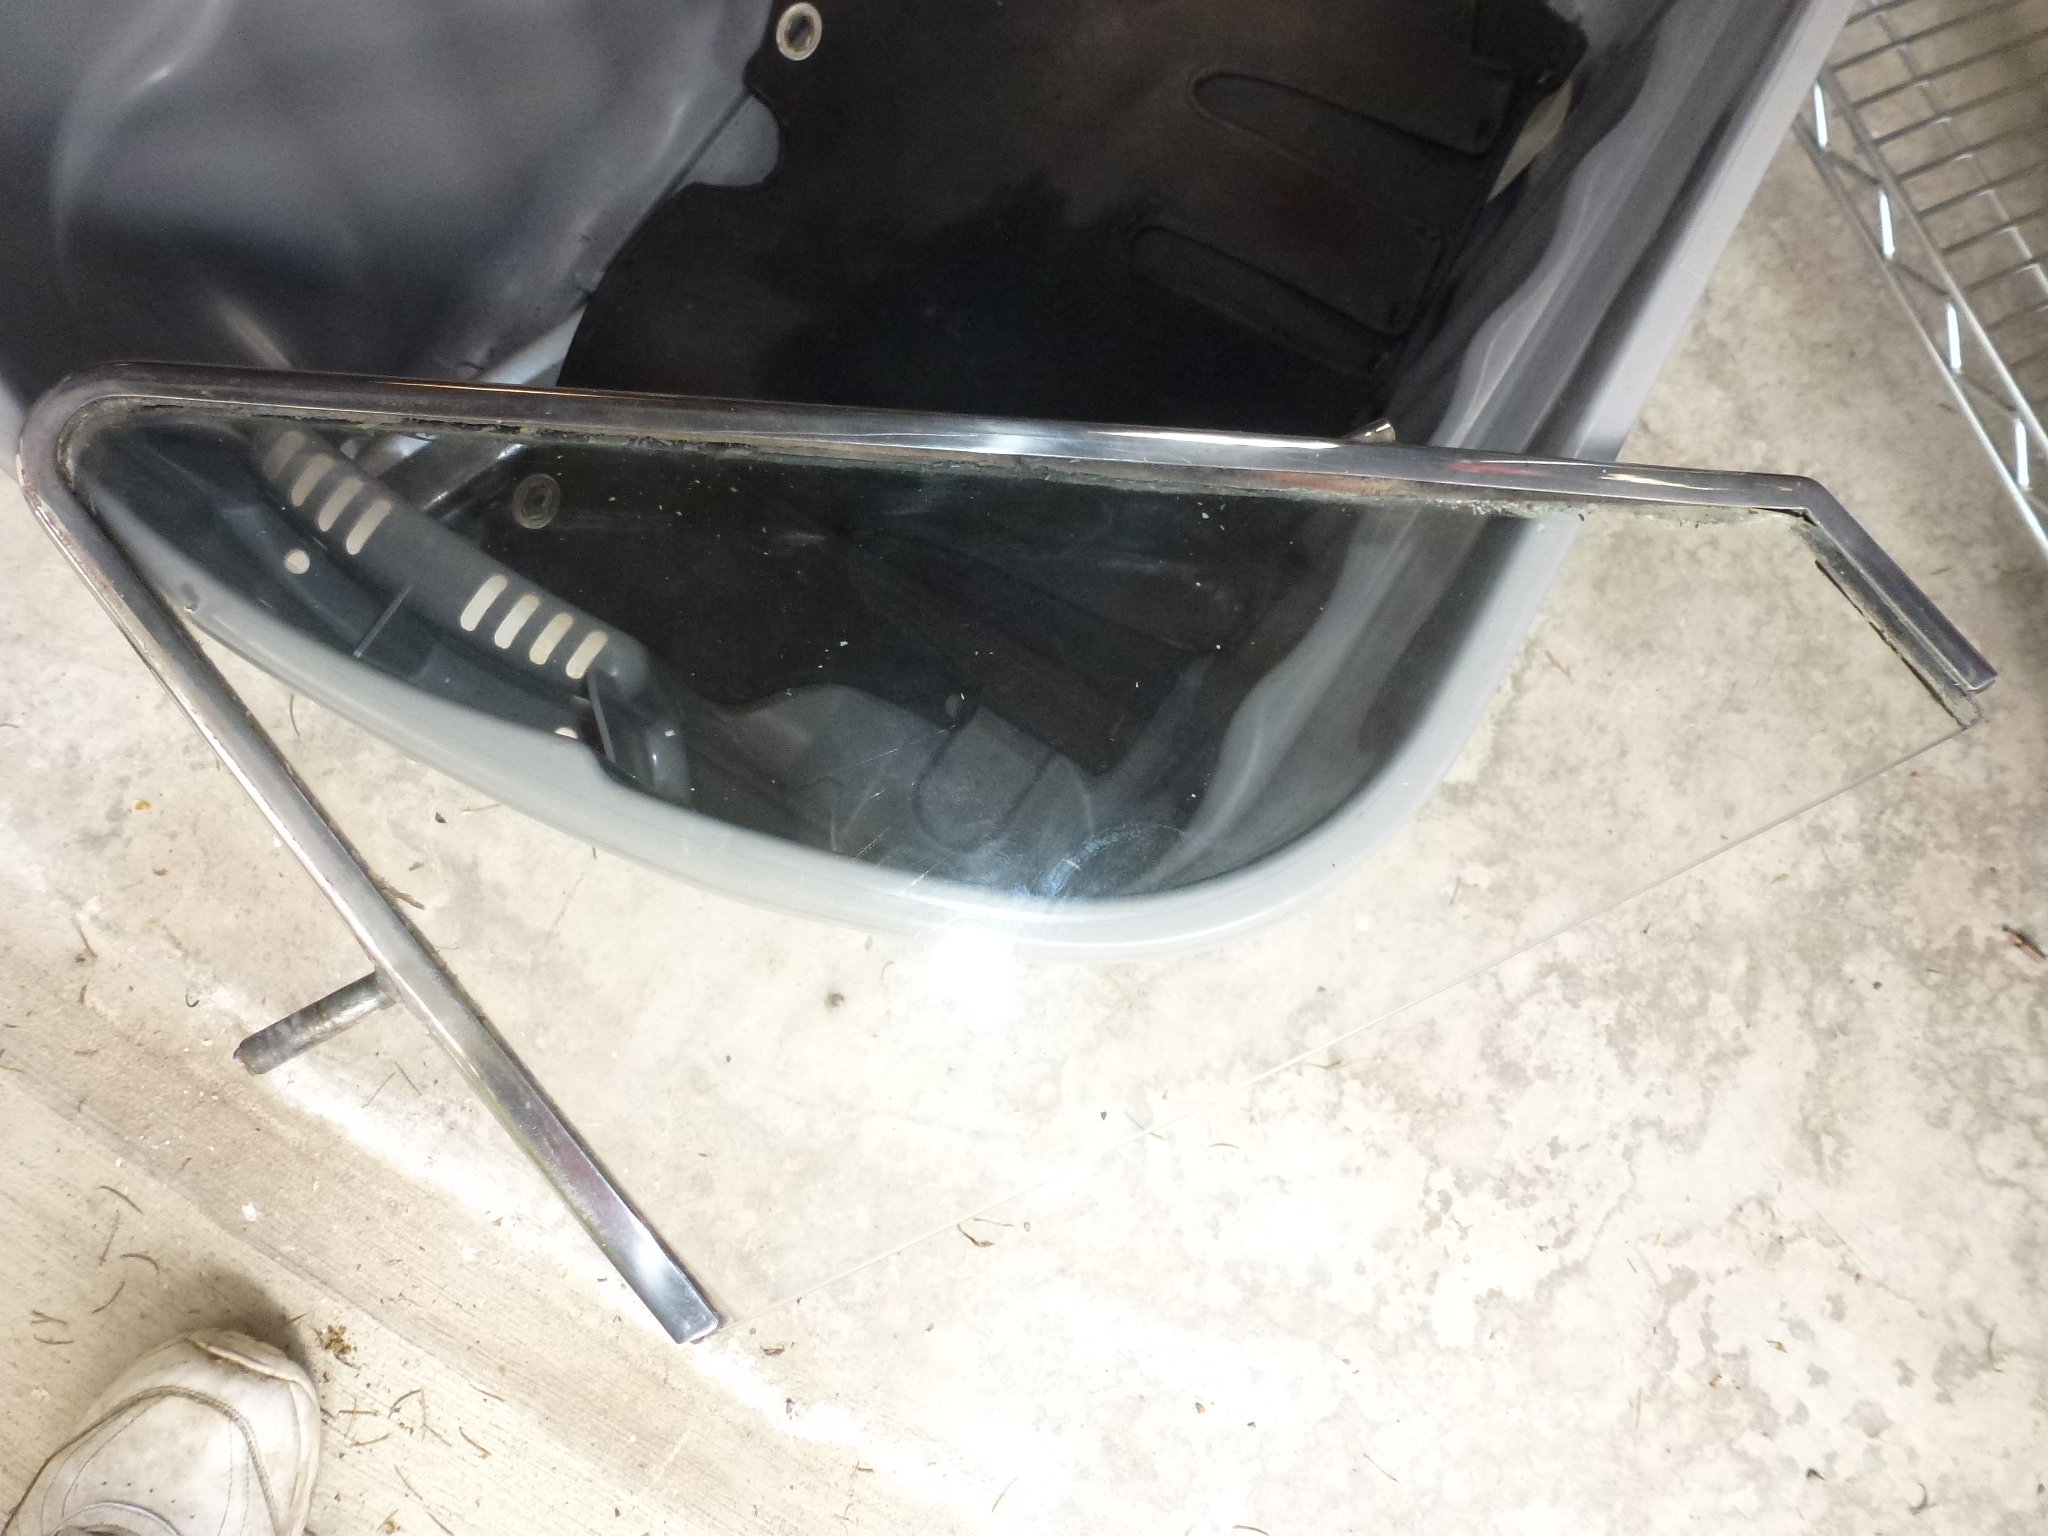
I got the replacement vent window frame back from the plating shop today. Now I have to figure out how to put the glass into it. It took a while to safely remove the glass from the old frame. Pininfarina used some sort of black caulk. I had a dickens of time getting the glass loose, eventually using a combination of cutting, scraping and a heat gun along with some prying to get the glass free. The left picture shows the glass partially free while the right one has it just as it came out. It took a lot of scraping and cleaning to get the old caulk off. In addition, there was some silicone rubber, so either it was leaking or came loose and was fixed.
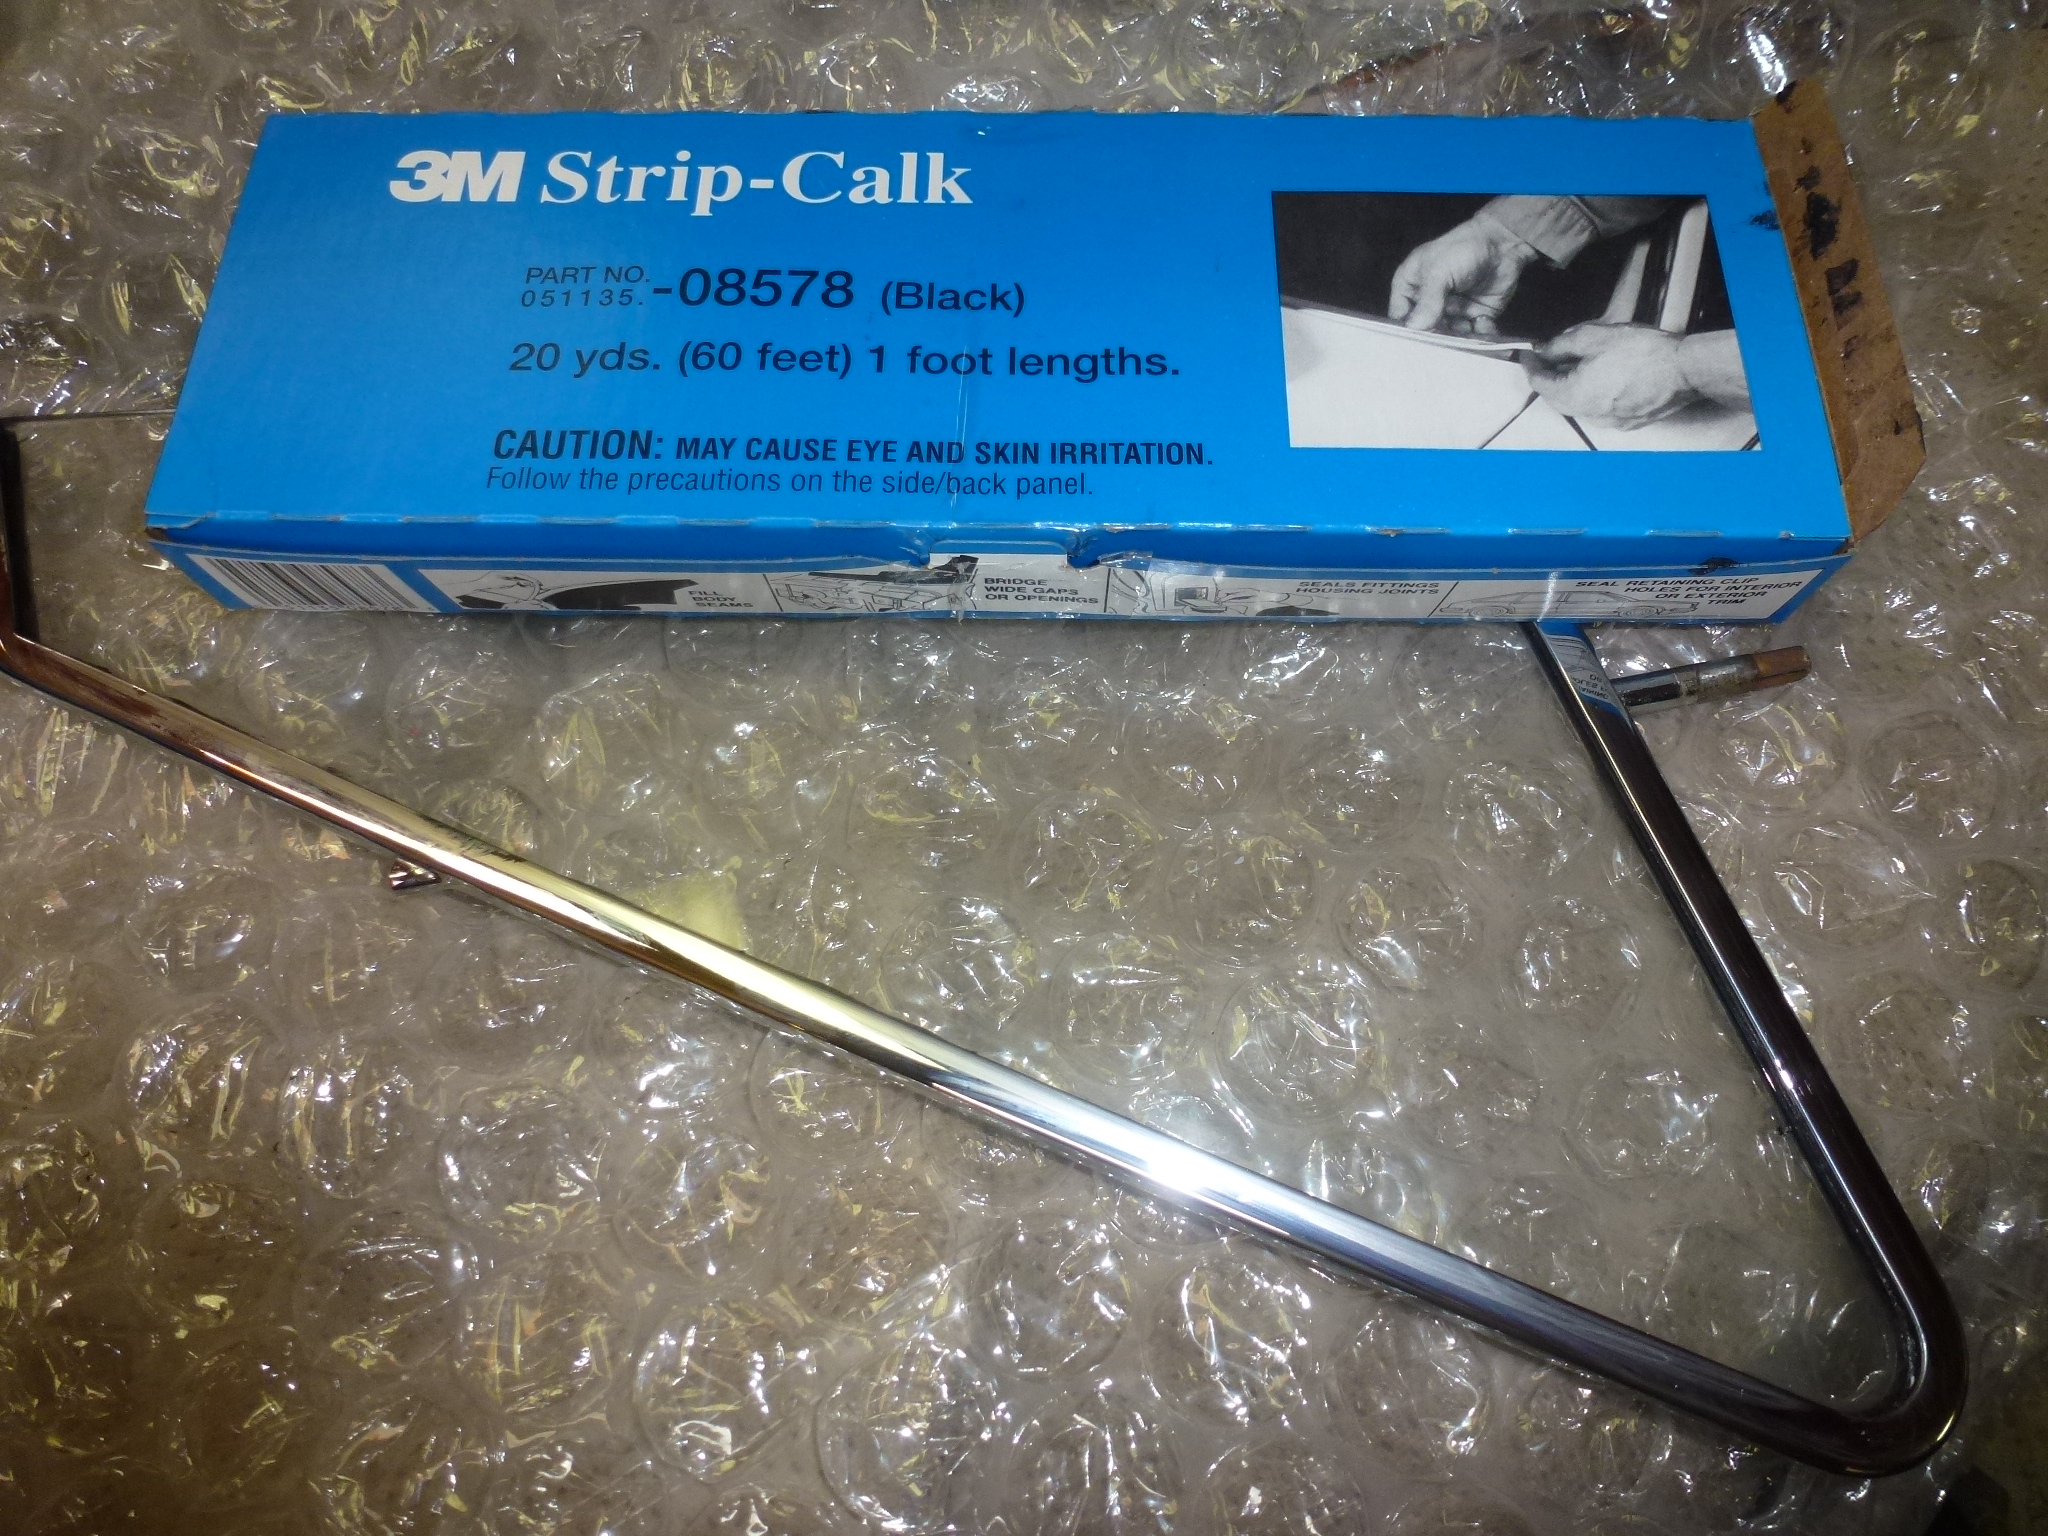
Now I have to figure how to secure the glass in the new frame. I tried some rubber strips, but I don't have any thick enough. Perhaps some black silicone rubber in the groove, rubber strip and then more silicon rubber to bed the glass in? The silicone rubber will hold everything in place and fill in any gaps left by the rubber. Or maybe some 3M strip caulk in black?
Anyway, I ran out of time to fiddle with it today, so that's another days problem.
I found the errant scraper strip. It is 3' long, so I couldn't figure out how I could have misplaced it. It had gotten inside of one of the door bolsters that is under the window with the other bolster on top of it. When I was looking through that bin, I didn't look between the bolsters. Anyway, it is now installed.
After posting a thread on Tom Yang's message board about the vent glass, the consensus was to use 3M strip caulk to bed the glass in the frame. I put two strips in the bottom of the channel and inserted the glass. Then I put a strip on each side of the glass as the edge of the channel. Using a chisel, I pushed that caulk into the channel on each side of the glass, trying to keep the glass centered in the frame. That all worked, but it was very messy. Be sure to have plenty of lacquer thinner around for the clean-up. But once done, it looks quite nice.
Installing the vent window was interesting. The rotating mechanism has a slot that the part that the vent window fits into. Then that piece fits into a square hole from the bottom that the vent window fits into from the top. There is also a collar with an adjustment to prevent the window from turning too easily. Since I had had everything apart, the square hole piece ended up being rotated 90° from where it should be. It took a while to figure out why I could either have the window close, but open only about 20° or open wide, but not close. Once I realized the problem, it was easy to get the window installed and working properly.
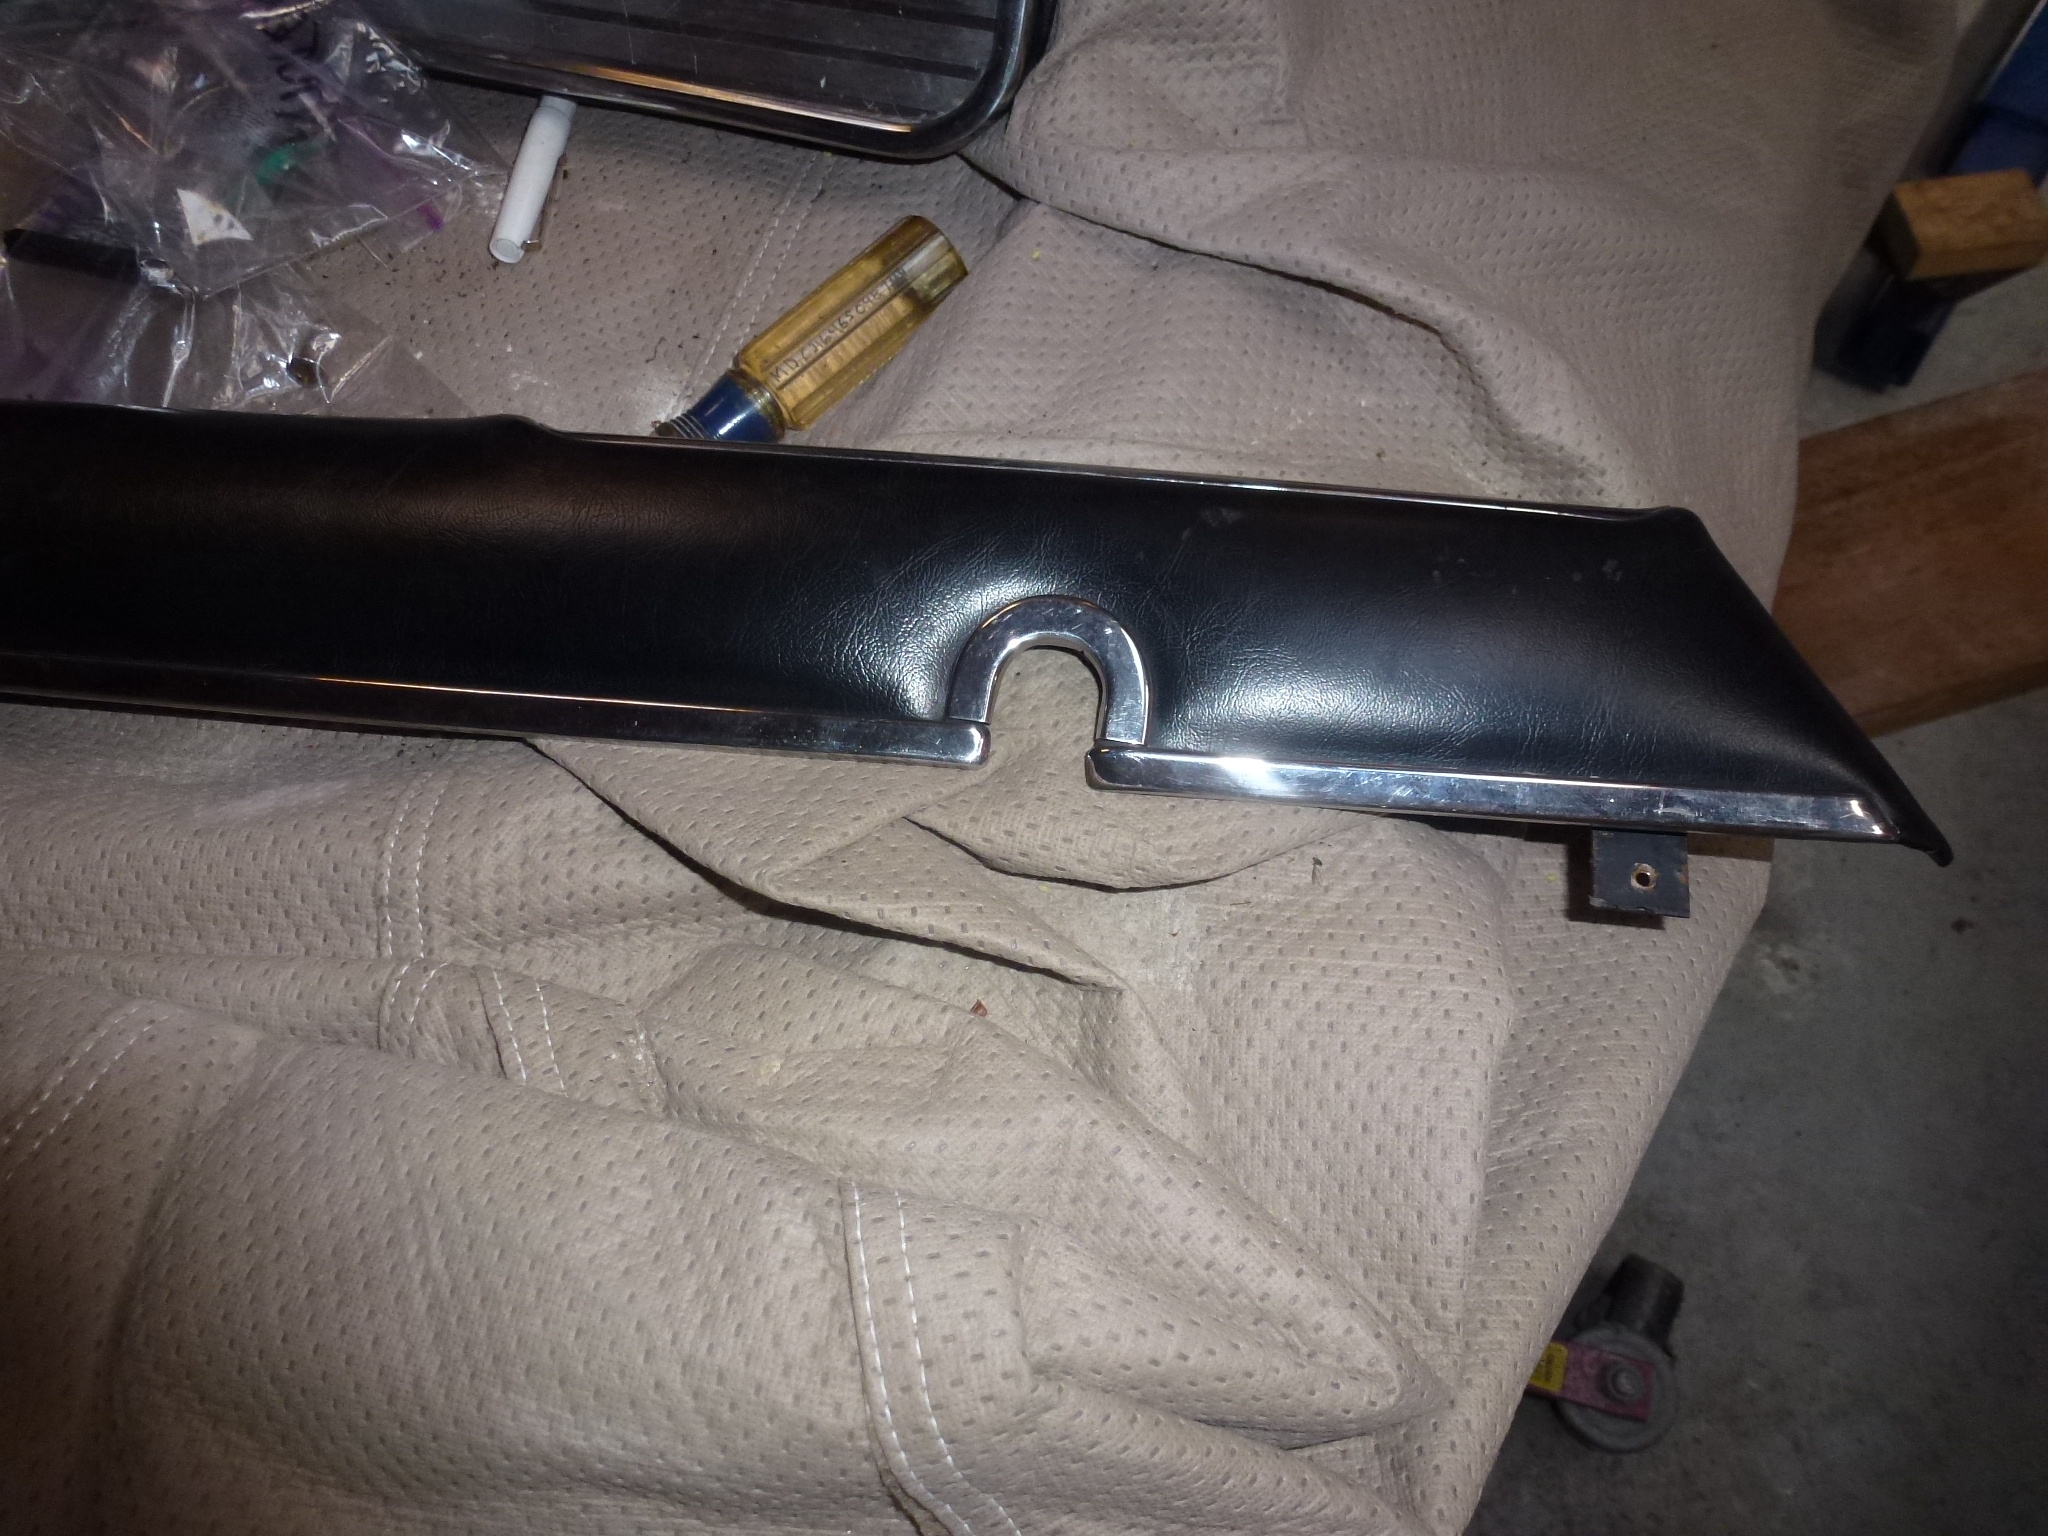
Once I had the scraper strip and vent window installed, put the door bolsters on. The door panel themselves have to wait. The LH window motor is screeching, so I will probably need to take it out and grease it. The RH door has a run in the paint on the inside that shows next to the door panel. So the paint shop will have to fix that up and the panel will probably be in the way.
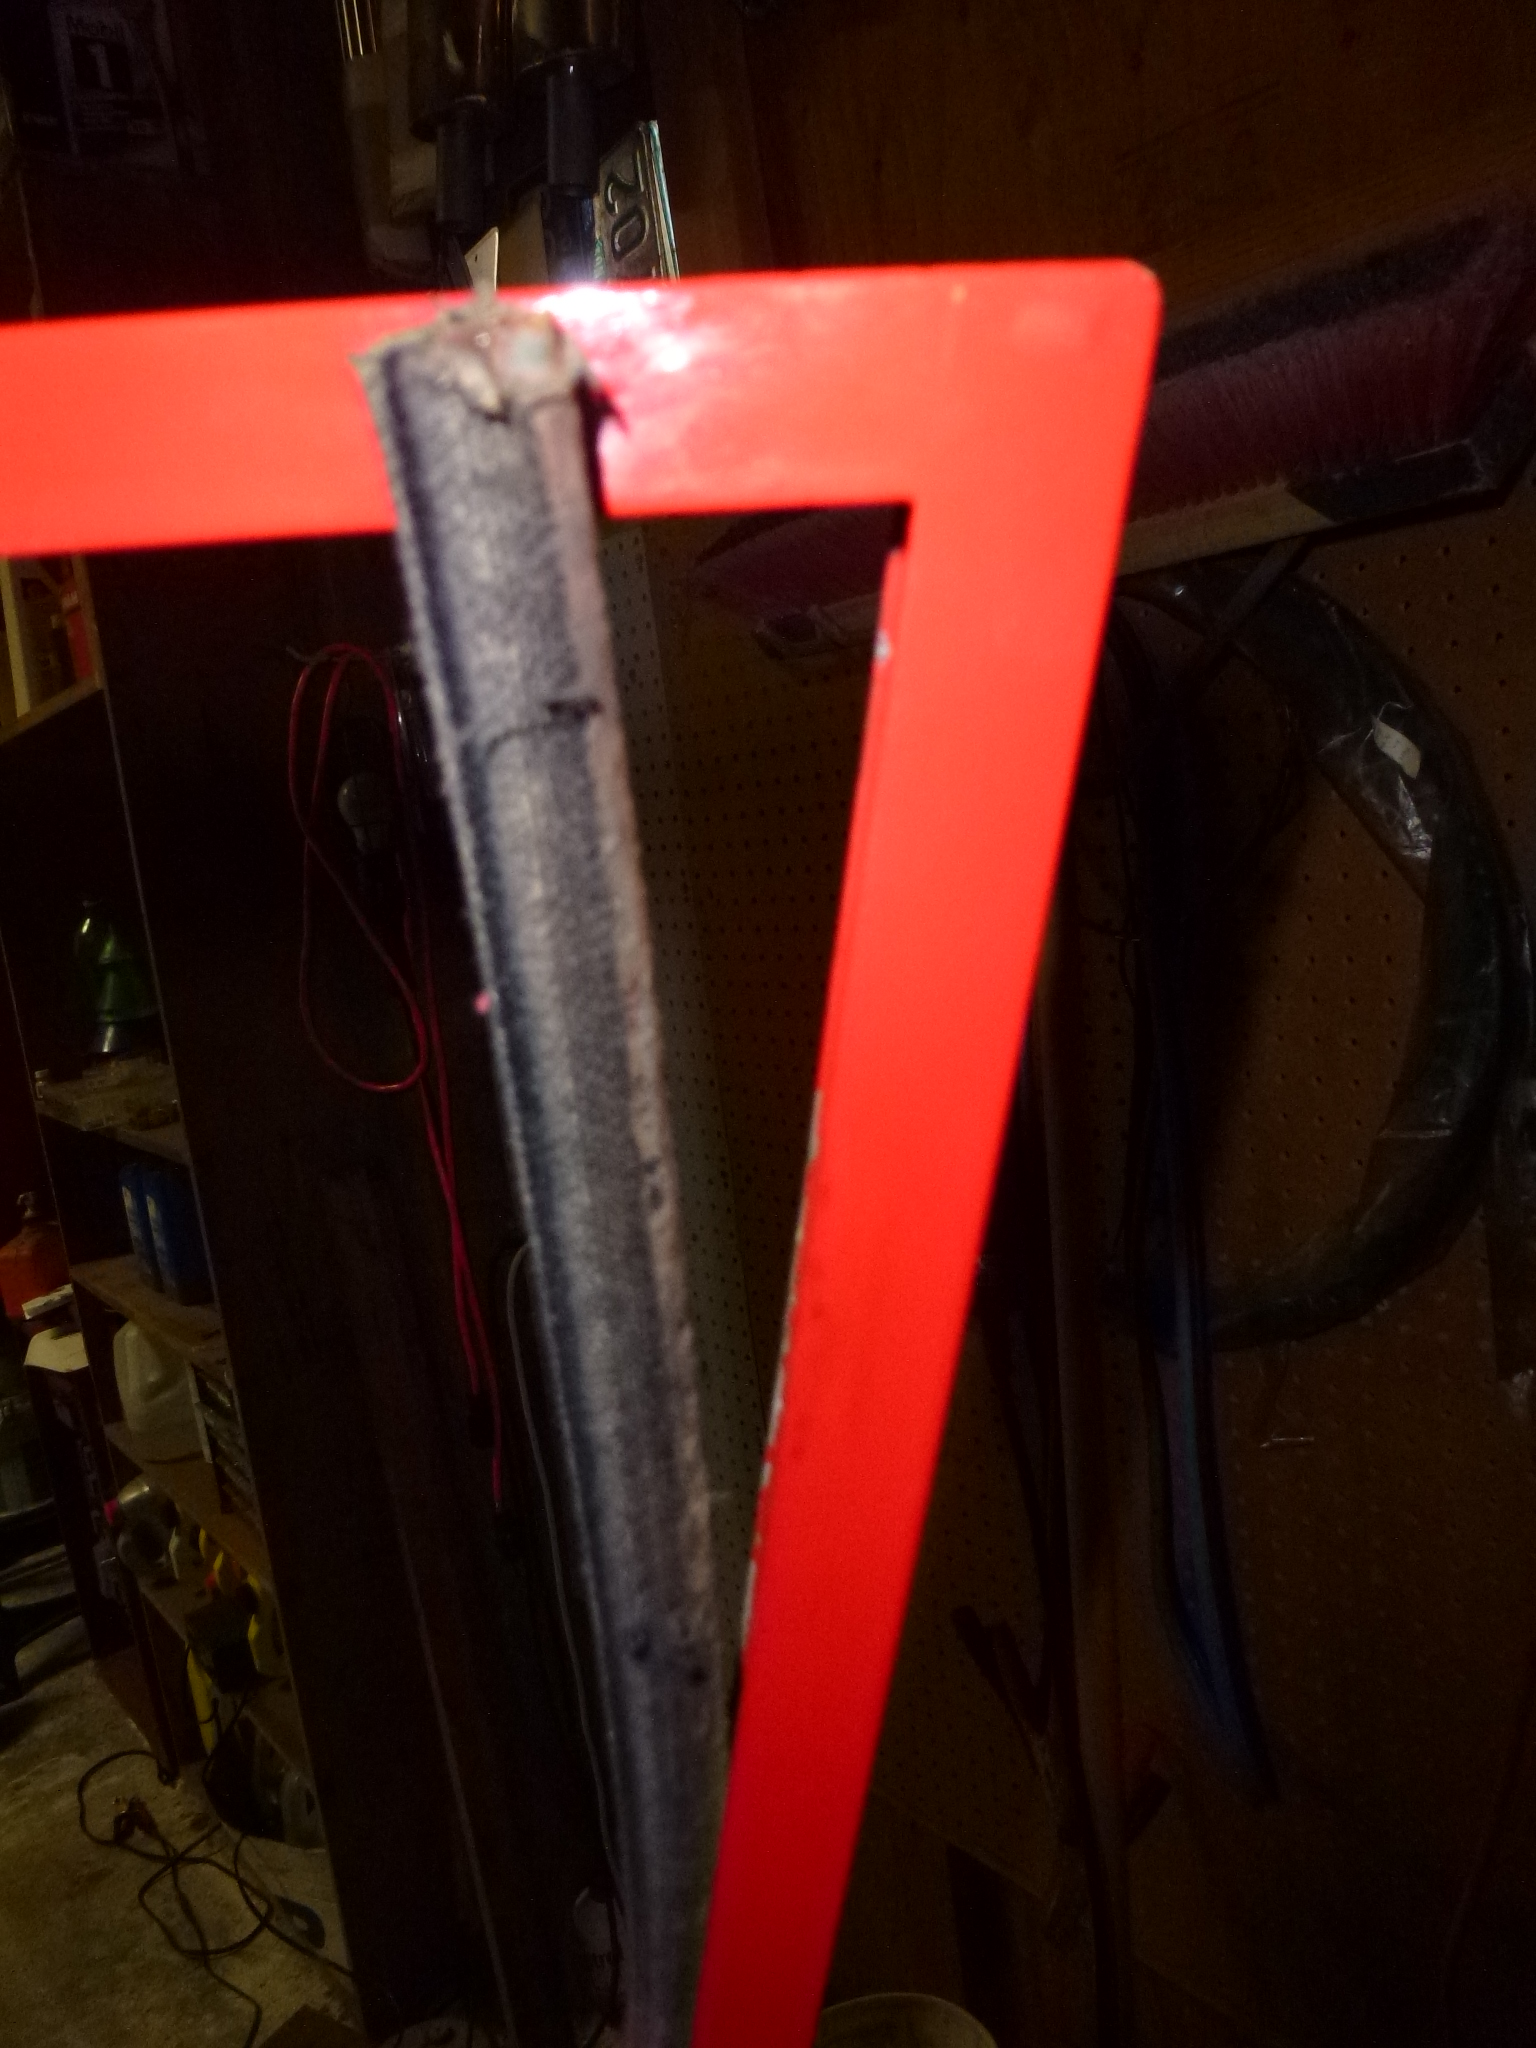
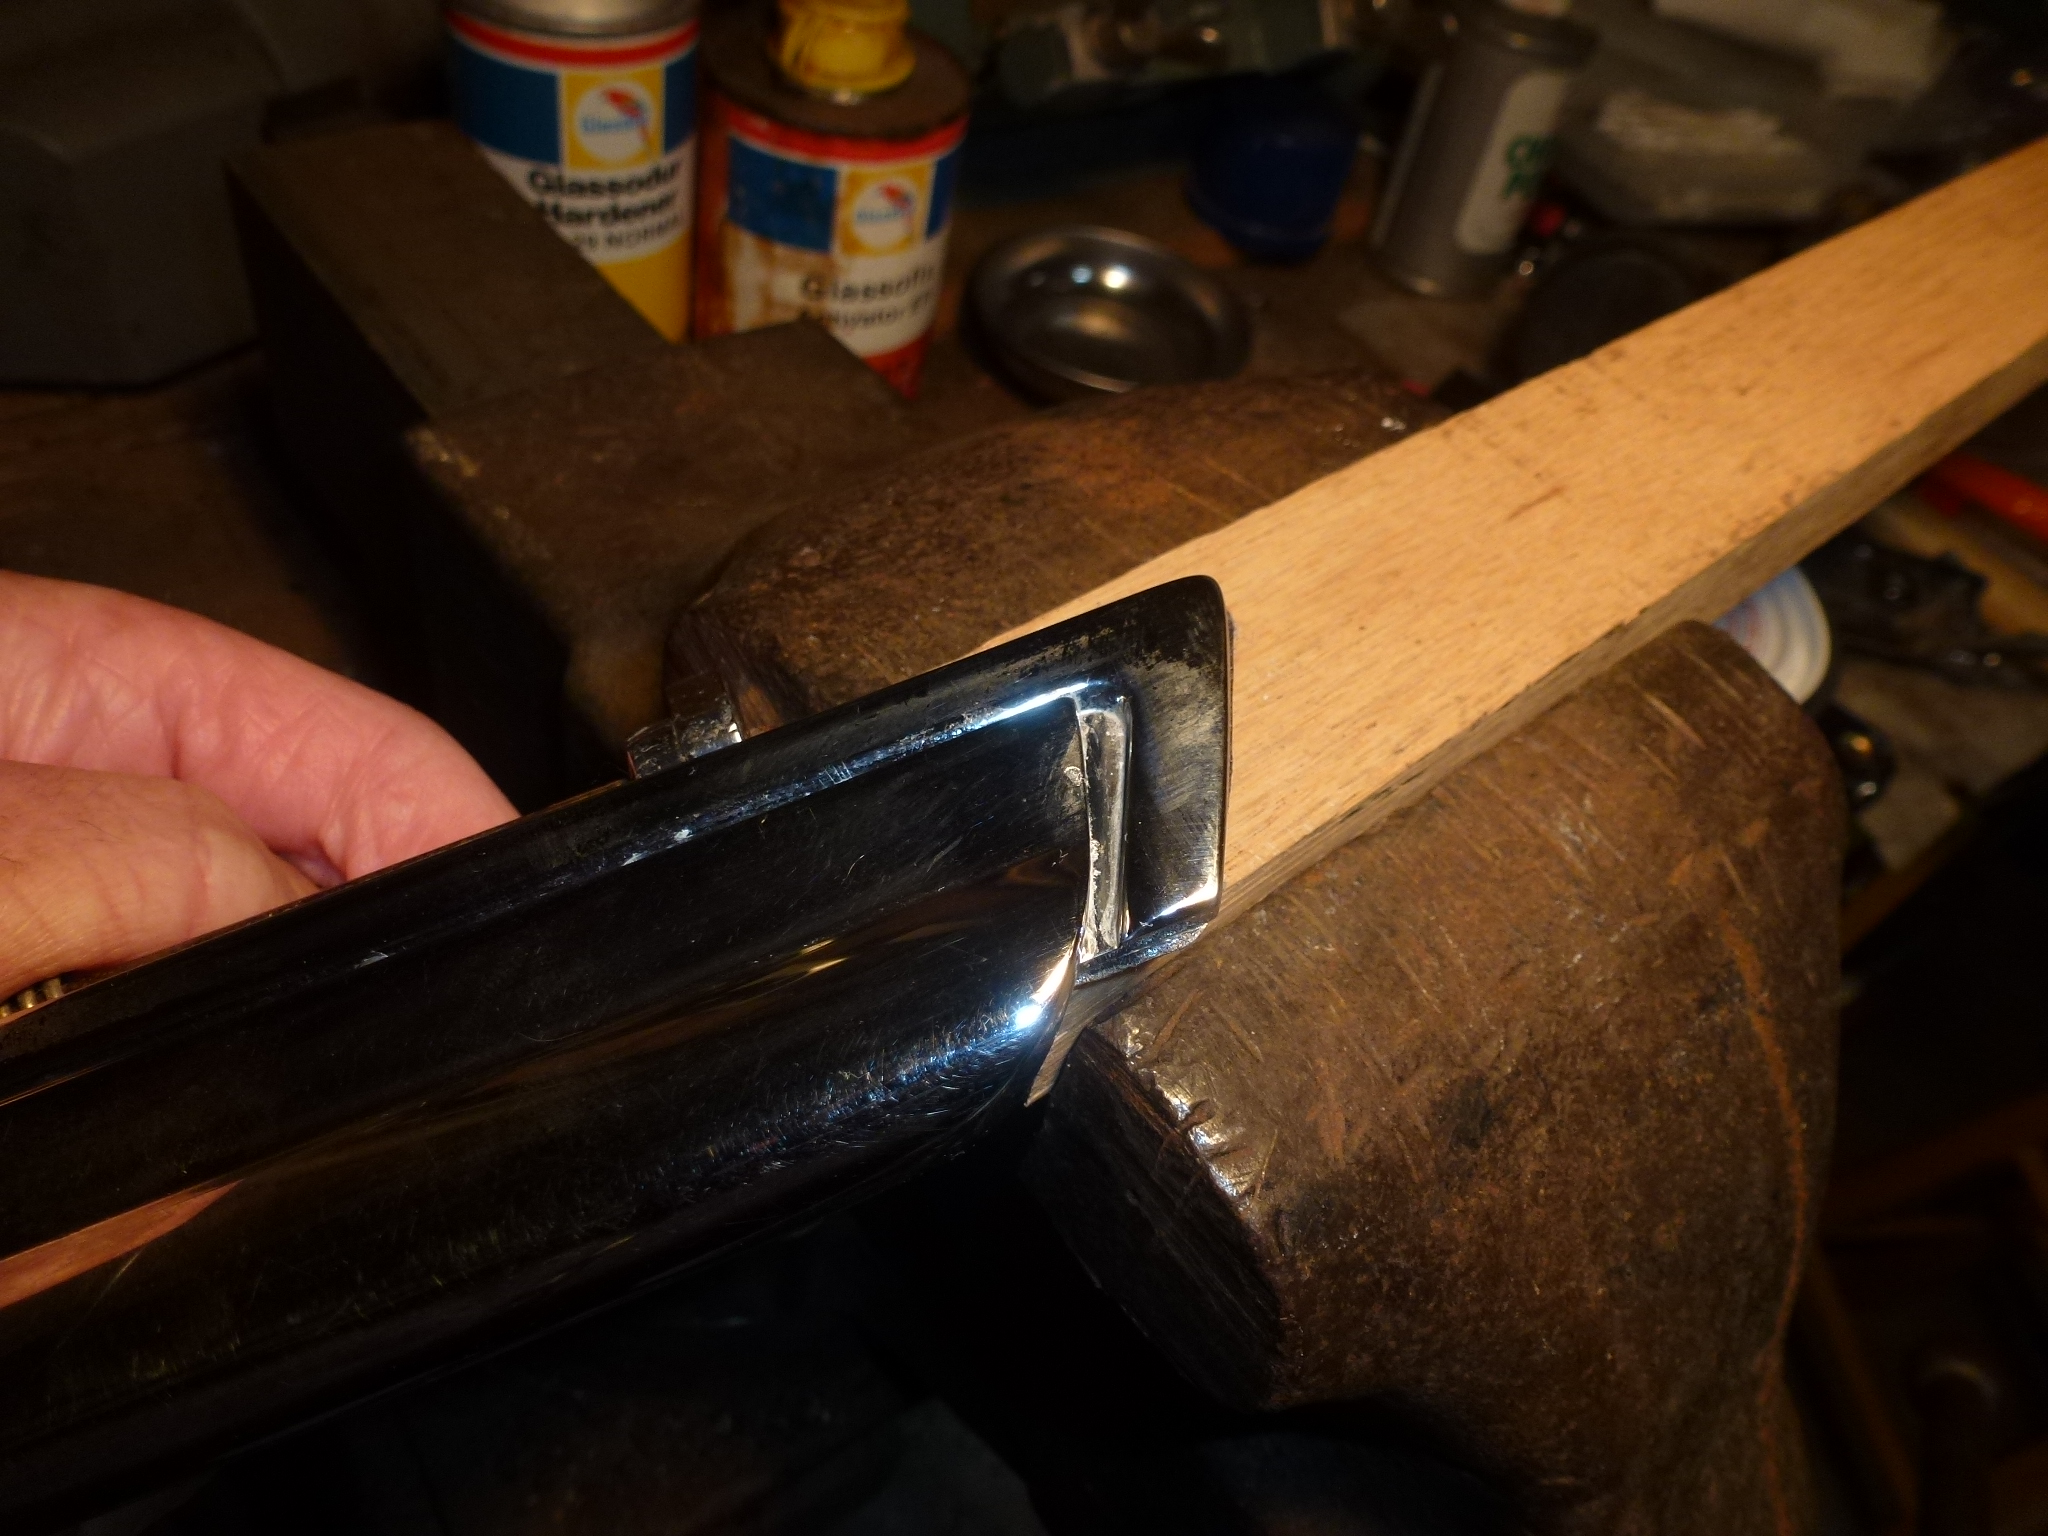
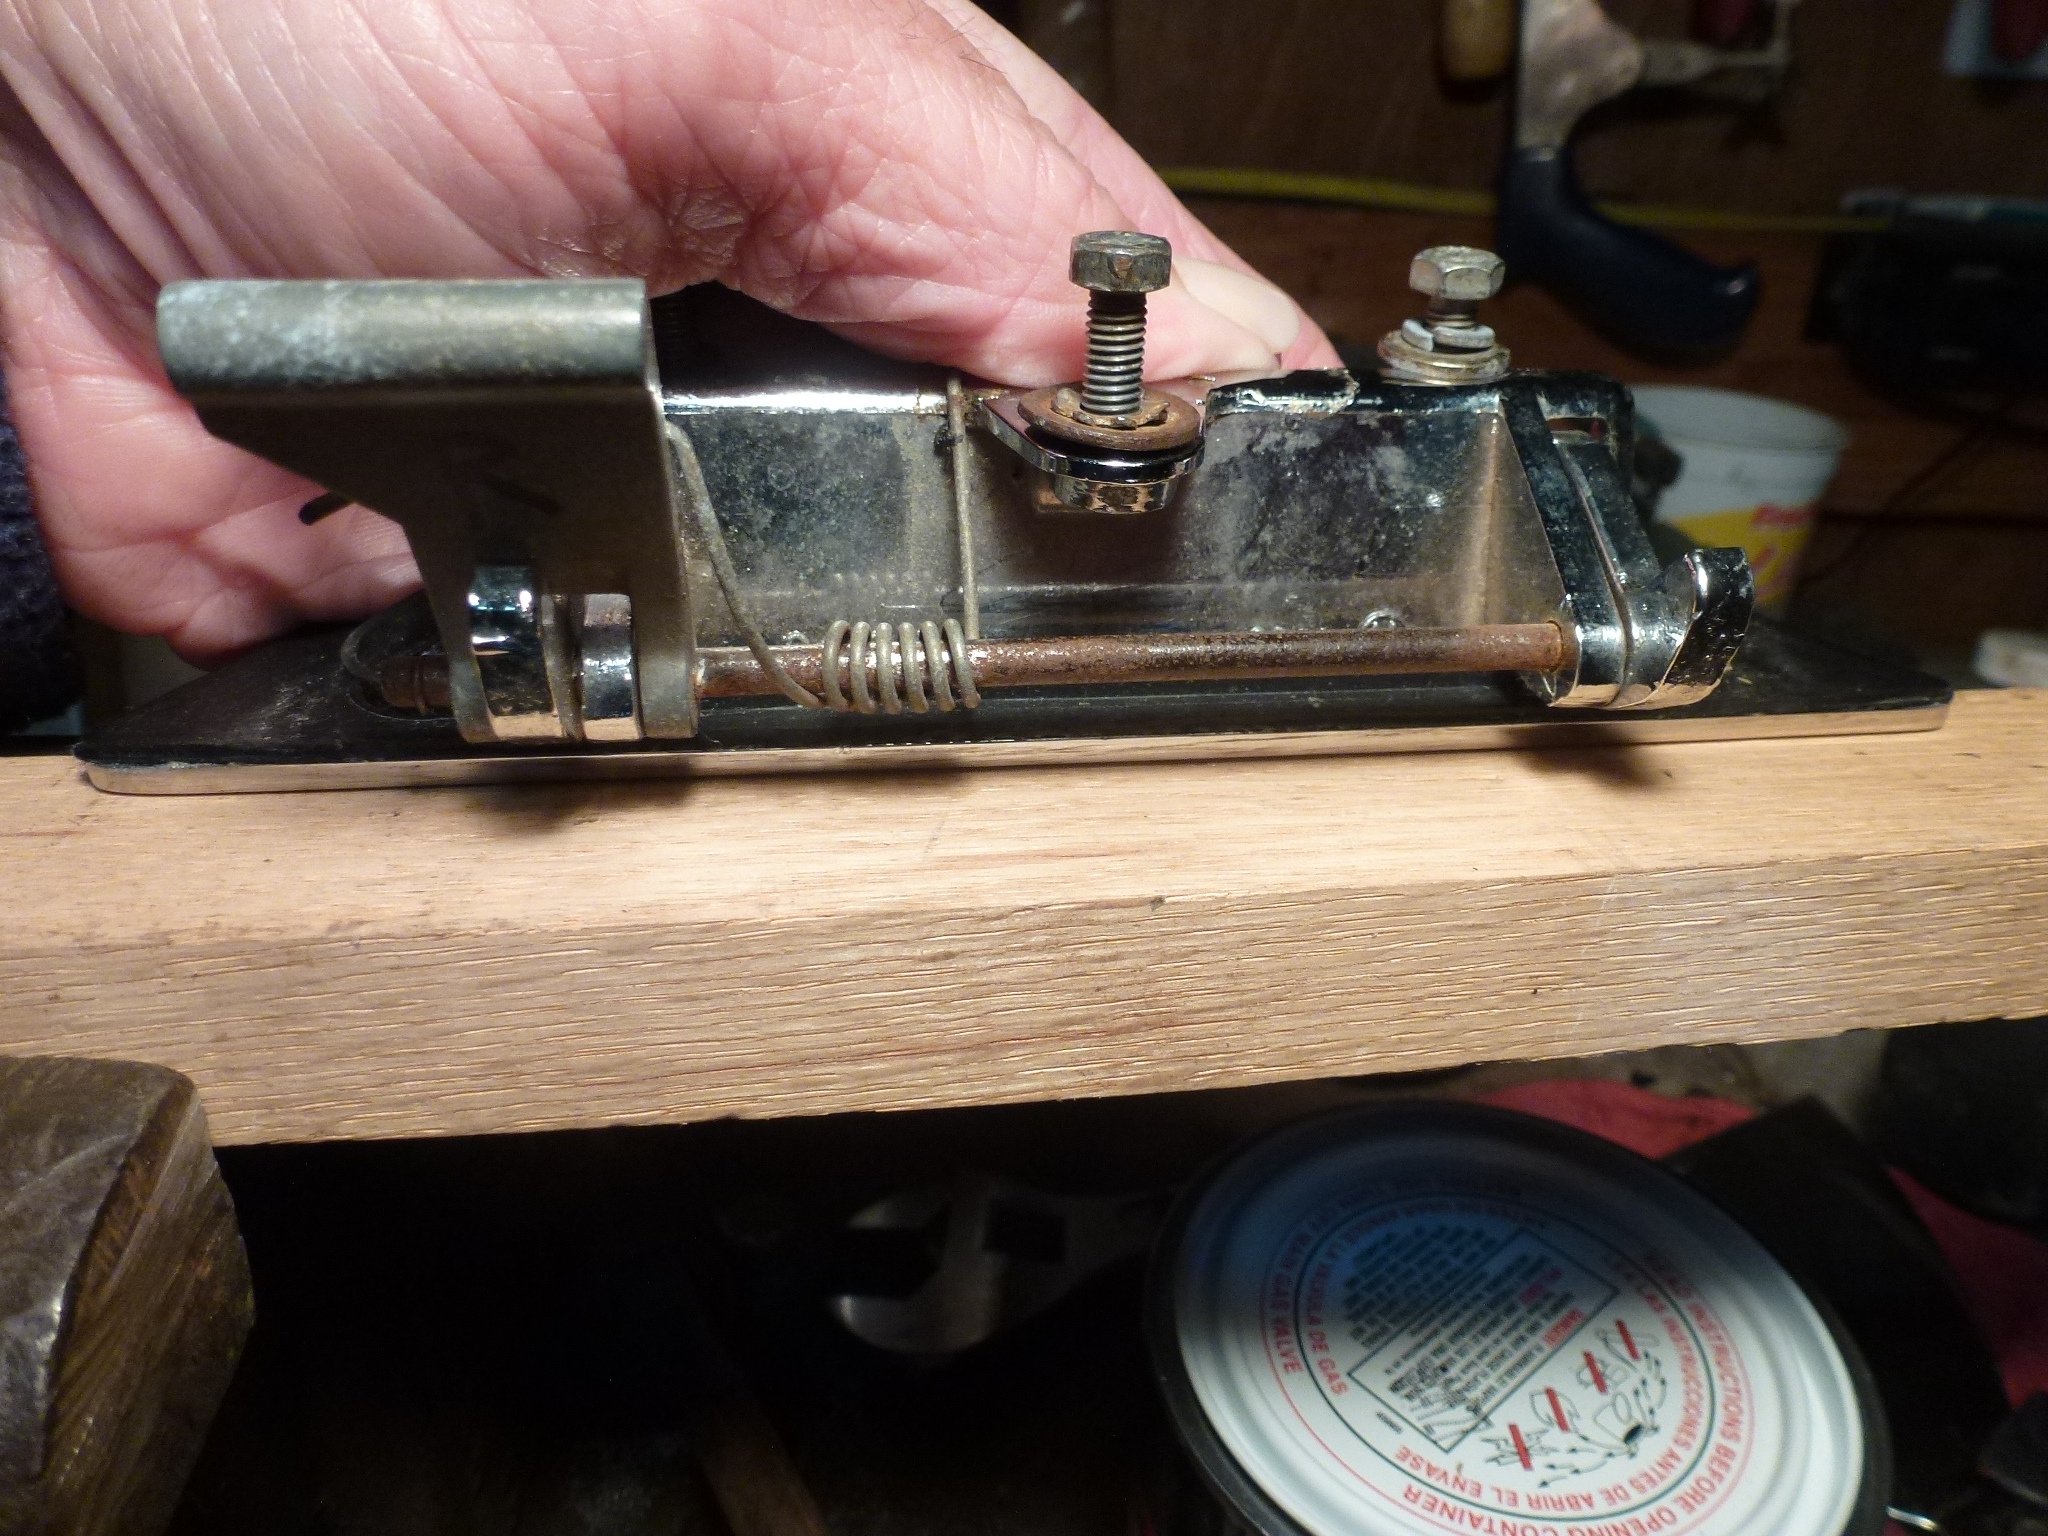
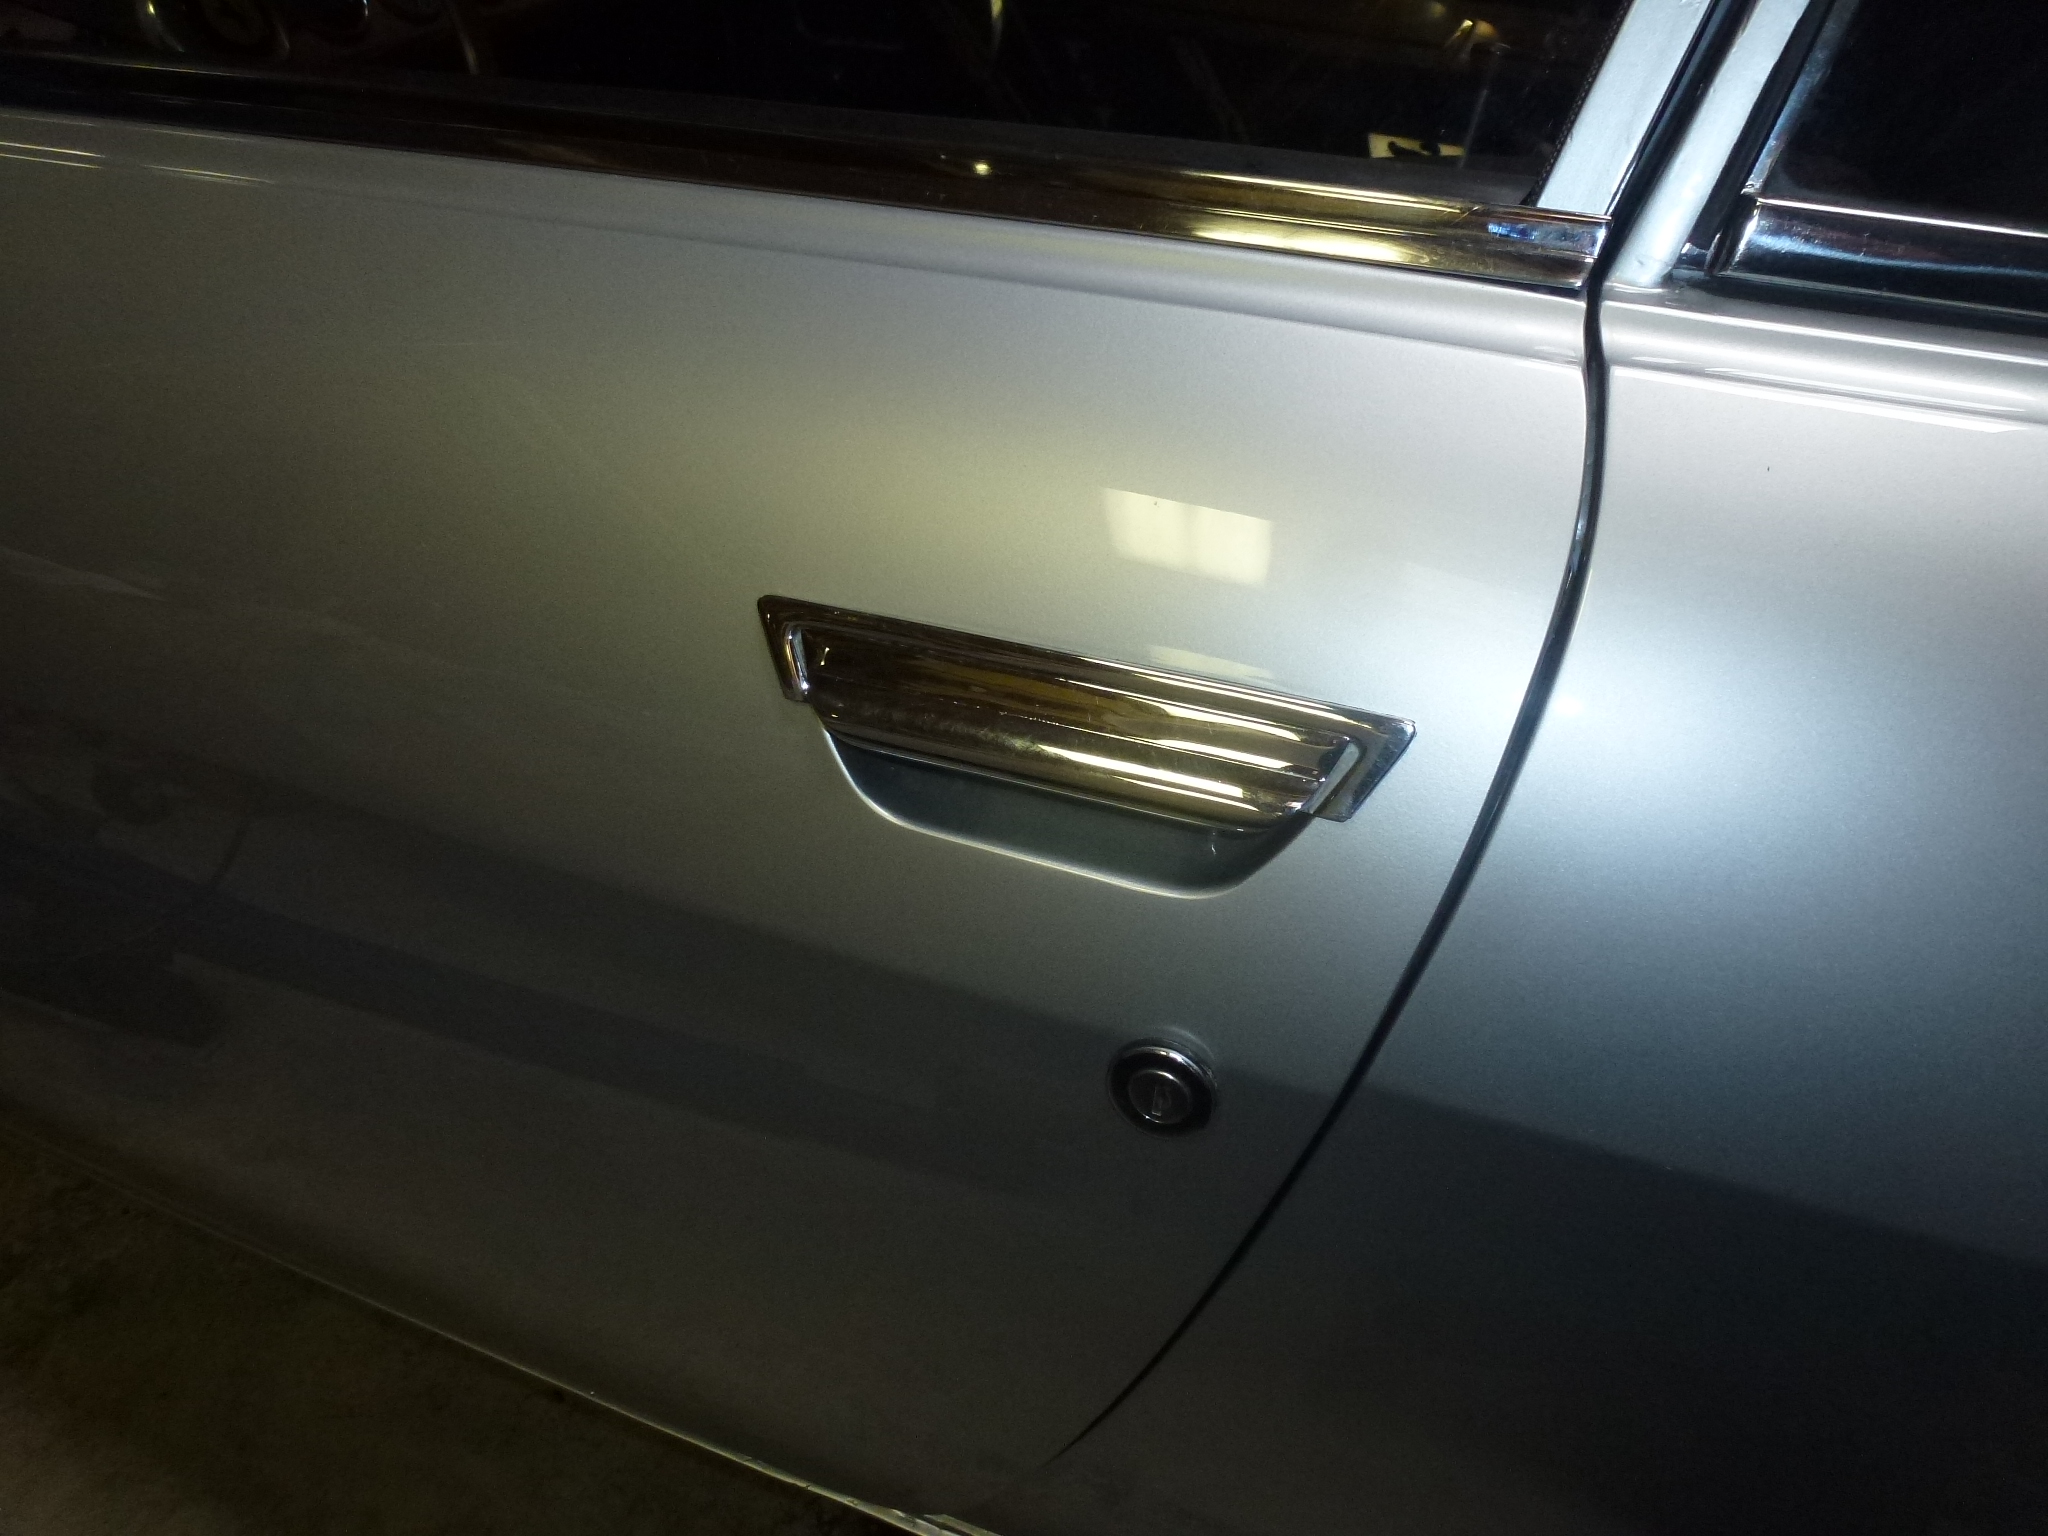
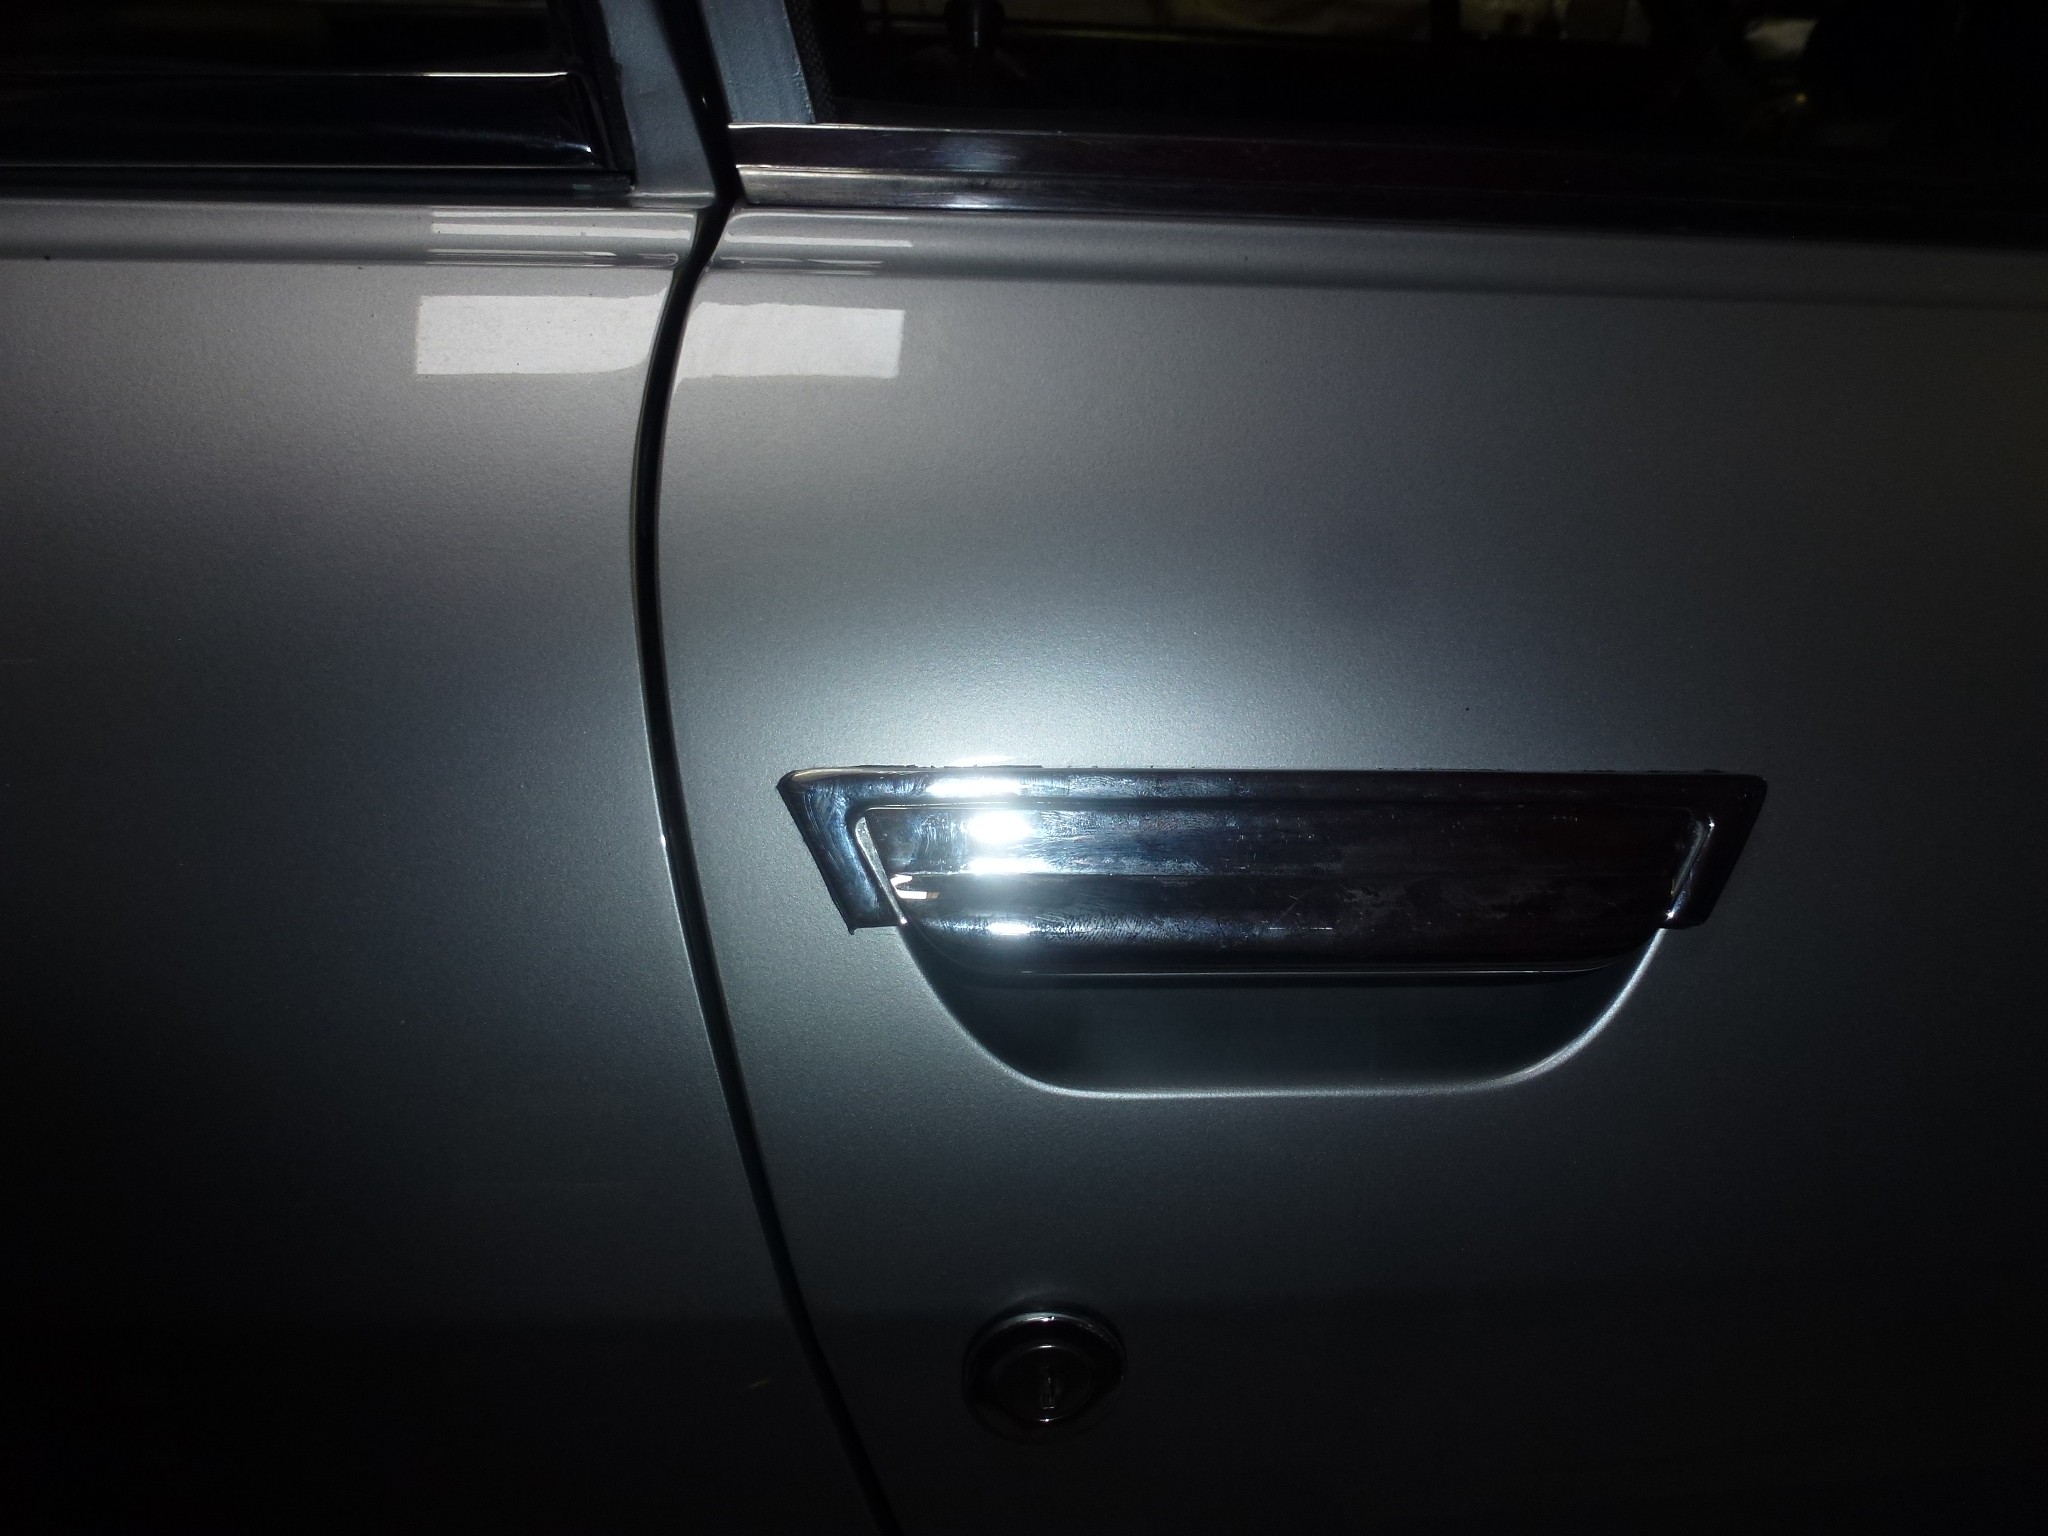
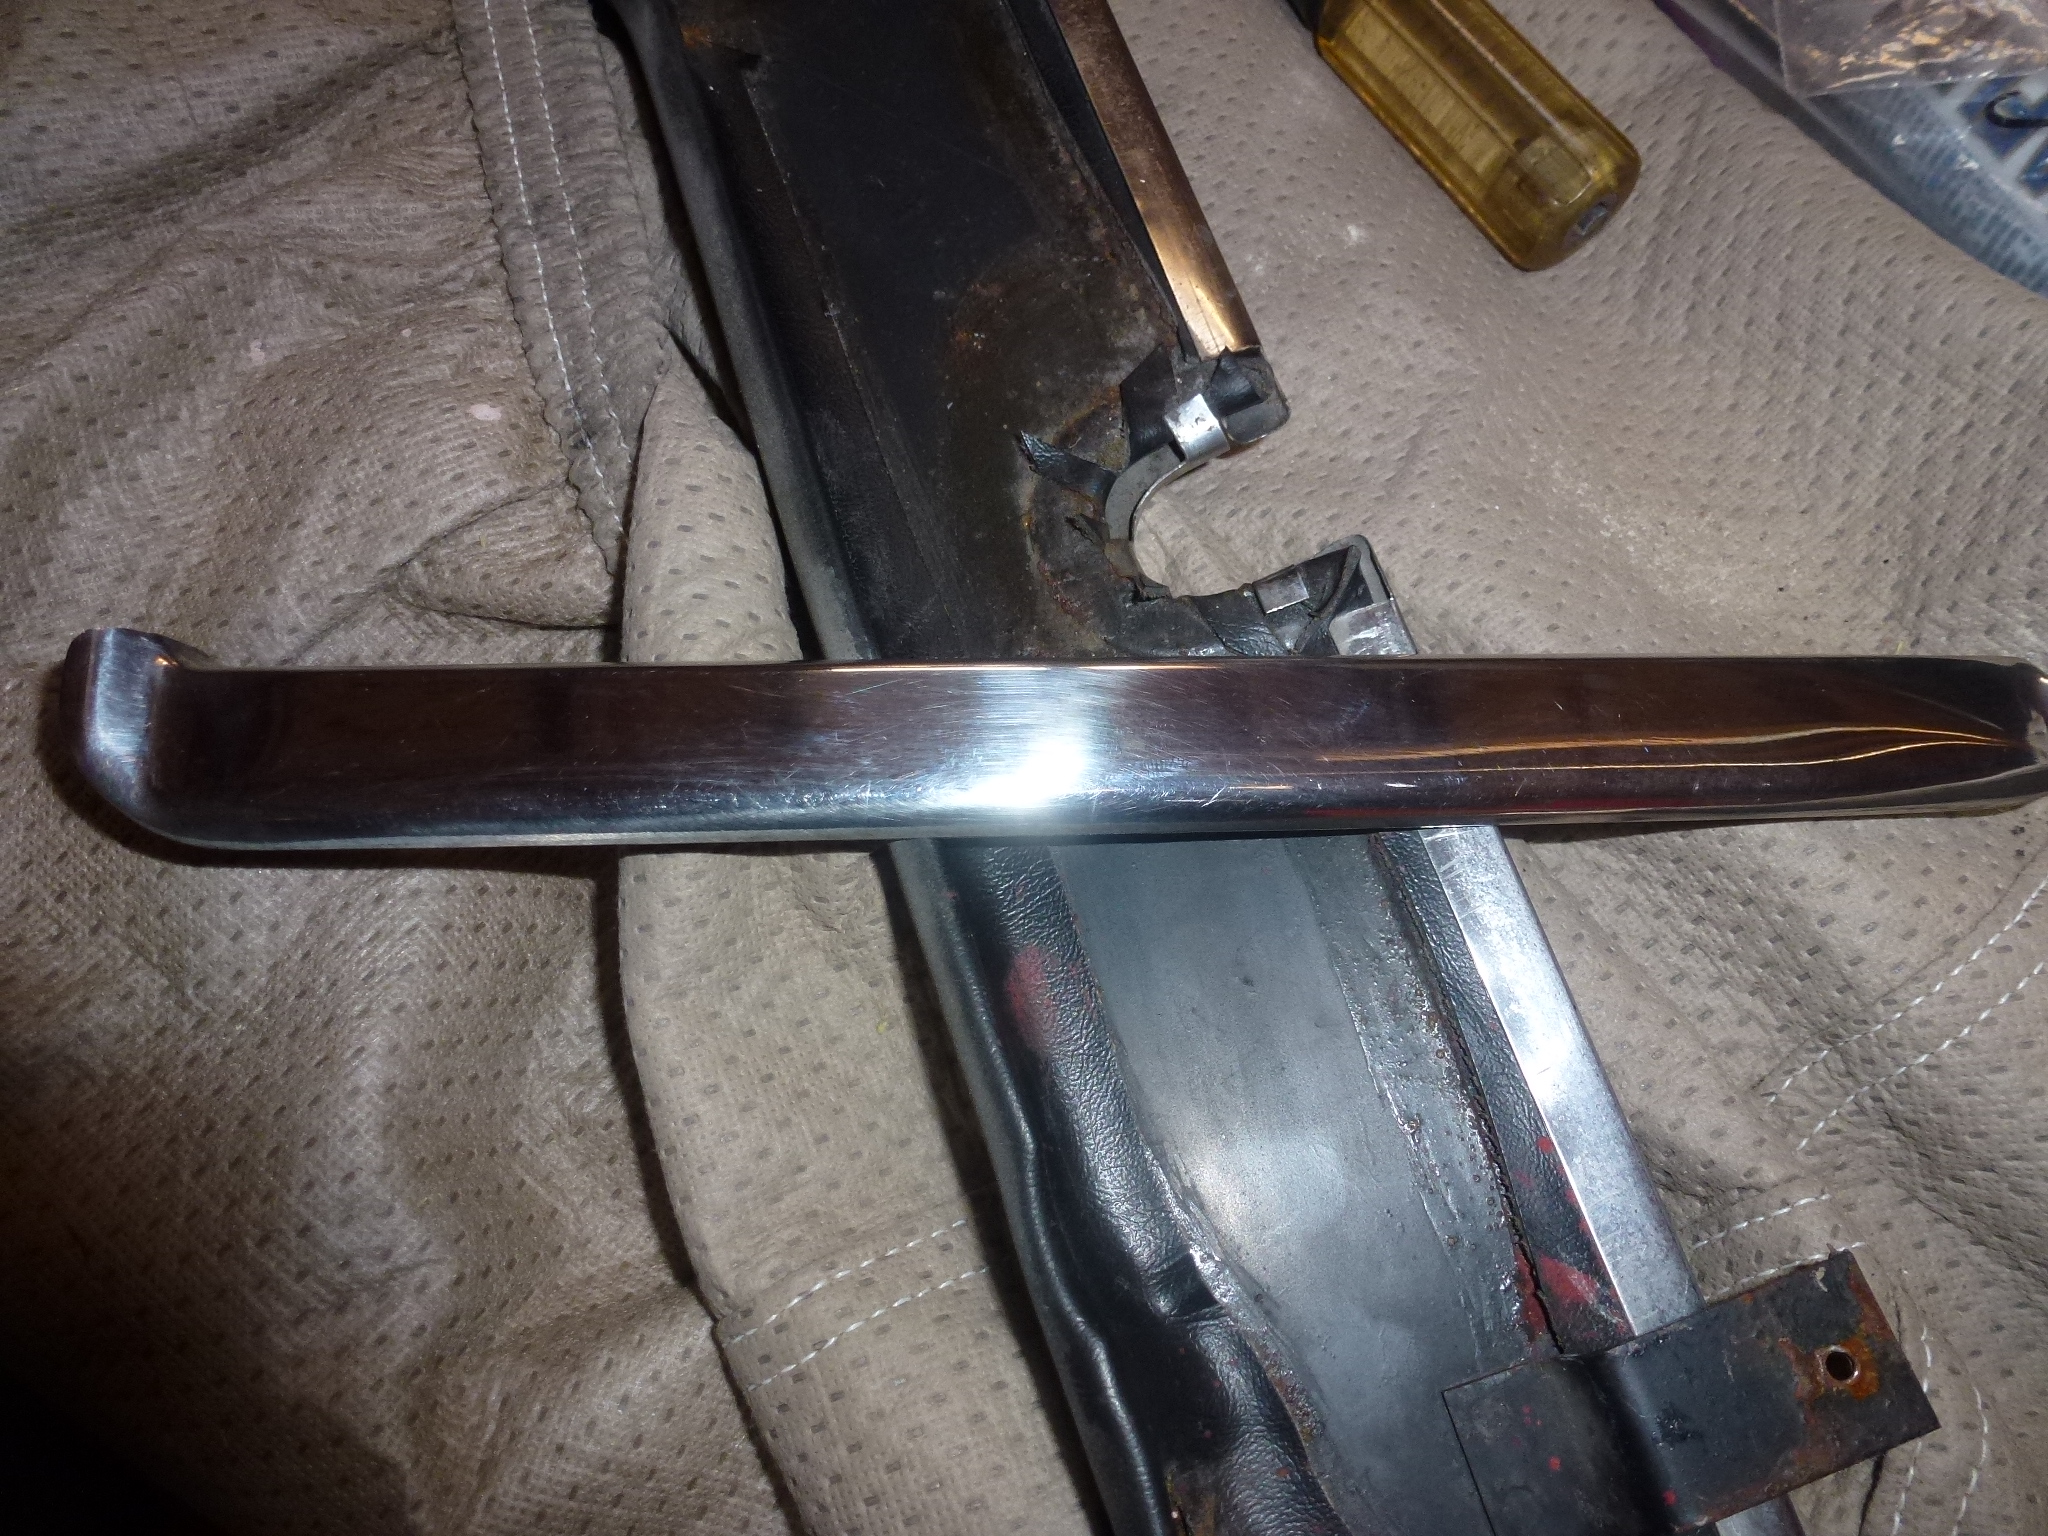
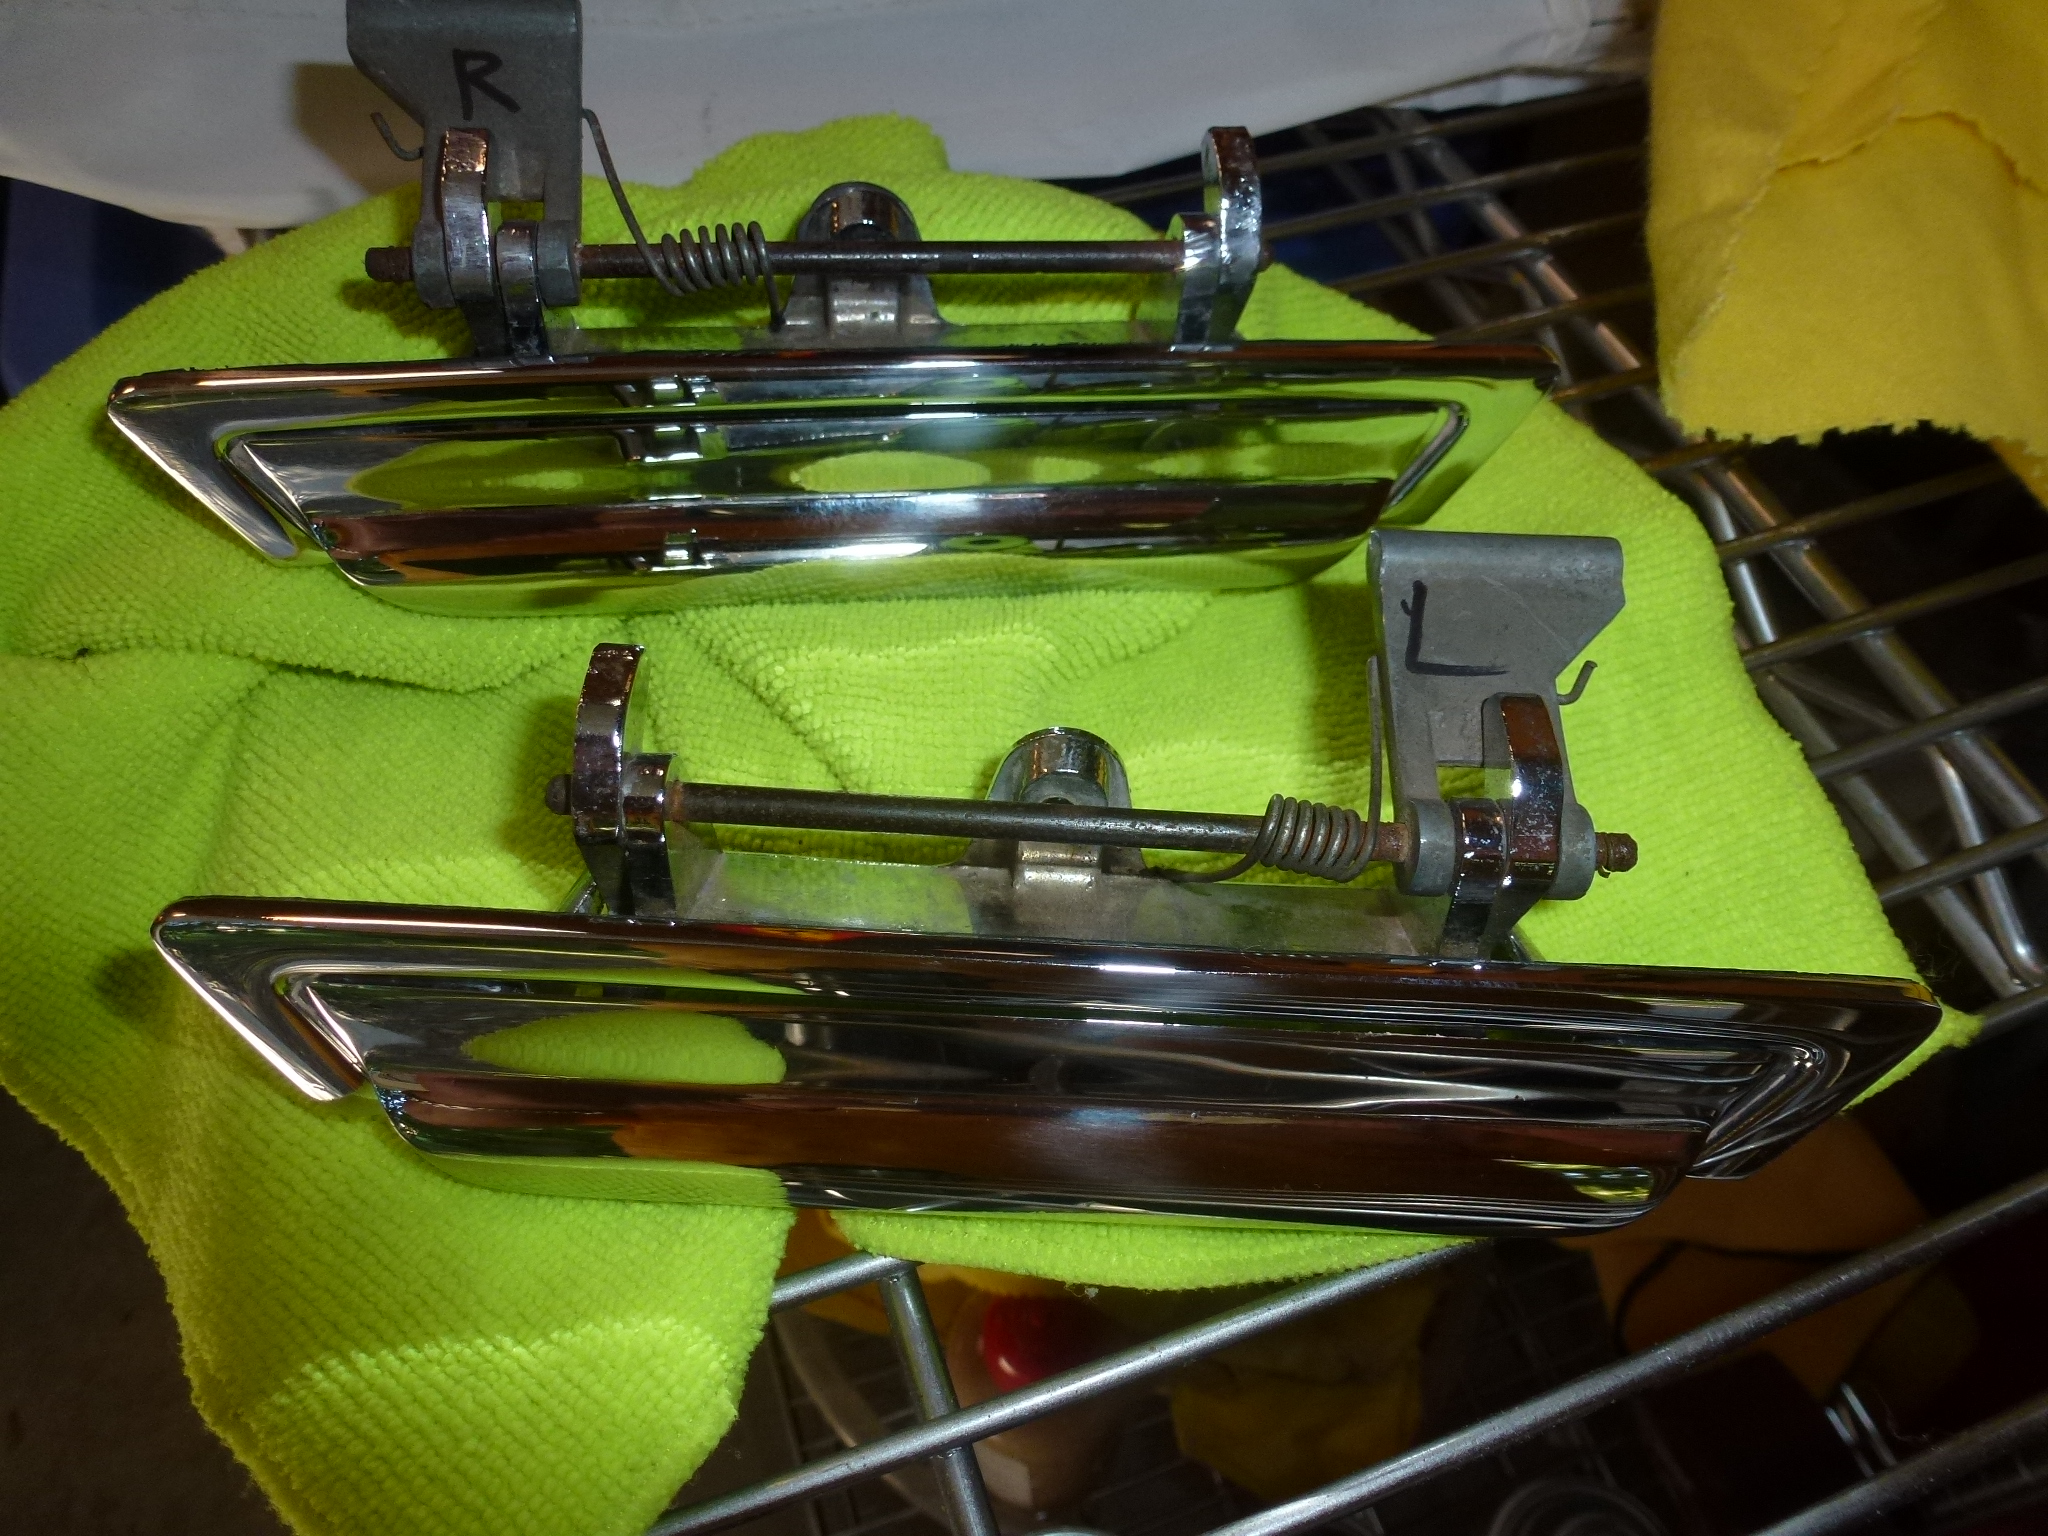
Now that the window motor is greased, I worked on the exterior door handles. One problem with the handles is that they have corners that stick out. Since they are made of soft pot metal, these corners will get bent is the handle is tightened too much. The screws are toward the center and the rubber molding compresses there. When the body gets pulled in, the corners bend out. You can see the gap in the center while the ends are touching the board.
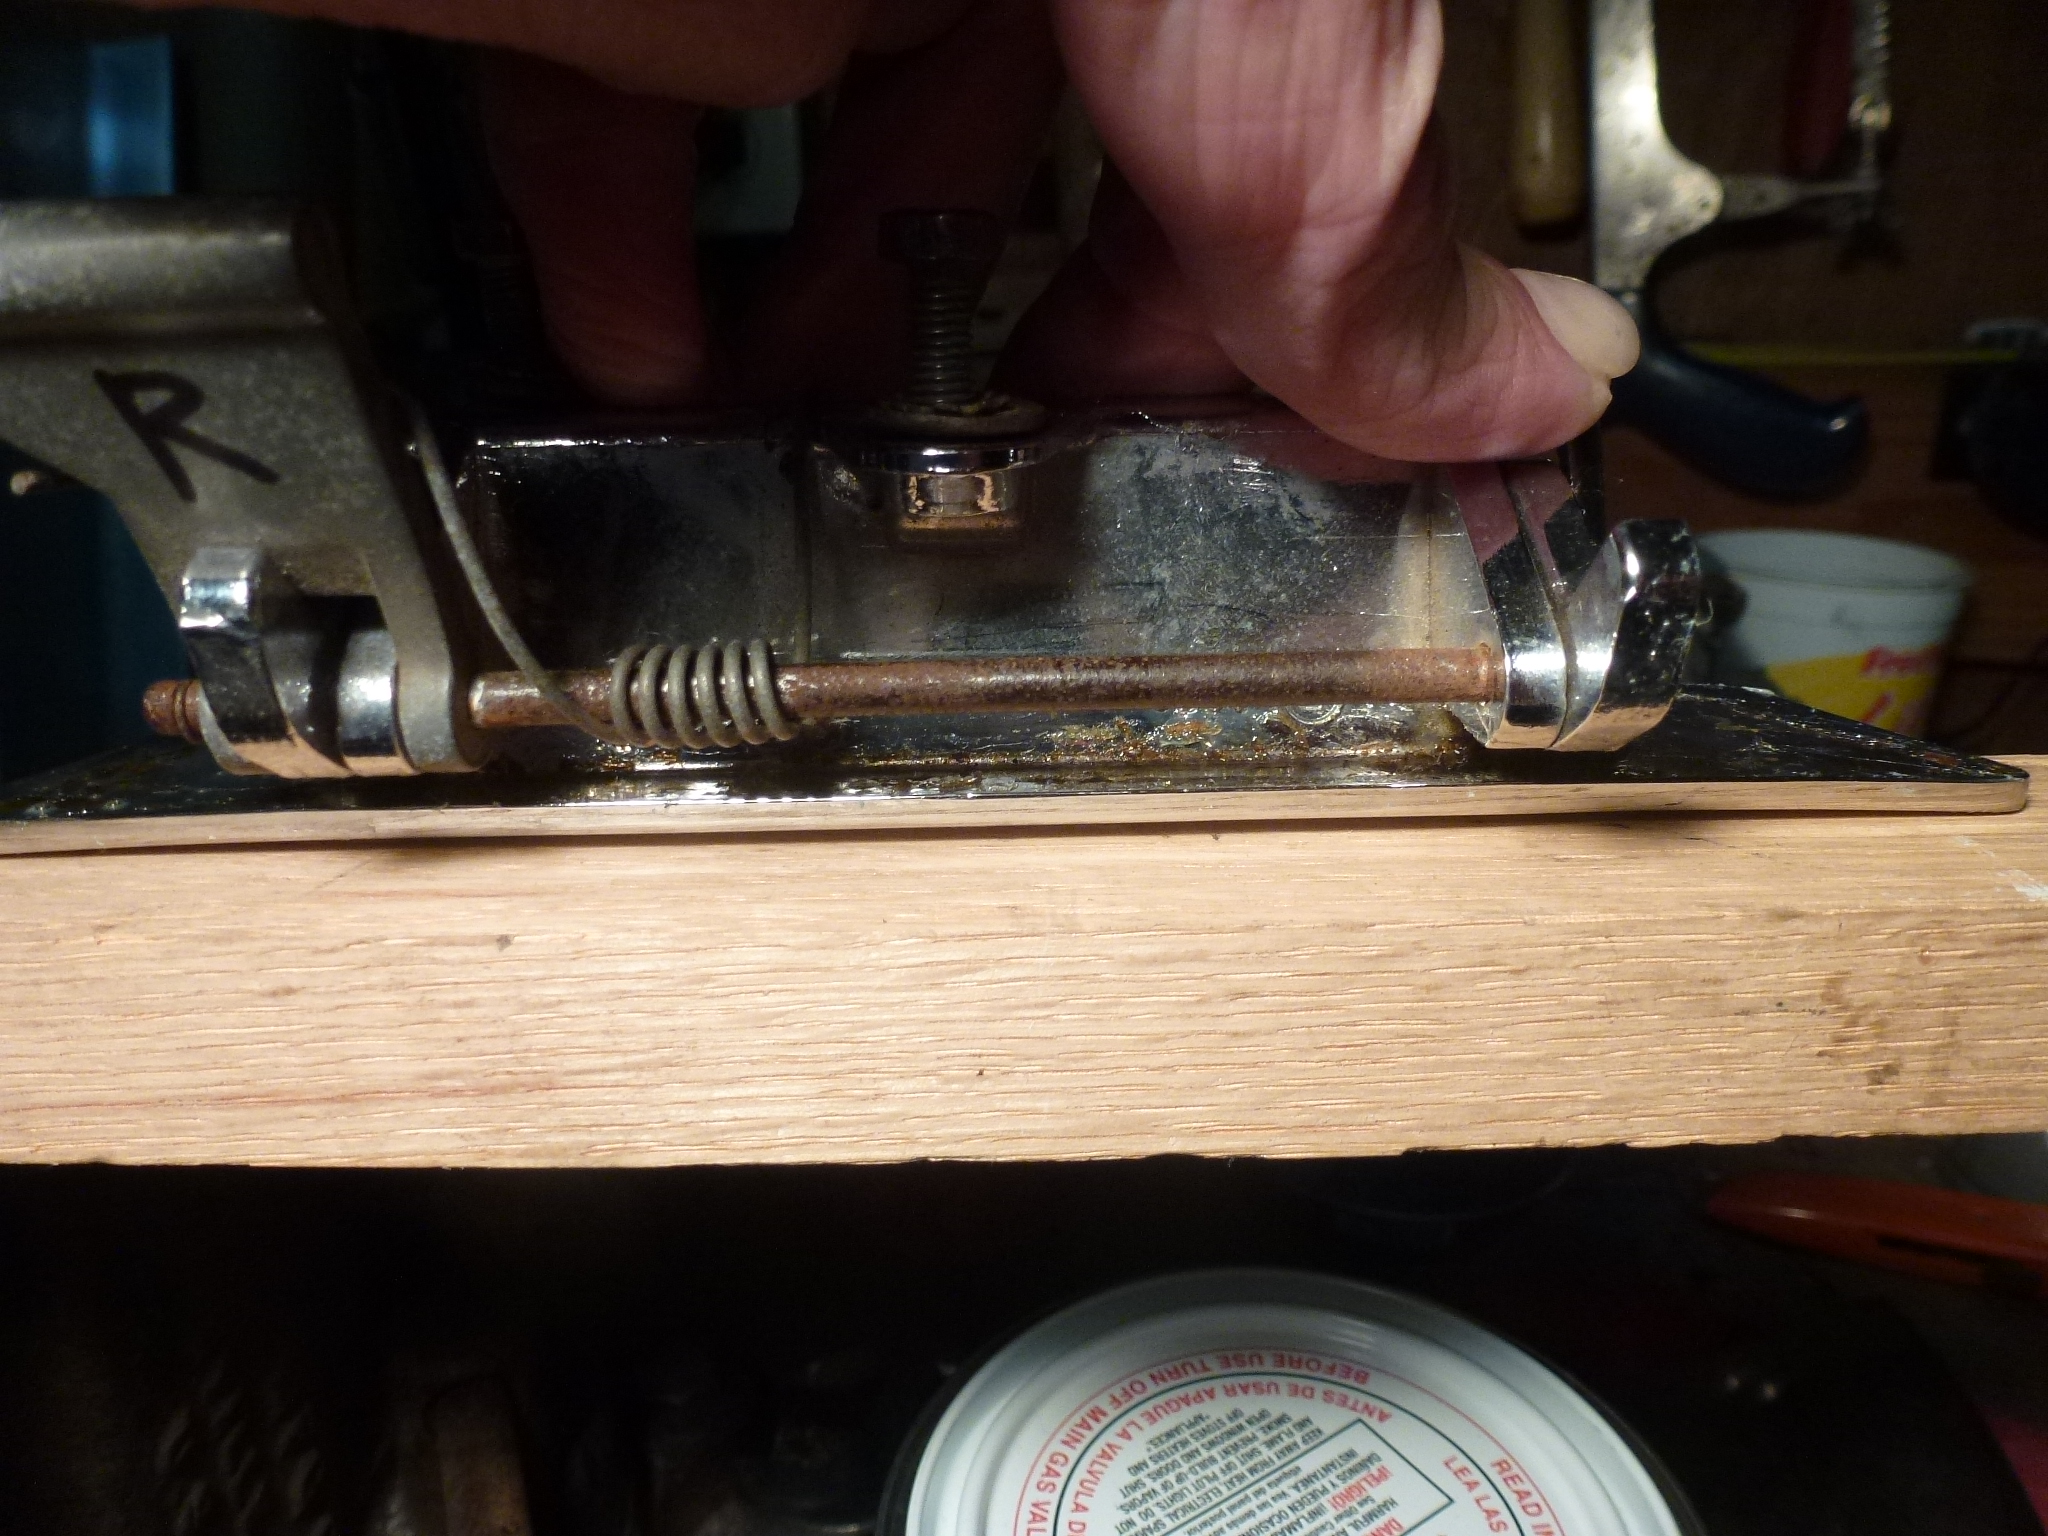
My first thought was to cut a piece of oak wood in the curve and then clamp the handle between the two pieces in a vise to safely bend the handle corners back straight. However, the design of the handle didn't allow that. In the end, I simple put the handle on the oak and softly tapped the end of each corner with a rubber mallet to flatten it. It doesn't take much, but will look a lot better on the car.
Once the rubber molding was glued on the handles, I put them back on the car.
Now I could install the inner door panel, inner handle escutcheon and arm rest. The driver's door is done!
When I picked up the car at the paint shop, we had to install the latches in order to drive the car home. The driver's side went on fine, but I couldn't get the passenger's side to latch well. It ended up about 1/8" high at the rear, so matter how I adjusted the latch. I had fiddled with this again after I got the car home to no avail. When I put the door handle on, I decided to start from scratch so I removed the latch portion on the jamb. Then, the door would close and be in the correct alignment. In looking at the captured nuts that are movable for the adjustment, I noticed that one on them was jammed and not moving around properly. Once I got that freed up, I was able to re-install the latch and adjust the door properly. Now the body lines are even.
There is a run on the inside of the passenger's door, so I can't install the door panel until that is fixed.
Now that the paint run on the right door got fixed, I installed that door panel, trim and arm rest.

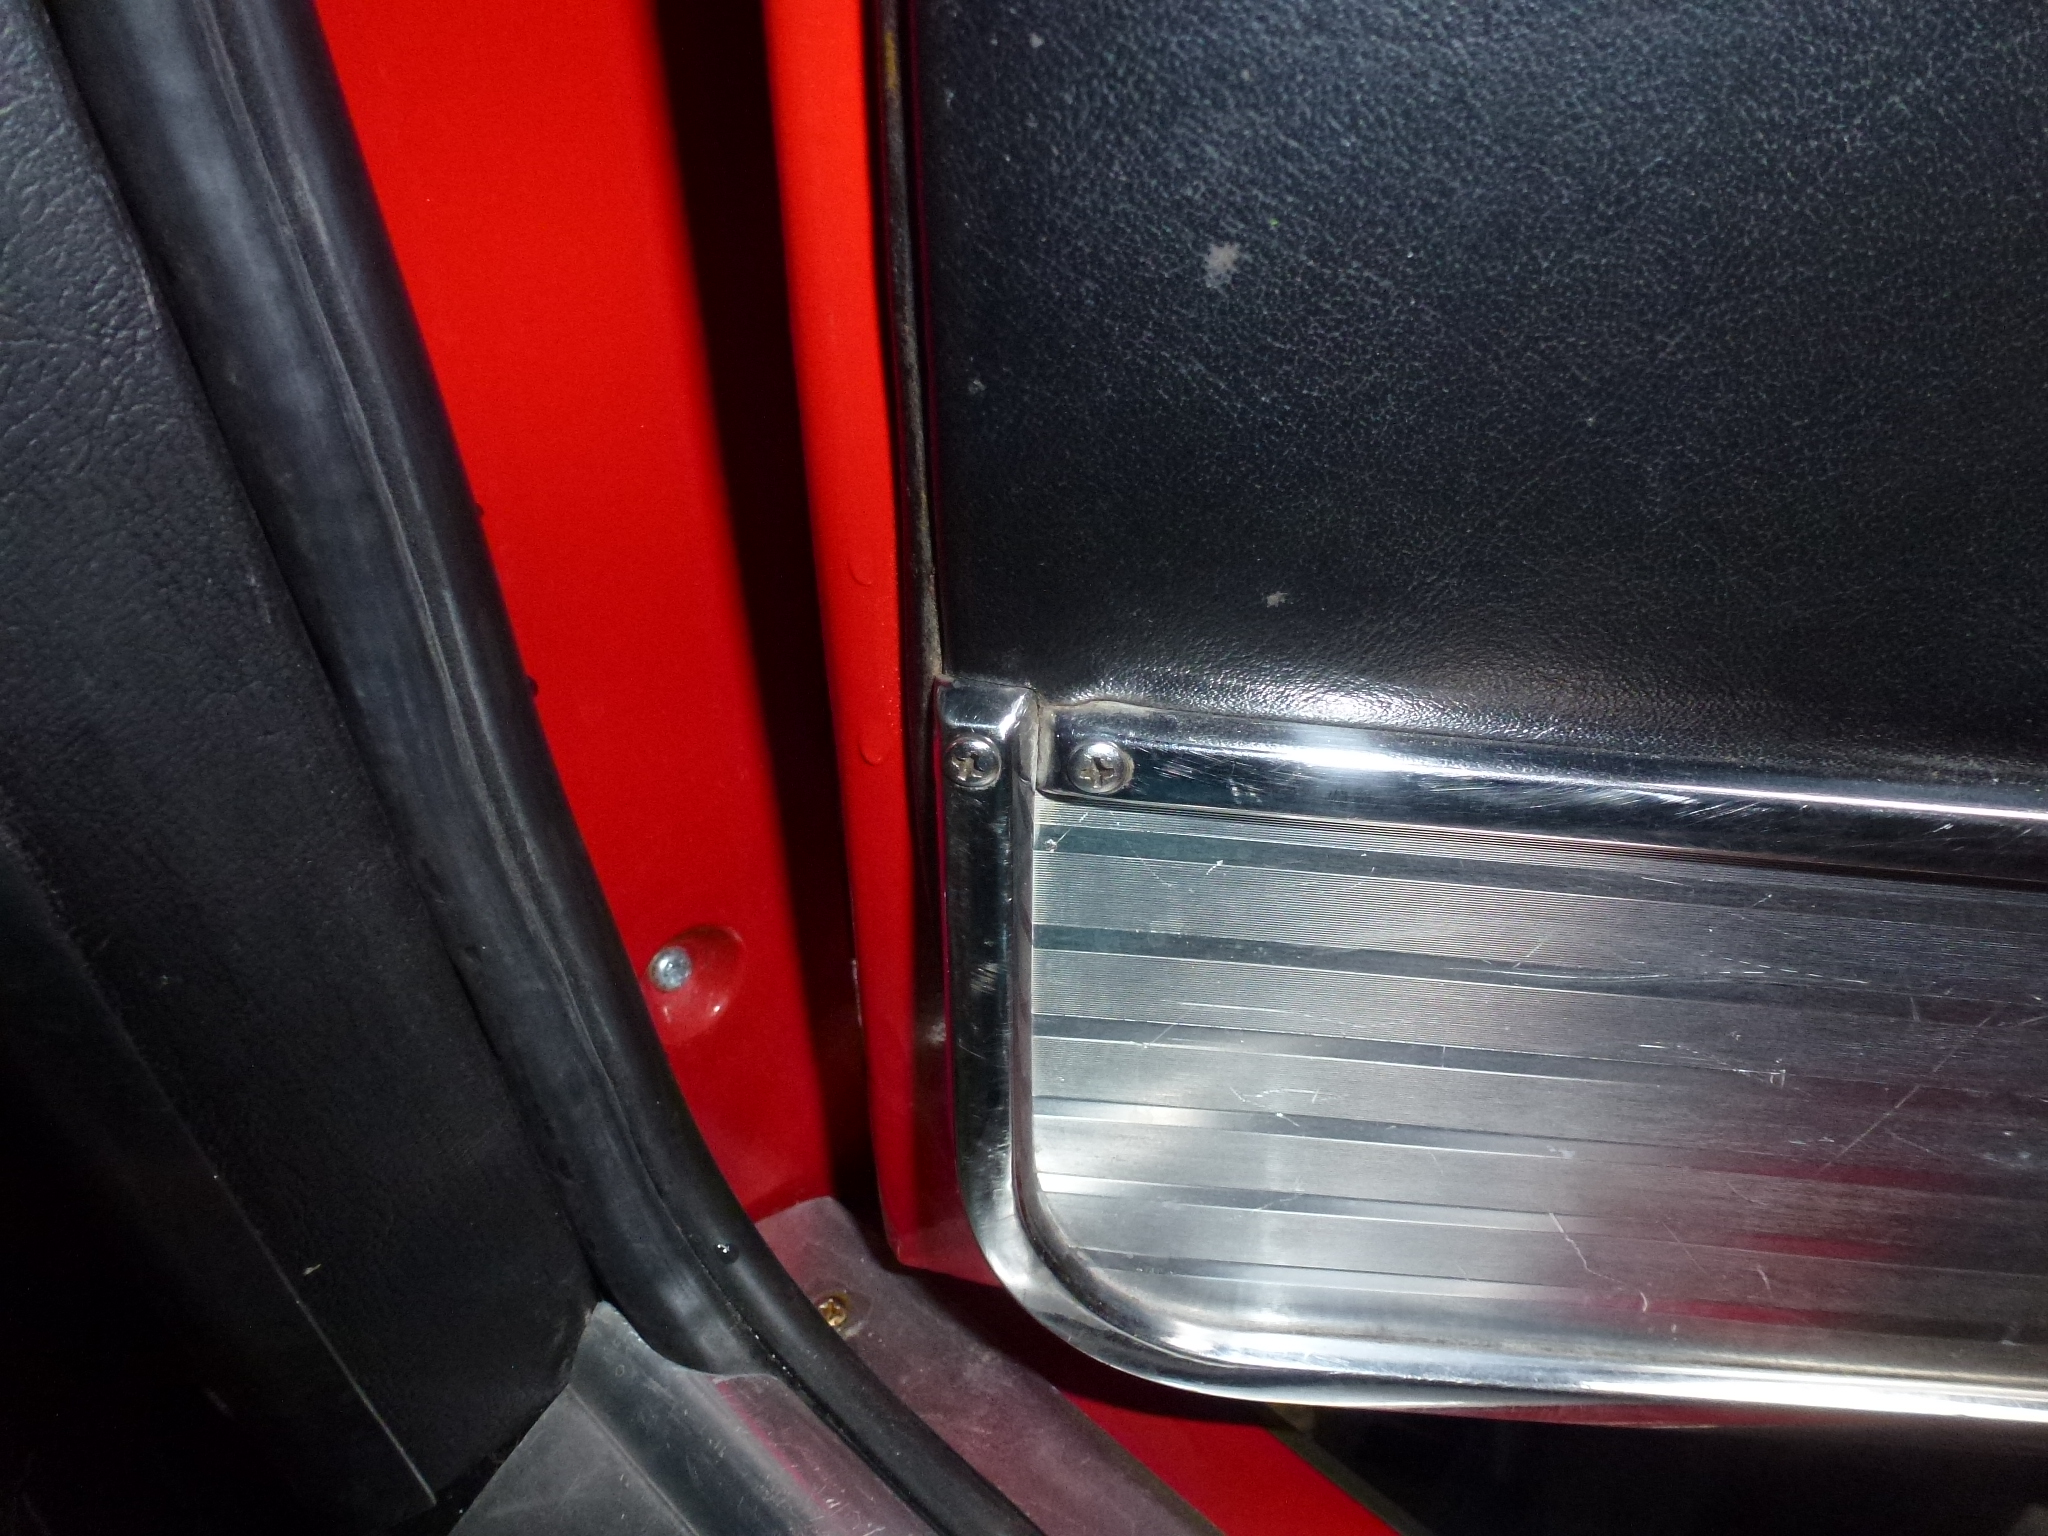
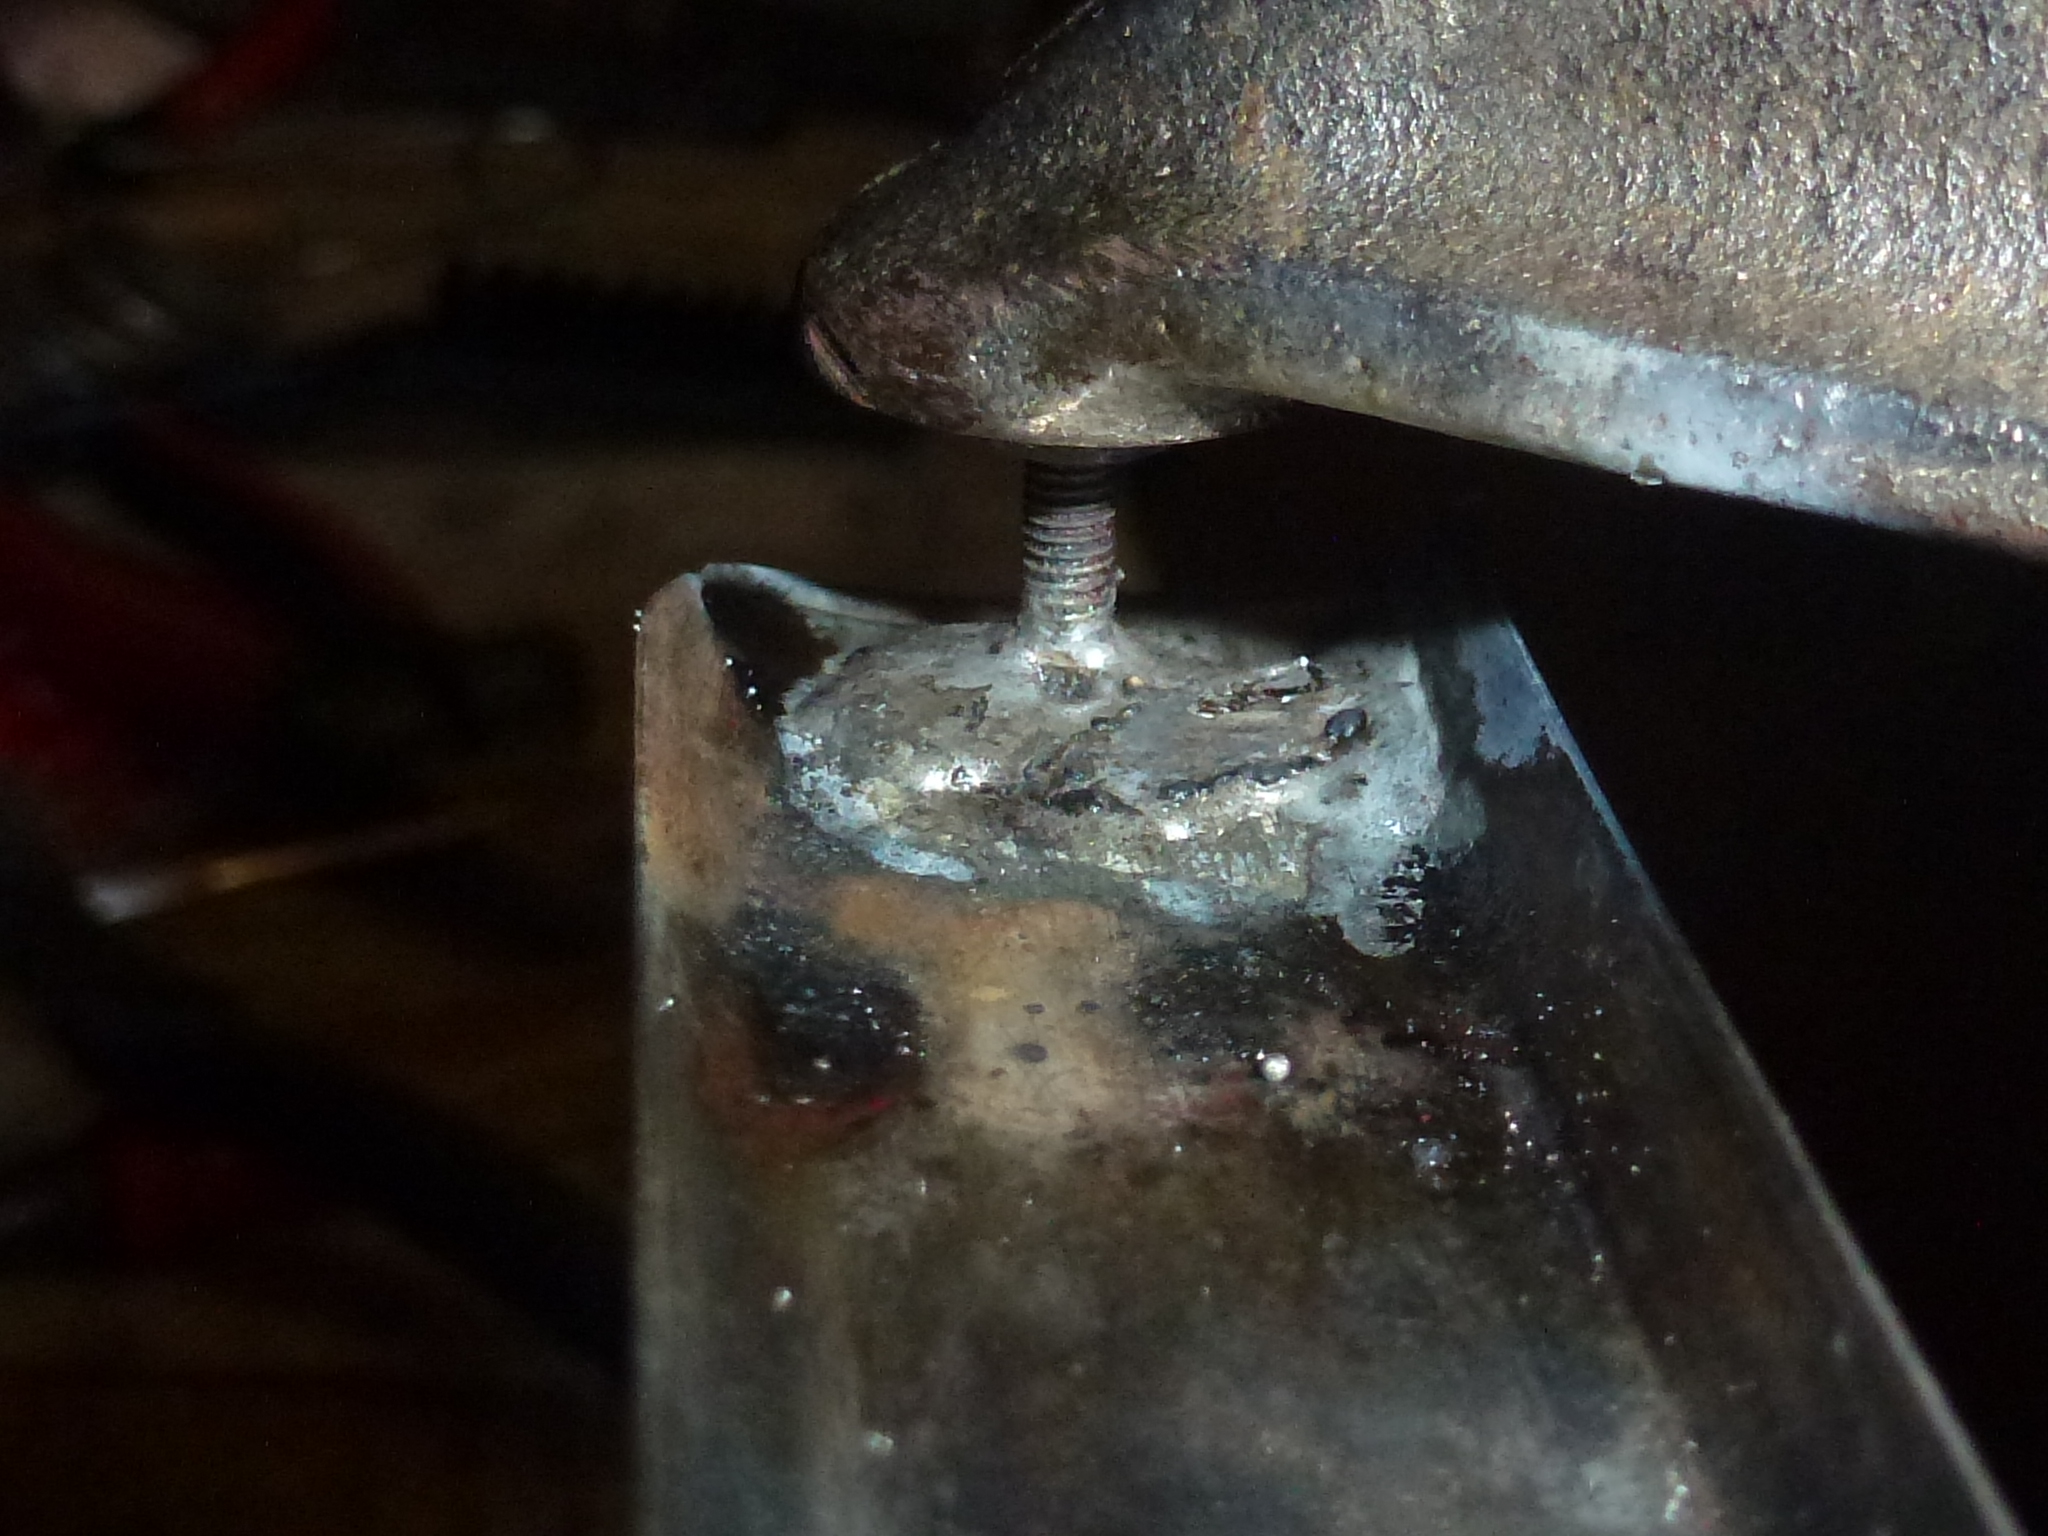
When I put the door back together, I noticed a problem from years ago that I never addressed. Back then, a stud came loose from the stainless steel trim on the door bolster. I was able to solder the stud back on, but that marred the polished surface. As I had a firm date for a show, I didn't have time to address this issue then.
Now that the show is over, I took the door panel and bolster back off to be able to sand and polish the glitch. As I was sanding the area, the old solder joint broke free, so I had to re-solder the stud back on. Here you can see the clamp holding the stud in place while the solder cools. The material is stainless steel, but I'm not quite sure what grade as it is magnetic and solders well with a liquid flux. It sands and polishes like stainless; if it was chromed, I would have sanded through the chrome layer. You can see the final result in the right picture.
Now that the one trim piece looks so good, I decided to polish the other ones on the door bolsters. This required taking off the driver's door panel too.
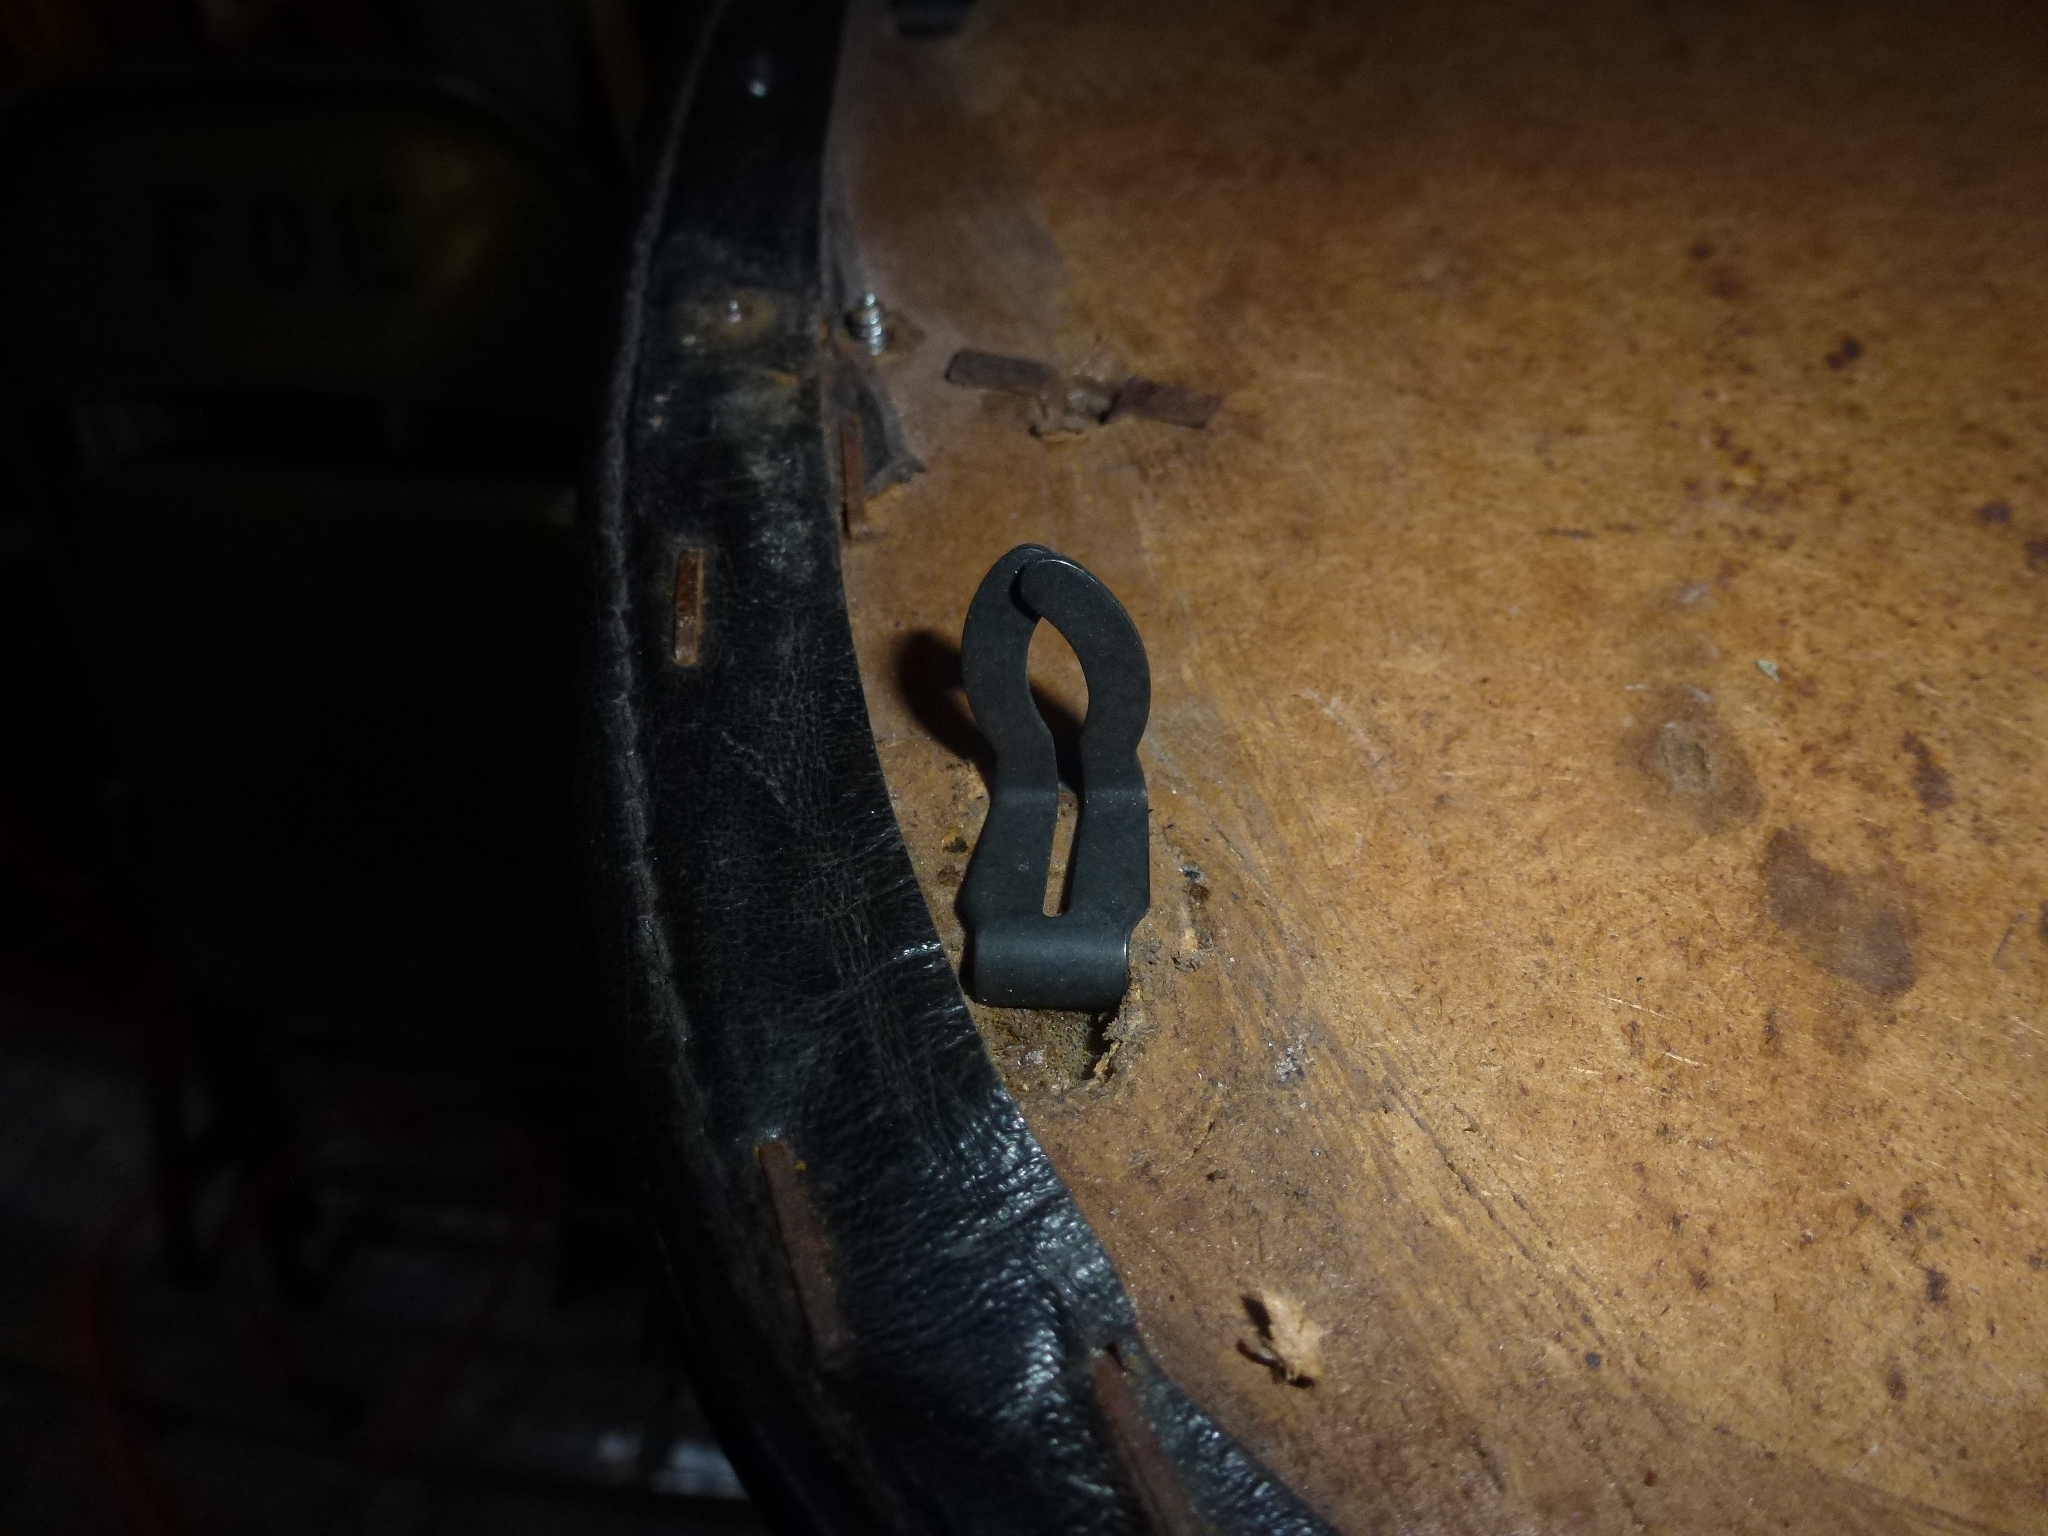
The strips at the bottom of the bolster are held on by little clips. Usually you can pry the strip off the clip but sometimes, the clip comes off the bolster.
In addition to polishing the trim, I took the opportunity to fix the exterior latches better. As mentioned above, the ends of the handles want to bend if the handle is tightened against the rubber gasket too hard. Well, I left the bolts pretty loose; loose enough that the handle would actually move a little bit when pulled and the ends were still bending a little. There was a recent discussion on Tom Yang's message board where it was suggested that using washers as spacers would prevent the bolts from compressing the gasket in the center. I measured the gasket and it is about .060" thick. A regular washer was .040, but a 5mm fender washer was .055", just about right. Instead of trying to fit the three fender washers between the handle and recess in the body, I used some J-B Weld to bond the washers onto the door handles. That way, I just put the handles on as normal and the washers are already in place. One thing that the washers will do is make space for the end of the spring. You can see that it ends up between the handle and the body.
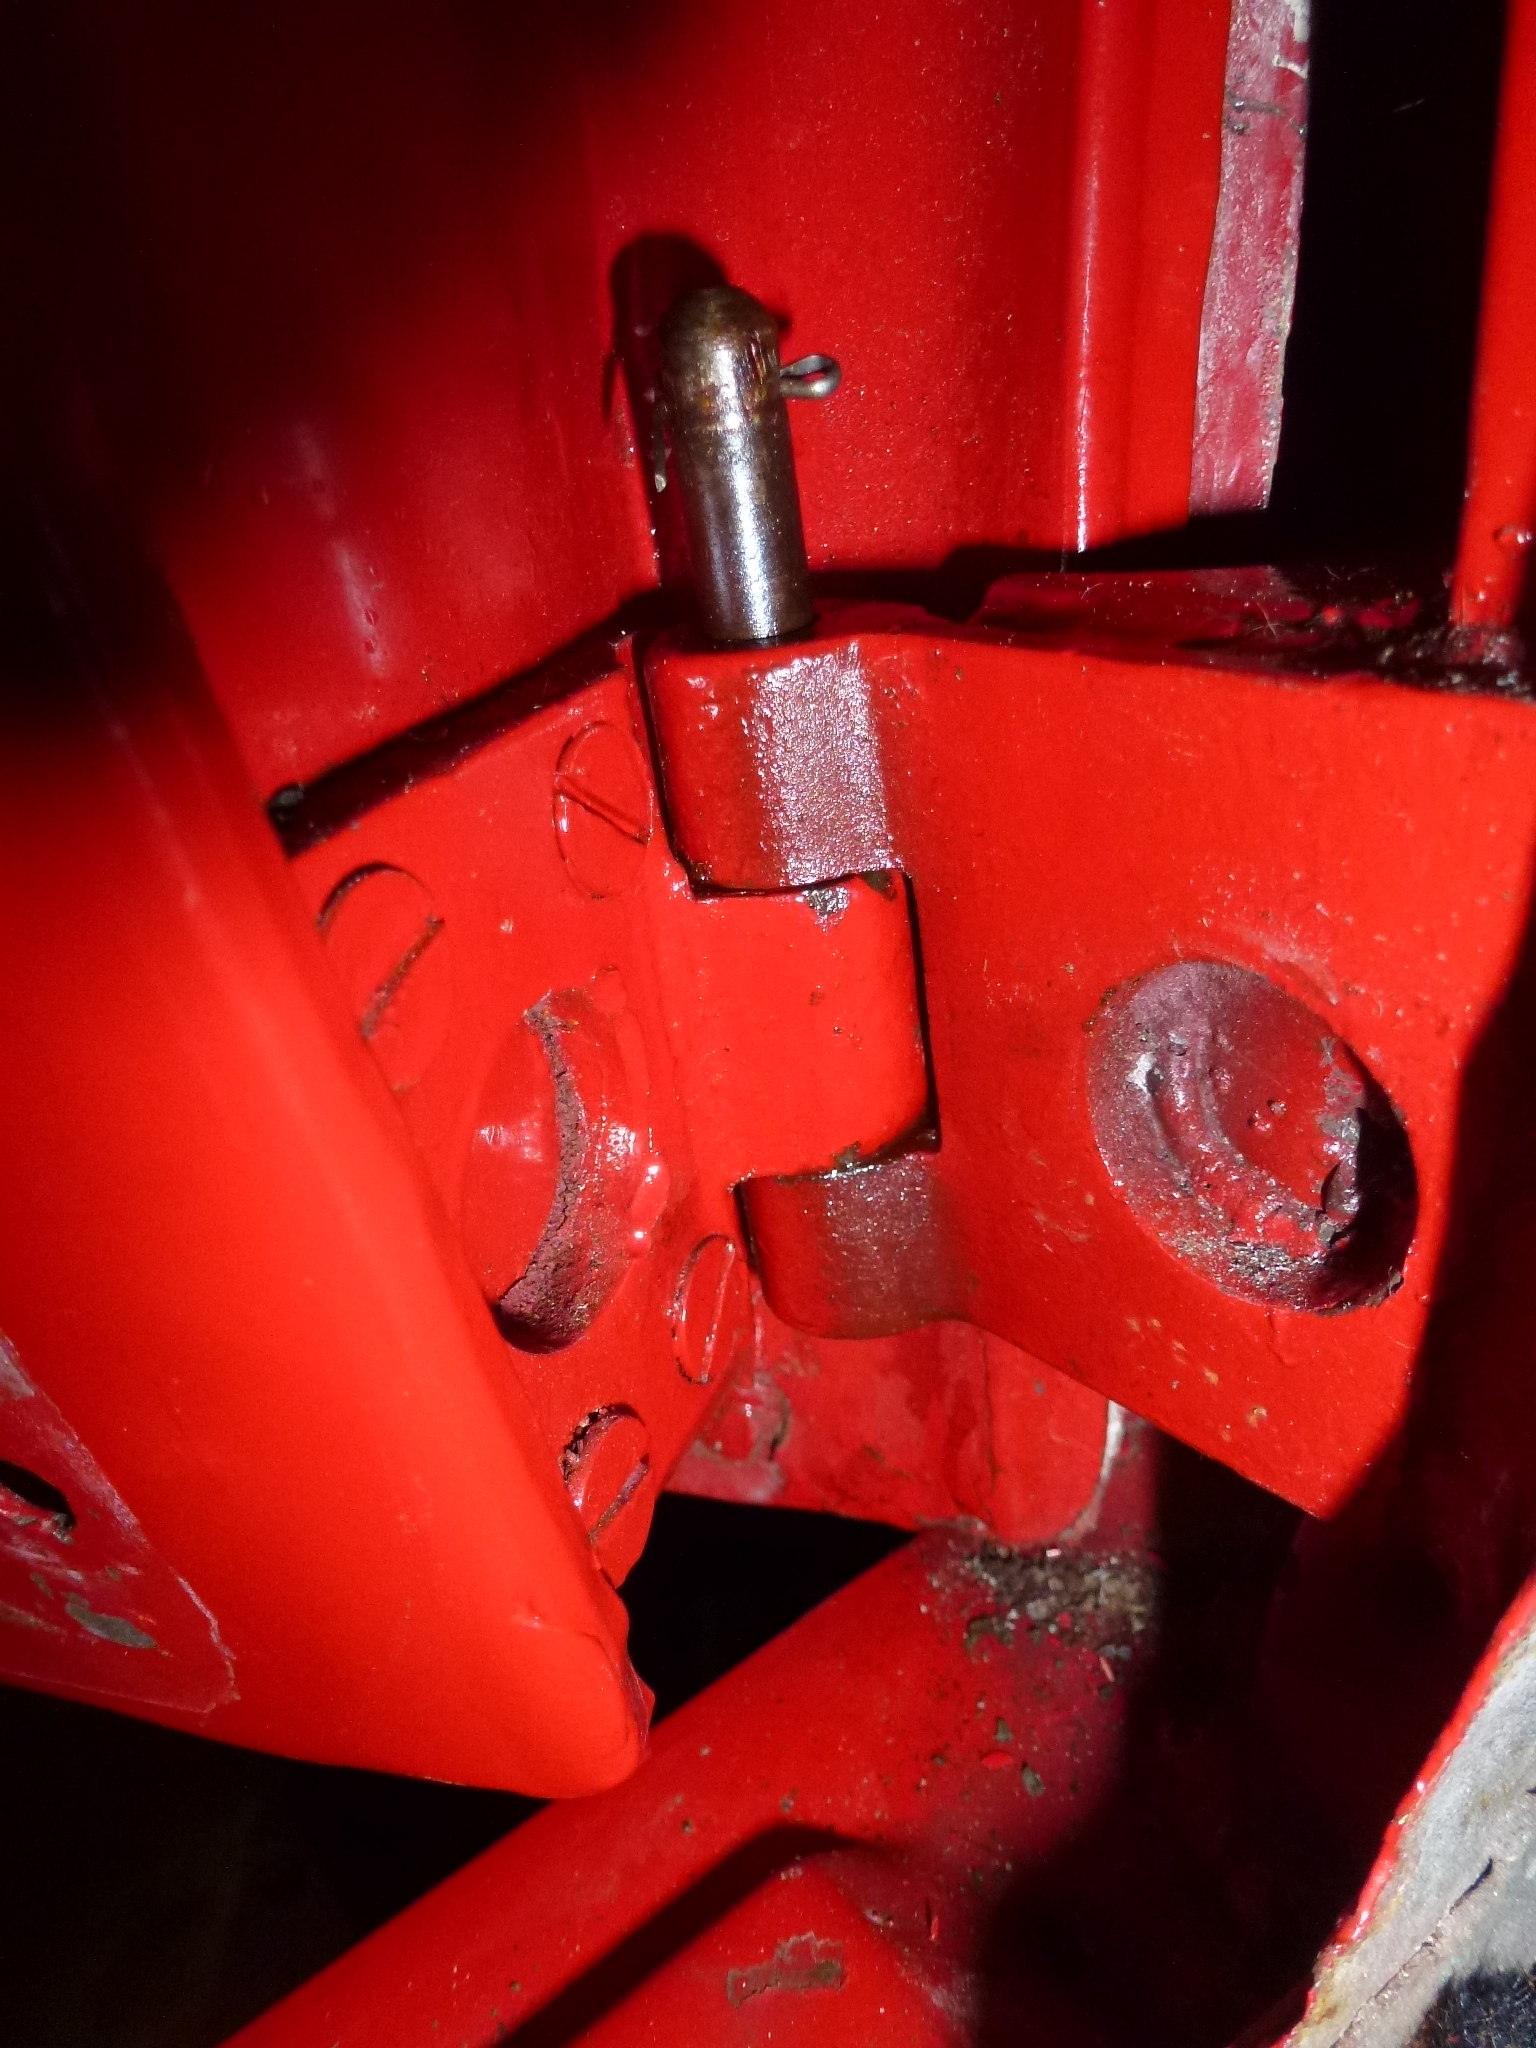
Speaking of putting on (or taking off) the handles as normal, I've always futzed around trying to keep the lever the handle actuates down while fitting in the handle. This time, I simply unscrewed the latch on the edge of the door. This lets the interior part of the latch drop down, out of the way of removing or installing the handle. The handle just slides in or out easily then. Since that latch has locating pins, one can put it back together without having to do any alignment of the doors. The only caveat is to not try and close the door when the latch is apart unless it is completely removed from the door edge.
I also took some time and polished up the chrome on the door handles. These were chromed 30 years ago and had minor scratches that mostly buffed out.
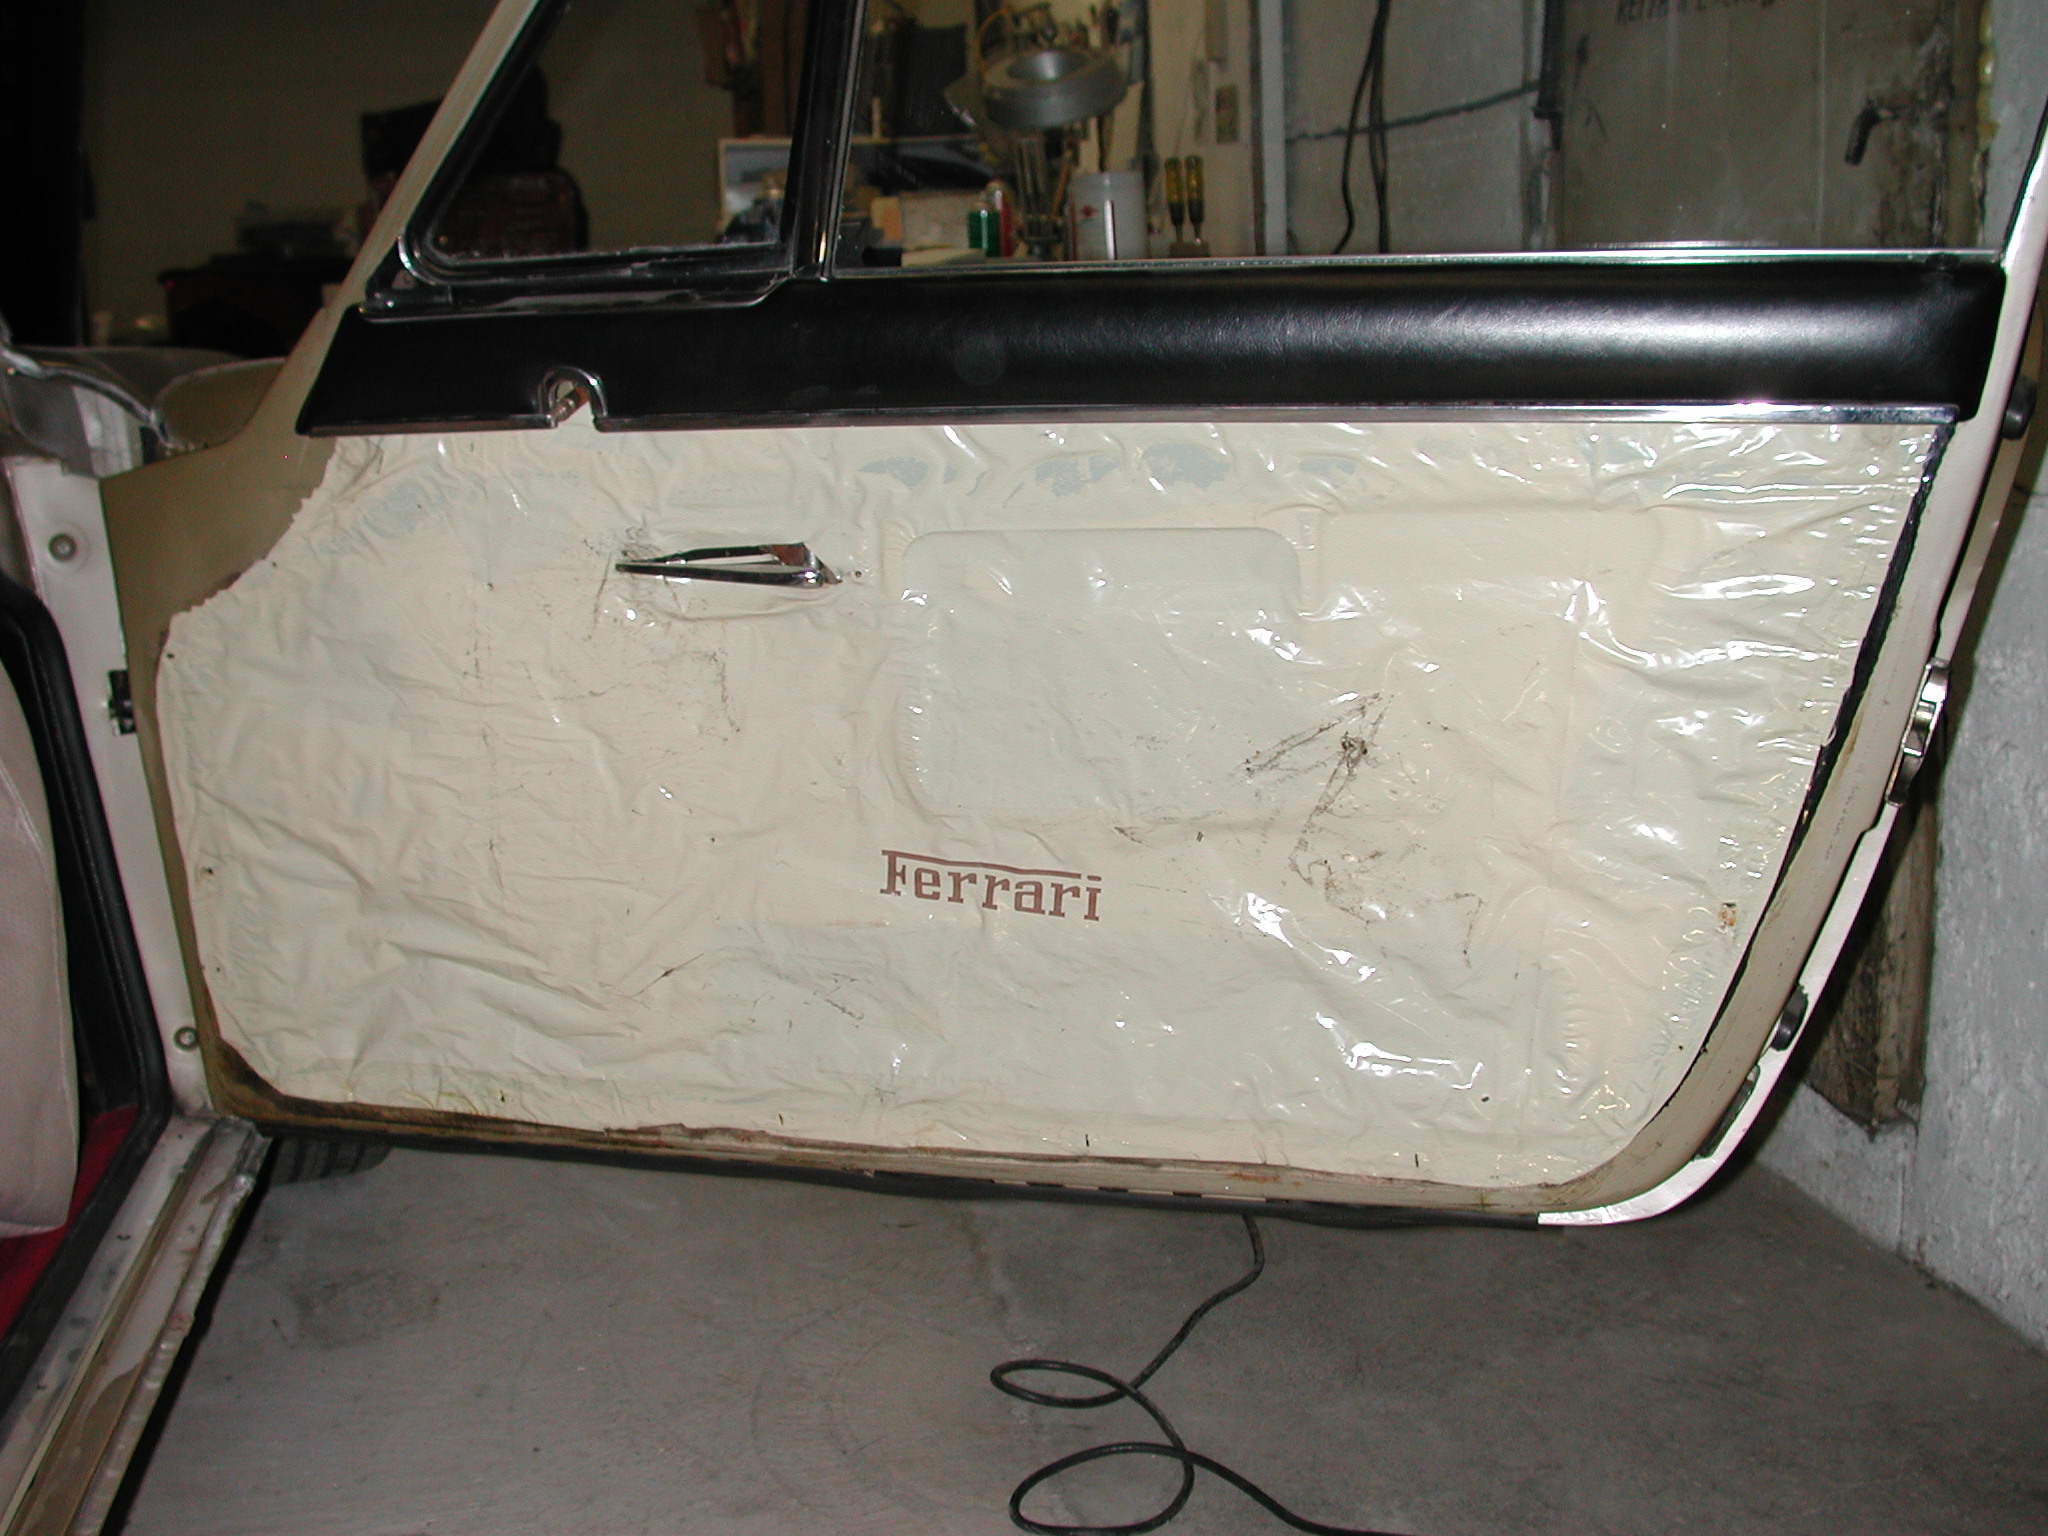
Another thing that didn't get done in the haste to get the car together for the show was to replace the plastic sheeting that is installed behind the door panels. If this is left off, the door panel hardboard can absorb a lot of moisture that leaks into the door at the bottom of the window. Eventually, this will warp or destroy the door panel. Now, it would be nice to have original sheeting with the Ferrari logo like on Lowell Brown's 330 GT, but I had to make do with what Home Depot had to offer.
I also replaced some of the clips that hold the door panel to the inner panel on the door. I had broken a few over the years and used a substitute, but was able to find originals a couple of years ago.
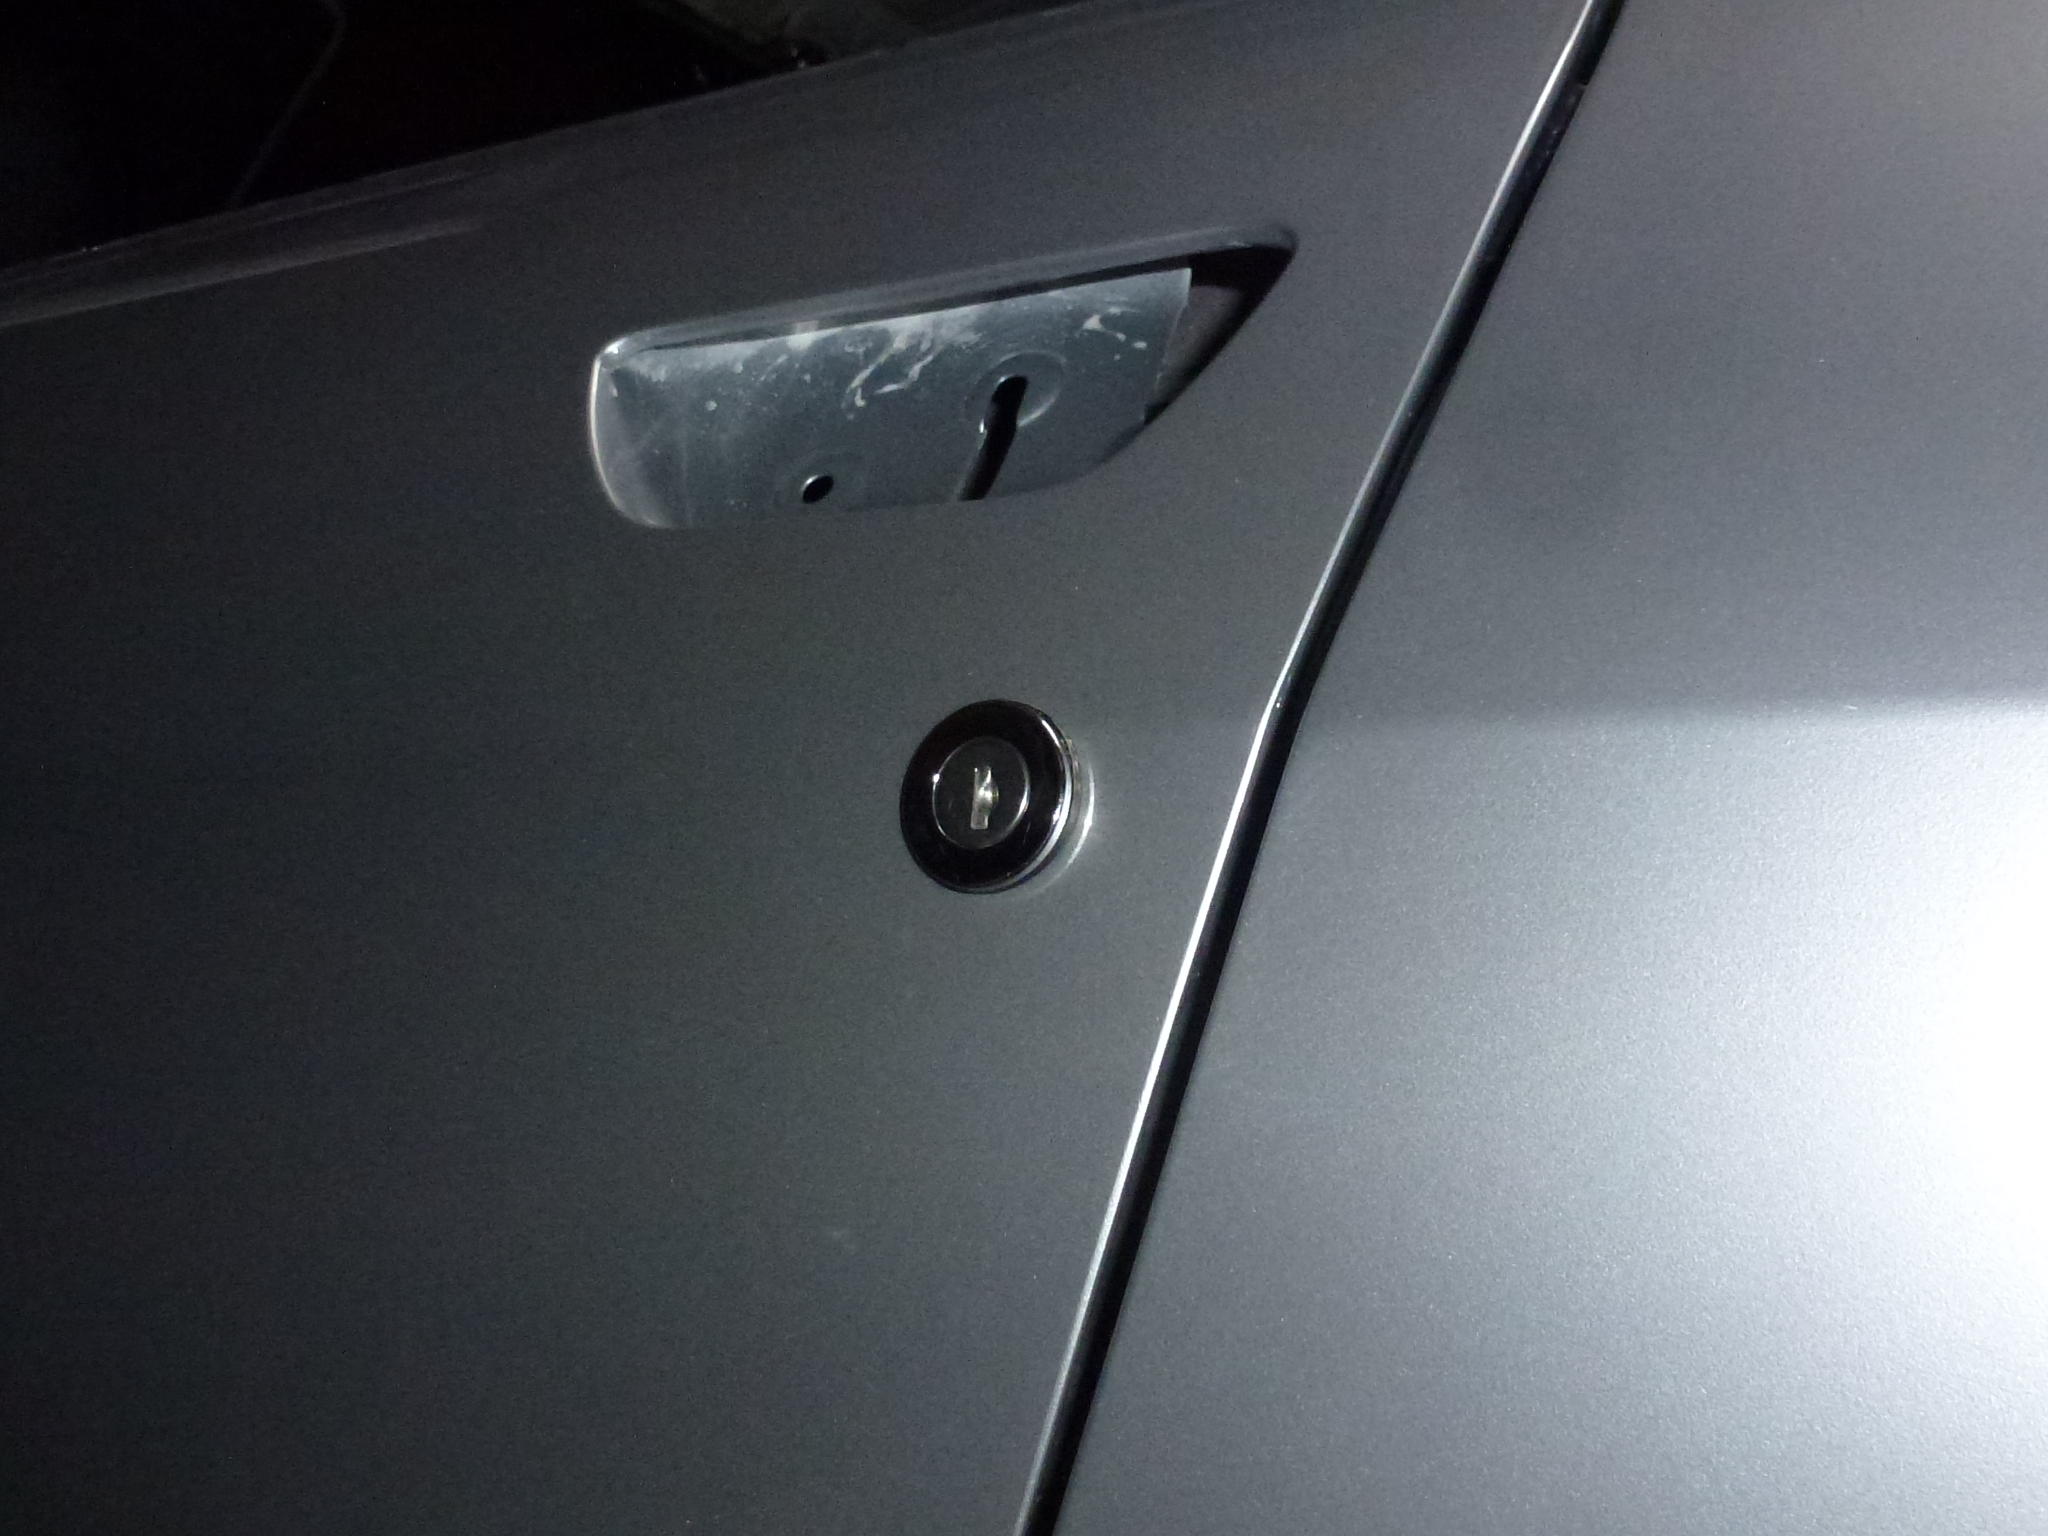
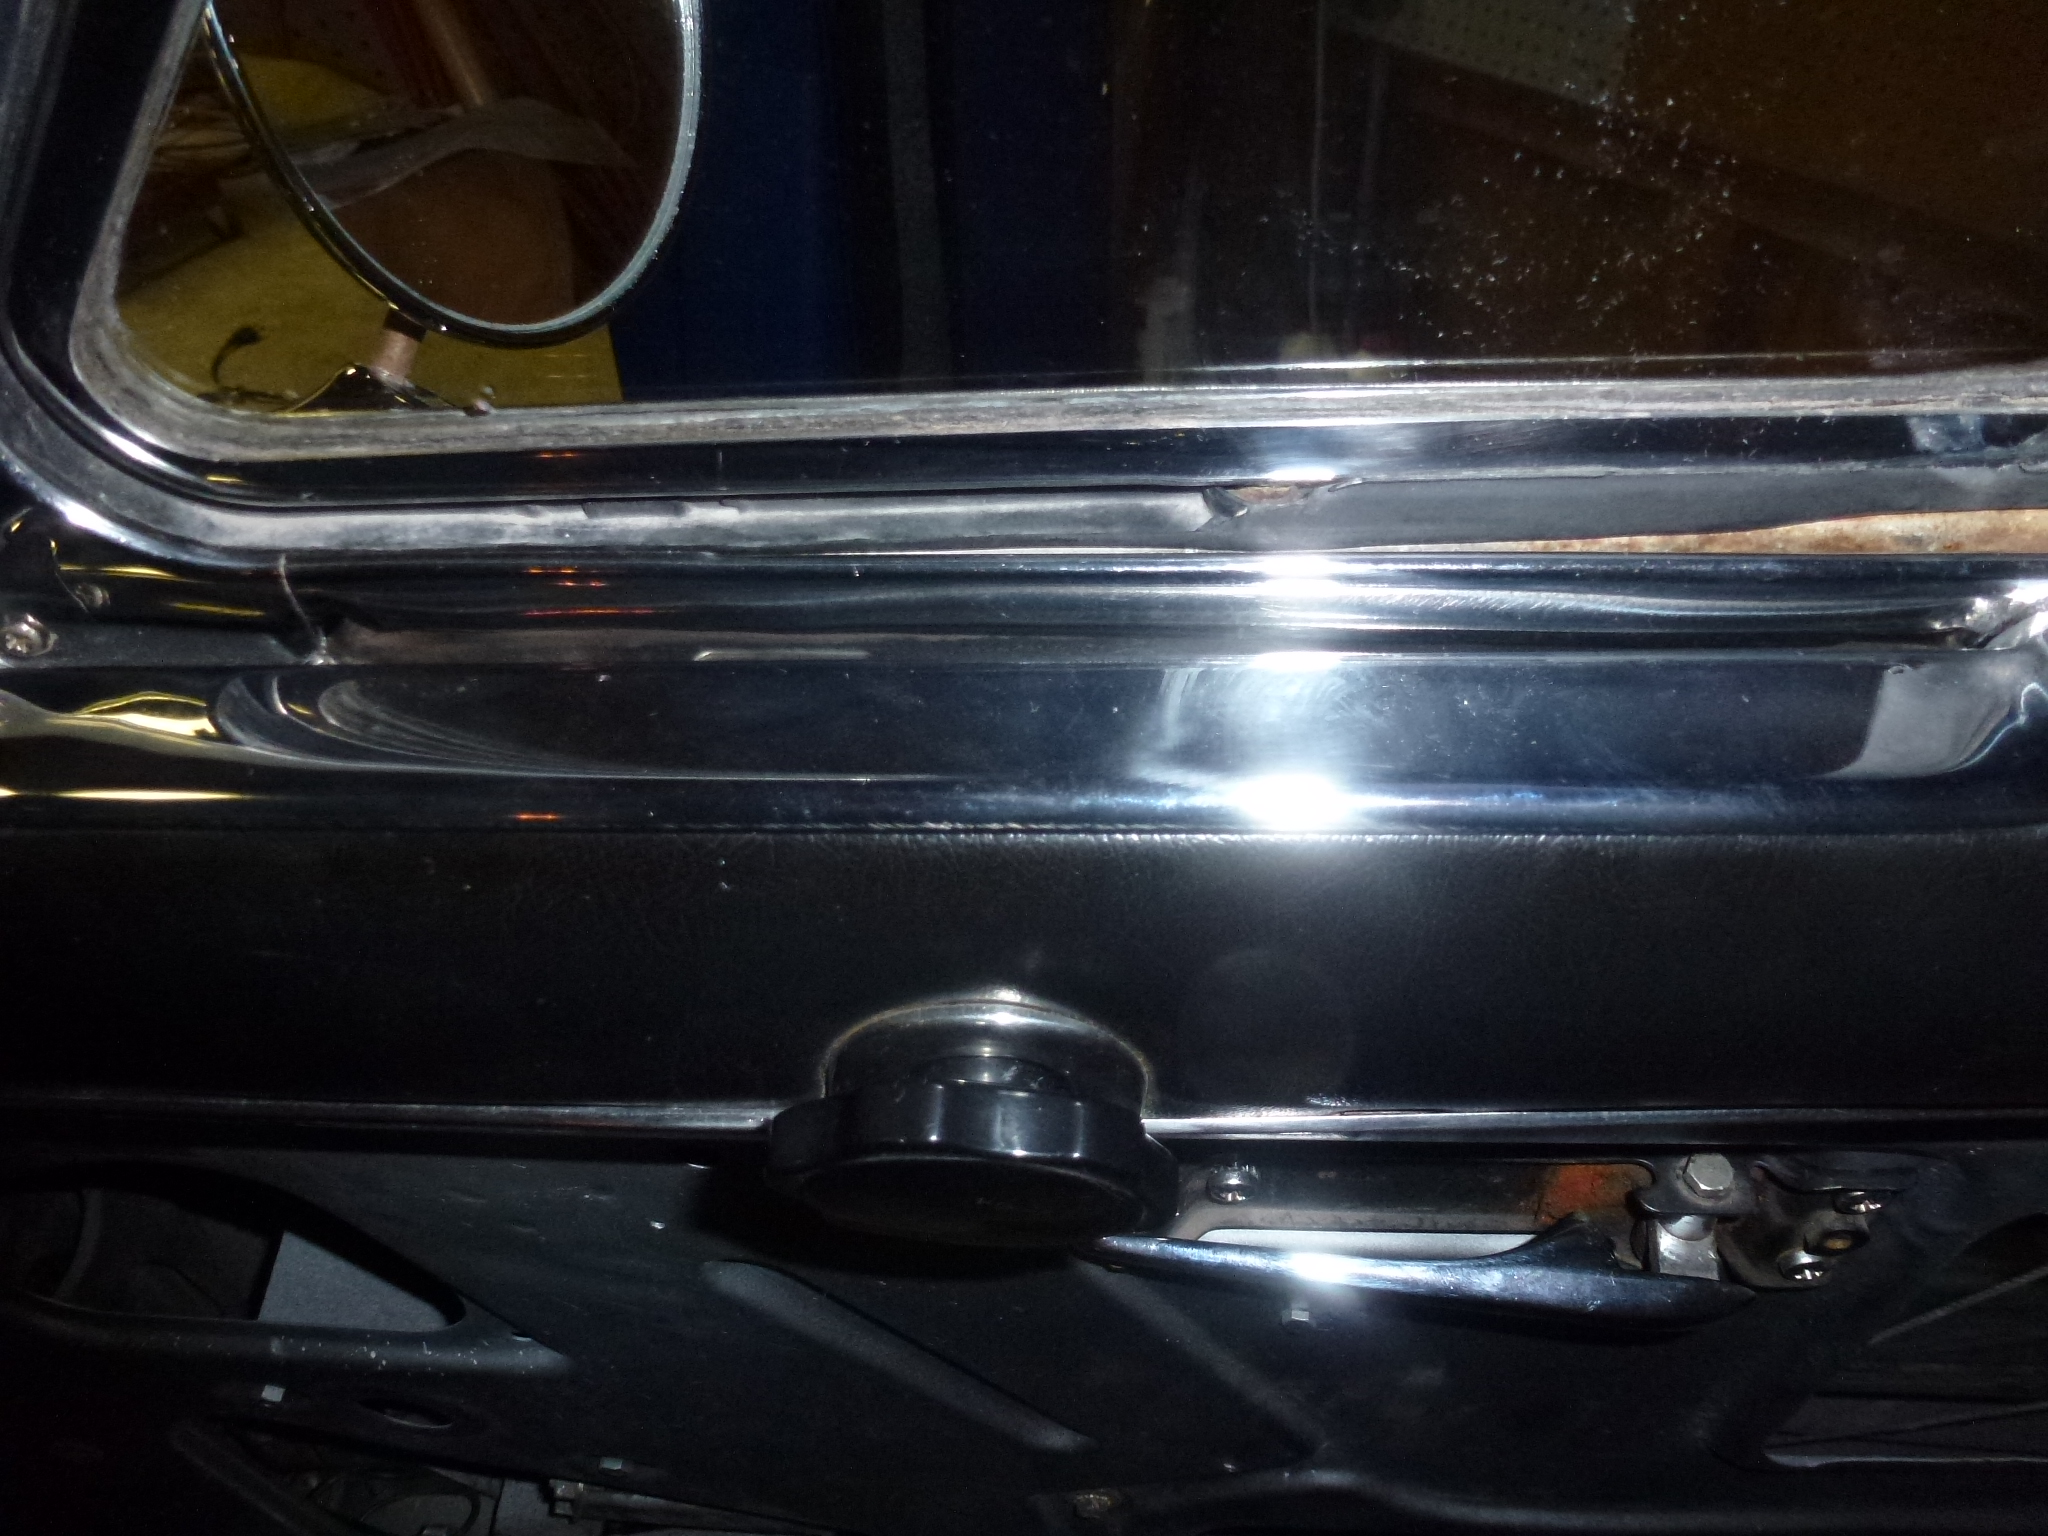
I also worked on the door locks. The key wouldn't actuate the knob all of the time to consistently lock or unlock the passenger's side door. What I found was that I hadn't tightened the lock onto the door sufficiently, so the lock would rotate some, thereby negating some of the turning mechanism of the key. I then checked the driver's door and found that lock a little loose too. Finally, the doors are done and the panels back on.
There were a couple of issues with the driver's door that I wasn't happy with. So with another NW Region FCA concours coming up, I decided to resolve them. First, the washers I fit between the door handle and body weren't thick enough, so the ends of the door handles (wings) were still bending. This time, I realized that I needed to measure the gap between the handle and the body and fit washers for that gap. It ended up with three 6mm flat washers for the bolt in the middle and two for the outside bolts. So now, I can tighten the handle down and not put any pressure on the handle ends.
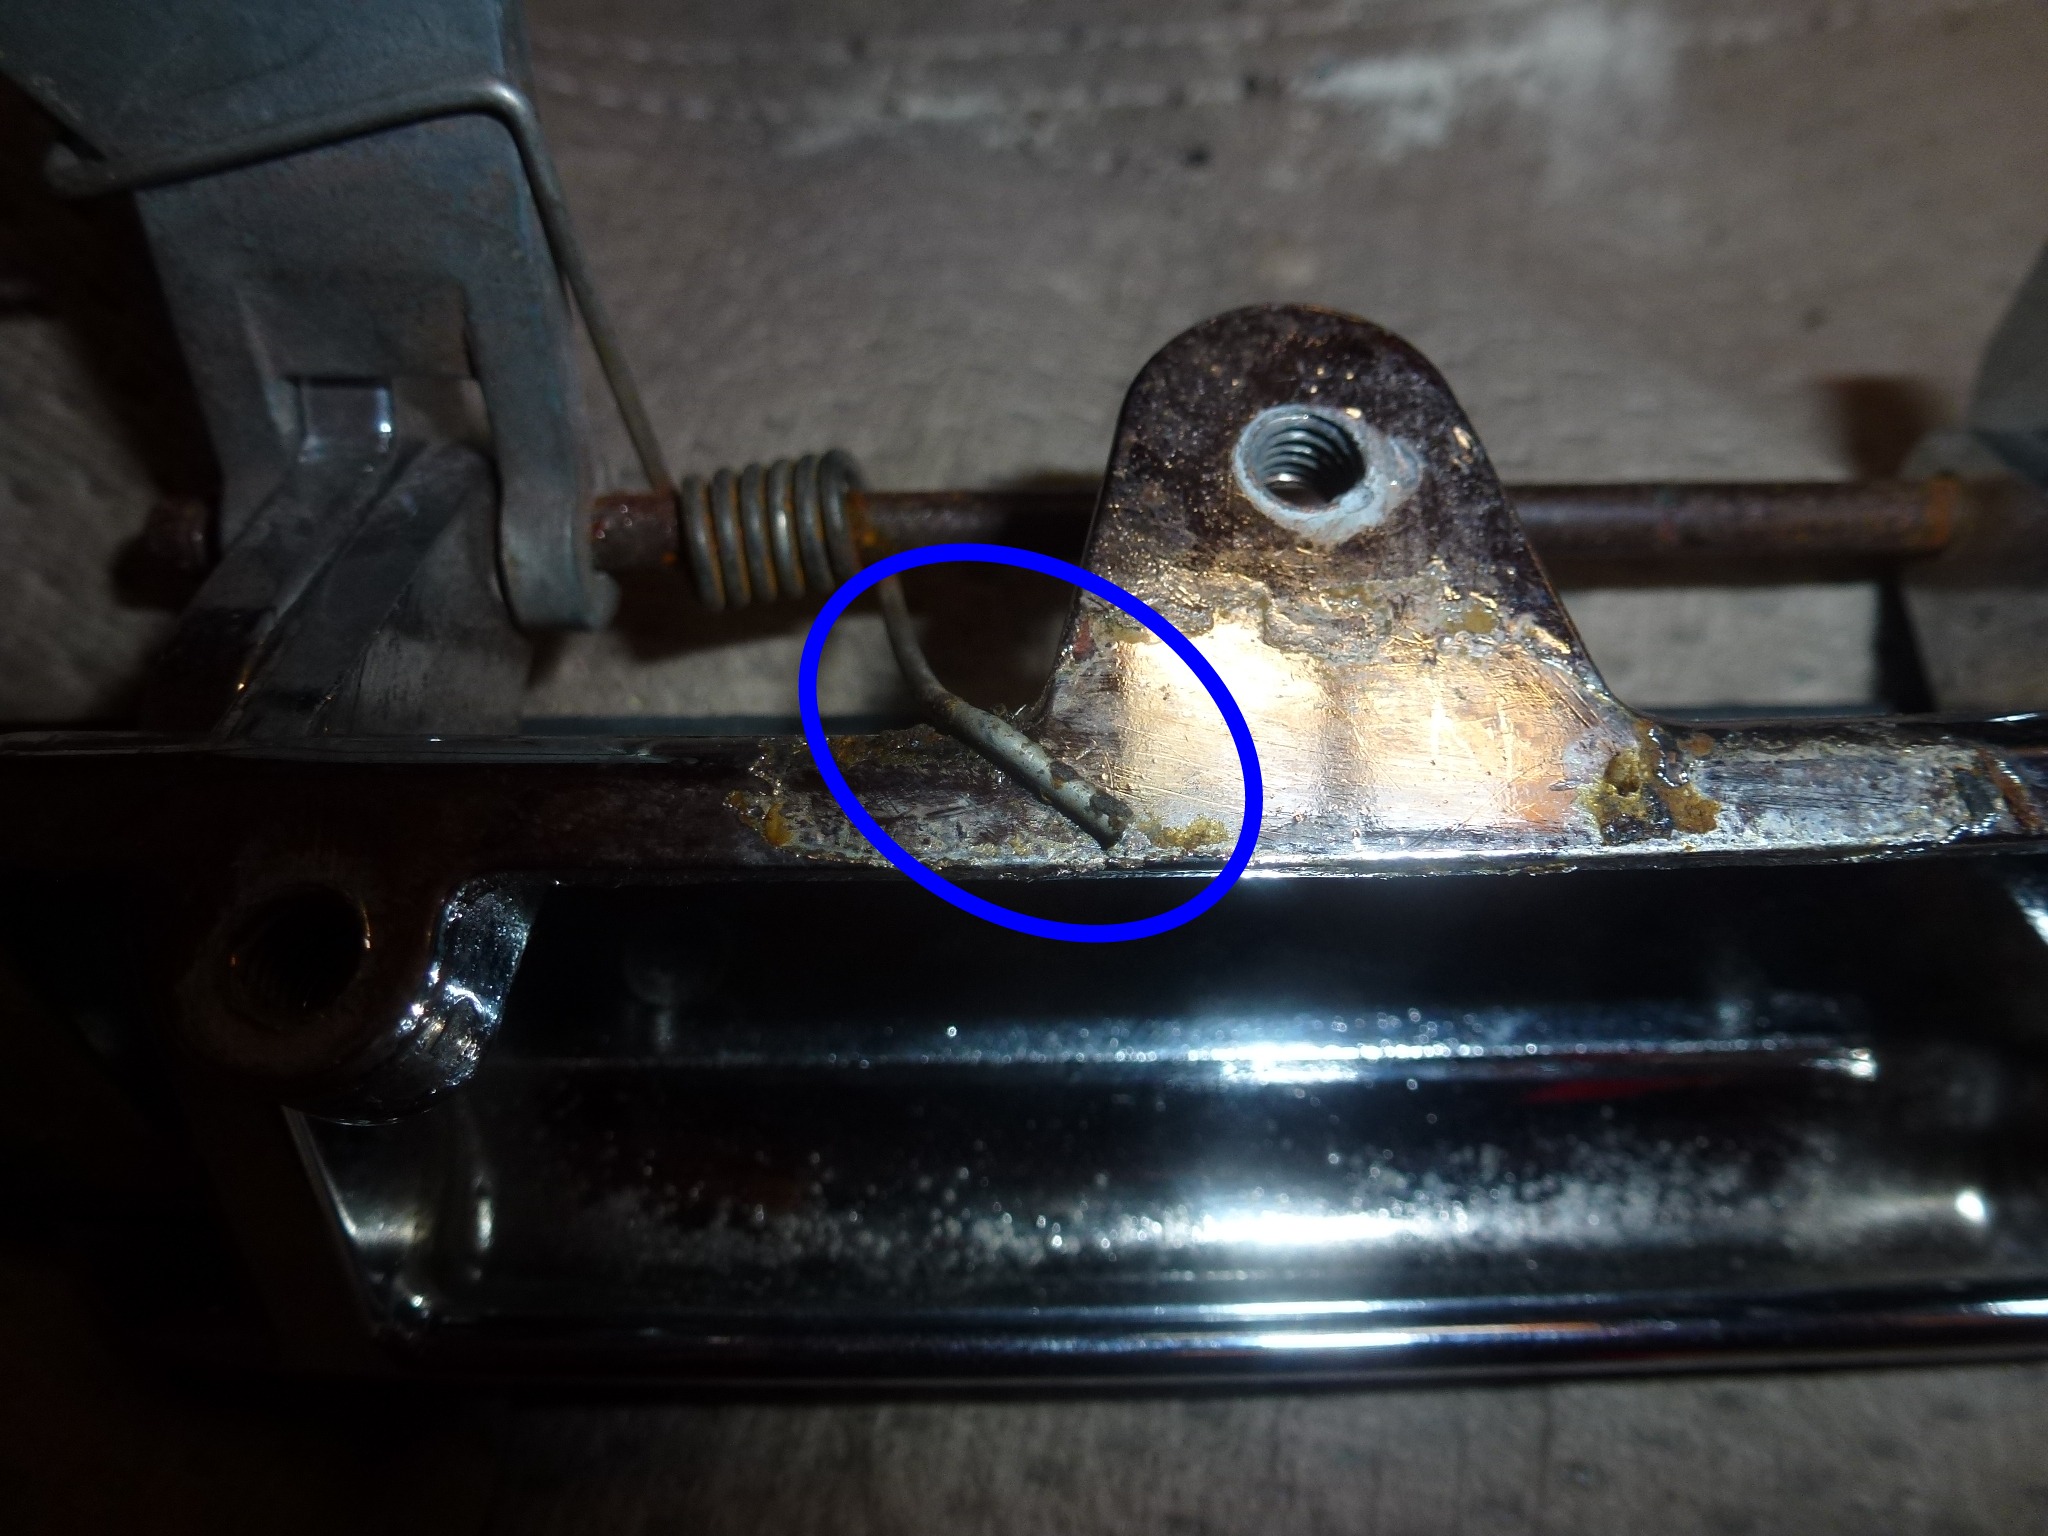
Second, that door has always been problematic when trying to open it from the outside handle. I would have to pull up hard on the handle and then out to get the door to open. This, due to not wanting the handle too tight and bending the wings, would cause the rear end of the latch to move up and no longer be parallel to the door lines. For a long time, I thought that it was a latch adjustment problem, so I kept fiddling with that, to no avail. Finally I realized the the door opened fine when using the interior handle. Upon further inspection, I realized that the interior handle released the rotating latch mechanism further than the exterior handle did. The exterior handle has an arm that pushes down on a flange connected to the rotating latch mechanism.
After removing the latch assembly, I determined that the flange end was bent down, probably from 50 years of use, so the arm just wasn't pushing it down enough to fully release the latch. I straightened the flange and made the end square, but when I put the latch back in place, the end of the flange no longer was under the handle arm. So I had to remove it again and bend the whole flange piece over so it was under the handle properly. Now the exterior handle releases the latch properly and the door opens easily. After doing all of this, I stopped for a break before putting the door panel and other pieces back on. I'm glad I did, because while eating dinner, I realized that I had forgotten to clip the door lock back onto the mechanism. I would have had to take the door panel back off to fix this, so I'm glad I took the break.