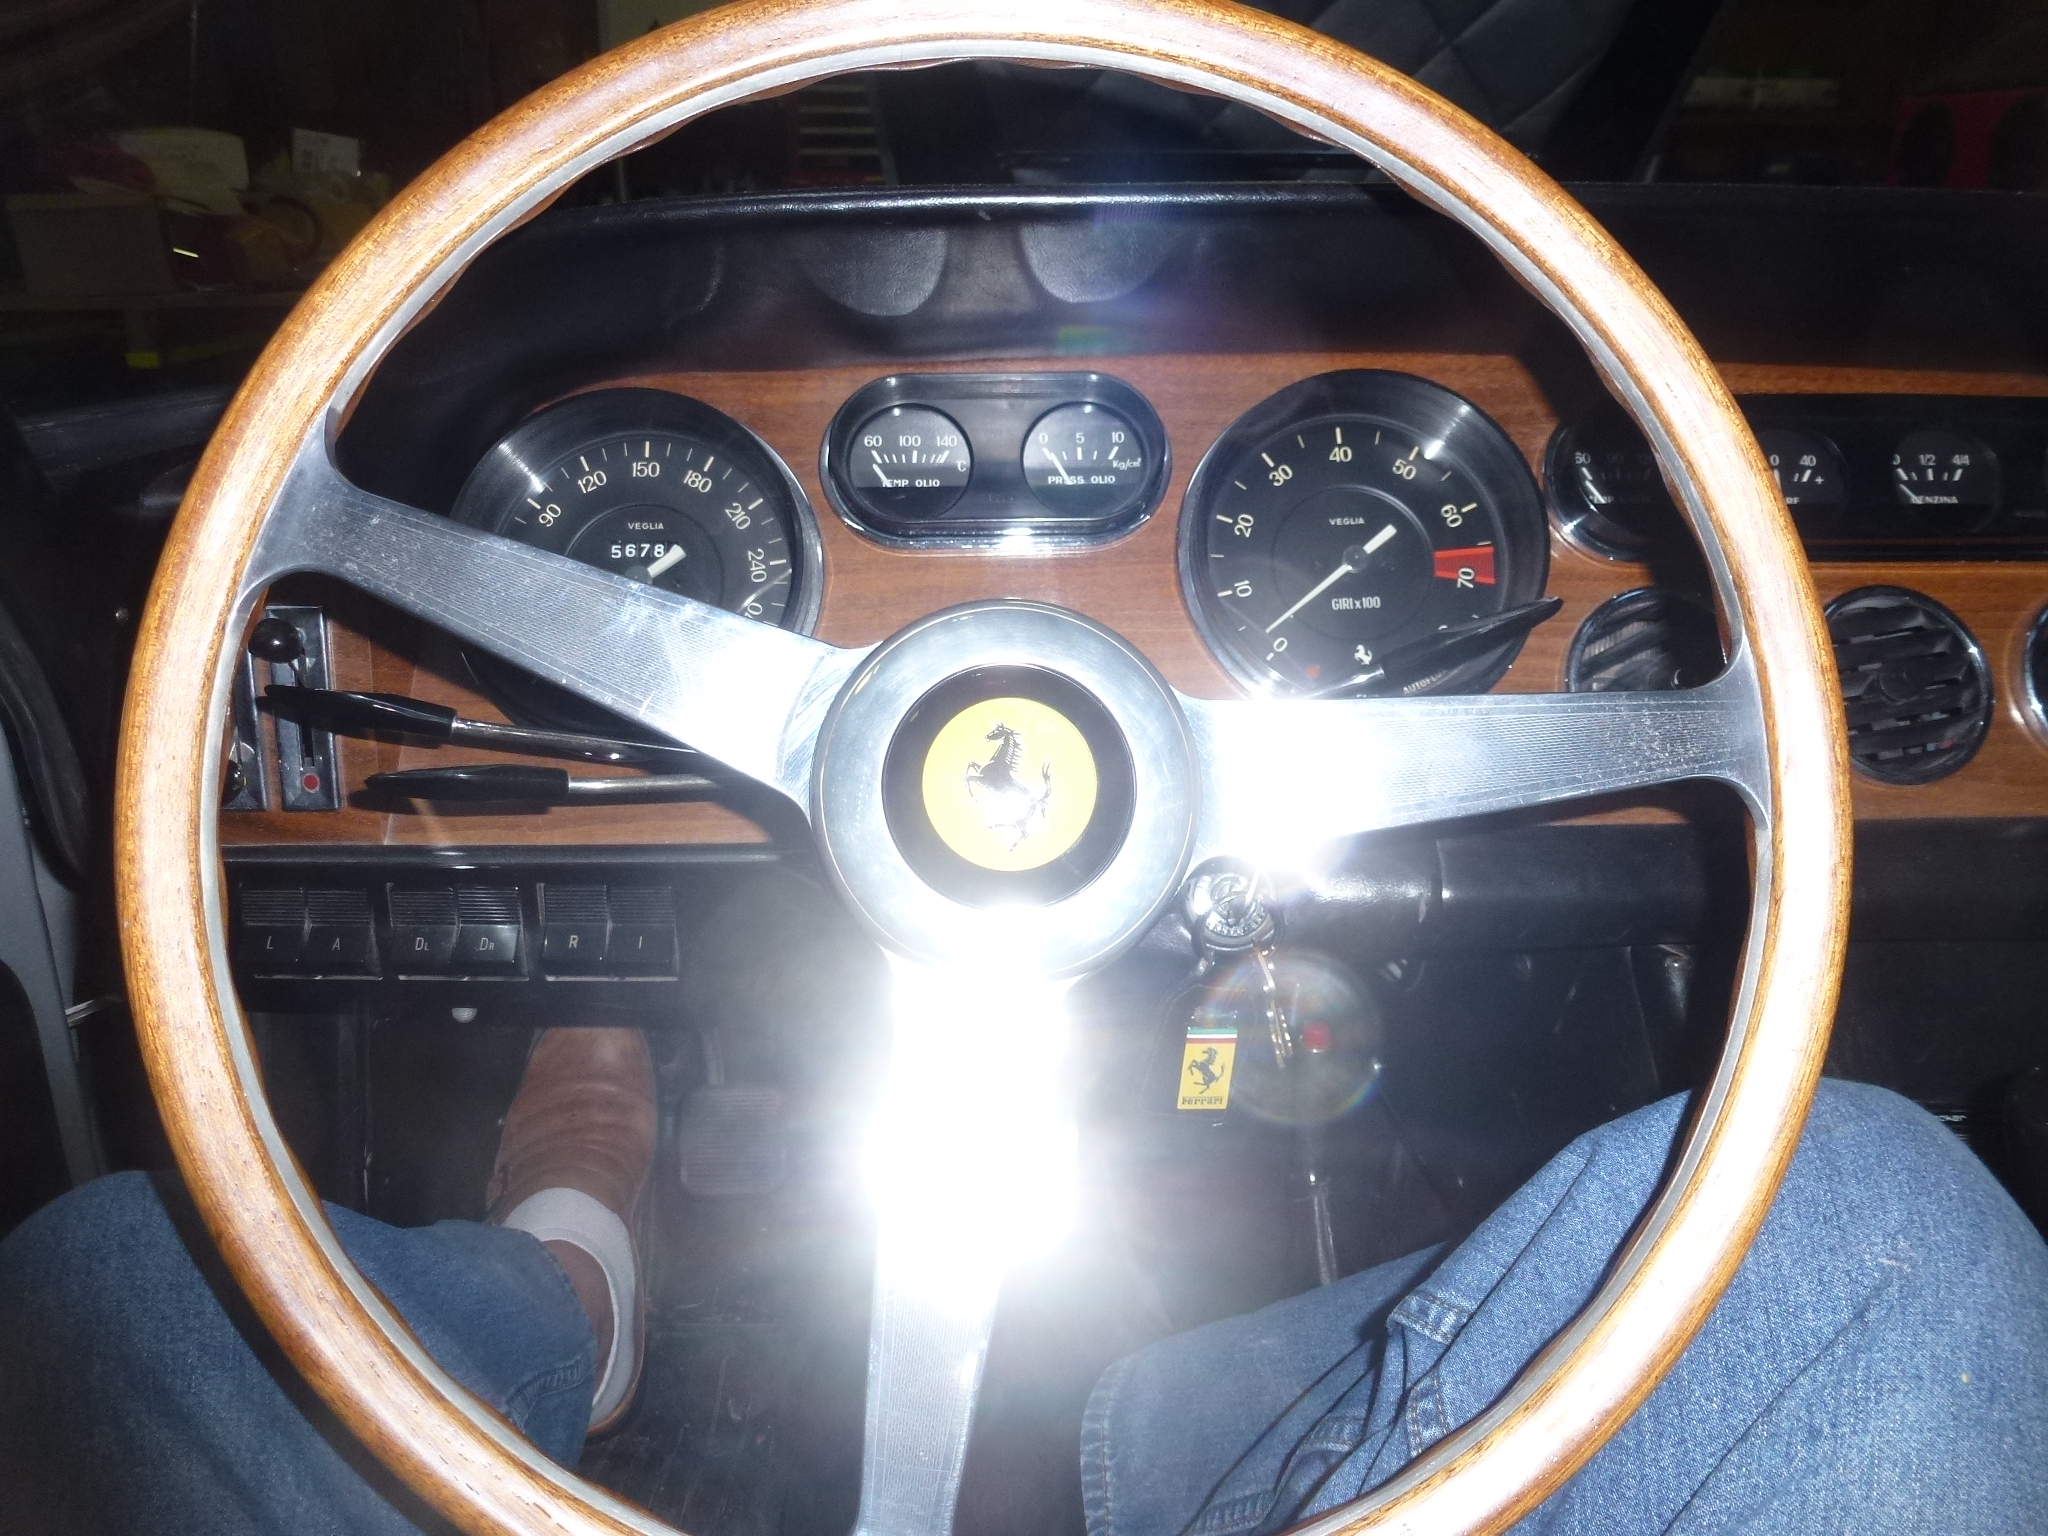
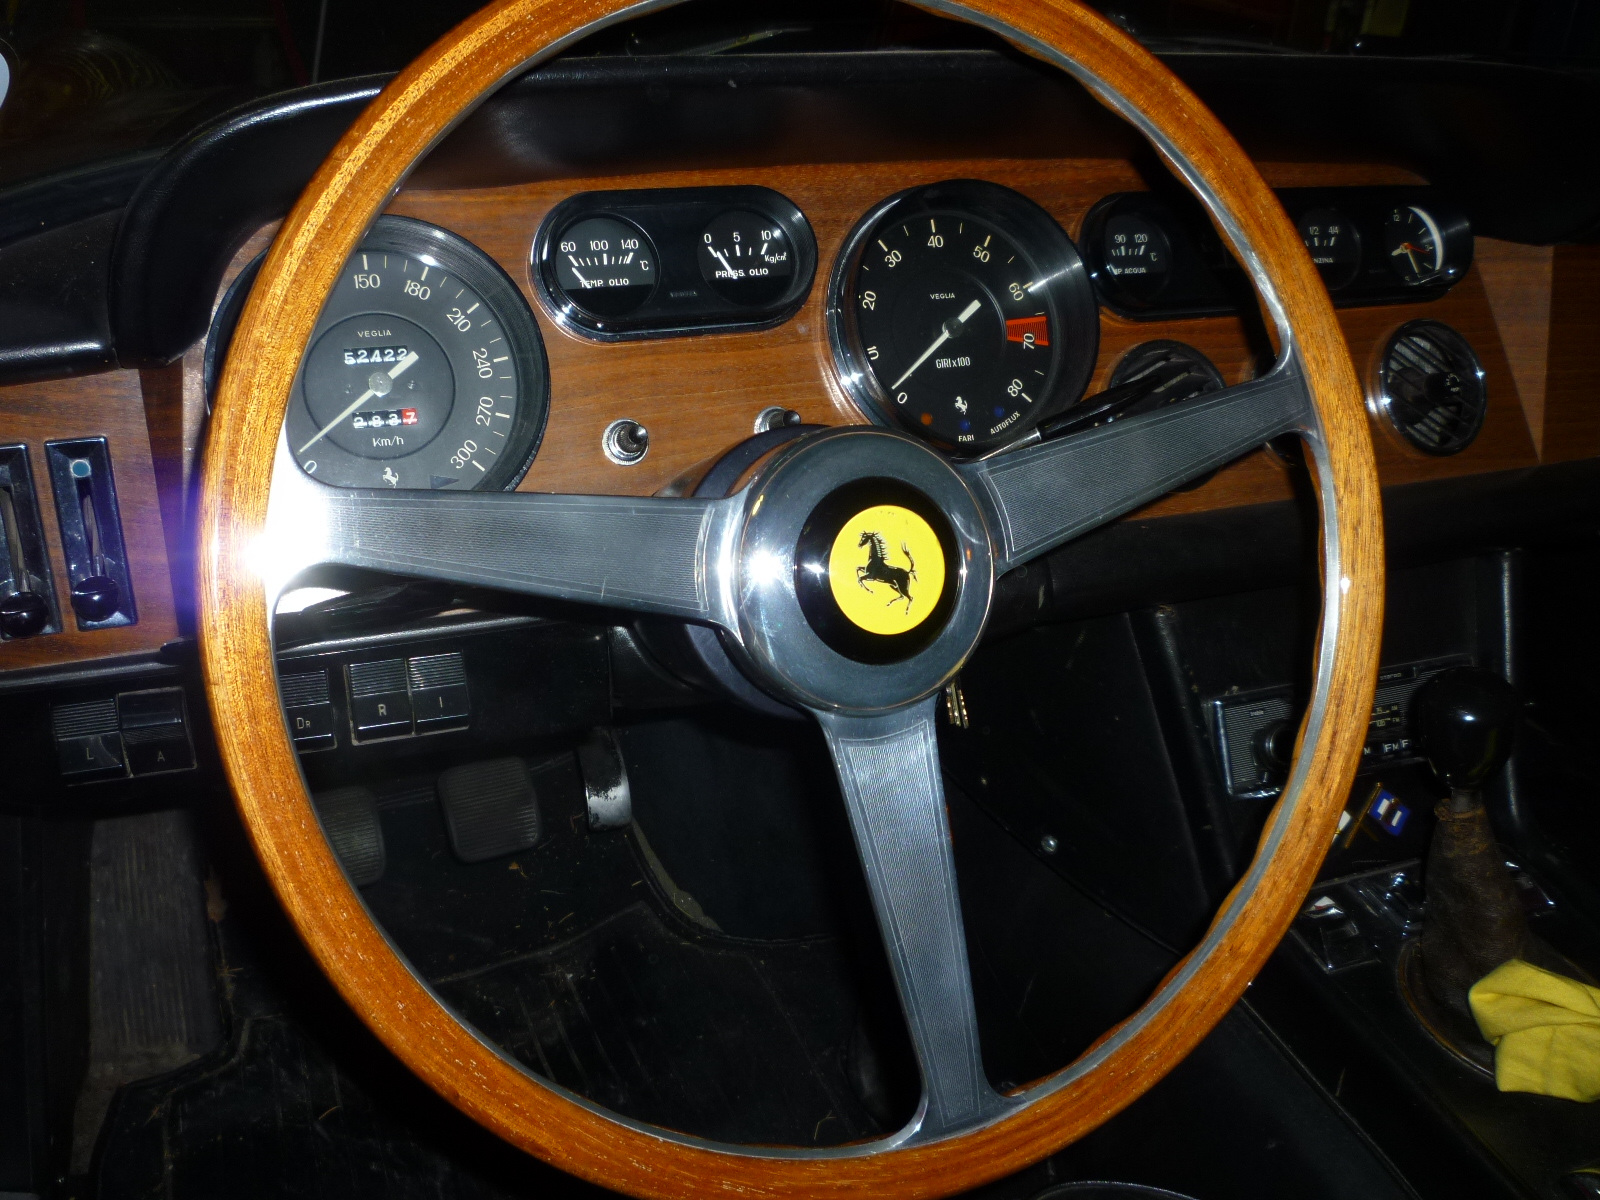
Steering Wheel
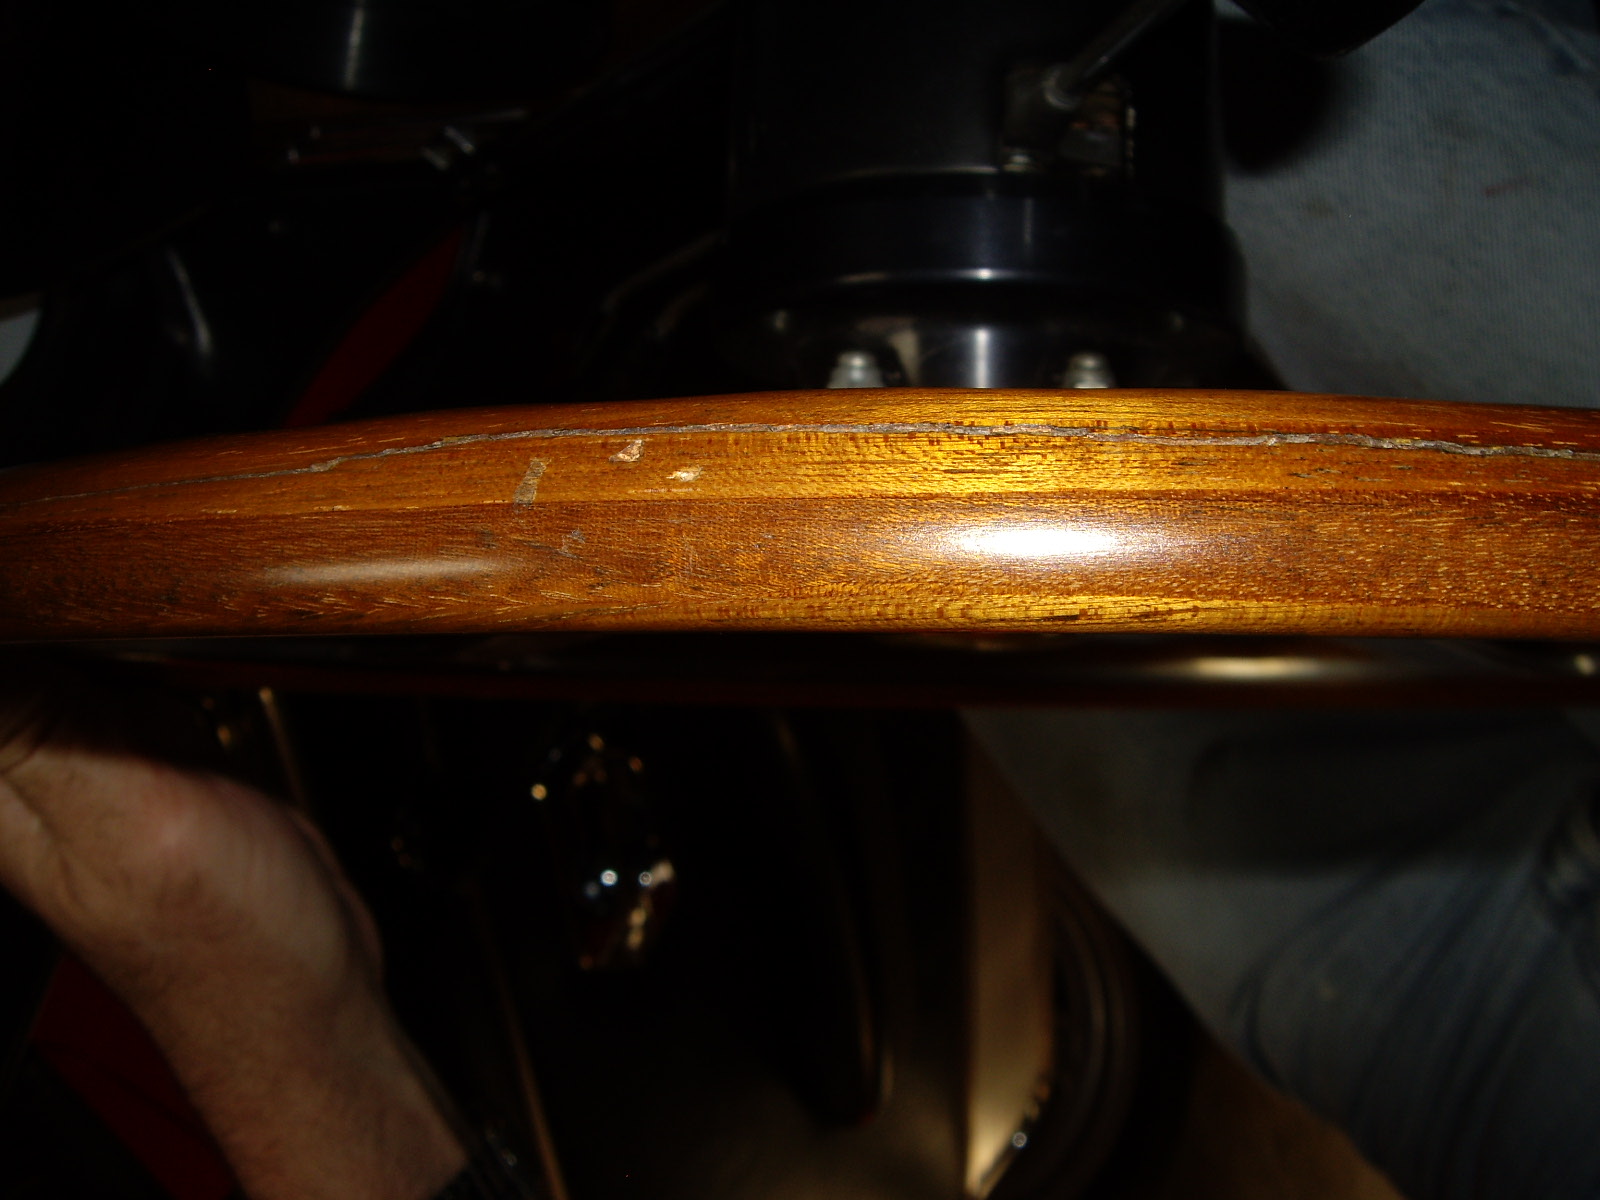
Not long after I got the car, the steering wheel had gotten cracked in two places. A word to the wise, don't let someone try to adjust the seat forward by pulling on the rim of the steering wheel. Have then grab the column. Now perhaps I need stronger springs under the seat. Those were missing when I bought the car so I just got some from the hardware store.
I ended up gluing the cracks back together with carpenter's glue and clamping it overnight. In order to get the glue as far as possible into the cracks, I would put some glue on the crack and then use the blow gun with the air pressure set pretty low (~20 lbs). Then just use the air to push more and more glue into the crack. You can get it deeper into a much smaller crack than using a knife blade or needle. After the glue was dry, a light sanding, 3 coats of spray polyurethane varnish with steel wool used between each coat did the trick. Then a lot of polishing the aluminum spokes by hand shined it up.
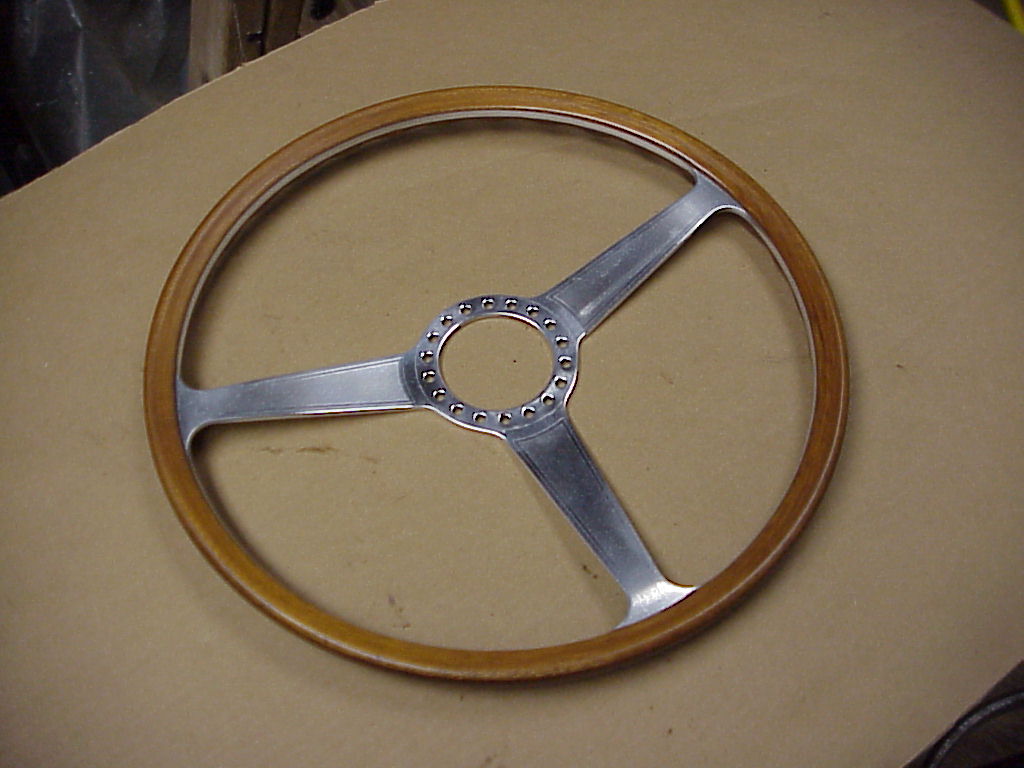
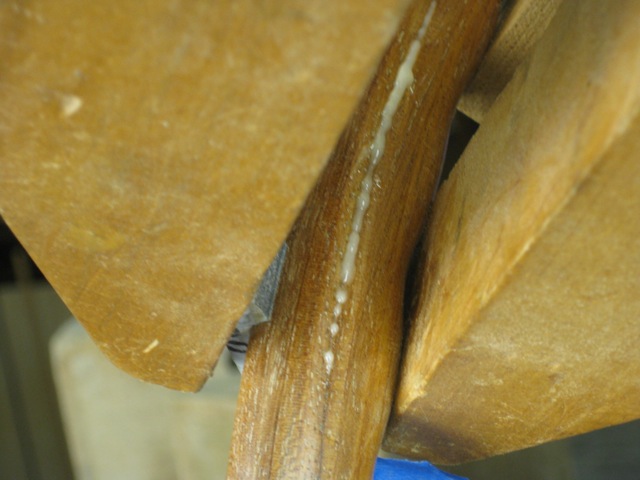
Fast forward a few years. My glue job (nor the second one) didn't hold. After a couple of years, the flexing of the wheel in normal driving would open the cracks again. This time I decide to have it professionally done. Peter Gluklick, who is restoring a PF coupe, is a professional wood restorer and does Pebble Beach concours cars' steering wheels, dashes, wood trim, etc. I sent him some pictures and from that, he decided that I hadn't completely screwed things up. You can see one of the cracks on the left and the length of them on the right, almost 1/2 of the steering wheel.

One of Peter's problems was undoing what I had done, i.e. removing the glue that didn't hold.
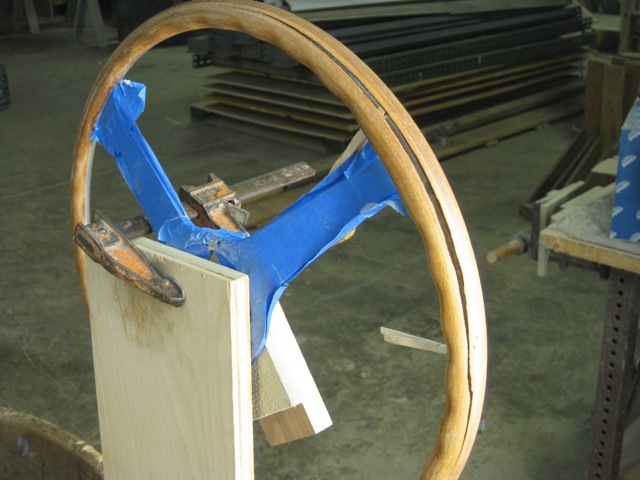

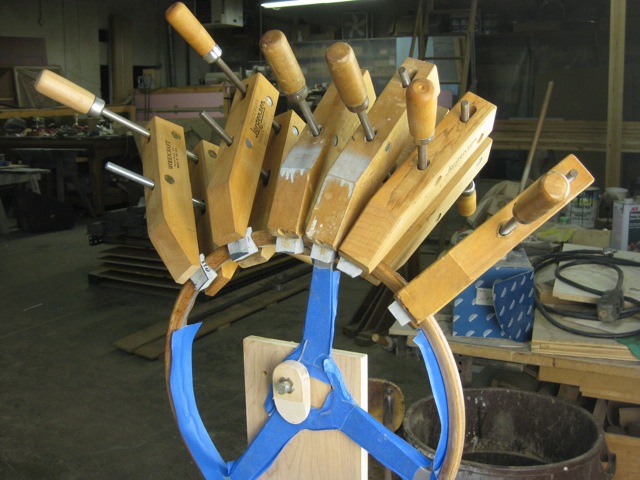
After that was done, Peter re-glued everything getting a good squeeze-out with the clamps.
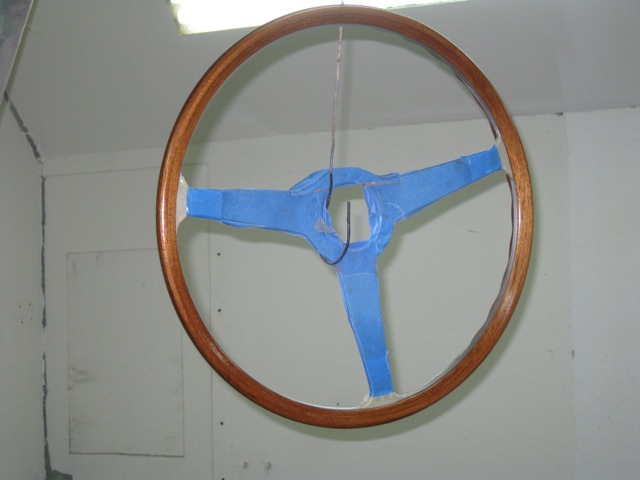
Peter uses a polyurethane sealer followed by catalyzed lacquer topcoats. He finds that the lacquer has a film build and sheen much like the original wheels and does not appear dipped in plastic as so many of the 'modern' finishes do. The color of the lacquer is a touch less amber than the original which he thinks looks better on the aluminum band. Additionally in the event the surface needs to be repaired or stripped either is readily do-able. Here's the wheel ready for a final sanding and top-coat.
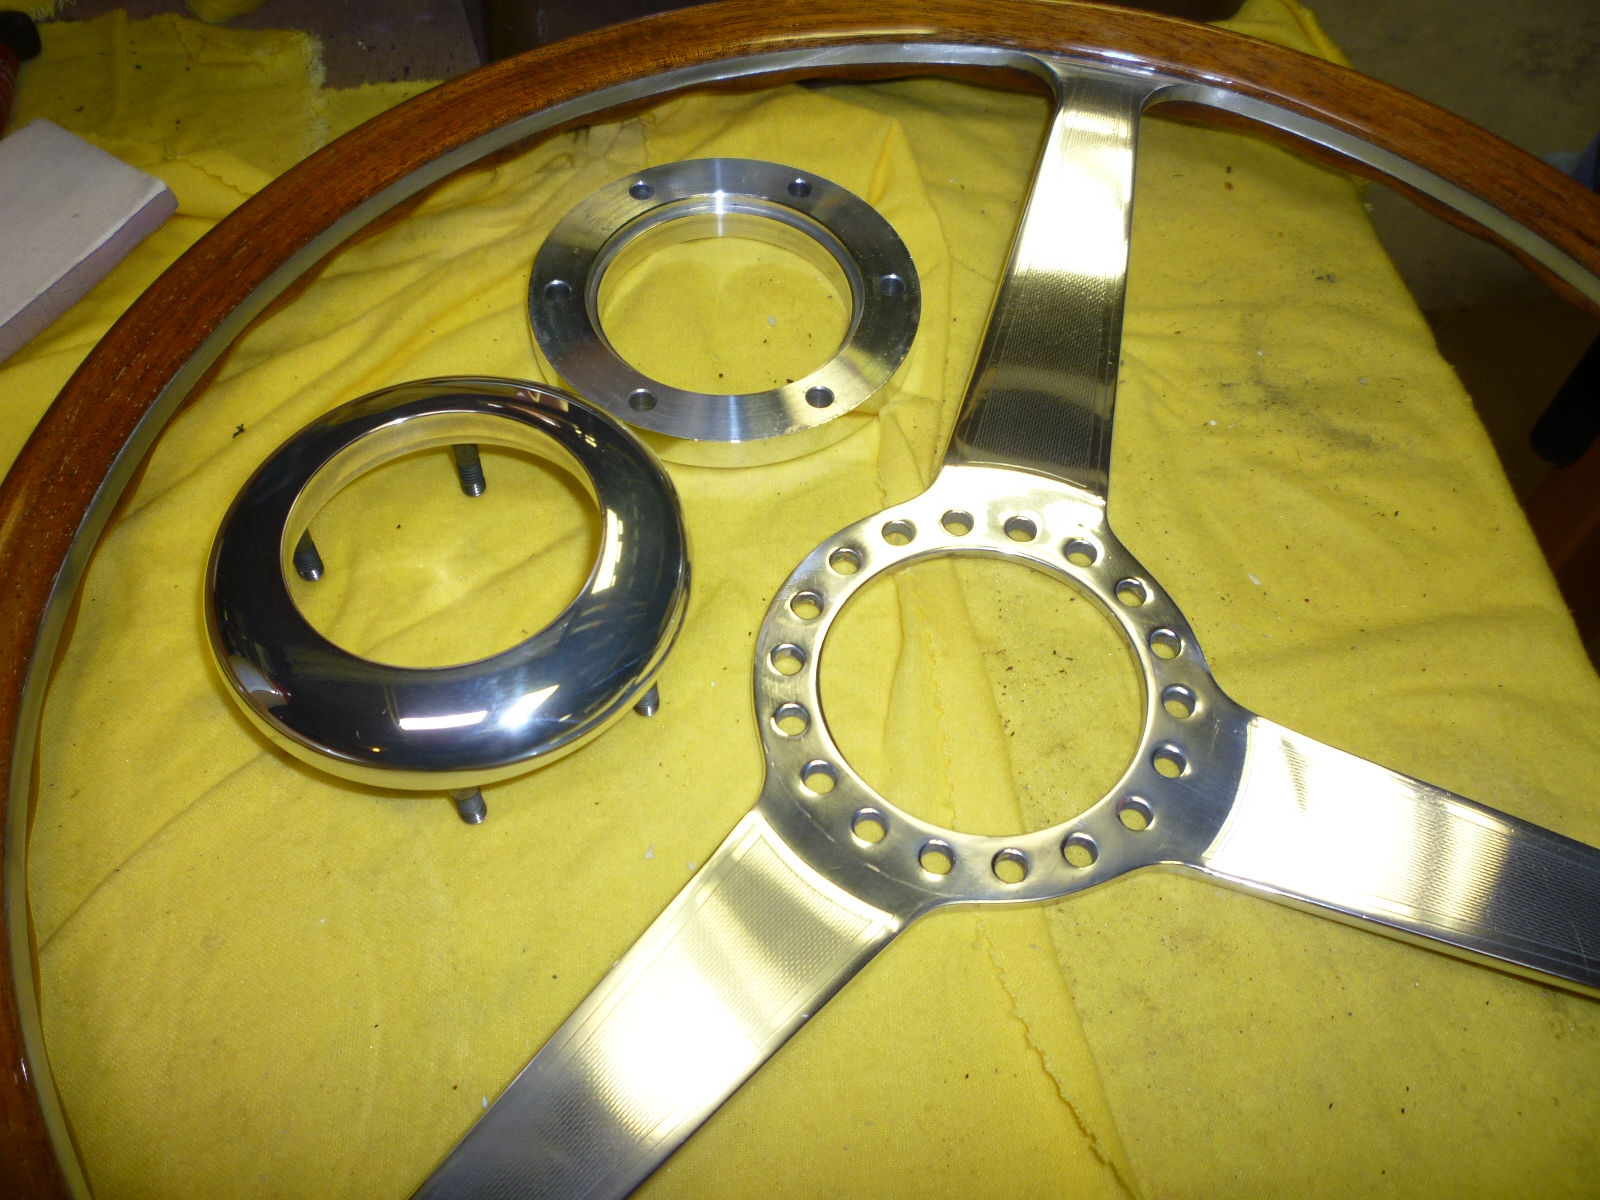
Of course, with all of Peter's fine work, I had to polish and wax the hub and backing plate so the center would look good. Now the car is ready for the Festa Italiano in a couple of days.
As with all work on a Ferrari, it took twice as long as the estimate. And it'll take a couple of years before I'm sure that my cracking problem is gone for good.
Well, it has lasted, though I am very careful to only grasp the center hub when pulling the seat forward. I had to take the steering wheel off to fix a broken headlight stalk. so I took the opportunity to polish and wax everything again. I had noticed that there was some pitting on the spokes where your thumbs would naturally rest while driving.
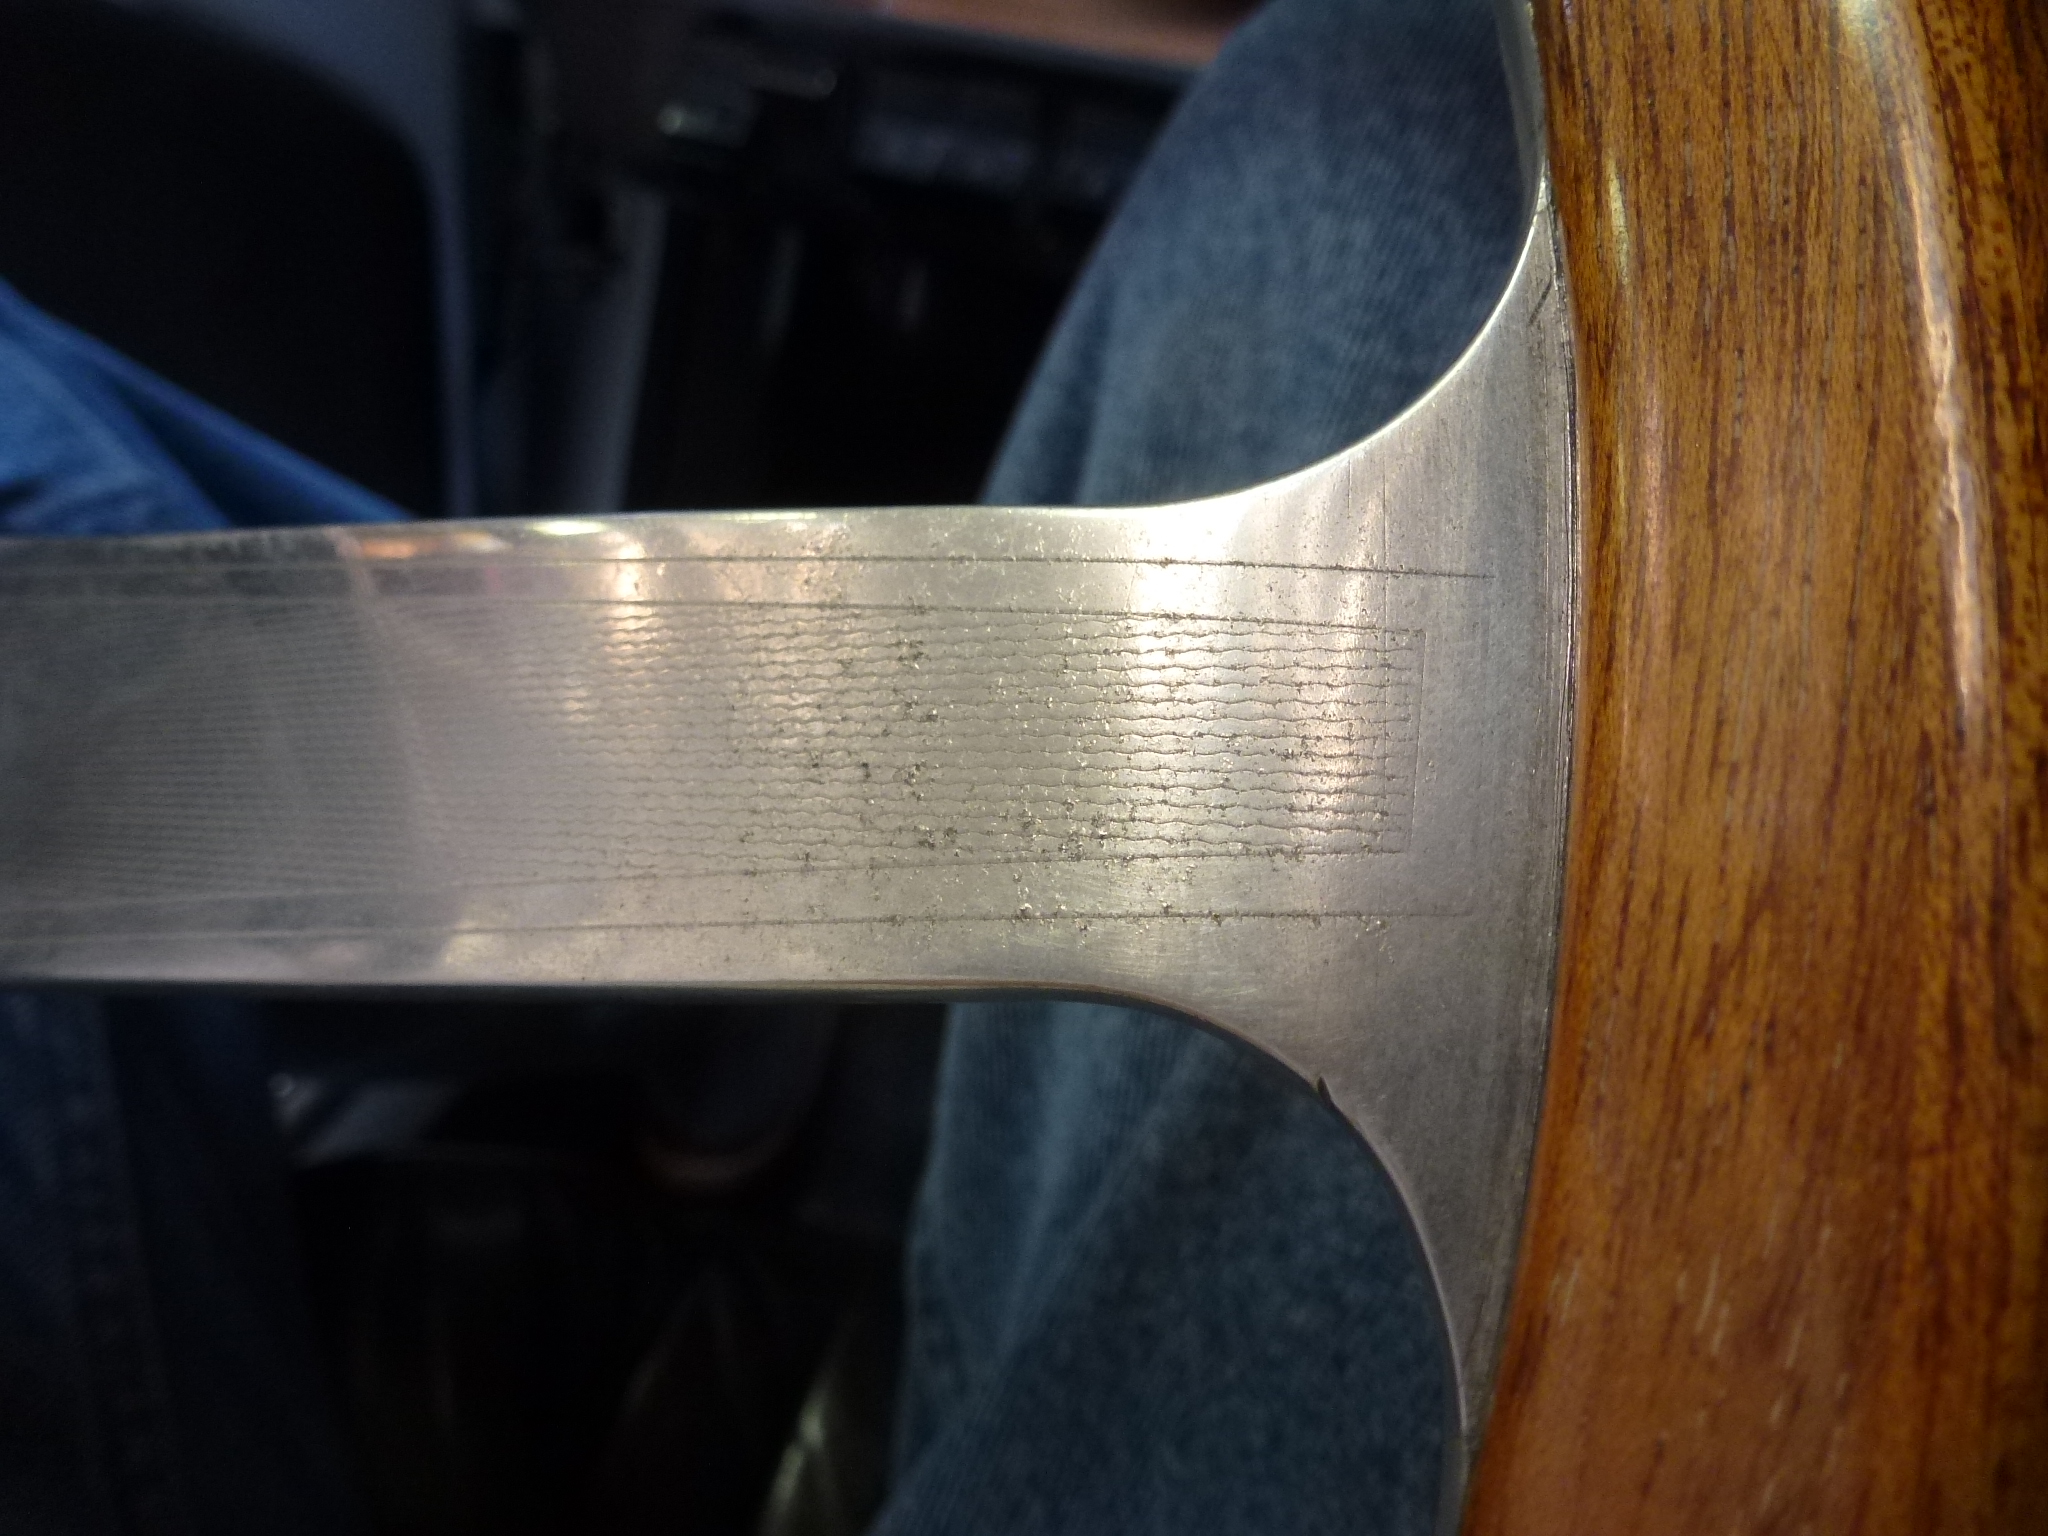
There's a limited amount that can be done for this or one would be removing the engraving too. I ended up just using some 600 and 1000 grit wet sandpaper to smooth out the pits. Then just polishing everything with the fine buffing wheel and compound. A final wax job and everything was put back together.