Trunk Lid Painting
The trunk lid might be the death of me. I've now painted it 6 times, yes, six!
- The first time I painted the car, a piece of grit was in the middle of the trunk lid.
- There were a few problem areas, so I decided to fix these up and re-spray those areas. When I did the trunk (to fix the grit problem), a big bug landed on the fresh paint.
- When I re-did the car in Glassurit enamel, the trunk lid crazed under the enamel.
- When I was painting the door jams, etc. a couple of years ago, I re-did the trunk. A big blob of paint blew out of the gun when I was spraying the trunk lid.
- During the push to get the car on the road, I did a fast re-work of the trunk, but the paint fish-eyed when I sprayed it.
Now for try number six.
It's just a couple of weeks before the annual Monterey pilgrimage, this year (2004) combined with the FCA annual meet. I decided that it was time to get the trunk lid right once and for all.
I sanded off all of the paint to remove any possible silicone contamination (cause of fish-eye paint). Then I smeared a coat of bondo over the whole surface. For those not familiar with the 60s Ferrari bodies, they were hand built with the bodies just being close to right. Then a plastic filler was sprayed over the body and sanded smooth to make the final surface for painting. So the underlying metal bears only a passing resemblance to the final lines you see. In particular, the trunk lid is aluminum and thus more prone to dents, dings, waves, etc.
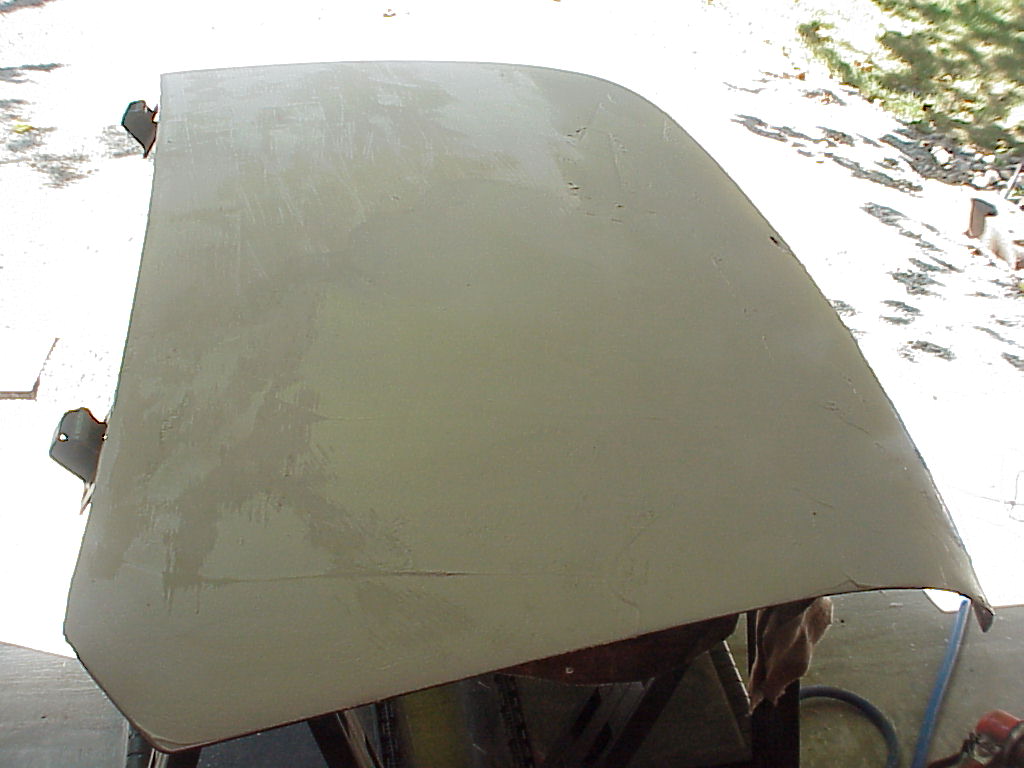
Once the bondo was sanded down with 36 grit, I switched to 80 grit to smooth it enough to find the highs, lows and problem areas. More filler was added as needed and more sanding was done. Then I sprayed a guide coat of primer and sanded it to determine any areas that were still too high or low. This also brought out several pin-holes in the bondo which were touched up. Then I sanded the surface smooth with 150 grit and sprayed two layers of primer as the base for the final sanding. Then onto finer sandpaper ending up with 400 grit.
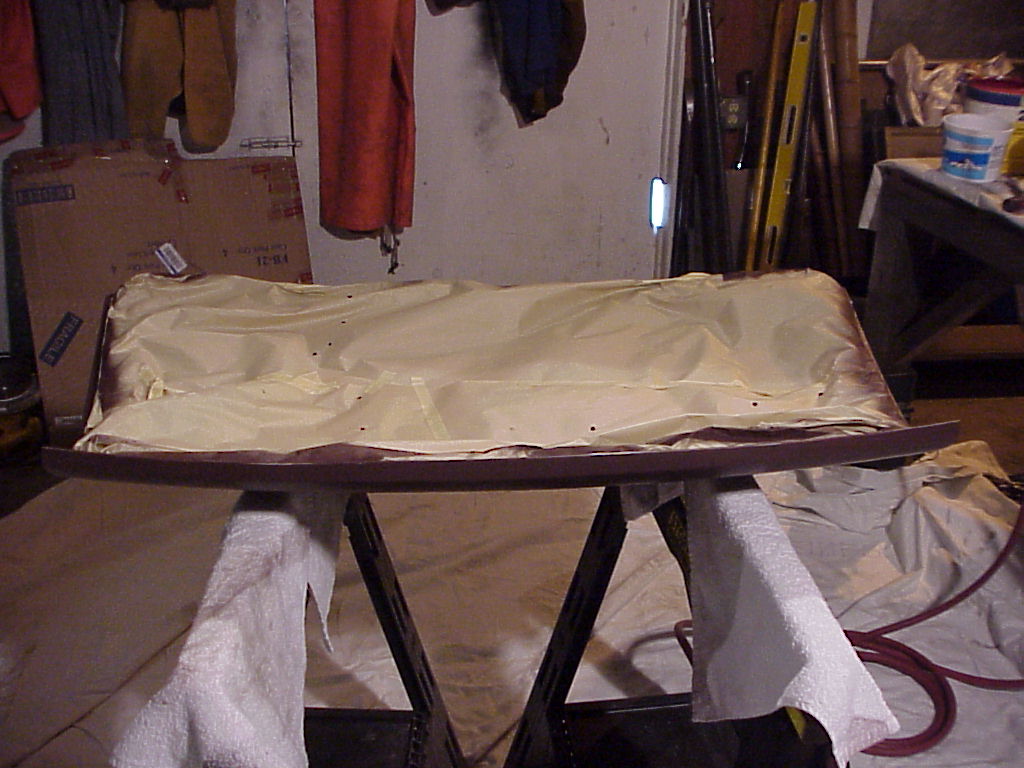
Today was painting day. I finished the final sanding and dug out all of the paint information, cans of paint, reducer, hardener, converter, clear coat and the spray gun. What seems to be a simple job took most of the day. I ended up spraying the trunk in my neighbors shop as he has a dryer for his compressor. That makes sure that there isn't any moisture coming through with the air to ruin the paint. Here's the underside all masked up and the lid just after the last coat went on.
 |
 |
One other thing I noticed was that the wire leading to the trunk light was in bad shape. There were several breaks and a couple of places where the insulation was smashed flat.
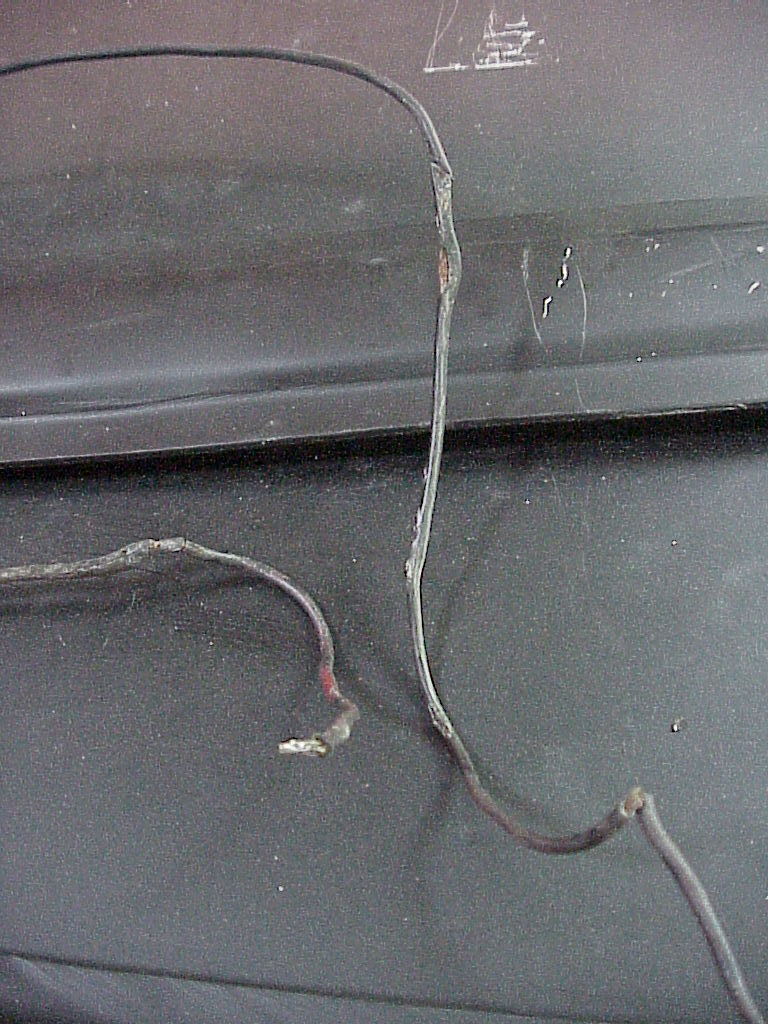
I replaced the whole wire with new, soldering a old and new end together so I could use the old wire as a puller. Now I don't have to worry about a short every time I open the trunk. However, when I installed the trunk lid and hooked up the trunk light, there was a short to ground! I was better off with the old frayed, smashed wire, it never gave any problems. I pulled off some of the carpet was was able to move the wire so there wasn't a short anymore. I would have done something better if the circuit was more critical.
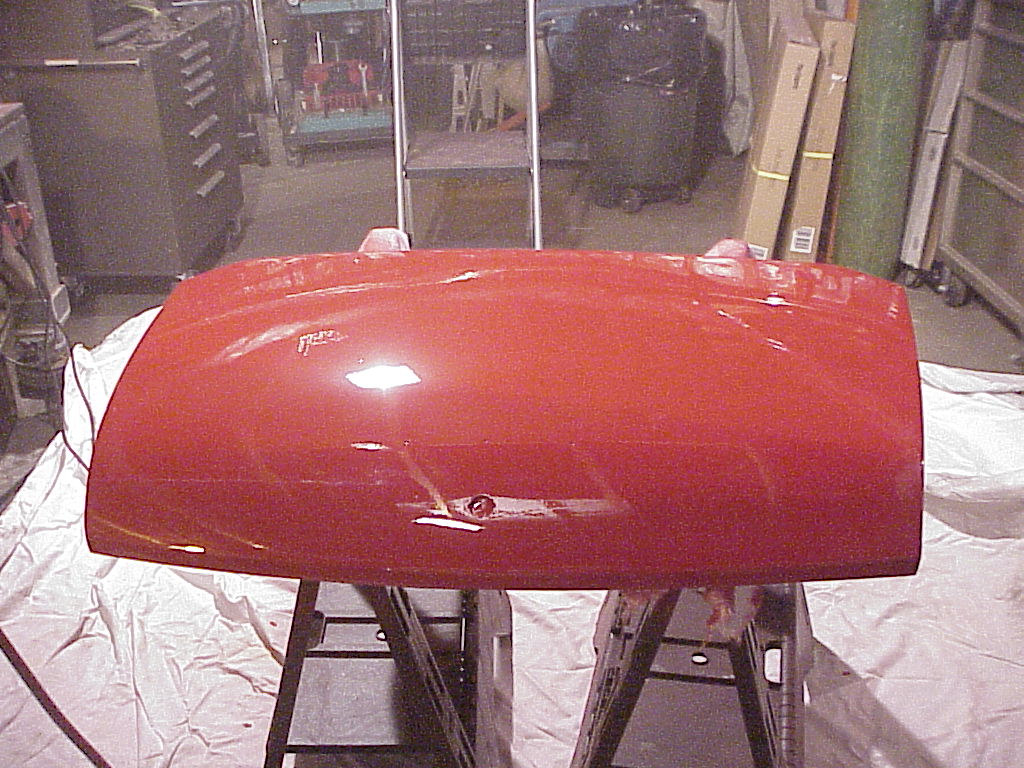
I finally got around to wet sanding and polishing the trunk lid.
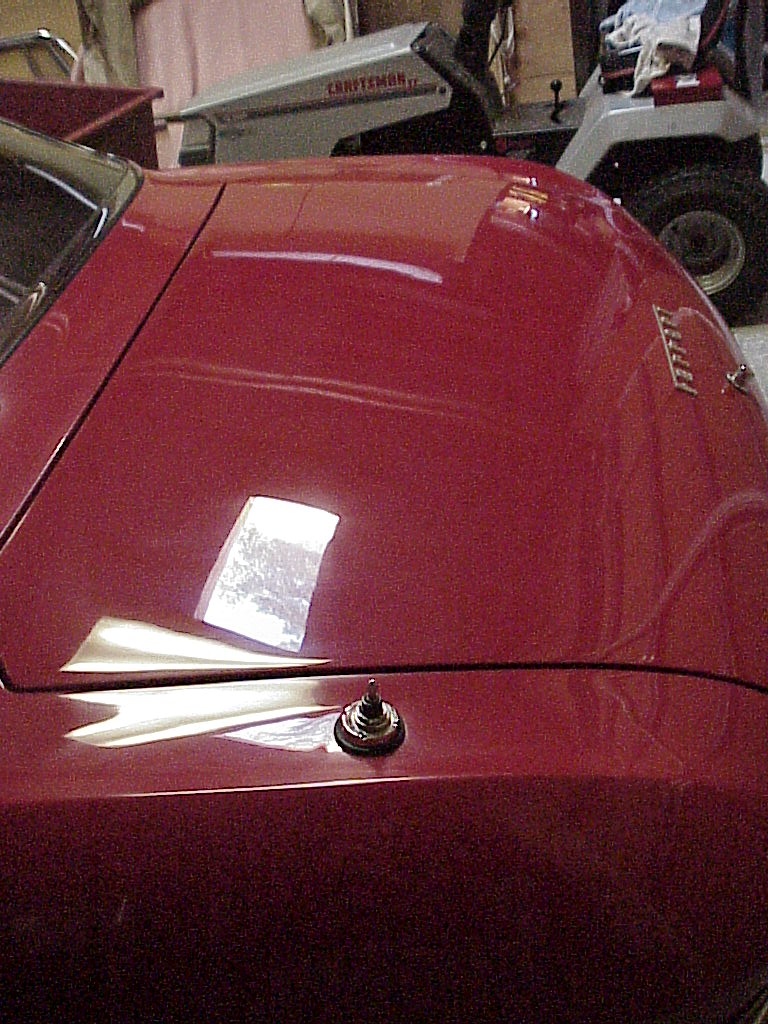
As you can see from the reflection of the skylight, it came out pretty nice. I removed it from the car to do this so I took the opportunity to replace the trunk light wire that was shorting. When I pulled the other one, I found that it had gotten the insulation nicked where there was a weld in the aluminum framework. I was able to use a small cut-off wheel on a Dremel to smooth this out so the new wire could get pushed past without harming it. So now I have my trunk light reconnected. I also remembered to put a short section of shrink wrap on the wire where it goes into the trunk lid frame. This will prevent the insulation from being worn through by the edge of the aluminum hole.